
Restaurants have made the concept of side dishes quite different from what I grew up with. Then, side dishes were actually served on the side, not under the main course meat. At the dinner table sides were in separate bowls, or on children’s plates beside the main course meat, but of course, not touching if the child didn’t want them to.
Seeing sides intertwined with the main courses on restaurant menus as well as on plates and thereby touching, seems a bit odd to me. Even odder is the fact that a side may make a crispy main course soggy.
So, here we have everything from salads to zucchini as sides; you can add your main course on top if it pleases you.
While modern greens are available prewashed and packaged, it is important to know how to wash them. Fill a bowl with cold water and add the greens. Swish the greens in the cold water then remove the greens to a colander. Discard the water once the greens have been removed. If necessary to remove more debris, repeat the process. Traditionally, greens are to be washed three times, but they seem less dirty from our local farms these days.
In making a green salad, use one or a combination of the following: baby turnip or spinach greens; arugula or watercress; red leaf, Bibb, Boston, or other tender lettuces; and as many whole herbs as are tasty on their own. Chop whatever herbs need chopping and add them.
Serves 6 to 8
5 cups baby greens
1–2 tablespoons whole or chopped fresh basil, thyme, oregano, tarragon, lemon balm, and/or mint
1/3–1/2 cup Basic Vinaigrette
Toss the cleaned and dried greens with the chopped herbs and vinaigrette just before serving.
.
Dressing a Salad
Dress a green salad just before serving to prevent the leaves from wilting and browning from acid in the vinaigrette. Add the greens to a large, wide bowl. Drizzle dressing on top. Toss with clean hands or salad implements to coat the leaves lightly in dressing. Add more dressing as needed. If serving from the larger bowl and passing at the table, pass as soon as possible.
Salad dressings, like vinaigrettes, are an integral part of the home kitchen. Rather than a line up of partly used bottles of commercial dressings, try using homemade where you know the ingredients and can control fats and sugar among other additions. I normally use a light olive oil for mine but have used peanut and canola. I do avoid many other oils, as they tend to go “off” with the heat of the Southern kitchen more than others in my experience. The better the ingredients, the better the dressing. Taste each of them separately as well as once combined. Too oily? Add salt, a bit of sugar, or a lighter oil to lighten it. Too tart? Add water or stock before adding more oil to balance.
Don’t be afraid to experiment with adding citrus juices, sweeteners, herbs, spices, or anything that changes the texture.
Serves 4 to 6
1–2 teaspoons Dijon mustard
1/3 cup sherry vinegar (or substitute red wine, Champagne, or other wine vinegar)
1 teaspoon water
Salt
Freshly ground black pepper
1 cup extra virgin olive oil
Granulated sugar, optional
Water or chicken stock or broth
For an everyday vinaigrette, whisk or shake together mustard, vinegar, water, salt, pepper, and oil. Taste and add more seasoning, sugar, and/or water or chicken stock. Refrigerate up to a week; whisk or shake as needed.
For a temporary emulsion, whisk the mustard, vinegar, water, salt, and pepper together in a small bowl. Slowly whisk in a fourth of the oil until thick. Add the rest in a steady stream while whisking. Season to taste with additional salt. Add sugar and/or water or chicken stock if still too oily-tasting. This vinaigrette will be opaque and creamy, with the ingredients evenly distributed. Store covered in the refrigerator or on the counter.
Variations: For a small portion of vinaigrette, whisk together 1 teaspoon mustard, 1 tablespoon vinegar, salt, pepper, and 3 tablespoons oil. Taste for seasoning and add sugar or water or chicken stock if desired.
Watermelon and Cantaloupe Salad
There is a wonderful restaurant in the south of France that specializes in the lovely French Charentais melon—my favorite of any melon I have eaten—where I once took a cooking class with my son-in-law Pierre Henri’s mother, following which I ate more melon recipes than I considered possible. I lie in bed and dream of them at night, as well as the ripe watermelon and cantaloupes Cynthia and I gathered on a photo shoot in Cordele, Georgia, one summer day and stored in the wings of the Georgia Secretary of Agriculture’s plane. Secretary Irwin had kindly loaned us his plane to fly to agricultural places that were difficult to reach. Since most picking in South Georgia is done in the cool of morning (if there is any cool), so was our melon-picking. We picked the ones with the widest expanse of white where the melon had sat, ripening everywhere but its belly. The paler green belly, evenly webbed rind, and the “give” of the stems award big kudos to cantaloupes, honeydews, and watermelons.
There is nothing better than ripe melon from the field. We rarely encounter it in our urban life, so we bring home and ripen our own melons as we do many of our avocados, tomatoes, and other fruits, on the top of our kitchen table. The aroma of the melons is by far the headiest of the fruits. When ready to eat, we start with a salad, beginning with equal amounts of each melon cut in bite-sized cubes of 1 or 2 inches, adding as we go along. The ripe melons in themselves provide enough juices, but there is always the option of a sauce or even a splash of white wine or wine vinegar for the salad. One kind of melon is better than none, two kinds make a good splash of color and flavor for any table, and three are heaven.
Other additions can be arugula, lemon balm, mint, lemon or orange thyme, ripe bite-sized tomatoes, halved grapes, or the cook’s delight. Usually the melon speaks for itself. Although we are constantly told that melons don’t ripen once picked, I still think melons that have softened on the counter have more flavor than harder ones, so I don't refrigerate until soft.
Serves 6–8
3 cups melon, preferably two varieties, cut in 1/2- to 1-inch cubes
Splash of white wine, or white wine vinegar, optional
1–2 tablespoons chopped fresh herbs (see headnote), optional
2 cups arugula or sturdy lettuce, optional
Tomatoes, grapes, etc., optional
Combine all ingredients in a bowl, toss gently, refrigerate 1 to 2 days as desired. Serve cold.
NOTE: Any leftover melon can be puréed to use in Chilled Melon Soup.
Carolina Gold Rice & Fruit Salad with Ginger Dressing
This can be served—and extolled—just as it is, or cooked meat such as ham, chicken, or fish can be added for a more elaborate dish. It can even be served hot or cold.
Serves 6
1/2 cup Carolina Gold Rice,* Arborio, or other short-grained rice
1/2 cup pecan pieces
1 teaspoon curry powder
1 cup fresh or dried figs, quartered
1/2 cup dried apricots, quartered
1 recipe Ginger Dressing
3–4 cups arugula or other tasty greens, washed and dried
Bring a large pot of salted water to the boil. Add rice, reduce to simmer, and cook until the center of a grain has only a small amount of white when cut with a fingernail, about 15 minutes. Stir occasionally to prevent it from sticking to the bottom of the pot. Drain and rinse under cold water.
Toast the pecans over medium-low heat in a small skillet until golden brown. Remove to a bowl. Add curry powder to the empty skillet and toast gently just until fragrant, about 30 to 60 seconds. Add to the bowl with pecans.
In a large bowl, toss the figs, apricots, pecan-curry mixture, and cooled rice with about 1/4 cup of the Ginger Dressing until lightly coated; add the arugula. Taste and add more seasoning or dressing if needed.
Variation: Substitute a favorite grain such as Basmati brown rice, red rice, pearl barley, rye berries, wheat berries, farro, or the like.
*Carolina Gold may need rinsing.
I’m such a ginger fan that a friend once gave me a pound of candied ginger. I use it with savory recipes as well as sweet, as I rarely see what’s “not to like" about ginger. Without boiled ginger juice, grated ginger and white wine vinegar would be a likely substitute but might take a little adjustment.
Makes 1/2 cup
1 tablespoon bottled ginger juice
2 tablespoons white wine or sherry vinegar
Salt
1/3 cup extra virgin olive oil
Whisk the ginger juice, vinegar, optional hot sauce, and a couple of big pinches of salt in a large bowl. Whisk in the olive oil, but stop when the dressing takes on a slightly thick, opaque look. Use to dress the salad just before serving, or store for up to one week in the refrigerator.
Asparagus was once a major crop in South Carolina, shipped straight up to New York and other northern cities. Somehow canned asparagus took over in my childhood and I hated it and its texture. Fresh asparagus is not only in my good graces, I love it.
Serves 2
6–10 asparagus stalks, preferably thin
1/4–1/2 cup grated Parmigiano-Reggiano cheese
1/4–1/3 cup extra virgin olive oil
1–2 teaspoons sherry vinegar or lemon juice
Salt and pepper
Cut off any rough ends of the asparagus stalks. Peel asparagus, starting at the bottom of the flower. If the stalk is slender and young, save the peel. If tough, use for another purpose. Continue peeling the stalk, essentially making ribbons of asparagus. Gather them and any delicate outer peels into a small mound and toss with Parmigiano-Reggiano and olive oil. Add sherry vinegar or lemon juice. Season with salt and pepper to taste.
Alma’s New Potatoes with Mustard Seed
Alma Friedman and I worked at Rich’s Department Store at the same time, where she ruled the Advertising Department with a firm hand, and I was Director of the Cooking School. Not a cook herself, when she tasted something she liked she would ask me to duplicate it. Usually her choice was so good that the dish stayed in my repertoire. I still use this recipe about twice a month but usually cut it in half or just guesstimate for Jack and myself. After all, I didn’t have a recipe to begin with, so I might come up with a new one. So might you, for that matter. Feel free to embellish.
Serves 10
40–50 new potatoes, about 3–4 pounds
1/2 cup bacon or meat drippings or butter
5–6 tablespoons mustard seed
5–6 tablespoons Dijon mustard, to taste
Salt
Freshly ground black pepper
Preheat the oven to 350 degrees.
Peel the potatoes. Heat the drippings or butter in a roasting pan over medium heat, add the potatoes, and toss to coat with the drippings. Place in the oven and roast, turning every 15 minutes, until browned all over, about 1 hour. Remove from the oven, toss in the mustard seed, and return to the oven for another 5 minutes. Remove and add the Dijon mustard, tossing with a spoon to coat the potatoes lightly. Add salt and pepper to taste. Serve hot and savor.

This derivation of the French Pommes Anna is served upside down, revealing a brown, crispy, buttery exterior and a tender, moist interior. It is a special dish but an easy one if using a heavy, nonstick skillet. It is doable otherwise but a bit more stressful. Of course, it may be prepared in a smaller or larger amount and pan, depending on the number of people being served. I’ve tried adding cheese or other ingredients, but I like the original way noted here for the contrast of crisp and soft and the heightened taste of the potatoes. Remember, water follows salt, so salting too early in the process will dilute the crustiness and its color. Neglecting to add salt every other layer will prevent the potatoes from sticking together.
Serves 4 to 6
1 1/2–1 3/4 pounds Yukon Gold potatoes, peeled and sliced 1/8 inch thick*
Salt
Freshly ground black pepper
5–8 tablespoons butter, cut in pieces
Preheat oven to 400 degrees.
Thickly butter a 6- to 8-inch heavy, nonstick, well-seasoned frying pan, or cake tin. Arrange the potatoes in overlapping circles to cover the base of the pan, making a pretty design as it will be the final top crust. Add a second layer, continuing to overlap, and season with salt and pepper; dot with 4 to 5 pieces of butter. Continue to fill the pan with layers of potatoes (the first two layers and the last layer are the only ones that need to be pretty—the rest can be haphazard), seasoning and buttering every other layer. Butter a piece of aluminum foil and cover the potatoes and the pan. Put an ovenproof plate or a heavy saucepan on top of the foil to press down on the potatoes.
Cook the potatoes in the pan on the stovetop over medium heat for 10 to 15 minutes to brown the bottom, checking to be sure it is not burning. When medium brown—the color of light caramel—move the pan to the oven, leaving the weighted ovenproof plate on, if possible. Bake about 30 minutes, or until the potatoes are soft, depending on the number of potatoes. Can be made ahead to this point and set aside if necessary, then reheated for 10 minutes, but it will suffer a bit. Using oven mitts, turn out upside down on a serving dish, crust side up. To serve, cut with a knife or scissors.
*Thicker slices will work, but the melting quality of the interior layers of the cake will decline a bit. A food processor or mandolin are handy slicing tools for the nonprofessional cook.
Whipped, Mashed, or Riced Potatoes
Once mastered, mashed potatoes can be cooked more frequently and served easily for a week-night family meal. Some families like lumpy potatoes, as they are used to them. Others like them smooth, rich, and loose. It doesn’t matter. But when a special meal comes around, consider the variation below and use cream. Mashed potatoes should be so delicious that the family will miss them long after the cook is dead and gone. And don’t forget the butter. The recipe can be doubled if necessary.
Serves 4
2 pounds Yukon Gold or Idaho potatoes, peeled and cut into 1/2-inch cubes
Salt
2–4 tablespoons butter, divided
1/2–1 cup milk, buttermilk, skim milk, or potato water, heated
Freshly ground black pepper
Add enough cold water to the potatoes to cover them by 1 inch in a heavy pot. Add 1 teaspoon salt and bring to the boil over high heat. Reduce the heat to low, cover, and simmer until soft, about 20 to 30 minutes. Test by squooshing a bit of potatoes between two fingers to make sure there are no lumps. If there are, cook longer. Drain well in a colander, reserving water as needed to add to mashed potatoes.
Add the butter to the empty pot and melt over low heat. Return potatoes to the pot over a low heat and whip, mash, or rice (see Perfect Mashed Potatoes) to incorporate the butter. If the potatoes are more watery than desired, before adding the hot liquid, cook the potatoes with the butter until some of the liquid evaporates. Add some of the hot liquid and butter and blend well. Continue adding milk, mashing or whipping constantly, until the desired consistency is reached. Season to taste with salt and pepper.
Reheating Mashed Potatoes: When cooking the potatoes a day or two in advance, cool and store in a heavy-duty ziplock bag. When ready to use, move mashed potatoes to a bowl, cover with plastic wrap to keep a skin from forming, and reheat in the microwave until very hot. Or heat a heavy pan with some butter over medium heat, add the potatoes, and stir over heat continually until hot.
Variations:
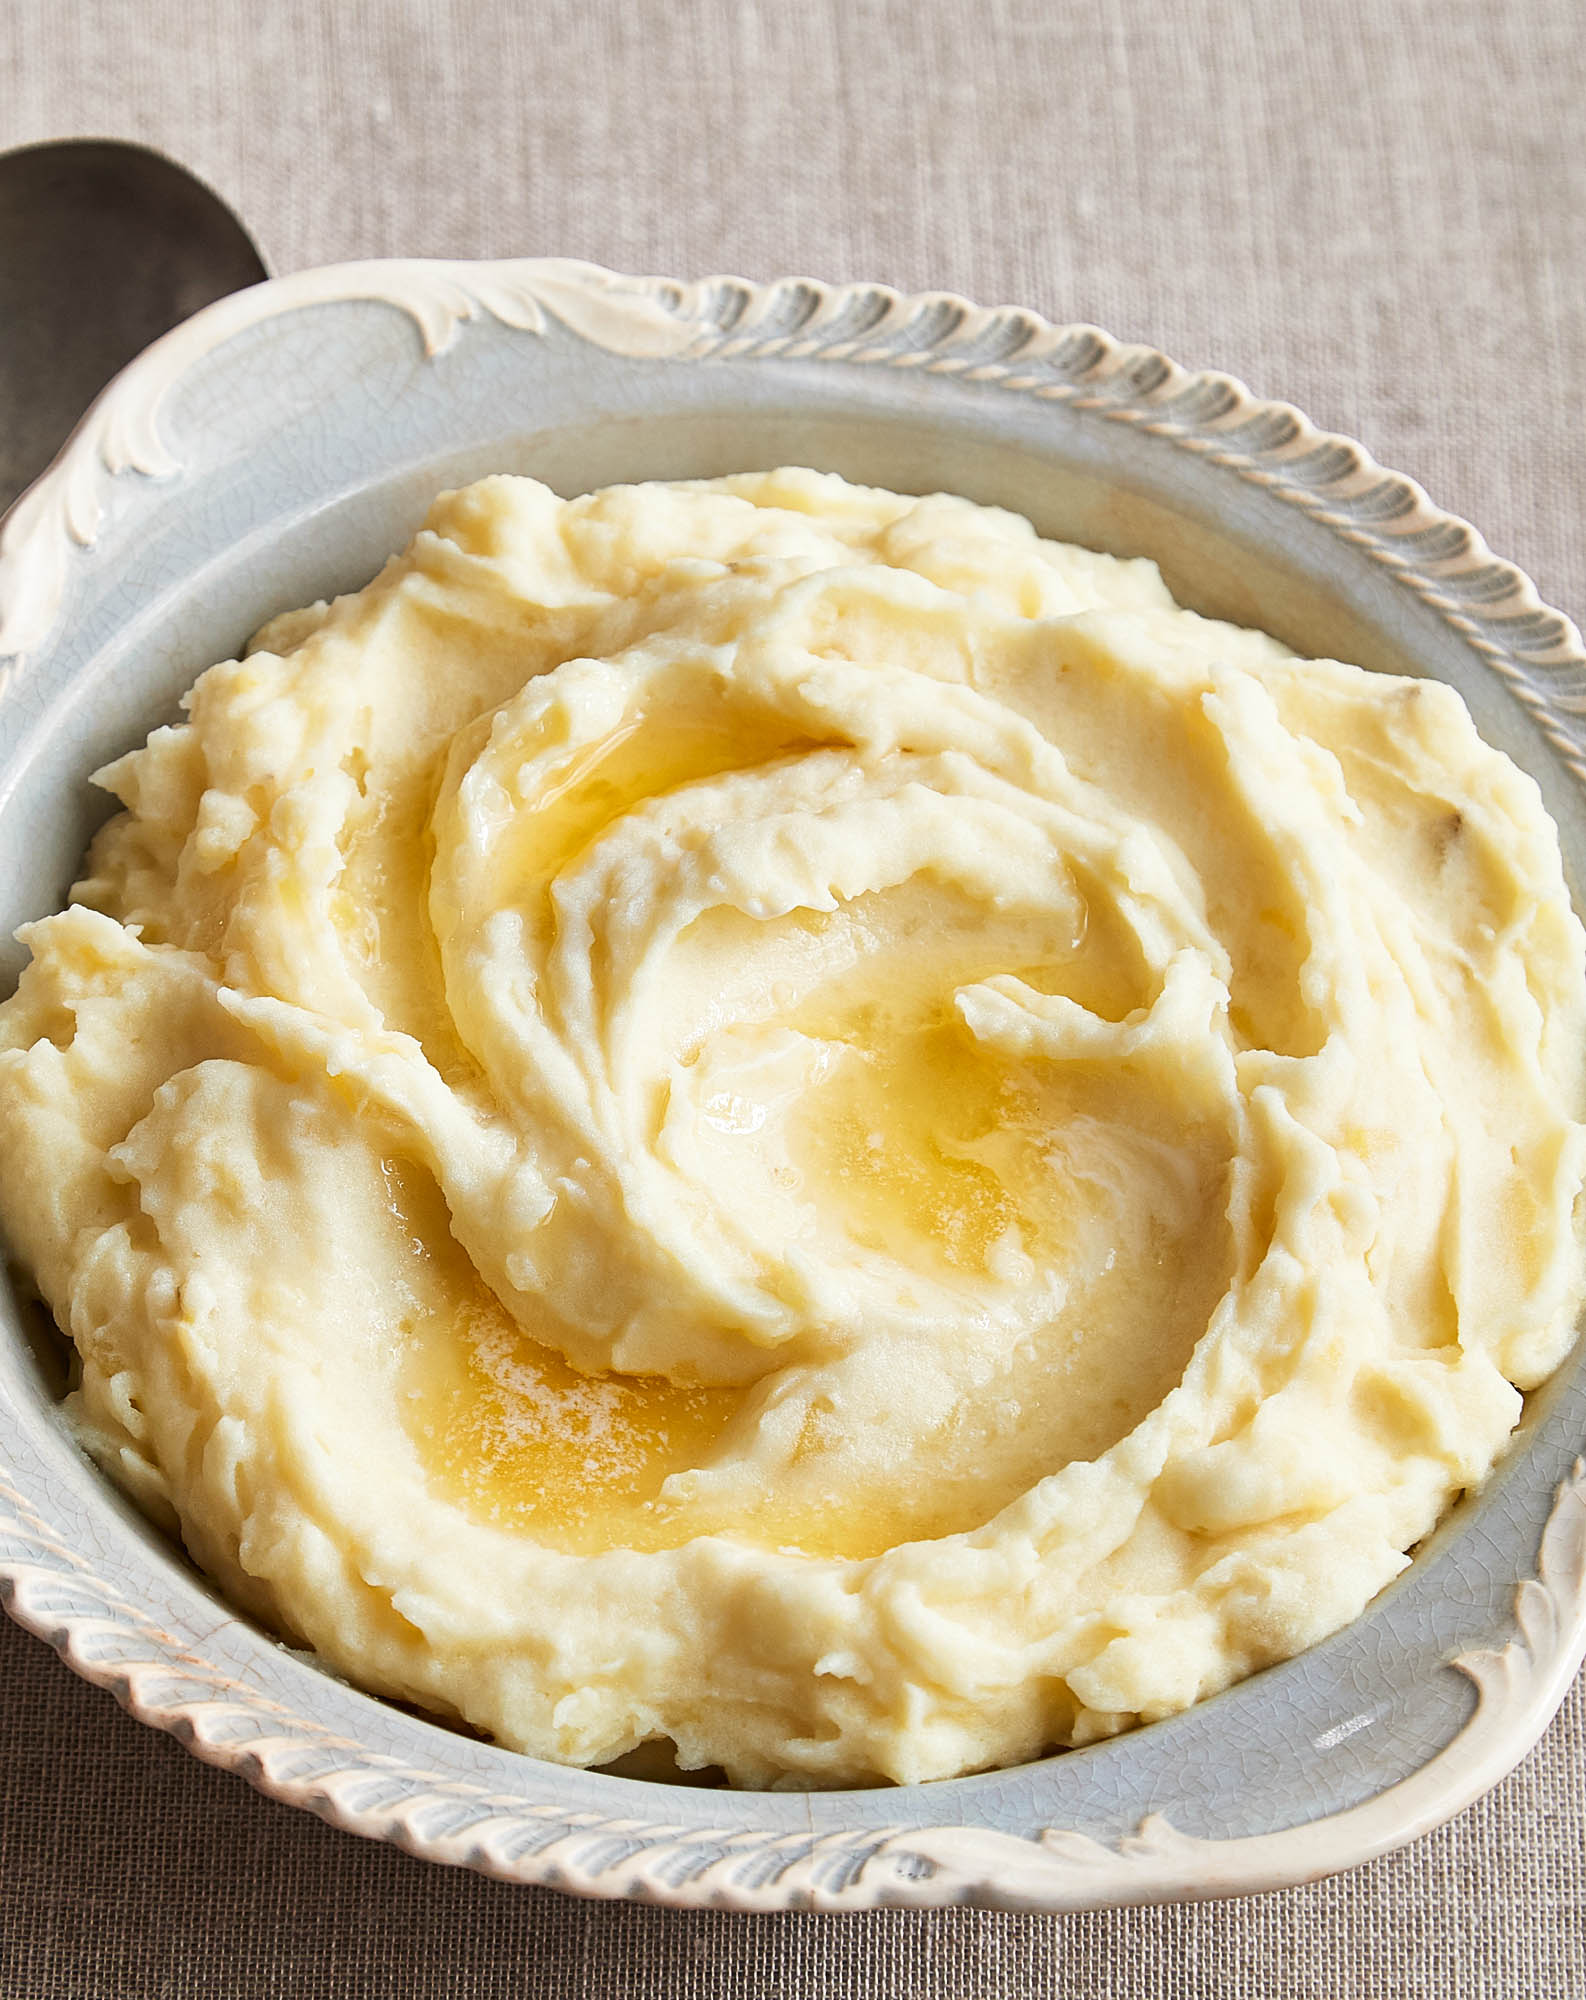
There are three crucial steps in achieving this ideal: 1) cooking the potatoes sufficiently, 2) adding fat to the hot potatoes to coat the starch molecules, and 3) adding hot liquid to the potatoes in a pot over the heat to let the starches swell. To finish the potatoes, select one of these methods:
• Mash or whip in the fat over low heat, then add the hot liquid using a small electric hand mixer or sturdy whisk.
• Use a flat-bottomed masher or other heavy object to mash down the drained potatoes in the pan over low heat before stirring in hot liquid, and continue until desired texture.
• Push the cooked potatoes through a ricer into the still hot pan with melted butter.
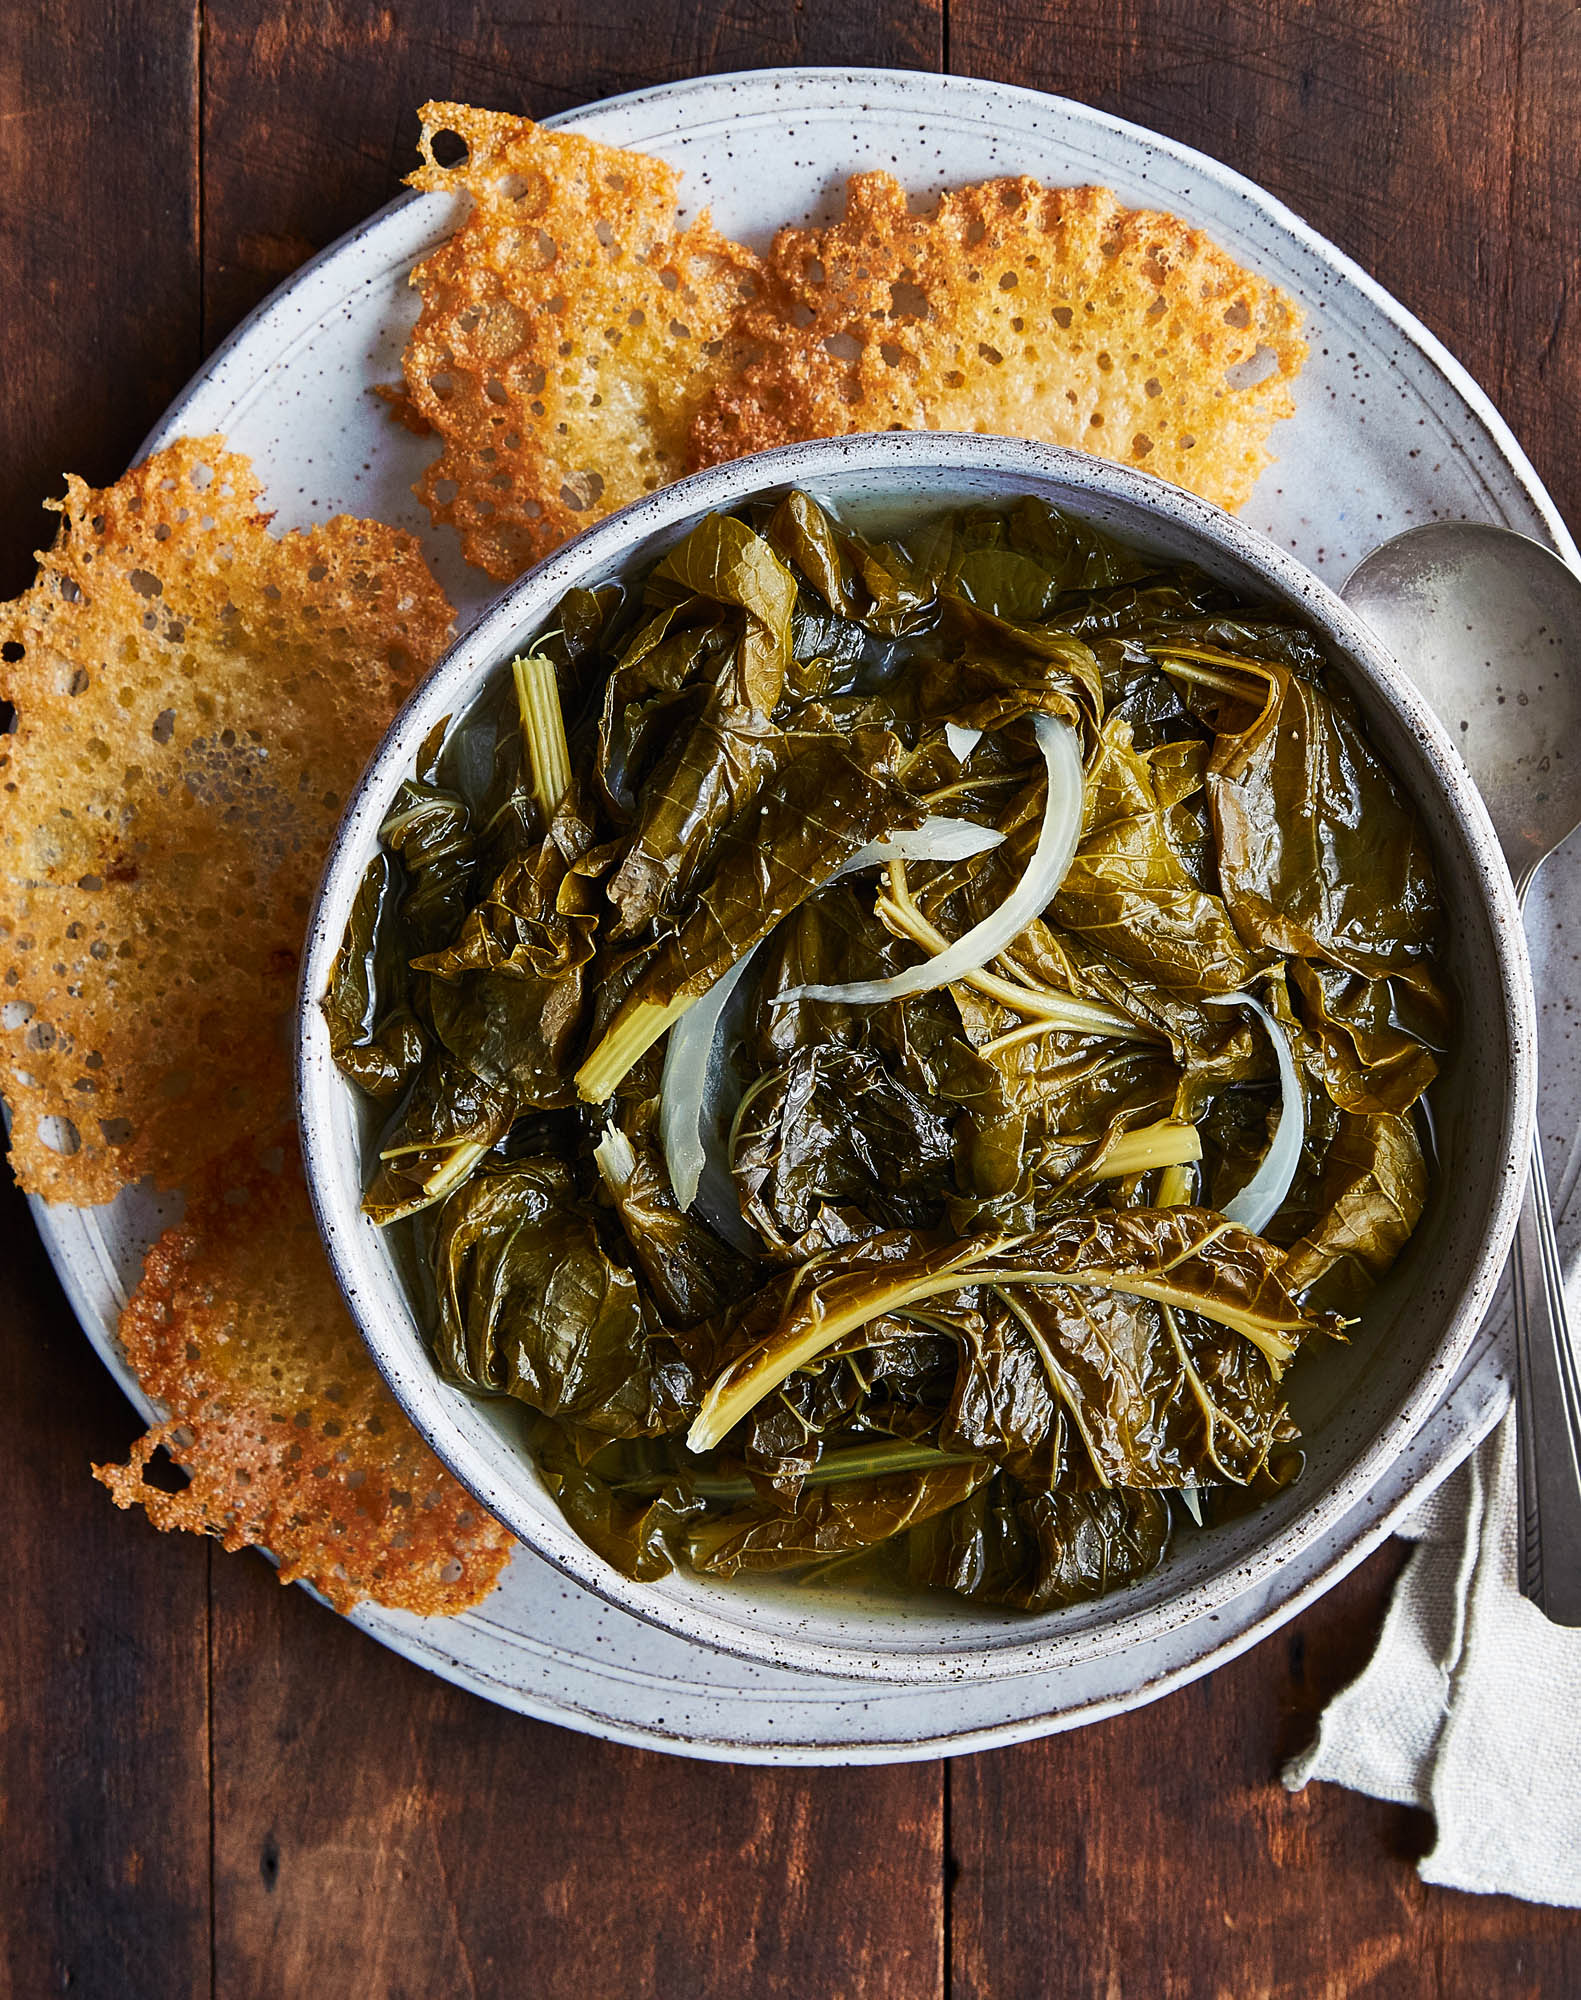
Long-Cooked Turnip Greens & Pot Likker
Greens and their pot liquid, or pot likker, are elixirs of comfort food in the South. They fix any ailment. When eaten with cornbread, they are considered a meal. Sometimes people drink the pot likker first and then eat the greens, others eat them together like a soup, and some eat the greens first, finishing with the pot likker. But the really Southern people I know dip the cornbread in the likker, getting the cornbread a bit soggy, eat it, and then follow with a bit of the turnips. Oh, but then there are those that split the cornbread and make a sandwich with the greens and a sprinkle of hot sauce in the middle. It’s the combination that counts.
Serves 6 to 8, including pot likker
1/4 pound sliced bacon, rinsed salt pork or streak o’ lean, smoked neck, or other cured pork
1–2 slices onion
1 dried red chili pepper
5 pounds turnip or collard greens, washed
Salt
Freshly ground black pepper
Hot sauce, optional
Bring 1/2 gallon of water to the boil in a large pot over high heat. Add the pork, onion, and dried chili pepper and return to the boil. If time is available, cook to make a flavored broth, about 30 minutes.
Meanwhile, tear off and discard the stalks and any tough veins of the greens. Tear or cut the remaining greens into pieces and add to the broth. Return to the boil, reduce the heat to a simmer, pushing any bobbing greens down into the liquid, and cover. Cook 50 minutes to 3 hours, as desired. Use a pair of large scissors to cut any pieces larger than bite-sized. Taste and season with salt, pepper, and hot sauce as desired. Serve with the pot likker or strain, reserving the broth for another time. Cooked greens will last covered and refrigerated for several days. They freeze up to 3 months.
Served piping hot from a skillet or griddle, these crispy treasures, traditionally called hoecakes, can be thin enough to nearly see through or thick enough to dunk. With its origin perhaps in early Southern cookbooks, I’ve been making these with regularity since I had my restaurant in Georgia in the early 1970s. They are good by themselves, almost as a snack, or whenever cornbread would be used.
Makes about 20 fritters
9 tablespoons self-rising cornmeal mix
4 1/2 tablespoons commercial or Homemade Self-Rising Flour
1–1 1/2 cups water
1/2–1 teaspoon vinegary hot sauce, such as Tabasco or Texas Pete
2–4 tablespoons oil, cook’s preference, for frying
Salt
Whisk together the self-rising cornmeal and flour. Add water as needed to keep batter thin, and whisk until smooth. Add hot sauce, to taste.
Heat a thin layer of oil in a large skillet over medium heat. One tablespoon at a time, drop the batter into the hot skillet. Cook each cake until brown and crisp on the bottom; turn with a spatula and then brown the other side. Add more oil to the pan as needed, and add more water to the batter as needed to keep the batter thin. Remove to a plate lined with paper towels and season with a pinch of salt just before serving.
Tip: If you have cornmeal that isn’t self-rising, make your own by combining 9 tablespoons cornmeal with 3/4 teaspoon baking powder and 1/4 teaspoon salt.
Turnips enhance an au gratin with a bit of tanginess and are always available in the South in the fall. They can be layered with sliced squash or other vegetables. There is no set ratio for ingredients—and the cheese and herbs can be varied according to what is available. If only milk is available, increase the amount of butter to enrich the dish. This is a go-to Thanksgiving dish for my family, so calories don’t matter, and I prepare enough for reheating leftovers. It is easily cut in half.
Serves 10
3 pounds white turnips, peeled and sliced 1/8 inch thick
Salt
Freshly ground black pepper
2 tablespoons chopped fresh parsley, thyme and/or oregano
3 garlic cloves, finely chopped or crushed with salt
1 cup grated Gruyère cheese
1 cup freshly grated Parmesan cheese
1/3–1/2 cup butter
1 1/2–2 cups heavy cream
1/2 cup breadcrumbs or panko
Bring a large pot of water to the boil, add the sliced turnips, and return to a slow boil. Simmer young and small turnips for 3 minutes and larger ones for 8 to 10 minutes to remove excess sharpness while still leaving a bit of pep in them. Drain and pat dry with paper towels.
Butter a long casserole dish, preferably no more than 3 inches deep, that will accommodate 3 layers of sliced turnips and the cheese. Spread a layer of parboiled turnips to cover the dish (they may overlap slightly) and sprinkle with salt and pepper. Mix the herbs with the garlic and sprinkle a third over the turnips. Combine the two cheeses and sprinkle the turnips with a third of the mixture. Dot with a third of the butter.
Continue to layer until all the turnips are added to the dish, finishing with cheese on top of the third layer. Pour cream over the entire dish until it barely covers the top layer of turnips. Sprinkle with the breadcrumbs or panko and dot with remaining butter. Can be made ahead to this point and refrigerated. Bring to room temperature before baking.
When ready to bake, preheat oven to 400 degrees. Add the dish, reduce the heat to 375, and bake until the cheese is melted and the breadcrumbs are nicely browned, about 45 minutes. Serve hot. This freezes up to 3 months. Defrost and reheat in a 350-degree oven for about 30 minutes, or until bubbly.
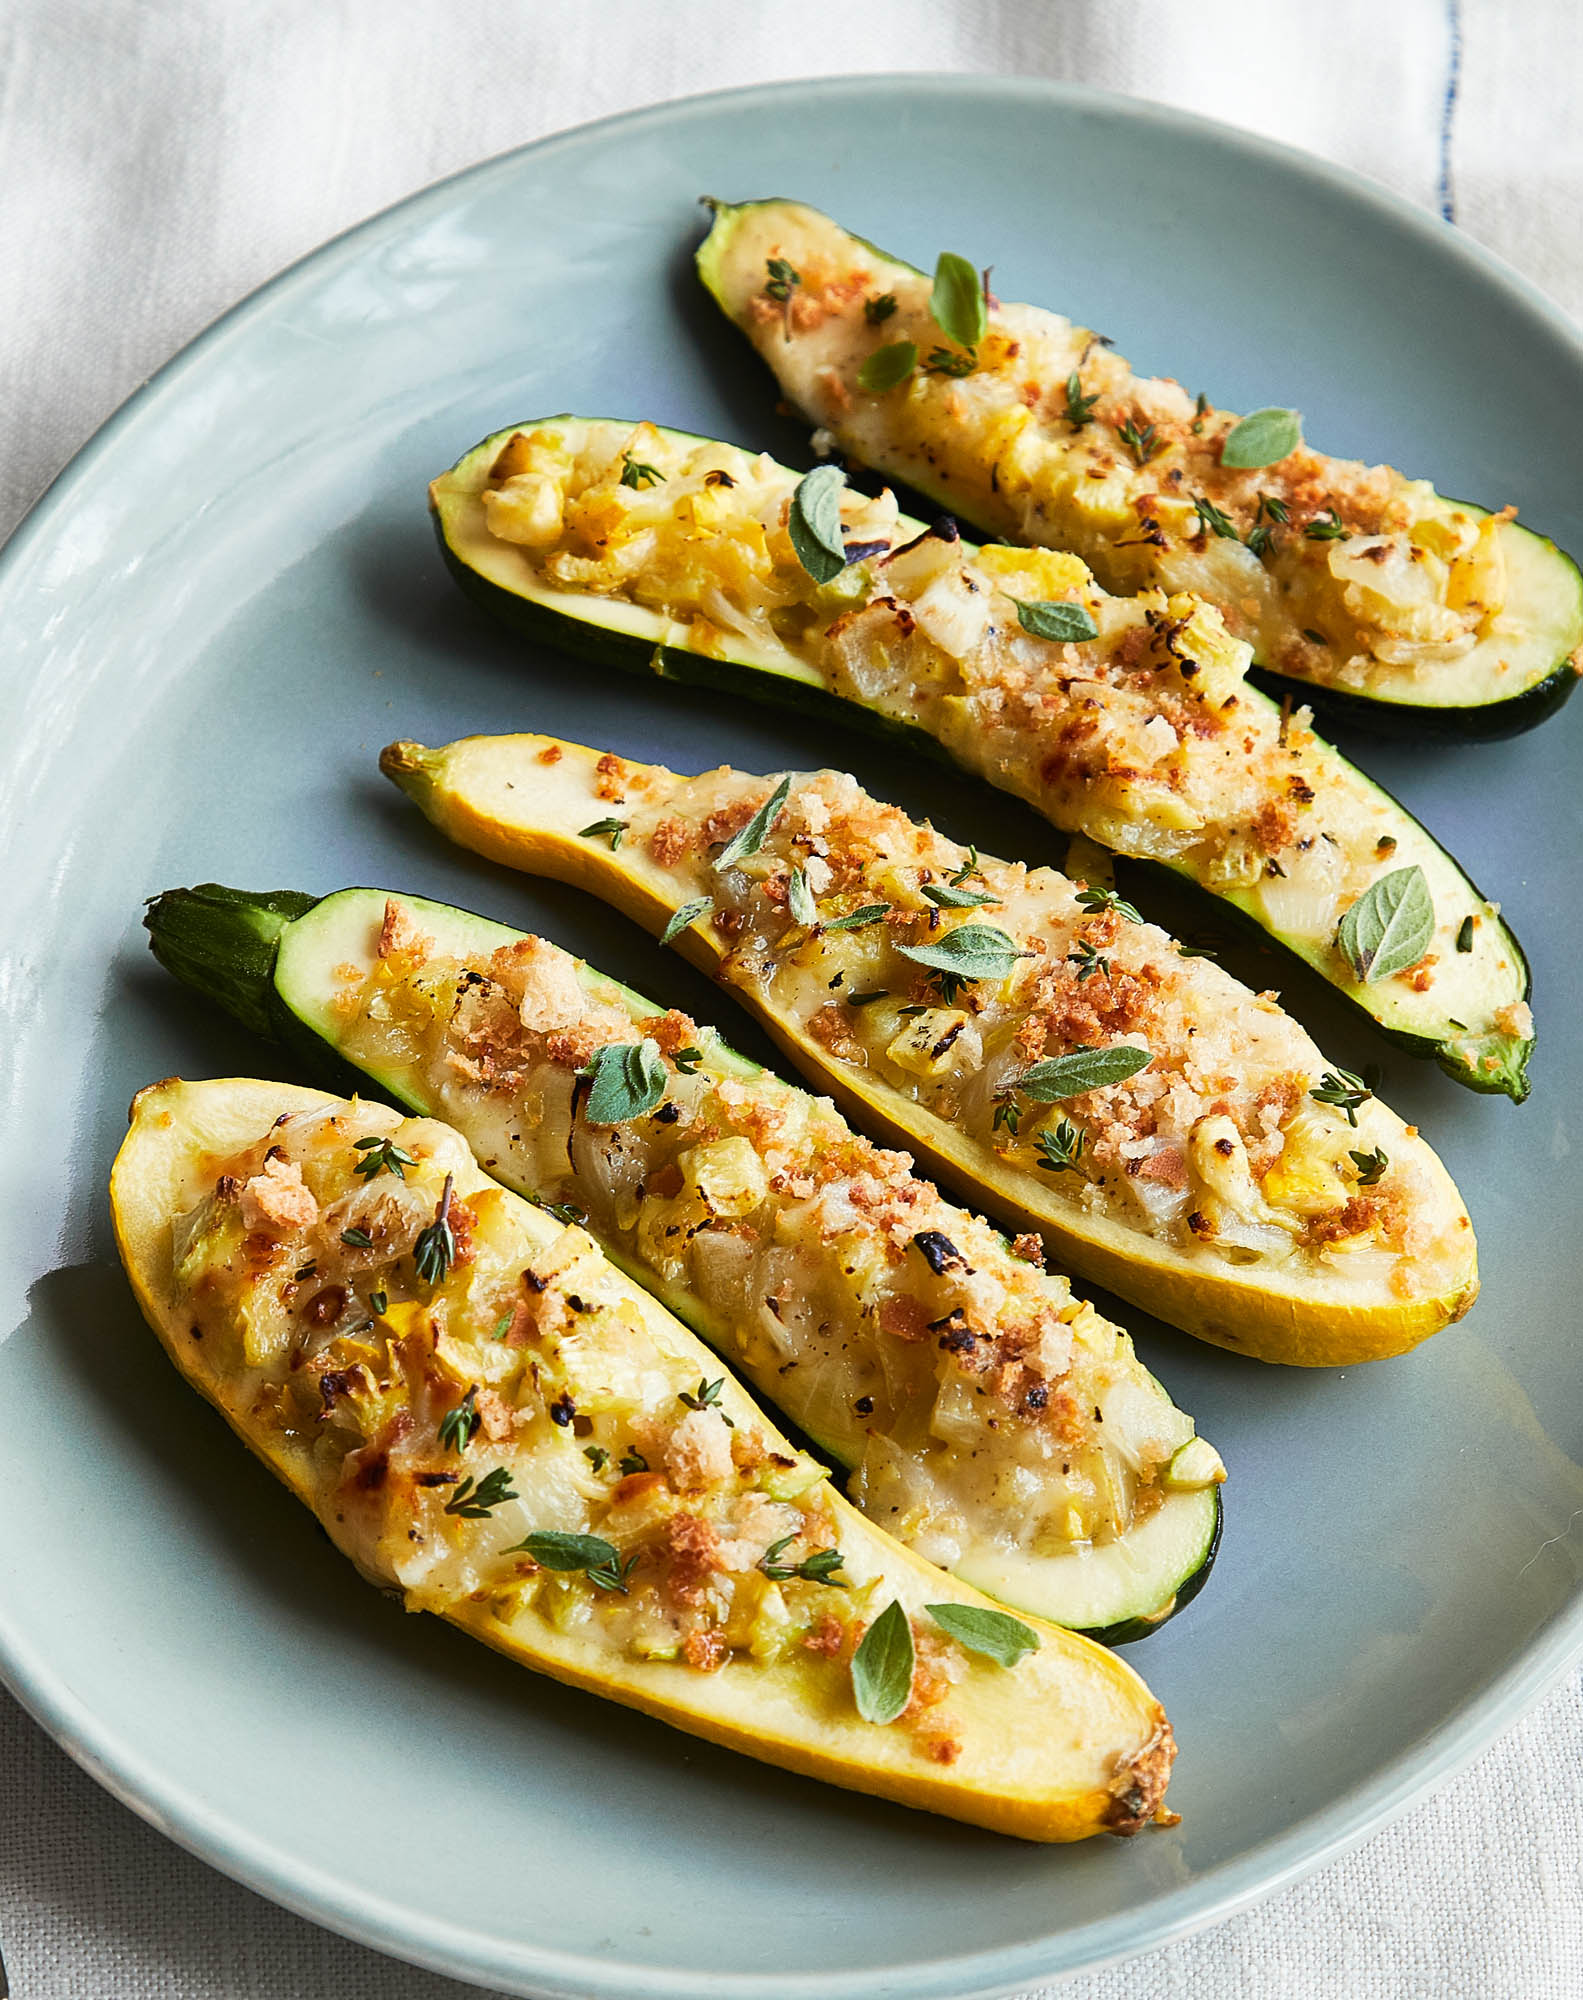
Stuffed Squash & Zucchini Boats
A recipe for a stuffed vegetable can’t be exact, as the vegetables vary in size. It is better to have extra stuffing than not enough, as the extra can be refrigerated or frozen for another time or baked in a ramekin for a cook’s treat. This recipe will also work for those canoe-sized, end-of-season zucchini; cook both the shells and the filled zucchini a little longer.
Makes 12, serves 6 to 8
6 small zucchini or yellow squash
6 tablespoons butter, divided
1 medium onion, chopped
2 garlic cloves, chopped
1 cup grated mixed cheeses, preferably Gruyère and fresh Parmesan
3 tablespoons chopped fresh herbs such as thyme, oregano, or basil, optional, divided
Salt
Freshly ground black pepper
1/2 cup breadcrumbs
Preheat oven to 350 degrees.
Halve the squash and scoop out the pulp, leaving the inside walls of the vegetable intact to form boats; set aside. If any boats have broken, chop them and add to the pulp as necessary to fill the other boats. Cook the boats in the microwave until soft, just a few minutes; or slide into a pot of boiling water and cook until soft, approximately 10 minutes, remove and drain well.
Meanwhile, melt 3 tablespoons of butter in a skillet. Add the onion and any chopped squash, and cook until the onion is translucent. Add the garlic and cook a few minutes more. Cool slightly and add the cheese. Taste for seasoning, add 2 tablespoons of the herbs, if using, and season with salt and pepper.
Move the boats to a rimmed baking sheet and fill with the mixture. Top boats with breadcrumbs and dot with remaining butter. Bake until heated through, about 15 minutes. Sprinkle with remaining herbs, if using, and serve hot. May be refrigerated or frozen, wrapped well. Defrost and reheat until heated through, approximately 15 minutes.
Tians take simple vegetables. Combine them into an evocative design to add a touch of glamour to a meal. Have fun!
Serves 6
1 medium onion, diced
5 garlic cloves, chopped
1/3 cup olive oil, divided
1 pint cherry tomatoes, halved
Salt
Freshly ground black pepper
2 large or 3 medium eggplants
3 medium zucchini
1 (12-ounce) jar roasted red peppers (about 2 peppers), drained and sliced
1 teaspoon chopped fresh thyme leaves, divided
1 teaspoon chopped fresh oregano, divided
1/4 cup fresh basil leaves, for garnish
Preheat oven to 350.
Heat 2 tablespoons olive oil in a skillet, add onion and cook until soft, 3 to 5 minutes. Add garlic and cherry tomatoes and sauté until they begin to soften, about 5 minutes. Season with salt and pepper.
Slice eggplant and zucchini in rounds about 1/4 inch thick.
To assemble the tian, overlap slices of eggplant and zucchini, alternating, around the edge of a round or oval casserole dish (about 10 inches in diameter, or a 9 x 13-inch rectangular dish). Continue with additional rows to cover the entire dish. Leave a small space open in the middle and fill with the tomato mixture. Brush the slices with 2 to 3 tablespoons olive oil. Insert red peppers strips randomly in between slices of some eggplant and zucchini. Sprinkle with thyme and oregano and season with salt and pepper.
Bake tian until vegetables are tender and juices are bubbling around the edge, about 30 to 40 minutes. Garnish with fresh basil leaves. The tian may be cooked ahead and refrigerated or frozen for reheating later. It may suffer a bit in presentation but will still be delicious.

Meant for the time of year when the garden is brimming with an abundant mixture of vegetables, this is also highly variable. Use what’s available, and don’t try to be precise. If a vegetable listed is not available, omit it or add another. The vegetables are prettier and more nutritious when left unpeeled.
Serves 10 to 12
4 large or 6 small eggplants
Salt
3 red, yellow, or green bell peppers
6 medium zucchini
3 medium onions
8 tablespoons oil, cook’s preference, divided
6 garlic cloves, chopped
2 cans Italian plum tomatoes with juice (totaling 28 ounces) or 2 pounds fresh tomatoes, chopped
1 cup chopped fresh herbs, preferably thyme, parsley, and basil
Freshly ground black pepper
Preheat oven to 350 degrees. Slice the eggplant into 1/4-inch-thick slices. Lightly score the flesh of the slices in a crosshatch pattern (like tic-tac-toe). Move slices to a colander over a bowl or sink and season with 1 teaspoon salt. Let sit 30 minutes to degorge (remove the water from) the eggplant.
Meanwhile, seed the peppers, and then slice the peppers, zucchini, and onions. Discard the liquid extracted from the eggplant. Rinse, drain, and dry eggplant well with paper towels. Brush eggplant and zucchini slices with some of the oil and move to an oiled rimmed baking sheet. Cook in the oven until lightly browned, about 20 minutes, turning halfway through.
Heat 2 tablespoons of the oil over medium high in a heavy-bottomed pan. Add the onions, peppers, and garlic, and cook until soft, adding oil as needed, about 10 minutes. Add the tomatoes and their juices and cook another 20 minutes. Add the cooked eggplant and zucchini and the herbs. Serve now, or for a thicker, softer consistency better for a bed for meats, cook another hour. Season well with black pepper. Serve hot or cold. This freezes well and reheats easily in the microwave.
The earthy richness of root vegetables makes them an attractive winter side dish. When I was growing up during World War Two, meat drippings were saved—usually first poured through cheesecloth to remove the cooked bits—in a metal coffee can next to the stove. When paper towels became prevalent, the can might be covered with a paper towel and secured with a sturdy rubber band and the fat poured through the towel. The drippings were mixed willy-nilly, the flavor a surprise according to the can’s contents.
While drippings add an enormous amount of flavor and color, butter or oil work as well. Use as many root vegetables as available. Multicolored carrots or other vegetables add pizzazz. Turnips can be bitter if large, so if necessary, par cook as below.
Serves 6 to 8
3 turnips, peeled and quartered
3 medium carrots, peeled
3 medium onions, peeled
2 cups butternut squash
4–6 tablespoons drippings, cooking oil, butter, or a combination
Salt
Freshly ground black pepper
2–4 tablespoons rosemary, crumbled
Preheat oven to 400 degrees.
Cover any turnips larger than a baseball with water in a saucepan, bring to the boil, and boil 5 minutes, carefully tasting a sample before removing. (There should be no bitterness.) Drain then pat dry on paper towels.
Toss each group of vegetables in the preferred fat. Spread vegetables in one layer over a sheet pan or two, and roast in the oven until browned and crisp all over, about 1 hour, turning every 15 minutes and removing any vegetables that are cooked and browned, as they will cook according to size and density. Season with salt and pepper. Crumble rosemary on top and serve hot.
Variation: Add quartered fennel bulb and cook as above. Green onions and shallot bulbs can be used as well. Lemon rind and herbs are bright additions with, or instead of, the rosemary.
Thinking of my friend Deni Seibert causes me to tackle my fridge after holidays. It is typically crammed full of various leftovers—some watercress and turnip greens flavored with meaty ham hocks, in broth as solid as Jell-O; a few bits of turkey in the broth from the boiled-down carcass; green onion tops whose bulbs had seen better days; several very ripe tomatoes; a hard piece of cheddar; some candied fruit and cream cheese.
Deni has perfected her leftovers into an art in the form of weekly made soup. Russ, her husband, was director of Longwood Gardens in Delaware for years, and they brought their children up there. Deni has the ability never to be flustered, even when the doorbell rings and some person, perhaps never met before but heard about, is at her door saying, “I know this is rude, but I’ve wanted to meet you for ever so long and found that I had just enough time before going to the airport if I drove straight here without calling and rang your doorbell.” Deni brings them into her kitchen, makes them feel completely at ease, and, if they are very lucky, they get her homemade soup.
She starts a new soup fresh each week, beginning with the Sunday meal’s leftovers—a ham bone boiled up, or the bone from whatever meat she served for Sunday dinner. Each day through the rest of the week, leftovers are added to her soup. The best day is Saturday. By that time the soup is chock-full of surprises—carrots from Wednesday, butter beans from Thursday, a couple of cut-up boiled potatoes from Friday. Perhaps it is easy to be gracious if you always know you have a good soup in the fridge.
The truth is, anyone can make a soup with the bits and pieces one has in the fridge. It is good to start with a broth to give the soup body. If you have a chicken or duck or turkey carcass with a little meat still clinging to the bones, you have a fine base. Better still if you have some ham hocks in jelly. If you cut up your own raw chickens every time you’re preparing fried chicken or a sauté, it is provident to save the backbone, neck, and gizzards, and package and freeze them until you have enough packages for a stock.
When preparing vegetables, I chuck into a freezer bag the end pieces of onions and carrots and maybe other vegetables, as well as parsley stalks, outer ribs of celery, and so on, and these all go into the soup pot. (I’m afraid I save the green onion tops for myself and char them until crisp—a cook’s treat.)
But to get back to the findings in my own post-holiday fridge: in addition to making a turkey and/or ham soup, I can use up two leftover tortillas! I’ll use the tomatoes in a tomato bruschetta with some slightly stale Italian bread I have on hand. The bit of cheese has a speck of mold on it, but that doesn’t hurt cheese. I’ll just scrape it off and use it along with the leftover meat on the ham hocks to make a gougère—that delicious French cheesy cream puff that my nearly-daughter Audrey and her Frenchman beau taught me how to put together (they’ll often make an entire meal of a gougère). The leftover vegetables will also work nicely cooked together. And that eggplant can make a nice snacking appetizer, too, while I wait.
Finally, there’s the candied fruit and some cream cheese. Almond crisp cookies are a good solution for leftover candied fruit, but then I also remember a recipe from Betty Rosbottom for a wonderful cheesecake that uses both candied fruit and cream cheese—and a fair amount of sour cream, I admit—but better to add to what I have and produce a scrumptious dessert than to throw away any usable ingredient. Now I’ve made a clean sweep. What a feeling of satisfaction!
This story was originally published in Nathalie Dupree’s Matters of Taste, © 1990 by Nathalie Dupree, published by Alfred A. Knopf, Inc. It may have been modified for this book.
Celery & Carrots with Ginger Sauce
Rather than needing a separate pan, the ginger sauce makes itself from the vegetables mixed with the seasonings. For that reason, the heat should be kept low enough to have the vegetables extrude their juices. Too high a heat will cause them to evaporate and be sauceless, but they will still be delicious.
Serves 4
6 tablespoons butter
8 stalks celery, sliced on the diagonal (about 2 cups)
4 large carrots, sliced on the diagonal (about 2 cups)
1/4 cup granulated sugar
1 1/2–3 teaspoons chopped fresh ginger
1 handful small fresh mint leaves, about 1/3 cup
Melt the butter over low heat in a heavy pan. Add the celery and carrots. Cover and cook over low heat until barely crunchy, about 10 minutes. Mix together the sugar and ginger in a small bowl and add to the pan. Stir the celery and carrots in the sugar-ginger mixture slowly and gently until they are well glazed and slightly browned. If the mint leaves aren’t small and pretty, chop coarsely; otherwise leave them whole. Dish up, stirring in the mint.
Variation: Cook in a skillet for more tender-crisp vegetables, or cook in a pot for longer to yield softer vegetables.

Pan-Charred Green Beans with Pecans
This has been a favorite recipe of mine since a brief stint living in New York in the Village. I was out of butter and asked my beau to bring some to flavor the green beans when cooked. I added the beans to boiling salted water and carelessly left the pan uncovered while I stepped out of the kitchen. The liquid quickly boiled out, and I returned to charred beans. I tasted them, and they were delicious, and voila! A recipe was born! I realized I did not need water or fat to cook the green beans and liked them charred and slightly crunchy. The pecans only made it better, as did the butter when it arrived.
An under-salted green bean is worse than an undercooked one. Be sure to taste and season as needed.
Serves 4
3 tablespoons butter, divided
1 pound green beans, ends and strings removed
Salt
1/2 cup chopped pecans
Freshly ground black pepper
Heat a large cast-iron or heavy-duty skillet over high heat. Add 1 tablespoon of the butter. Add the green beans in one layer to the hot skillet. Sprinkle 1 teaspoon salt over the beans. Cook over high heat, tossing occasionally. Add butter only if they start to stick. Toss the beans occasionally and continue to cook until blistered with occasional charring, about 5 minutes. When cooked, remove beans to a plate. Melt any additional butter in the skillet and sauté chopped pecans until toasty. Return cooked green beans to the skillet and toss with buttered pecans to combine. Season with salt and pepper to taste.
Celeste Dupree, maven of Social Circle, Georgia, taught me how important Macaroni Pie is to the South when she taught me to make this custardy rendition of macaroni and cheese. I use it as a side dish, a starter, or a main course. It can be doubled if a larger dish is used. It is an ultimate comfort food.
Serves 6–8
3 cups cooked and drained spaghetti (macaroni)
4 tablespoons butter, melted
4 large eggs, beaten to mix
3 cups milk
1 1/2 teaspoons Dijon mustard
2 teaspoons salt
Freshly ground black pepper
1 teaspoon ground hot red pepper, optional
1 pound sharp cheddar or Gruyère cheese, grated
Preheat oven to 350 degrees.
Roughly cut the cooked spaghetti into 3-inch pieces and toss with half the butter. Lightly whisk the eggs with the milk in a large bowl. Add the mustard, salt, peppers, and half the cheese. Put half the spaghetti into a greased 3-quart baking dish, sprinkle with cheese to cover and 1 tablespoon of the butter. Ladle on half the egg/cheese mixture, top with the rest of the spaghetti. Ladle on the remainder of the mixture and enough cheese and the remaining butter to cover the top. If the dish is deep, it may not need all the cheese.
Move to the preheated oven. If the dish is less than three inches deep, bake for 30 minutes; if deeper, bake for about 45 minutes. Check and reduce the heat 25 degrees if the cheese is browning too much or the custard is bubbling. Cover lightly with foil and continue to cook until a fork inserted in the custard comes out clean and the top is golden brown, up to 40 minutes more, depending on the thickness of the baking dish.