In recent years I’ve tried to emphasize through our products and in my writing that health should be more than a lack of illness; it should be about fun, vibrancy, and abundance. Once I got the hang of making different kinds of herbal honeys, it seemed logical to find ways to play with them by using them in other recipes and (because we do a lot of traveling) by making them “portable.” Here are some of our tried-and-true ideas for how to incorporate herbal honey mixes into your life at home and on the go. When you’re on the move, you can still keep your honey supplements close at hand.
Herbal Choco-Nut Spread
You can stir any herbal honey spread into your favorite nut butter, or make your own like this one. Great for sandwiches and dipping . . . Mmmmm.
Ingredients
1 cup hazelnuts
12 ounces 60–70% cacao chocolate
3 tablespoons honey spread or infused honey of your choice
2 tablespoons sunflower oil
1 tablespoon unsweetened cocoa powder
1⁄2 teaspoon almond extract
3⁄4 teaspoon salt
Instructions
1. Preheat the oven to 350°F (180°C). Spread the hazelnuts on a baking sheet and roast them for 10 to 12 minutes. You’ll see the skins brown just a bit. Dump them directly onto a slightly damp towel and rub them until the skins are removed. Let cool.
2. Melt the chocolate in the top of a double boiler.
3. In a food processor, grind the hazelnuts into a paste. Add the honey or honey spread, oil, cocoa powder, almond extract, cooled chocolate, and salt, and blend until smooth. Don’t worry if the spread seems too thin, it will thicken as it cools. Transfer to a pint jar with a tight-fitting lid and label. Refrigerate and use within 2 to 3 months.
Almond Cherry No-Bake Balls
This recipe can be altered to accommodate just about any kind of nut and any kind of dried fruit. Dates are always a good foundation, as they provide a delicious sweetener and bind all ingredients together. This is perfect for sending in a lunchbox on days when a child needs a bit of a boost.
Ingredients
11⁄2cups almonds
2⁄3 cup dried cherries
1⁄4 cup dates
1⁄4 cup your choice of honey spread
2 teaspoons vanilla extract
2 teaspoons coconut oil
Instructions
Grind the almonds in a food processor. Add in the dried cherries and dates, and process until smooth. Add the honey spread and process until the mixture sticks together and forms a ball. Make 12 bite-size balls or press the mixture into a pan and cut into 12 bars. If you increase the amount of ingredients, be mindful of the corresponding number of servings. Each serving provides enough honey and herb for a “dose.”
No-Bake Halva Bars
Halva is a traditional Persian treat that first appeared in writing in a Baghdad cookbook in 1226, and it is still enjoyed in the Middle East and Greece. True halva is made with high heat and honey to create a fudgelike consistency. In keeping with the evidence against heating honey, here is my spin.
1. In a food processor, add the pistachios, sesame seeds, and almonds, and process into a coarse meal.
2. Add the honey spread, coconut oil, and rose water, and process until everything is well mixed.
3. Roll into 12 balls or press and cut into 12 bars to provide a proper “dose” with this amount of ingredients. Dust with confectioners’ sugar to keep from sticking together in storage.
Extra Special Coconut Butter
Coconut butter is rich in lauric acid, healthy fats, amino acids, calcium, and magnesium. It boosts metabolism and supports a healthy immune system. Here’s a version that takes this wonder food to another level. Spread it on toast or use as a base for smoothies.
1–2 cups evaporated cane juice or sugar (optional, as needed)
Instructions
1. Mix the packet of calcium powder (found in the pectin box) with 1⁄2 cup of the water.
2. Add mashed fruit to a large bowl and then add honey and lemon juice.
3. Bring the remaining 3⁄4 cup water to a boil. Remove from the heat and add the pectin and cane juice, if using. Stir until completely dissolved.
4. Stir the pectin water into the fruit mixture.
5. Add 4 teaspoons of the calcium water to your mix. Add more if needed until you get a good gel consistency. Refrigerate the remainder of the calcium water and use for other recipes.
6. Spoon the jam into freezer-safe glass pint jars (you’ll need at least three). Leave at least 1⁄2-inch headroom in each.
7. Keep jam in the refrigerator for up to 1 week. Any that you don’t eat in that time should go in the freezer.
Jellies
These wonderful little jellies are the perfect way to enjoy a dose of your favorite honey-and-herb blend while on the go.
1. Pour the coffee or herbal tea into a small pot and stir in the gelatin.
2. Bring to a boil and stir until it starts to thicken.
3. Remove from the heat and stir in your honey spread.
4. Pour into silicone candy molds and place in the freezer until set. Eat within 1 week.
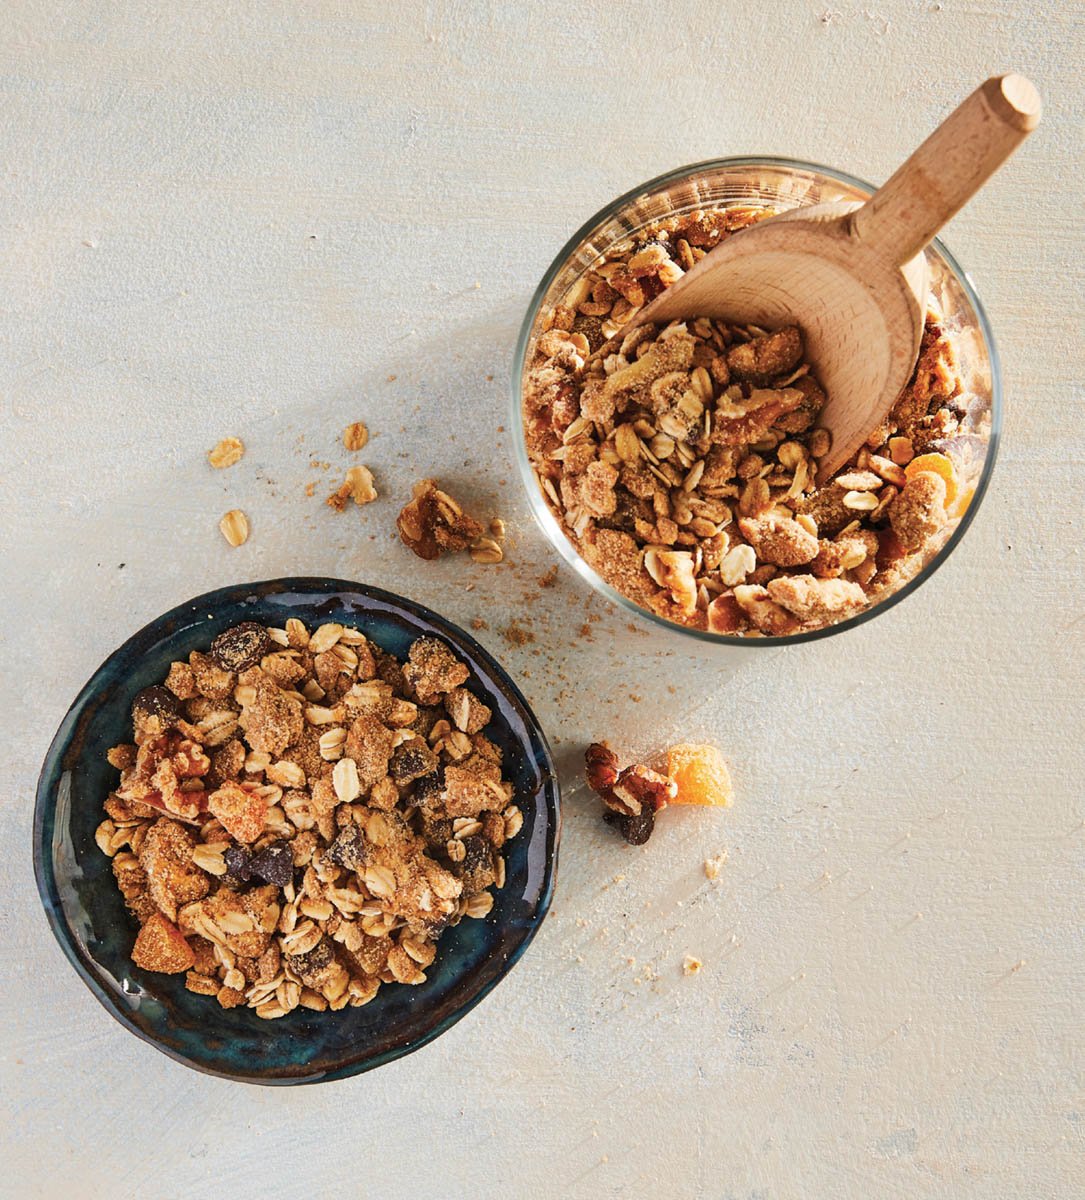
No-Bake Honey-Coated Granola
We love granola, but most of the classic recipes involve baking it. I created a delicious soft no-bake version to make use of a favorite breakfast and snack food.
Ingredients
3 cups oats
1⁄4 cup butter
1⁄2 cup brown sugar
1⁄2 teaspoon ground cinnamon
1⁄8 teaspoon salt
1 teaspoon vanilla extract
1⁄4 cup honey spread of your choice
1⁄2 cup nuts of your choice
1⁄2 cup dried fruit of your choice
1⁄2 cup chocolate chips (optional)
Instructions
1. Place 3⁄4 cup of the oats in a food processor and process into a coarse flour.
2. Melt butter.
3. In a large bowl, add the oat flour, brown sugar, cinnamon, salt, and the remaining 21⁄4 cups oats. Stir to combine.
4. Stir in melted butter, vanilla extract, and honey spread.
5. Add nuts, dried fruits, and chocolate chips, if using. Stir to combine.
6. Spread out on a greased pan or, alternatively, a pan lined with waxed or parchment paper. Allow to stand 30 minutes.
7. Break the granola into smaller chunks and store in a sealed glass container in a cool, dry space for up to 1 month.
Honey-Coated Maté
I was inspired to make a blend of this traditional South American restorative beverage that was a little different, using tea leaves instead of powder.
Ingredients
2 tablespoons raw honey
1⁄4 cup yerba maté tea leaves
Instructions
In a bowl, stir the honey into the yerba maté tea leaves.
To use: Add 2 heaping teaspoons of honey-coated tea leaves for each cup of boiled water. It is customary to sip maté from a hollowed-out gourd using a bombilla, a special drinking straw. But even if you don’t have a traditional gourd to use as a drinking vessel, you can use a filtered drinking straw. These straws make it convenient to drink maté on the go, as you do not need to strain the tea first. Store any excess in a sealed container for 1 to 2 years.
Basic Blend Smoothie
Smoothies are a great way to incorporate the benefits and complex flavors of infused honeys or honey spreads.
Ingredients
1⁄4 cup your choice of a “basic blend” (see step 1)
2–3 cups fruit and/or veggies
1–11⁄2 cups liquid (see step 3 for suggestions)
1⁄4 cup yogurt or 1⁄4 cup more of the “basic blend”
Instructions
1. Create a “basic blend” of your choice: In a bowl, combine 1–2 tablespoons of a honey spread or an infused honey with 1–2 tablespoons of any spices or extra goodies like coconut, cocoa, oils or nut butters. You may also choose to use a full 1⁄4 cup of some Extra Special Coconut Butter or Herbal Choco-Nut Spread, which already contains an herbal honey blend and oils.
2. Add 2–3 cups fresh or frozen fruit and/or veggies to a blender. The sky is the limit here, but if you are intimidated by what combination might taste good, look for prepackaged combinations in your grocery’s freezer aisle.
3. Pour in 1–11⁄2 cups liquid. This might be a favorite juice, milk, nut milk, water, or even coffee or herbal tea. The important thing is that you add this component before you start to blend in order to make it easier for your blender to get to work on the fruits and veggies.
4. Add yogurt, or more of the basic blend if you want to skip the yogurt.
5. Add “basic blend” created in step 1.
6. Blend all ingredients until smooth. Serve immediately.
My dear friend Stephanie Tourles has written books that focus on using raw fruits and veggies in smoothies. I reached out to her for thoughts on how to use honey spreads in blended drinks and she offered a couple of delicious ideas.
Ingredients
11⁄2cups purified water
3 medium or 4 small bananas, cut into 1-inch chunks
Put the water, bananas, nut butter, flaxseed meal, honey spread, vanilla, and salt in a blender and blend on high until smooth, about 30 seconds. (You can expect tiny bits of flaxseed meal in the finished drink; that’s normal.) Serve in two glasses or insulated mugs and drink right away. This should not be stored in the refrigerator or a thermos for later use, as the flaxseed meal will begin to swell and the texture of the drink will become slippery and gel-like. It is rich in natural sugars and fiber, so be sure to “chew” each sip so that it digests with ease.
Purple Cow Sorbet Slush
This refreshing icy slush provides a balanced source of vitamins and minerals. Thanks again to Stephanie Tourles for this one. Tasty and nutritious!
Ingredients
3 cups frozen purple grapes, with or without seeds
Put the grapes, nut milk, honey spread (any honey spread with adaptogens or elderberries can be a good replacement), vanilla, and salt in a blender and purée until thick and frosty, 30 to 45 seconds. Pour into two glasses or insulated mugs. This slush is rich in natural sugars and fiber, so sip very slowly and “chew” each sip so that it digests with ease.
Cream Cheese and Honey Icing
Because our household focuses on real food, it can be a struggle to find a good icing recipe to top baked goodies. This is one of our go-to mixes that can incorporate an endless variety of infused honeys or honey spreads.
Ingredients
8 ounces cream cheese
1⁄2–3⁄4 cup honey spread or infused honey of your choice
Instructions
Soften the cream cheese to room temperature on the counter. Add the cream cheese and honey spread together in a stand mixer with a paddle attachment and whip until light and creamy.
Our Favorite Pumpkin Mousse
Some of our favorite ways to use sweet remedies at the farm come out on special occasions, holidays, and celebrations.
1. Add the cold water to a small saucepan and sprinkle the gelatin over the top. Let it sit 5 minutes. Cook over medium heat until the gelatin is dissolved, but do not let it boil. Cool completely.
2. Place pumpkin purée in a large bowl. Stir in cooled gelatin.
3. Add egg yolks, maple syrup, honey spread, rum, vanilla, salt, and pepper. Whisk until fully blended.
4. Using an electric mixer on medium speed, whisk the egg whites and sugar until the soft peak stage.
5. Gently fold the egg whites into the pumpkin purée mix.
6. Whip the heavy cream until the stiff peak stage and gently fold into the rest.
7. Divide mousse into eight servings. Cover the top of each dish with plastic wrap to prevent the formation of a skin. Refrigerate until firm: at least 2 hours, but up to overnight. Add a dollop of whipped cream and serve.
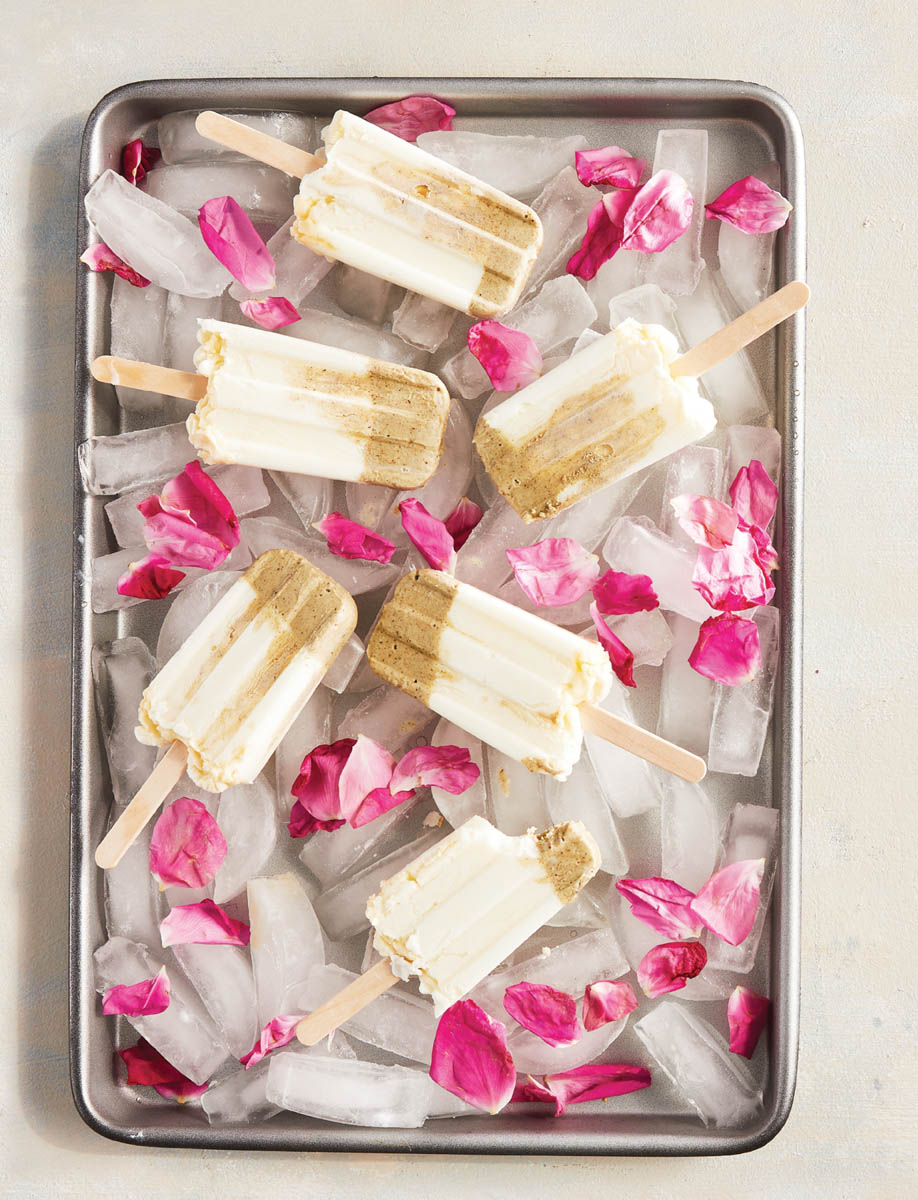
Matcha Rose Yogurt Pops
For those who like their frozen treats more creamy, here is one of our favorite recipes for entertaining. Pull these pops out at your next gathering for a bit of fun.
1. Stir 1⁄4 cup of the yogurt in a bowl with the Matcha Latte honey spread.
2. Mix the remaining yogurt, Rose Petal Infusion, and vanilla extract in another bowl. Set aside for step 6.
3. Divide the yogurt with Matcha Latte honey spread mixture evenly among six ice pop molds. If the mixture is too thick, use a pastry bag or a resealable plastic bag with a cut corner to fill the ice pop tray.
4. Gently tap the tray on a countertop to get rid of any air bubbles before putting in the freezer.
5. Insert a pop stick into each mold and freeze for 1 hour.
6. Remove the molds from the freezer and top off with the Rose Petal Infusion and yogurt mix from step 2.
7. Return the molds to the freezer and freeze firm overnight.
Honey Ice Pops
You can make any honey-and-herb smoothie into ice pops. Simply reserve 21⁄2 cups of smoothie mixture to pour into ice pop molds. This one is less ice cream and more sorbet. It’s easy to whip up, and I never have trouble talking the kids into taking their “medicine” in the form of an ice pop!
Ingredients
2 cups fresh or frozen berries
1⁄2 orange with the peel
1 cup filtered water, more if needed
2 tablespoons honey spread of your choice
Instructions
1. Add berries, orange, water, and honey spread to a blender and blend on high, stopping occasionally to scrape down the sides if needed. Add a little more water as needed.
2. Pour mixture into ice pop molds, secure lids (and sticks, depending on your mold), and freeze for several hours. This makes enough to fill my six-serving stainless steel ice pop mold.
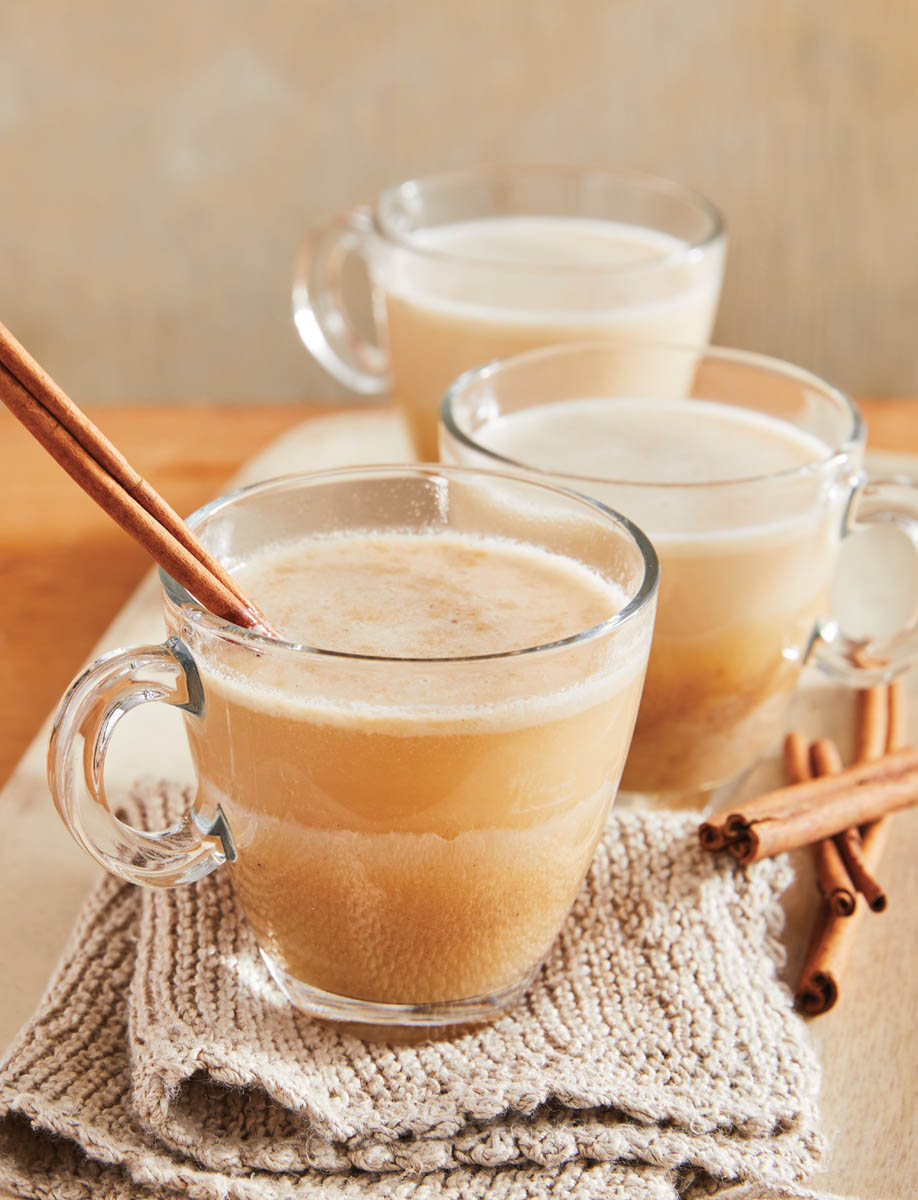
Hot Buttered Rum
We experimented for quite a while with a warm toddylike drink to cozy up with at the fire and sip. Blending vanilla ice cream with a honey spread or infused honey results in a heavenly creamy balm against the chill outside.
Ingredients
1⁄4 cup packed brown sugar
1⁄4 cup butter
1⁄4 cup honey spread or infused honey of your choice
1⁄2 cup vanilla ice cream
Optional
1⁄2 teaspoon ground cinnamon
1⁄4 teaspoon ground nutmeg
1⁄8 teaspoon ground cloves
For Serving
4 ounces rum
2 cups boiling water
4 cinnamon sticks
Instructions
1. Combine sugar and butter, and warm in a small saucepan over low heat until melted.
2. Combine the contents of the saucepan with a honey spread (I recommend Ache Ease, Golden Milk Mix, Tummy Love, or Well Fast), ice cream, and any optional ingredients in a mixer and blend for 1 to 2 minutes until combined.
3. To serve, fill four mugs one-quarter of the way with the ice cream mixture, then add 1 ounce rum, and then top with 1⁄2 cup boiling water.
4. This is easily made ahead and can be stored in the refrigerator up to 2 weeks, and 1 month in freezer.
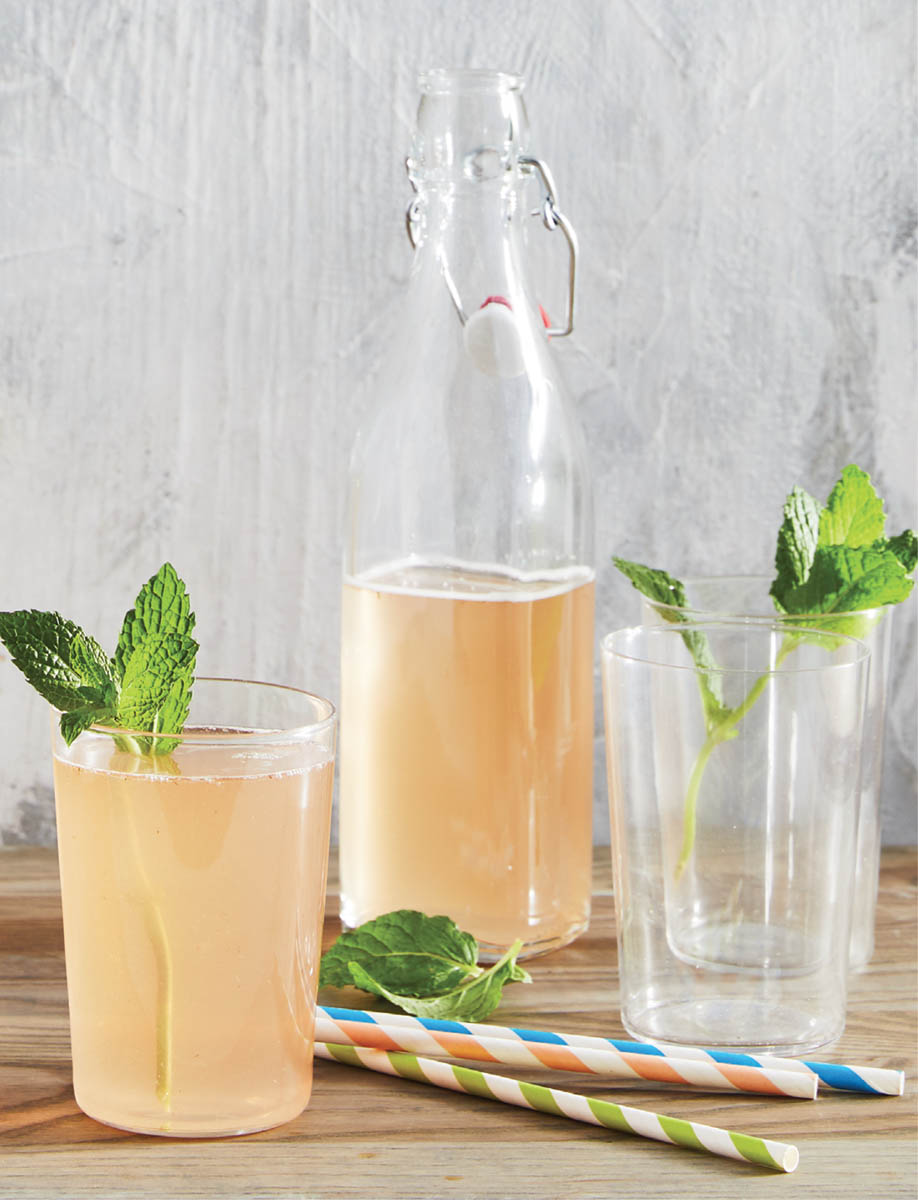
Honey Rose Soda
This soda makes use of two of my favorite plants in the rose family, Rosa rugosa and Aronia melanocarpa. We love the sweet, tart results of this soda and the ease of fermentation helped along with the natural yeasts on the aronia berry.
Ingredients
2 cups aronia berries, fresh or frozen
1 cup chopped fresh rose petals
1⁄2 gallon fresh spring water
1⁄2 cup raw honey
Instructions
1. Add the aronia berries and the rose petals to a half-gallon glass jar.
2. Bring the water to a boil. Add boiling water to the jar until it covers the roses and berries. Cover the jar and allow everything to steep until the water has cooled to room temperature.
3. Add the honey and enough water to fill the jar. Stir well.
4. Cover with butter muslin, a tea towel, or a coffee filter, and secure with a rubber band.
5. Stir three or four times a day. You should see bubbling start between days 2 and 4.
6. Once your soda begins to bubble, strain and transfer it to Grolsch-style stoppered bottles.
7. Allow your beverage to ferment at room temperature for another 12 to 24 hours, then move to the refrigerator for storage. Once chilled, your soda is ready to enjoy. Use within 9 months.
Infused Honey Simple Syrup
Simple syrups add smooth sweetness to homemade liquors and cocktails but are typically made with table sugar. Making them with infused honey is not only more beneficial but adds finesse to any drink you mix.
Ingredients
1 cup water
1 cup infused honey of your choice
Instructions
1. Warm the water slightly in a small saucepan over low heat and then remove it from the heat.
2. Add the honey and stir until it’s dissolved.
3. Store in a squeezable syrup bottle.
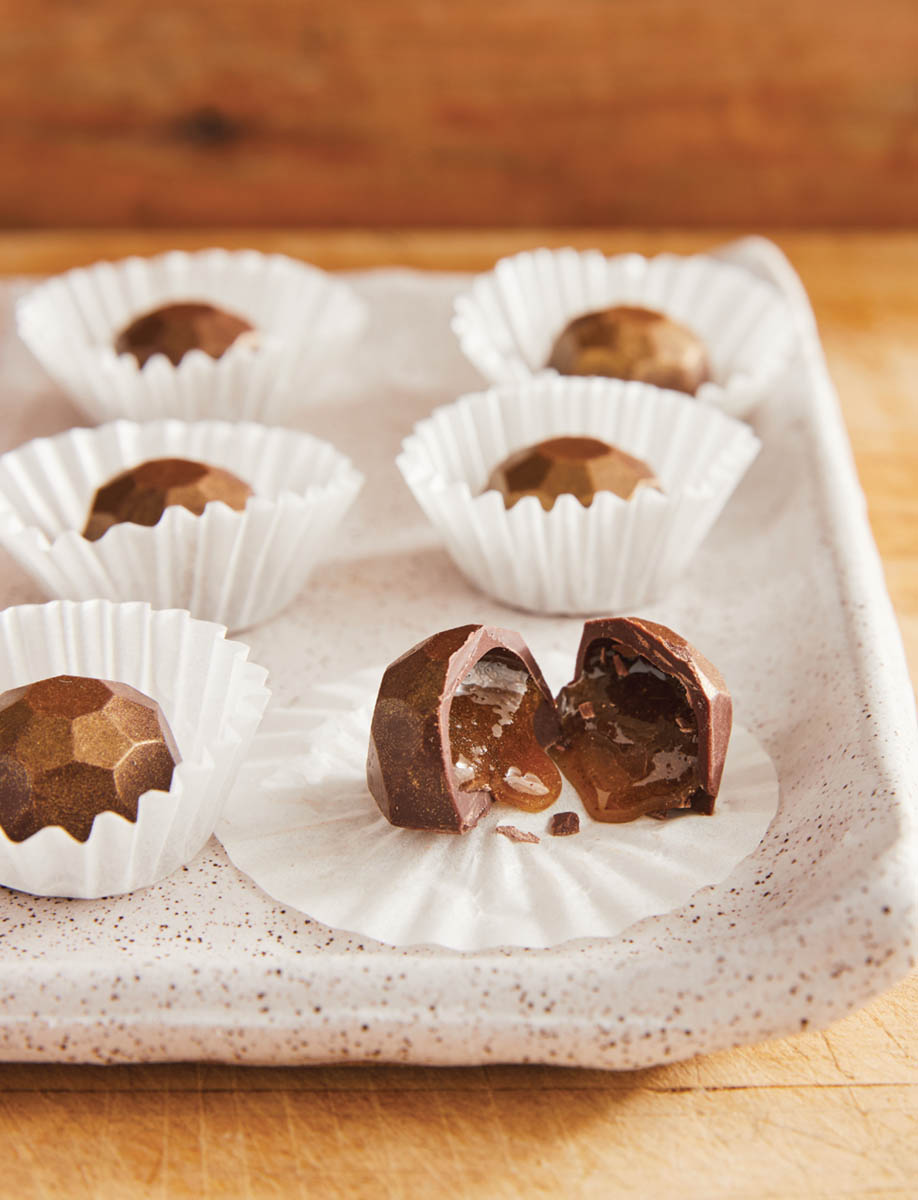
Coco Cat Honey-Filled Chocolates
Melissa and Todd Camp own the unique Coco Cat Bakery in Columbus, Ohio. Their chocolates and baked goods are laced with farm-fresh seasonal herbs and produce, so it’s only natural that they would think to use our honey as a filling inside the delicious chocolate shells. Honey and chocolate were made for each other!
1. Cut three-quarters of the chocolate into small bits. Reserve the remaining chunk for later.
2. Temper the chocolate by placing the cut portion in a bowl suspended over a pan of boiling water.
3. Using a candy thermometer, slowly bring the chocolate up to 115°F (45°C).
4. Remove from the heat.
5. Add the remaining chunk of chocolate and stir until melted. Keep an eye on the temperature. The unmelted chocolate will help it to cool. You are looking for a temperature of 90°F (32°C) so the chocolate will be tempered.
6. Spoon in enough tempered chocolate to paint the cavities of a chocolate mold.
7. Turn out any excess over waxed paper. You can scrape this off and remelt your chocolate!
8. Allow the chocolate coating to harden in the molds at room temperature or, if you are in a hurry, pop it in the freezer for 10 minutes.
9. Once set, your molds are ready to fill. Place a dollop of honey spread in each cavity so that it is filled about three-quarters of the way. When all cavities are filled, return the mold to the freezer for 30 to 45 minutes to fully set.
10. Remove the mold from the freezer and use a decorating brush to paint tempered dark chocolate to seal each cavity (you may need to reheat your chocolate at this point), being sure to cover all the way to the edges.
11. Place your chocolates in the freezer or simply allow to set on the counter. Turn over your molds when set and gently tap on the counter to release the chocolate.
Fermenting with Honey
Fermented foods like pickles, sauerkraut, and yogurt are so good for you because they contain probiotics that help digestion. Fermentation is, basically, a chemical reaction induced by microorganisms or enzymes that split complex organic compounds (like sugar) into relatively simple substances (like carbon dioxide and alcohol) by yeast. On my ever-curious quest, I wondered if honey could be used for fermenting. I reached out to two of my good friends who happen to be pros at fermenting.
Hannah Crum is known as the Kombucha Mamma and is author of The Big Book of Kombucha. Kirsten and Christopher Shockey are the owners of Ferment Works and authors of Fermented Vegetables and Fiery Ferments. Kirsten explained to me that honey’s antibacterial qualities can be problematic to the microorganisms necessary in the fermentation process. However, the addition of liquid to honey disrupts its naturally occurring antimicrobial environment and allows healthy microbes to move in. The exciting thing is, even when diluted, honey maintains the ability to carry and catalyze the phytochemicals from herbs (or fruits or veggies) mixed into it. When we ferment a blend of honey and vegetables, we make a true superfood that delivers all the benefits of fermentation, such as improved digestibility, along with all the inherent benefits of honey and veggies.
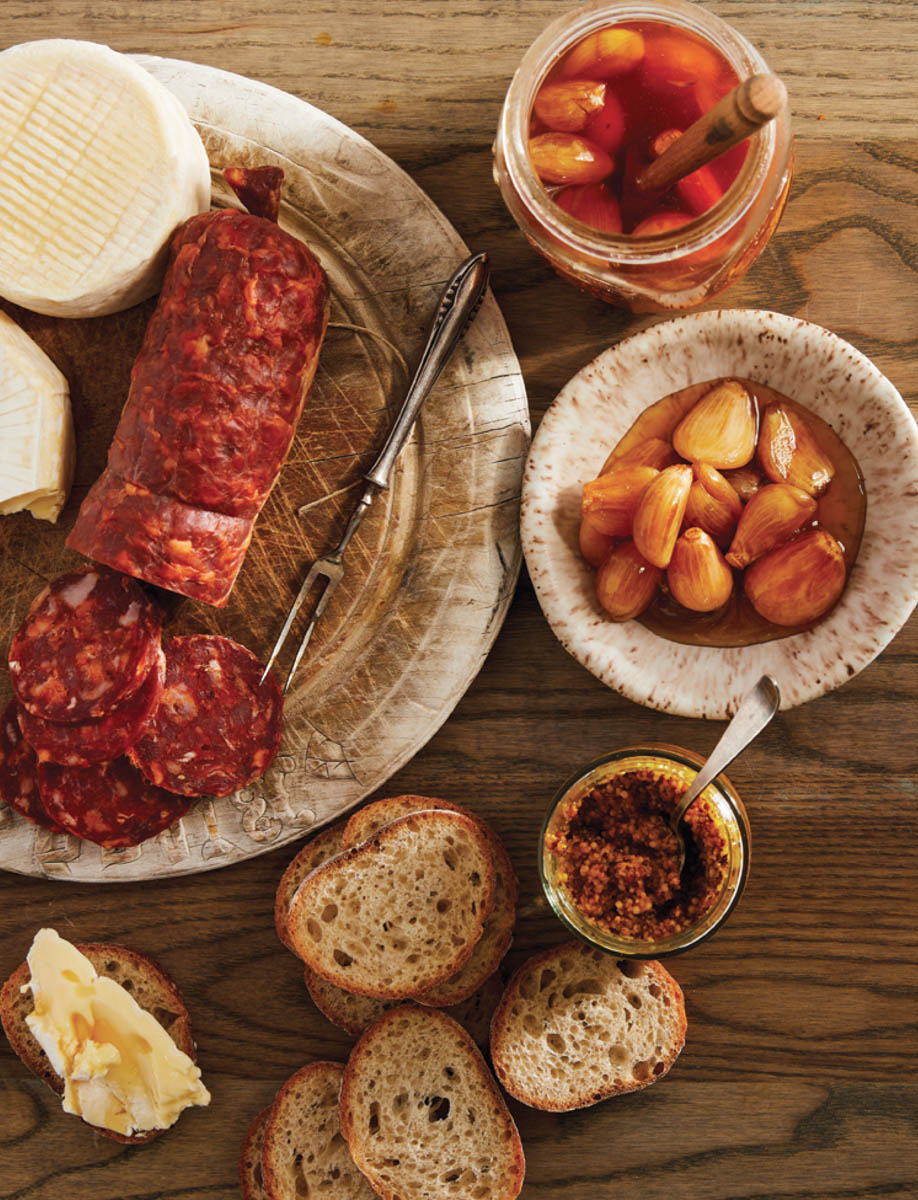
Fermented Honey Garlic
This will become a staple in your pantry, trust me. The potent medicinal properties of both honey and garlic increase with fermentation. You can eat a honey-soaked clove to boost immunity or brush the garlic-infused honey over freshly baked rolls. Try drizzling this on pizza or over a cheese plate! Many thanks to Kirsten Shockey for the recipe.
Ingredients
11⁄4cups garlic cloves
11⁄2cups raw honey, or to fill pint jar
Instructions
1. Peel garlic cloves. Press each clove with the back of a chef’s knife to lightly bruise. This will release some of the garlic’s juice, which will help stimulate the honey to ferment.
2. Place lightly crushed garlic cloves in a pint jar with a tight-fitting lid. Pour in honey to cover the garlic leaving about 11⁄2 inches of headspace. This space is important as the honey will become quite bubbly and active, and the headspace will give the mixture the room it needs to keep from overflowing. Place lid on jar and tighten.
3. Place jar on the counter. Every other day, or more often as needed, crack open the lid and allow the CO2 to escape. Retighten and turn the jar over and allow the honey to recoat the garlic that will float to the top.
4. Ferment for 1 month. The ferment will be ready when the bubbles start to settle, the honey becomes runny, and the garlic develops a mellow flavor. Store indefinitely at room temperature.
Fermented Honey Mustard
Each ingredient in this spread (also from Kirsten) works to create an incredible flavor, with digestive benefits to boot.
Ingredients
1⁄2 cup water
1⁄4 teaspoon whole allspice
1⁄4 teaspoon whole cloves
1⁄4 cup brown mustard seeds
1⁄4 cup light mustard seeds
1⁄4 cup raw honey
1⁄4 cup diced onion
1 teaspoon finely grated fresh turmeric root
Instructions
1. In a small saucepan, heat the water with the allspice and cloves until boiling. Reduce the heat and allow to simmer for 10 minutes. Allow to cool slightly. Place the mustard seeds, honey, onion, turmeric, and 1⁄4 cup of the spice-infused water in a blender or, alternatively, in a jar to be blended with a hand blender.
2. Blend until smooth, adding as much of the remaining spice-infused water as needed. Discard the rest. As the mustard seeds break down, they become creamy and act as a thickening agent. Keep blending until the mixture reaches a paste consistency.
3. Spoon the mustard mixture into a pint jar, pressing out any air pockets as you go. When it is all in the jar, you may need to use a butter knife to work out any remaining pockets. Then screw the lid on tightly.
4. Set the jar in a corner of the kitchen to ferment. Watch for air pockets forming in the mustard. If you see any, open the lid and press the mustard back down. If the lid starts to bulge, it is simply the CO2 created by fermentation. Just open it for a moment to “burp” the ferment.
5. Allow to ferment for 10 to 14 days.
6. Store the mustard in the refrigerator, where it will last for 10 to 12 months.