
Hand Positions for Healing
There are certain hand positions that are typically used in the practice of reiki, and in this chapter, we’ll look at basic positions for the head and for full-body treatment given to yourself or administered on another person.
Originally, it seems that Usui only taught five head positions, and the rest of the body either wasn’t treated directly or hand placement was intuited.1 Treatment of the head focuses on calming the mind, because once the mind is at peace, the rest of the body will more naturally follow. The crown is also seen as our connection to spirit, thus focusing on this area enhances one’s connection to spiritual energy, which, again, will have a beneficial effect on the entire body.
Five Head Positions
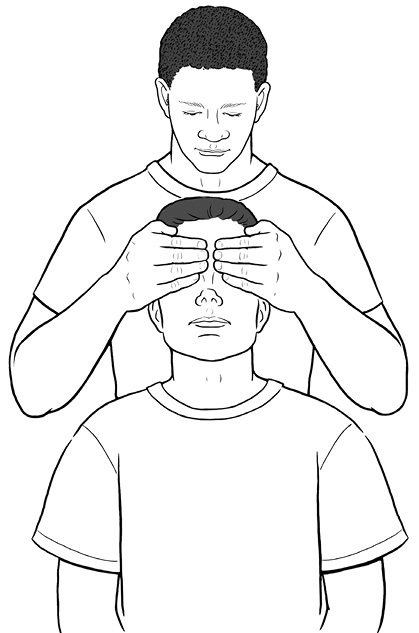
1. Zentô Bu (Forehead): Standing behind the seated recipient, lightly place or hover your hands over the eyes, fingertips together and pointing inward. You can also perform this on yourself by simply placing your hands over your eyes.
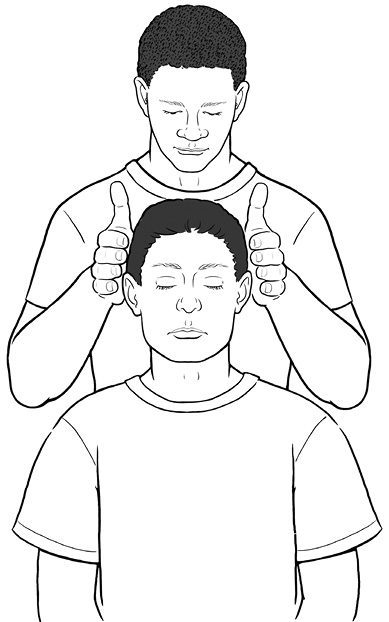
2. Sokutô Bu (Both Temples): Hover hands on either side of the temples.
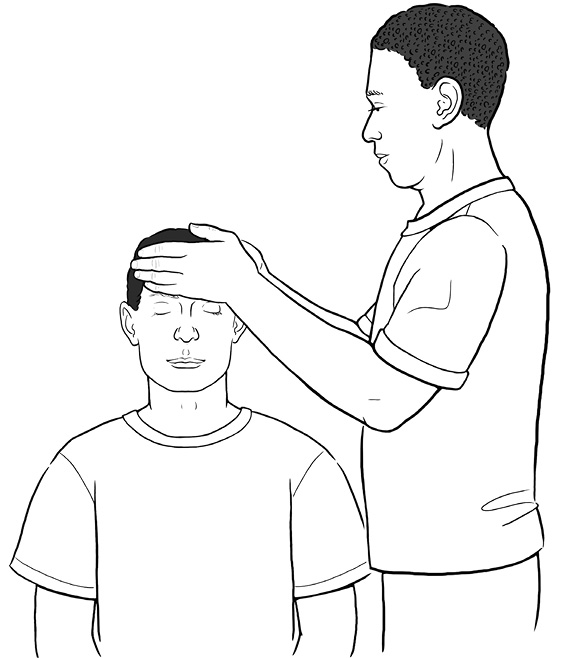
3. Kôtô Bu (Back of Head and Forehead): Standing to the side of the seated recipient, hover one hand in front of the forehead and one hand behind the head.
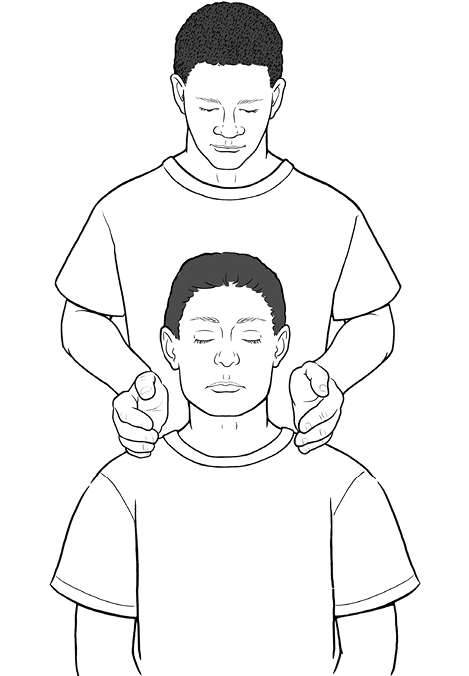
4. Enzui Bu (Sides of Neck): Hover hands on either side of the neck, just above the shoulders.
5. Tôchô Bu (Crown): Standing behind the seated recipient, fingers together, hover the hands over the crown, then curl the fingertips downward, pointing at the crown. You can do this for yourself by hovering your hands above your crown or resting your hands on the top of your head.

It is advised to hold each position for as long as you can feel energy flowing from your hands into the recipient, which might be anywhere from a few minutes to half an hour (or longer in some cases). We’ll talk more about energetic sensations during a treatment when we learn the technique of byôsen in Chapter 14.
Two primary sources for traditional hand positions are the Reiki Ryôhô Hikkei, the healing guide portion of the fiftieth anniversary materials published by the Usui Reiki Ryôhô Gakkai, and the Ryôhô Shishin, the treatment manual published by Hayashi’s clinic, the Hayashi Reiki Kenkyukai. Both the Reiki Ryôhô Hikkei and the Ryôhô Shishin contain sections of healing protocols for various disorders, divided by area or system of the body, such as digestive system diseases, gynecological disorders, and circulatory diseases. In the Reiki Ryôhô Hikkei, nearly all the protocols involve treatment of the head, in addition to other areas, such as specific organs. In contrast to the Ryôhô Shishin, the Hikkei also includes treatments aimed at specific spinal vertebrae, and Tadao Yamaguchi writes, “Chiropractic theory was first introduced to Japan around the time Usui Sensei was teaching Reiki, so he may have been inspired and adapted its concepts.” 2 The Shishin is heavily focused on specific organs, which might be a reflection of Hayashi’s medical training.
The Gakkai’s manual indicates that only one hand should be used for administering treatment, and you should decide at the start which hand you will be using throughout, with the exception of paired structures, such as the kidneys or ears, which can be treated with both hands. The manual states that “it is best to touch the patient’s skin when you treat,” but contact over clothing is fine, as the energy can penetrate the fabric.3 Touch isn’t necessary when the client does not wish to be touched or an infectious condition is present.
In many modern-day reiki books, there is a standard series of hand positions for whole body reiki treatments. In my research, I was unable to find the source of this sequence, but it is so commonly used (and it’s effective, in my experience) that it merits inclusion here, and I’ve presented two versions: one for self-treatment and one for treating others.
The Basic Twelve Positions for Self-Healing
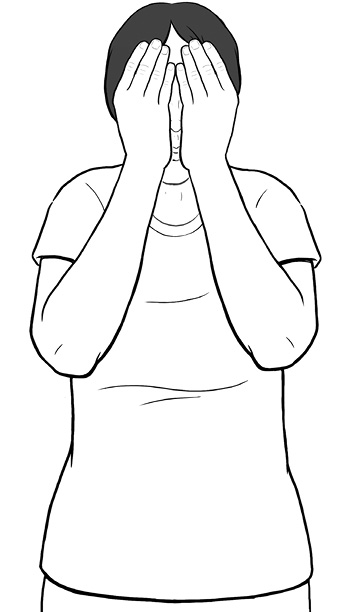
1. Front of the Face: Place both hands over your face with your fingertips resting on the forehead so the palms are cupped over your eyes.
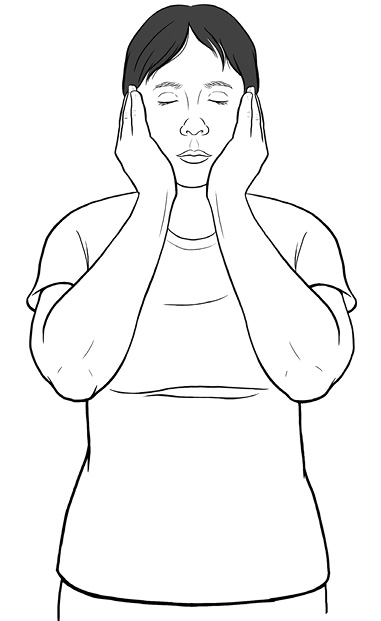
2. Sides of the Face: Place both hands on either side of your face, fingertips resting on the temple, palms curving over the jaw. Alternate position: Bring the fingertips together along the midline at the top of the skull. Your palms will fold along the sides of your head, above your ears.
3. Back of the Head: Bring your palms to the back of your head, forming a triangle with your hands—index fingertips and thumb tips touching. Your palms will be cradling the base of your skull. Alternate position (and one I especially like): Place one hand over your forehead, fingers parallel to your eyebrows and the other hand on the back of your head, opposite the front hand.
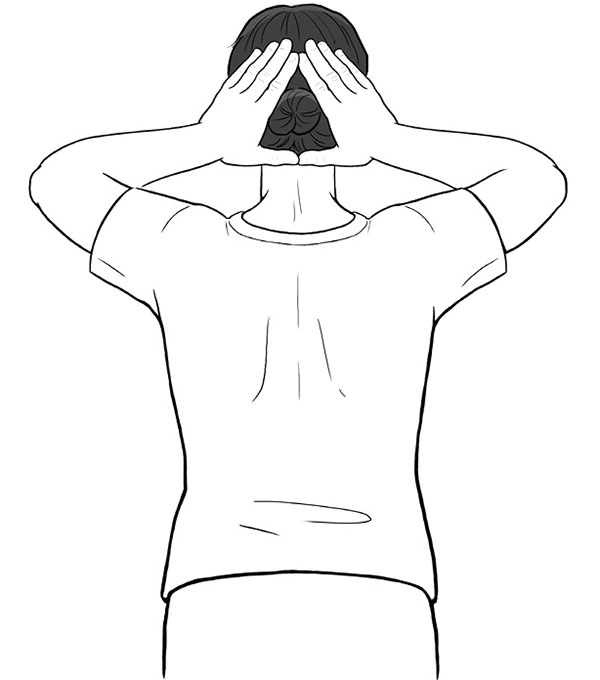
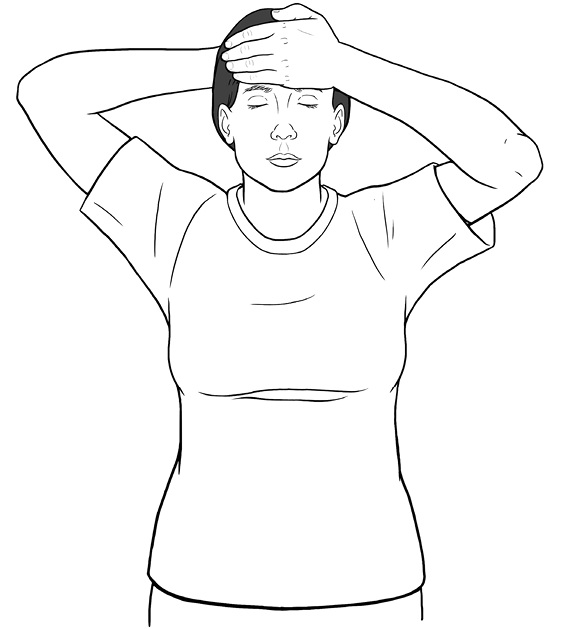
Figure 17: Back of the head, alternate
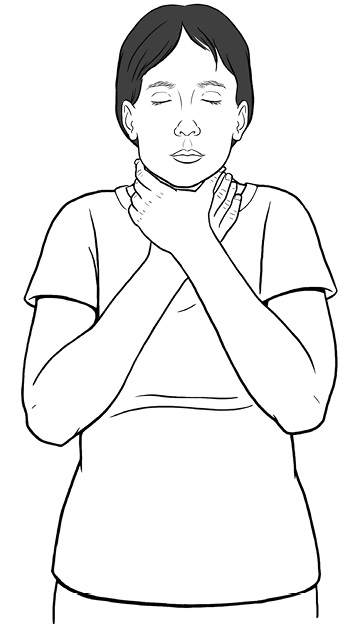
4. Throat: Bring the heels of your hands together and bring them close to your throat, fingers wrapping gently around either side of your neck. No need to strangle yourself; a light, gentle clasp is what you’re aiming for.
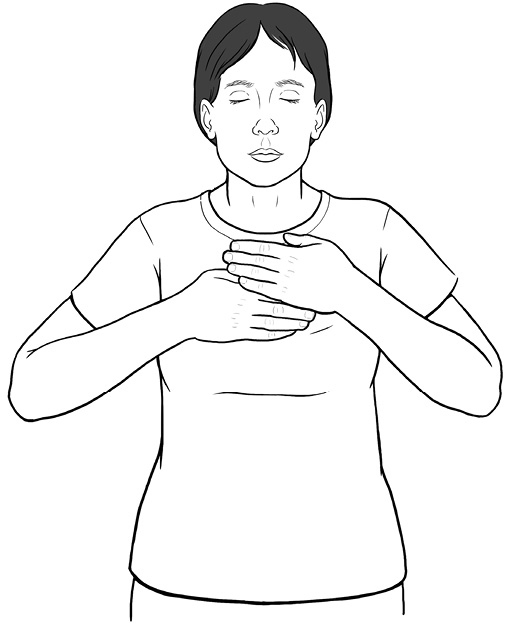
5. Heart: Place your palms over your chest, one higher than the other.
6. Upper Abdomen: Place your hands, fingertips touching and horizontal, right under the breasts.
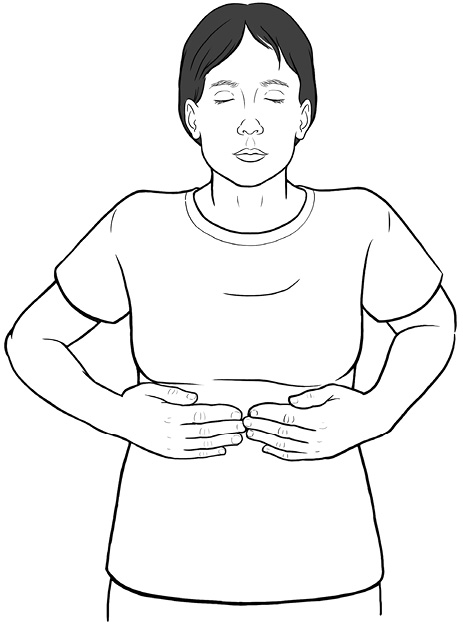
7. Middle Abdomen: Move your hands just below position 6.
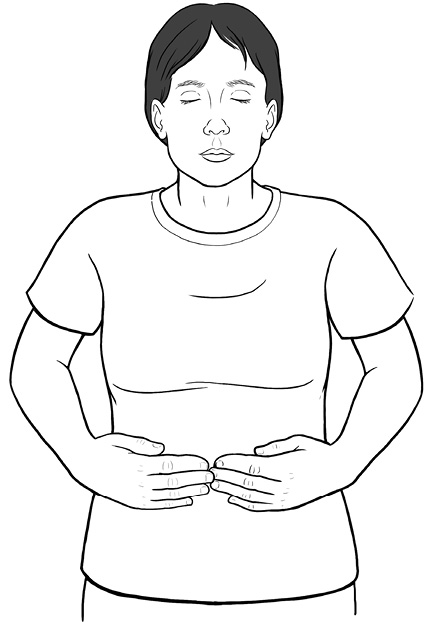
8. Lower Abdomen/Tanden: Move your hands lower on the abdomen, just under the navel. Alternate position (and another that I’m quite fond of): Place one hand over the center of your chest at heart level and the other hand just below your navel.
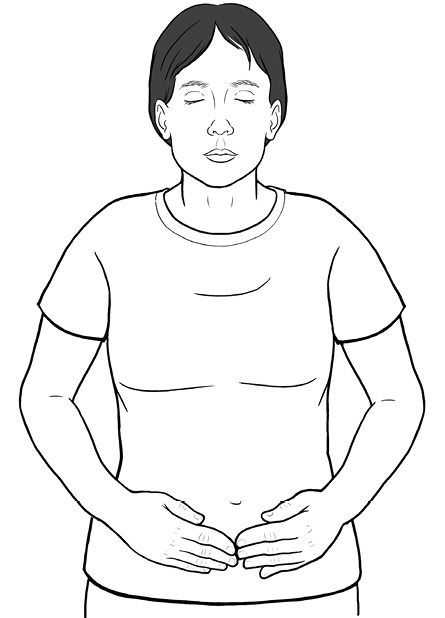
Figure 22: Lower abdomen/tanden

Figure 23: Lower abdomen, alternate
9. Upper Back: Reaching over your shoulders, place your hands on your upper back. Depending on your shoulder mobility, your fingertips will rest somewhat higher or lower between your shoulder blades.
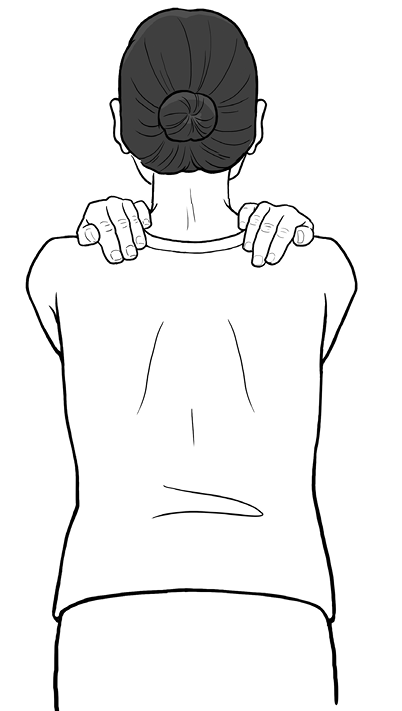
10. Middle Back: This can be a bit difficult to reach, depending on shoulder mobility, so keep in mind that reiki will go wherever it is needed, even if your hands can’t reach. If comfortable, bring your hands back and around your sides, placing them on your mid-back. Sometimes it helps to lean forward a bit, and you can also do one hand at a time.
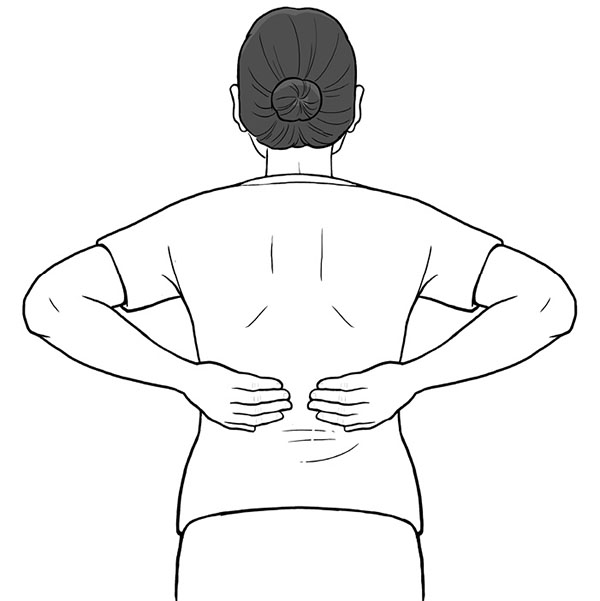
11. Lower Back: Bring your arms around and back, placing your hands on your lower back. Your fingertips will brush the tops of your hips. As with position 10, feel free to do one hand at a time if that’s more comfortable.
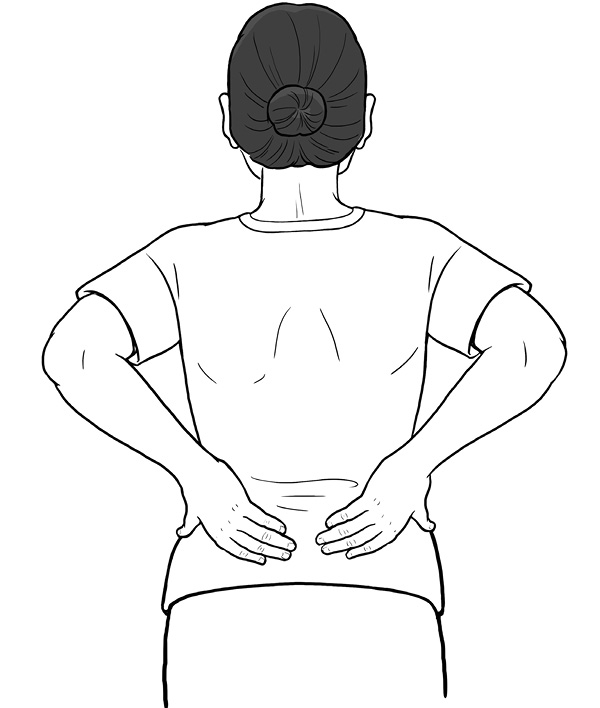
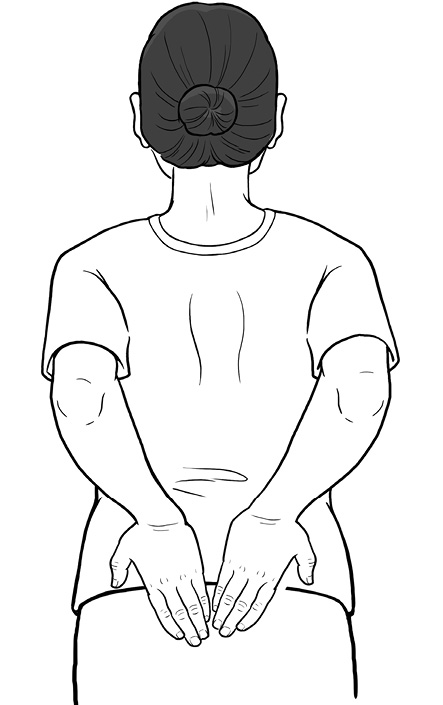
12. Sacrum: The sacrum is a bone at the base of your spine. The tip of the sacrum is commonly known as the tailbone. Reach around your back and place your hands over your sacrum. It’s usually most comfortable to angle the fingers down, palms angled up and out, forming a V shape.
The Basic Hand Positions for Treating Others
If this is new to you, before administering treatments for others, please read Chapter 18, which outlines how to conduct a reiki session in more detail. These instructions assume that the client is lying face up on a treatment table to start. Cover the table with a single-use disposable or washable linen and offer them a sheet or blanket. You can also place a bolster or rolled-up blanket underneath the knees to relieve tension in the low back.
1. Front of the Face: Place both hands over the person’s face with your palms gently cupping over the eyes and your fingertips resting on their cheekbones. I like to place a folded, clean tissue over the eyes to prevent the clammy feel of skin-to-skin contact on the face. You can also hover over this area without touching.
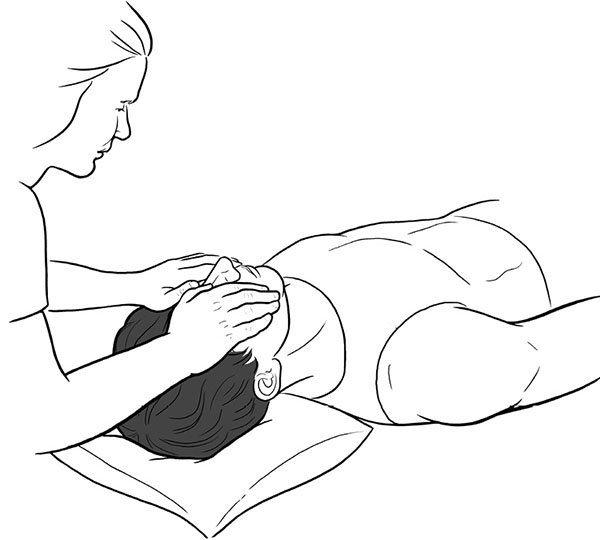
2. Temples: Place both hands on either side of the head, fingertips over the temples, palms curving over the sides of the skull, possibly meeting at the crown of the head, depending on the size of your hands and the recipient’s head.
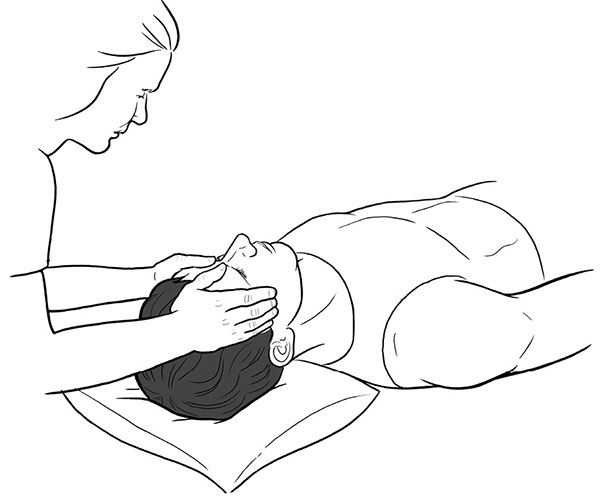
3. Ears: Hover your hands in a cupped position over the person’s ears. I prefer to hover along the sides of the head as opposed to covering the ears, as the latter can feel constricting, but feel free to experiment and check in with the recipient’s preference.
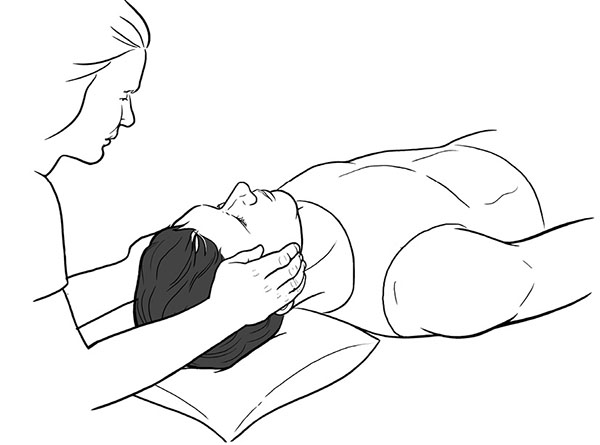
4. Back of the Head: Place your hands on either side of the person’s head with the backs of your hands contacting the treatment table. Gently rock their head to one side, enough to allow you to slide the opposite palm under their head, and repeat with the other hand so you are cradling the back of their skull in both hands. Make sure you aren’t wearing jewelry on your hands or wrists that could dig into their scalp.
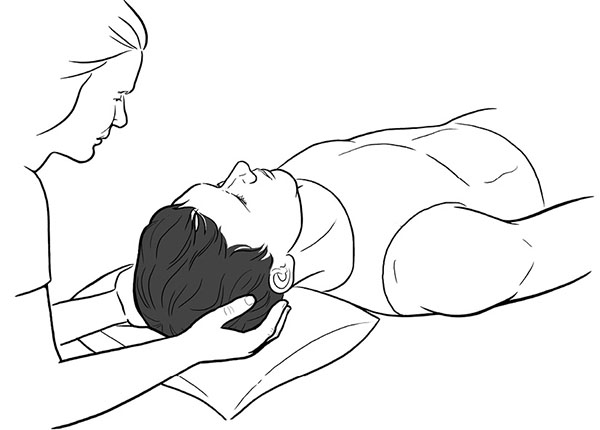
Figure 31: Client, back of the head
5.Throat: Two versions for this one, depending on the recipient’s preference and comfort. You can lightly place your fingers over the front of the throat on both sides. Your fingertips will meet in the center in line with the sternum (breastbone). Be very aware of the amount of pressure you are applying as a little can feel constricting in this sensitive area. A variation that I prefer is to place the pinky-edge of the hands on the clavicle (collarbone) so your fingertips meet at the sternum and your palms are facing the underside of the person’s chin. You are able to send energy to the throat region without applying pressure with the palms to the throat.
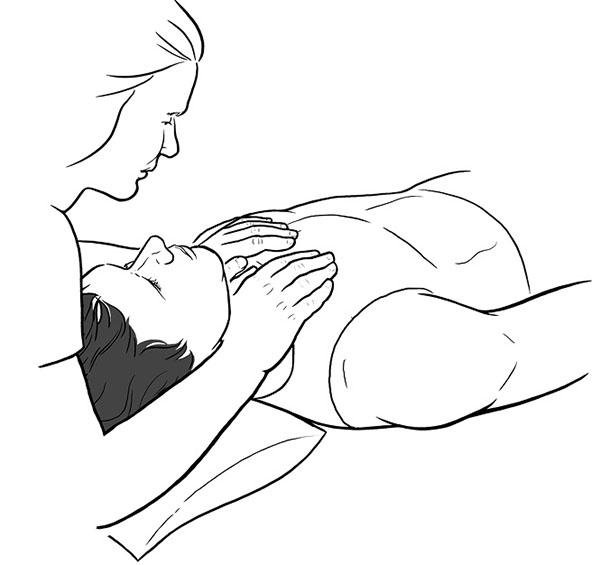
6. Heart: Hover your hands over the heart region. You can overlap your hands in the air so that the palm of one hand partially covers the fingers of the other or you can stack them on top of each other. Hopefully this goes without saying, but do not touch female clients’ breasts.
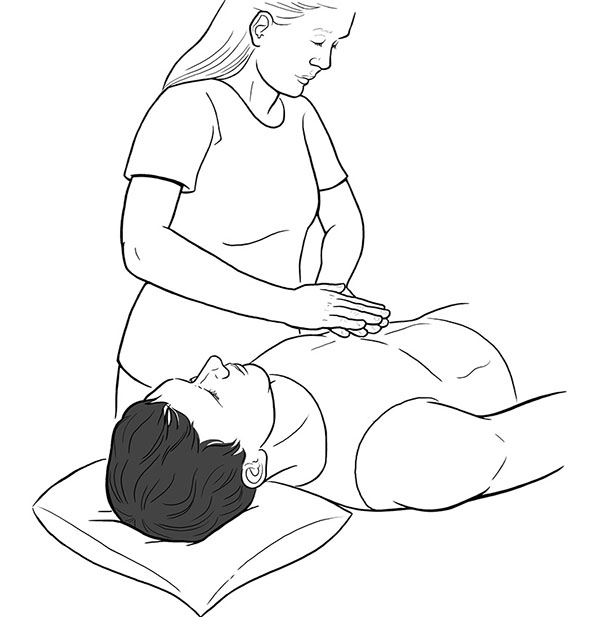
7. Ribs: Working on one side of the body at a time, place your hands side by side (i.e., one hand closer to the recipient’s head, the other hand closer to the hips) over their ribs. You can move to the other side of the table to treat the opposite side of the body or simply move your hands if you are tall enough to do so without straining or overreaching.
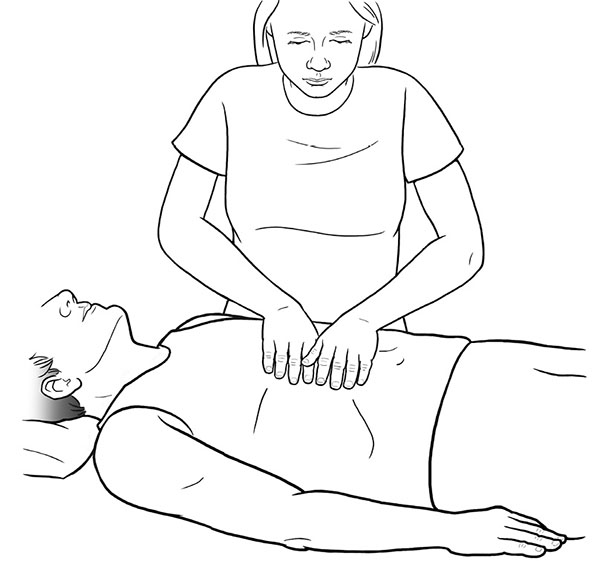
8. Lower Abdomen/Tanden: Place both hands in line with each other, just above the navel for the lower abdomen. Move your hands right below the navel for the tanden.
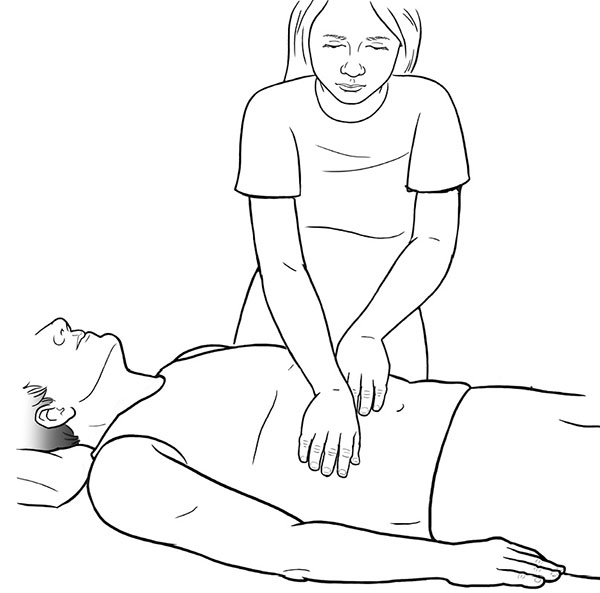
Figures 35A and 35B: Client, lower abdomen/tanden
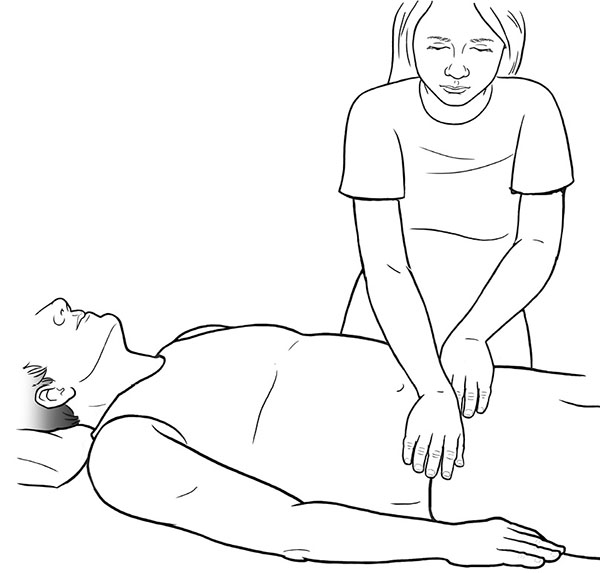
9. Hips: Place your hands on the sides of the hips (where a side seam would run if the recipient were wearing jeans).
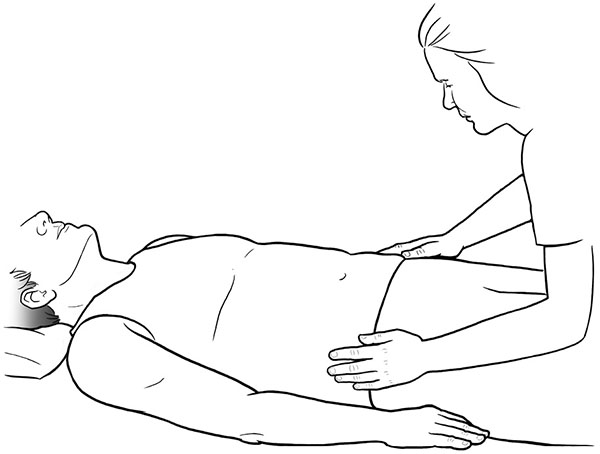
10. Thighs: Move progressively from the upper thighs to just above the knees, using both hands on the same leg and repeating on the opposite leg or placing your hands on both legs simultaneously if this doesn’t cause you to overreach and introduce strain into your body.
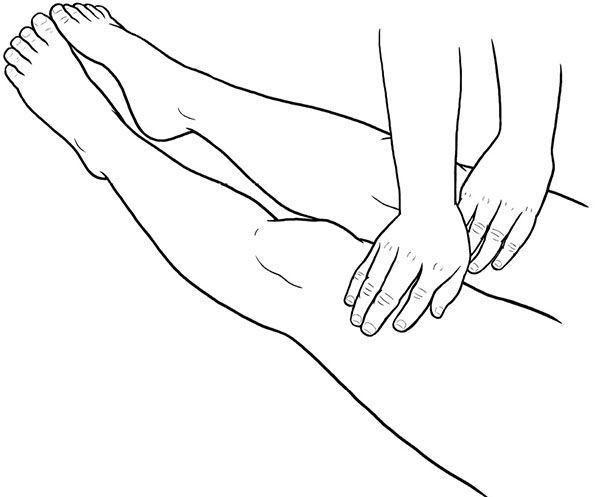
11. Knees, Lower Leg: Using the same hand placement options as for the thighs, move from the knees to the ankles.
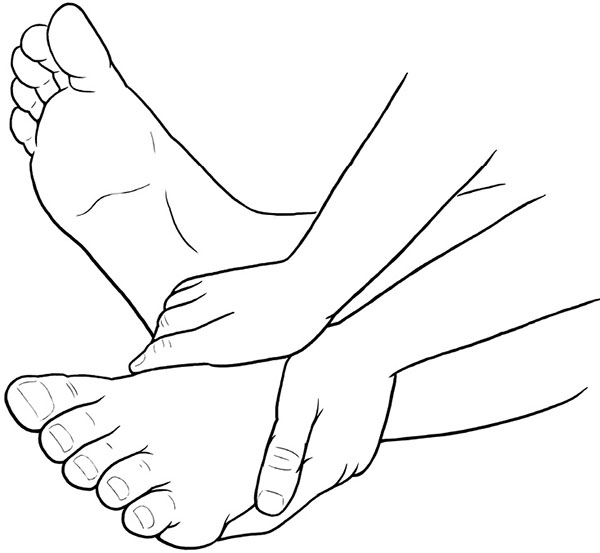
12. Feet: Gently grasp the ankle with both hands and repeat on the opposite ankle.
If using, remove the bolster from beneath the knees, and raise the face cradle of the treatment table. The recipient will roll over to their stomach, placing their face in the cradle. (Face cradles should be covered with disposable paper or reusable, washable fabric covers with a fresh cover used for each person.) Check to see if the cradle needs to be adjusted for comfort. The bolster can be placed under the recipient’s ankles in this position.
13. Upper Back: Use the same hand position as described for the heart area, this time placing your hands just above the scapulae (shoulder blades).
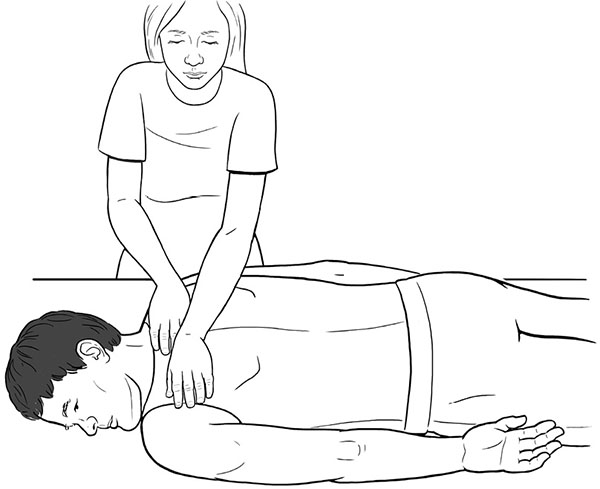
14. Shoulder Blades: Move down the back, placing your hands over the shoulder blades.
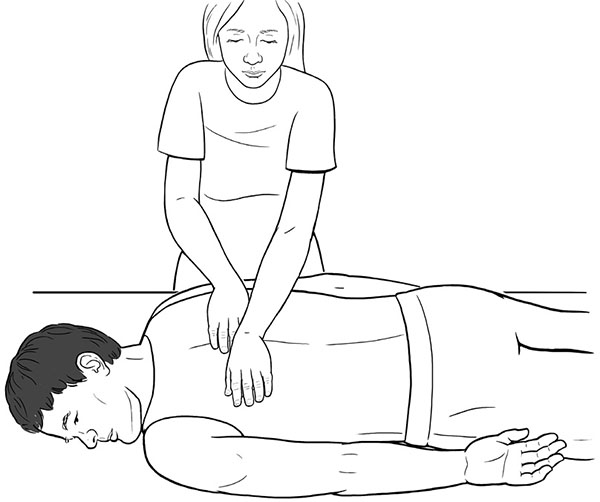
Figure 40: Client, shoulder blades
15. Middle Back: Move down the back, covering each section from below the shoulder blades to the hips.
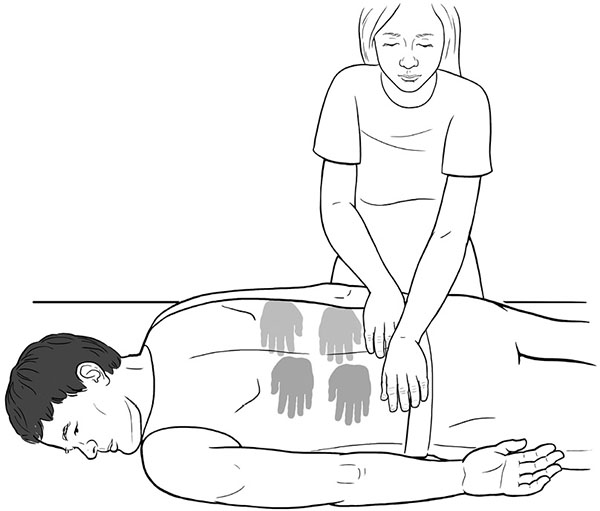
16. Sacrum: The sacrum is a bone at the base of your spine. The tip of the sacrum is commonly known as the tailbone. Place your hands at the uppermost part of the sacrum, right above the top of the gluteal cleft so you’re not handling their glutes.

17. Knees: Place your palms over the backs of the knees. This is an area where you need to be sensitive of your pressure. There is neurovasculature that can be compressed if you are bearing down on the backs of the knees.
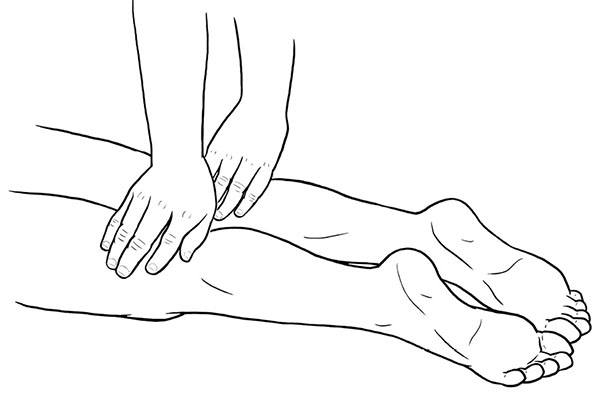
Figure 43: Client, posterior knees
18. Ankles: Move to the foot of the table and gently wrap your hands around the backs of the ankles.
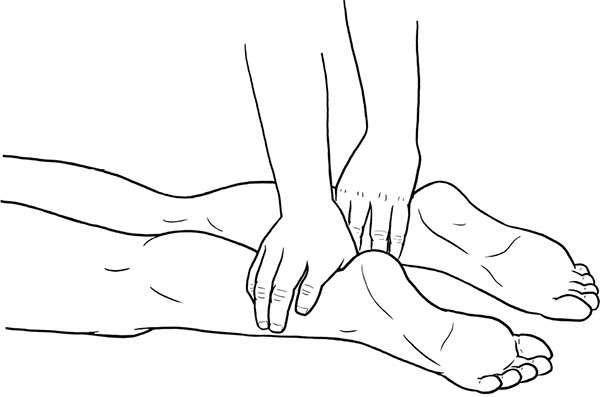
Figure 44: Client, posterior ankles
19. Feet: Place your hands over the soles of the feet, from the toes to the middle of the foot, depending on the size of your hands.

Figure 45: Client, soles of feet
To conclude the treatment, gently sweep your hands over the person’s aura, usually about a foot to a foot and a half above their skin, starting at the crown of the head and ending at the feet. This constitutes one sweep. Walk back up to the head of the table and repeat with a second sweep, and conclude with a third aura sweep. Remove the bolster from beneath the ankles to make it easier for them to get off the table, and provide assistance or a stepping stool if necessary. Offer them a cup of water and the restroom if needed. You can use kenyoku hô (page 229) on yourself to completely end the session, and if you made contact with the clothing or skin, wash your hands between clients.
Ketsueki Kôkan Hô
In Jikiden Reiki, a treatment concludes with a light massage or ketsueki kôkan hô. Some areas require a license to touch, so check local regulations before including this in your treatments. This technique is done with the recipient lying face down on the treatment table.
1. If you incorporate symbols into your reiki practice, you can use Symbol One here (see page 153 for more details), drawing the symbol on either side of the base of the skull with your finger. It is said that this intensifies the flow of reiki in the head, but this technique works quite well without the symbol, too.
2. Using your index and middle finger, quickly and lightly sweep your fingers down the back,one finger on either side of the spine, repeating about twenty times.
3. Find the sacrum at the base of the spine, and draw Symbol One on either side to send reiki to both the upper and the lower body. You can also forego the symbol and simply place your hands over the sacrum, allowing reiki to flow.
4. Mentally divide the upper body into five or six bands. Starting in the uppermost band, place your palms on either side of the spine and sweep down to the sides of the body, like you’re brushing something off the person’s back. Repeat for the remaining bands, down to the hips. Repeat this three or four times.
5. Rub the lower back with light palm pressure, moving your hands back and forth about ten times.
6. Starting at the hip, sweep your hand along the outside of the leg, all the way down to the ankle, and repeat three or four times. Do the same on the other leg.
7. Sweep your hand from the bottom of the glutes to the ankle along the back of the leg, repeating three or four times. Do the same on the other leg.
8. Sweep your hand from the inner thigh (avoiding areas of privacy) to the inner ankle, and repeat three or four times. Do the same on the other leg.
9. Apply gentle compression on the belly of the hamstrings with your left hand, and clasp just above the ankle with the right hand. Use your body weight to gently traction (pull) the leg. Do the same on the other leg.
10. Pat all over the back, from the shoulders down to the glutes, and repeat three or four times.
11. Pat down the outside of one leg, then the back of that leg, and the inside of the leg, repeating three or four times. Repeat on the other leg.
Now that you know the basic hand positions for reiki treatments, it’s time to learn another foundational aspect of reiki practice, symbols and mantras, which we’ll cover in the next chapter.