Chapter 6
Adding Photos and Videos
Photos and videos lend a personal touch to your Facebook pages. They give you a way to visually add beauty, humor, and impact. Often you can say so much more with a carefully chosen photo or video than you can in words. This chapter explains how to view, upload, edit, and tag photos and videos.
UPLOAD AND USE PHOTOS
Adding photos is a way to share experiences—a vacation, wedding, birth of a grandchild, or a severe winter storm. You can download images from a digital camera onto your computer and then upload them onto Facebook. You can share images from friends’ pages and place them on your own Timeline. You can upload photos from a mobile phone directly into Facebook. You can upload photos one at a time or arrange them in albums so that people can view them together.
Understanding the Photo Arena
You can view photos from your primary Facebook pages. Your Home and Timeline pages are the best places to upload photos:
• On your Home page, click Add Photo/Video in the top middle column (this is how we recommend you upload photos in this chapter) or, on the left column, click Apps | Photos | Upload Photos (you may have to click More under Apps to see Photos).
• On your Timeline, click Photo beneath your photo, or beneath your name click Photos | Add Photos.
• If you have not installed Timeline yet, you can get to the upload command from your Profile page. Click Photos on the left column and then click Upload Photos.
Photos are organized into albums. Even when you upload a single photo, such as your profile picture, it is inserted into a default photo album. However, you can create an album and place your photos into it according to the criteria you select—your last vacation, grandchildren, birthday parties, and so on.
You upload your photos and determine at that time whether to share them or not. If you do not share them, that is, you indicate the audience is only you, they remain available to be edited, deleted, added to, or rearranged until you are ready to put them out to the world.
 Scan Your News Feed Photos
You can filter your News Feed so that you only see postings with photos. You might remember a photo, but not exactly when you saw it or who posted it. This is a good way to find it.
On your Home page, click Photos (under Apps) in the left column. The center column will be populated with postings only containing photos.
| Tip You can add your Home page photo to your Favorites in the left column rather than under Apps. That would make it easier and quicker to find. Mouse over Photos and click Edit (pencil icon). Click Add To Favorites.
|
When you click a photo, album, or video, you display the Photo Viewer view with options for working with the photo. See “Edit Using the Photo Viewer” later in the chapter.
Upload a Photo from Your Computer
An album is automatically created for you when you upload single photos. Your photos must be at least 180 pixels large in order to be uploaded; you will receive a warning message if your photo is too small. To upload a photo from your computer to add to your Timeline or News Feed:
1. On your Home page, click Add Photo/Video. On the Timeline, click Photo (beneath your profile picture, not beneath your name).
| Tip If you have not installed Timeline yet, on your Profile page click Photos on the left column and then click Upload Photos.
|
2. Click Upload Photo/Video.
3. Click Browse. When Windows Explorer opens, find your photo file, click it to select it, and click Open. This will place the photo location in your dialog box.
4. You have these options:
• To add a caption for the photo, click in the text box and type your comment.
• To select your audience for the photo, click the Audience Selector  (yours may be different depending on your default) and select your setting.
• To record who you are with in the photo or video, click the Who Were You With “Tag” icon and type a name starting with “@,” such as @Marty. A list of matching friends will be displayed from which you can select the correct one.
• To record the year for your Timeline, click the clock icon and choose a year. This is a way you can place photos in previous years for your Timeline.
• To record the location where the photo was taken, click the pin icon and type the location.
5. Click Post to upload the photo to your News Feed stream and Timeline, or to a friend’s Timeline.
| Tip You can upload a photo to a friend’s Wall/Timeline as well as to your own. Display your friend’s Timeline, and click Add Photos/Videos beneath their name. Note that if you post a photo to a friend’s page, it will not appear in the photos on your own Timeline. Also, it will be visible to all viewing your friend’s Wall/Timeline.
|
Upload a Photo Using Email
Facebook enables you to use a unique email, assigned just to you, to send photos or videos to your page. You need to protect it so that others do not send information to your page as if they were you.
Find Your Post-by-Email Address
You can email photos or videos from your mobile device to your Facebook account by sending them to a unique post-by-email address.
1. Click the down arrow to the right of Home, and click Account Settings | Mobile.
2. To the right of Post-By-Email Address, click Refresh. Your current post-by-email address is shown. It will be a name followed by “@m.facebook.com.” If you don’t have a post-by-email address, you most likely do not have an active mobile device registered.
3. Click the unique email address ending in “@m.facebook.com” to create an email that will be sent directly from your computer to your page. When you click this, an empty email message will appear, an example of which is shown in Figure 6-1.
Figure 6-1: You can send photos to Facebook using a unique email address that is just for your Facebook page.
4. Insert your photo or video file into the email. Type the caption into the Subject text box.
5. Click Send. After a bit, the photo will appear on both your Timeline and News Feed.
| Note When sending a photo to your Facebook page using the unique Facebook address, use the Subject line as the caption. If you don’t attach a photo, the Subject line will be used to update your status on your Wall.
|
| Note It’s a bit rude to attach large photo and video files to emails sent to friends and family. It slows down the recipient’s response time, and is annoying. When sharing graphics and videos, you should consider using links and file formats that don’t create an unnecessary burden on the Internet. Still photos and other images look great if you use the JPEG file format, which can compress an original image to easily one-tenth its size while maintaining fidelity and clarity. For videos, the MPEG 4 file format is popular because the file size is small, but fidelity is good and can be read by Windows, Mac, and Linux users.
|
Upload Photos into a New Album
You can upload at least 1,000 pictures into an album, and there are no limits to the number of albums you may have. To create an album of photos grouped together by event, relationship, time, or other organizational approach, you simply name the album and select the photos you want included.
1. Click Add Photo/Video at the top of the Home page or click Photo beneath your profile picture (not beneath your name) on the Timeline. Click Create Photo Album. You’ll see a Windows Explorer or other dialog box. (If you have not installed Timeline yet, on your Profile page, click Photos on the left column and then click Upload Photos.)
2. Find the photos you want in your album. Hold down CTRL while you click each photo that you want in the album. When you’re finished, click Open. It will take a moment, but the Untitled Album dialog box will open. You will be asked for certain identifying information, which is visible to friends with permission to see these photos.
3. The dialog box displays these options, as shown in Figure 6-2:
Figure 6-2: Uploading photos is easily done, along with entering identifying information.
• Name Your Album Click in the Untitled Album text box, and type the name of the album itself.
• Identifying Info Click in the Say Something text box beneath the title to add a description of the album.
• Location Click in the Where Were These Taken text box, and type the location or other identifying information for the album. The album may be about an overall location, with individual locations for some of the photos.
• Date Click Add Date and set the month, year, and day, if you want.
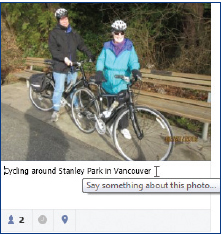
• Photo ID Click the Say Something About This Photo link beneath the photo and type a description about the individual photo itself.
• Set Privacy Click the audience selector icon beneath each photo and click who you want to see it—essentially the level of privacy you want.
• Tag People Click the tag icon, click the spot in the image, and type the name of the person or other identifying info in the text box.
• Photo Date If your photos have different dates, click the clock icon and select the month, day, and year when the photo was taken.
• Photo Location If your photos have different locations, click the location icon and type the location. You may need to delete the current location before you can enter a new one.
• Audience Selector To set your privacy, click the Audience Selector and select the audience you want for the album. This can be changed later if you want.
• High Quality Click the High Quality check box to make the photos high resolution. Unless there is some reason for high resolution, keep the default setting, which is no check mark. High-resolution photos take much longer to load.
• Add More Photos You may want to add more photos at this point, but you can also do it later.
4. Click Post Album. The photos are uploaded to your Facebook site. You can either change or edit the photos. See “Edit Your Photo Albums” for more information.
| Tip You may also see a dialog box, shown in Figure 6-3, titled “Who’s In These Photos?” You can either type a name in the text box beneath each image and click Save Tags, or click Skip Tagging Friends.
|
Figure 6-3: You will have an opportunity to tag people in the album photos.
Del Presents His Photos
I resisted joining Facebook because I was told it was onerous. My wife had already joined and was posting about our social life and family. I thought it would duplicate our place on Facebook for me to also have an account. However, I was wrong. I am having a lot of fun with my own personal account. We only share in common about half of our Facebook friends. My extended group includes my ex-coworkers, old buddies, college friends, industry acquaintances, and photography contacts.
After I retired I continued my lifelong love of photography by making it one of my major hobbies. Several times a week I post my favorite or latest photographs. I enjoy getting feedback and reading the comments people write. As a side benefit to this, people have contacted me via my normal email address, and I have sold many of my photographs that they have had framed and displayed in their homes or workplaces.
In addition, using my photography, I assemble digital cards for the major holidays and for friends’ birthdays and post them on Facebook for the occasion. This activity has been well received and appreciated.
Del H., 66, Washington
Download a Photo on Your Wall
If you see a photo on someone else’s posting that you would like to download onto your own computer, you can do it this way:
1. Click the photo to enlarge it.
2. Beneath the photo click Options | Download.
3. You may be asked if you want to open or save the image. Click Save | Save As. The Save As dialog will appear.
4. Type a name you prefer for the photo if you don’t like the original, and then select the image type. You will probably want to retain the .jpg file type.
5. Click Save.
Find Your Albums
You may find that you want to return to your album to edit at a later date. First, you need to find it.
1. Click your name on the menu bar for your Timeline.
2. Click Photos beneath your name. You’ll see a list of albums. You may have to click See More beneath the thumbnails of the Your Albums rows.
3. Click the album you want to work with.
4. To edit the photos in the album, click Edit Album.
Edit Your Photo Albums
Once you have uploaded photos, you can reorganize them; delete them; change or add captions, dates, or locations; change your audience; and so on.
1. Click Home | Photos (in the left column under Apps) | My Albums.
2. Find the photo album you want to edit and click it.
3. Click Edit Album beneath the album title.
Figure 6-4: You can edit the overall specifications of the photo album.
• Click the title to open the text box and type a new name.
• Click in the Description text box to enter a new description for the album itself.
• If you already have a description, delete it and begin typing a new one. If you don’t have one, click the location icon and begin typing. As you type, a list of locations will display. Click the one that matches.
• Click Edit Date to change the year, month, and day.
• Click Add Photos to add new photos to the album.
• Click Delete Album (the trashcan icon) to delete a photo from the album.
• Click the Audience Selector to set who may see your photos.
5. Click Done to finish.
Change the Order of Photos in an Album
To move photos in an album or re-sort the order:
1. On your Home page, click Photos on the leftmost column under Apps.
2. Click My Albums at the top of the page.
3. Click the album you want. The photos in the album will be displayed.
4. Click and drag the photo to the location you want it.
Edit Individual Photos
There are at least two ways to edit your photos. In one case you edit photos within albums, and in the other, you edit photos with the Photo Viewer, the enlarged image that appears when you click a photo.
Edit Album Photos
1. Click Home | Photos (in the left column under Apps) | My Albums.
2. Find the photo album you want to edit and click it.
3. Click Edit Album beneath the album title. You see the rows of photos in the selected album.
4. At the bottom of each photo, you’ll find a way to edit the photo’s data:
• To change or add a description, click in the text box beneath the photo and type.
• To tag someone, click the tag icon, click in the photo to place the tag, and type the name you want in the photo.
• To record the year, month, or day, click the clock icon and choose what you want.
• To record or change the location, click the pin icon and type the name, choosing the match when it appears.
5. When you are finished with each photo, click Done at the top.
Edit Using the Photo Viewer
This technique is easy and accessible. It uses the Photo Viewer feature in Facebook, which enlarges photos on a black background. If it is a photo you have posted rather than a friend’s photo, you’ll find additional commands available (you can’t edit a friend’s photo other than to share or download it). Although you might want to search for a photo in the My Albums section of your photos (because sometimes we forget where a photo is), you can also just click a photo of your own on your Timeline or Home page.
1. On your Timeline or News Feed, click your picture you want to edit. Or, click Home | Photos | My Albums.
2. Find the photo album you want to edit and click it. (Do not click Edit Album.) The contents of the album will be displayed.
3. Simply click the photo—it will be enlarged. Click Edit in the right sidebar. The sidebar will open with the data you can change, as seen in Figure 6-5.
Figure 6-5: Enlarging the photo within its album allows you to record many variables about the image—what, where, when, and who are just starters.
• Click in the Description, Who Were You With, or Where Was This Photo Taken text box and type what you want.
• Click the down arrows to set the year, month, and day.
• Click the Audience Selector, and an Edit Album Privacy option is displayed. Click it and set your privacy. When you change the privacy here, it is for the whole album.
• Add a comment if you like, or share or like the photo.
• Beneath the photo, you can tag a photo or find another way to like or share the photo. (See “Tag a Photo” for details.)
• Click Options for a menu of more options: you can again add or change a location or date, rotate the photo right or left, download the photo, make this photo your profile or Timeline cover, or delete it.
• Click the left and right arrows to scroll to the previous and next photos, respectively.
4. Click Done Editing to finalize your changes.
5. Click X to close the photo and return to the previous page.
Tag a Photo
Tagging allows you to identify someone in a photo of yours and notify them that they are tagged in a photo. To bring up the Photo Viewer so you can work with a photo, follow the steps in “Edit Using the Photo Viewer.” With the photo open in the Photo Viewer:
1. Click Tag Photo. Your cursor will turn into a crosshair.
2. Click the spot on the photo where you want the tag. A text box will open.
3. Type your tag. A list of your friends will appear. You can select a name or type another. If you find a name on the list is similar to the one you typed, but not identical or not the one you want, unselect the name by mousing over the list so that the selection goes away before you press ENTER to finalize the typed name. In this way you can add a name that is not a friend, not in your list names, and will not be assigned erroneously to be the tagged name.
4. When you’re done, click Done Tagging.
Delete a Tag
To get rid of a tag, you must first delete it and then retype a new tag.
1. In the Photo Viewer, find the tagged name on the right, and mouse over it (it will follow the word “with.”) When you have several tags, you’ll see the box surrounding the point on the photo that contains the selected tag.
2. When you have the pointer over the correct tag, click Remove Tag.
Rotate a Photo
Sometimes a photo is sideways and you want to straighten it. From the Photo Viewer, click Options beneath the photo. A list of options is displayed:
• Click Rotate Left to rotate your photo 90 degrees counterclockwise.
• Click Rotate Right to rotate your photo 90 degrees clockwise.
Delete a Photo
Perhaps you want to get rid of a photo.
1. From the Photo Viewer, click Options beneath the photo.
2. Click Delete This Photo. A Delete Photo dialog box will appear.
3. Click Confirm to verify that this is what you want.
Make a Photo Your Profile Picture
Depending on whether you want to upload or take a new photo, or whether you want to make an existing uploaded photo into your profile picture, you have a couple of ways to create your profile photo.
1. On your Timeline, mouse over your current Timeline profile picture, and click Edit Profile Picture. (Yours could also say Edit Picture.) A menu is displayed:
• To upload a new photo from your computer, click Upload Photo and follow the steps.
• To take a photo of yourself using a webcam, assuming you have a webcam on or in your computer, click Take Photo. The Take A Profile Photo window will open and display the Adobe Flash Player Settings dialog box. Click Allow, click Close to remove the Flash Player, and click the camera icon to take the picture. If you don’t like the picture, delete it and click the camera icon again (remember to look at the camera, not the screen, and that there is a 3-2-1 countdown). If you like the picture, click the padlock icon to set the privacy, and then click Save Picture to save the photo. (Refer to Chapter 2 for the details of this approach.)
–Or–
1. To use a photo for your profile picture that is already uploaded onto Facebook, click Choose From Photos. The dialog box will be displayed showing all the photos of you.
2. If you want one that is displayed, click it. If not, click View Albums to see a display of all your photos. Click through the albums until you find the one you want. Click Make Profile Picture. A page will be displayed allowing you to crop the photo.
3. Click in the center of the highlight box, and drag the box so the object you want to use for your profile photo is centered in the box the way you want it.
4. Click one of the four corners to enlarge or reduce the size of the box as you wish. Your photo will be cropped so that only the area within the box will left and used for your profile picture.
5. When you are ready, click Done Cropping to finalize the profile picture replacement. Click Cancel to stop the process.
Save a Photo to Disk
You may want to save your changed photo or another one to your computer disk.
1. To save a photo, first follow the steps in “Edit Using the Photo Viewer” to find and display the photo. Essentially, find it and click it.
2. Mouse over the bottom of the enlarged image for the menu bar.
3. Below the image, click Options | Download. At the bottom of the page a dialog box will open.
4. Click the Save down arrow, and click Save As.
5. Find the folder where you want to save the file, change the name to something you’ll recognize, and click Save.
Share Your Photos
You may find that you want to share your photos with others. You may be looking at a photo on your News Feed or Timeline, or you may have just finished editing it in the Photo Viewer.
• To share a photo on your News Feed or Timeline, click Share beneath the photo.
• To share an edited photo displayed in Photo Viewer, mouse over the bottom of the enlarged image for the menu bar, and then click Share.
| Tip The pencil icon  indicates that something can be edited. Click the icon, and a text box or other format will be presented that enables you to edit or change the information. indicates that something can be edited. Click the icon, and a text box or other format will be presented that enables you to edit or change the information.
|
Share Photos or Albums with Non-Facebook Friends
To share your photos or albums with people who are not on Facebook:
1. On the Timeline, click Photos beneath your name.
2. Click the album you want to share.
3. On the bottom of the page, as seen in Figure 6-6, click Want To Share Your Album? You Can Give Friends Or Relatives This Link. A blank email with the link will be displayed.
Figure 6-6: You can send photos or albums to people not on Facebook or to people who are not your Facebook friends.
4. Type the email address, change the subject line if you don’t like the default listed, add anything you want in the body of the message, and click Send.
Make Your Facebook App Photos Private
For the most part, you set your privacy, your audience, at the time a photo is posted. It will have the same audience as the post. However, some Facebook Apps do not have audience selectors to use when uploading photos from your cell, for instance. You can set an overall default for these types of photos and status updates sent from your mobile phone or other Facebook app. To set your default security for these posts:
1. Click the right arrow to the right of Home, and click Privacy Settings.
2. Under For Mobile Apps Without The Inline Audience Selector, you have these options:
• Public Allows anyone to see this photo or album.
• Friends Allows your friends to view the photo or album.
• Custom Allows you to select specific people, lists, or groups to see or not see a post.
3. When you have selected the audience you want, click Home or <your name> on the menu bar to leave the Privacy Settings page.
USE VIDEOS
Using videos is a delight—especially when you don’t have to watch a lead-in advertisement first! You can share your own family videos or links to those on YouTube or other visual networking sites. You can set your audience intentions for each video as well, making them available for both group and individual viewing.
Upload a Video
You can upload videos from your own computer, from another website (such as YouTube), or from your mobile phone (see Chapter 5 for how to work with your mobile phone).
| CAUTION! The video must have been created by you or your friends—that is, you have the right to upload it. In addition, because of storage requirements, you are asked to restrict your videos to those that are under 1MB in size and run under 20 minutes in length.
|
Upload a Video from Your Computer
1. On your Home page in the top-center column, click Add Photo/ Video | Upload Photo/Video, or on your Timeline beneath your photo, click Photo | Upload Photo/Video.
| Tip To find your videos if you don’t have Timeline, click your name on the menu bar for your Profile page. Then click Photos on the left column, and then click Videos to the right of the Your Photos title.
|
2. Click Browse. When Windows Explorer comes up, find your video file, click it to select it, and click Open. This will place the file location in your dialog box.
3. To comment on the video, click in the text box and type your comment.
4. To set your privacy settings for the video, click the Audience Selector icon, as shown in Figure 6-7, and select your setting.
Figure 6-7: When uploading your video, add a comment explaining what it is and select your privacy intentions before clicking Post.
5. Click Post to upload the video to your News Feed stream and Wall:
• The first time you upload a video, you may see a message about allowing a pop-up blocker on your computer to permit this upload; if so, click Okay and then Allow Once.
• Also, you may have to click Agree To The Terms Of Service before you can proceed. This is a legally binding agreement verifying that you know the creator of the video, that it is an original work, and that you have the right to share it with others—that there is no copyright violation.
• You’ll have to wait for a few minutes while the video is uploaded.
6. When you see the Upload Complete message (you may also get an email), click Close And Edit Video. See the following “Edit the Video Title” section.
Edit the Video Title
If you select to edit the video immediately upon uploading it, you’ll see the screen shown in Figure 6-8. This allows you to tag people, add comments, a title, the when and where of the video, a description, and set your privacy, if you have not already done so.
Figure 6-8: The first editing opportunity allows you to enter a title and description for the video and tag friends connected with it.
1. Click In This Video to tag any friends who appear in this video.
2. Click Title and type a name for the video.
3. Click Where and type the location. Select a location from the list of possibilities if it is correct.
4. Click the When fields as they are displayed to add the date—year, month, and day.
5. Click Description and type a description of what the video is about.
6. Click the Privacy down arrow, and select your desired audience.
7. Click Save. When you click Save you’ll see an additional editing screen, as described in “Make Further Video Edits.”
Make Further Video Edits
When you first upload a video, click Edit Video, and save the title editing page, the page shown in Figure 6-9 is displayed. It contains additional functions you can perform with videos:
Figure 6-9: After uploading a video, you’ll be presented with ways to edit it.
• Write A Comment Adds a comment that will be seen beneath the video on your Timeline or News Feed.
• Tag This Video Enables you to identify people or objects in the video.
• Change Date Allows you to change the date or set it so it is positioned correctly on your Timeline.
• Edit This Video Redisplays the Edit Video page shown in Figure 6-8, allowing you to do several editing functions, such as adding a title and tagging individuals.
• Delete Video Allows you to delete the video from Facebook.
• Embed This Video Provides Hypertext Markup Language (HTML) code so that you can embed the video on any site on the Web.
• Rotate Video Click Rotate Right or Rotate Left to rotate the video 90 degrees to the right or left.
Find and Edit a Video Using the Video Viewer
You can also access this screen in a different way, from your Timeline, as described here.
1. From your Timeline, click Photos beneath your name.
2. On the top of the Your Albums page, on the left, click Videos. You’ll see a list of your videos.
3. Click the video you want to edit. Figure 6-10 shows the edit screen for the uploaded video. You have these options:
Figure 6-10: Using the Video Viewer allows you additional ways to edit your video.
• Mouse over the bottom of the video to reveal the Options menu, which enables you to rotate the video, change the date, edit the video, delete, or embed it. You also see Share and Like options.
• To the right of the video, you have the option to tag the video, comment, or edit it again.
4. Click X on the upper right of the white space to return to the previous page.
Upload a Video from a Video Site
1. Find the Uniform Resource Locator (URL) of the video you want to upload to Facebook. Copy the address by clicking in the URL of the page to select it and pressing CTRL+C.
2. On your Timeline, click What’s On Your Mind and paste the copied address by pressing CTRL+V or type the link you want from the other site into the text box, and click Attach. An example of what you’ll see will be displayed.
3. Click in the text box in front of the URL, and add comments to let people know what the video is about.
4. Click the Audience Selector to set your privacy desires if the default is not correct.
5. Click Post to place the video link on your Timeline and News Feed.

Gary Is a Pro with Photos and Videos
As an author, illustrator, video editor, and special effects artist, I connect with friends by uploading images I’ve photographed or drawn and videos I’ve either created or edited—with little text. My friends know me as a graphics sort of person, and I try not to disappoint!
Facebook lets you post an image on your Wall as a spontaneous gesture, a visual augmentation of a chat, or as part of an album. My advice is not to post all your family photos—once you’ve uploaded something, it is fair game for copying—and abuse!
You don’t have to upload media directly to Facebook. You can also upload high-resolution images to lots of galleries online. I try to be green and think of ways to post images or videos once on the Web, and use links to distribute and advertise my graphics. I have a repository for most of my work and use hyperlinks to make it accessible. For example, YouTube (when you’ve logged in as a director) can link videos directly to Facebook or other social networks. So if you upload, say, a 7MB video to YouTube, you’ve uploaded it onto the Internet only once—but it can be viewed often using links to different social networks.
Gary B., 68, New York
Record a Video with a Webcam
Recording your own video is a way to personalize your Facebook page dramatically. To record a video you’ll need a webcam and microphone. You should also think about background lighting and appearance. First, you set some options, then you record, and then you review the video.
1. On your Timeline, click Photos beneath your name, and click Add Videos | Record Video. The Create A New Video dialog box will appear. You’ll see a red rectangle with a white spot at the bottom with a small dialog box above it. (If you don’t see the dialog box, click your right mouse button and select Settings.)
| Tip To record a video if you don’t have Timeline, click your name on the menu bar for your Profile page. Then click Photos on the left column, and then click Videos to the right of the Your Photos title. Click Record on the upper right of the page.
|
2. In the Adobe Flash Player Settings dialog box, click Allow.
3. Click each of the icons along the bottom of the dialog box, and consider whether the settings are correct for what you want to do. From left to right, the icons and their meanings are as follows:
• Enable Hardware Acceleration This is selected by default and is most likely what you want.
• Privacy Allows Facebook to use the camera and microphone. Clicking Remember allows you to change the defaults.
• Local Storage Determines the amount of storage a video can use. You probably want to limit this to 10MB, which is a fairly short video.
• Microphone Lets you set the volume being recorded by the microphone. You can test it by talking and looking at the meter on the left. You want the fewest possible red spikes.
• Camera Lets you select the camera you want to use. You probably only have one.
4. When the settings are the way you want them, click Close to close the Flash dialog box.
5. To start capturing the video, click the Start button (white dot) at the bottom center of the window. Record the video and sound. When you are done, click the Stop (white square) button at the bottom center of the window.
6. Click Play on the bottom-right corner to preview your video. If you are not happy with it, click Reset to erase the video so you can re-record it.
7. When the video is the way you want it, Click Save. Then, on the Edit Video page, click the Audience Selector to set the privacy to your liking, and then click Save to save the video and post it to your Timeline and News Feed.
You should be able to return to your Timeline and see your video. See “View a Video” to understand how to play the video. After playing the video, you can click Go To Video, where you can tag, edit (add titles and descriptions), and delete the video.
View a Video
You can access a video either from your Home page or Timeline. It may start playing immediately, or if you need to start it, you must first click the Play icon  . As it plays, if you move your cursor over the video, the video commands appear on the screen.
1. From the Home page, click Photos (under Apps) in the leftmost column—you may have to click More to expand the list. Click My Albums and then click Videos to the right of Your Albums. You’ll see a list of your videos. Scroll through the list until you see the one you want. Click the video you want to play. It may begin to play immediately.
2. Mouse over the bottom of the video to see the option bar.
3. After it finishes, or before it starts, you’ll find these options:
• Click the Play icon to start the video. The Play button toggles into a Pause button.
• Click Pause to stop the video.
• Click the Mute icon to suppress the sound.
• Click and drag the Volume Control triangle to control the volume.
• Click the Play In Full Screen icon to display the video in a full-screen mode. Press ESC to return to regular viewing.