Of all the topics and techniques I teach in my workshops, light quality seems to be the one area in which students feel the least knowledgeable and ask the most questions.
How would you define light quality? Is it the color of the light? Is it whether the light is soft or hard? Possibly it’s a combination of the two? Light quality can be thought to incorporate a lot of different subjective elements.
To my way of thinking, the subject looking their best has to be considered when evaluating whether any kind of lighting looks and feels great. In other words, light quality can often depend on the subject and—more importantly—the intended purpose of the picture. For years, I thought that light quality had to do with shadows and highlights working together to produce a lighting that was either hard (high contrast with sharp shadows) or soft (low contrast with gentle shadows), flat or directional, and warm or cool. I have since determined that light quality can be a combination of any or all of the above.
Light that seems too high in contrast for some subjects or scenes might just be ideally suited for another subject or for a different intended purpose. In other words, all that matters is the final result and how it works with the subject to produce a picture that meets everyone’s needs—the subject, the client, and the photographer.
“of all the topics and techniques I teach, light quality seems to be the one area in which students feel the least knowledgeable and ask the most questions.”
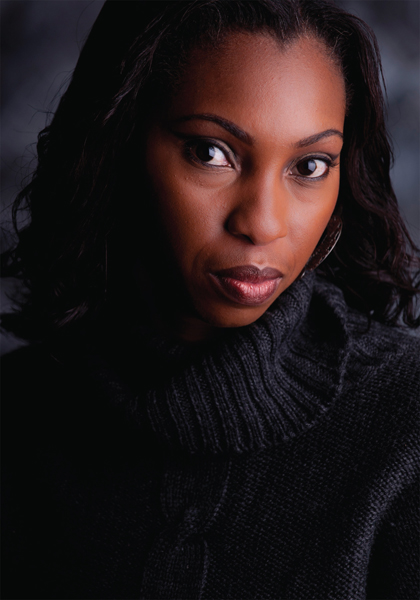
Image 2–1. Light quality depends on the subject and the purpose of the portrait. What is wrong for one image may be perfect for another.
The Relative Size of the Light Source
Before we dive further into the concept of tailoring the lighting to our subject and the purpose of the portrait, let’s take a moment to evaluate one of the primary controls we’ll be using: the size of the light relative to the subject. This can be adjusted using not only the physical size of the light (a larger or smaller modifier), but also by adjusting the position of the light source relative to the subject. This is one of the single most important things I have learned about lighting.
If you move any light source closer to your subject, the source increases in size relative to that subject. Conversely, if you move the source farther away from your subject, the source decreases in size relative to that subject. In fact, there are three changes that will take place each and every time you change the size or distance of any light source in any photographic situation: the shadow changes, the size of the highlight changes, and the brightness of the highlight also changes. As we’ll see in the next section, this understanding is the basis for the groundbreaking approach to photographic lighting that Dean Collins pioneered in the 1980s and 1990s.
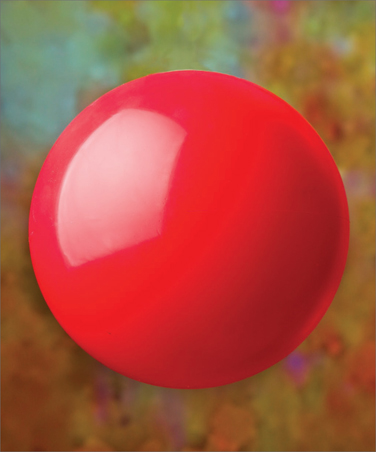
Image 2–2. Placed close to the subject, the softbox is large relative to the subject. Look at the shadow and the brightness/size of the highlight.
“Let’s take a moment to evaluate one of the primary controls we’ll be using: the size of the light relative to the subject.”
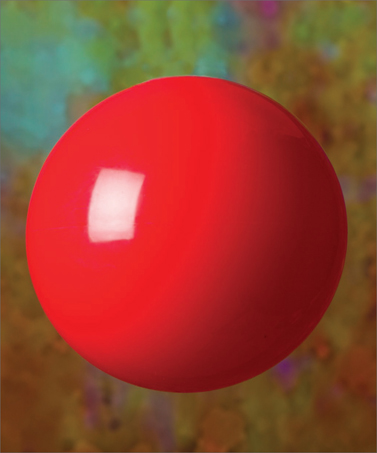
Image 2–3. As the distance of the softbox to the subject increases, it becomes smaller relative to the subject. Again, look at the shadow and the brightness/size of the highlight.
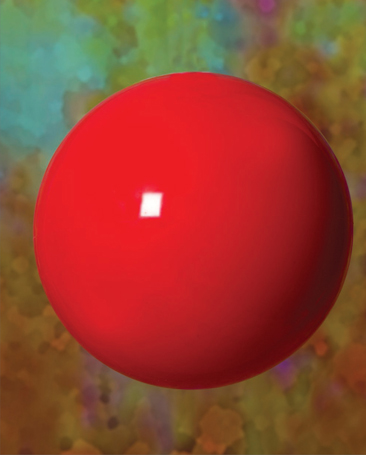
Image 2–4. As the distance of the softbox to the subject increases even more, it becomes still smaller relative to the subject. Compare the shadow and the brightness/size of the highlight in this image to the same zones in the previous two photos.
As you can see in images 2–2, 2–3, and 2–4, reducing the size of a light source will generate sharper- or harder-edged shadows. Conversely, if you want (or need) to soften the edge of any shadow, you can increase the physical size of your light or—the simpler solution—you can just move the current light closer to the subject.
Images 2–2, 2–3, and 2–4 also show that reducing the size of any given source will create smaller highlights on your subject. And the great thing about the physics of light is this: as the size of the highlight gets smaller, it also get brighter. Basically, it is being concentrated to a smaller area—and the smaller the area it has to cover, the brighter it becomes. This should not be confused with exposure. We are talking about light quality in this example, not light quantity.
Here is a quick recap:
Smaller source =
sharp-edged shadows, small highlights, bright highlights
Larger source =
soft-edged shadows, large highlights, less bright highlights
Now for the fun part—and there is just one thing you have to understand. Light will fall off from the source in a predictable way that can be calculated using the inverse square of the distance. For example, imagine you double the distance between a softbox and the subject—moving it from a position 5 feet from the subject to a distance of 10 feet from the subject. To understand how that will affect the lighting on the subject, you would square that change in distance (you doubled the distance, so 22 = 4) and invert it (¼). This value tells you that the highlight will now be ¼ of the size. The edge of the shadow created by the light will also be four times sharper. Also, the highlight will be four times as bright.
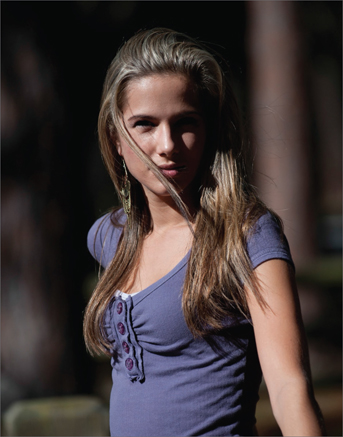
Image 2–5. While exposed properly, this image may be (subjectively) lit improperly. Care must be taken to create a complementary likeness in most images of people.
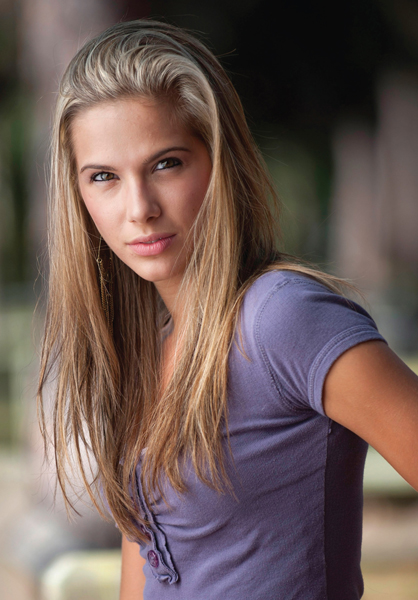
Image 2–6. Here’s the same image—but now with the sunlight diffused through translucent fabric. This changes the subjective feel or mood of this portrait. The exposure is, again, objectively correct.
It is great to know this little bit of lighting physics as you are working with speedlights, studio lights on location, window light, etc. It tells you exactly how to control the light if, for example, you have a highlight that you wish was not so bright. If you can reduce the distance between the light and the subject, or increase the size of the light, the highlight will diminish in brightness proportionally.
Throughout the 1980s and 1990s, the great photographer Dean Collins taught the importance of understanding three-dimensional contrast and how it relates to the quality of light. As Collins taught, the form and texture of a subject are revealed by three elements (the highlights, the shadows, and the true tonality of the subject) and the transitions between these zones. Of course, there are other compositional contrasts that affect the sense of dimension (such as the use of the foreground, middle ground, and background)—but in terms of lighting controls for dimension, working to fully control the highlights, shadows, and true tonalities is of key importance.
Let’s take a close look at each of the three aspects of three-dimensional contrast. The better you understand these controls, the more quickly your work will progress. You’ll begin to gain more confidence in yourself and more attention from your clients and those who view your work.
The true tonality of your subject is its realistic color and lightness/darkness as perceived by our eyes. This must be properly exposed as discussed in chapter 1. But once you determine that exposure level to be true and accurate, the highlights (areas lighter than the true tonality) and shadows (areas darker than the true tonality) help to reveal the textures and actual shape of the subject in many photographs. They also help to convey drama, personality, and mood.
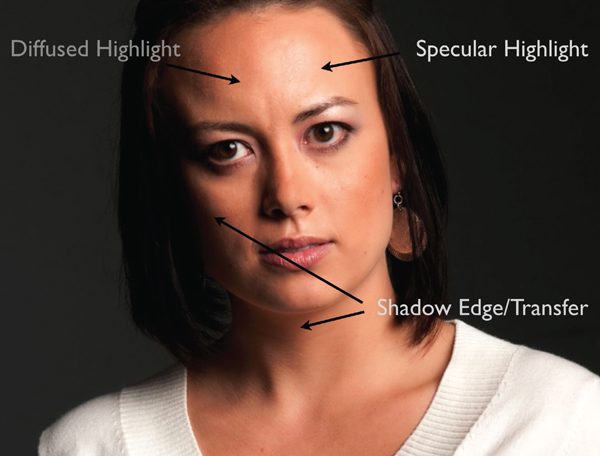
Image 2–7. This image reveals the true tonality (also known as the diffused highlight), the specular highlight, and the edge of the shadows, where the highlight transfers into shadow. This transfer edge can be soft or hard.
Let’s break down the highlights and shadows and see how they are linked together by physics. And remember: you are in complete control of the highlights and shadows in any photograph over which you have control of the light.
A highlight, specifically a specular highlight, is essentially a mirrored image of the light source that created it. If you light a shiny, highly reflective object you will see a reflection of the light source, the device creating the highlight. When photographing people, this specular can usually be seen clearly in the eyes of the subject and is commonly known as the catchlight. The catchlight will always tell you how a subject was lit—the position, size, and shape of the light are perfectly reflected.
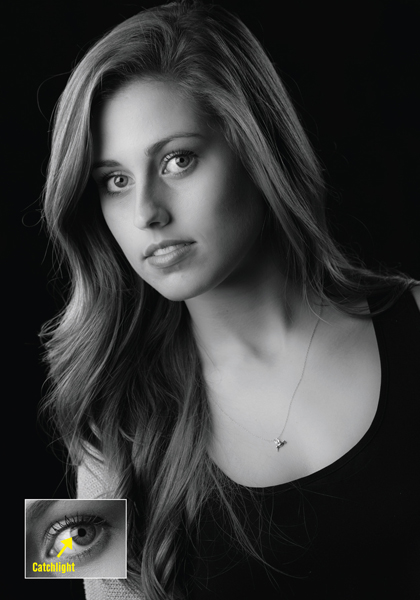
Image 2–8. The catchlights (bright highlights) on the shiny surface of the model’s eyes are direct reflections of the light source.
Highlights from the light source can also be seen as subtle reflections on the tip of the nose, the cheekbones, forehead, and on the brighter side of the face. In much of my personal work, I place accent lights behind my subjects and direct them forward toward the camera to produce shape-defining highlights on the hair, shoulders, arms, etc.
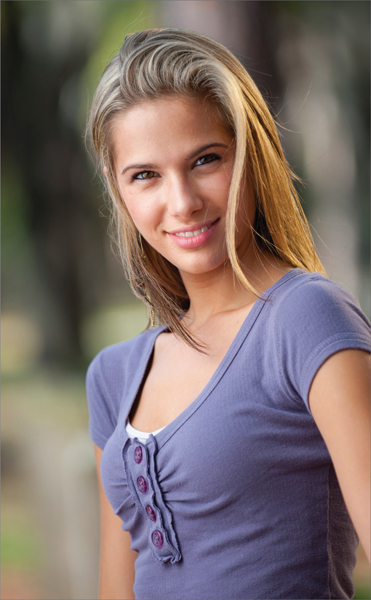
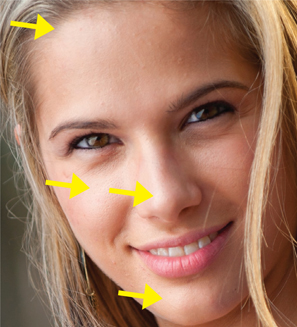
Image 2–9. The light source also produces subtle reflections of itself on the skin—particularly on the cheekbone, forehead, and the brighter side of the face.
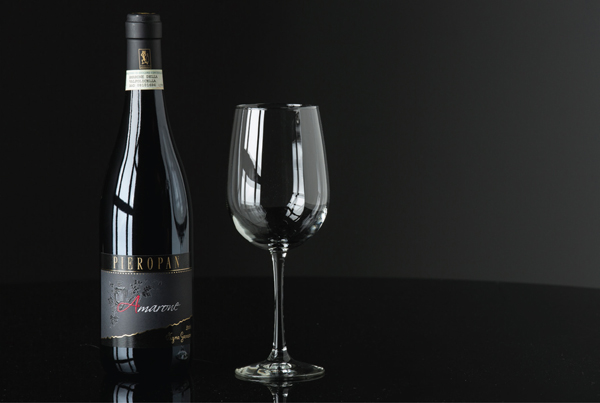
Image 2–10. Especially on highly reflective surfaces, the shape and size of the specular highlights should be a well thought-out part of the design.
Imagine someone posed holding a wine glass or dark wine bottle with red wine. Due to the high reflectance of the glass, the highlights will be well defined on the dark area of the wine and clearly revealed to the viewer. In this case, it would be really important to have a reflection that is not objectionable; it should be well thought-out as part of the design of the picture. In fact, you might even consider creating a window-light effect when using a softbox. This can be done by making window “panes” with strips of black tape or paper. These will be seen in the reflections on the glass and will make it look as though the light was coming from a window (image 2–10).
In commercial and advertising photography, the highlight often becomes a design element in the picture. Think about a piece of crystal stemware, a highly polished metal appliance, or high-gloss pottery. On subjects like these, the highlight is easy to see and should be carefully placed and shaped to help, not harm, the lighting.
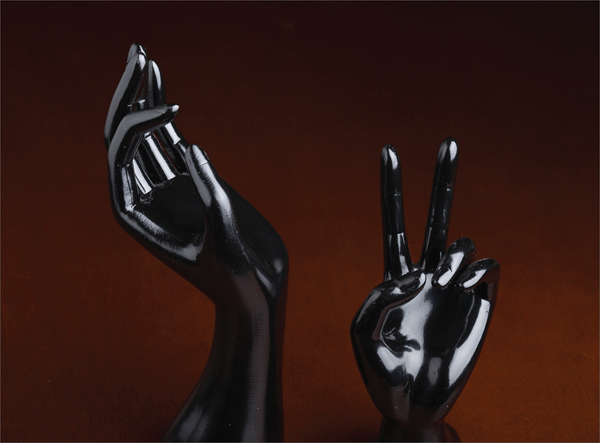
Image 2–11. A light source that was small relative to the subject produced small, sharp, bright highlights on the shiny surface.

Image 2–12. Adjusting the light source so that it was larger relative to the subject produced larger, softer, less intense highlights on the shiny surface.
You have probably seen photographers use what is known as a lighting tent or cone. These devices, constructed of diffusion material, completely surround the product or object placed inside. They are then lit from the outside (through the diffusion material) to produce large, soft highlight areas on the product inside—highlights that do not distract from the subject.
The shadow, on the other hand, can help to identify how much contrast there is in your work, both locally and globally. There are two basic things about the shadow all photographers need to understand: the sharpness of the edge of the shadow and the density (or darkness) of the shadow. These factors both play an important role in the finished picture. As we have already seen, the edge of the shadow is directly controlled by the size of the light source relative to the subject. This can be controlled by the physical size of the light source or the distance of the light source to the subject. If the image calls for a sharp-edged shadow, a small light source is the right choice. Alternately, you could use a large source that is moved a long way from the subject.
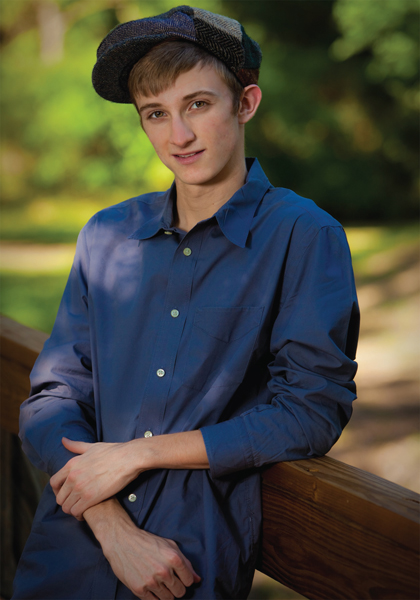
Image 2–13. A subtle flash added a fairly sharp-edged shadow you can see under the nose and along the chin and jawline of the subject. (Photo by Rob Hull.)
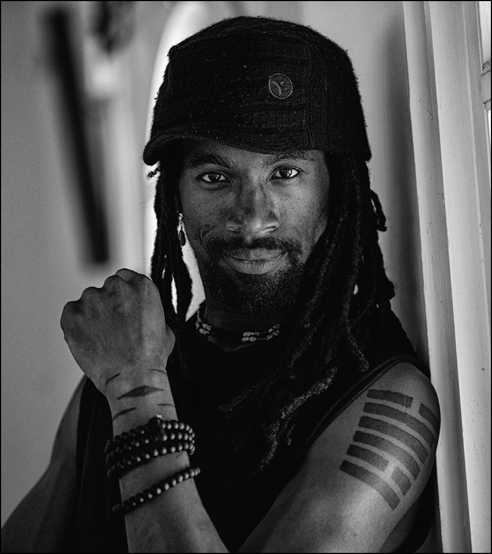
Image 2–14. With the subject very close to the light source, the shadow is much more soft, as is the transition from highlight to shadow.
I often use the bright sun as a reference because the shadows on a bright sunny day bear out this concept perfectly. The shadow on the ground that you see while walking down the sidewalk on a bright sunny day is sharp and almost cuttingly sharp (image 2–15). Compare this with the beautiful, soft shadow that can be seen in a window light portrait—or any other time a large source of light illuminates your subject. For me, it is interesting to discover how directly the shadows and highlights are linked together. You cannot change one without affecting the other.
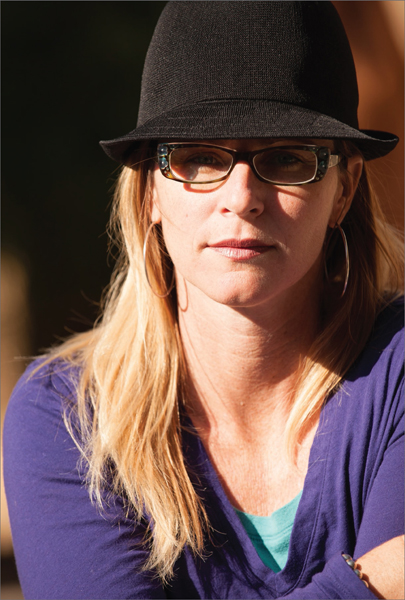
Image 2–15. Direct sun creates bright highlights and sharply defined shadows.
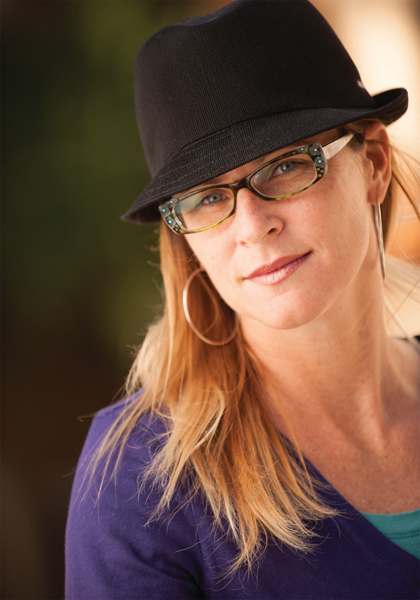
Image 2–16. On a direct sunlight portrait, adding a diffusion panel produces a dramatic change in terms of the light quality in the highlights as well as in the shadows. You will also notice the background change. The panel takes light away from the subject, allowing the background to get brighter when the exposure is adjusted.
In the portrait photography world, the shape and tonality of the shadow areas play an important role in accentuating or minimizing the contours of the face. Using traditional lighting patterns (butterfly lighting, Rembrandt lighting, loop lighting, and split lighting) will help to give direction to the light and add to the integrity of the portrait as much as the subject’s expression. Exercising care for and control over the shadow areas in a portrait can help to illustrate the true nature of the kind of image you are creating. For example, a large window with soft, directional light will produce a large, soft shadow. If this is not the mood that you want to portray in the portrait, you now have the necessary tools to make the needed adjustment by reducing the size of the light source relative to the subject (in the case of window light, this could mean moving the subject farther from the window to make the light source smaller relative to them).
“In the portrait photography world, the shape and tonality of the shadow areas play an important role in accentuating or minimizing the contours face.”
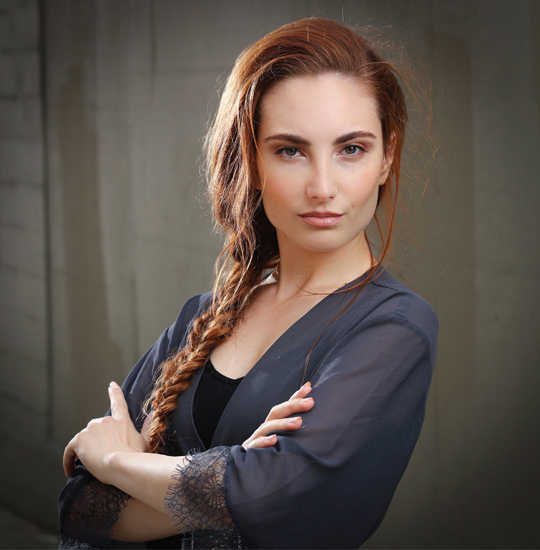
Image 2–17. The same kinds of lighting decisions we’d make in the studio can also be successful on location. Here, we were working with a beautiful model in an alleyway in the middle of the day—but employing all of the same techniques we might use in the studio.