The M15 Half-Track under construction.
| Sicily and Italy, 1943–5 | 4 |
THIS CHAPTER COVERS THE American forces engaged in the campaigns in Sicily and Italy, which ended on 2 May 1945. The units that saw action in both Sicily (9 July–17 August 1943) and the subsequent campaign in Italy (3 September 1943–2 May 1945) will feature here. Infantrymen, of course, were deployed in both campaigns, but the nature of the terrain made the use of specialist units invaluable: these were the Rangers and Airborne forces in Sicily and later the Rangers in Italy.
Operation Husky, the invasion of Sicily, saw the widespread deployment of Allied paratroop units, as well as Ranger units. The Ranger units attached to the 7th Army under General George S. Patton were the 1st, 3rd and 4th Ranger Battalions. This operation was the first time such a large number of Ranger units had been deployed.
The 82nd Airborne Division, under the command of Major General Matthew Ridgway, was known as the ‘All American’ from a belief that the Division had men from every state in America. The initial assault, made by the 505th Parachute Regimental Combat Team under Colonel Gavin, was the first regimental-sized combat parachute assault conducted by the US Army in WWII. The 82nd proved itself to be a true elite unit during the landings. In November 1943 it was sent to the UK to prepare for the invasion of Europe.
The three Ranger Battalions deployed in Sicily were trained by Colonel William Orlando Darby. He was one of the first American troops to be sent to Northern Ireland, where he became acquainted with the training methods of the British Commandos. A US Army equivalent was sanctioned on 19 June 1942 and the 1st Battalion was recruited for training in Carrickfergus. Most of the recruits came from the 34th ‘Red Bull’ division. Darby later commanded the 1st Battalion in Italy. This became known as Darby’s Rangers (although the Italians in Sicily nicknamed it the ‘Black Death’). Darby’s Rangers fought throughout the Italian campaign: Darby himself was killed two days before the Germans surrendered.
The M15 T28E1 was an anti-aircraft version of the M5 Half-track. Eighty were produced for use in the North African campaign and some of these were also used in Sicily and Italy. The M15 could provide both anti-aircraft fire and ground support from
its 20mm cannon and two .50 calibre M2 heavy machine guns, because the guns were mounted in a traversable turret in the back of an adapted M3 Half-track.
This is a metal kit made by SHQ Miniatures. Because it is not a true modellers’ kit, care is needed when assembling it as the plan assumes pre-existing skills and knowledge. Good reference material is essential.
Step 1. As with the Lee (see Chapter 3), the kit is assembled starting with the running gear, and then the cab and seats. Leave the glue to cure for a couple of hours. Unlike polystyrene cement, cyanoacrylate glue cures properly in only a couple of hours and so is faster to work with, but care needs to be taken in order to avoid any accidents.
Step 2. Now assemble the gun cradle and then add the guns. Do this in two stages and take care with all the parts as they are small and delicate. Now leave the gun cradle and progress with the rest of the build: the reason will soon become apparent. Once the two halves of the model have been joined, with the cab attached to the rear section, and allowed to dry, add the fenders, the lights and armoured visor. The support legs for the visor were not properly formed and this was corrected using brass rod, cut to length. Locating holes were drilled with a pin vice to correspond with the positions of the new support legs: these should ensure a strong and stable bond.
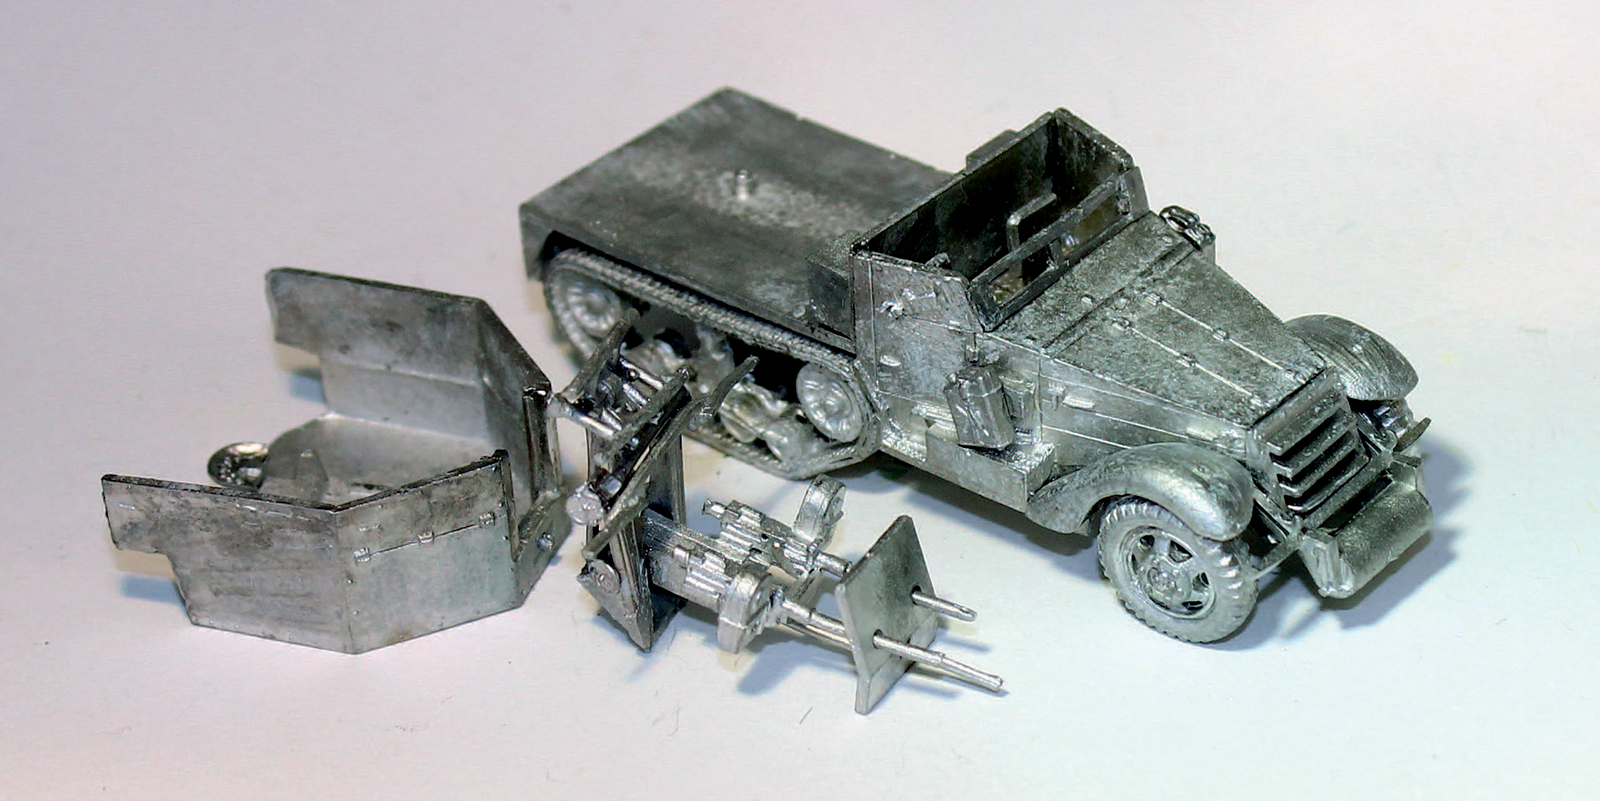
The parts for the anti-aircraft gun and its housing.
Step 3. Now move on to the turret. The instructions show ammunition stowage boxes, but as these were not included in the kit they were scratch built. Cut four pieces of plastic square rod each 5mm in length and then cut these in half, giving eight pieces in total. Glue four on the inside of the turret, either side of the guns. These were dry fitted first so the correct location of the new boxes could be judged correctly.
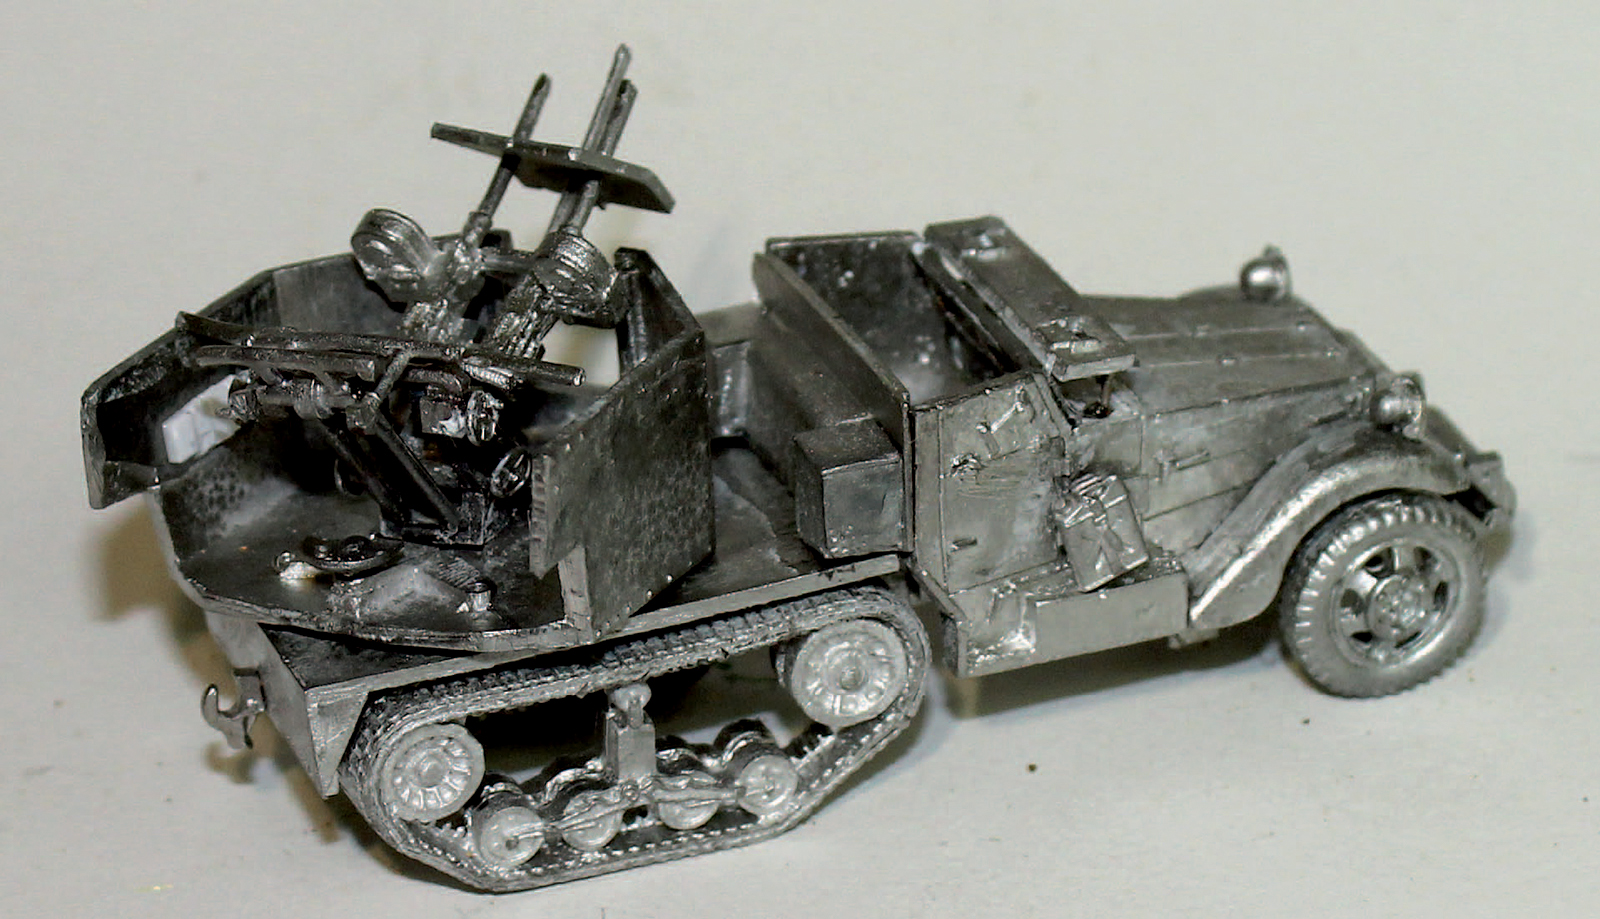
The assembled gun mounted on the back of the half-track.
Step 4. The kit comes with the option of a roller for the early M15 or a winch for the later M15. This model will be fitted with the roller as these were more common in both Sicily and Italy. Next, fit the headlights by drilling a small hole in the locations marked. Add the stowage next and then prime the model: as this is an all-metal kit the use of car primer is recommended and this can be bought from any good car accessory outlet.

The armoured visor.

The primed vehicle, ready for painting.

Apply two thin coats of acrylic Olive Brown.
Step 5. Now give the model two thin coats of acrylic Vallejo 889 ‘Olive Brown’. Once dry, add a little white to this colour and use it to add highlights to the panels. This will give the effect of shade and depth to the model.
Step 6. Apply a green acrylic filter (Vallejo) over the model: take care to do this sparingly and evenly with a brush. This product should dry fairly quickly and gives a pleasing result. Once dry apply a coat of satin varnish with an airbrush.
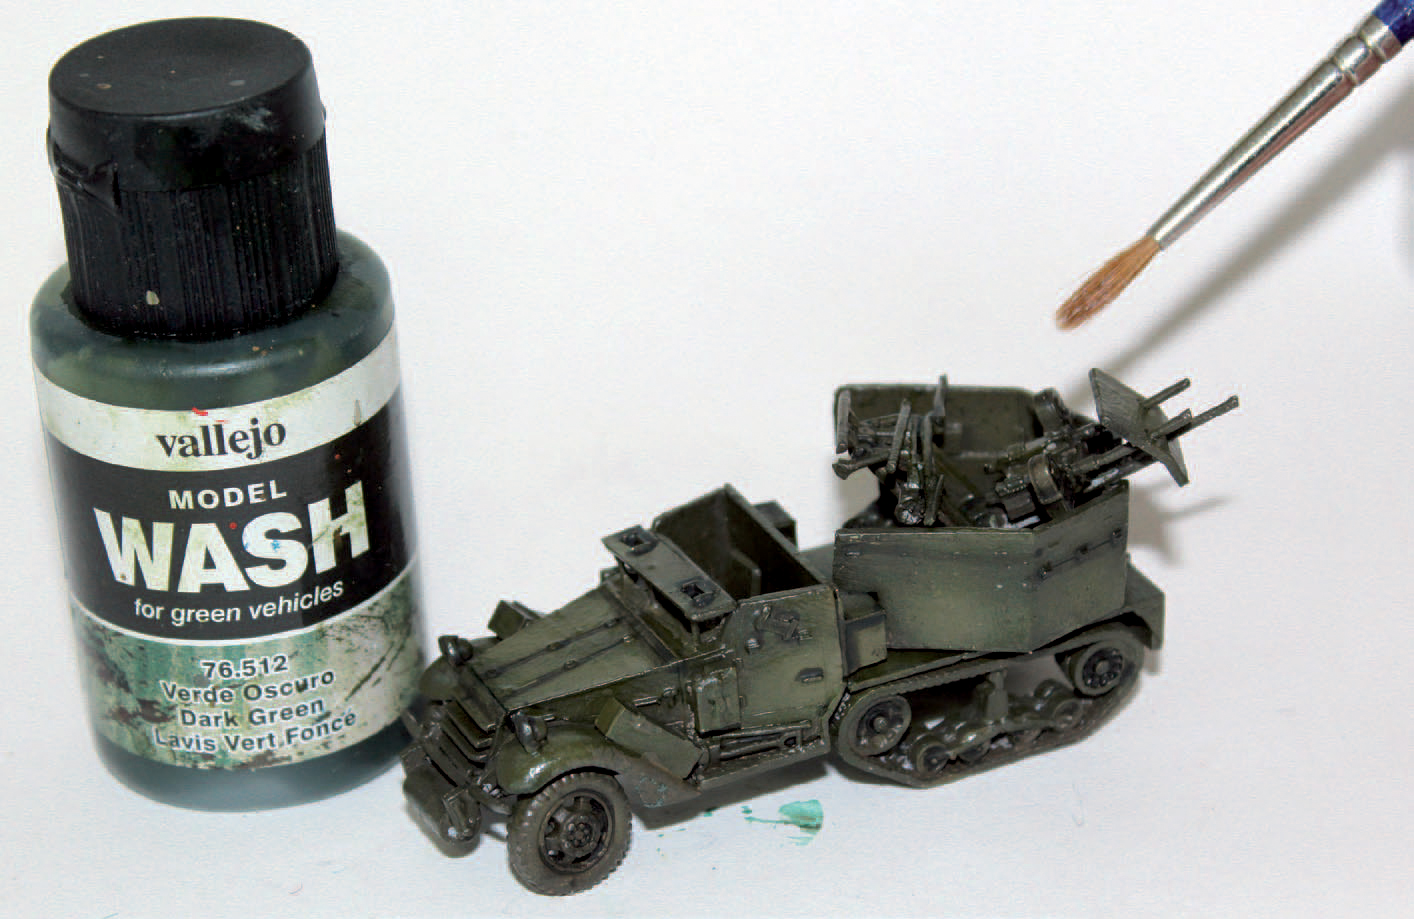
After a green acrylic filter has been applied and allowed to dry, use an airbrush to apply a coat of satin varnish.

Apply a very light coat of brown filter with a brush dipped in enamel thinner.
Step 7. Apply brown filter sparingly with a brush lightly dipped in enamel thinner. The brush should only be moist, so wipe any excess thinner off onto a tissue. Then apply the filter sparingly over the model, taking care not to flood the model as a subtle effect is desired.
Step 8. Paint the wheels with dark grey. Never use black because this is too harsh. Paint the tracks dark brown. Then paint the guns dark grey and, once dry, lightly brush over with gunmetal. Then paint the tools and any stowage in the appropriate colours: it is best to keep these muted, because if the colours are too bright they will detract from the overall finish.
Step 9. Now apply any decals. None are provided with this kit, but water slide decals are easy to use and can be bought from several suppliers. Two products that assist in the application of water slide decals are Micro Sol and Micro Set. Micro Sol softens decals before application, which makes them easier to conform to uneven surfaces. Micro Set, when brushed onto the desired location of the decal on the model, will provide good adhesion. To apply, remove the decal from the sheet and dip it into the warm water just to dampen it. Dab lightly with a tissue to remove any excess fluid. Then apply the decal in the chosen position with the aid of a soft brush. Once done, leave to dry, and then apply an even coat of matt varnish. After leaving it to dry for at least twenty-four hours, another coat of matt varnish should be applied to protect it.

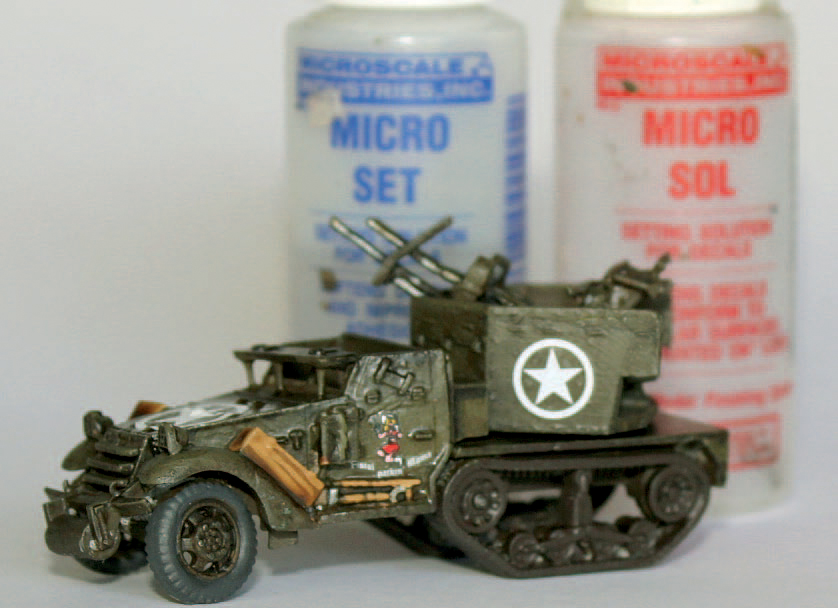
Paint the wheels, guns, tools and any stowage.
Step 10. Next weather the model, following the steps given for the Sherman Jumbo (see Chapter 6). Use MIG P232 ‘Dry Mud’ for the lower areas and P037 ‘Gulf War Sand’ for the upper surfaces.

The finished model with decals and weathering.
The M2 and M3 were first put out to tender in late 1940 and a contract to produce 424 vehicles was awarded to the Autocar company, which had its factory located in Ardmore, Pennsylvania. The Diamond T Company of Chicago was given a contract to produce the M3, and the White Motor Company, which was already producing the M2A1 scout car, was added to the list of companies producing the M3 and M2 half-track. Some 13,500 M2s were produced by the White Motor Company alone.
The first M2s were deployed in 1941. In North Africa from early 1942 they were issued to artillery units for use as both an ammunition carrier and a prime mover for the 105mm Howitzer. The M2 was also issued to infantry units to carry machine gun squads and for reconnaissance units. The other use of the M2 was as a prime mover for the 57mm Anti-Tank gun, the role that will be modelled here using a Plastic Soldier Company (PSC) M3 Half-track with the addition of an S&S Models M2 resin conversion rear body, which was designed to fit with the Plastic Soldier Company M3.

The S&S resin replacement body next to the PSC M3 part, part of which it will replace.
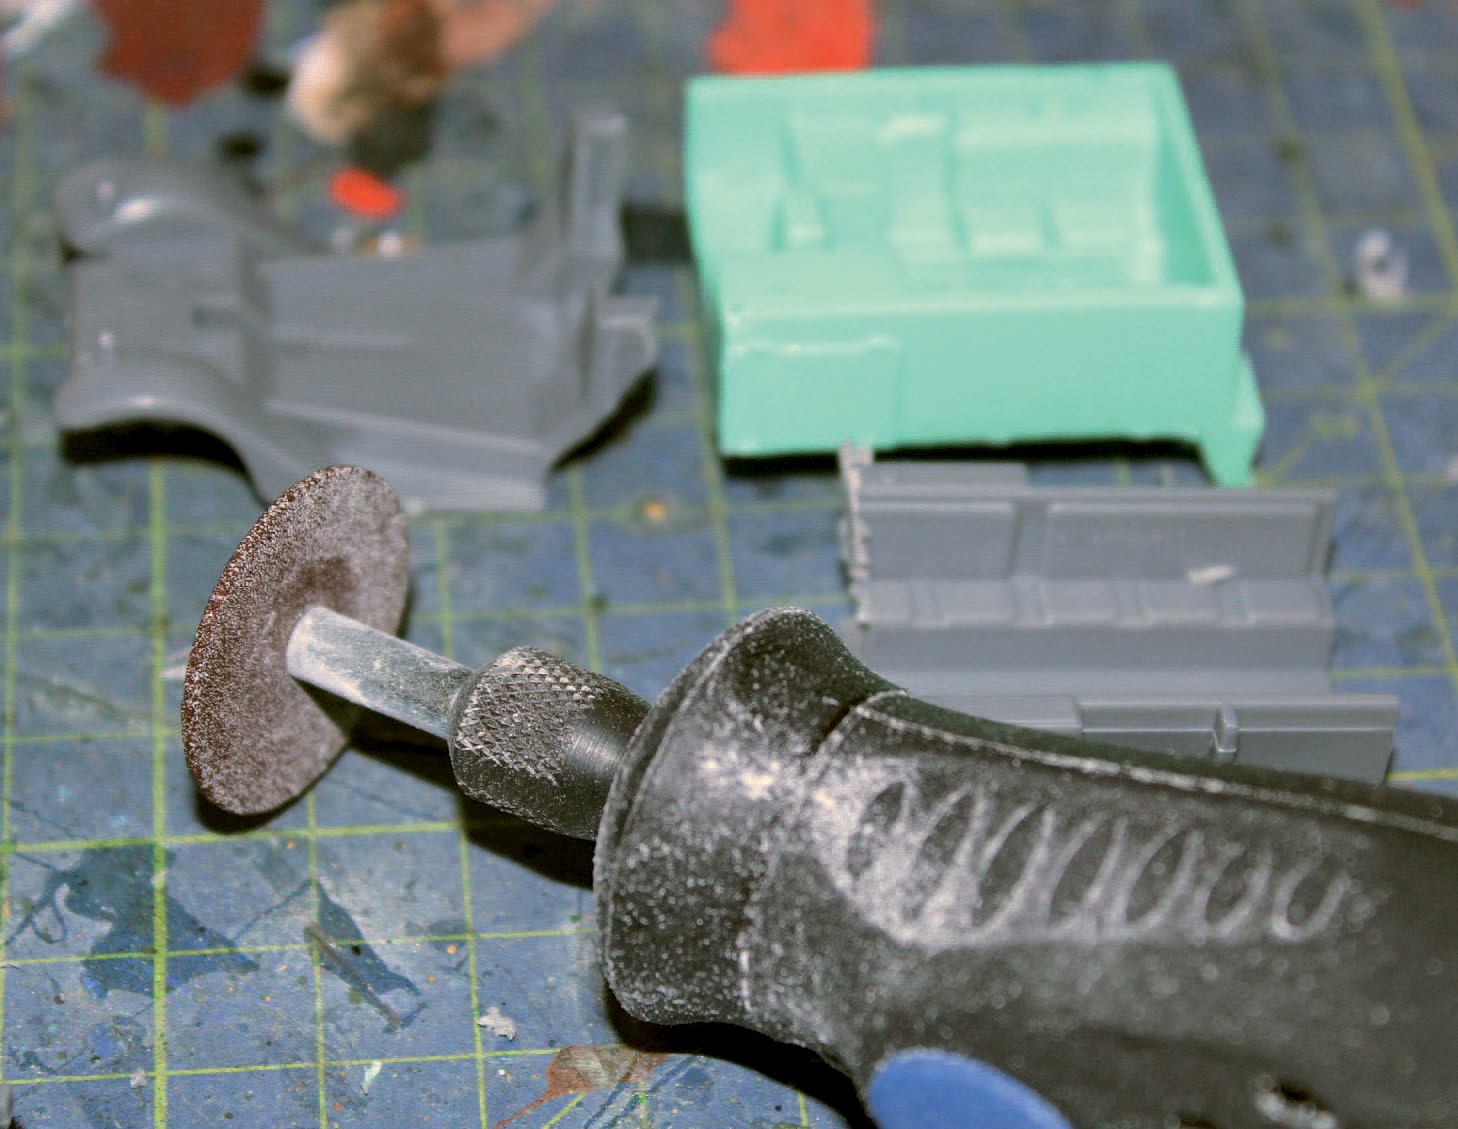
Use either a Dremel or a razor saw to cut the plastic. When using a power tool on plastic be aware that the plastic will soften during the cutting process.
Step 1. Start by carefully marking the area behind the driving compartment that needs to be removed to fit the new resin body. Use either a Dremel or a razor saw. When using any power tool on plastic, take into account that the plastic will soften during the cutting process due to friction, so the cut should be made several millimetres from the actual mark made. Next, with great care, make another cut behind the driving compartment to remove more of the unwanted plastic, then carefully remove the last pieces with a sharp knife. Throughout this process keep fitting the two pieces together until a good fit is achieved.

This stage will take great accuracy when cutting. The advice is ‘measure twice, cut once’.
Step 2. Now fit the rear chassis: in order to achieve a snug fit, the two pieces at the end will need to be removed. Then glue it to the underside of the resin superstructure using cyanoacrylate. Glue the new resin body to the front and leave it supported for an hour to allow the glue to dry. When this is complete the joint between the new resin body and the cab of the half-track may need some minor filling.

The two pieces of the PSC kit that must be cut away from the sub-frame. Doing this will allow this piece to fit snugly to the S&S body.

The chassis is now fitted to the replacement conversion body.
Step 3. Attach the track units and axle and wheels. Leave the driver’s compartment open, as this will need to be painted before proceeding further: it will be a challenge to paint once the M2 is fully built. Paint the driver and co-driver following the instructions provided for painting infantry as the uniforms were similar (see Chapter 3).
Step 4. The build can now be completed by fitting the bonnet, the stowage racks and some stowage. The .30 calibre machine gun that is added to the model comes with the PSC kit. Use grey primer, then paint and weather as for the other vehicles covered in this chapter, especially the M15, as the colours and technique are the same.

Some stowage has been added.

The PSC M3 half-track has now been converted into an M2 half-track.

The completed model with passengers, towing a 57mm Anti-Tank gun.
The uniforms worn by US tank crews changed little between 1942 and 1945. The M-1938 tanker helmet was similar to those then worn by American footballers. From the mid-1930s it became clear that tank crews should be issued with appropriate head protection against knocks and bangs from the inside the tank, especially when moving cross-country at speed. A patent for the helmet submitted on 1 May 1941 referred to it as the M-1938, pertaining to the year when the design developed.
The M-1938 tanker helmet was issued to all tank crews from 1942 onwards. It offered first-class protection and was comfortable to wear, and so was a popular item of kit. Even Military Police were seen wearing it while riding motorcycles. It has to be noted that this helmet was purely designed to protect the wearer from knocks and bumps, just like a motorcycle crash helmet, and it was not designed to protect from ballistics.
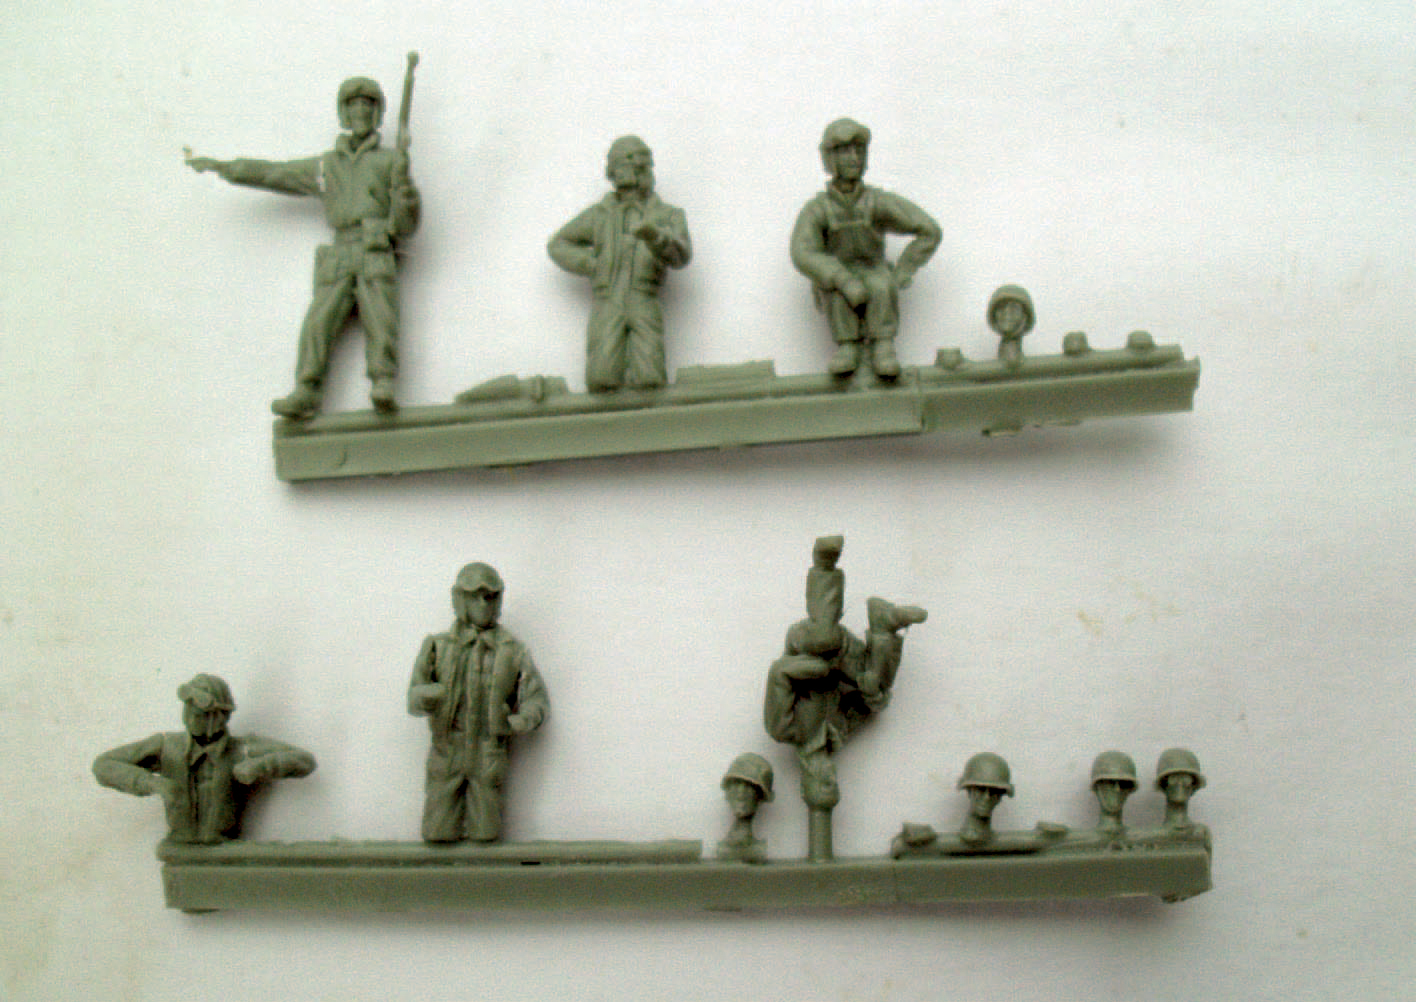
The Milicast set has a good variety of uniforms and the figures look relaxed. One crewman even has a Thompson sub-machine gun.
Just like the infantry, tank crews wore a mix of M-1941 jackets, HBT overalls and standard boots. In winter and cold climates, crews also wore winter combat trousers, which came up to the chest.
These figures are from one of the sets offered by Milicast in 1:76 scale and they depict the style of dress worn by tank crews from 1942 to 1945. The set is cast in high-quality resin, designed to complement the various US armour kits in the Milicast range.
Step 1. Prepare the figures for painting by cleaning away any mould lines and flash with a file and sharp knife. Then mount them on a piece of card or similar with the aid of glue. In this example, the figures are on sprues and will be painted in situ. First paint with black primer and leave to dry (about an hour in a warm room).
Step 2. Start by applying a base coat of AK3071 ‘Dark Olive Green/M-43 Uniform Green Olive’. Even though this colour is intended for a later uniform, it will be fine for the HBT overalls worn by tank crews. Then add some white and use the mixture to apply highlights. Paint the M-1941 jackets with AK3075 ‘US Field Drab’. Add the base colour ‘Red Brown’ for the areas of flesh.
Step 3. Add white paint to the colours used in step 2 and add highlights to the painted areas. Then paint the areas of flesh using the technique described in Chapter 3. Now paint the belts with AK3074 ‘Brown Olive Drab’ and highlight as before: this colour works very well when painting US Army webbing. The M-1938 helmet is also painted with ‘Brown Olive Drab’ and highlighted as for the uniform. The helmet had leather edges on the ear flaps, so paint these as well.
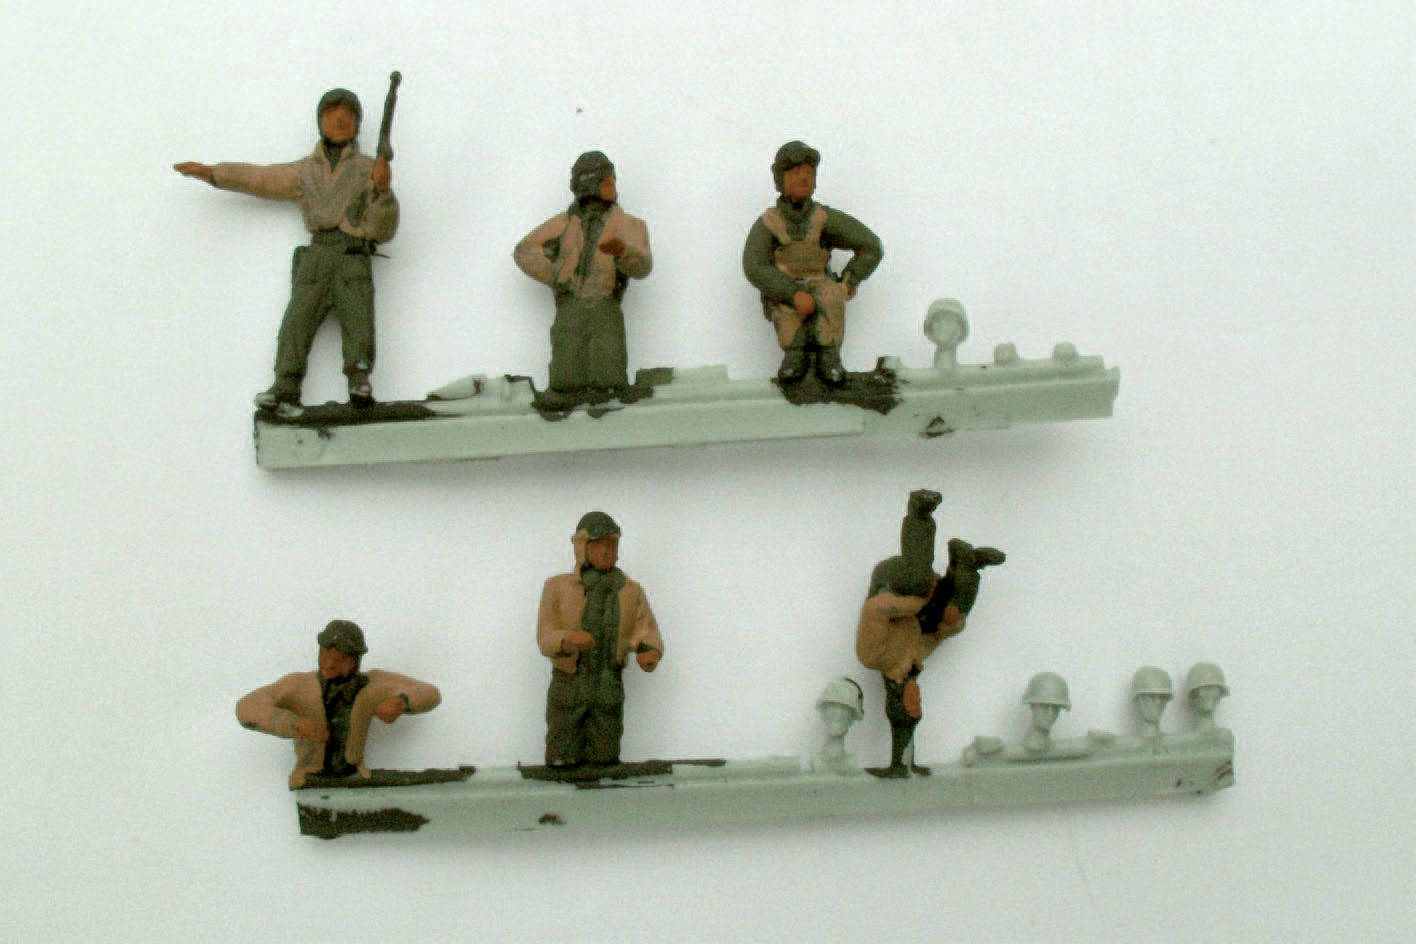
The base colours of the uniforms applied.

The base colours of the jackets and overalls have been highlighted.
Step 4. Next, paint the boots, goggles and holsters – tank crewmen were issued with hand guns – using a very dark grey. Paint the goggles’ strap with Vallejo 924 ‘Russian Uniform’ and edge the goggles with this colour too. With a fine brush paint the goggles’ lens in gunmetal. Finally, apply a dark brown diluted wash and leave to dry before applying two coats of matt varnish.
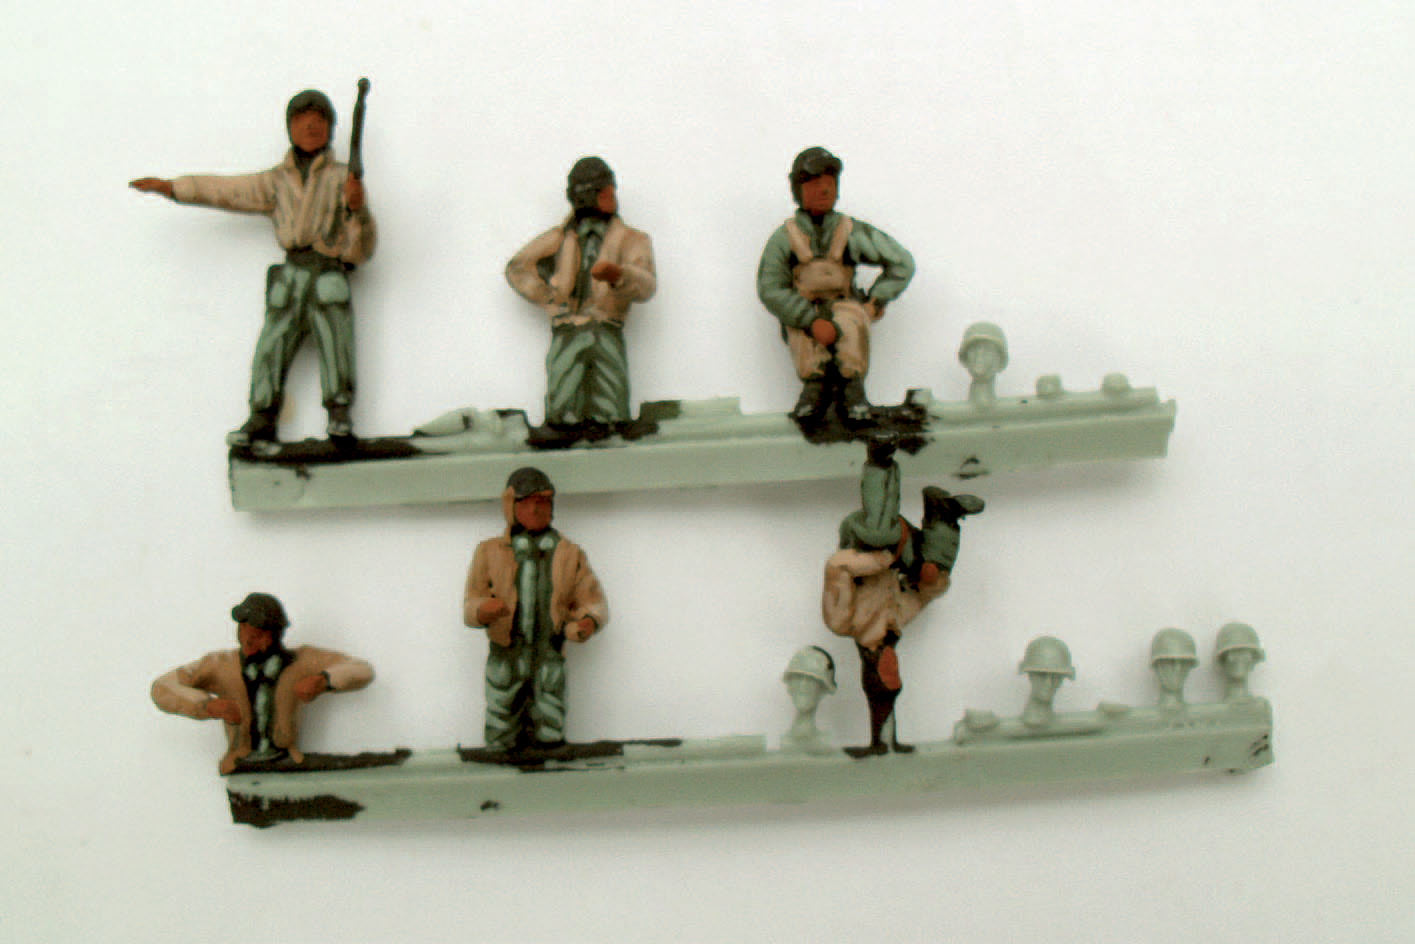
Further details have been added.
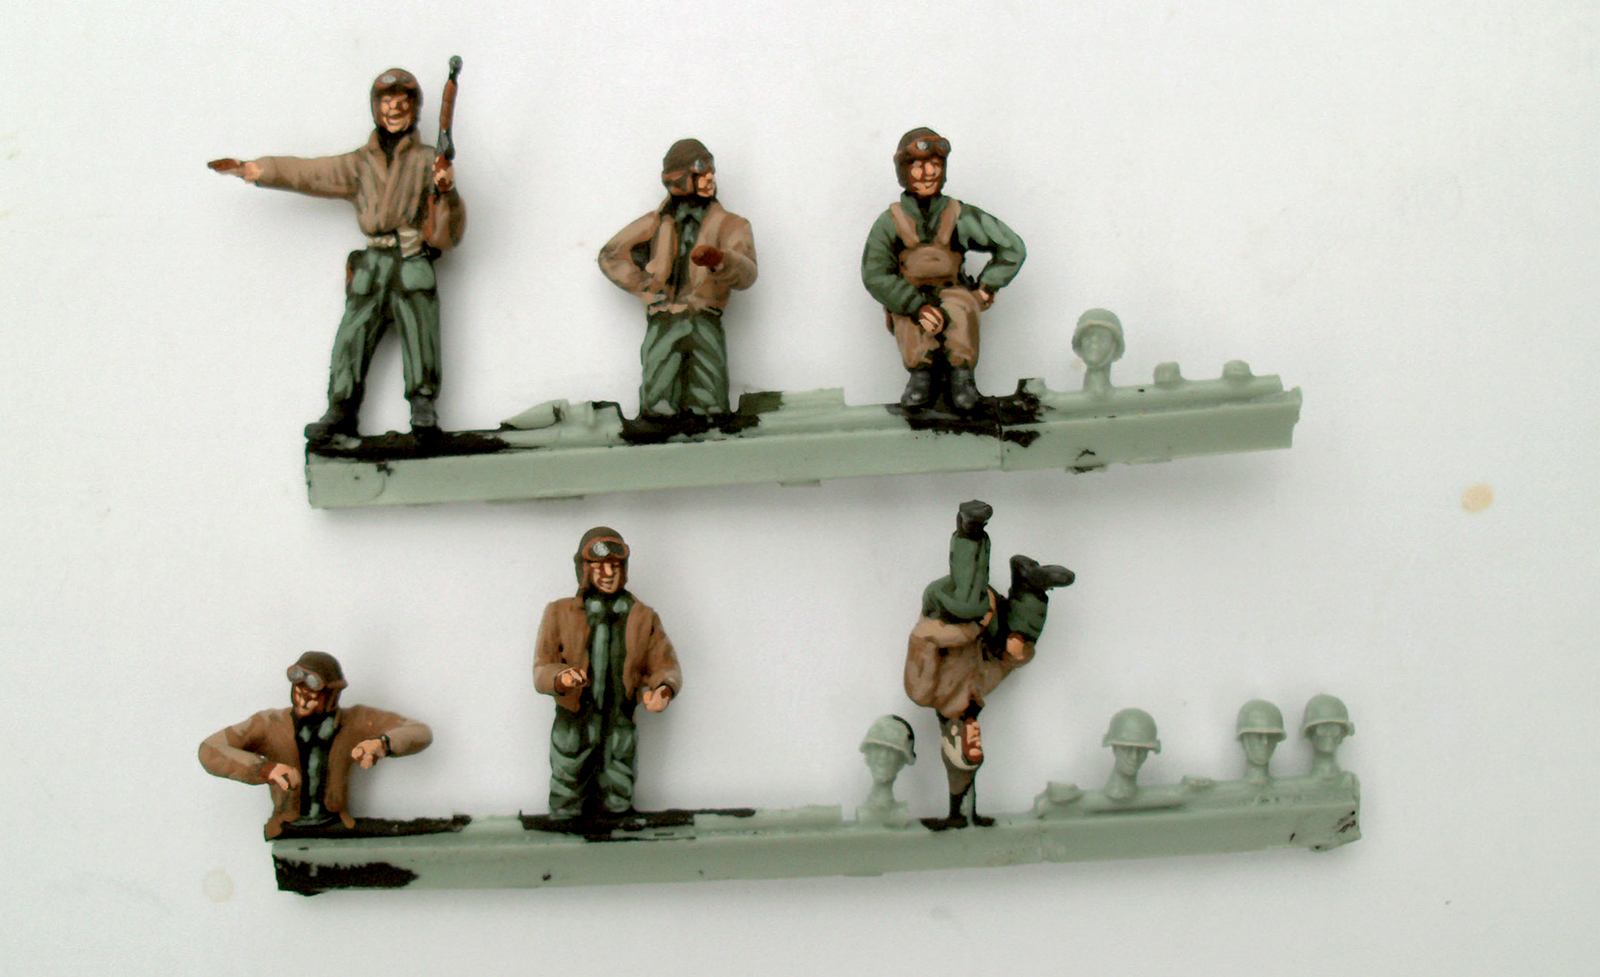
The completed figures prior to construction.