This panel is mostly about how things look on the screen: windows, menus, buttons, scroll bars, and fonts. (It used to be called Appearance, but General is more like—yes, you guessed it—the iPhone and the iPad.)
These pop-up menus let you crank up or tone down macOS’s overall colorfulness:
Appearance. Choose between Blue and Graphite. Blue refers to macOS’s factory setting—bright, candy-colored progress bars,
 menu, and pulsing OK buttons—and those shiny red, yellow, and green buttons in the corner of every window. If you, like some graphics professionals, find all this circus-poster coloring a bit distracting, then choose Graphite, which renders all those interface elements in various shades of gray.
Use dark menu bar and Dock. When you turn this checkbox on, the backgrounds of your menu bar and Dock turn dark gray. Here again, Apple probably had visual artists in mind with this feature—but it looks cool and calming no matter who you are.
Automatically hide and show the menu bar. This checkbox has nothing to do with colors, of course. But it can make a big difference on a small screen (this means you, laptoppers).
When it’s turned on, your menu bar disappears (including the menu-bar clock and other menulets). It reappears only as needed—when you move your cursor to the top of the screen.
Highlight color. When you drag your cursor across text, its background changes color to indicate that you’ve selected it. Which color the background becomes is up to you; choose a shade from the pop-up menu. The Highlight color also affects such subtleties as the lines on the inside of a window as you drag an icon into it.
If you choose Other, the Color Picker palette appears, from which you can choose any color your Mac is capable of displaying.
This pop-up menu controls the size of the icons in the Sidebar (Disk icons on the desktop), as you’d expect. But you might not guess that it also controls the type size of those icons. And you’d definitely not guess that it simultaneously adjusts the size and type of the mailbox icons in the Mail program.
These options control the scroll bars of all your windows—including the controversial removal of scroll bars.
Show scroll bars. If you choose “Automatically based on mouse or trackpad,” then whether the scroll bars appear or not depends on what you have plugged in.
If you have a trackpad or a Magic Mouse, for example, Apple assumes that you’ll scroll by dragging your fingers—so you won’t be needing the scroll bars at the edges of the windows. Therefore, the scroll bars appear only when you’re actually scrolling (and then only to show you where you are in the window).
But if you have no way of using touch gestures—for example, if you have a regular mouse or the Apple Mouse—then scroll bars are always visible, so you don’t freak out.
“When scrolling” means that the scroll bars pop into view during the actual scroll, when your mouse or fingers-on-trackpad are actually in motion. And Always, of course, means that the scroll bars never disappear.
Click in the scroll bar to. For details on “Jump to the next page” and “Jump to the spot that’s clicked,” see the box in Old Finder Mode.
When you click a link in, for example, an email message—or on Twitter or Facebook—which web browser should open? Safari? Chrome? Firefox? Here’s where you decide.
This option is for people who liked the old “Save changes before closing?” message that appears when you close a document—instead of the Auto Save feature (Auto Save and Versions). If you turn this item on, Auto Save will still be there in case your program crashes, for example. But when you close that document or its program, you’ll be asked whether or not you want to preserve the changes you’ve made since your last manual Save. Auto Save programs like Pages and TextEdit, in other words, will work just like they used to—and the way all other programs do.
Here it is: the master on/off switch for the macOS feature responsible for reopening your last-used documents and windows each time you open a window.
Usually, the auto-reopening feature saves you time and helps you resume your mental flow. But if you find it disturbing (or if you’re worried about someone else discovering what you’re up to), then turn on this checkbox.
Just how many of your recently opened documents, networked servers, and programs do you want the Mac to show using the Recent Items command in the menu? Pick a number from the pop-up menus.
You know that fantastic synergy you gain if you own both an iPhone and a Mac—the features described starting in Figure 9-5? This is the master on/off switch.
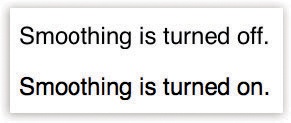
The Mac’s built-in text-smoothing (antialiasing) feature is supposed to produce smoother, more commercial-looking text anywhere it appears on your Mac: in word-processing documents, email messages, web pages, and so on (Figure 10-17).