Once you’ve set up more than one account, the screen shown in Figure 13-1 appears whenever you turn on the Mac, whenever you choose  →Log Out, or whenever the Mac logs you out automatically. But a few extra controls let you, an administrator, set up either more or less security at the Login screen—or, put another way, build in less or more convenience.
Open System Preferences, click Users & Groups, click the  , enter an admin password to prove your worthiness, and then click the Login Options button (Figure 13-9). Here are some of the ways you can shape the login experience for greater security (or greater convenience):
Automatic login. This option eliminates the need to sign in at all. It’s a timesaving, hassle-free arrangement if only one person uses the Mac, or uses it most of the time.
When you choose an account holder’s name from this pop-up menu, you’re prompted for his password. Type it and click OK.
From now on, the screen shown in Figure 13-1 won’t appear at all at startup time. After turning on the machine, you, the specified account holder, zoom straight to your desktop.
Of course, everybody else must still enter their names and passwords. (And how can they, since the Mac rushes right into the Automatic person’s account at startup time? Answer: The Automatic thing happens only at startup. The usual Login screen appears whenever the current account holder logs out—by choosing
 →Log Out, for example.)
Display login window as. Under normal circumstances, the Login screen presents a list of account holders when you power up the Mac, as shown in Figure 13-1. That’s the “List of users” option in action.
If you’re especially worried about security, however, you might not want even that list to appear. If you turn on “Name and password” (Figure 13-9), then each person who signs in must type both his name (into a blank that appears) and his password—a very inconvenient, but more secure, arrangement.
Figure 13-9. These options make it easier or harder for people to sign in, offering various degrees of security. By the way: Turning on “Name and password” also lets you sign in as >console, an advanced geeky troubleshooting technique. It’s also one way to sign in with the root account, if you’re Unixy enough to know what that is.
Show the Sleep, Restart, and Shut Down buttons. Truth is, the macOS security system is easy to circumvent. Devoted evildoers can bypass the standard Login screen in a number of different ways: restart in FireWire disk mode, restart at the Unix Terminal, and so on. Suddenly, these no-goodniks have full access to every document on the machine, blowing right past all the safeguards you’ve so carefully established.
One way to thwart them is to use FileVault (Tip). Another is to turn off this checkbox. Now there’s no Restart or Shut Down button to tempt mischief-makers. That’s plenty of protection in most homes, schools, and workplaces; after all, Mac people tend to be nice people.
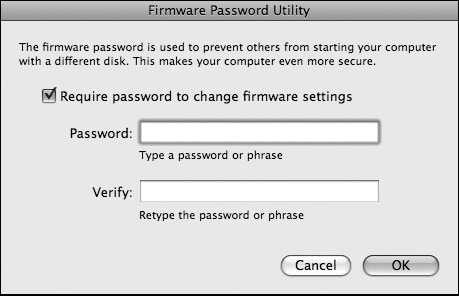
But if you worry that somebody with a pronounced mean streak might restart simply by pulling the plug, then either use FileVault or set the firmware password, as described in the box below.
Show Input menu in login window. If the Input menu is available at login time, it means that people who use non-U.S. keyboard layouts and alphabets can use the login features without having to pretend to be American. (You can’t use fancy non-Roman alphabets like Japanese or Russian for your password. But at least this option will let you enter your full name in the language of your choice. Greetings, Mr. Bond-san.)
Show password hints. MacOS is kind enough to display your password hint (“Middle name of the first person who ever kissed me”) after you’ve typed your password wrong three times when trying to log in. This option lets you turn off that feature for an extra layer of security. The hint will never appear.
Show fast user switching menu as. The fast user switching feature lets you switch to another account without having to log out of the first one, as described in Figure 13-11.
If you do turn on fast user switching, a new menu appears at the upper-right corner of your screen, listing all the account holders on the machine. Thanks to this pop-up menu, you can now specify what that menu looks like. It can display the current account holder’s full name (Name), the short name (Short Name), or only a generic torso-silhouette icon (Icon) to save space on the menu bar.
Use VoiceOver in the login window. The VoiceOver feature (Figure 10-4) is all well and good if you’re blind. But how are you supposed to log in? Turn on this checkbox, and VoiceOver speaks the features on the Login panel, too.
Network Account Server. If you work in a company big enough to use Microsoft’s corporate server software (and rich enough to employ a hardworking network administrator), you might be told to click this button and enter a server address so that you’ll be able to access things like the company address book and calendar.
Tip
Actually, there’s one more, rather secret login option—and if you’re a laptop lugger, you might really like it. You can create a message that appears on the Login screen whenever you—or, rather, not you—turn on the computer. For example, it could be an “If found, contact…” message. Or a “$500 reward” message.
To set it up, open System Preferences→Security & Privacy→General. Click the  , authenticate yourself, and then turn on “Show a message when the screen is locked.” Click Set Lock Message, and then type your message. (Press Option-Return to create a new paragraph.) And hope whoever finds your laptop has a conscience.


