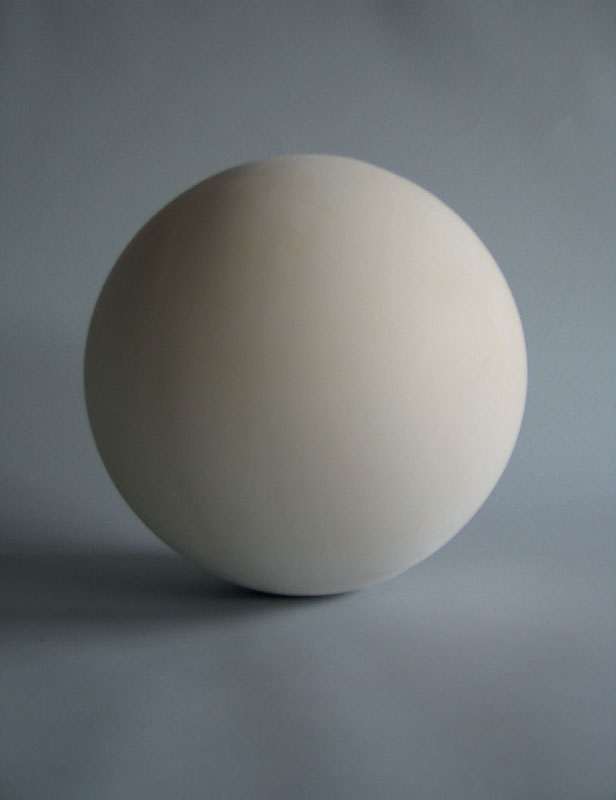
Multiple piece pigmented Alpha plaster sphere cast (700mm circumference).
Multiple piece pigmented Alpha plaster sphere cast (700mm circumference).
CHAPTER THIRTEEN
MULTIPLE-PIECE CASTING
Multiple-piece casting involves creating a cast from a multiple-piece mould. This is explained in principle in my first book, Mouldmaking and Casting, but it seems useful to explain and illustrate multiple-piece casting in a little more detail here. Although the principles of the process are not complex it can be tricky to execute with accuracy. Once understood in principle, the process is generic to most multiple-piece casting tasks.
Generally speaking a mould created in multiple pieces can be cast in three ways:
1. Solid Casting material is poured into a joined multiple-piece mould to create a solid casting.
2. Hollow slush cast (one-piece) Casting material is poured into a joined multiple-piece mould and slushed around the inside until set (see Chapter 12).
3. Hollow laminated (multiple-piece) Casting material is applied in layers to individual pieces of a multiple-piece mould and then joined together.
There may be a number of reasons why creating a multiple-piece cast by building up mould pieces individually would be preferable:
1. Economy of materials Casting solid will obviously use more casting material than hollow castings.
2. Scale For castings of a large size it may not physically be practical to cast solid or slush cast hollow.
3. Weight For castings of a large scale it may not physically be practical or desirable aesthetically to cast solid.
4. Mould access It may not be possible to cast a joined multiple-piece mould if there is inadequate access for applying the casting material. This would be the case, for instance, with a mould with a ‘footprint’ smaller than the body of the mould or where there is only a pouring hole as access. The mouldmaker needs to be able to access the inside of a mould physically in order to apply the casting material.
The project illustrated uses plaster but these principles could be applied to most casting materials and more complex multiple-piece castings.
PROJECT
Specification
An Alpha casting plaster and fibreglass laminated cast, slightly tinted with yellow earth pigment for demonstration, from a five-piece Jesmonite mould. Size: 300mm circumference.
Time Required
Approximately one and a half hours.
Materials
■ Spray wax release agent;
■ basic Alpha casting plaster (supplied by Alec Tiranti Ltd);
■ heavy fibreglass mat;
■ Yellow Ochre earth pigment; and
■ a small amount of grey clay.
Tools
■ A plaster mixing bowl;
■ a plastic jug;
■ a clay knife; and
■ a small sponge.
Method
The basic principles of multiple-piece casting involve the application of the casting material to an open multiple-piece mould. In terms of the seams, it is always easier to apply casting material to as few mould pieces as possible and subsequently to join the cast pieces together from inside the mould.
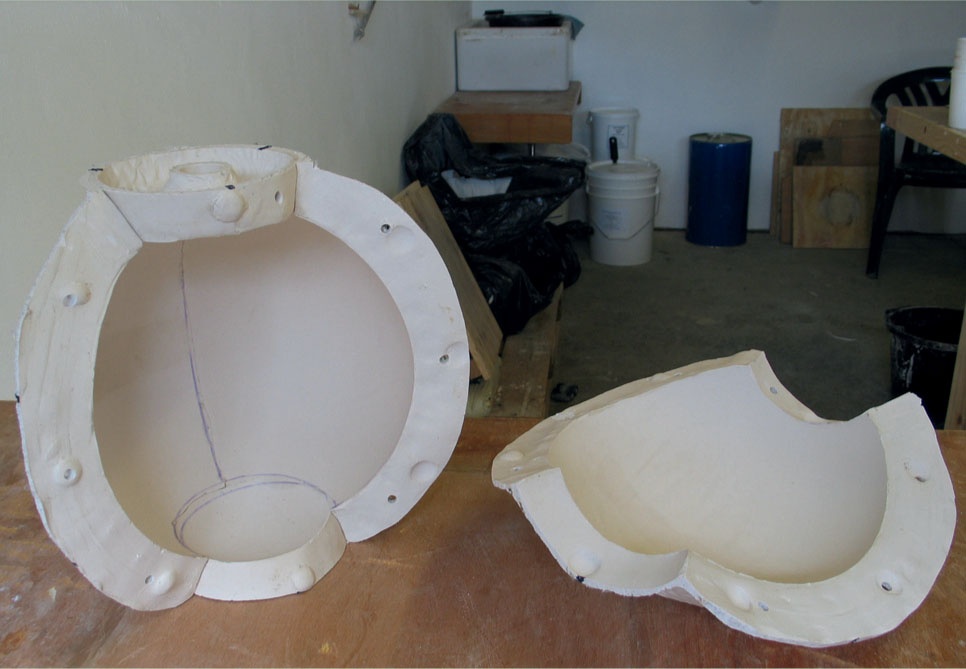
If the mould is in two pieces, casting material is applied to each piece separately. The mould pieces are then joined and the separately applied cast pieces are joined from inside the mould. Moulds that are in more than two pieces could be cast separately and joined in the same way – although it is obviously an advantage if you can join a cast in as few pieces as possible. For this reason you should join as many mould pieces as possible but still allow access to apply the casting material and then cast and join any remaining piece or pieces of the mould.
In the example illustrated a five-piece Jesmonite mould is used. It would be possible to apply casting material to each mould piece separately and then join all five pieces to be sealed together from inside. In this case, however, it is preferable to join four pieces of the mould and apply casting material to all four at the same time. The last mould piece is cast separately and then joined to the other four pieces in one operation. This effectively means that only two cast pieces need to be joined internally in the mould.
SET-UP AND PREPARATION
As with any project, careful preparation before the start of the job is crucial. Knowing the material quantities and tools needed, undertaking repairs to the original and setting-up the working area will all help to complete the job accurately and efficiently. (Tip: make sure you have enough materials to complete the job before you start. Running out of material halfway through the job is at least a waste of time and, at worst, a loss of previously executed work.)
1. Ensure all work surfaces are clean, clear and well lit. This may sound obvious, but preparation of this sort prior to casting will greatly help in production. It easy to miss parts of the mould surface in a badly lit work space.
2. Ensure all mould pieces are clean and dry.
3. Ensure all mould fastenings are present.
MOULD PREPARATION
1. Join and secure four pieces of the mould, allowing access from the missing single piece.
2. Apply release agent to the surfaces of the four joined mould pieces and the one separate mould piece.
3. Apply release agent to all exposed mould flanges. With any multiple-piece mould you should ensure that any casting material leakage from the seam to be joined internally does not stick the mould flanges together. Obviously the more accurately the mould is made the less seam leakage there will be, but it is better to err on the side of caution.
APPLICATION OF CASTING MATERIAL
For this project a cast is produced using Alpha casting plaster.
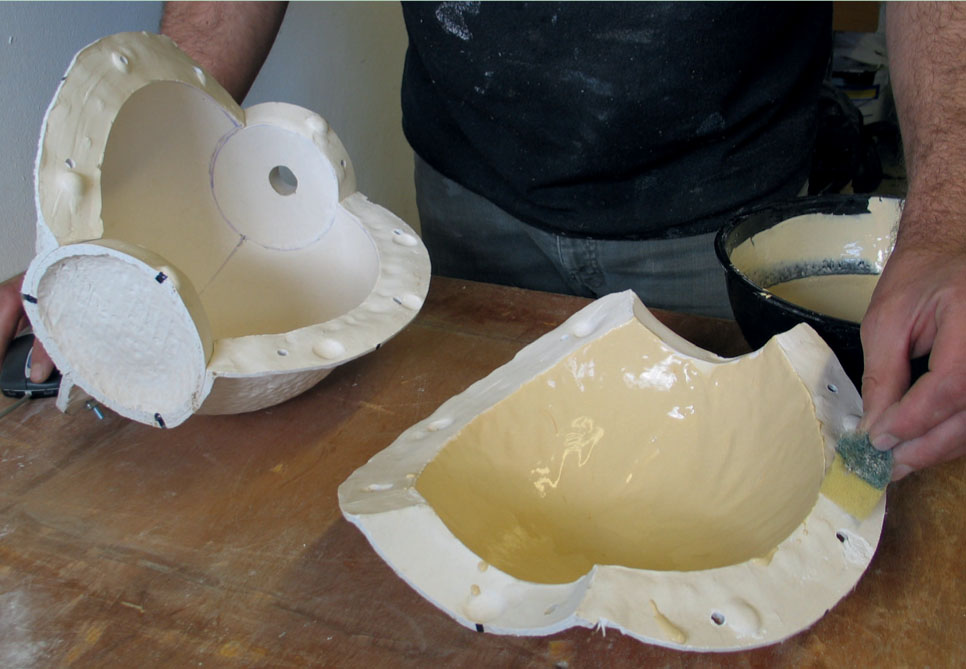
1. Apply a layer of plaster to the surfaces of the joined four mould pieces and the single separate piece.
2. Work right up to the edges of the mould pieces. Avoid getting any casting material on the exposed mould flanges. If necessary, clean off any casting material from the mould flanges.
3. Allow this layer to set before applying further layers.
4. Apply further layers to the required thickness as above.
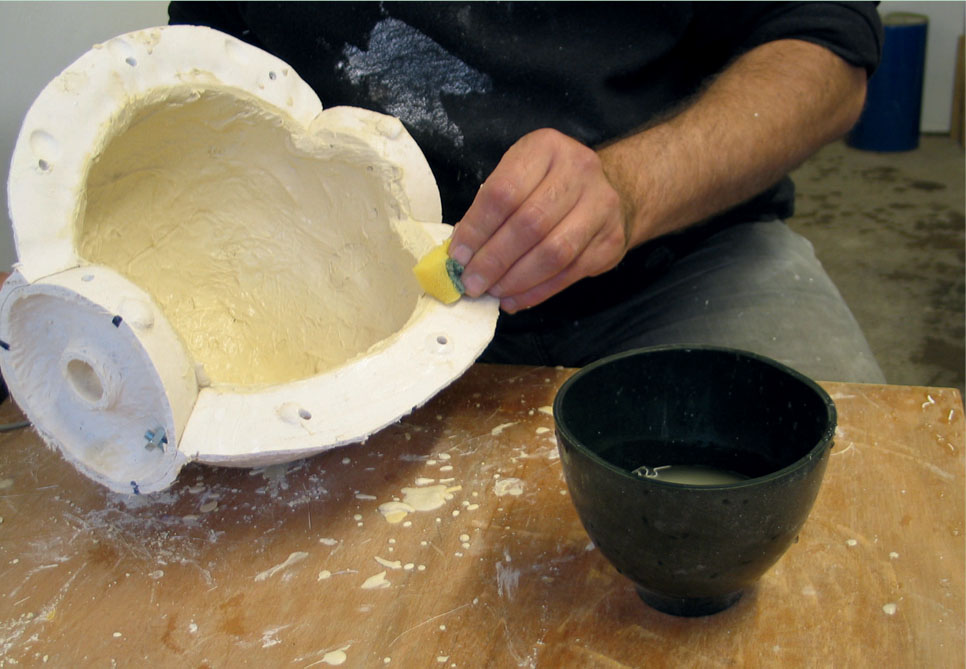
5. As the layers build up create a chamfered edge angled down from the mould edge. This can be done by running a finger or sponge around the mould edges. The casting material needs to be applied right up to the edges of the mould surfaces but then chamfered down to avoid excess casting material preventing accurate registration when joining the final mould piece.
6. Apply laminating material as necessary to achieve full cast thickness and strength.
7. Ensure that the pouring hole is kept clear as the layers are built up.
8. When the required thickness has been achieved allow the cast pieces to set but not dry out. The cast pieces need to be firm enough to move without breaking but wet enough to allow good adhesion when joining with more casting material.
Four pieces of the mould are securely joined, leaving one piece open.
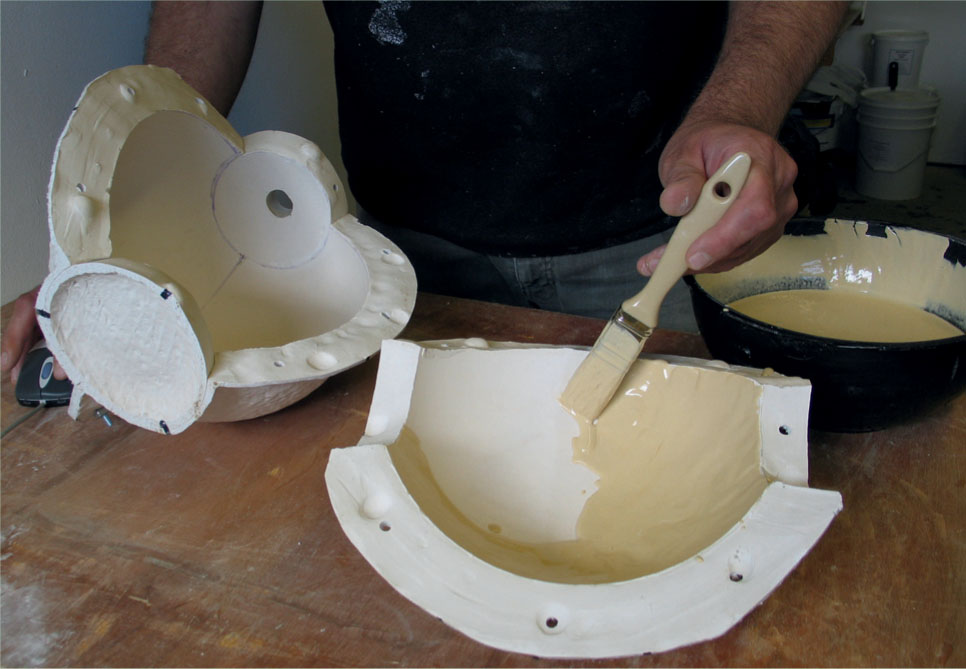
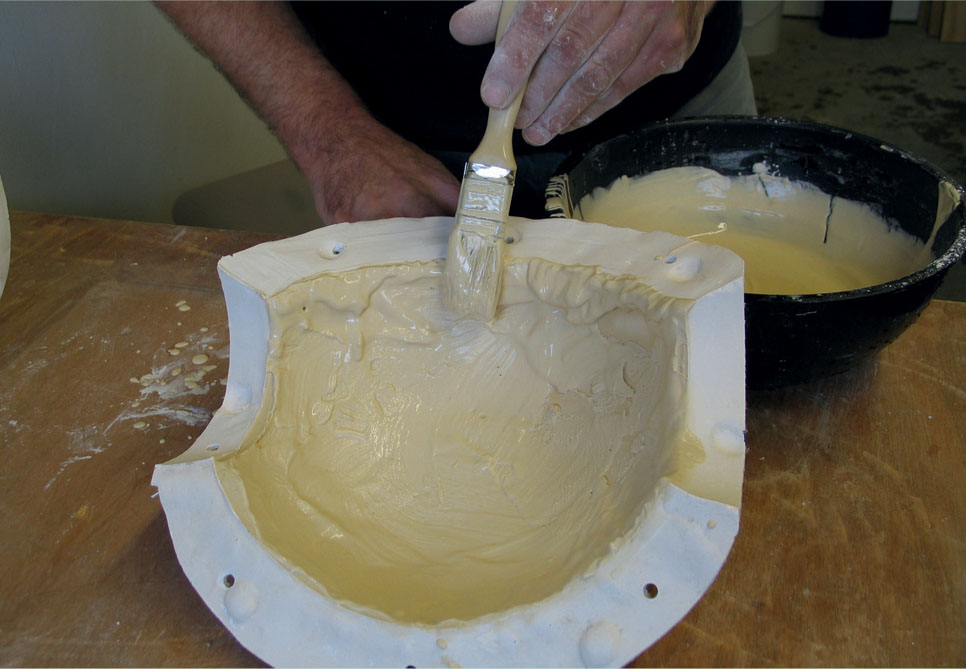
A first coat of plaster is applied to the single mould surface.
Mould flanges are cleaned of excess plaster.

A first coat of plaster is applied to the joined remaining mould pieces and allowed to set.
As the plaster is built up in lamination the edges of the cast are thickened.
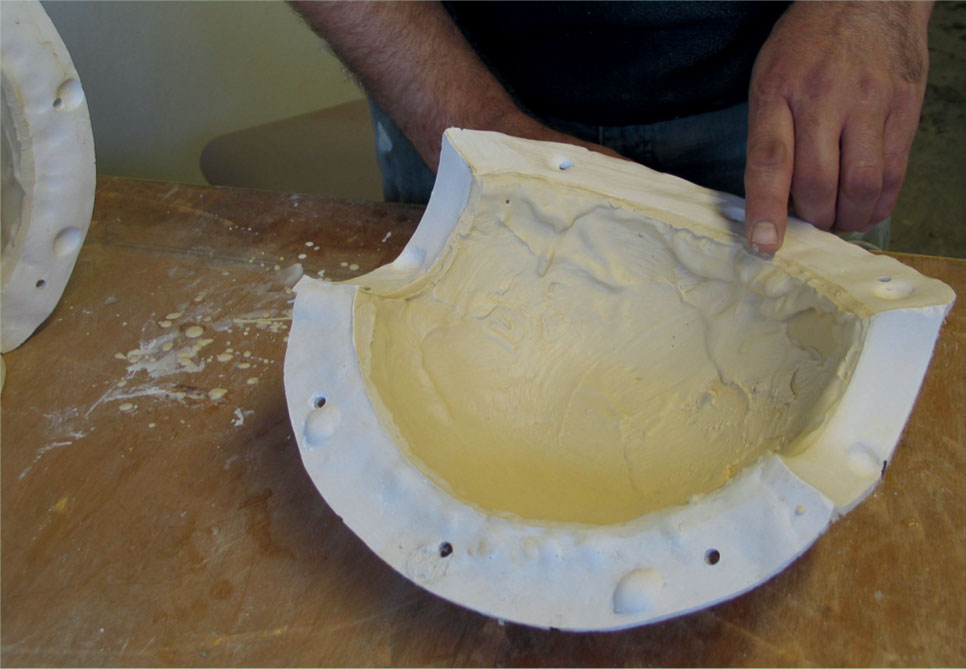
The cast piece edges are chamfered downward using a finger.
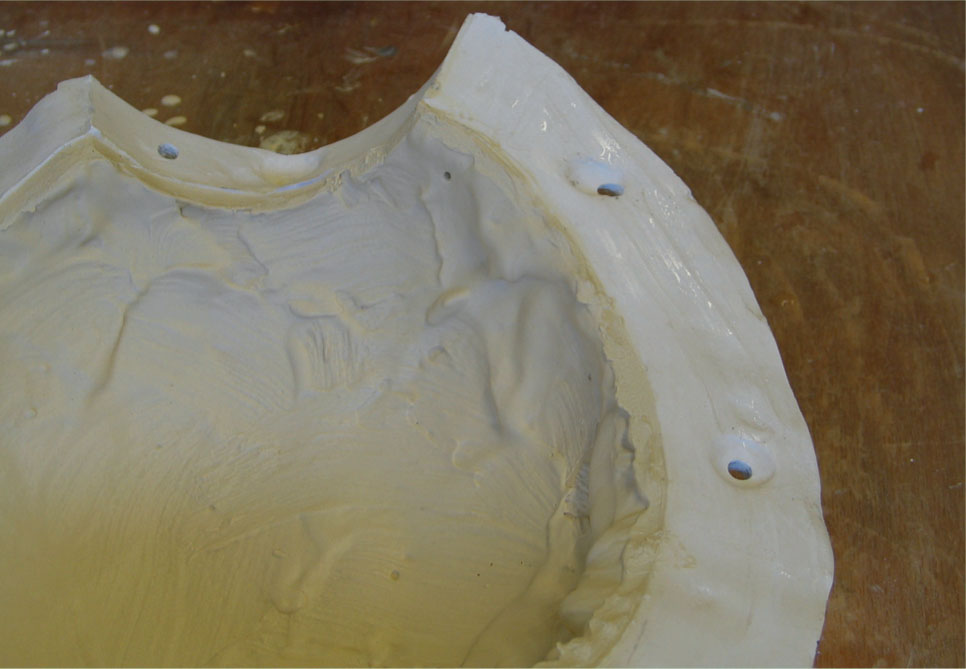
The chamfered edges of the cast pieces.
The mould is joined and secured.
Keep the mould flanges clean of any excess material.
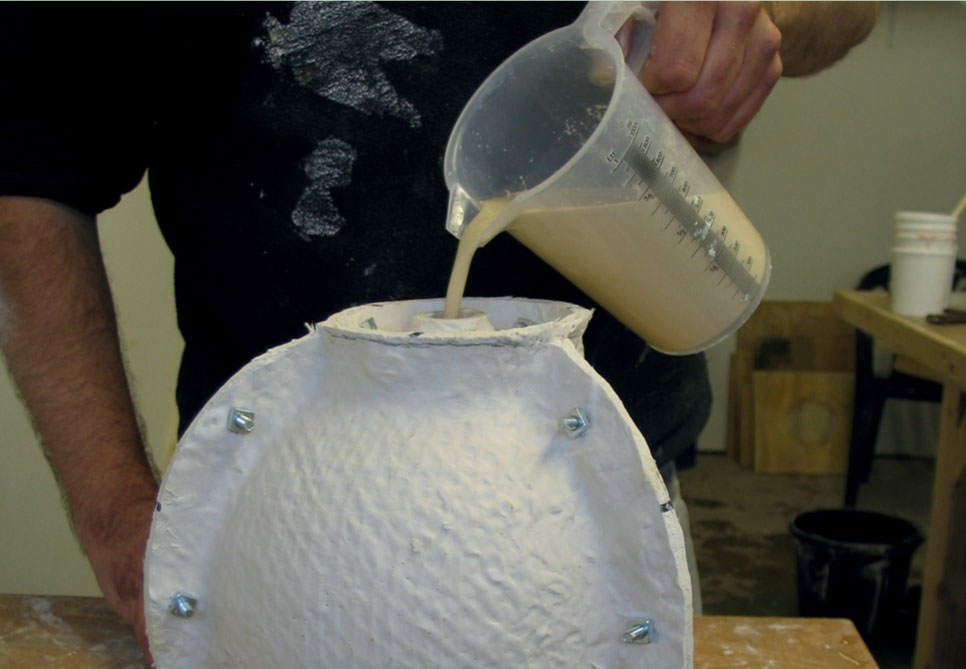
Plaster is poured into the mould via the pouring hole.
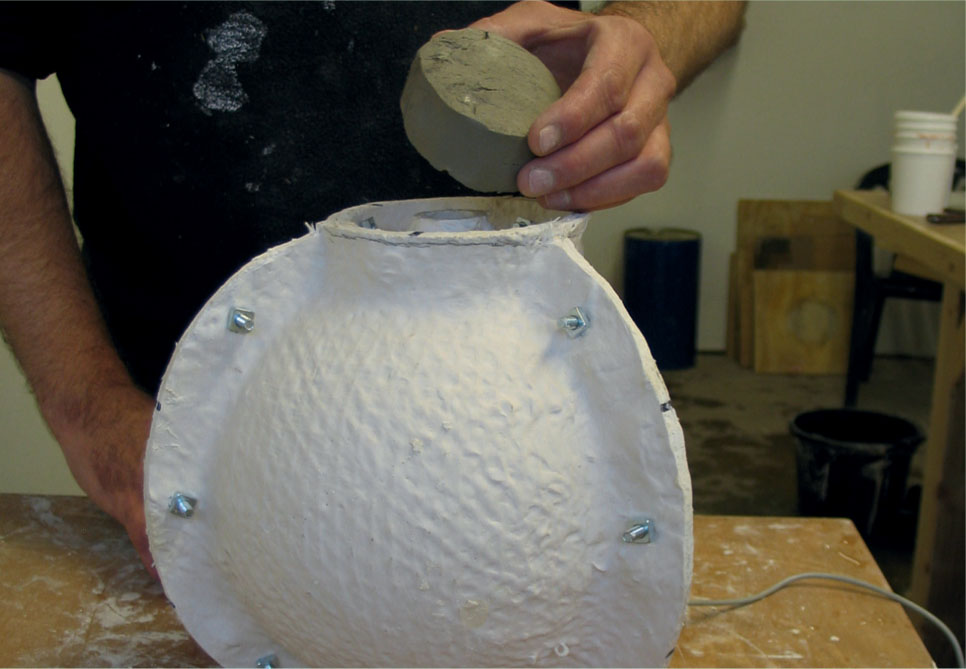
A pre-made bung is inserted to seal the pouring hole.

The mould is tilted at the seams to allow the plaster to cover them internally.
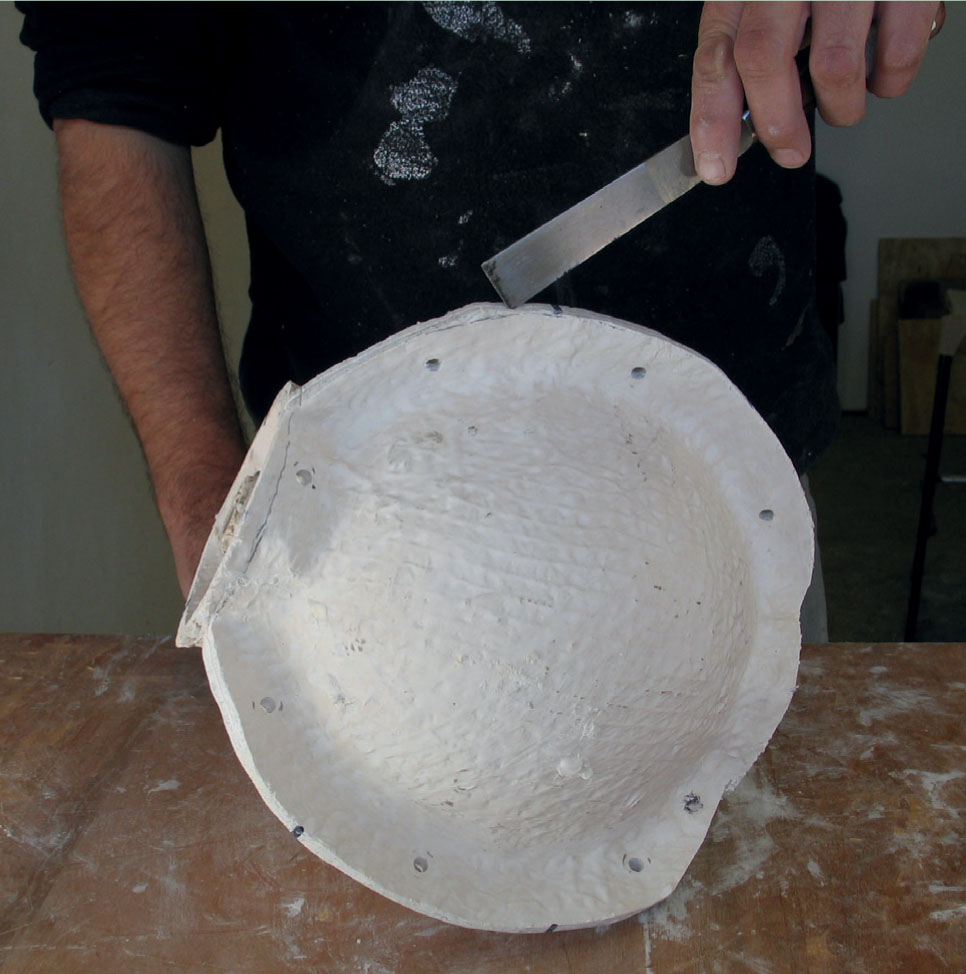
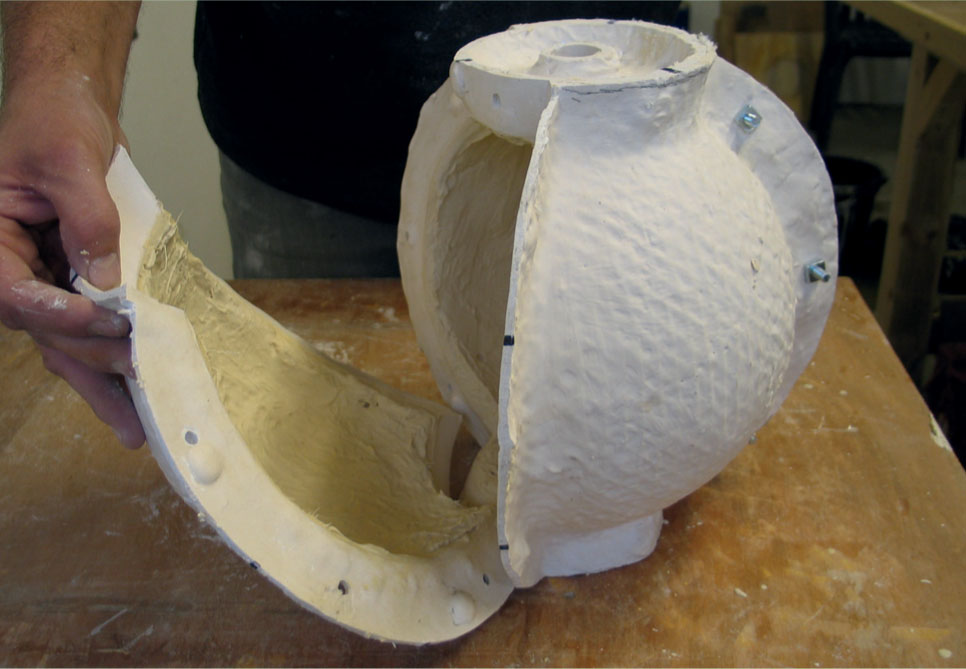
Once the cast has set the mould pieces are helped open with a knife.

The five mould pieces are carefully removed to demould the cast.
JOINING THE CAST PIECES
1. Ensure there is no excess cast material on the mould flanges and around the pouring hole.
2. Ensure the cast edges are chamfered down from the mould flanges.
3. Carefully join and secure the mould pieces containing the cast pieces.
4. Make a small batch of casting material and pour this into the joined mould via the pouring hole.
5. Seal the pouring hole with clay or a pre-made bung.
6. Rotate and tilt the mould to allow the casting material to cover the seam lines inside the mould. The chamfered edges of the casting will allow the casting material to cover and join the cast seams efficiently.
7. Rotate and tilt the mould until the casting ma terial has set.
8. Repeat this process several times to ensure a good deposit of casting material over the seam lines.
9. Allow the casting material to set fully before demoulding.