
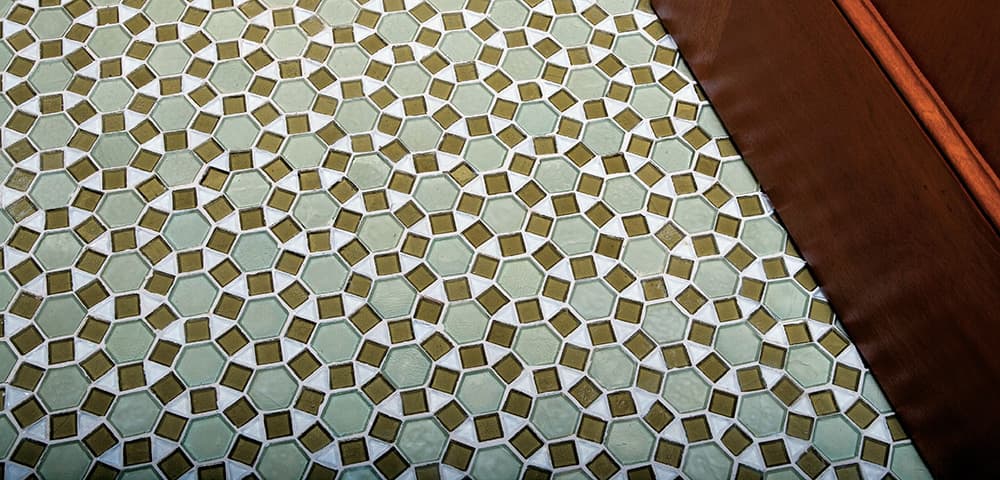
Tile Basics

Shopping for tile is both fun and daunting. The sheer number of options is enough to make anyone’s head spin. You can choose from glass, ceramic, or porcelain or select more exotic metal and wood tiles. And that’s just the materials. Surface appearances vary as well, from solid colors to amazingly complex patterns.
This section will help you sort through all those possibilities. The choices will naturally be narrowed depending on the surface you’re looking to tile. Beyond that, the final look you’re after will lead you to a small number of alternatives. Once you choose a material and a finish, it’s just a matter of settling on the right size, shape, and format. No matter which tiles you choose, it’s hard to go wrong—especially with the guidance you’ll find in the pages that follow.
Get your new tiles home and the materials and techniques you’ll use to install them are remarkably similar. All you have to do is master a few basics such as correctly cutting tile, and you ensure success no matter what tile you’re using or where you’re installing it. More particular skills related to individual materials, surfaces, or formats of tile are dealt with in projects featured later in the book.
In this chapter:
• Buying Tile & Tiling Materials

Floor Tile
Floor tile needs to be more than just attractive—it needs to be strong and durable as well. After all, floors bear the weight of furniture, foot traffic, and the sudden impact of everyone and everything that falls on them. Floor tile is engineered to tolerate these stresses. Most floor tile is also suitable for countertops. And although it’s generally thicker and heavier than wall tile, many styles of floor tile can be used on walls. The trim pieces necessary for counters and walls aren’t always available, though, which may limit your options.
When shopping for tile, look for ratings by the American National Standards Institute or the Porcelain Enamel Institute (see below). If ratings aren’t available, check with your dealer to make sure the tile you’re considering is suitable for your project.
Before you start shopping, consider where the tile will be used and what you want it to accomplish. Will it be exposed to moisture? Should it be a focal point or a subtle background? Do you want the floor to establish the room’s color scheme or blend into it? The range of options is truly mind-boggling, so establish some guidelines before you go shopping to simplify the selection process.
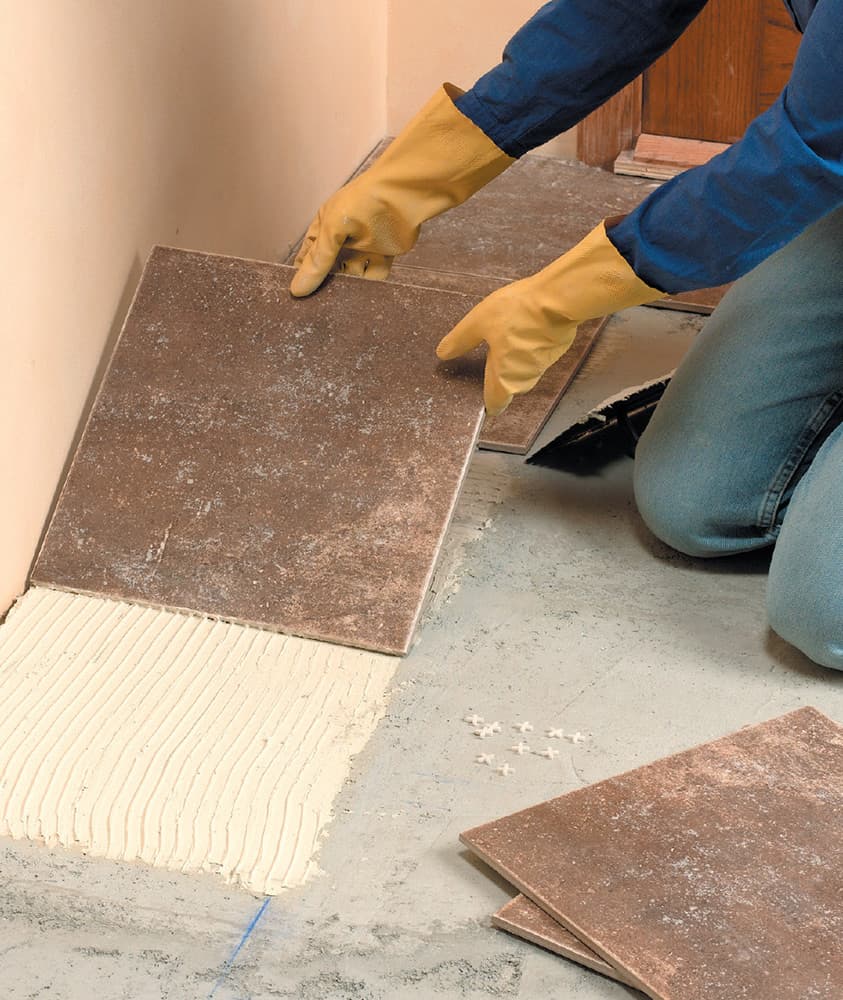
Floor tiles are thicker and almost always larger than wall tiles. Ceramic floor tiles are usually between 1/4 and 1/2" thick.
 FLOOR TILE RATINGS
Floor tile often comes labeled with water absorption and Porcelain Enamel Institute (PEI) ratings. Ratings indicate how a tile can be used and whether or not it needs to be sealed against moisture. Absorption is a concern because tile that soaks up water is susceptible to mildew and mold and can be difficult to clean. Tile is rated non-vitreous, semi-vitreous, vitreous, or impervious, in increasing order of water resistance. Non-vitreous tile is quite porous; semi-vitreous is used in dry-to-occasionally-wet locations; vitreous tile can be used without regard to its exposure to moisture. Impervious tile is generally reserved for restaurants, hospitals, and commercial applications where sanitation is a special concern.
The PEI number is a wear rating that indicates how the tile should be used. Ratings of 1 and 2 indicate tile is suitable for walls only; tile rated 3 and 4 is suitable for all residential applications—walls, counters, and floors. Most tile carries absorption and PEI ratings, but some, especially imported and art tiles, may not. Ask the retailer if you’re not sure.
Depending on the retailer, tile may also have other ratings. Some tile is graded 1 to 3 for the quality of manufacturing. Grade 1 indicates standard grade; 2 indicates minor glaze and size flaws; 3 indicates major flaws; use for decoration only. Tile suitable for outdoor use is sometimes rated with regard to its resistance to frost. Finally, coefficient of friction numbers may be included with some tile. The higher the coefficient, the more slip resistant the tile. A dry coefficient of .6 is the minimum standard established by the Americans with Disabilities Act.
Wall Tile
Wall tile, unlike floor tile, doesn’t have the burden of bearing weight or withstanding heavy traffic, so it can be thinner, have finer finishes, and, in some cases, be less expensive. Wall tile layouts tend to have more exposed edges, so manufacturers often offer matching trim and border pieces with finished edges. Wall tile is generally self spacing—individual tiles have small flanges on each edge to help keep the spacing even. You can use floor tile on walls, but since it is heavier, it tends to slide down during installation. Using battens while installing can help solve this problem. Fewer styles of matching trim tile are available for floor tile, which may make it difficult to conceal unfinished edges.
Wall tile should not be used on floors or countertops, however, because it will not stand up to much weight or sudden impacts. If you have concerns about a tile’s suitability for your application, ask your retailer or look for ratings by the American National Standards Institute or the Porcelain Enamel Institute. Wall tile can be a fairly inconspicuous wall covering or, if used in an elaborate design, can become the focal point of a room. As with floor tiles, there are styles for every effect from subtle to bold, so envision the effect you want before you head to the tile store or home improvement center.
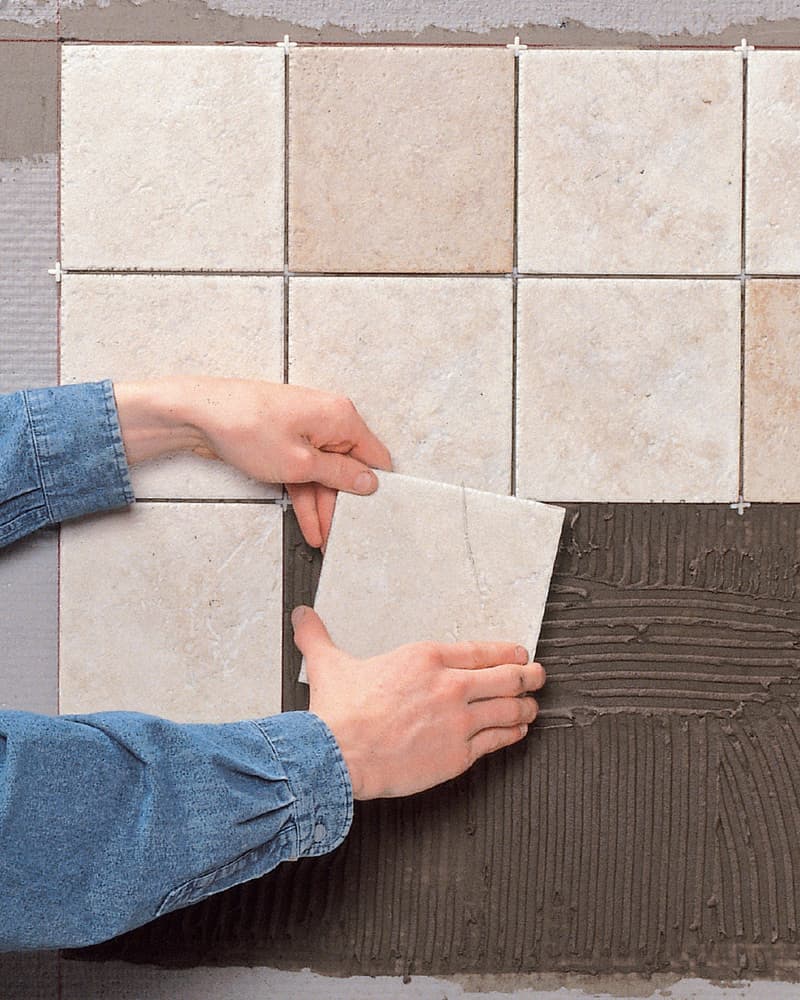
Wall tiles are usually less than 1/4" thick and no larger than 6 × 6", with 4 × 4" tiles the most common. Lightweight tiles are less likely to sag during installation.
WALL TILE RATINGS
Most tile intended for walls comes labeled with a water absorption rating. As with floor tile, absorbent wall tile will be susceptible to mildew and mold and be difficult to clean. Tiles are rated non-vitreous, semi-vitreous, vitreous, and impervious, in increasing order of water resistance. Practically speaking, these ratings tell you whether your tile may require sealant or if it can be left as is. Non-vitreous and semi-vitreous do absorb noticeable amounts of water and may need to be sealed in damp rooms such as bathrooms. Sealant can alter a tile’s appearance, so test before you buy.
There are a few other ratings to consider when purchasing wall tile. Depending on where you buy tile, it may be graded from 1 to 3 for the quality of manufacturing. Grade 1 indicates standard grade, suitable for all installations. Grade 2 indicates minor glaze and size flaws, but the tile is structurally standard. Grade 3 tiles may be slightly irregular in shape and are decorative, suitable only for walls. Tiles with manufacturing irregularities may be more difficult to lay out and install precisely. If you live in a freeze zone and are looking for tile for outdoor walls, you’ll also want tile rated resistant to frost. If the frost-resistance rating is not on the package, the retailer should be able to tell you. Some colored tile may come with a graphic to indicate the degree of color variation from tile to tile—in most cases it will vary somewhat.
Types of Tile
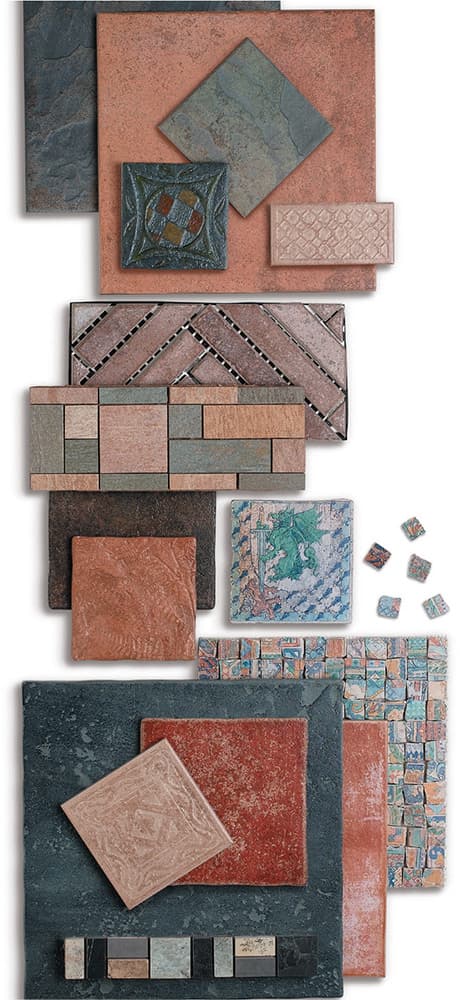
Porcelain tile is produced by pressing refined clay into shape and then firing it in a kiln at very high temperatures. The resulting tile is extremely hard, absorbs very little or no water, and doesn’t stain or mildew. Porcelain tile is manufactured in all shapes and sizes, and, because its white base color accepts dye beautifully, a virtually unlimited range of colors and finishes are available. Tile makers can also imprint textures when the tile is pressed to create a slip-resistant surface well suited for floors in wet locations. Porcelain tile is colored by mixing dye into the clay rather than applying it in a glaze, which means the color extends through the full thickness of the tile. Because of this process, tile makers can press finer, more intricate textures and patterns into the tile. Porcelain tile can even be pressed so that it’s nearly indistinguishable from cut stone or wood, which tends to be more expensive but less durable. For ease of care, porcelain is hard to beat. Its smooth finish and imperviousness to moisture keep soil and stains from setting in, making it easy to maintain.
Glazed ceramic tile is made from clay pressed into a shape by a machine, glazed, and then fired in a kiln. The glaze, made up of a number of glass and metal elements, provides color and creates a hard, shiny surface. To make floor tile slip-resistant, the surface can be textured, given a slightly raised design, or the glaze itself may include materials added to create a non-skid surface. Glazed tile generally absorbs very little or no water, making it both easy to maintain and mildew resistant. If the glaze is hard and scratch-resistant and the tile is properly installed and maintained, glazed ceramic tile can last for decades.
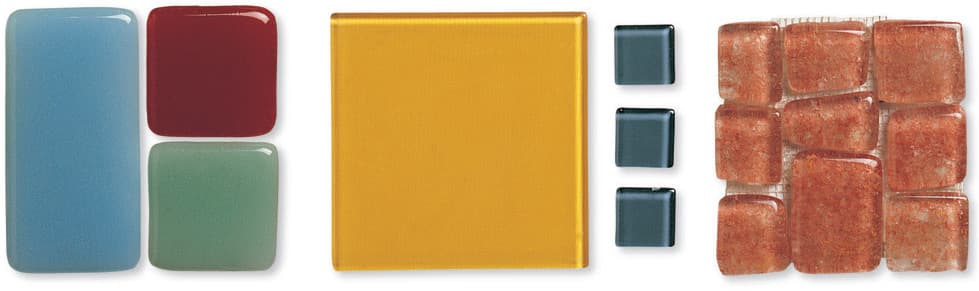
Glass tile is an especially interesting option for walls, although in some applications it can be used on floors as well. It is available in a variety of colors, degrees of translucency, shapes, and sizes. Because most glass tile is translucent to some degree, it’s important to use a white tile adhesive that won’t affect the appearance of the tiles once they are installed. Glass is impervious to moisture, but can be scratched and cracked, so it shouldn’t be installed where it will get hit by swinging doors or scratched by general traffic. See pages 24 to 25 to learn more about glass tile.
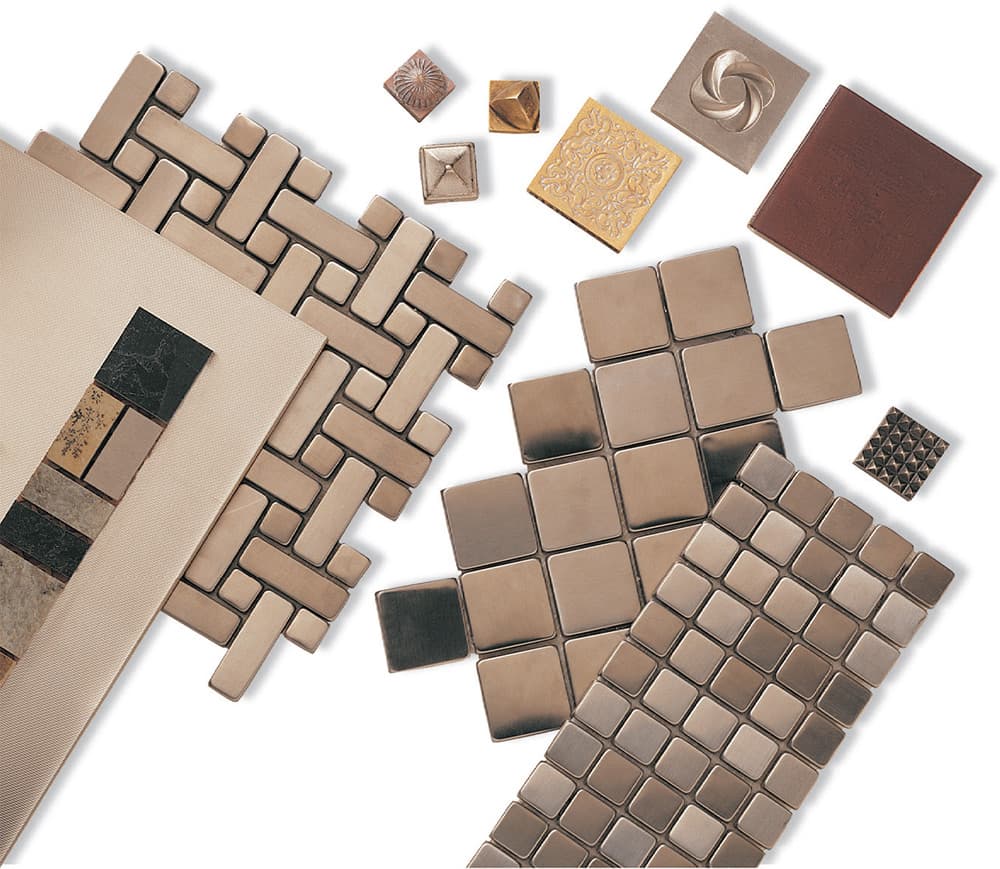
Metal and wood tiles are quite expensive per square foot, but adding just a few to an installation of glazed or porcelain tiles can have a big impact. Metal tiles are installed just like standard tiles, and they are available in shapes and thicknesses to work in most layouts. They are available with smooth finishes, polished or unpolished, and with embossed designs. Some metals may weather and discolor with time and exposure to moisture. Wood tiles are a new product that comes in different shapes and thicknesses and the same finishes and appearances as wood floors.

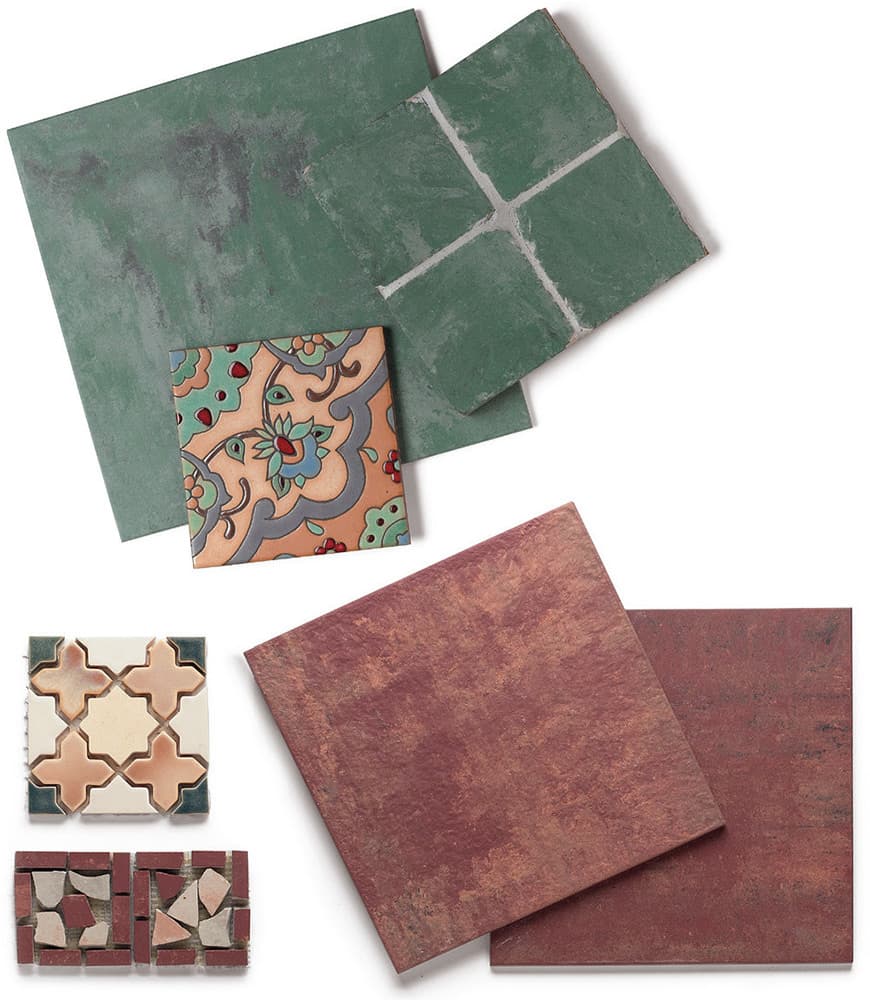
Natural stone tile is marble, granite, slate, and other more exotic stones cut very precisely into tiles of various sizes that can be installed just like manufactured tile. Because stone is a natural material, variations in color, texture, and markings must be expected. Manufacturers do offer stone tiles with some added finish. In addition to polished tile, suppliers offer a variety of distressed and textured finishes that can be very attractive as well as slip-resistant. With the exception of granite, natural stone tends to be quite porous and requires periodic sealing to prevent staining. Also, not all types are uniformly abrasion-resistant, so check before making a purchase. Some stone is so soft that it can be very easily scratched by normal use.
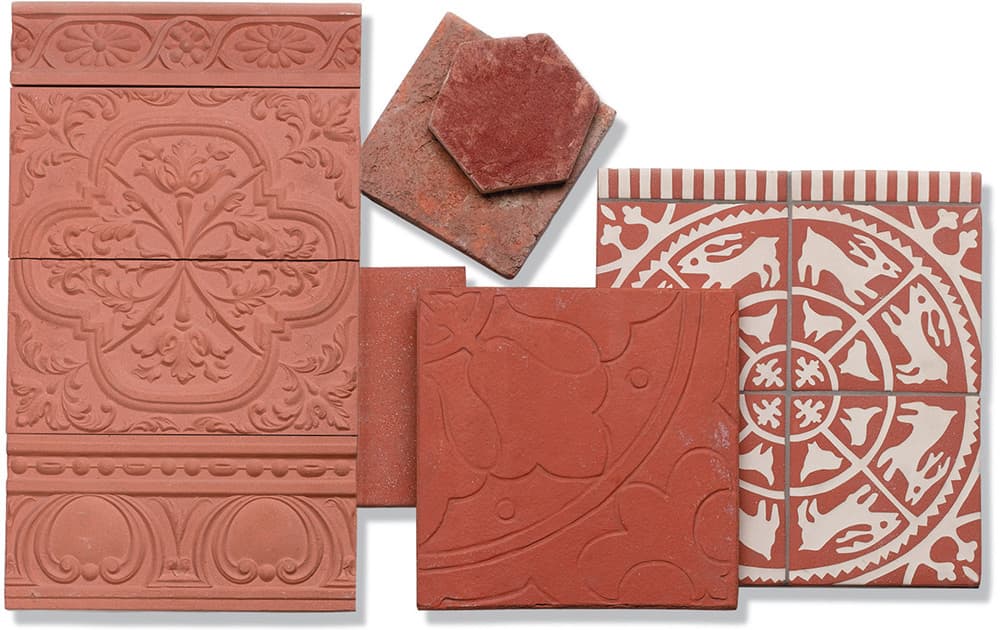
Terra-cotta tile evokes images of rustic patios in Mexico or perhaps sunny piazzas on the Mediterranean. These images are quite appropriate because terra-cotta tile originated in these regions. The tile is traditionally made by pressing unrefined clay into molds of various shapes and firing it (terra-cotta literally means “baked earth”). The color of the tile, from brown to red to yellow, is largely a result of the minerals unique to the local soil. Machine-made terra-cotta tile is regular in shape and can be laid like standard tile, but traditional terra-cotta, especially handmade Mexican saltillo tile, has irregularities and uneven shapes and thus requires more care during installation. The variability and rustic character of the tile make up much of its appeal—and terra-cotta can be quite slip-resistant. Unglazed terra-cotta, which is porous and absorbent, should be treated with sealant before being used in wet locations.

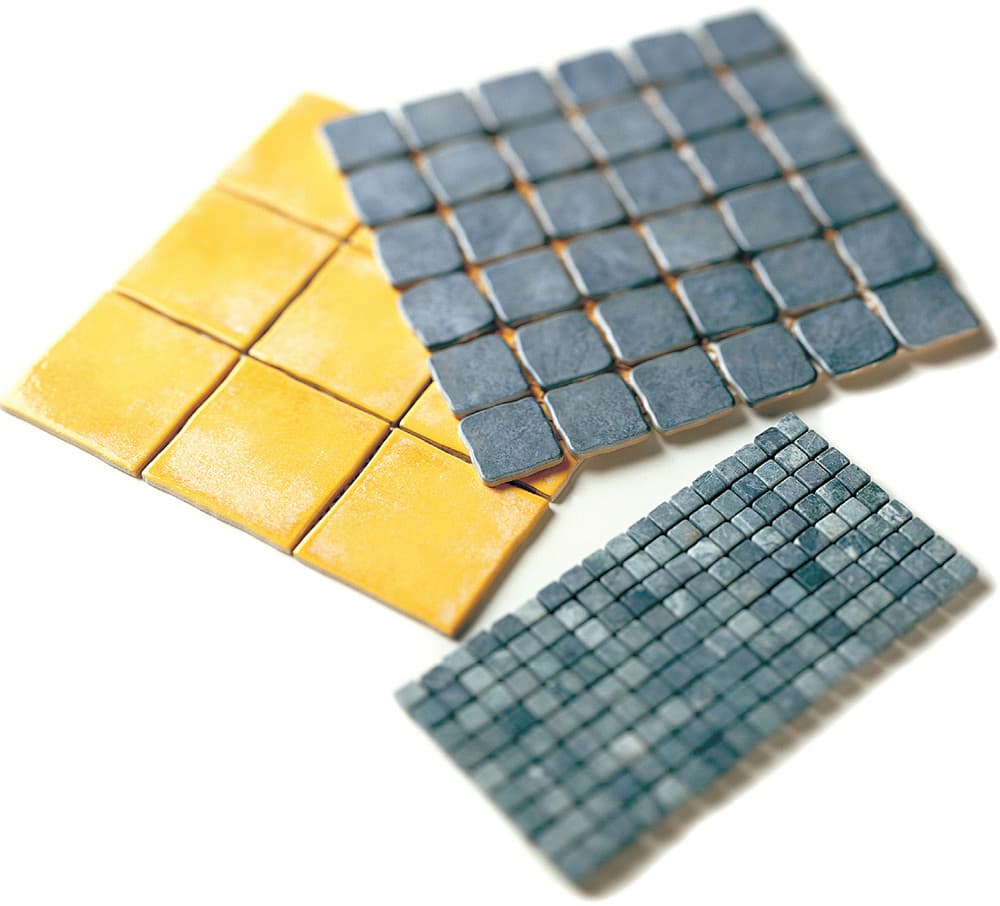
Mosaic tiles are ceramic, porcelain, terra-cotta, stone, or other tile cut into small pieces. Individual small tiles are often mounted on a mesh backing so that large squares of many tiles can be installed at once. These squares may be a solid color or contain a pattern or image. Individual mosaic tiles are also available for making custom accents and mosaics. Mosaic tile can be very low maintenance or it can require periodic application of sealant, depending on the material. Mosaic tile is generally quite slip-resistant because of the large number of grout lines in an installation.
Cement body tiles are actually shaped pieces of concrete. They can be made in nearly endless colors and textures because cement can be dyed, coated, and molded quite easily. They are, however, most often painted in bright and bold designs, a process that also seals the surface. They can even be finished to take on the appearance of marble or other stone. Cement tile can also be pressed with pronounced raised or relief designs. Cement tile is an economical choice both for its low cost and great durability, but there are several factors to keep in mind. Unfinished cement tile is highly porous and stains very easily. Some cement tile is unsuitable for outdoor installations, as it may crack if it freezes. Cement tile should be treated periodically with a sealant to preserve its appearance and prevent mildew.
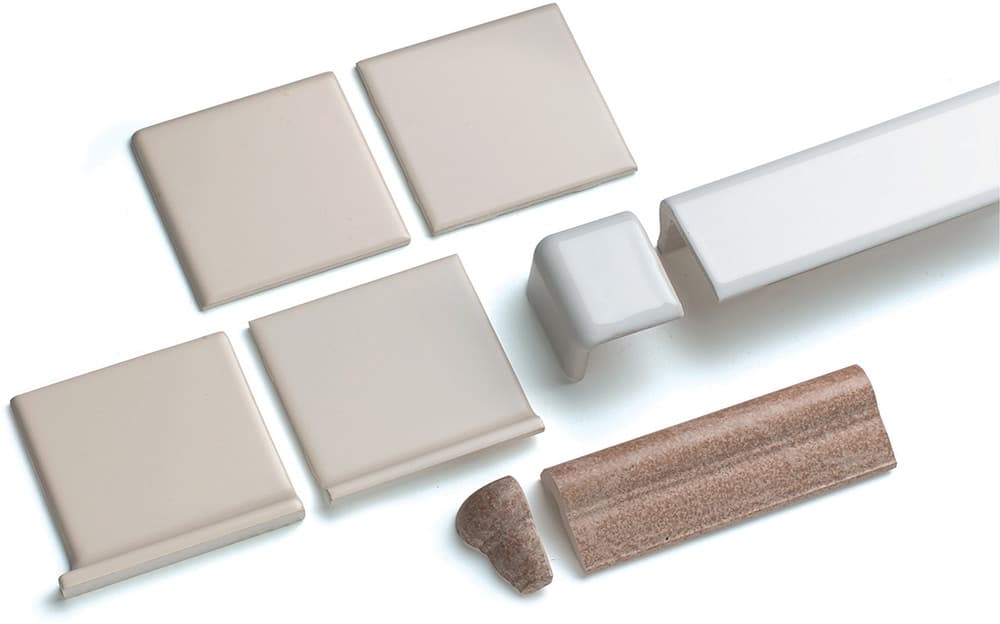
Trim tiles are designed to conceal exposed edges of field tile, especially on wall and counter installations. Bullnose tile is used to finish the edges of partial walls; cove and corner tile shields curves and corners; chair rail tile accents a wall of field tile or functions as an accent around edges. When planning a wall project, investigate available trim as part of the planning process.
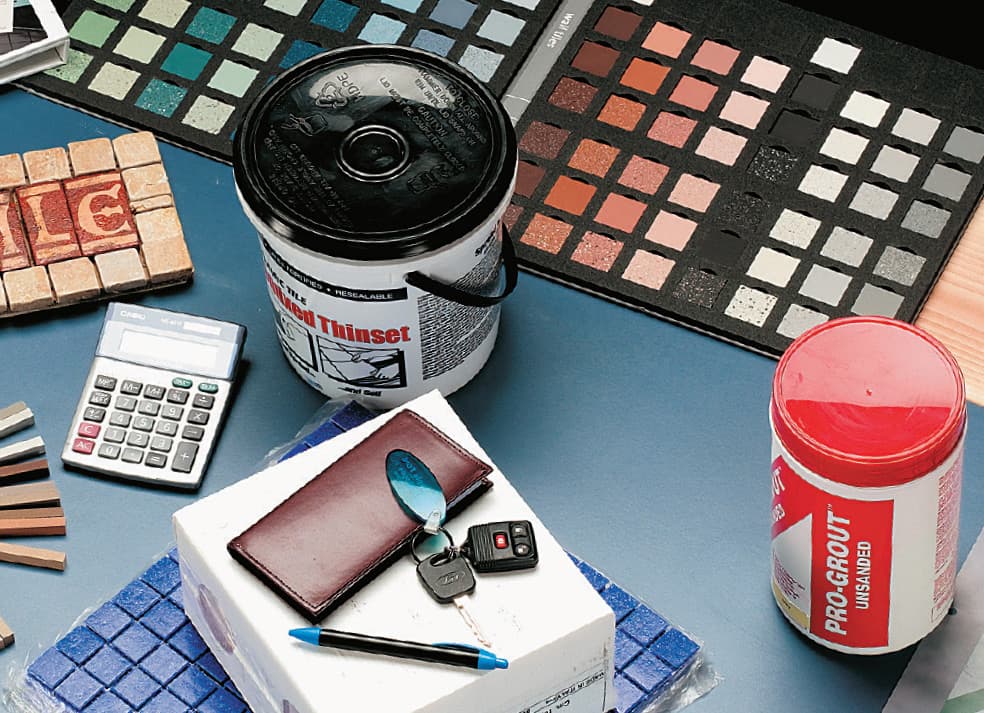
Buying Tile & Tiling Materials
Before you can select or purchase materials, you’ll need to figure out exactly what you need and how much. Start by drawing a room layout, a reference for you and for anyone advising you about the project.
To estimate the amount of tile you need for a floor project, calculate the square footage of the room and add five percent for waste. For example, in a 10-foot × 12-foot room, the total area is 120 square feet. Add five percent, six square feet, for breakage and other waste. You’ll need to purchase enough tile to cover 126 square feet.
Tile cartons generally indicate the number of square feet one carton will cover. Divide the square footage to be covered by the square footage contained in a carton to determine the number of cartons required for your floor project. For example, if a carton holds 10 square feet, you will need 13 cartons to cover the 10 × 12 floor in our example.
Estimating tile for a wall project is slightly more complex. Start by deciding how much of each wall will be tiled. In a shower, plan to tile to at least six inches above the showerhead. It’s common for tile to extend four feet up the remaining bathroom walls, although it’s possible and sometimes very attractive for full walls to be tiled.
To calculate the amount of field tile required, measure each wall and multiply the width times the height of the area to be covered. Subtract the square footage of doors and windows. Do this for each wall, then add all the figures together to calculate the total square footage. Add five percent for waste. Calculate the number of cartons necessary (square footage of the project divided by the square footage contained in a carton).
Trim for floors and walls is sold by the linear foot. Measure the linear footage and calculate based on that. Plan carefully—the cost of trim tile adds up quickly. See page 21 for further information on trim types and styles.
Before buying the tiles, ask about your dealer’s return policy. Most dealers allow you to return unused tiles for a refund. In any case, a few too many tiles is a good reserve in case one or more breaks during or after installation. Running out of tiles before the job’s done could turn into disaster if you can no longer get the tile or the colors don’t match.
A specialty tile shop or a larger home center will carry all or most of the materials you’ll need for your tiling project. It’s always a good idea to bring a few samples home to compare them and see how the color and scale work in the actual room in which they’ll be installed.
Suggestions for Buying Tile
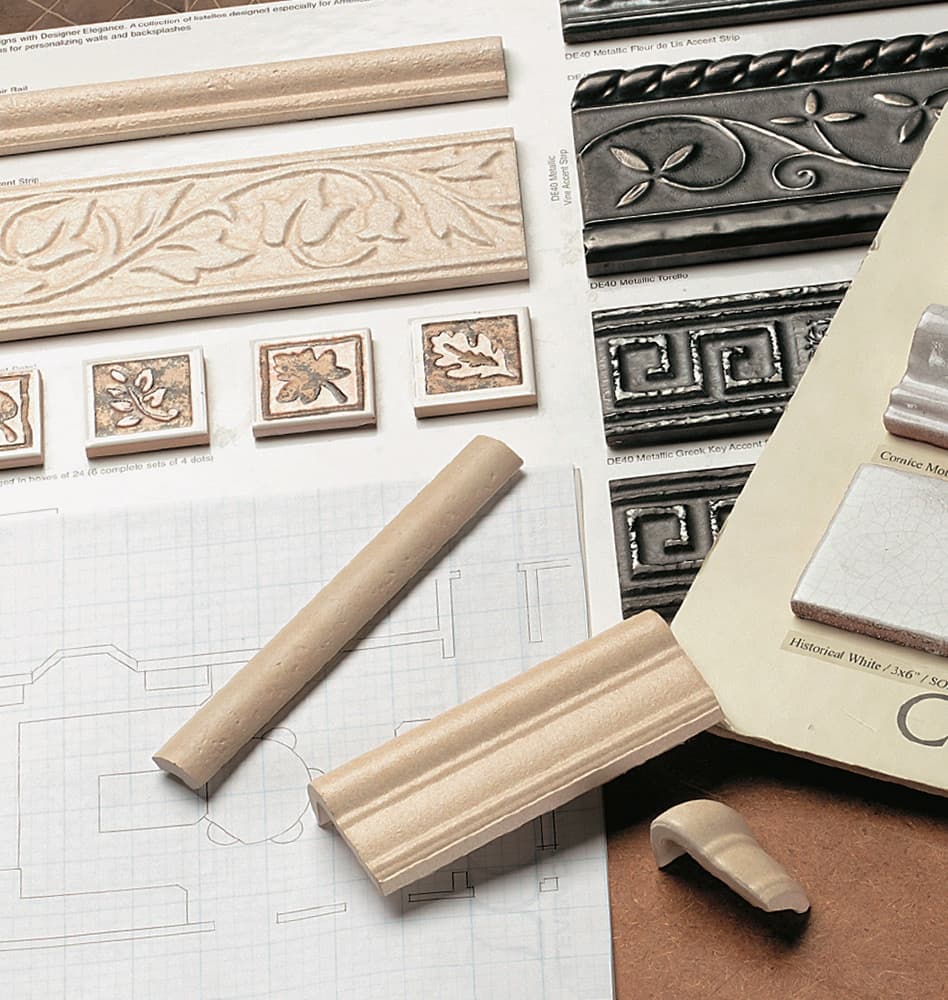
Use your room drawing to identify all the types of trim that will be necessary (above). Evaluate the trim available for the various tiles you’re considering and select a combination that meets the specifications of your project.

Buy all necessary tile, tools, and materials before you begin to avoid wasted trips and to make sure all the elements are appropriate for one another and the project.
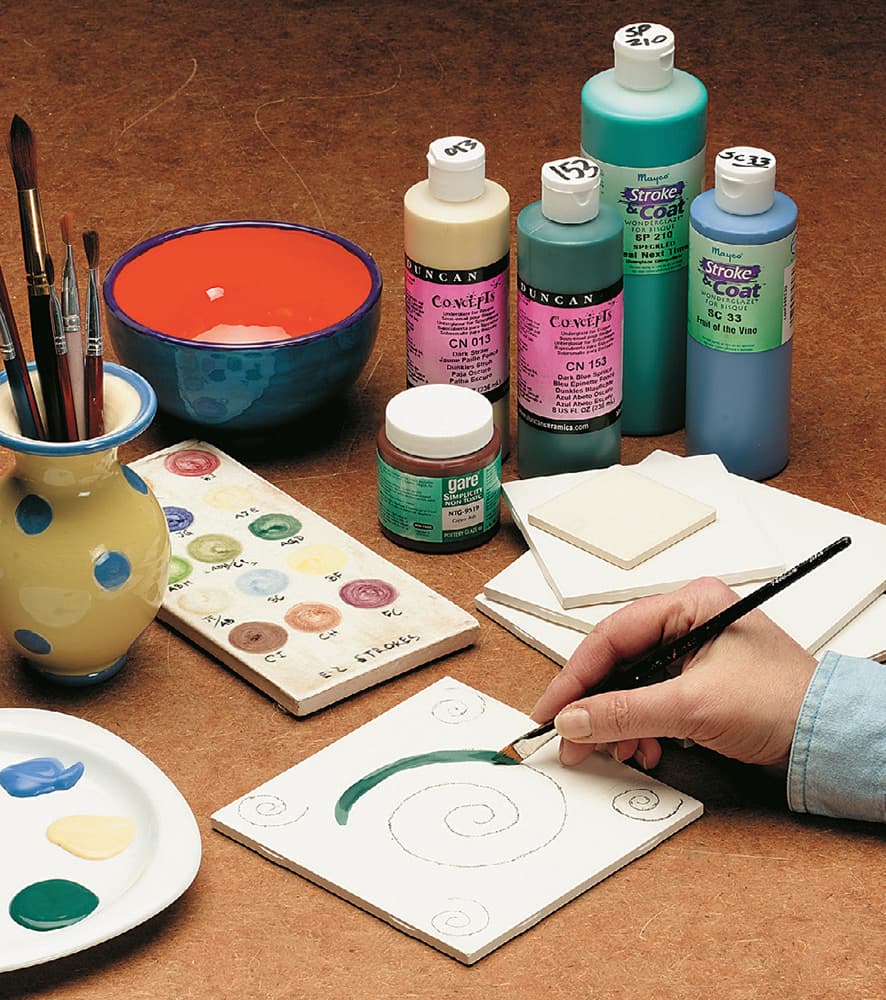
You can design and paint your own custom tiles at many specialty ceramic stores. Order tile of the right size, bisque-fired but not glazed. You can then paint or stencil designs on the tile and have them fired.

Mix tile from carton to carton. Slight variations in color won’t be as noticeable mixed throughout the project as they would be if the color shifts from one area to another.
GLASS TILE
Glass tile has become widely popular for its range of brilliant, jewel-toned colors, its unique luminescent appearance, and an easy-to-clean surface. It’s in the very nature of the material that just about any color can be reproduced in glass tile, and the range of potential designs and combinations is virtually unlimited. Glass tile remains one of the best ways to add a unique look to your kitchen or bathroom.
The color in glass tile is integral. Pigment is added during the actual production of the glass so that the color is completely incorporated throughout the material. The color won’t wear off, fade, or otherwise change. The tile will look as brilliant ten years from now as the day you installed it.
That said, it’s important to understand that these tiles are still glass. They are subject to chipping, making this option less than desirable for an area such as a busy kitchen floor.
Although glass tiles come in several different sizes, the most popular are glass mosaic tiles. These are produced in square sheets of tiles attached to a web backing. The tiles can be squares, diamonds, or other shapes, such as octagons. In any case, the backing makes glass mosaic tiles easy to install—as easy as any large-format tile. Glass mosaics are most widely used as backsplashes where the color variations and surface brilliance shine to their best advantage, but they are also increasingly being installed as low-traffic flooring in areas such as guest bathrooms, and on walk-in shower walls where they serve as distinctive focal points.
No matter where you install glass tiles, it’s important to use bright white mastic specifically formulated for glass tiles. Unless completely opaque, the tiles will feature some amount of show-through, so a white background is crucial for the color of the tile to be as brilliant as possible. Follow the installation instructions provided with the tiles you buy to the letter and you’ll have a beautiful tiled surface that seems almost lit from within.
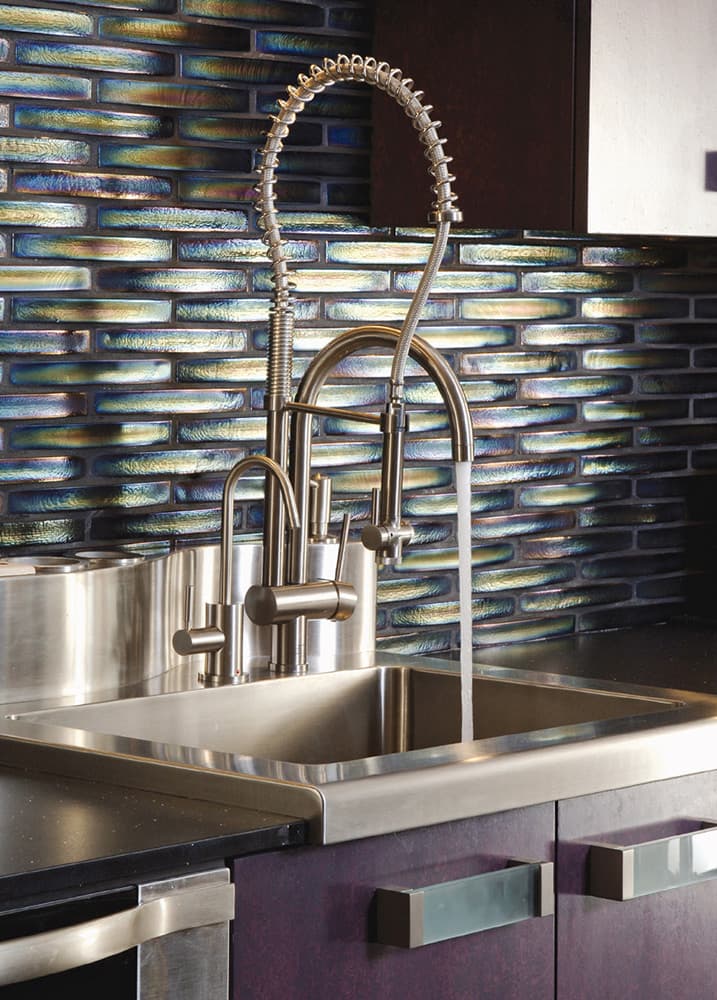
Fool the eye with dichroic glass tile such as the “woven” style shown here. A metallic “dichroic” coating makes the glass appear to be different colors at different angles and under different lighting. It’s an ever-changing visual that never ceases to amaze and inspire.
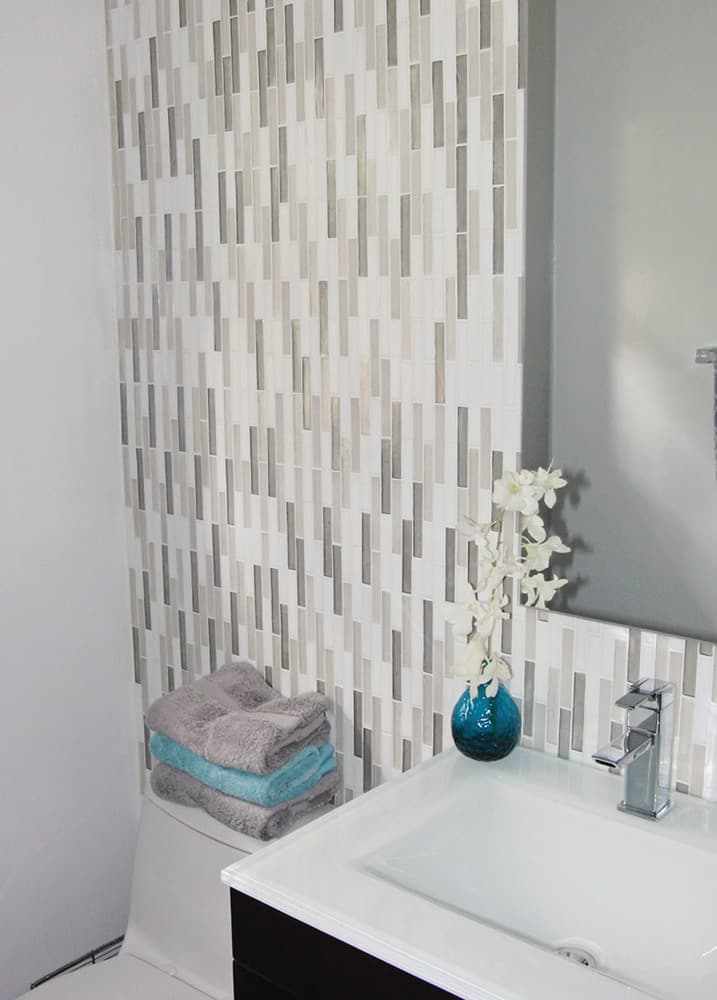
Buck the trend with a mosaic alternative. Glass mosaic is beautiful and amazingly popular, but the format is far from the only look glass tile manufacturers offer. The vertical “rain” pattern on this tile wall is a vivid example of a mosaic alternative with just as much vibrance, and a timeless mix of neutral colors.
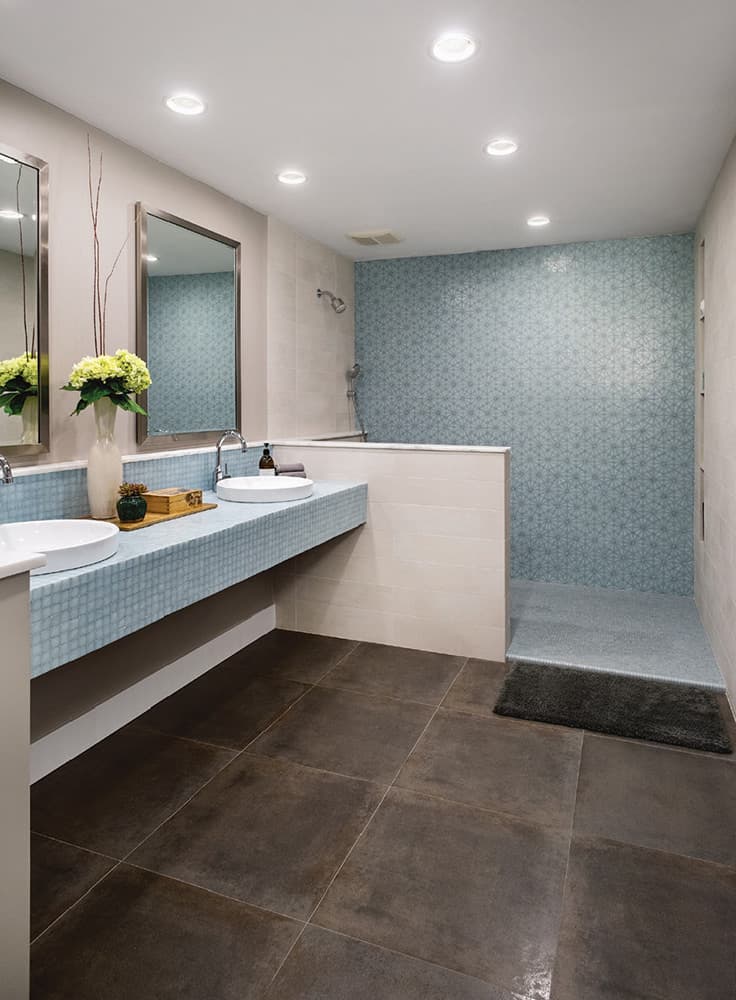
Make magical marriages by integrating glass tile designs with more traditional tiled surfaces. A solid-colored glass mosaic countertop and patterned blue glass tile shower wall perfectly complement the understated beige wall tile and cement floor in this bathroom.
Use glass tile to create intriguing visual texture. Glass tile manufacturers are increasingly producing tiles that trick the eye, providing interesting and fun illusions. In this case, the wall may appear to be quilted, but it’s actually a pattern of glass tiles used creatively.
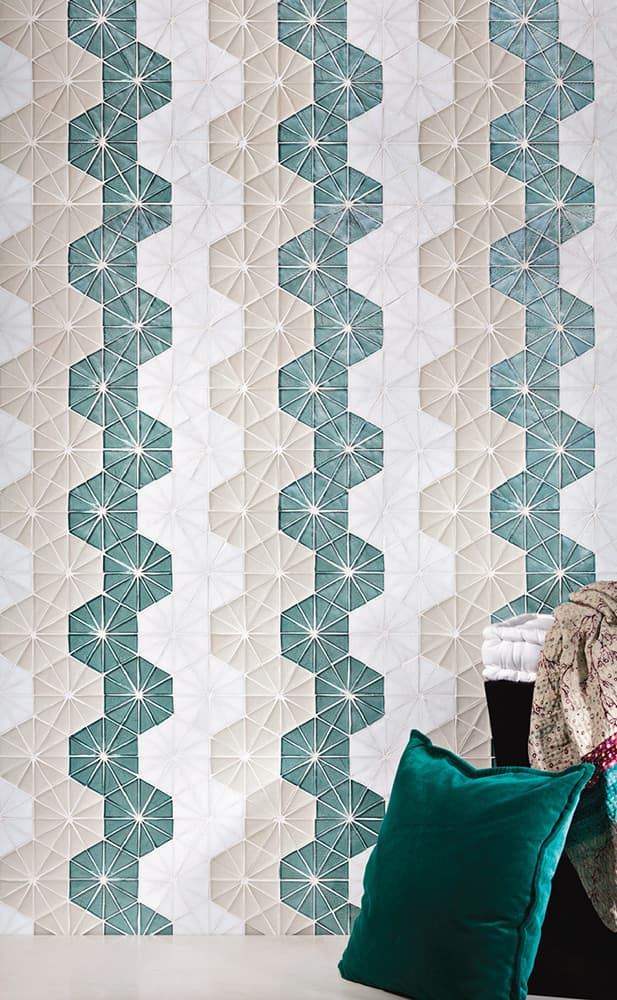
Custom glass tile designs make a bold statement. This sophisticated arrangement of hexagons, squares, and triangles is created in mosaic sheets at the tile manufacturing facility. Creating your own unique design and color scheme is great fun, but it does add considerably to the cost.
Cutting Tile
Careful planning will help you eliminate unnecessary cuts, but most tile jobs require cutting at least a few tiles and some jobs require cutting a large number of tiles, no matter how carefully you plan. For a few straight cuts on light- to medium-weight tile, use a snap cutter. If you’re working with heavy tile or a large number of cuts on any kind of tile, a wet saw greatly simplifies the job. When using a wet saw, wear safety glasses and hearing protection. Make sure the blade is in good condition and the water container is full. Never use the saw without water, even for a few seconds.
Other cutting tools include nippers, hand-held tile cutters, and rod saws. Nippers can be used on most types of tile, but a rod saw is most effective with wall tile, which is generally fairly soft.
A note of caution: hand-held tile cutters and tile nippers can create razor-sharp edges. Handle freshly cut tile carefully, and immediately round over the edges with a tile stone.
Before beginning a project, practice making straight and curved cuts on scrap tile.
 How to Use a Snap Cutter
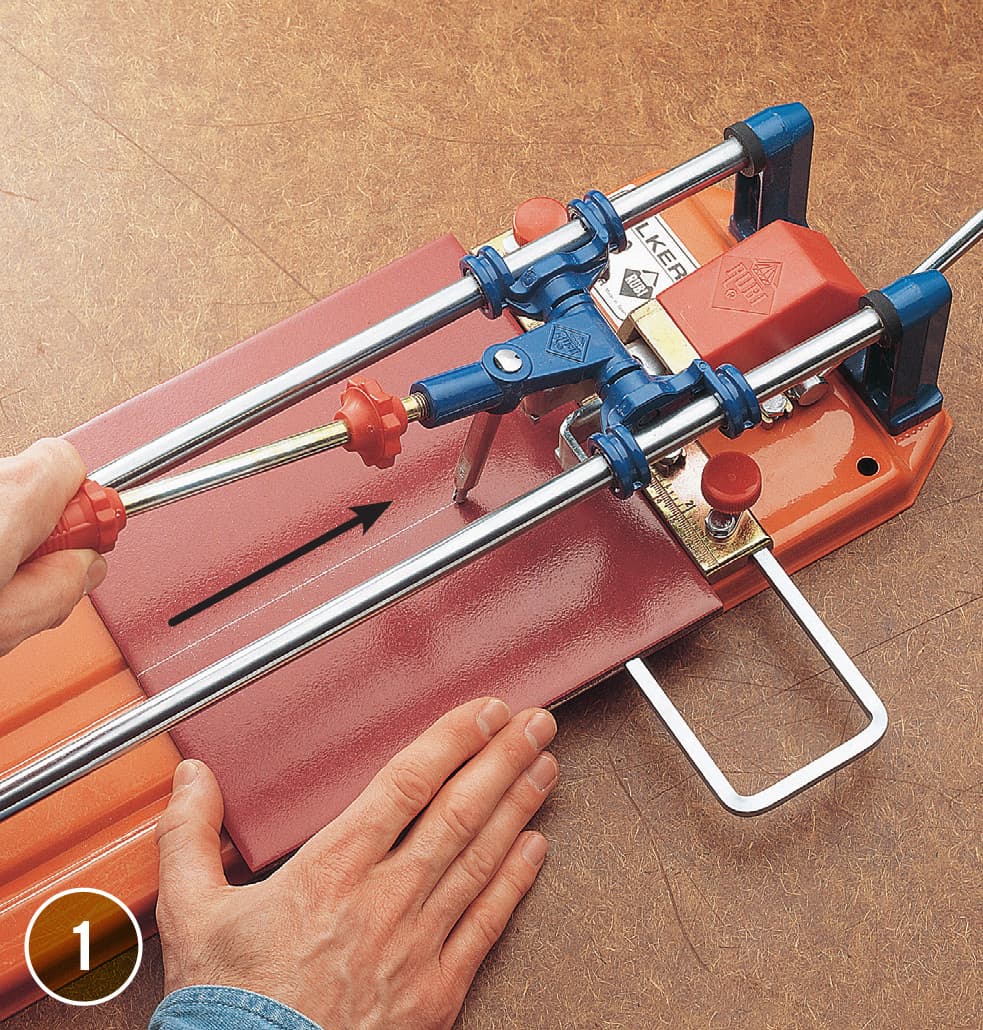
Mark a cutting line on the tile with a pencil, then place the tile in the cutter so the cutting wheel is directly over the line. While pressing down firmly on the wheel handle, run the wheel across the tile to score the surface. For a clean cut, score the tile only once.
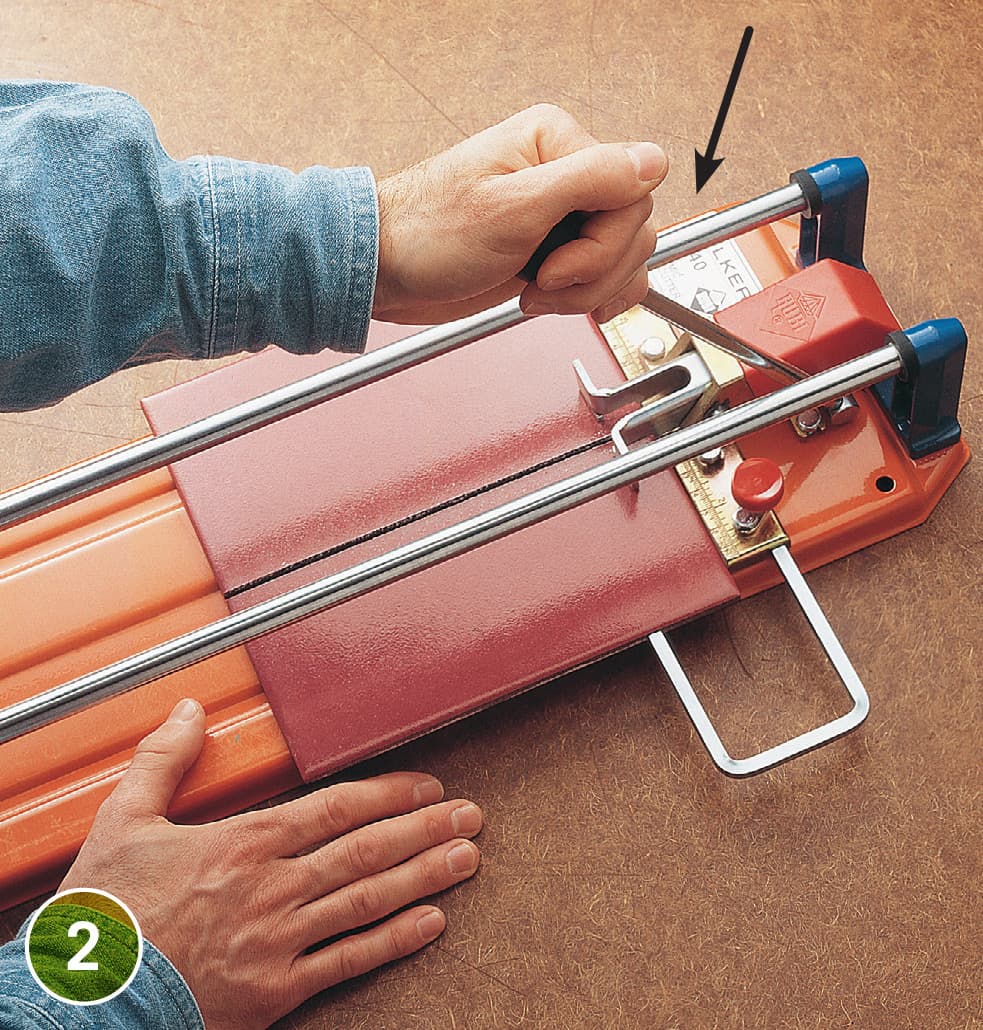
Snap the tile along the scored line, as directed by the tool manufacturer. Usually, snapping the tile is accomplished by depressing a lever on the tile cutter.
Types of Wet Tile Saws
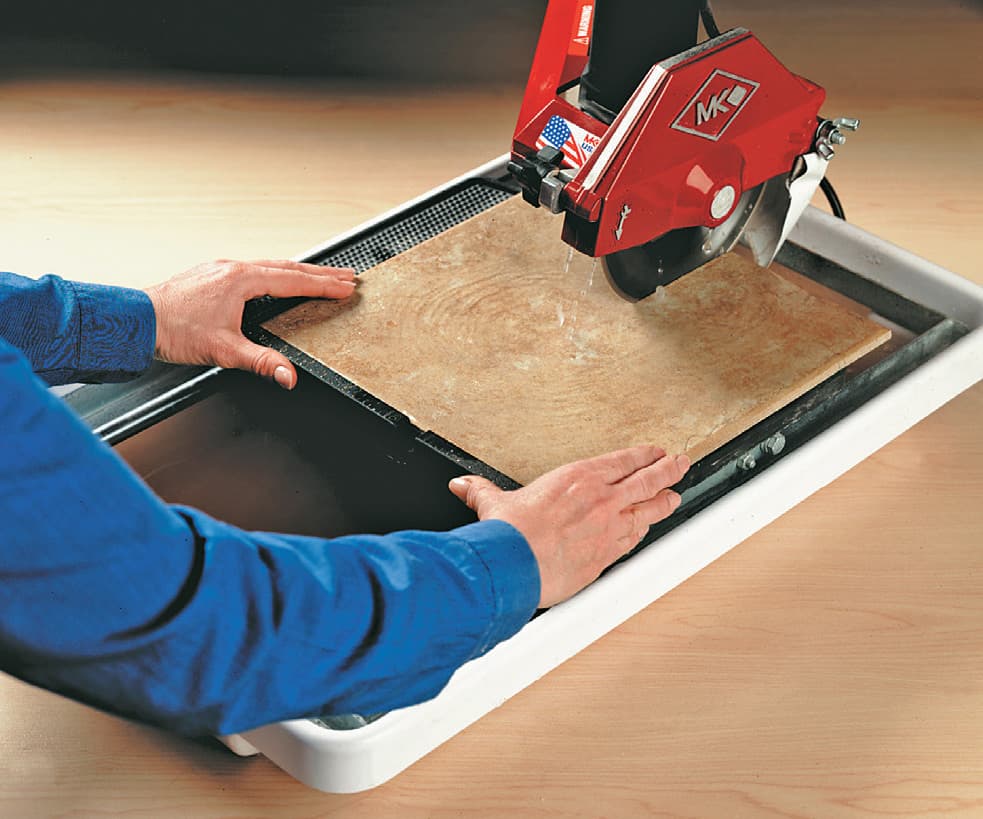
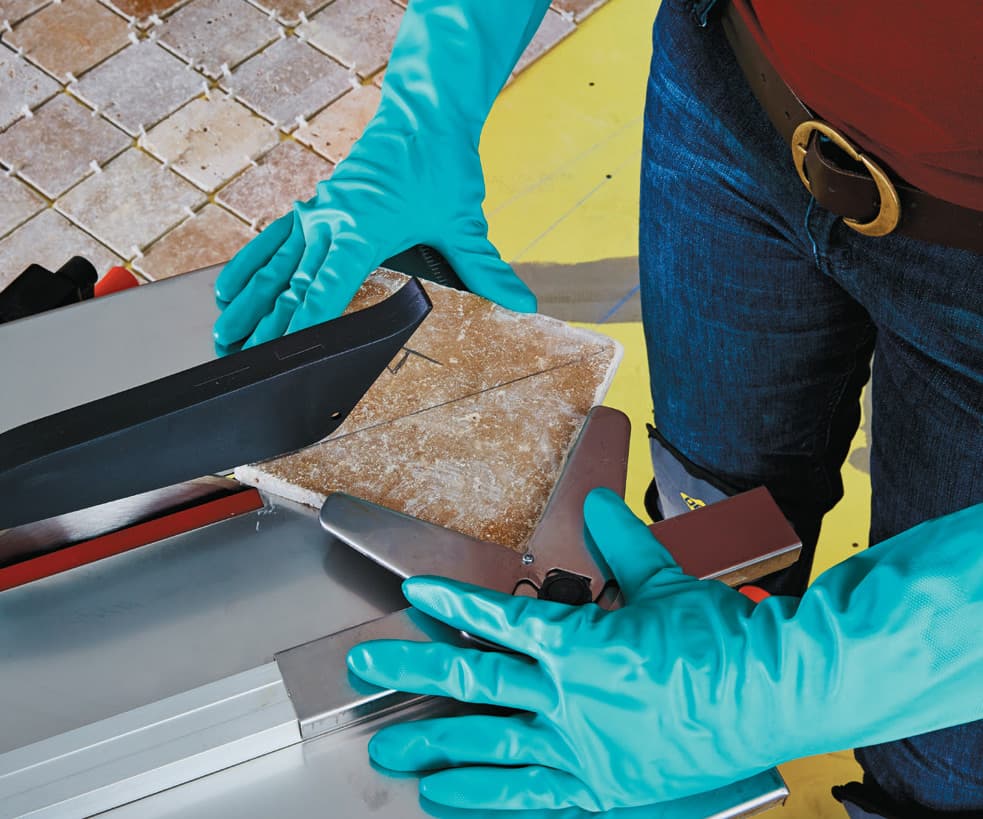
Sliding table wet saws offer good control and safety. They are relatively expensive to buy, so most DIYers rent them. You simply place the tile on the sliding table, secure it against the adjustable fence, and feed the table and tile slowly into the circular tile-cutting blade.
Fixed table wet tile saws also have an adjustable fence to guide the tile, but the operator slides the tile across the table surface and into the blade. The motors tend to be less powerful, but these models can be purchased for well under $100.
How to Mark Square Notches

Place the tile to be notched over the last full tile on one side of the corner. Set another full tile against the 1/2" spacer along the wall and trace along the opposite edge onto the second tile.
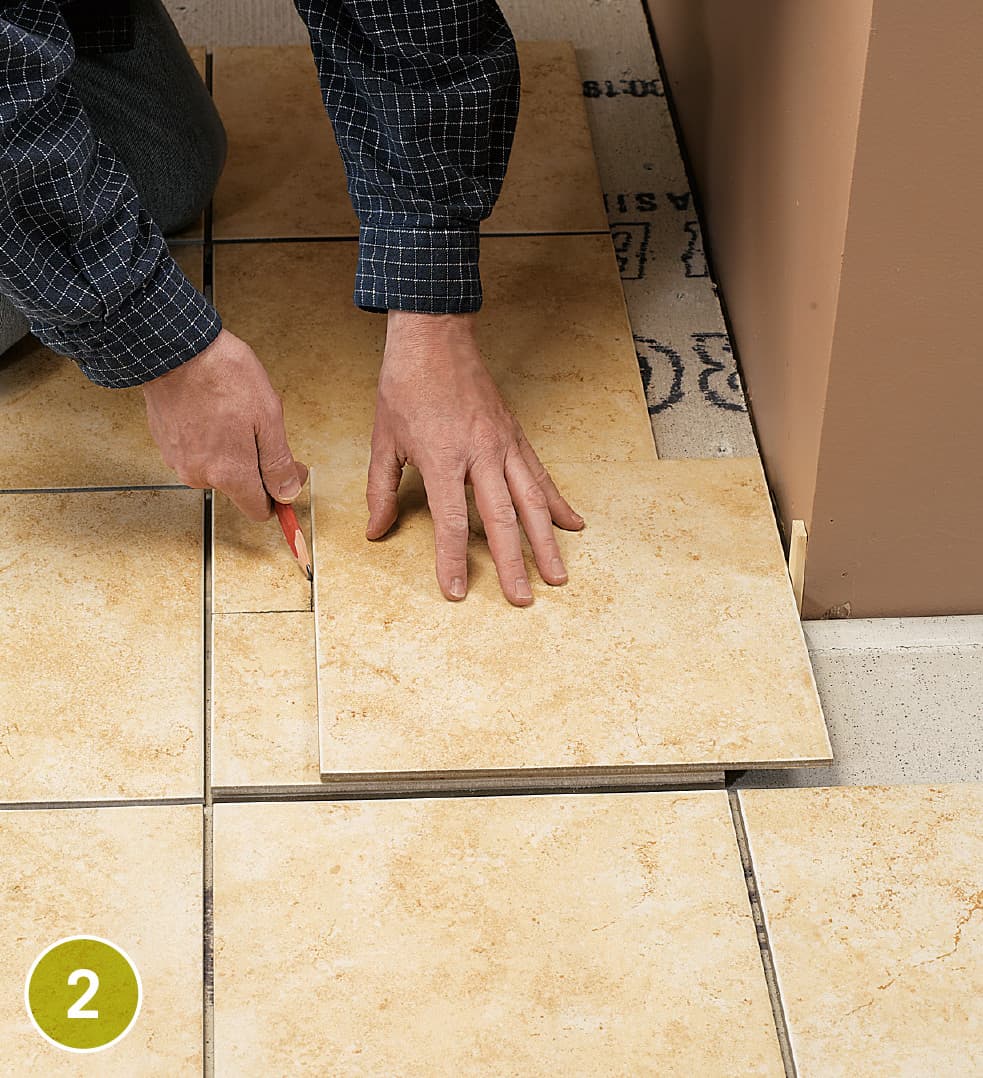
Move the top two tiles and spacer to the adjoining wall, making sure not to turn the tile that is being marked. Make a second mark on the tile as in step 1. Cut the tile and install.
Options for Cutting Square Notches

Use a wet tile saw. Cut along the marked line on one side of the notch. Turn the tile and cut along the other line to complete the notch. To keep the tile from breaking before you’re through, slow down as you get close to the intersection with the first cut.
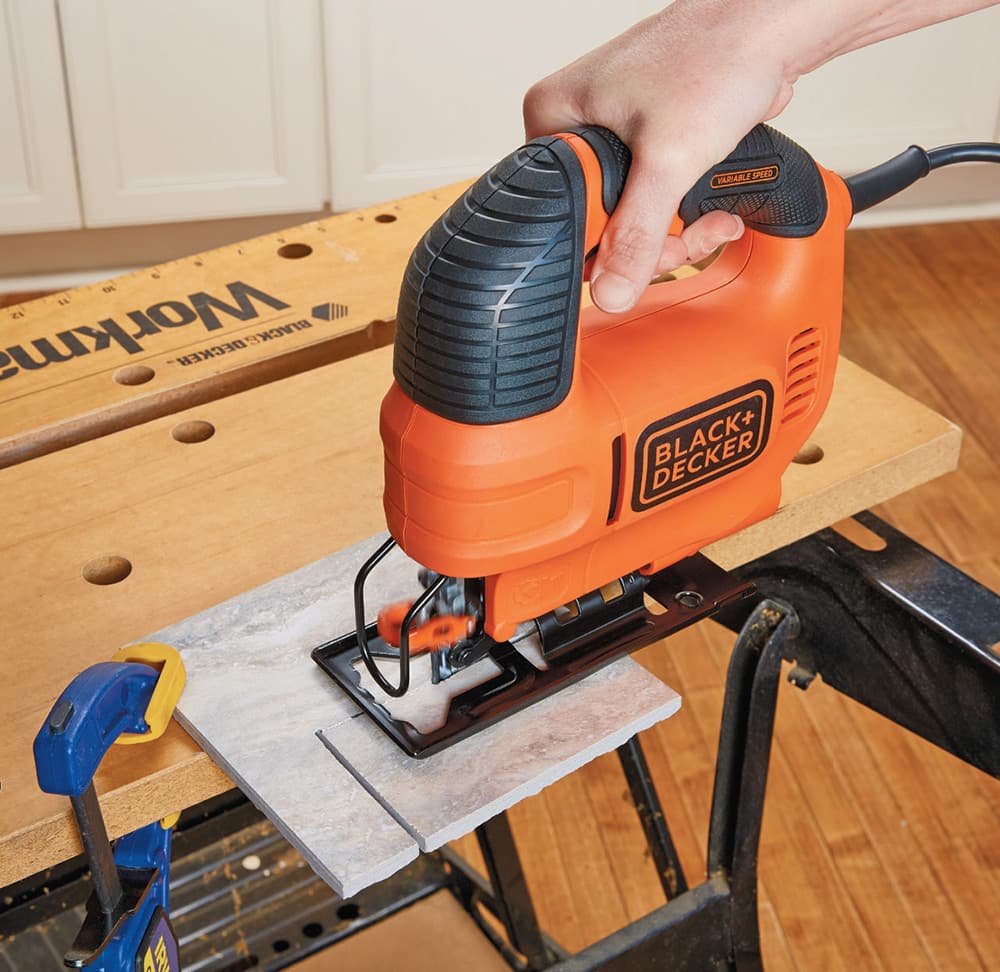
Use a jigsaw. To cut square notches in a small number of wall tiles, clamp the tile down on a worktable, then fit the jigsaw with a diamond-coated blade to make the cuts. If you need to notch quite a few tiles, a wet saw is more efficient.
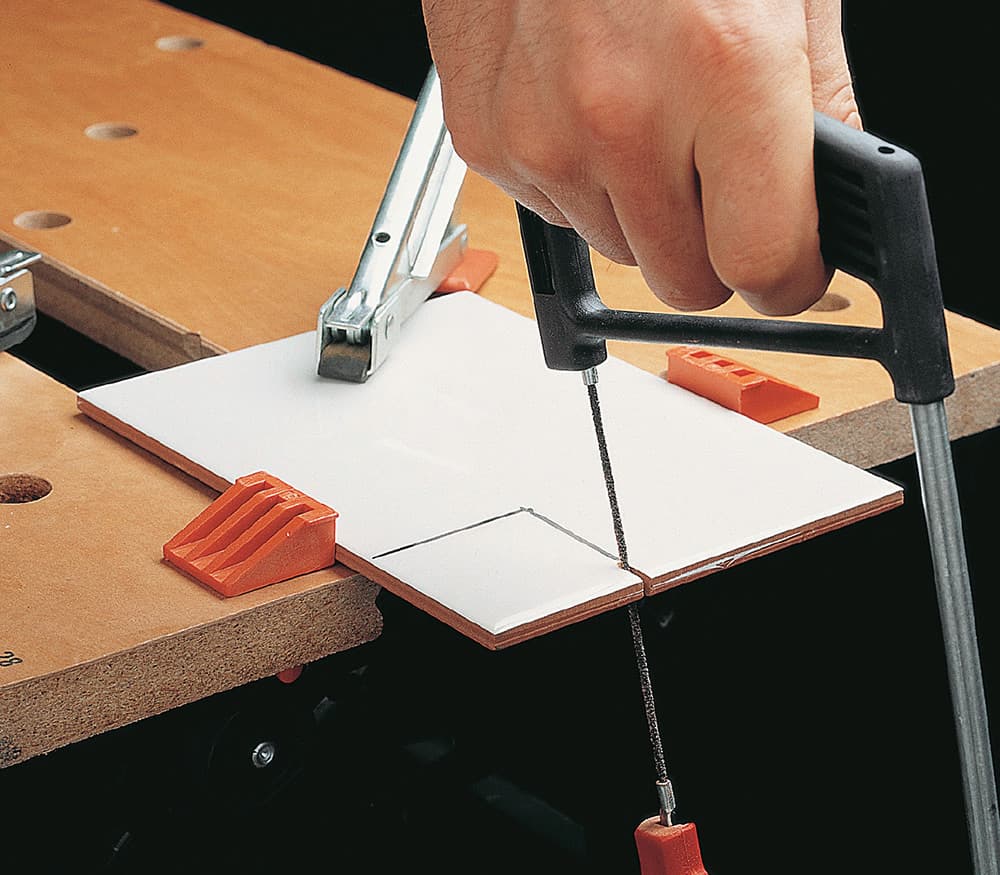
Use a rod saw. To make a small number of cuts in wall tile, you can use a rod saw. Fit a tungsten carbide rod saw into a hacksaw body. Firmly support the tile and use a sawing motion to cut the tile.
Use tile nippers. To make a very small notch, use tile nippers. Score the lines and then nibble up to the lines, biting very small pieces at a time.
How to Mark & Cut Irregular Notches
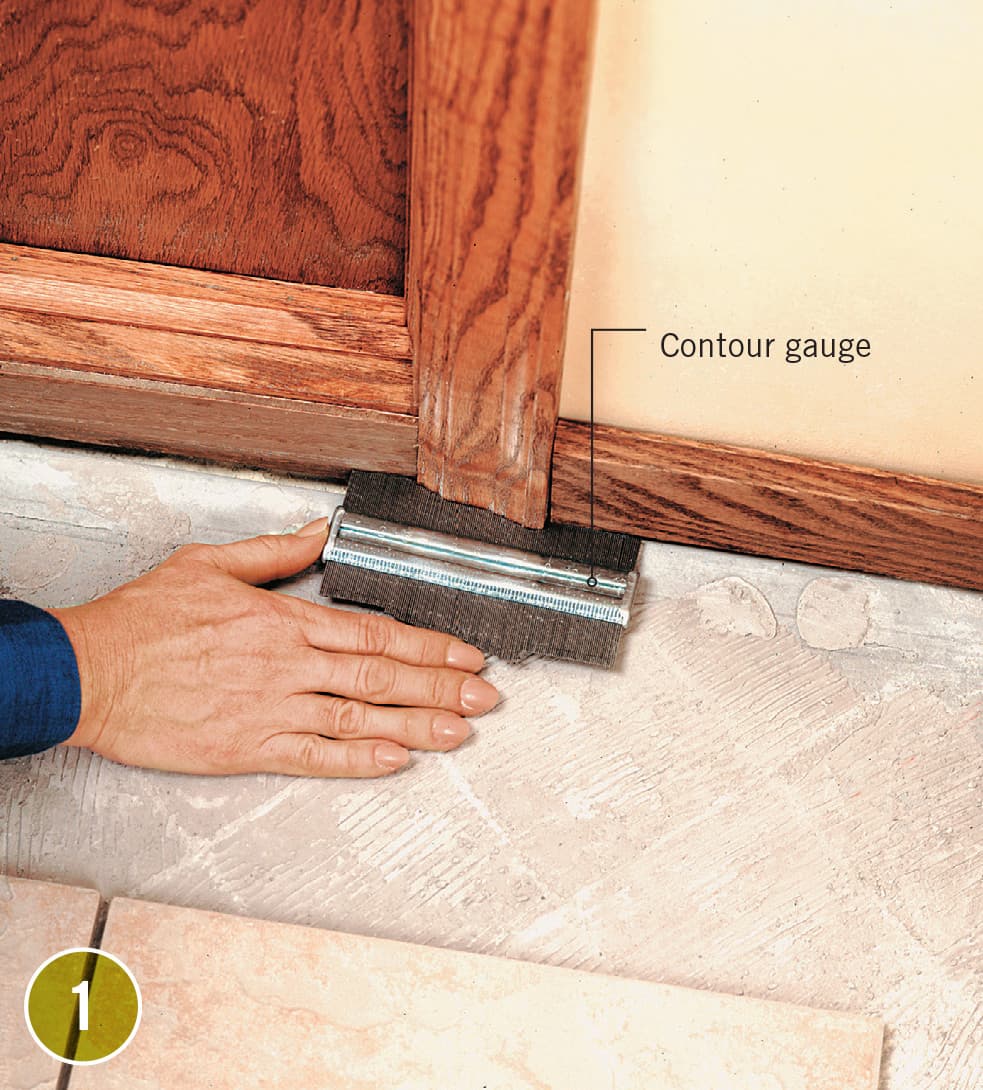
Make a paper template of the contour or use a contour gauge. To use a contour gauge, press the gauge against the profile and trace the contour from the gauge onto the tile.
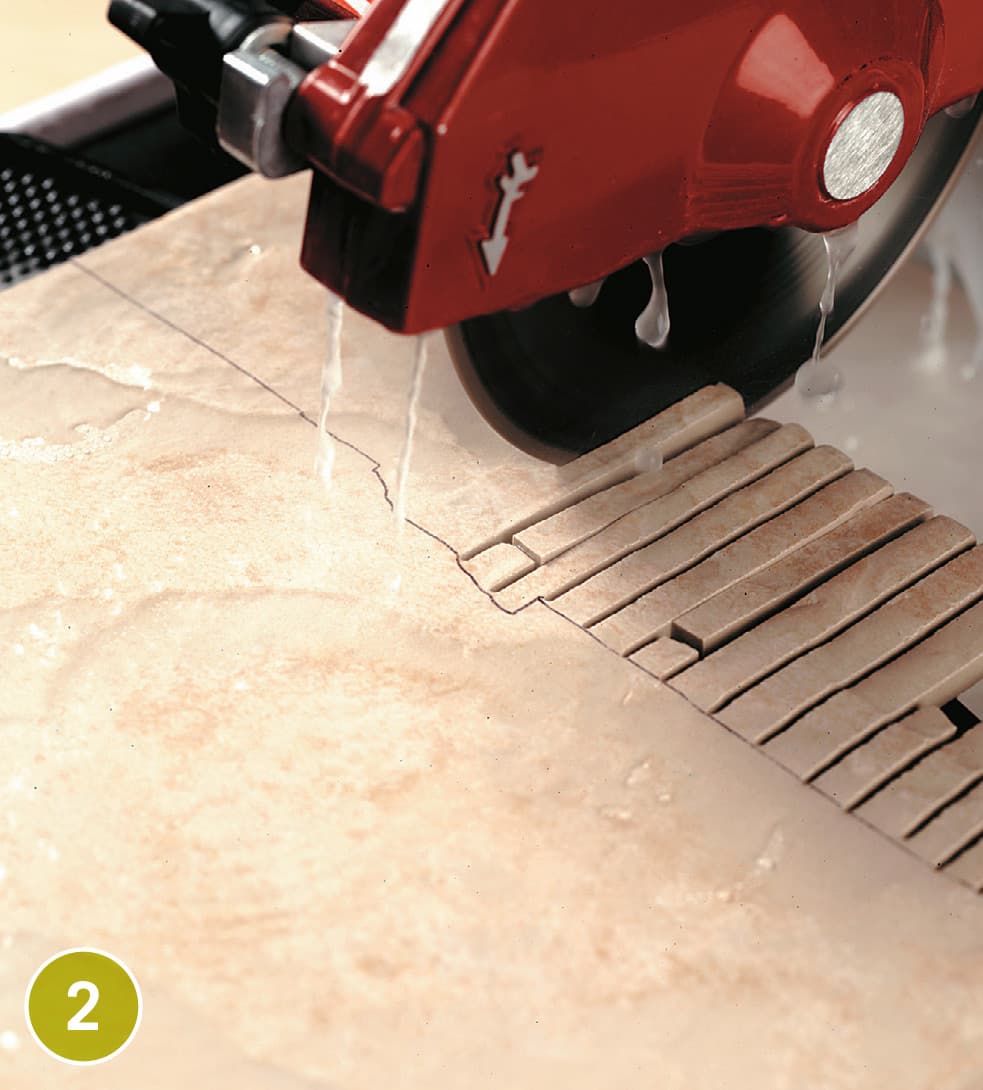
Use a wet saw to make a series of closely spaced, parallel cuts, then nip away the waste with tile nippers.
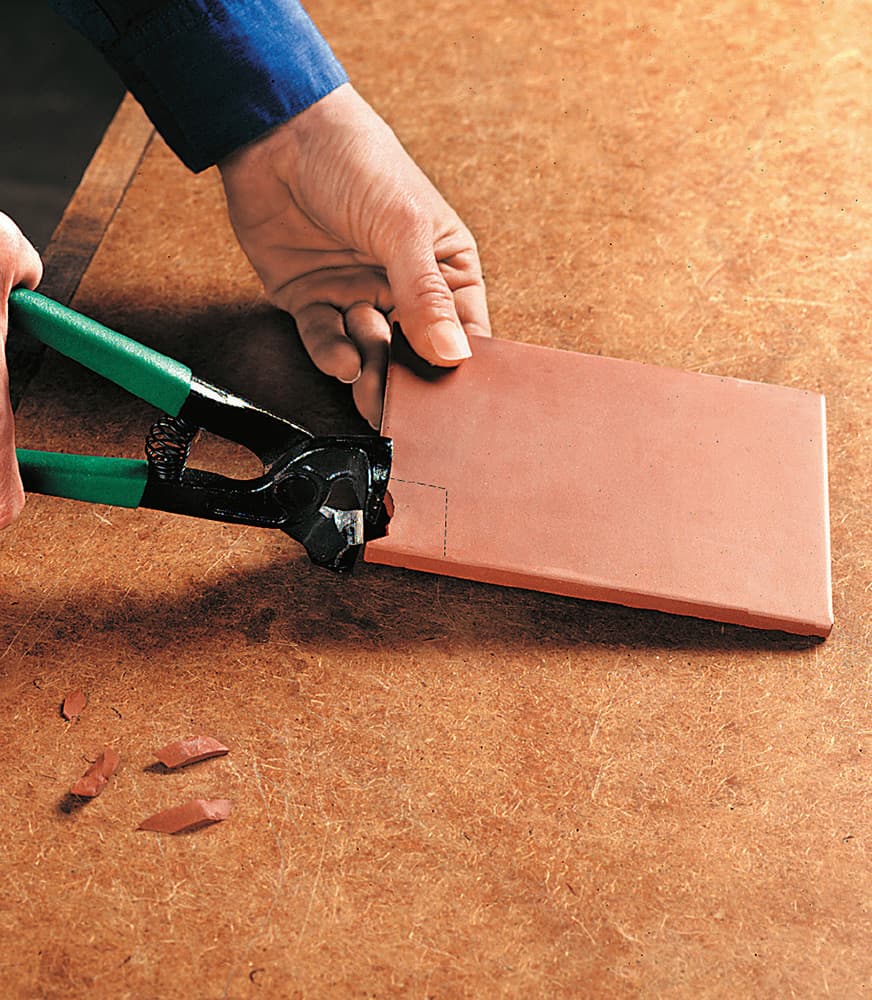
How to Cut Tile with Tile Nippers
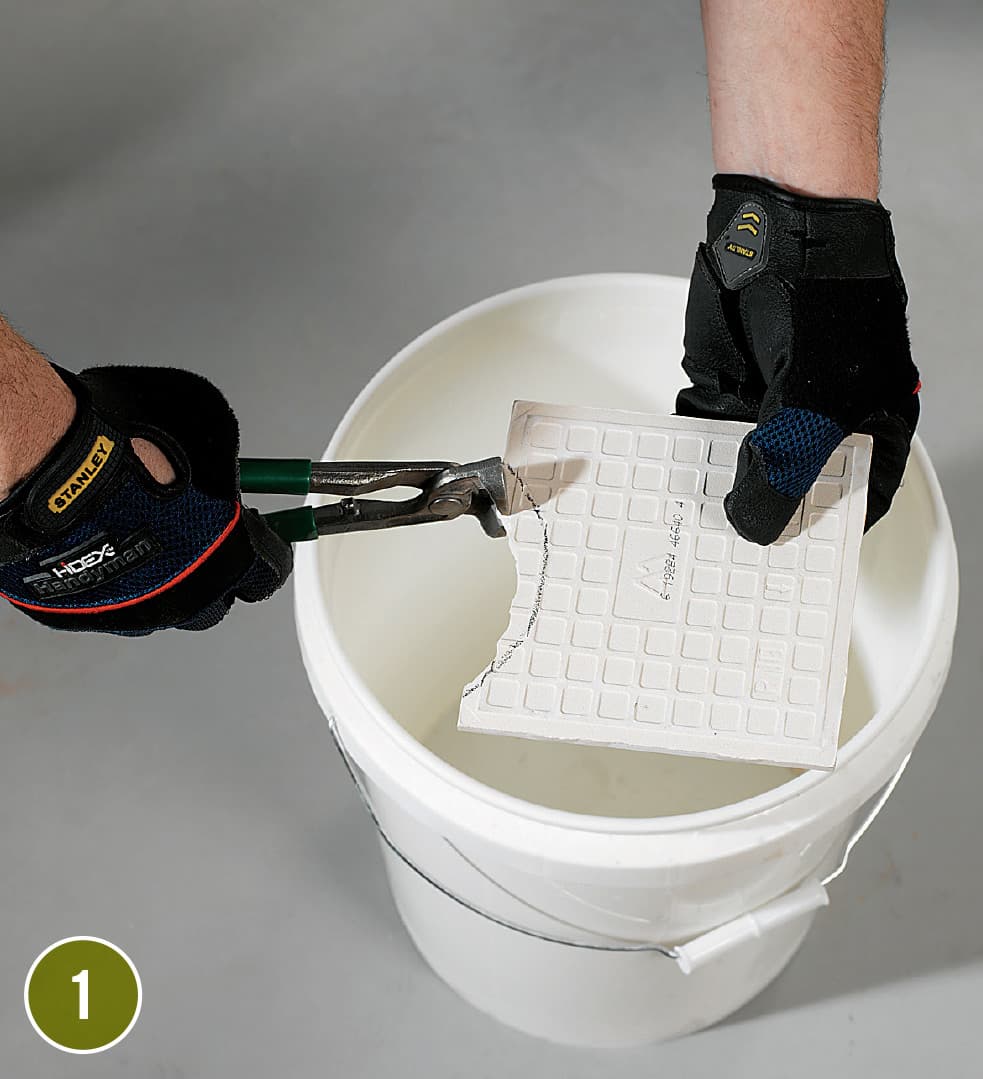
Tile nippers have sharp, carbide-tipped jaws that are used to firmly grip the leading edge of a tile and snap off small fragments of unwanted material. They are primarily used to make irregular cuts in tile.

To avoid breaking the tile, use the tile nippers to take very small bites out of the cut. Afterwards, use a rubbing stone to smooth the sharp edges of exposed cuts.
How to Mark Tile for Cutting Holes
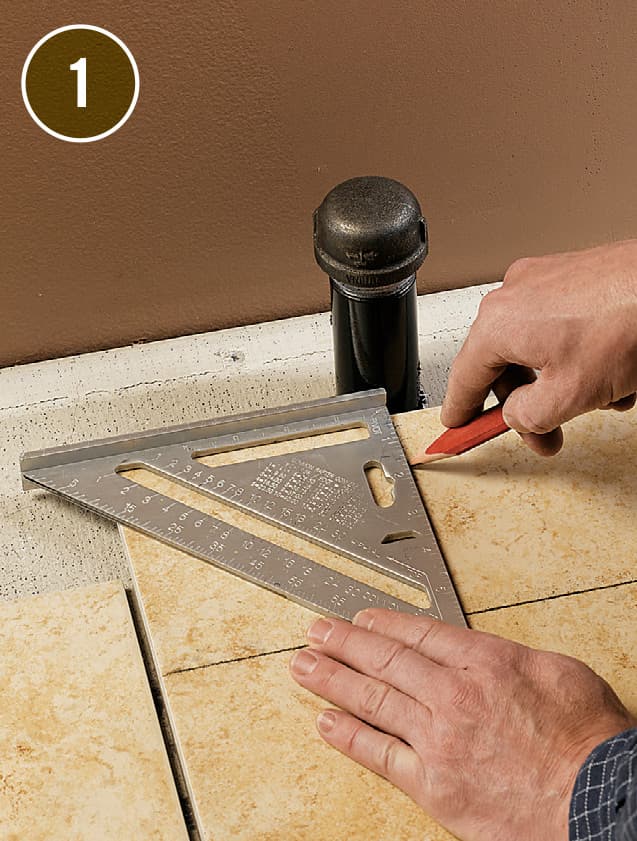
Align the tile to be cut with the last full row of tile and butt it against the pipe. Mark the center of the pipe onto the front edge of the tile.

Place a 1/4" spacer against the wall and butt the tile against it. Mark the pipe center on the side edge of the tile. Using a combination square, draw a line through each mark to the edges of the tile.
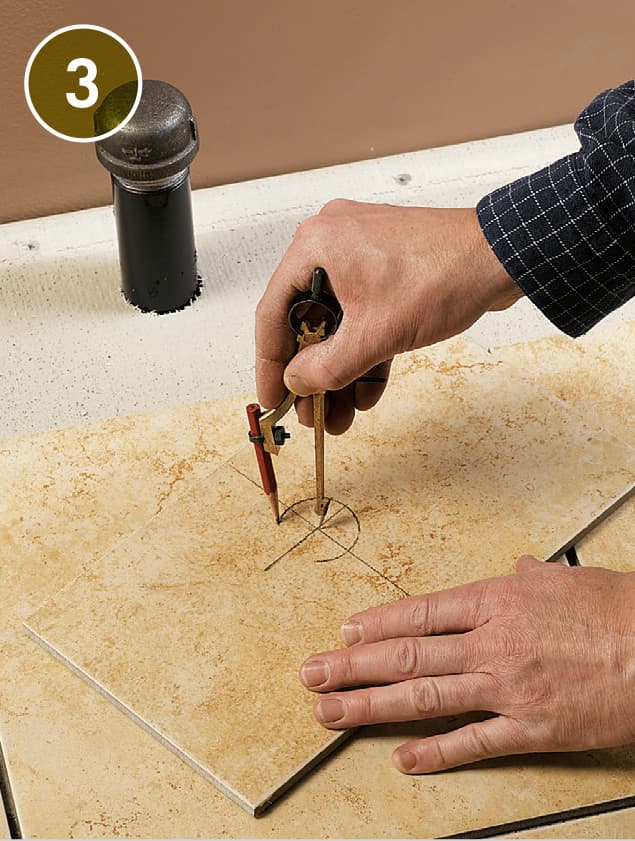
Starting from the intersection of the lines at the center, draw a circle slightly larger than the pipe or protrusion.
CUTTING MOSAIC TILE

Score cuts on mosaic tiles with a tile cutter in the row where the cut will occur. Cut away excess strips of mosaics from the sheet, using a utility knife, then use a handheld tile cutter (not tile nippers) to snap tiles one at a time.
NOTE: Use tile nippers to nip off narrow portions of tiles after scoring.
Options for Cutting Holes in Tile
Option 1: Drill around the edges of the hole using a ceramic tile bit. Gently knock out the waste material with a hammer. The rough edges of the hole will be covered by a protective plate (called an escutcheon).
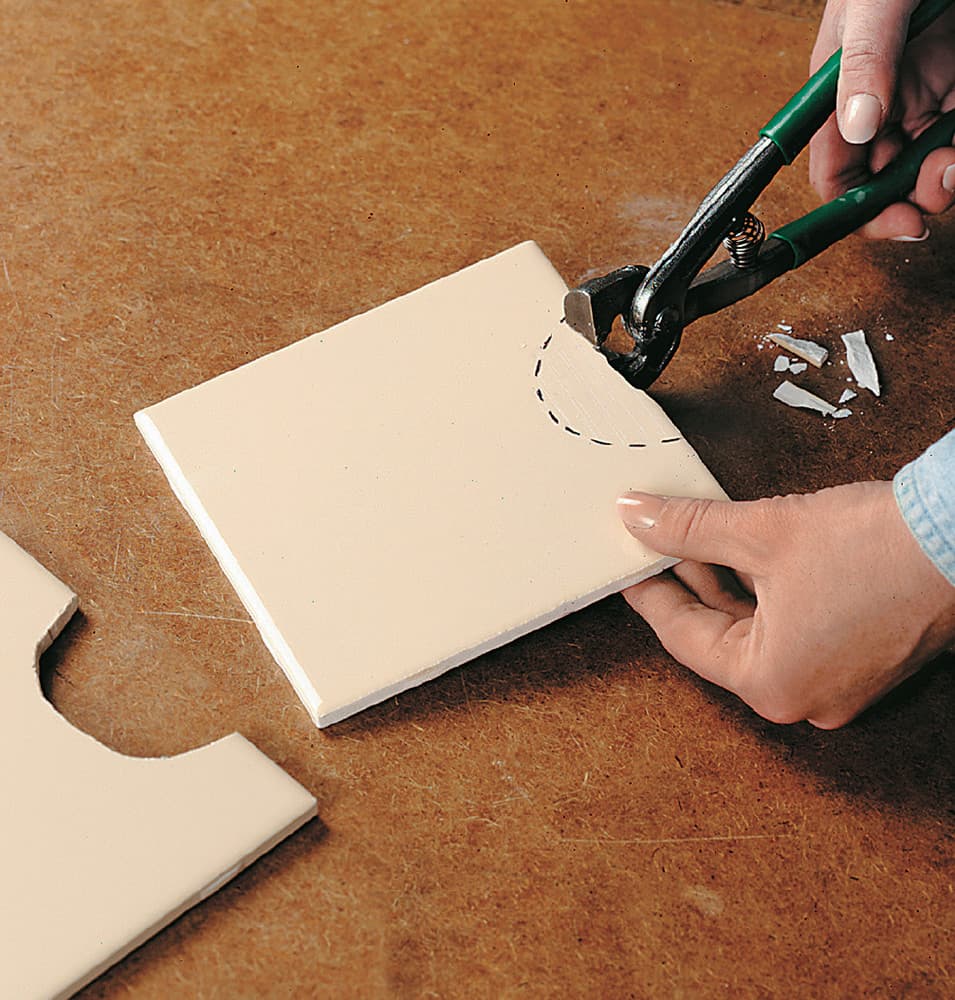
Option 2: Score and cut the tile so the hole is divided in half, using the straight-cut method, then use the curved-cut method to remove waste material from each half of the circle.
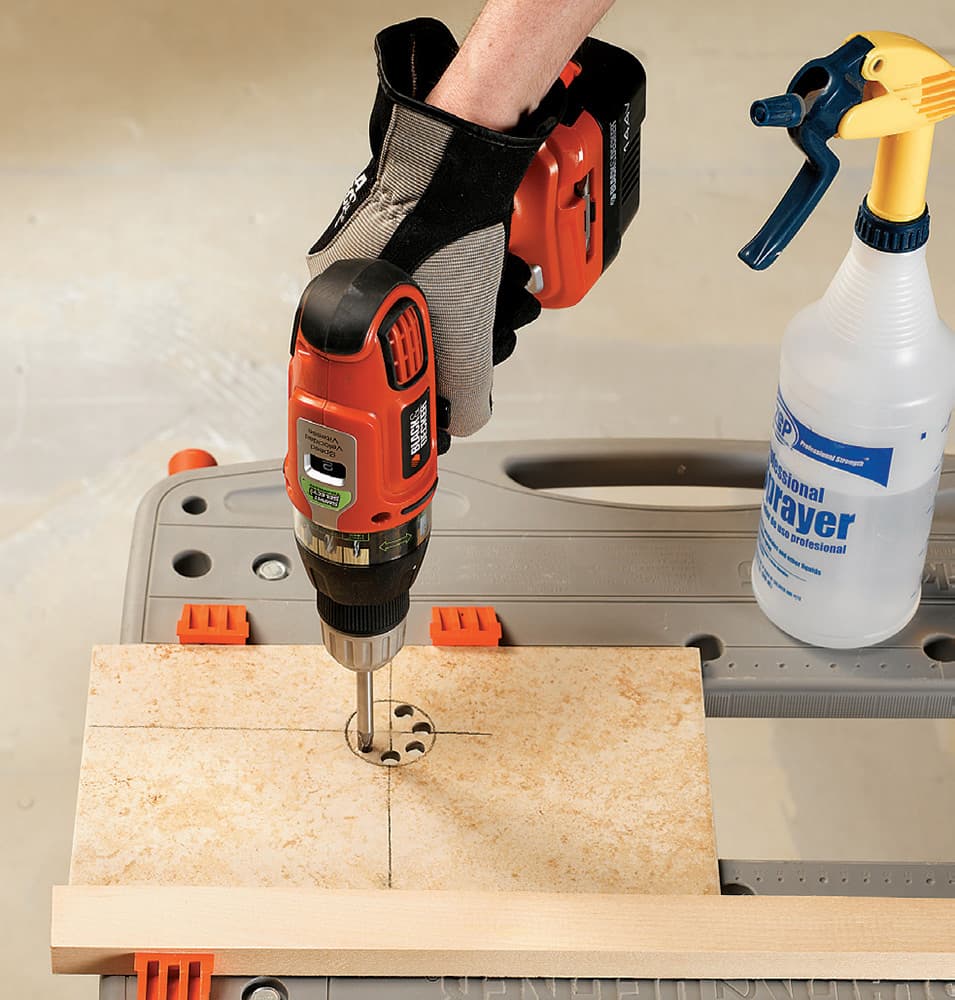
How to Cut a Hole with a Hole Saw
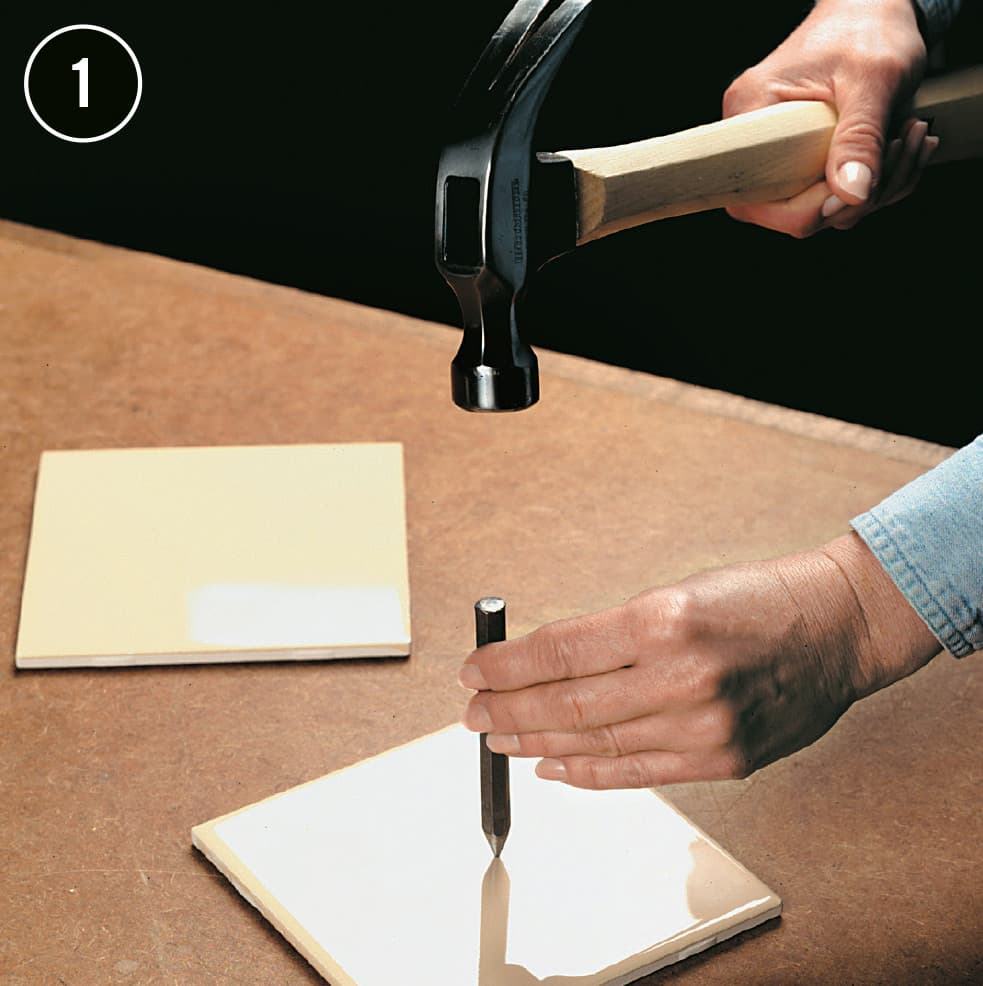
Make a dimple with a center punch to break through the glaze to keep the drill bit from wandering.
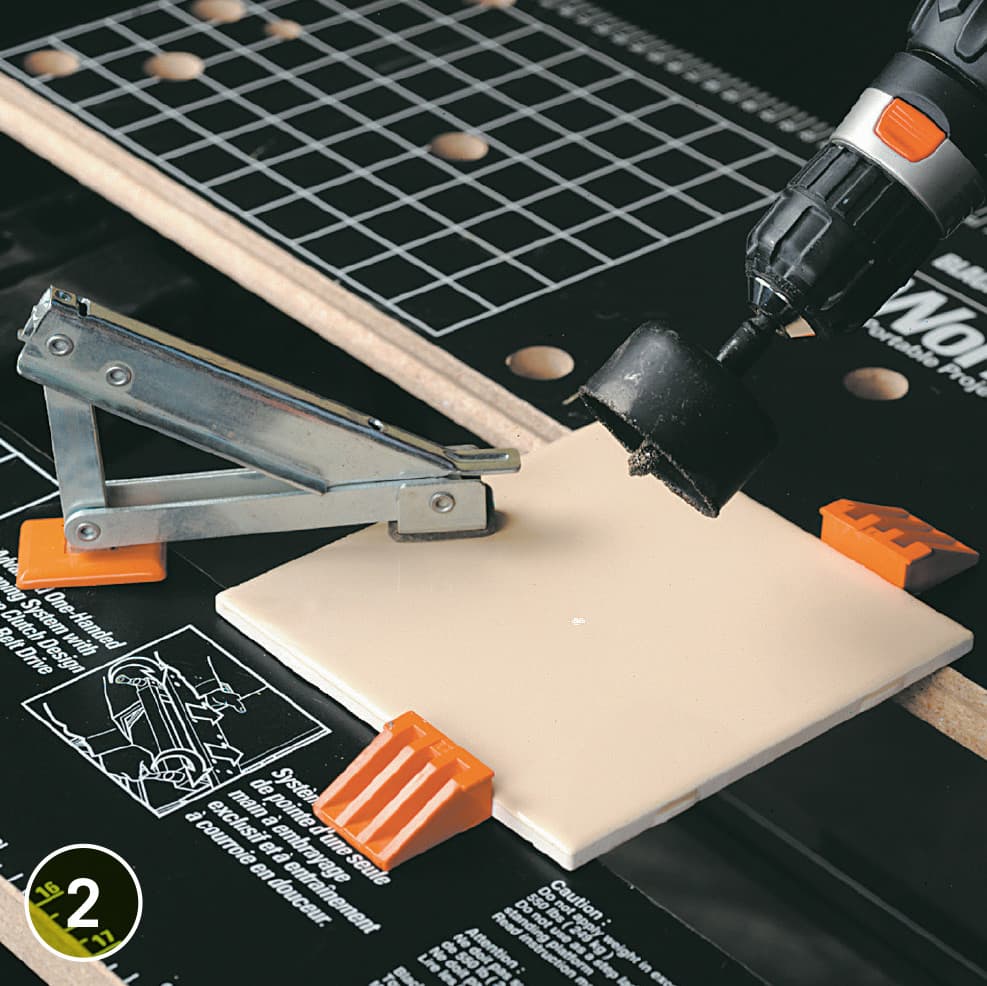
Select a tungsten carbide hole saw in the appropriate size and attach it to a power drill. Place the tip at the marked center and drill the hole.