
Outdoor Projects

Tile can bring as much magic to your outdoor spaces as it does to your indoor rooms. The durability, ease-of-maintenance and wonderfully attractive design potential make tile a great choice for patios, garden pathways, and outdoor kitchens.
Outdoor tile does need a clean, stable, level subsurface on which to sit. This can be a concrete slab or—in the case of a pathway—can be pounded aggregate such as crushed stone. However, if you want the surface to be stable over the long run, especially in colder climates, you’ll need to lay it in mortar over a solid substrate such as an existing patio.
The best tiles for outdoor use are those made with natural materials. Stone, terra cotta, and in certain spaces, glass, will complement the surrounding landscape and extend the interior design out in the backyard. That doesn’t mean you’ll be limited. You can use tiles in many different colors, glazed or unglazed, and in just about any size you would use for interior wall or floor.
In this chapter:
• Creating a Ceramic Tile Fountain

Tiled Steps
In addition to the traditional tricks for improving your home’s curb appeal—landscaping, fresh paint, pretty windows—a tiled entry makes a wonderful, positive impression. To be suitable for tiling, stair treads must be deep enough to walk on safely. Check local building codes for specifics, but most require that treads be at least 11 inches deep (from front to back) after the tile is added.
Before you start laying any tiles, the concrete must be free of curing agents, clean, and in good shape. Make necessary repairs and give them time to cure. An isolation membrane can be applied before the tile. This membrane can be a fiberglass sheet or it can be brushed on as a liquid to dry. In either case, the membrane separates the tile from the concrete, which allows the two to move independently and protects the tile from cracking due to settling or shifting of the concrete.
Choose exterior-rated, unglazed floor tile with a skid-resistant surface. Tile for the walking surfaces should be at least 1/2-inch thick. Use bullnose tiles at the front edges of treads (as you would on a countertop) and use cove tiles as the bottom course on risers.
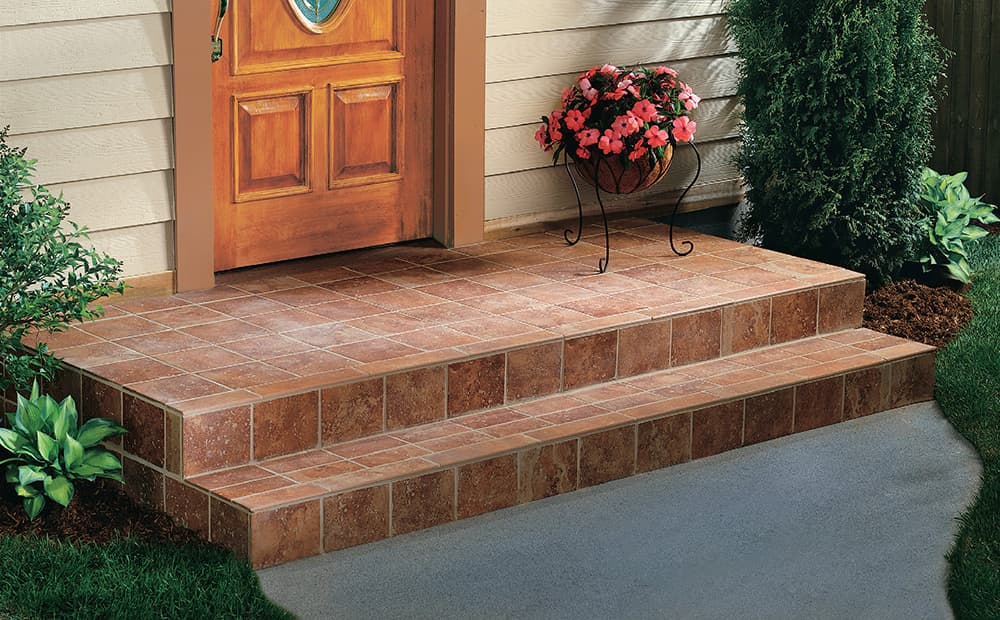
 How to Tile Concrete Steps

Use a pressure washer to clean the surface of the concrete. Use a washer with at least 4,000 psi, and follow manufacturer’s instructions carefully to avoid damaging the concrete with the pressurized spray.

Dig out rubble in large cracks and chips using a small cold chisel or flat-head screwdriver. Use a wire brush to loosen dirt and debris in small cracks. Sweep the area or use a wet/dry vacuum to remove all debris.

Fill small cracks and chips with masonry patching compound using a masonry trowel. Allow the patching compound to cure according to manufacturer’s directions.

Test the surface of the steps and stoop for low spots using a 4-ft. level or other straightedge. Fill any low spots with patching compound and allow the compound to cure thoroughly.

Spread a layer of liquid isolation membrane over the concrete using a notched trowel. Smooth the surface of the membrane using the flat edge of a trowel. Allow the membrane to cure according to manufacturer’s directions.

The sequence is important when tiling a stairway with landing. The primary objective is to install the tile in such a way that the fewest possible cut edges are visible from the main viewing position. If you are tiling the sides of concrete steps, start laying tile there first. Begin by extending horizontal lines from the tops of the stair treads back to the house on the sides of the steps. Use a 4-ft. level.
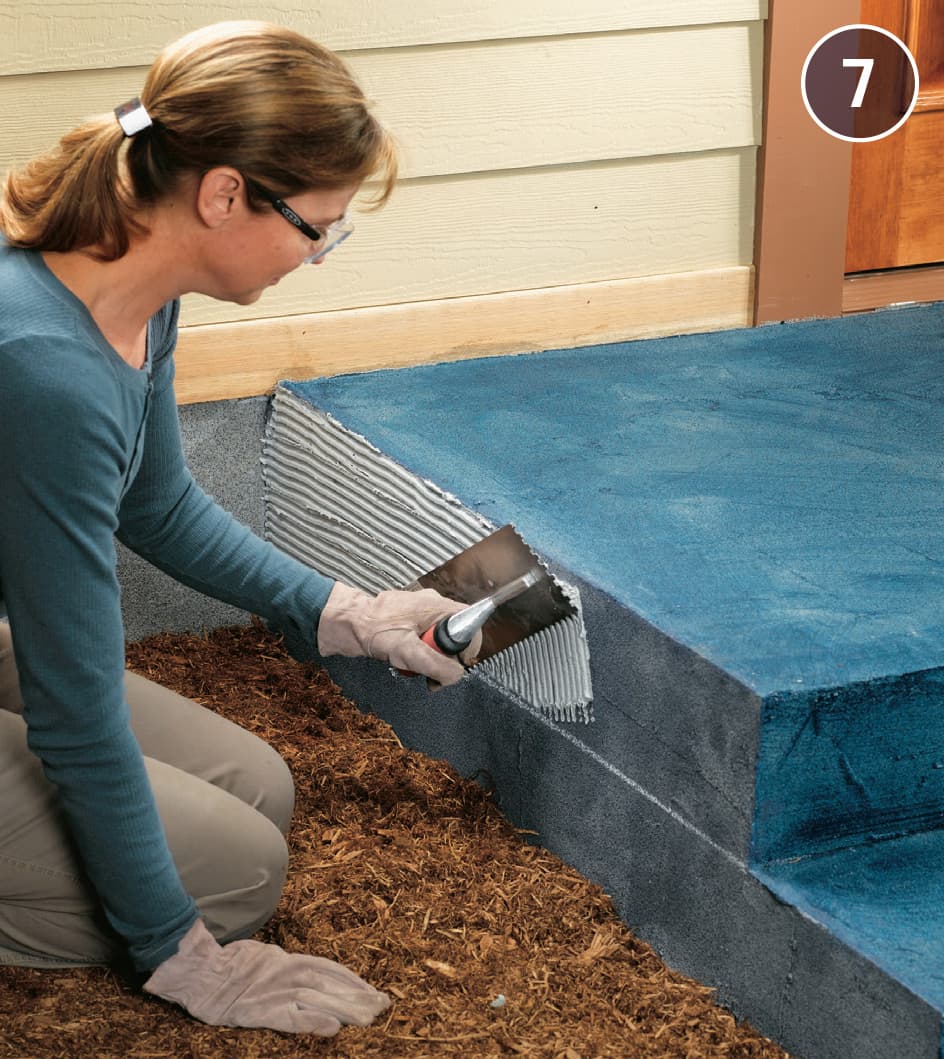
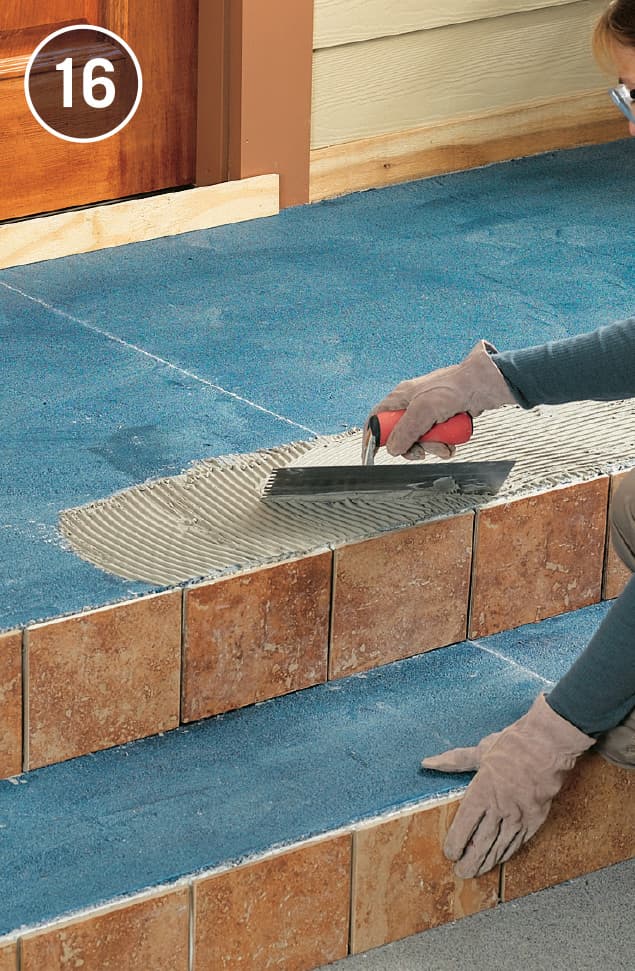
Mix a batch of thinset mortar with latex bonding adhesive and trowel it onto the sides of the steps, trying to retain visibility of the layout lines. Because the top steps are likely more visible than the bottom steps, start on top and work your way down.
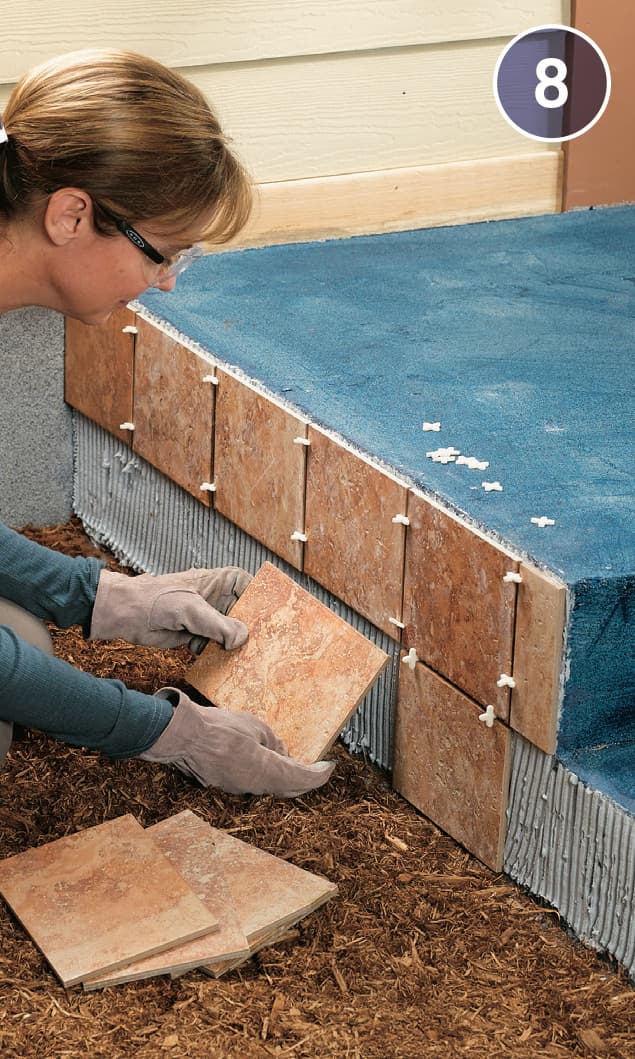
Begin setting tiles into the thinset mortar on the sides of the steps. Start at the top and work your way downward. Try to lay out tile so the vertical gaps between tiles align. Use spacers if you need to.

Wrap a 2 × 4 in old carpet and drag it back and forth across the tile surfaces to set them evenly. Don’t get too aggressive here—you don’t want to dislodge all of the thinset mortar.
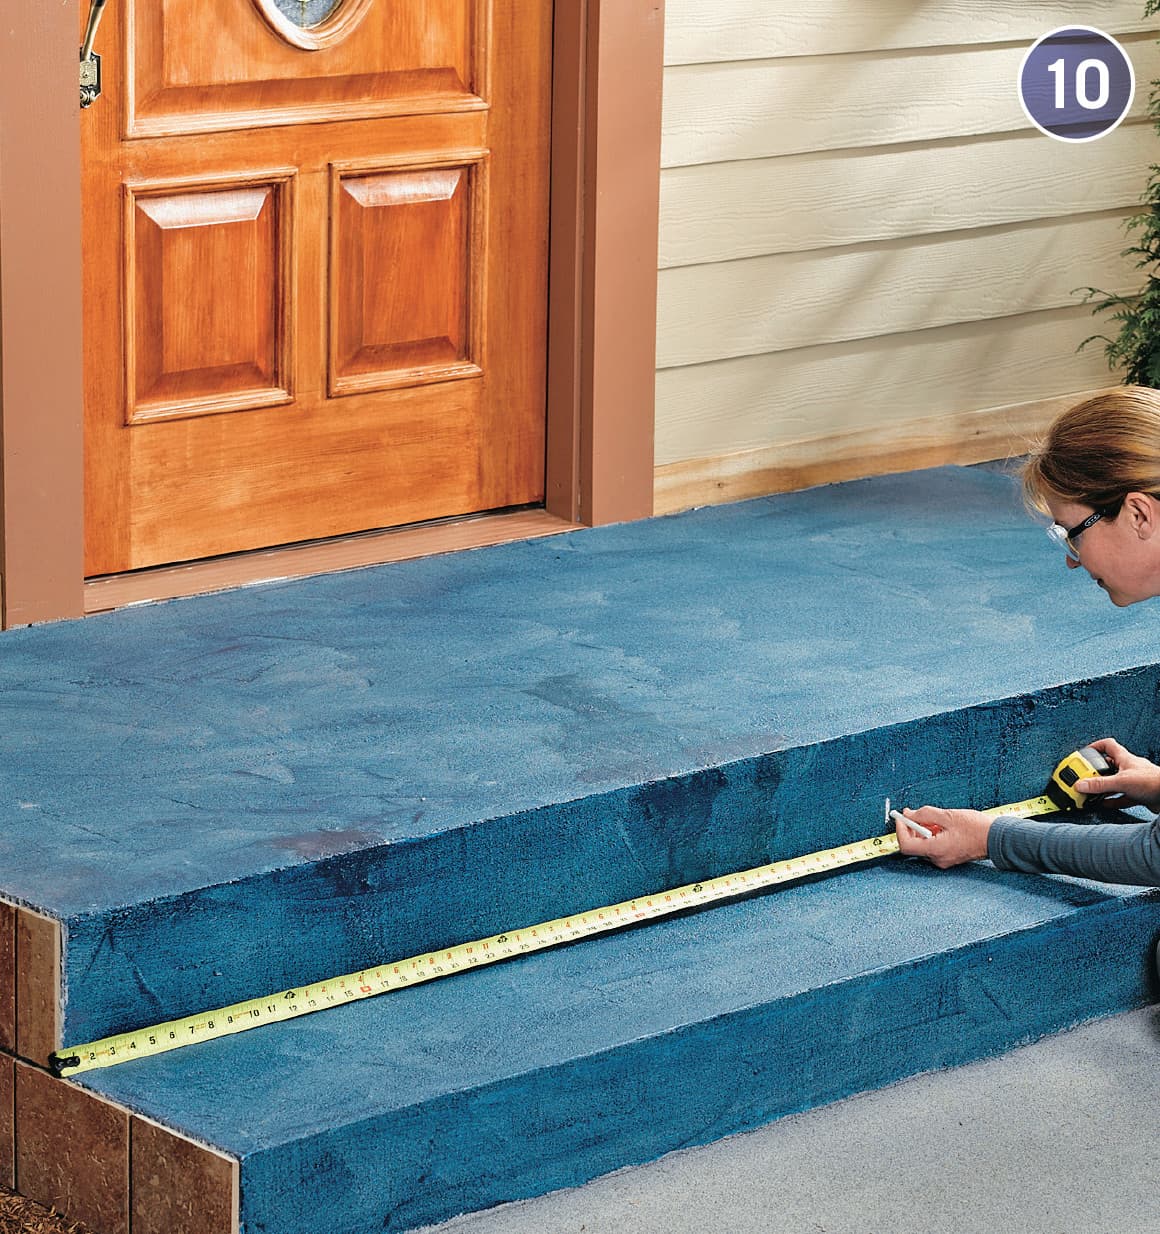
Measure the width of a riser, including the thickness of the tiles you’ve laid on the step sides. Calculate the centerpoint and mark it clearly with chalk or a high visibility marker.

Next, dry-lay the tiles on the stair risers. Because the location of the tops of the riser tiles affects the positioning of the tread and landing tiles, you’ll get the most accurate layout if the riser tiles are laid first. Start by stacking tiles vertically against the riser. (In some cases, you’ll only need one tile to reach from tread to tread.) Add spacers. Trace the location of the tread across the back of the top tile to mark it for cutting.

Cut enough tiles to size to lay tiles for all the stair risers. Be sure to allow enough space for grout joints if you are stacking tiles.

Trowel thinset mortar mixed with bonding adhesive onto the faces of the risers. In most cases, you should be able to tile each riser all at once.

Lay tiles on the risers. The bottom tile edges can rest on the tread, and the tops of the top tiles should be flush with or slightly lower than the plane of the tread above.

Dry-lay tile in both directions on the stair landing. You’ll want to maintain the same grout lines that are established by the riser tiles, but you’ll want to evaluate the front-to-back layout to make sure you don’t end up with a row of tiles that is less than 2" or so in width.
Cut tiles as indicated by your dry run, and then begin installing them by troweling thinset mortar for the bullnose tiles at the front edge of the landing. The tiles should overlap the top edges of the riser tiles, but not extend past their faces.

Set the first row of field tiles, maintaining an even gap between the field tiles and the bullnose tiles.

Add the last row of tiles next to the house and threshold, cutting them as needed so they are between 1/4 and 1/2" away from the house.

Install tiles on the stair treads, starting at the top tread and working your way downward. Set a bullnose tile on each side of the centerline and work your way toward the sides, making sure to conceal the step-side tiles with the tread tiles.

Fill in the field tiles on the stair treads, being sure to leave a gap between the back tiles and the riser tiles that’s the same width as the other tile gaps.

Let the thinset mortar cure for a few days, and then apply grout in the gaps between tiles using a grout float. Wipe away the grout after it clouds over. Cover with plastic, in the event of rain.

After a few weeks, seal the grout lines with an exterior-rated grout sealer.
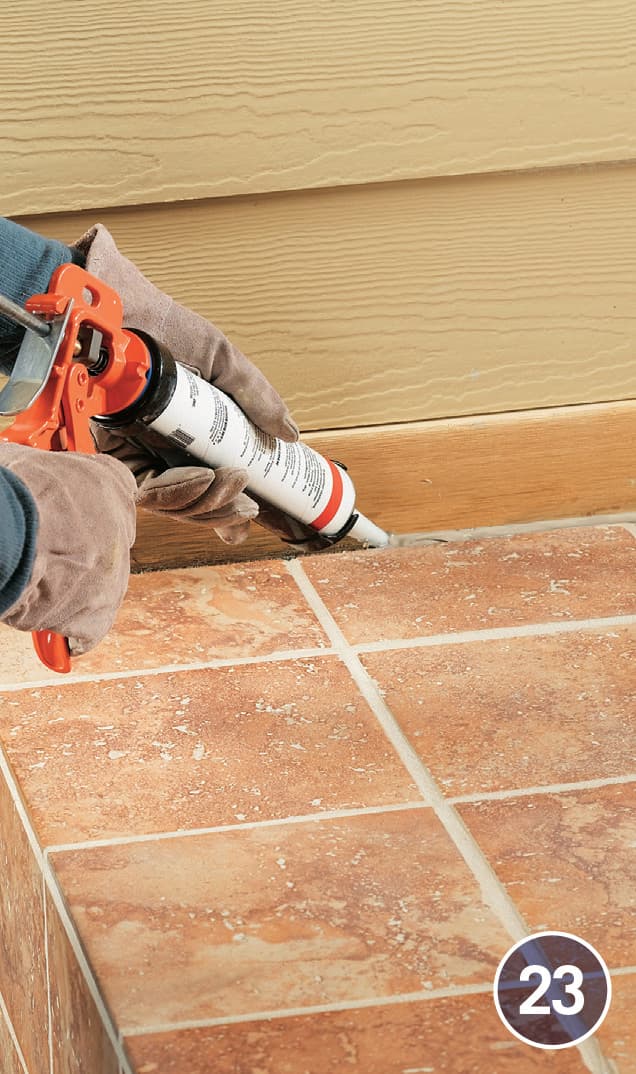
Select (or have prepared) a pretinted caulk that’s the same color as your grout. Fill the gap between the back row of tiles and the house with caulk. Smooth with a wet finger if needed.

Tiled Patio
Outdoor tile can be made of several different materials and is available in many colors and styles. Make sure the tiles you select are intended for outdoor use. A popular trend is to use natural stone tiles with different shapes and complementary colors, as demonstrated in this project. Tile manufacturers may offer brochures giving you ideas for modular patterns that can be created from their tiles.
When laying a modular, geometric pattern with tiles of different sizes, it’s crucial that you test the layout before you begin and that you place the first tiles very carefully. The first tiles will dictate the placement of all other tiles in your layout.
You can pour a new masonry slab on which to install your tile patio, but another option is to finish an existing slab by veneering it with tile—the scenario demonstrated here.
Outdoor tile must be installed on a clean, flat, and stable surface. When tiling an existing concrete slab, the surface must be free of flaking, wide cracks, and other major imperfections. A damaged slab can be repaired by applying a one- to two-inch-thick layer of new concrete over the old surface before laying tile.
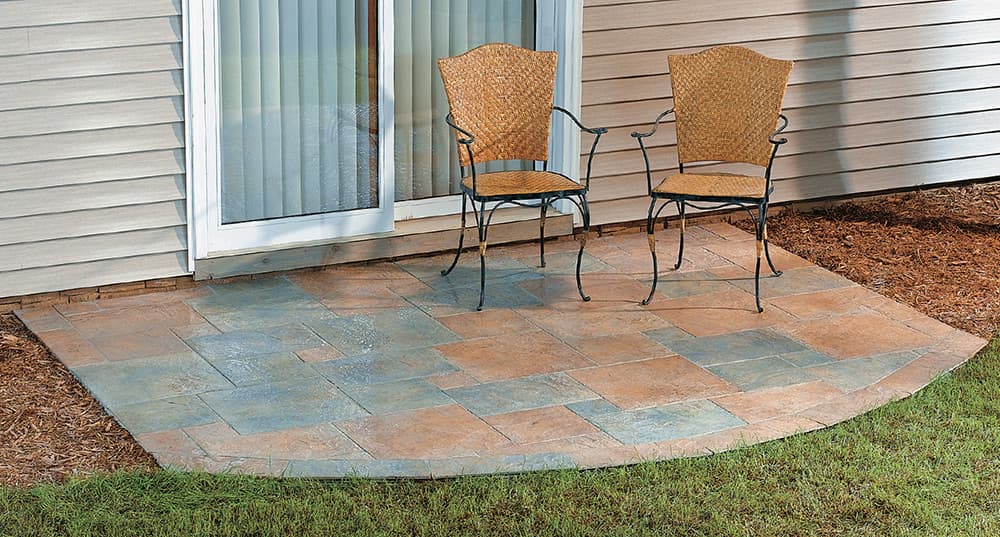
This modest, compact tiled patio creates a lovely, relaxing sitting area right outside sliding doors, but without consuming too much yard or garden space.
NOTE: Wear eye protection when cutting tile, and handle cut tiles carefully—the cut edges of some materials may be very sharp.
 How to Tile a Patio Slab
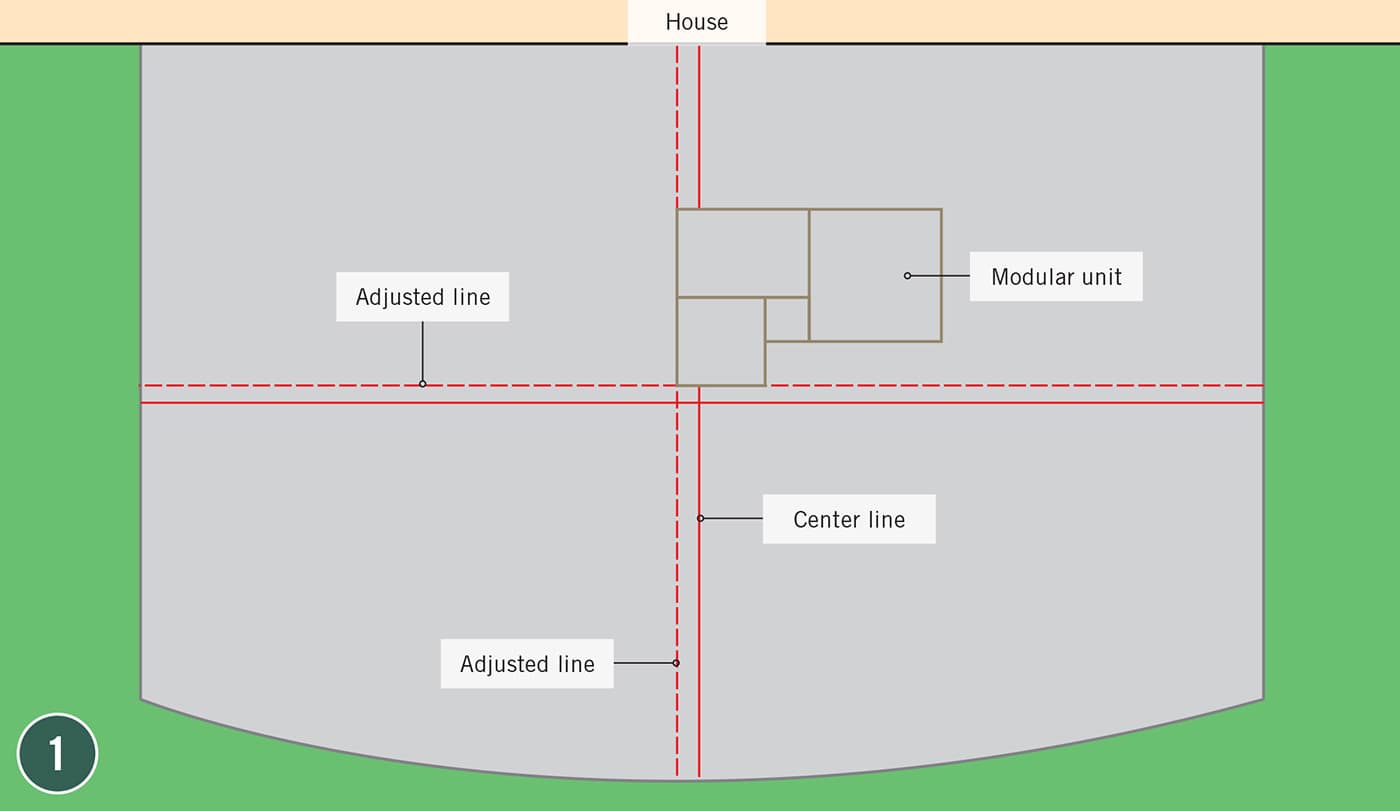
To establish a layout for tile with a modular pattern, you must carefully determine the location of the first tile. On the clean and dry concrete surface, measure and mark a centerline down the center of the slab. Test-fit tiles along the line—because of the modular pattern used here, the tiles are staggered. Mark the edge of a tile nearest the center of the pad, then create a second line perpendicular to the first and test-fit tiles along this line.

Make adjustments as needed so that the modular pattern breaks evenly over the patio surface and is symmetrical from side to side. You may need to adjust the position of one or both lines. The intersection of the lines is where your tile installation will begin. Outline the position of each group of tiles on the slab.

Mix thinset mortar according to manufacturer’s directions, and add an additive as directed. At the intersection of the two layout lines, use a notched trowel to spread thinset mortar over an area large enough to accommodate the layout of the first modular group of tiles. Hold the trowel at a 45° angle to rake the mortar to a consistent depth.

Set the first tile, twisting it slightly as you push it into the mortar. Align it with both adjusted layout lines, then place a padded 2 × 4 over the center of the tile and give it a light rap with a hammer to set the tile.

Position the second tile adjacent to the first with a slight gap between them. Place spacers on end in the joint near each corner and push the second tile against the spacers. Make certain the first tile remains aligned with the layout lines. Set the padded 2 × 4 across both tiles and tap to set. Use a damp cloth to remove any mortar that squeezes out of the joint or gets on tile surfaces. Joints must be at least 1/8"-deep to hold grout.

Lay the remaining tiles of the first modular unit using spacers to set gaps. Using a trowel, scrape the excess mortar from the concrete pad in areas where you will not yet be working to prevent it from hardening and interfering with tile installation.

With the first modular unit set, continue laying tile following the pattern established. You can use the chalklines for general reference, but they will not be necessary as layout lines. To prevent squeeze-out between tiles, scrape a heavy accumulation of mortar 1/2" away from the edge of a set tile before setting the adjacent tile.

After installing the tile, remove all the spacers, cover the tiled area with plastic, and let the thinset mortar cure according to the manufacturer’s instructions. When tile has fully set, remove the plastic and mix grout, using a grout additive instead of water. Grout additive is especially important in outdoor applications, because it creates joints that are more resilient in changing temperatures.

Use a grout float to spread grout over an area that is roughly 10 sq. ft. Push down with the face of the float to force grout into the joints, then hold the float edge at a 45° angle to the tile surfaces and scrape off the excess grout.

Once you’ve grouted this area, wipe off the grout residue using a damp sponge. Wipe with a light, circular motion—you want to clean tile surfaces but not pull grout out of the joints. Don’t try to get the tile perfectly clean the first time. Wipe the area several times, rinsing out the sponge frequently.

Once the grout has begun to set (usually about 1 hour, depending on temperature and humidity), clean the tile surfaces again. You want to thoroughly clean grout residue from tile surfaces because it is difficult to remove once it has hardened. Use a cloth to buff off a light film left after final cleaning.

Cover the pad with plastic and let the grout cure according to manufacturer’s instructions. Once the grout has cured, use a foam brush to apply grout sealer to only the grout, wiping any spill-over off of tile surfaces.

Apply tile sealer to the entire surface using a paint roller. Cover the patio with plastic and allow the sealer to dry completely before exposing the patio to weather or traffic.

Creating a Ceramic Tile Fountain
A fountain is welcome in any landscape, and building and installing one is easier and much less expensive than you might imagine. Think of it: a colorful tile-covered fountain reflected in a small garden pond, water gently splashing on sparkling sea glass. And you can make one. Easily.
Start with a common chimney flue tile and a few square feet of colorful mosaic tiles. Add an inexpensive twelve-volt fountain pump and tiny submersible disc lights, which can be wired into any low-voltage system. Almost before you know it, you’ll be ready to show off for the neighbors.
One note of caution: before adding accessories to your low-voltage system, make sure your transformer can handle the extra load.
Chimney flue tiles are available in many different sizes and can be purchased at most fireplace and masonry stores. Small precut sheets of expanded metal sheet are available from most hardware stores and home centers.


 How to Create a Ceramic Tile Fountain

Draw a line on the inside of the flue tile, about 4" from the top. On each wall of the tile, position two L-brackets at the line and glue each bracket in place with construction adhesive.

Set tile on the outside of the flue tile and the inside down to the line. Working on one side of the flue at a time, spread thin-set mortar on the surface, then press the tile into place. Let the mortar dry according to manufacturer’s directions. When the mortar is dry, grout the tile.
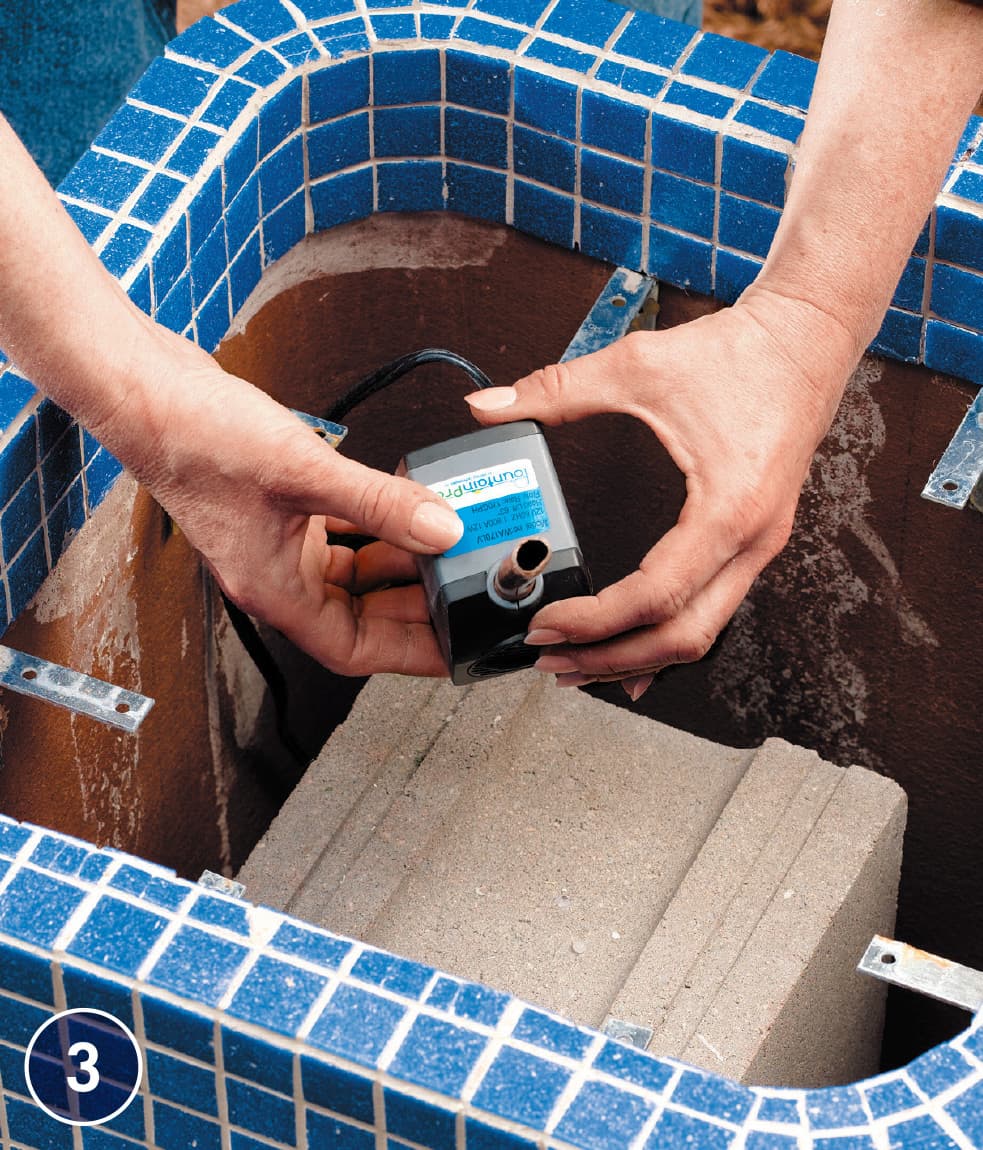
Position four bricks at the bottom of the water garden and set the flue tile on them. (The flue tile will be very heavy—recruit a helper or two for this.) Set a concrete block in the center of the flue tile and put the fountain pump on top of it.
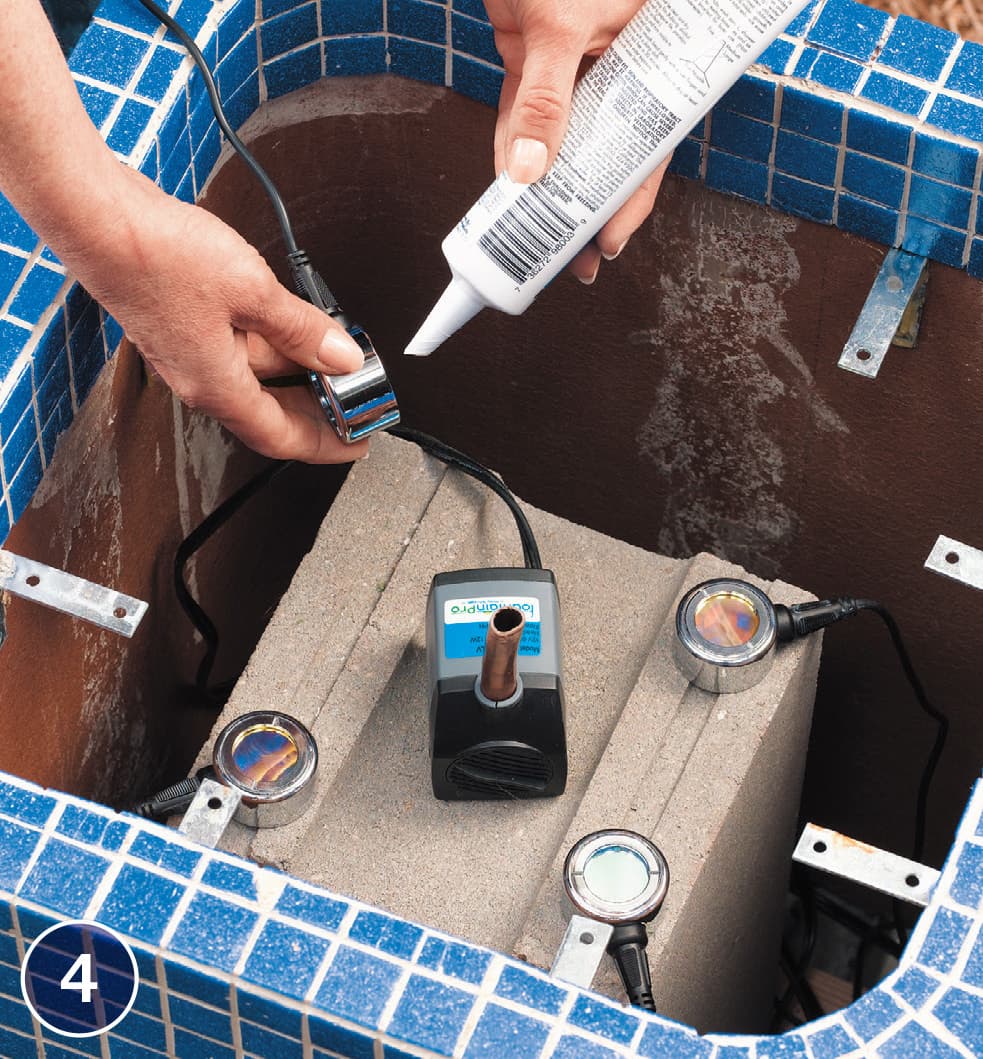
Set the lights in place, securing them to the concrete block with dabs of silicone caulk. Run the cables from the pump and lights out of the pond to the nearest fixture in your low-voltage lighting system. (If you don’t have a low-voltage lighting system, run the cables to the transformer and plug the transformer into the nearest GFCI outlet.)

Connect the cables from the pump and lights to a cable from your low-voltage lighting system, using the simple connectors included with the pump. Add water to the pond and test the lights and pump. Adjust the operation of the pump as necessary. Dig a small, shallow trench and bury the cables.
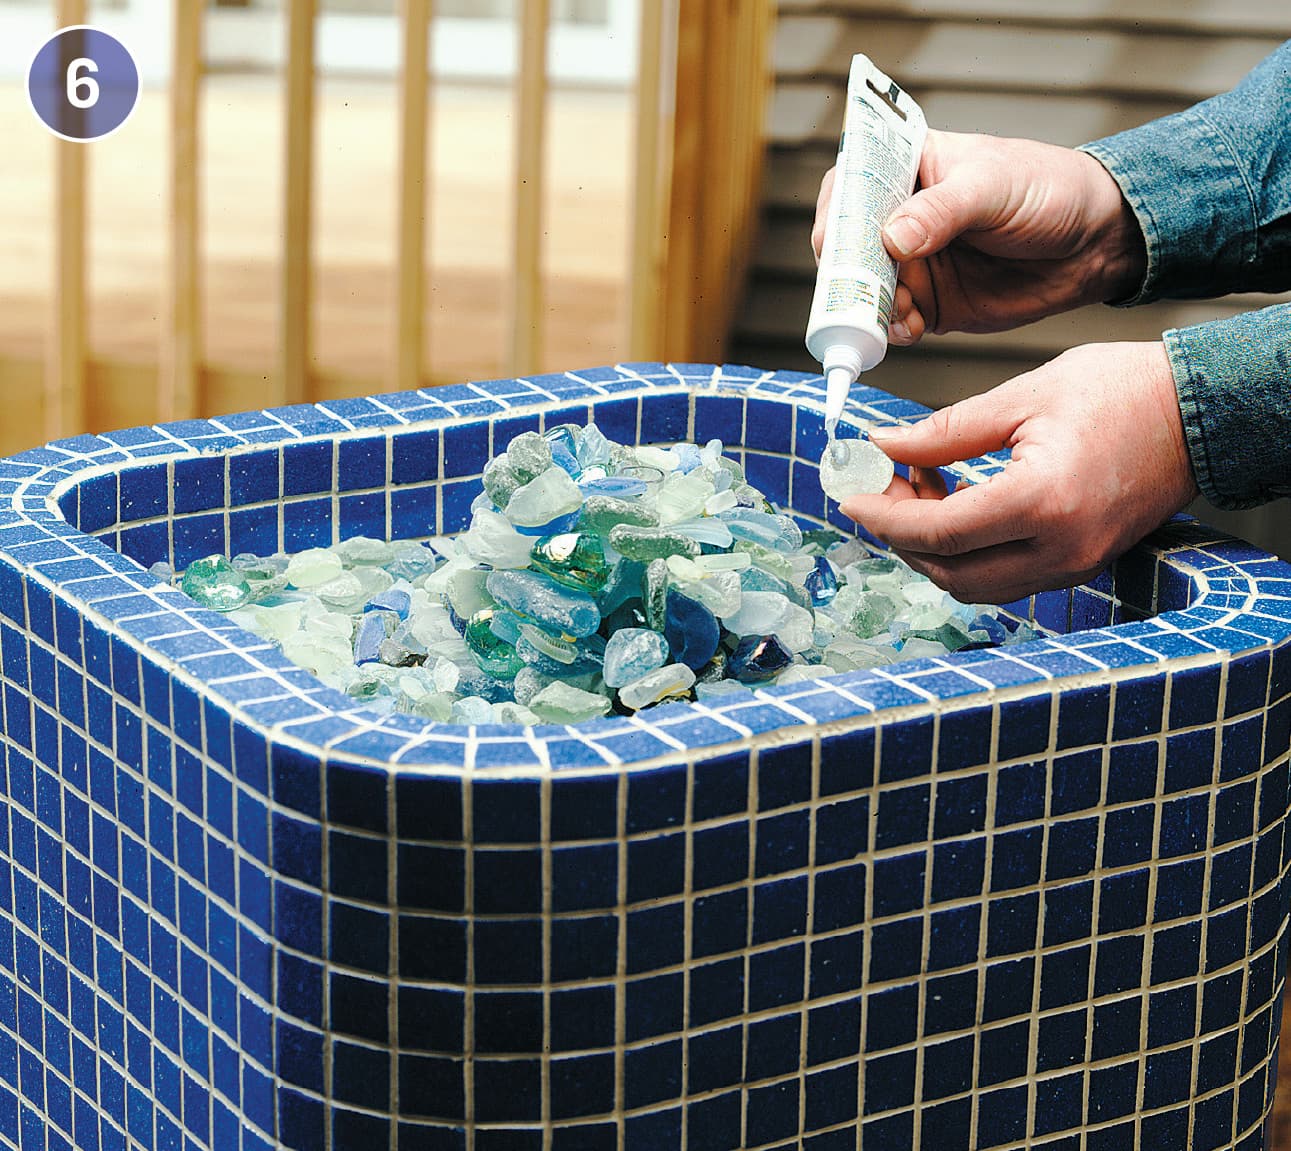
If necessary, cut the expanded metal grate to fit inside the flue tile, using a jigsaw with a metal-cutting blade. In the center of the grate, use the jigsaw or a bolt cutter to expand a hole to approximately 2" in diameter. Insert the pump’s discharge tube into this hole, then set the grate on top of the L-brackets in the flue tile. Mound the sea glass around the discharge tube. Use silicone to stick individual pieces of sea glass together, if necessary to hold them in place. Cover the remaining grate with a layer of sea glass.

Creating Mosaic Planters
The basic steps for adding tile to a planter are much the same as for adding tile to any other surface: plan the layout, set the tile, and grout. Fun and creativity come into the process when you turn your imagination loose with tile and container selection.
But don’t limit yourself to tile—mix in other materials such as flat glass marbles or broken pieces of stained glass, mirror, and china. The designs can be as simple or elaborate as you’d like.
Try a mosaic of daisies using bits of white stained glass for the petals, golden flat glass marbles for the centers, and broken tile bits for the background. Or maybe you’d prefer to use bits of green tile for a vine and leaves with purple flat glass marbles arranged like bunches of grapes. Add a background of broken china or broken stained glass, and you’ve got a beautiful handmade piece for only a few hours’ work.
Select containers that have flat rims, such as that on the white planter shown below, or that have a broad expanse of flat surface like that on the pot shown in the project on the following page. Try to match the style and colors of the planters to the design.

A few pieces of broken-up mosaic tile can turn an ordinary pot into a garden showpiece.
 How to Decorate Planters

Remove the mosaic tiles from their backing and experiment with designs and layouts. Cut tiles in half as necessary using a snap cutter. Use tile nippers to break some tiles into small pieces.

Draw an irregular border around the planter, ranging from 1 1/2 to 2" wide. Use a putty knife to spread mastic within the border and position the tile, alternating between the whole and half tiles all the way around the planter.

Fill in the remaining portion of the border with pieces of broken tile. Let the mastic dry according to manufacturer’s directions. Grout the tile. If the planter will be used outdoors, apply grout sealer after the grout has fully cured.

Tiled Garden Bench
A simple garden project such as this is a great way to use tiles left over from a large indoor or outdoor tiling project. This bench uses four hand-painted accent tiles surrounded by terra cotta field tiles with small squares that could easily be cut from larger tiles.
The bench itself is both a decorative focal point and a useful addition to any yard or garden. By using natural tones for the seat, the look blends seamlessly with any landscaping design. The bench is a sturdy construction that is ideal wherever you want to add seating in the garden. Best of all, it is easy to make and will take you less than a weekend to put together.

Making this tiled benchtop requires some creativity and a fair amount of tile cutting, but the result is both interesting and beautiful.
 TILED GARDEN BENCH

 How to Make a Tiled Garden Bench

Cut two sides and two ends, then position the ends between the sides so the edges are flush. Make sure the frame is square. Drill 1/8" pilot holes through the sides and into the ends. Drive 3" screws through the pilot holes.
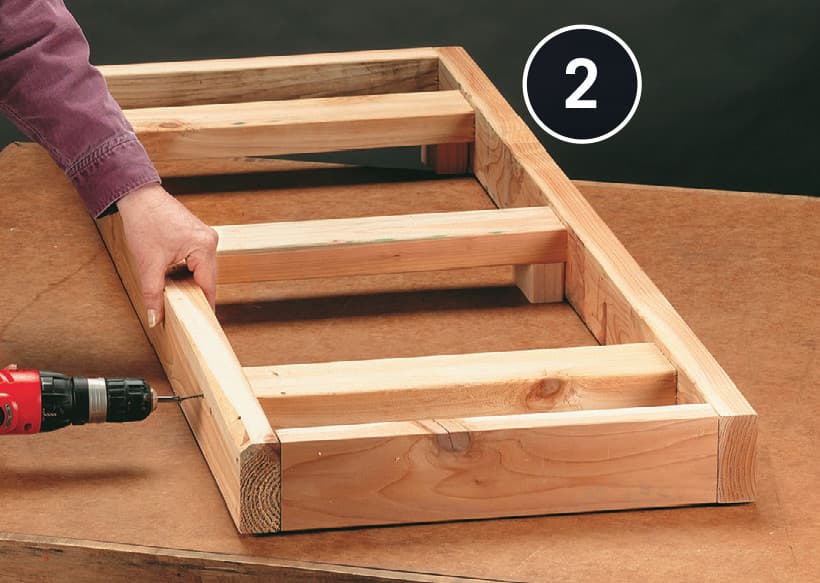
Cut three stretchers. Mark the sides, 4 1/2" from the inside of each end. Using 1 1/2" blocks beneath them as spacers, position the stretchers and make sure they’re level. Drill pilot holes and fasten the stretchers to the sides with 3" screws.

Cut one 15 × 48" core from 3/4" exterior-grade plywood and another the same size from cementboard. Staple plastic sheeting over the plywood, draping it over the edges. Lay the cementboard rough-side up on the plywood and attach it with 1 1/4" cementboard screws driven every 6". Make sure the screw heads are flush with the surface.
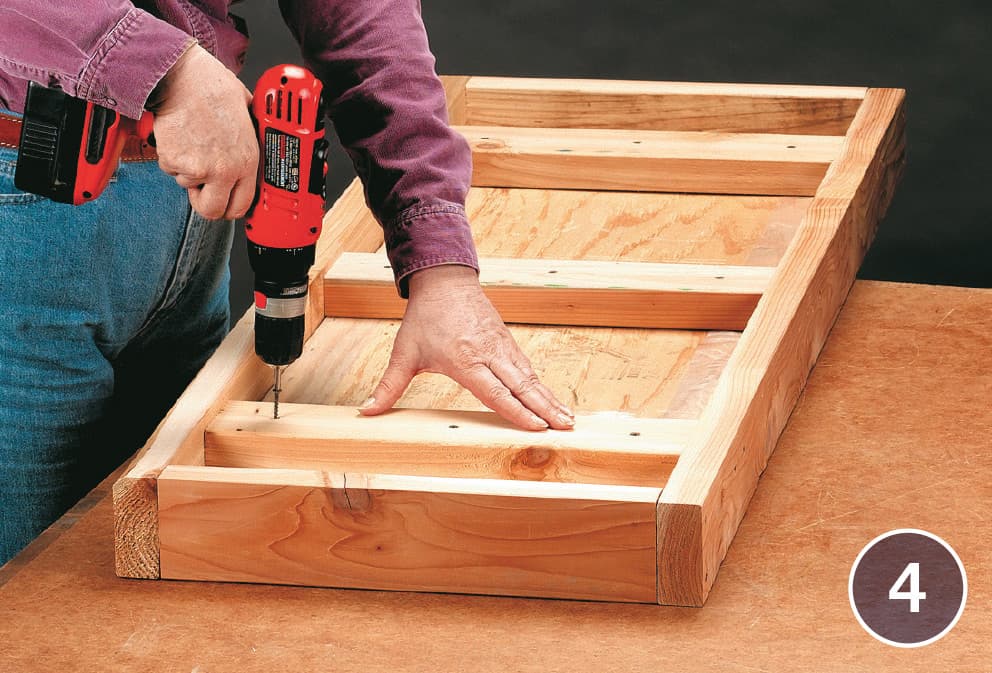
Position the bench frame upside down and over the plywood/cementboard core. Drill pilot holes and then drive 2" galvanized deck screws through the stretchers and into the plywood.

Cut four braces from a cedar 2 × 6. Mark the angle on each end of each brace by measuring down 1 1/2" from the top edge and 1 1/2" along the bottom edge. Draw a line between the two points and cut along that line using a power or hand miter saw or a circular saw.
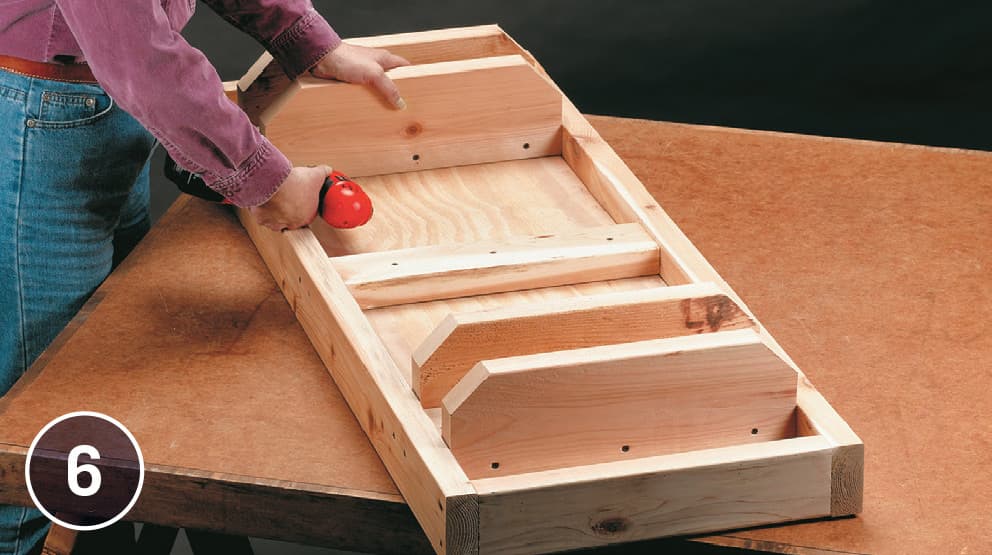
On each brace, measure down 3/4" from the top edge and draw a reference line across the stretcher for the screw positions. Drill 1/8" pilot holes along the reference line. Position a brace on each side of the end stretchers and fasten them with 3" screws driven through the braces and into the stretchers.
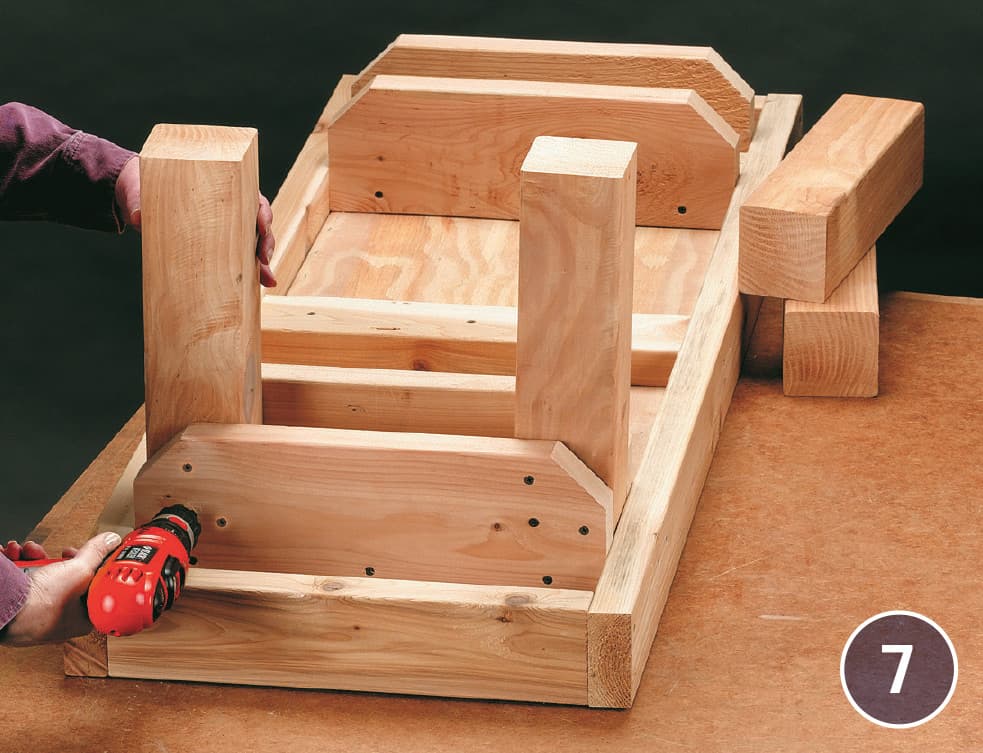
Cut four 13" legs from a 4 × 4. Position each leg between a set of braces and against the sides of the bench frame. Drill pilot holes through each brace and attach the leg to the braces by driving 3" screws through the braces and into the leg. Repeat the process for each leg. Sand all surfaces with 150-grit sandpaper, then seal all wood surfaces with clear wood sealer.

Snap perpendicular reference lines to mark the center of the length and width of the bench. Beginning at the center of the bench, dry-fit the field tiles, including spacers. Set the accent tiles in place and mark the field tile for cutting.
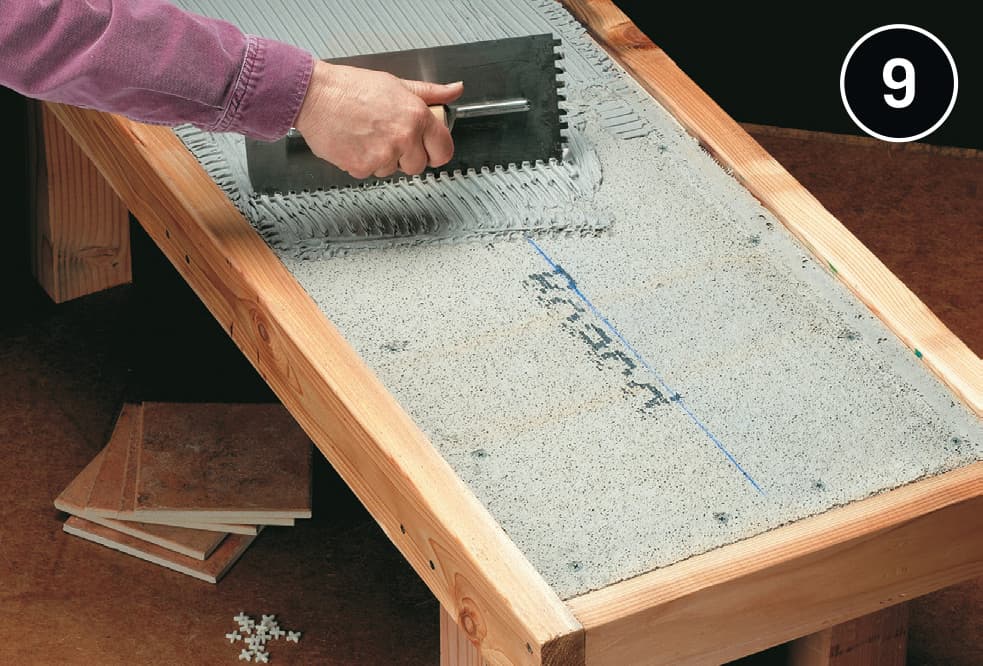
Cut the field tile and continue dry-fitting the bench top, including the accent and border tiles. When you’re satisfied, remove the tile and apply thinset mortar over the cementboard using a notched trowel.
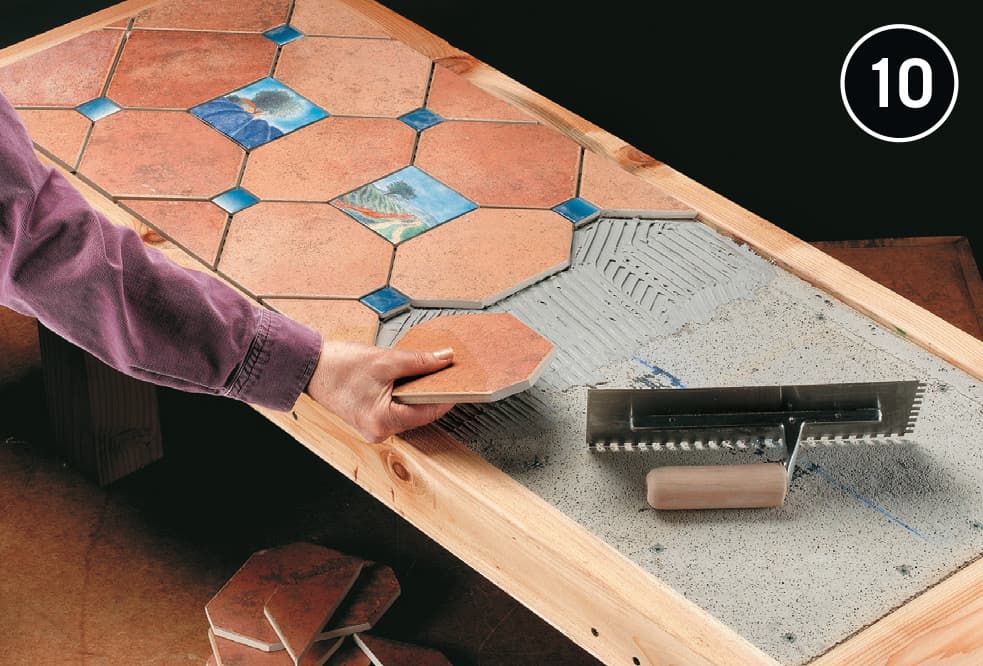
Set the tile into the thinset mortar, using a slight twisting motion. Continue adding thinset and setting the tile until the bench top is covered. Remove the spacers. Let the mortar dry according to manufacturer’s directions.
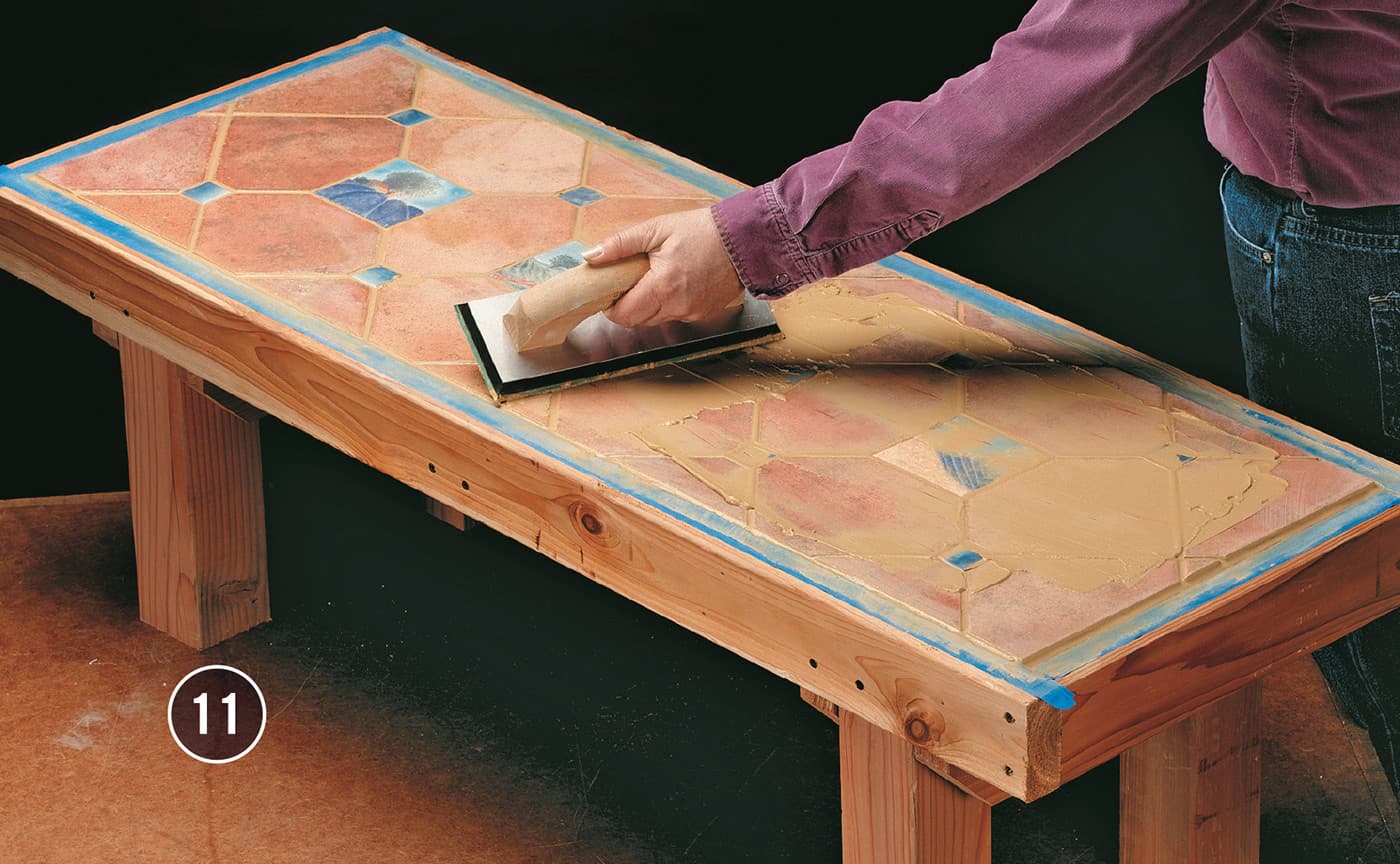
Mix grout and use a grout float to force it into the joints surrounding the tile. Wipe excess grout away with a damp sponge. When the grout has dried slightly, polish the tiles with a clean, dry cloth to remove the slight haze of grout. Seal the grout joints with grout sealer when dry.
 TOOLS & MATERIALS

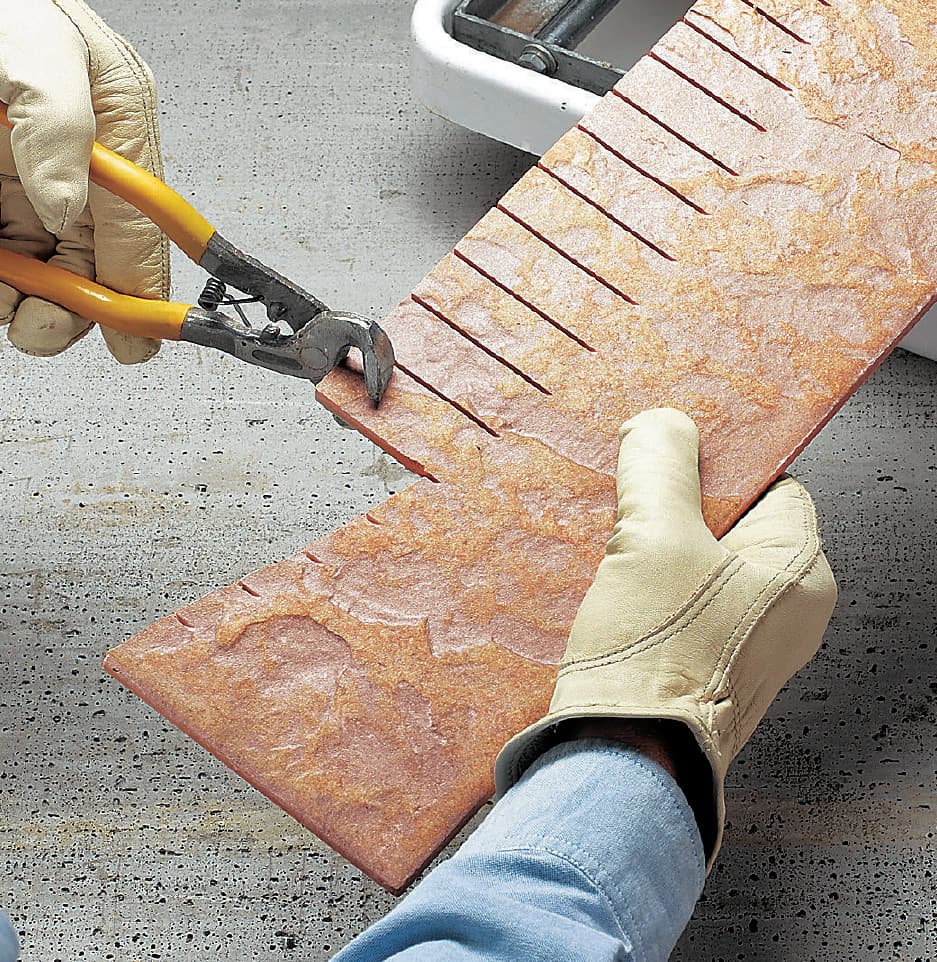
 CUTTING CONTOURS IN OUTDOOR TILE
 GROUTING POROUS TILES
