
Repair Projects
Tile is extremely durable, but like any construction material, it requires maintenance and occasional repairs. This chapter leads you through the most common repair projects: replacing grout, removing and replacing a broken tile, and replacing accessories, such as a ceramic soap dish.
When it comes to tile, replacing grout is the most common repair project because the grout is the most vulnerable part of the installation. While a small crack or hole in a grout joint may not seem like a major issue, in floors and wet walls it allows water to seep behind the tile and can lead to serious damage over time. Like any other repair, taking care of grout issues while they’re small prevents much larger problems later.
This chapter gives you all the information you’ll need to take excellent care of all your floor tile, wall tile, and its grout throughout your home.
In this chapter:

Maintaining Floor Tile
Although ceramic tile is one of the hardest floor coverings, problems can occur. Tiles sometimes become damaged and need to be replaced. Usually, this is simply a matter of removing and replacing individual tiles. However, major cracks in grout joints indicate that floor movement has caused the mortar beneath the tile to deteriorate. In this case, the mortar must be replaced to create a permanent repair.
Any time you remove tile, check the underlayment. If it’s no longer smooth, solid, and level, repair or replace it before replacing the tile. When removing grout or damaged tiles, be careful not to damage surrounding tiles. Always wear eye protection when working with a hammer and chisel. Any time you are doing a major tile installation, make sure to save extra tiles. This way, you will have materials on hand when repairs become necessary.
Regrouting tile may feel like a repair project (and not a very fun one at that), but it really is more of an ongoing maintenance issue. Failed or failing grout will allow moisture underneath tiles and can cause entire floors to fail.
 TOOLS & MATERIALS
Hammer
Cold chisel
Eye protection
Putty knife
Square-notched trowel
Rubber mallet
Grout float
Thinset mortar
Replacement tile
Grout
Bucket
Grout pigment
Grout sealer
Grout sponge
Floor-leveling compound
Carbide-tipped grout saw
Sandpaper
Cleaning tools
Wood block
Carpet scrap
Vacuum
White vinegar
 How to Replace a Floor Tile
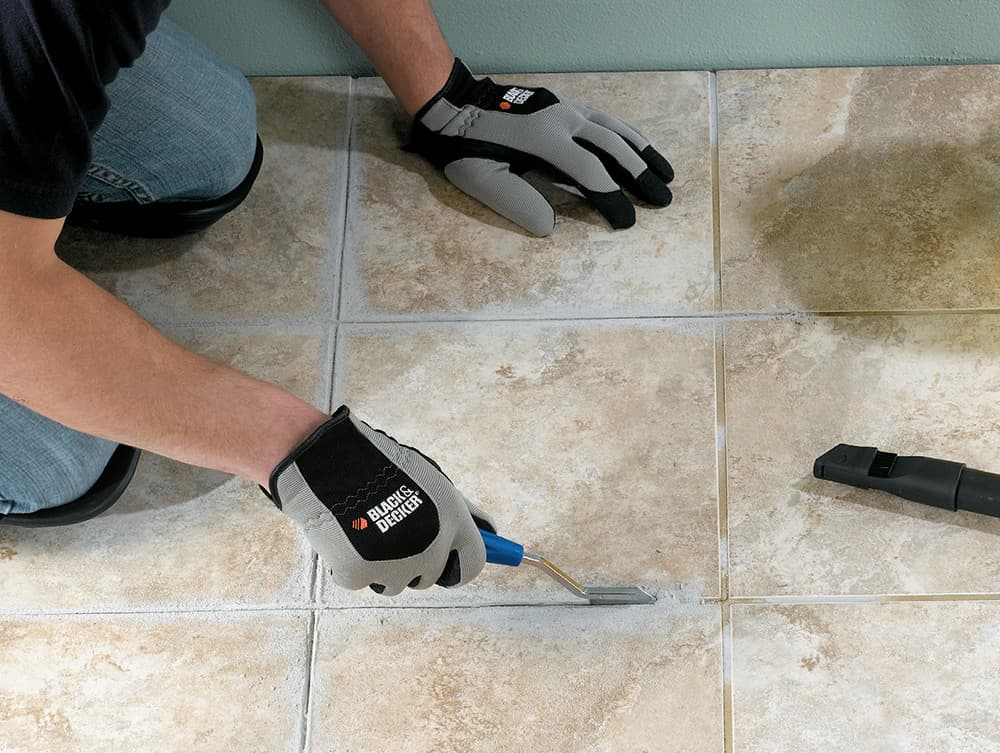
Use a grout tool to apply firm but gentle pressure across the grout until you expose the unglazed edges of the tile. Do not scratch the glazed tile surface. If the grout is stubborn, use a hammer and nail set to first tap the tile (step 2).
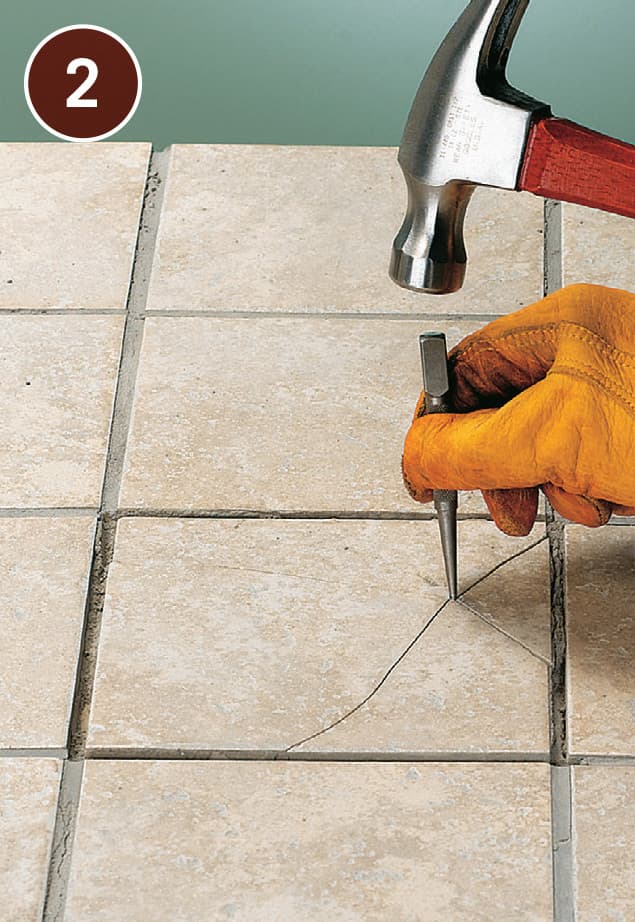
If the tile is not already cracked, use a hammer to puncture the tile by tapping a nail set or center punch into it. Alternatively, if the tile is significantly cracked, use a chisel to pry up the tile.

Insert a chisel into one of the cracks and gently tap the tile. Start at the center and chip outward so you don’t damage the adjacent tiles. Be aware that cementboard looks a lot like mortar when you’re chiseling. Remove and discard the broken pieces. Be sure to wear eye protection.
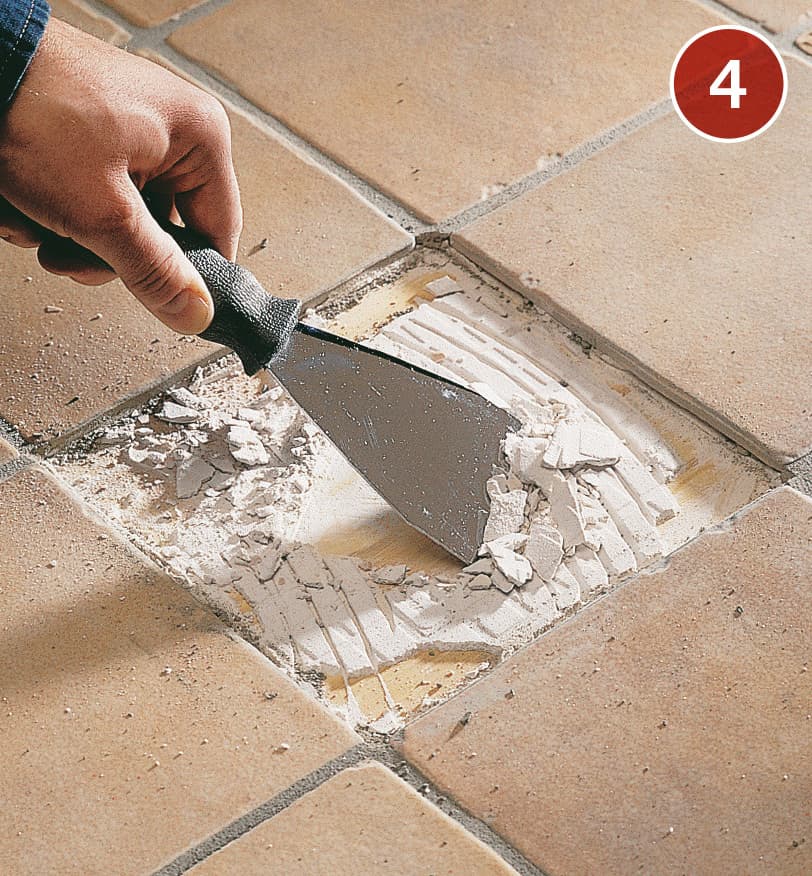
Use a putty knife to scrape away old thinset mortar; use a chisel for poured mortar installation. If the underlayment is covered with metal lath, you won’t be able to get the area smooth; just clean it out the best you can. Once the mortar is scraped from the underlayment, smooth the rough areas with sandpaper. If there are gouges in the underlayment, fill them with epoxy-based thinset mortar (for cementboard) or a floor-leveling compound (for plywood). Allow the area to dry completely.
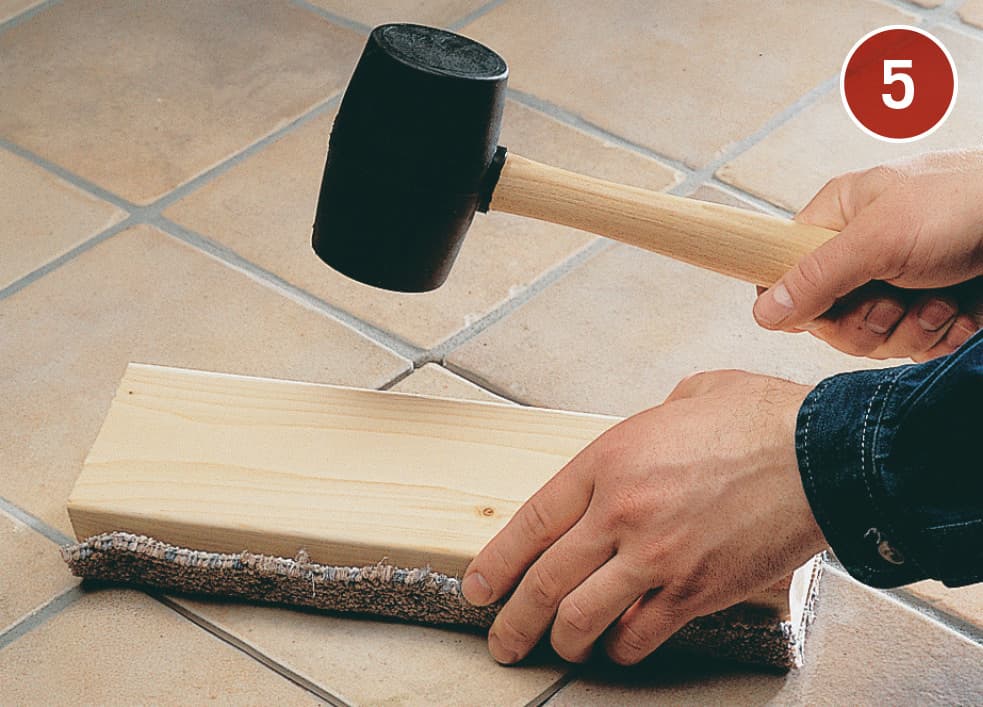
Set a new tile into the empty spot. Use a notched trowel to apply thinset mortar to the back of the tile before setting it into place. Make sure all debris is cleaned from the floor. Rap on a carpet-covered wood block with a mallet to set the tile.
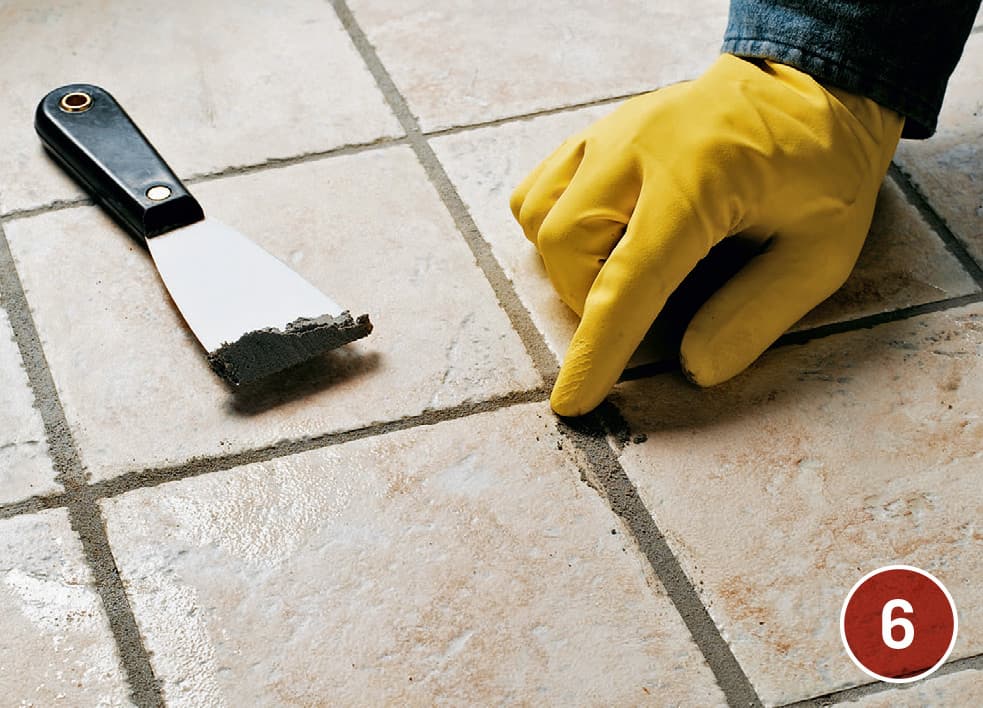
Fill in around the new tile with grout that matches the grout already on the floor. Because most grout darkens over time, choose a shade that’s a bit darker than the original color.
Regrouting Tile
The process of removing old grout and filling the cleaned joints with new grout is the same for most ceramic and porcelain tile installations (including floors, walls, and countertops). For improved adhesion and waterproofing, use a polymer-modified grout mix.
It’s important to note that regrouting is an appropriate repair only for tile that is securely bonded to its substrate. Several loose tiles in one area indicate that the mortar has failed or there are problems (usually moisture-related) with the substrate. If multiple tiles are loose, retiling the floor may be your only option. If a tile job is generally in good shape and you can find a perfect color match with your old grout, you can regrout only the affected areas. Otherwise, it will look best to replace all of the grout within an area.
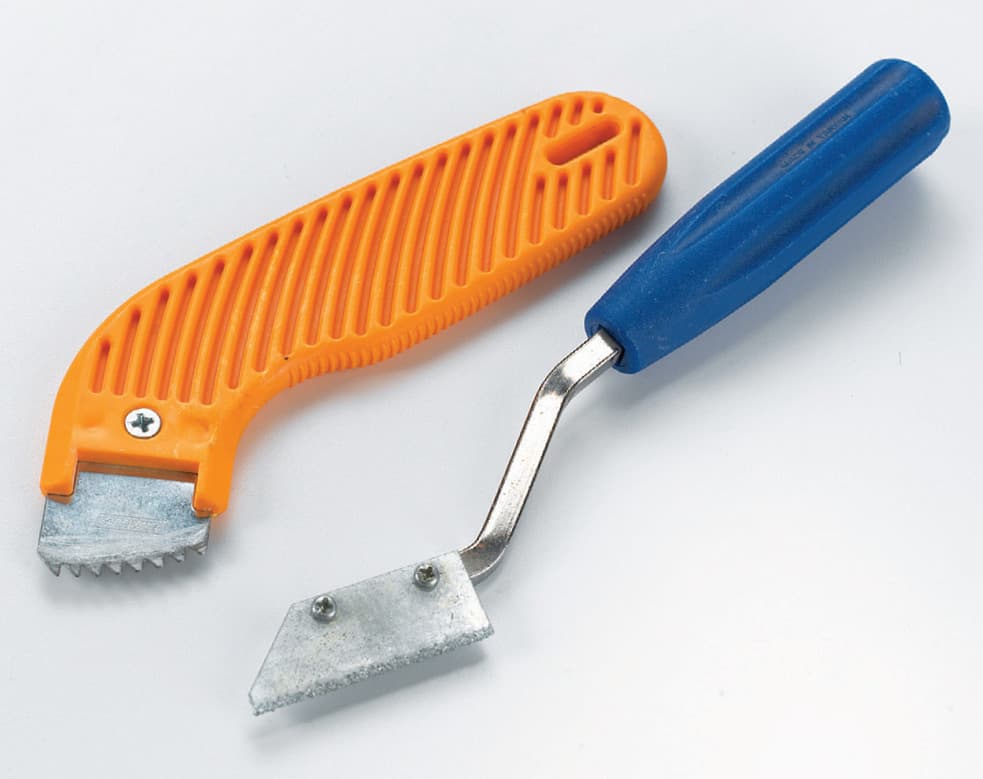
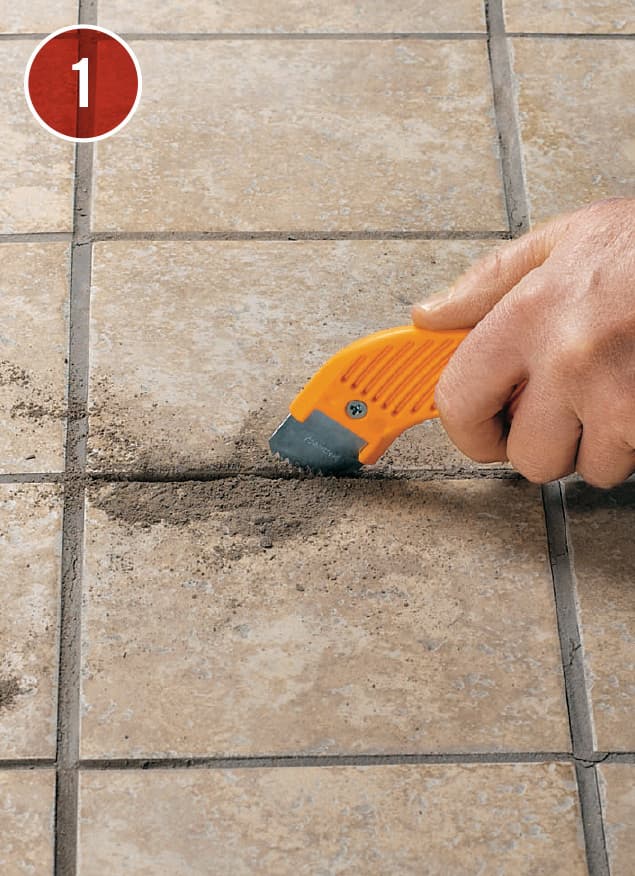
Carbide-blade grout tools are used to remove failing grout.
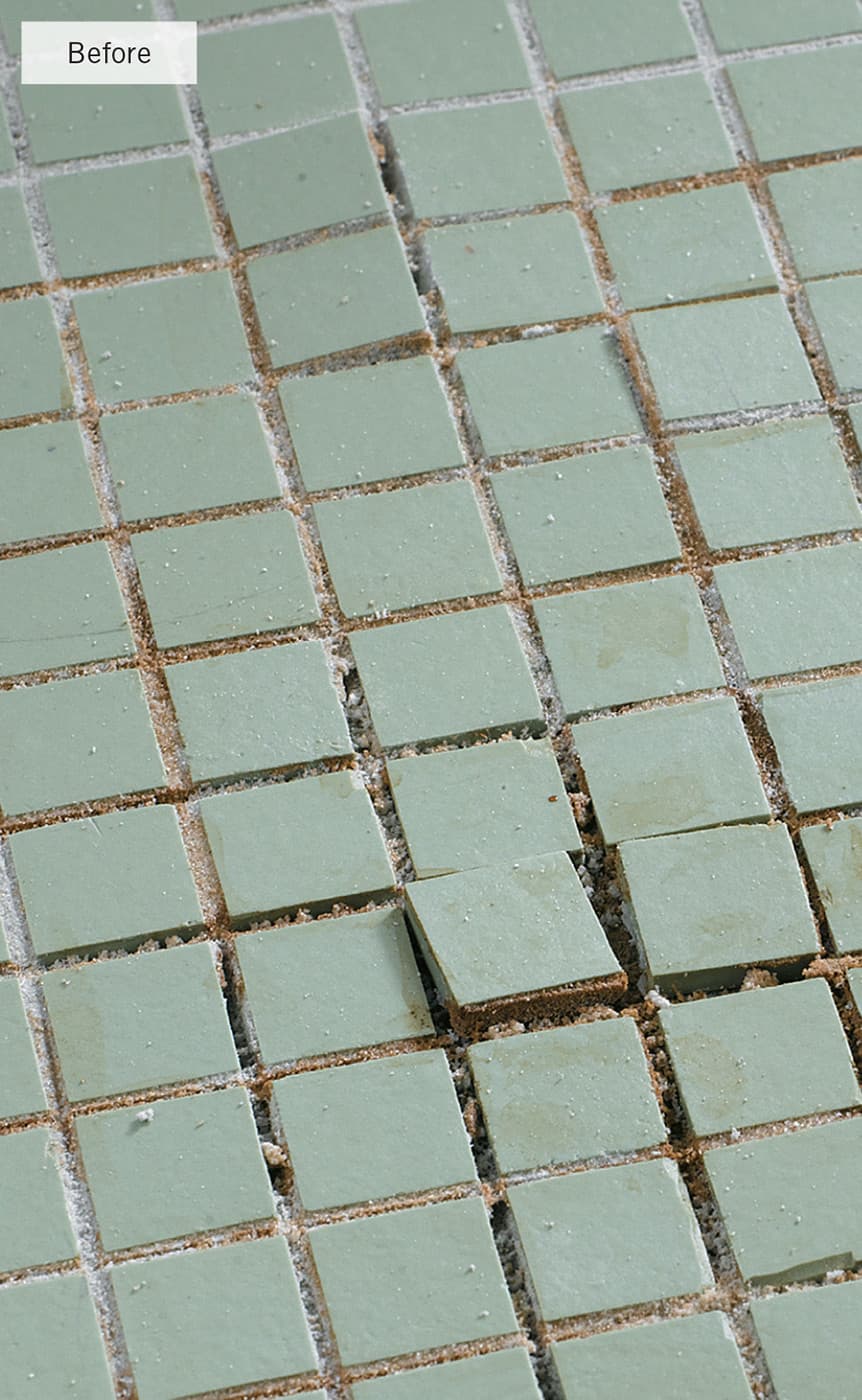
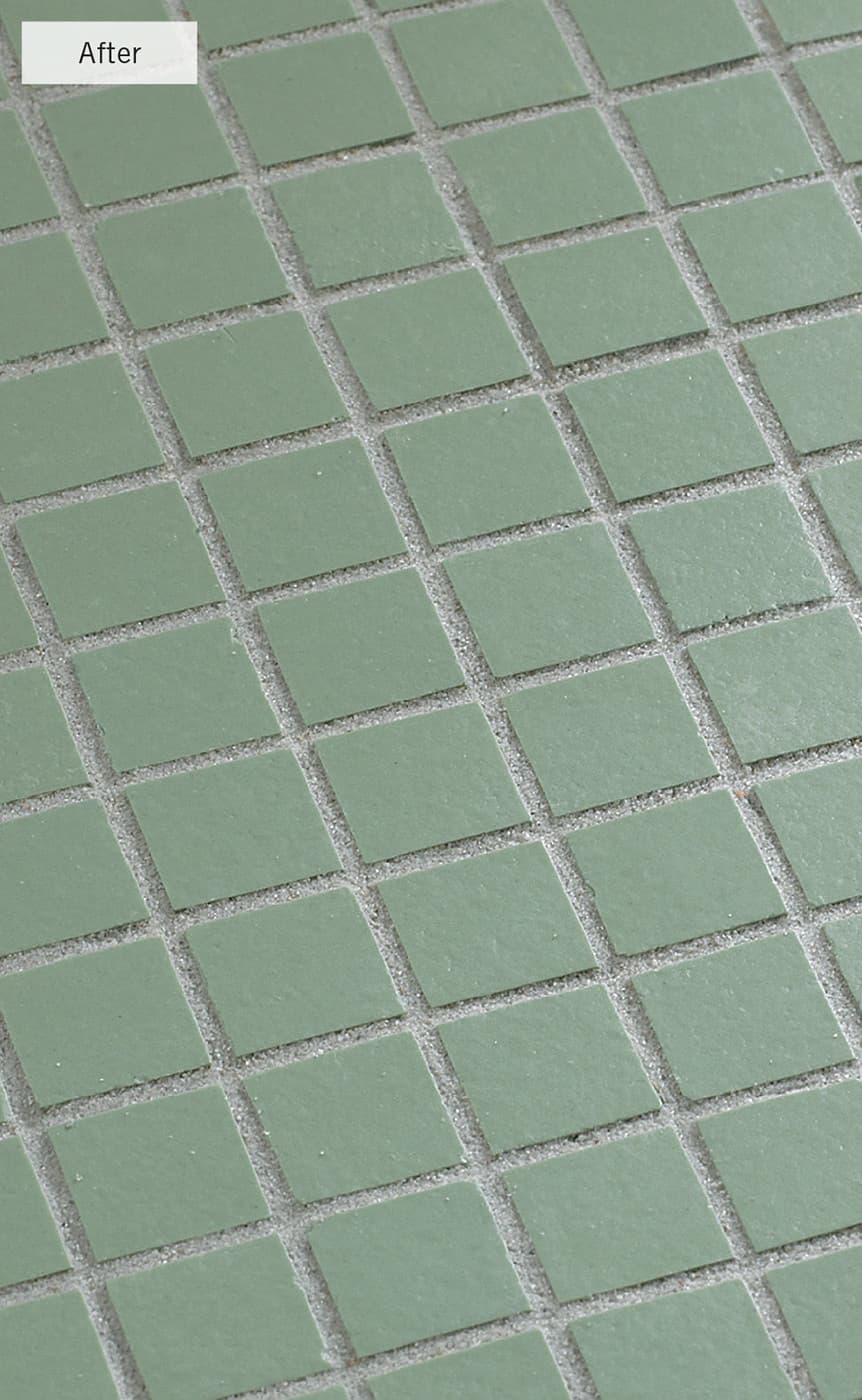
Failed grout allows water underneath tiles, which causes the damage to spread rapidly. If the grout lines in your tile floor are crumbling or a few tiles are loosened, the best solution is to regrout the entire floor.
How to Regrout Floor Tile
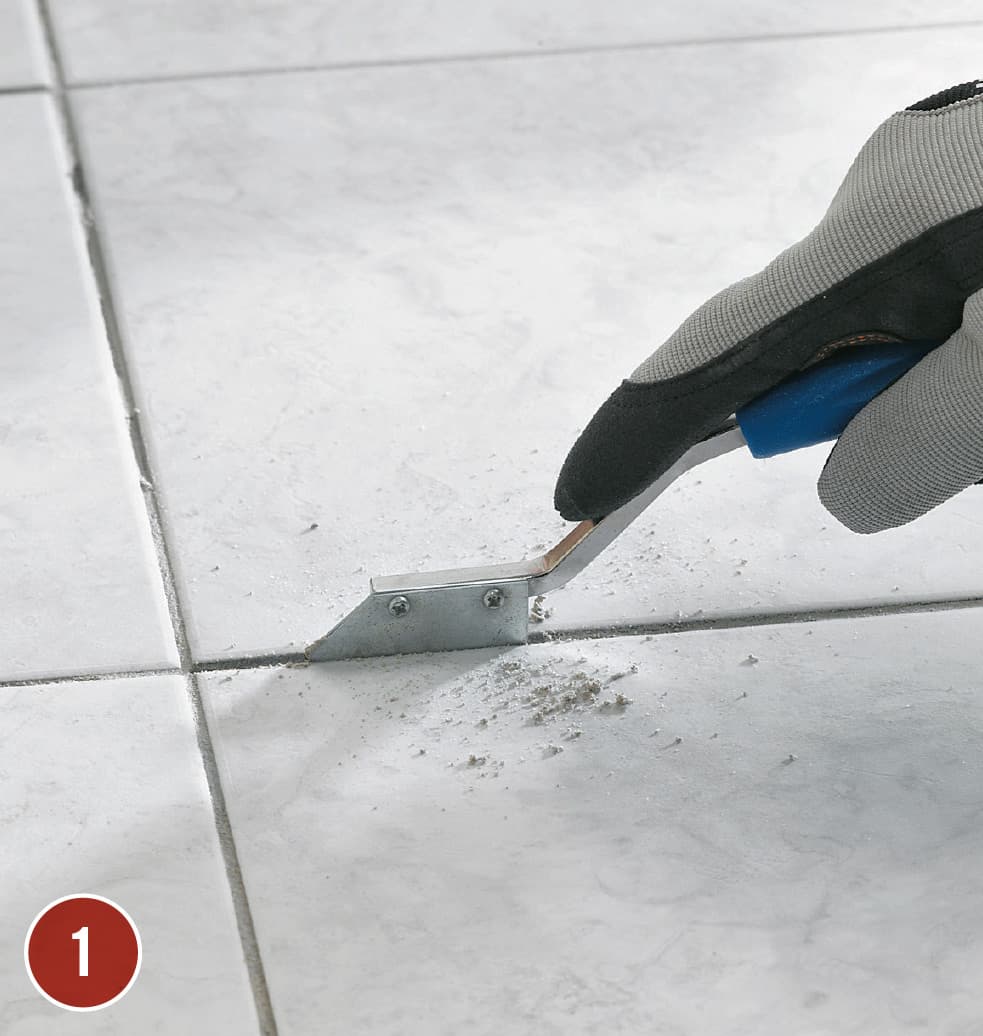
Scrape out the old grout with a grout tool or other tool, being careful not to scratch the tile faces or chip the edges. You may choose to regrout only the filed grout lines for a quick fix, but for more pleasing results and to prevent color variation in the grout lines, remove the grout around all tiles and regrout the entire floor.
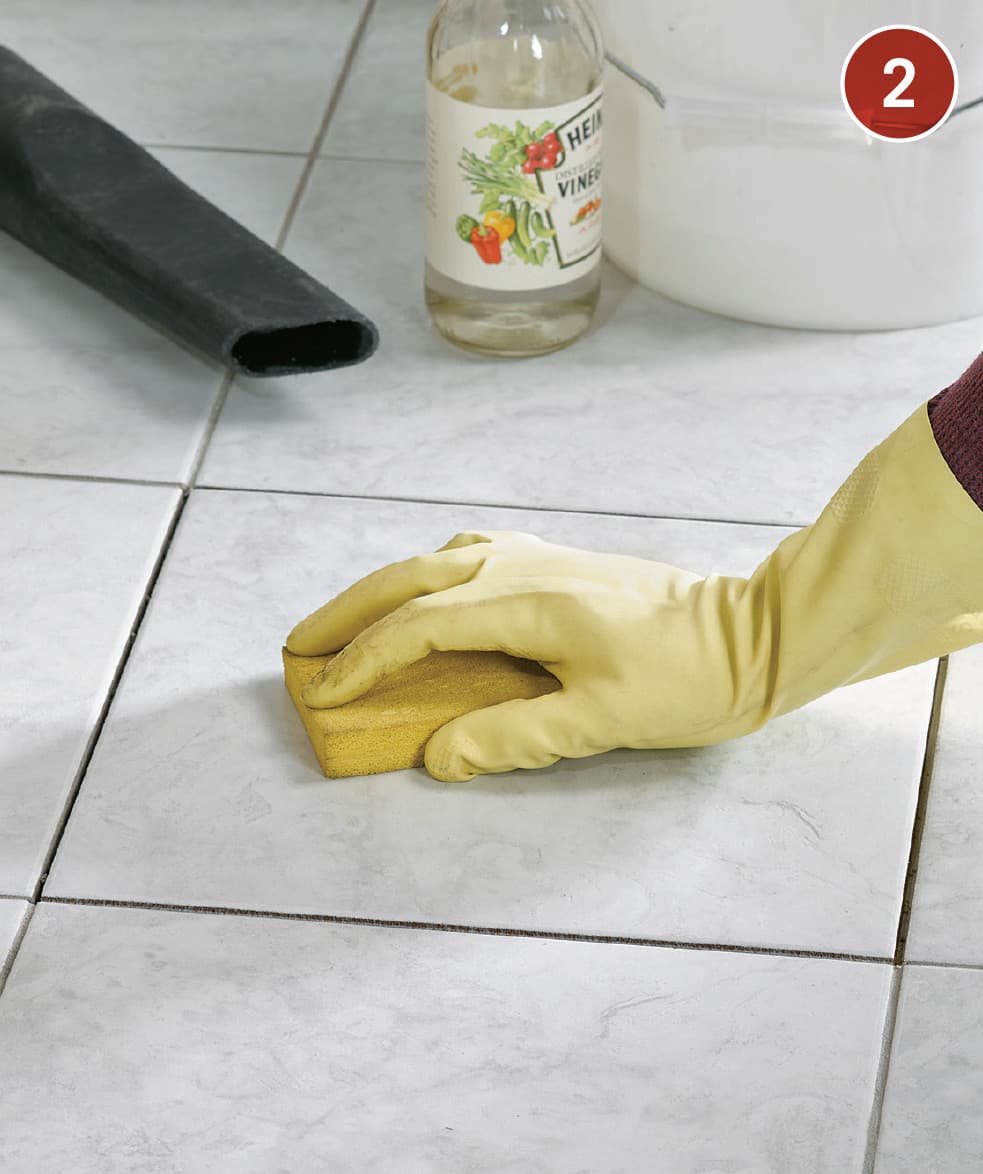
Wash the tiled floor with a 1:1 mix of white vinegar and water, paying special attention to the areas around the tile joints. Vacuum the floor first to get rid of all debris.
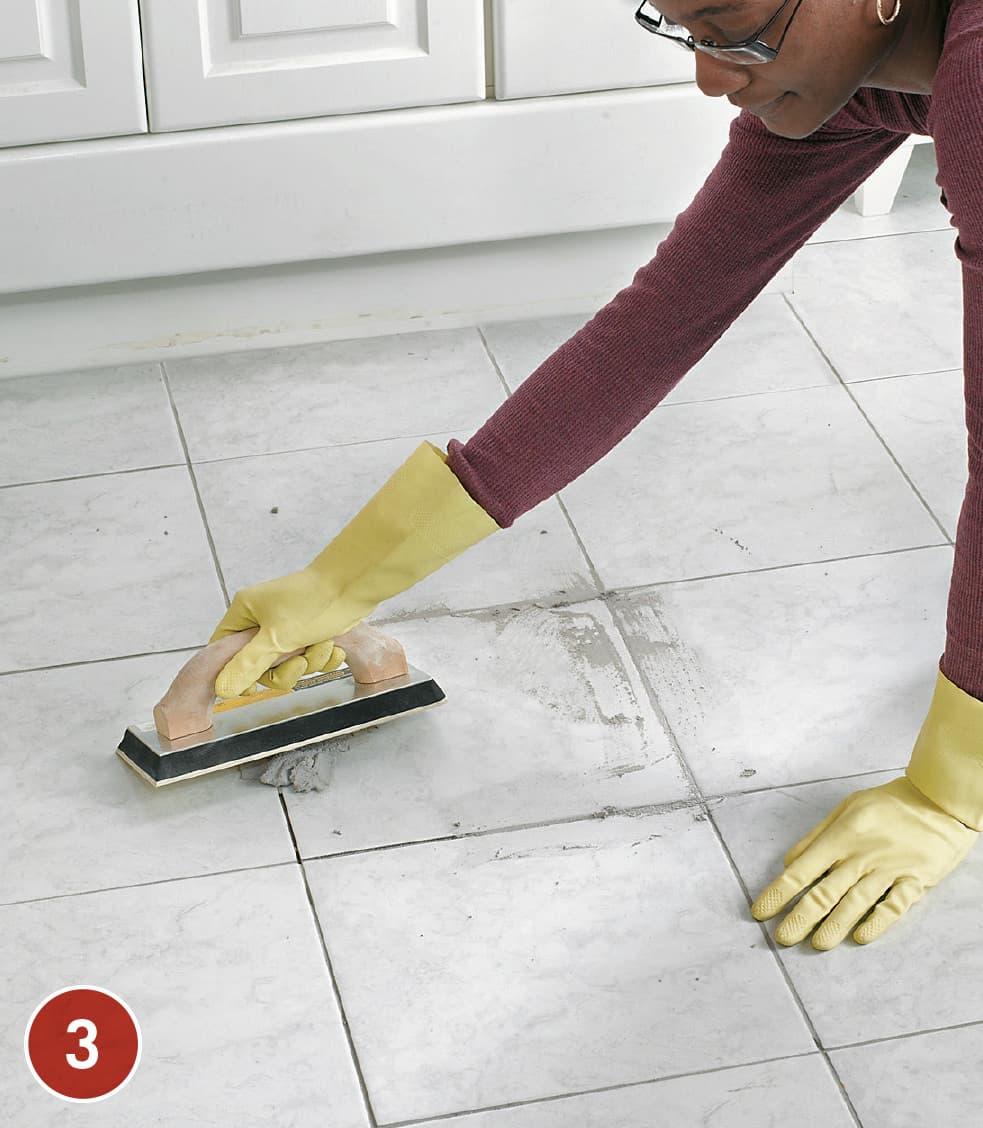
Apply new grout. Prepare grout mix according to the instructions on the package and then pack fresh grout deep into the joints using a rubber grout float. Hold the float at a 30° angle to the tiled surface.
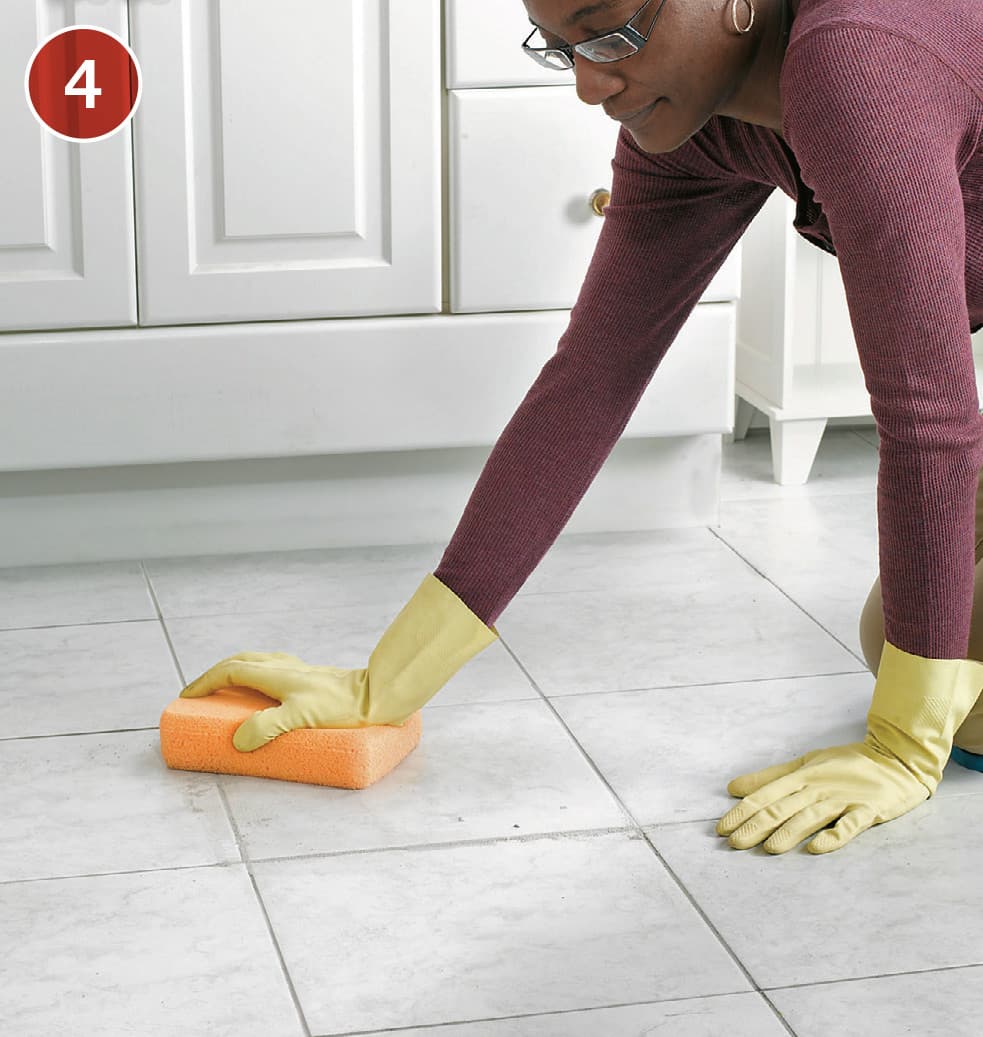
Wipe diagonally across the tiles and grouted joints to remove excess grout and smooth the joints. Seal the grout joints with grout sealer after they’ve dried for a week or so.
NOTE: Sealing all the grout joints will help new grout lines blend with old grout if you’re only doing a partial regrouting.
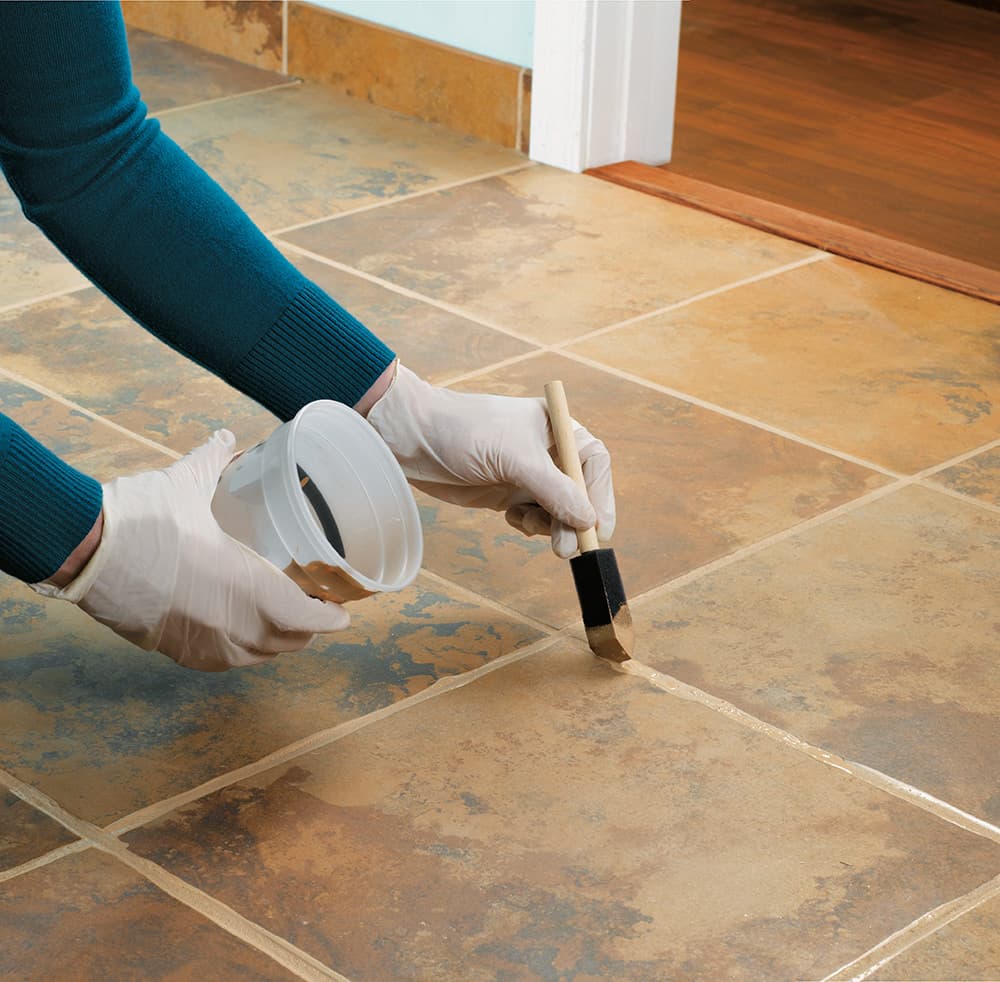
Grout Colorant
Available in a wide variety of colors, grout colorant is a topically-applied, water-based paint that is specially designed to recolor, rejuvenate, and seal existing grout mortar joints.
Grout colorant bonds well to sanded grout mortar making it an ideal solution for rejuvenating old ceramic tile flooring. For applications around porous or pitted tiles, use masking tape to prevent the edges of the tile from absorbing the colorant. Lighter colorants applied over darkened grout joints may require more than one application.
To begin, clean the work area thoroughly, removing bond-inhibiting grease, oil, and calcium deposits from the surface of the tile and grout. Rinse with clean water and allow it to fully dry. Properly prepared, grout joints will be porous and readily absorb water.
A foam brush applicator is used to carefully work the colorant into the grout joints. Remove excess colorant immediately from the edges of surrounding tile using a damp rag. Dry colorant can be removed using a damp, white nylon scrub pad.
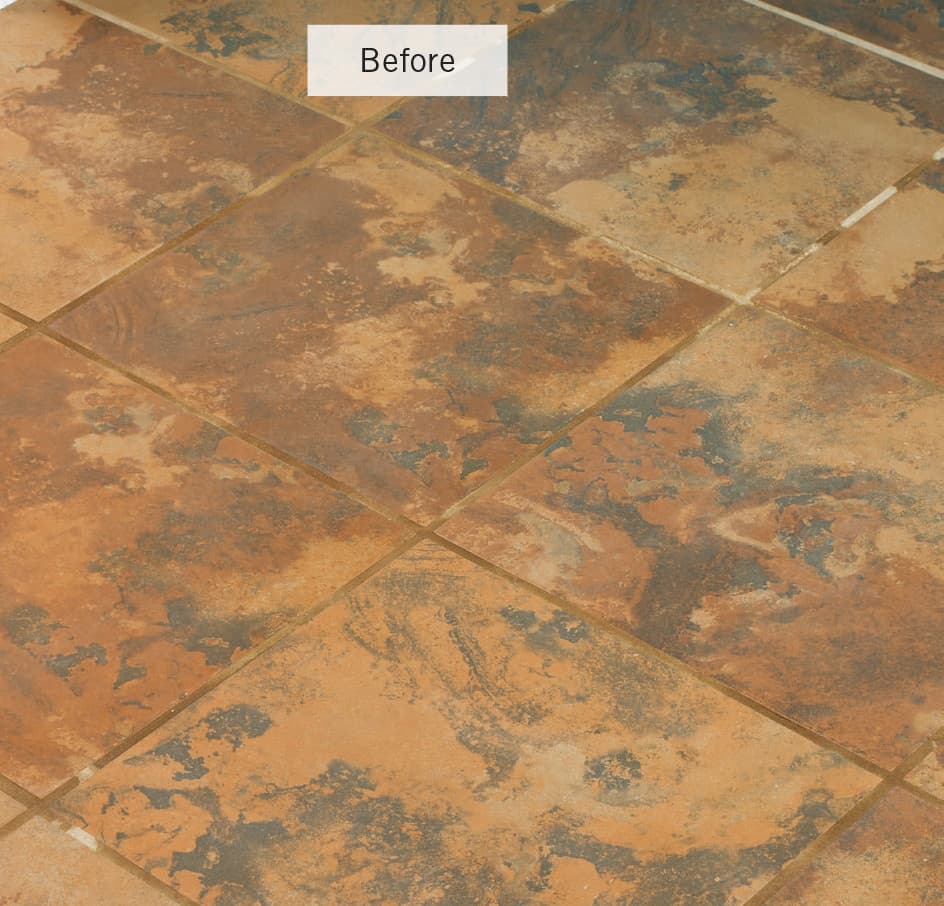
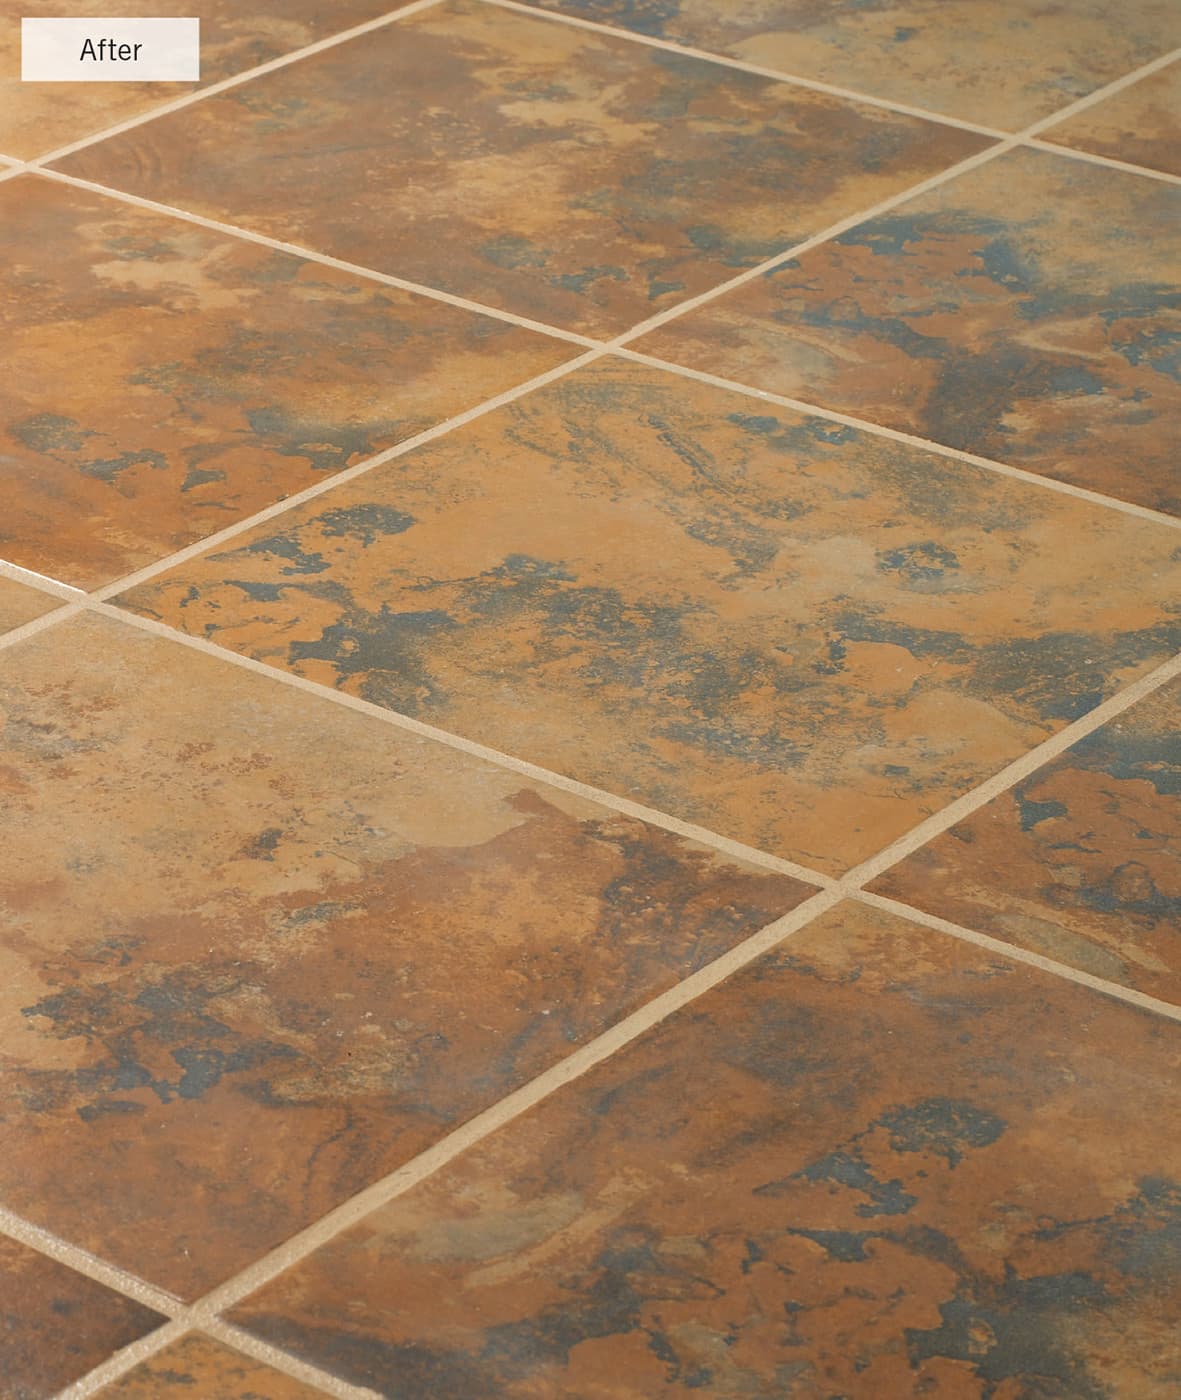
Grout that is in good condition but has simply become stained or discolored can be refreshed quickly and easily with an application of grout colorant.
TOOLS & MATERIALS
Grout colorant
Masking tape
Foam brushes
White scrub pad
Disposable rags
Cleaning products
Toothbrush
 How to Apply Grout Colorant
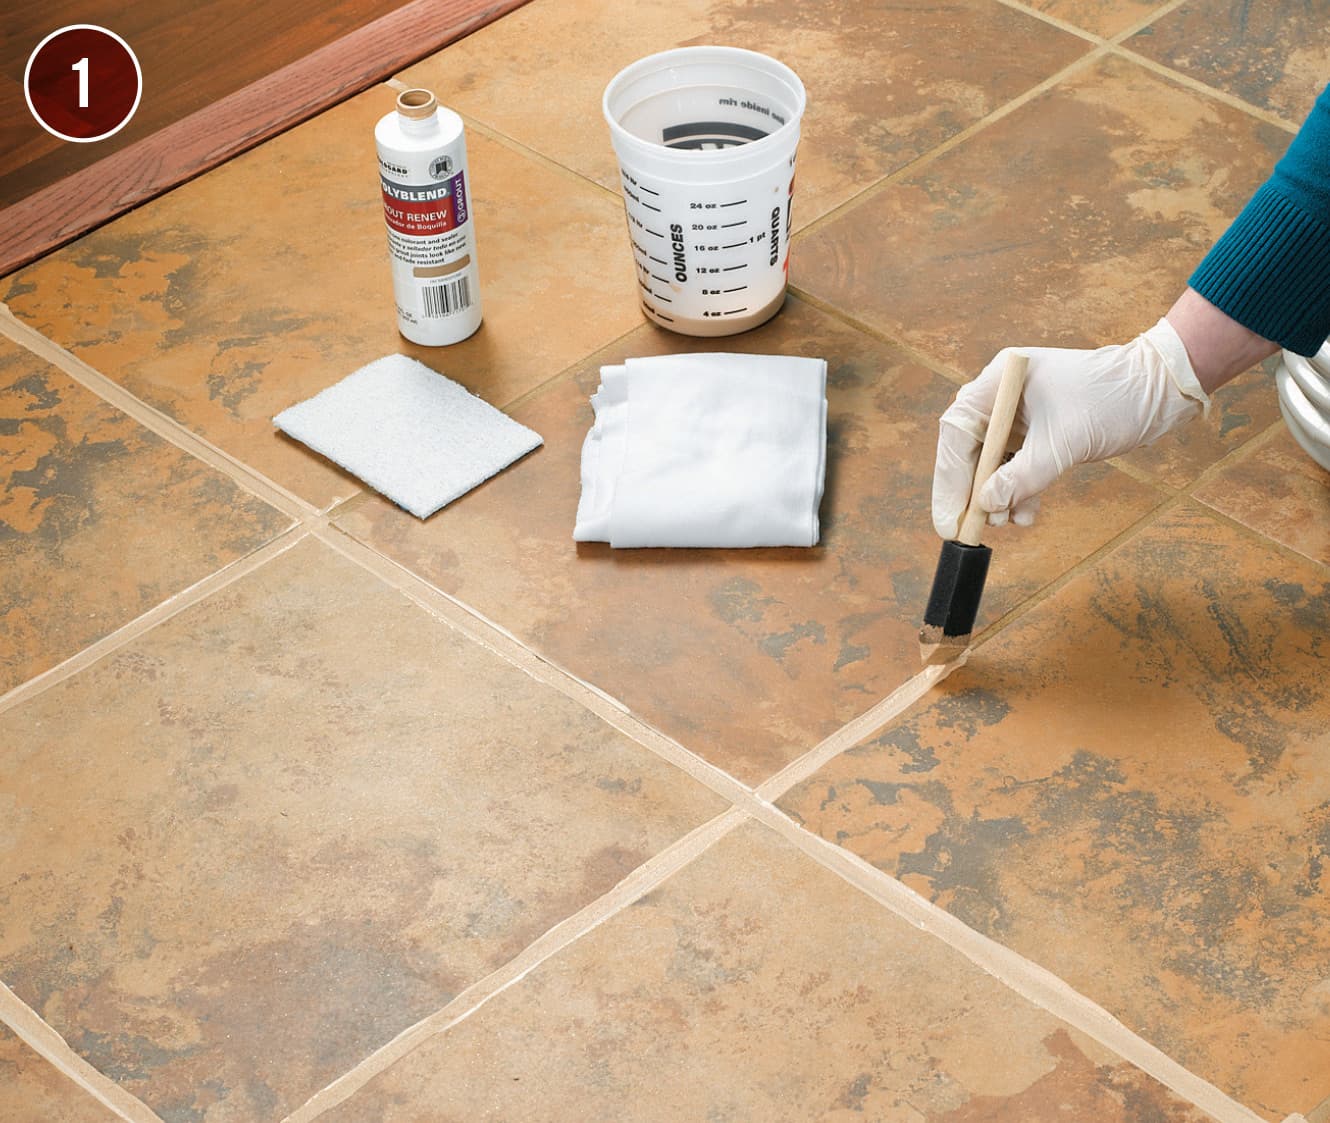
Apply grout colorant in thin coats to the grout joints using a foam brush. Clean the tiles and grout thoroughly first, and make sure the grout lines are dry.

Work the colorant into the the grout with an old (but clean!) toothbrush.
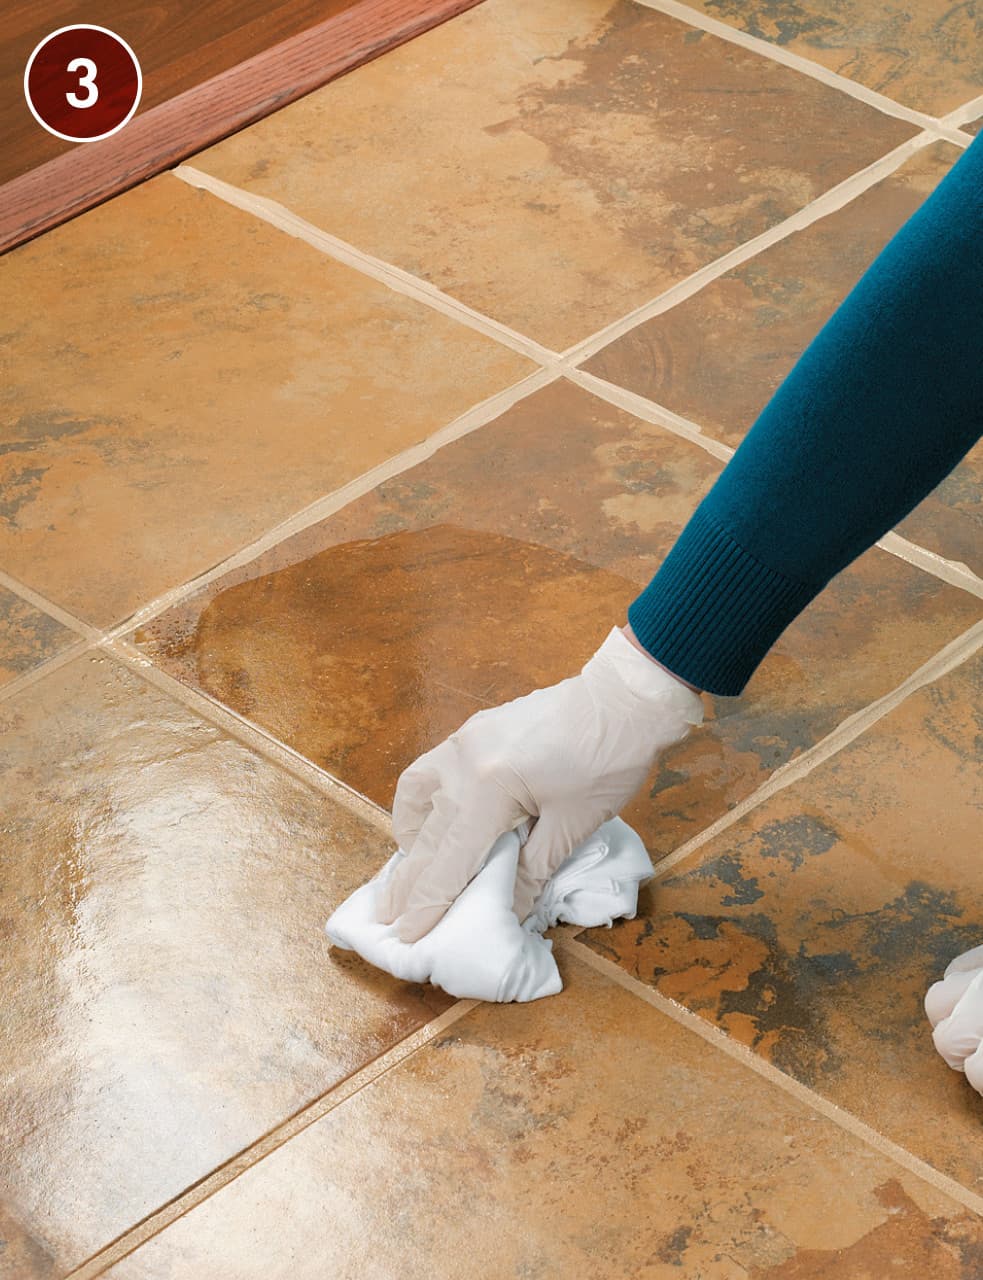
Use a damp rag or white nylon scrub pad to remove excess colorant from the edges of surrounding tile. Allow the grout colorant to dry completely.
 COLORIZING GROUT

Grout colorant can transform an old tile floor into a vibrant new floor at very little cost. It is sold in a variety of colors. If your local building center doesn’t carry it, check with a tile shop.
Repairing Wall Tile
As we’ve said throughout this book, ceramic wall tile is durable and nearly maintenance-free, but like every other material in your house, it can fail or develop problems. The most common problem with ceramic tile involves damaged grout. Failed grout is unattractive, but the real danger is that it offers a point of entry for water, especially in rooms such as bathrooms. Given a chance to work its way beneath grout, water can destroy a tile base and eventually wreck an entire installation. It’s important to regrout ceramic tile as soon as you see signs of damage.
Another potential problem for wall tile installations is damaged caulk. In tub and shower stalls and around sinks and backsplashes, the joints between the tile and the fixtures are sealed with caulk. The caulk eventually deteriorates, leaving an entry point for water. Unless the joints are recaulked, seeping water will destroy the tile base and the wall.
In bathrooms, towel rods, soap dishes, and other accessories can work loose from walls, especially if they weren’t installed correctly or aren’t supported properly. For maximum holding power, anchor new accessories to wall studs or blocking. If no studs or blocking are available, use special fasteners, such as toggle bolts or molly bolts, to anchor the accessories directly to the surface of the underlying wall. To hold screws firmly in place in ceramic tile walls, drill pilot holes and insert plastic sleeves, which expand when screws are driven into them.
How to Regrout Wall Tile
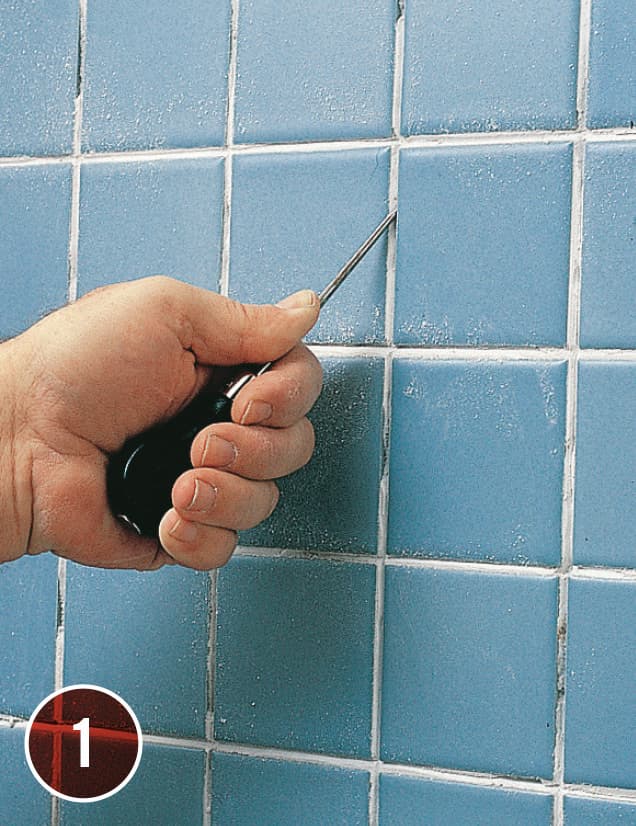
Use an awl, utility knife, or grout tool to scrape out the old grout completely, leaving a clean bed for the new grout.

Clean and rinse the grout joints, then spread grout over the entire tile surface, using a rubber grout float or sponge. Work the grout well into the joints and let it set slightly.
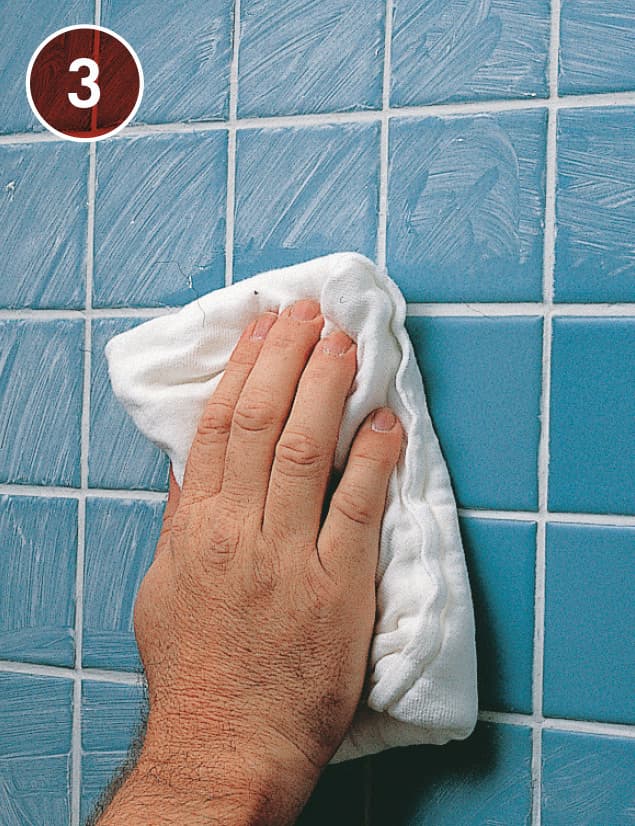
Wipe away excess grout with a damp sponge. When the grout is dry, wipe away the residue and polish the tiles with a dry cloth.
TOOLS & MATERIALS
Awl
Utility knife
Notched trowel
Grout float
Hammer
Chisel
Small pry bar
Eye protection
Replacement accessory
Tile adhesive
Masking tape
Grout
Cloth or rag
Silicone or latex caulk
Sponge
Surface-mounting hardware
Tile-cutting tools
Replacement tile
How to Replace Built-in Wall Accessories
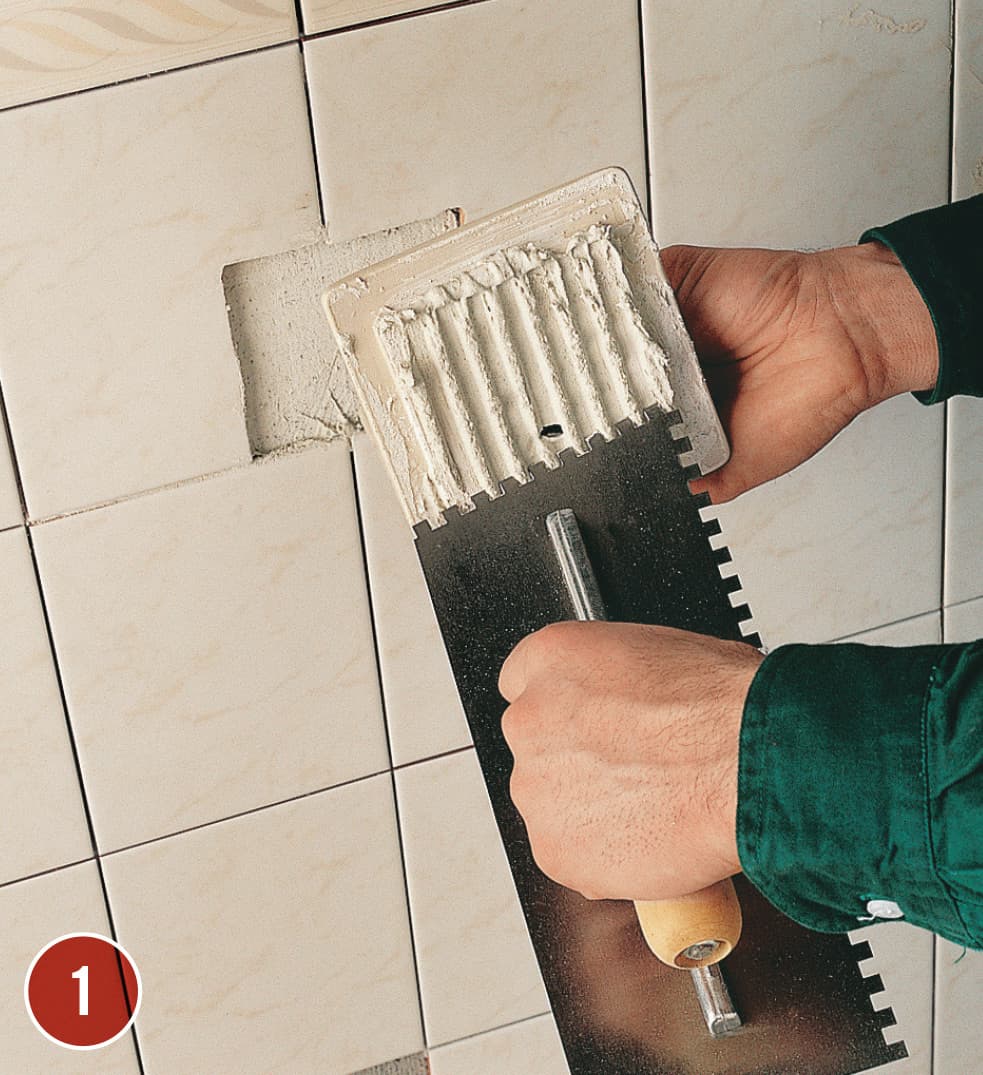
Carefully remove the damaged accessory. Scrape away any remaining mortar or grout. Apply dry-set tile adhesive to the back side of the new accessory, then press it firmly in place.
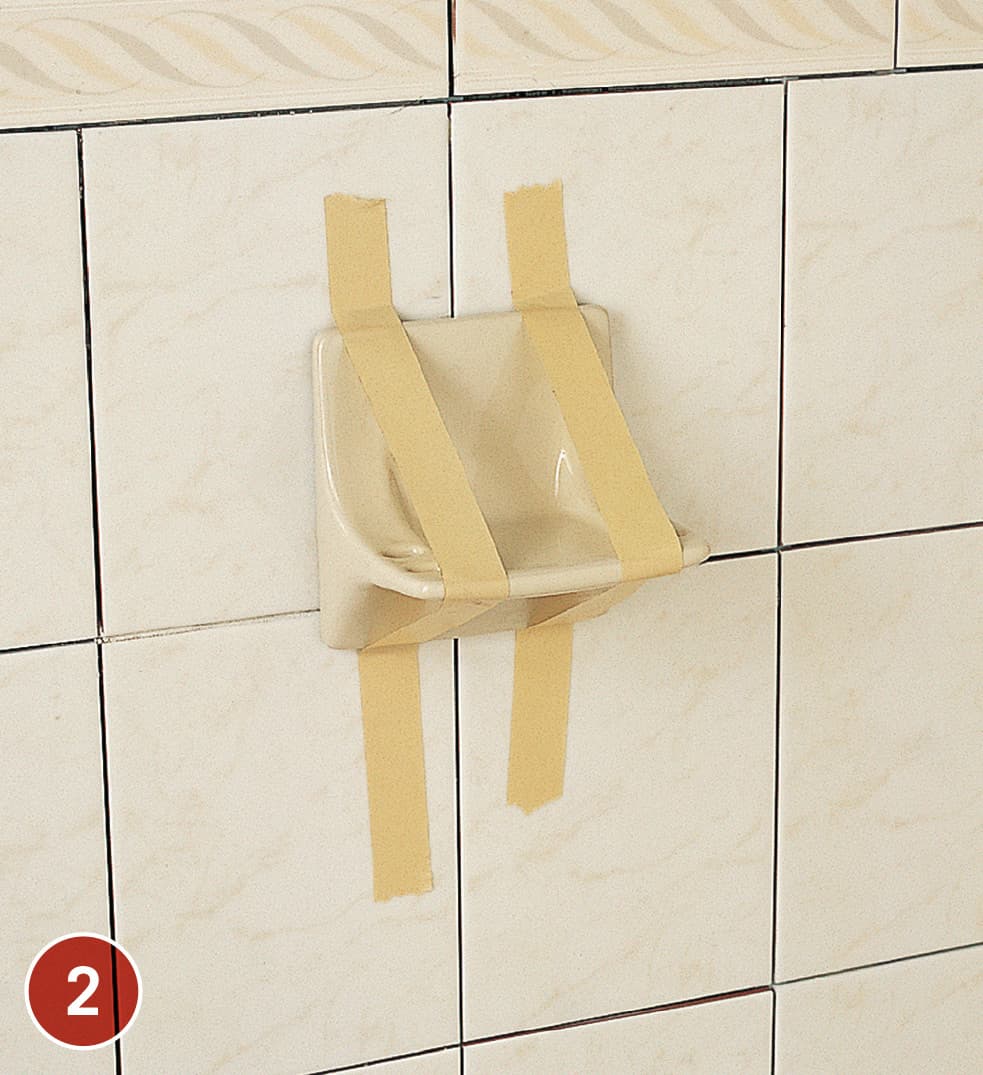
Use masking tape to hold the accessory in place while the adhesive dries. Let the mortar dry completely (12 to 24 hrs.), then grout and seal the area.
How to Replace Surface-Mounted Accessories
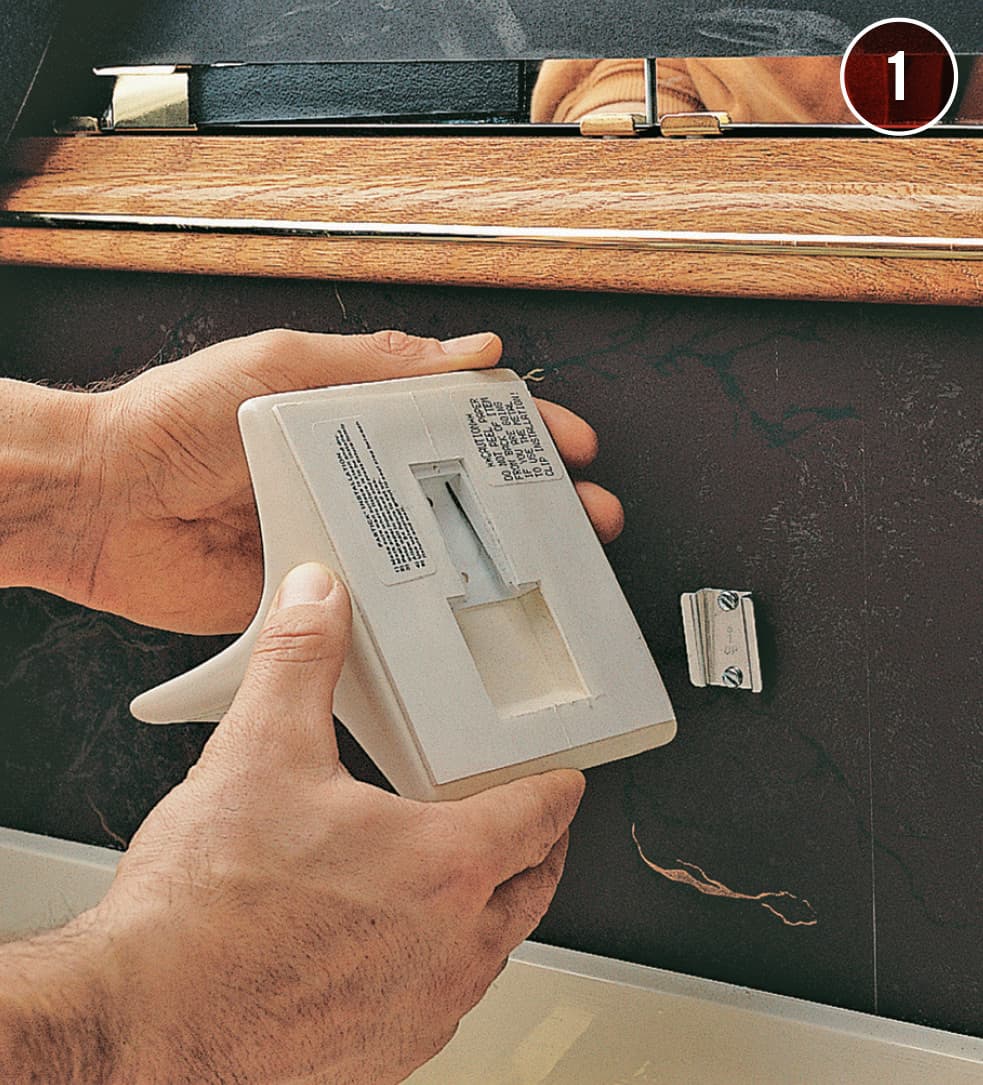
Lift the accessory up and off the mounting plate. If the mounting plate screws are driven into studs or blocking, simply hang the new accessory. If not, add hardware such as molly bolts, toggle bolts, or plastic anchor sleeves.
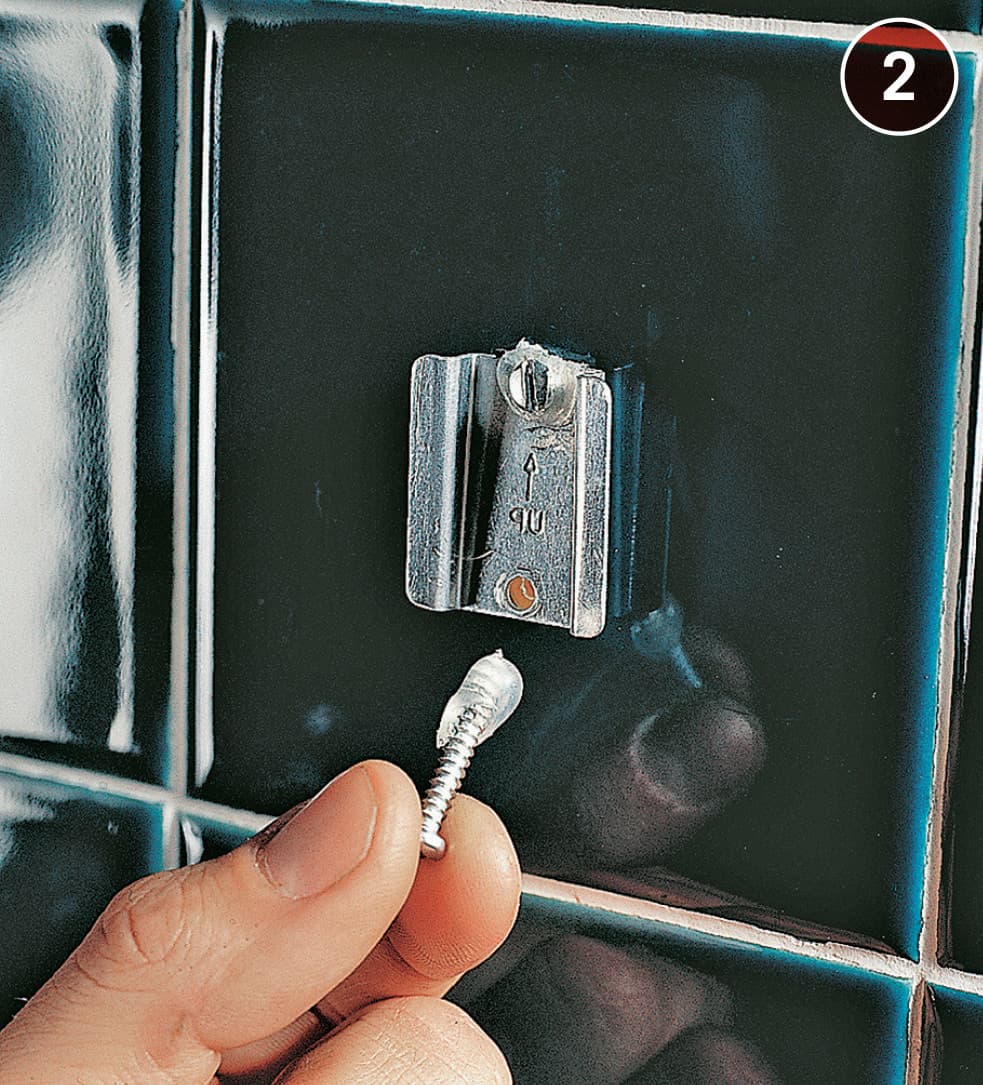
Put a dab of silicone caulk over the pilot holes and the tips of the screws before inserting them. Let the caulk dry, then install the new fixture on the mounting plate.
How to Remove & Replace Broken Wall Tiles
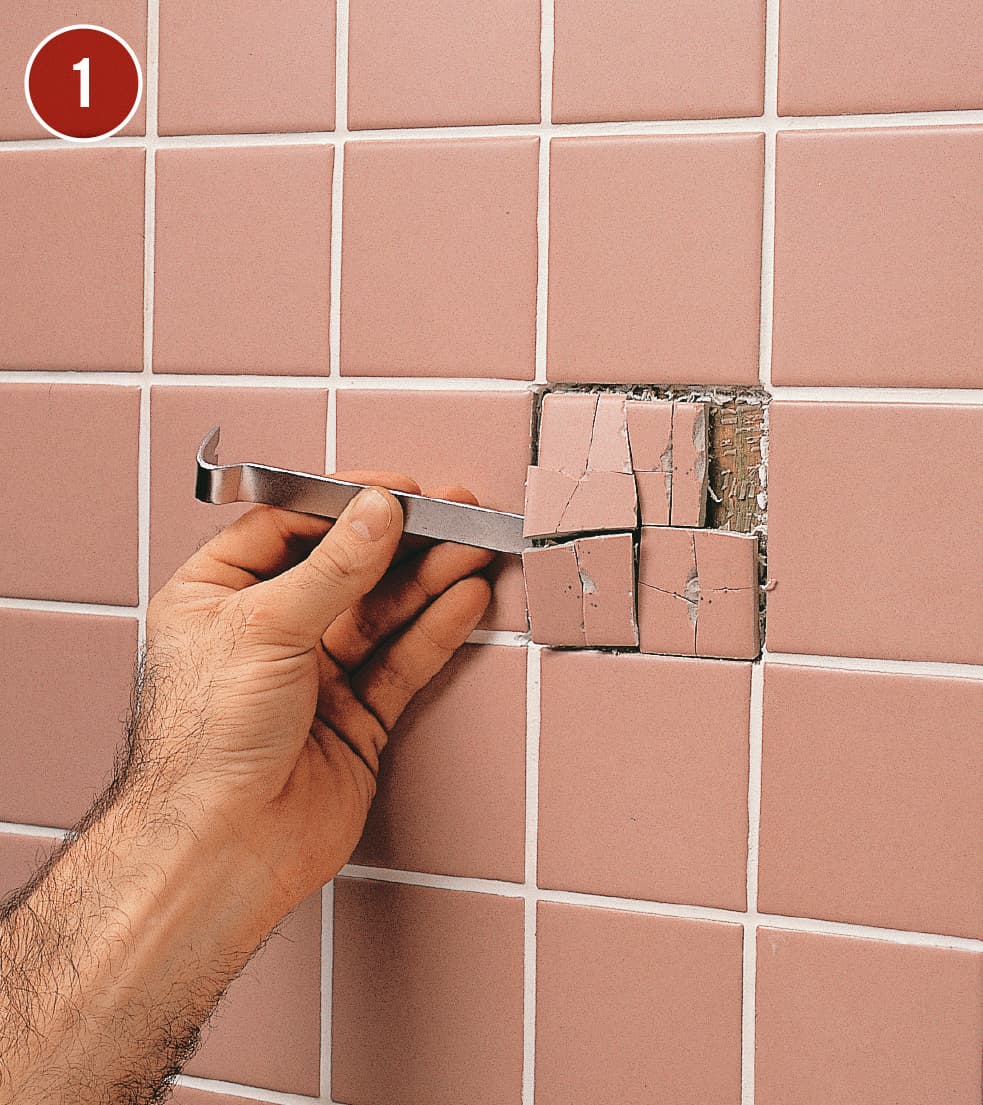
Carefully scrape away the grout from the surrounding joints using a utility knife or an awl. Break the damaged tile into small pieces using a hammer and chisel. Remove the broken pieces, then scrape away debris or old mortar from the open area.
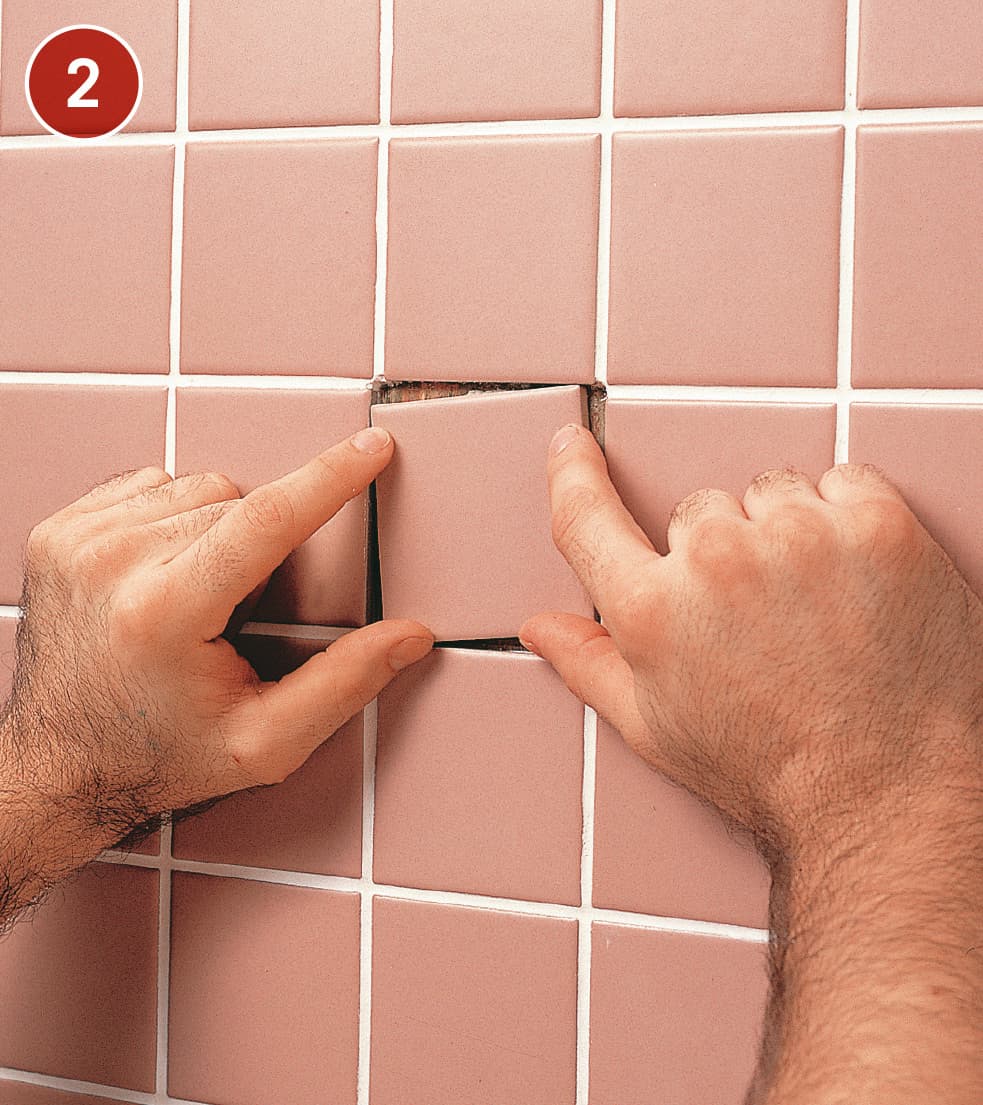
If the tile to be replaced is a cut tile, cut a new one to match. Test-fit the new tile and make sure it sits flush with the field. Spread adhesive on the back of the replacement tile and place it in the hole, twisting it slightly. Use masking tape to hold the tile in place for 24 hrs. so the adhesive can dry.
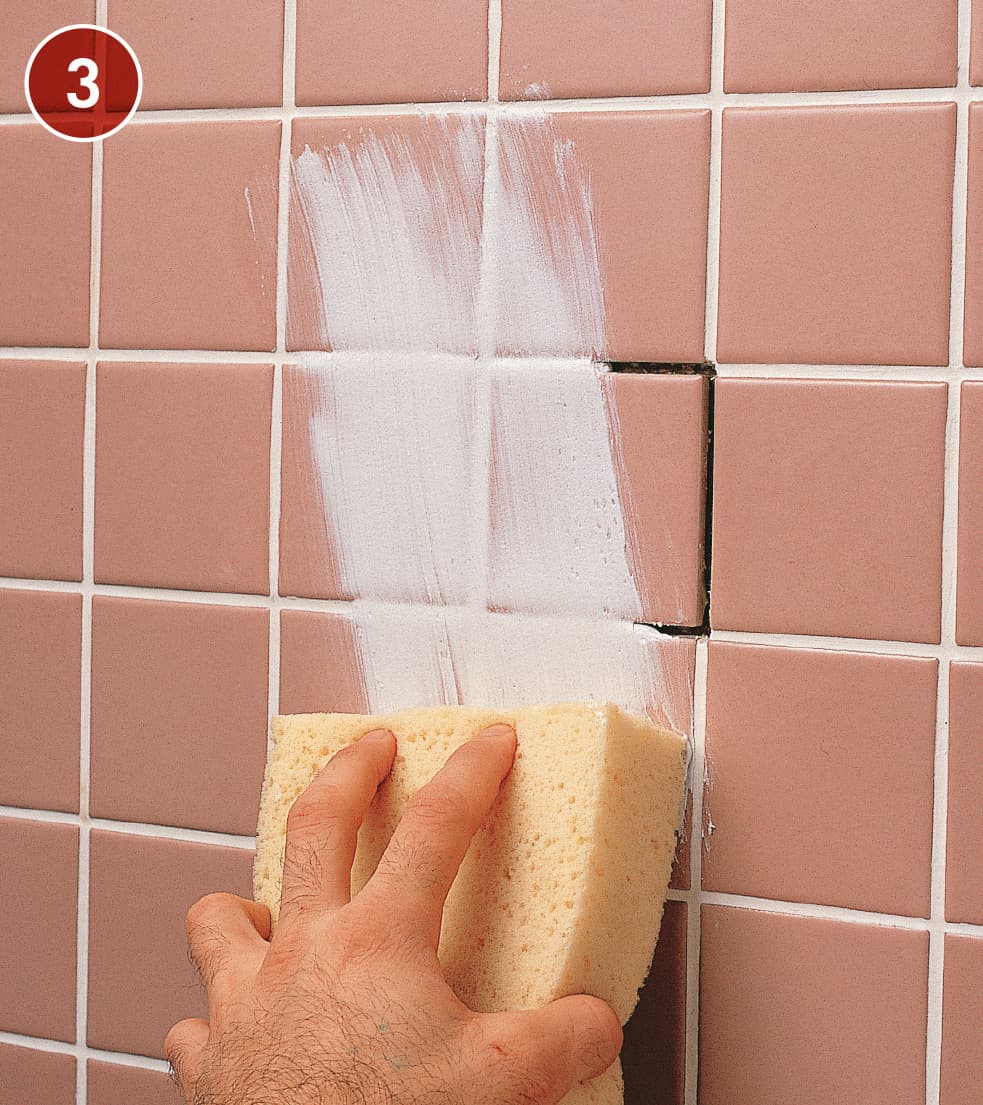
Remove the tape, then apply premixed grout using a sponge or grout float. Let the grout set slightly, then tool it with a rounded object such as a toothbrush handle. Wipe away excess grout with a damp cloth.
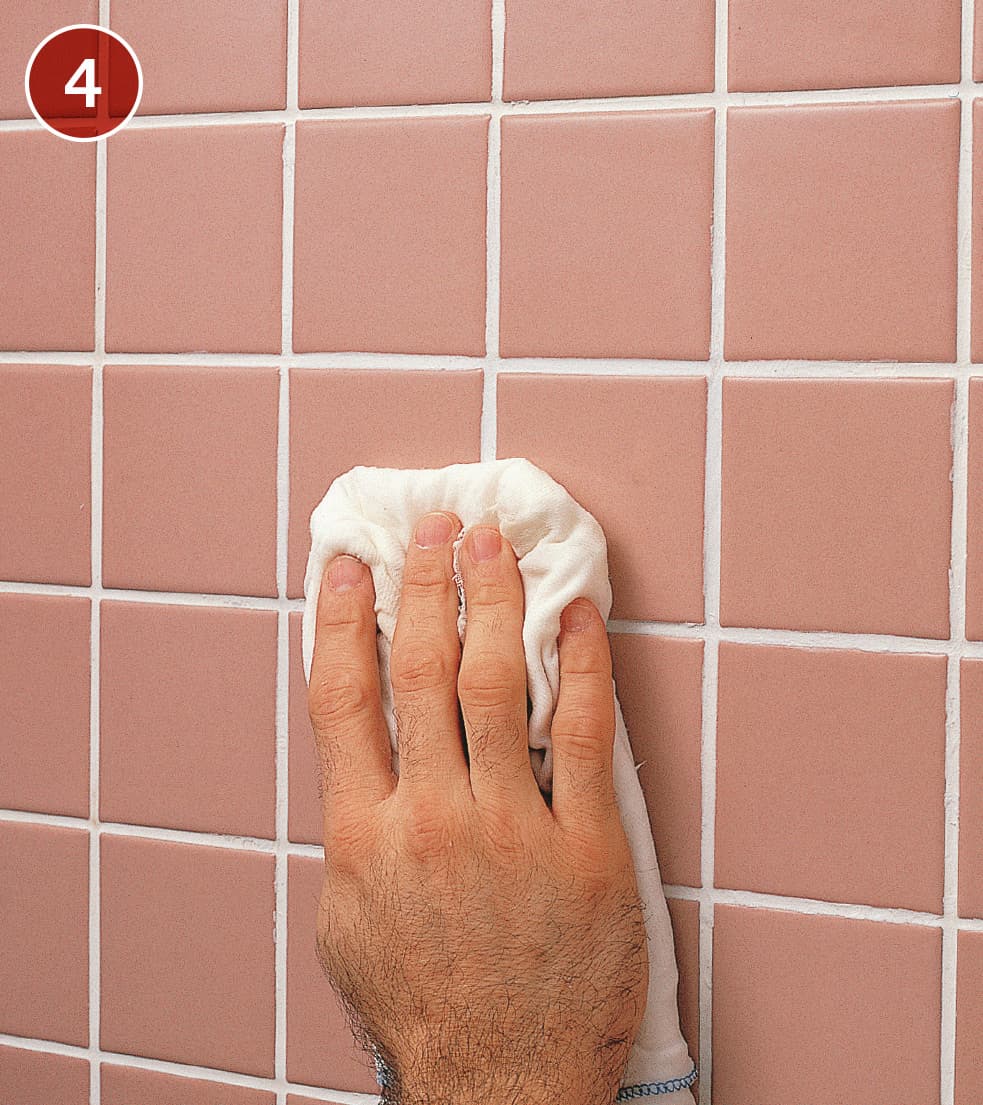
Let the grout dry for an hour, then polish the tile with a clean, dry cloth.
 REPLACING CAULK
Replace all of the old caulking along the tub or shower edges at the floor, and essentially anywhere a surface meets another surface. Don’t add a new layer of caulk over the old. This just makes a mess and may hide areas where the old caulk is failing without providing an adequate water seal.
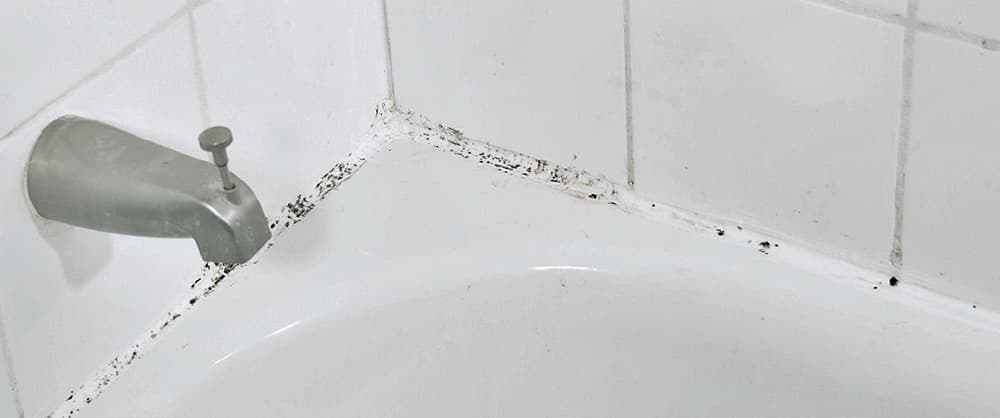
Just about any dated tub or shower can benefit from a thorough cleaning and recaulking of its seals.
 How to Replace Caulk
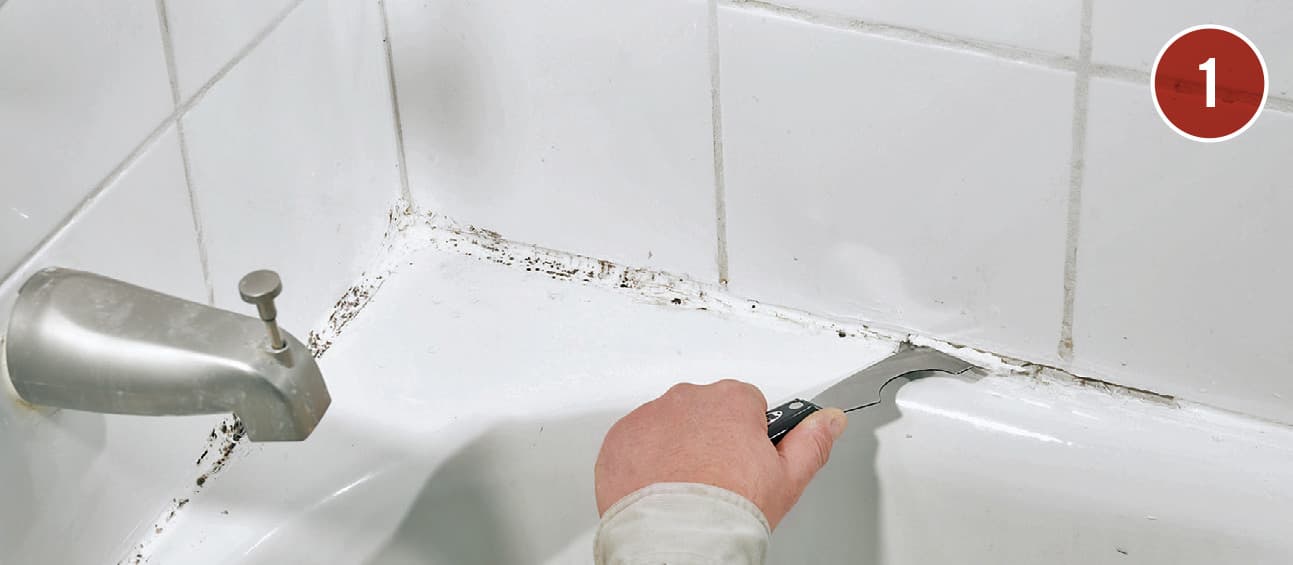
A 5-in-1 tool works better than a putty or utility knife for removing caulk. Use the tool’s razor-sharp tooth to slice caulk from crevices.
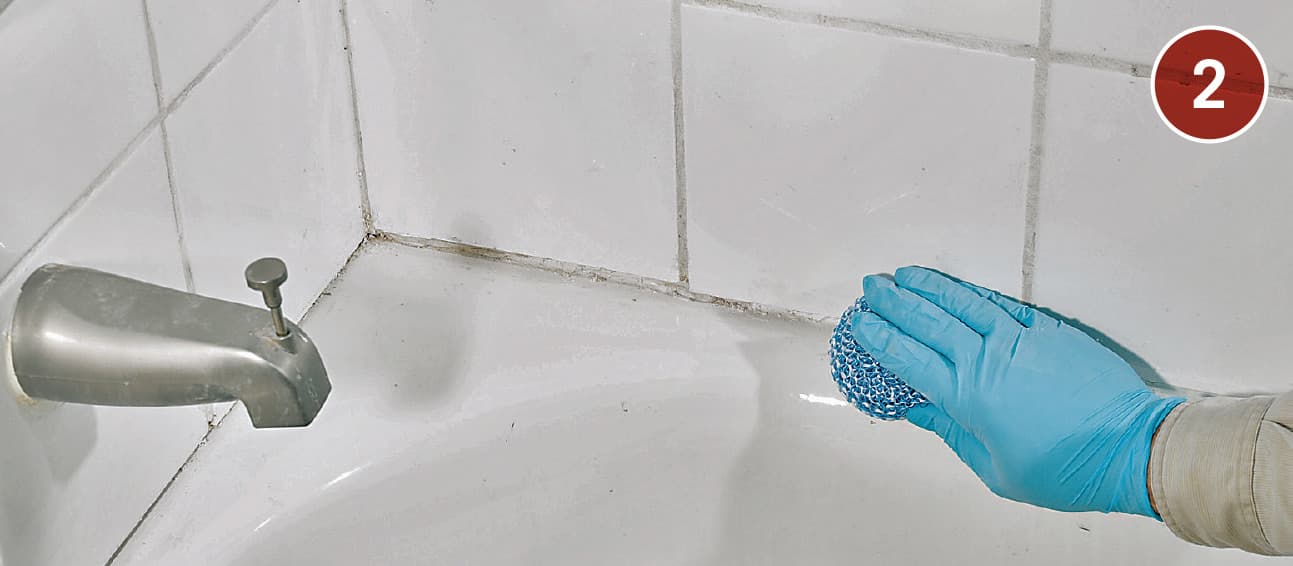
Scrub the area with denatured alcohol to remove grime and film from the area.
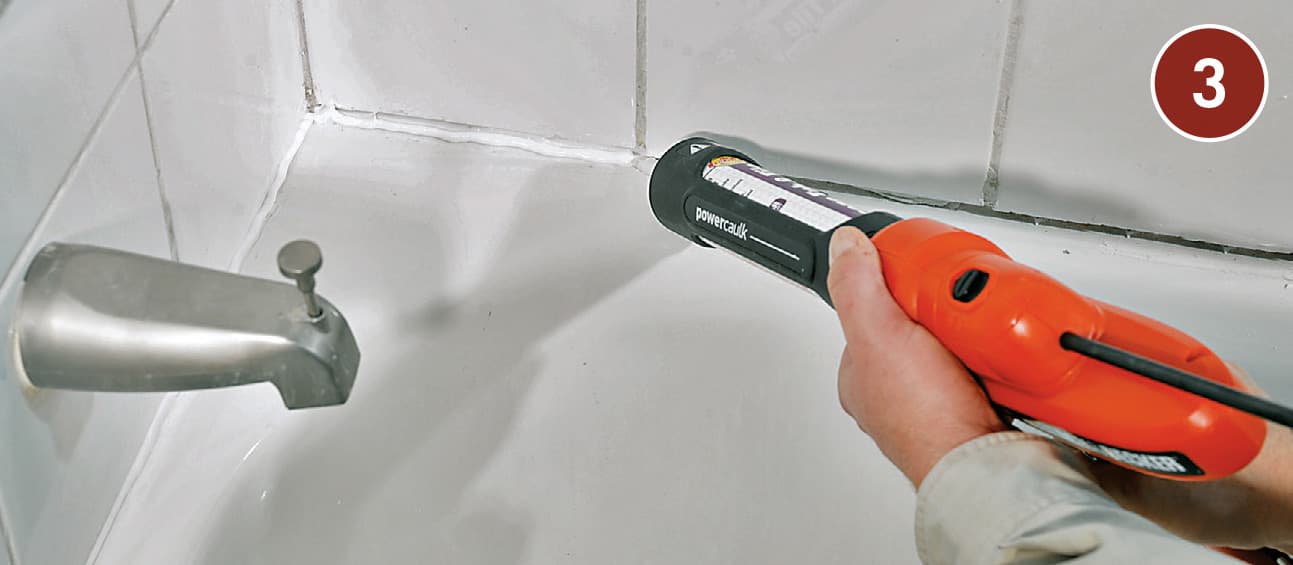
Filling—but not overfilling—the joint is the key to a neat caulk job. Smooth the freshly applied caulk with a damp finger using a very light touch.
CLEANING TILE & GROUT
You spent a considerable amount of time and money on your new tile installation, so it is only natural that you want to take good care of your investment. Fortunately, tile is a low-maintenance product and with proper care it will look new for many years to come.
Purchase a dust mop and sweep your floors daily. Place mats in doorways and through walkways to help collect dirt and grime, and shake them out frequently. In showers and tub tile surrounds, use a squeegee or towel to wipe excess water off walls after each use. This will help to prevent spotting and the formation of stain-causing mildew.
Dirt and grime will often accumulate in the textured surfaces of tile and grout. A plastic scrub brush and a little elbow grease will remove most stubborn dirt deposits. Household floor-cleaning machines with rotating brushes will safely scrub tile flooring and grout clean. Avoid using steam cleaners though, as the hot steam can damage grout and remove topically applied colorants or sealers.
Long term use of many tile cleaning products can actually harm tile and grout. A quality cleanser should be pH balanced, non-abrasive, and safe for tile surfaces and grout. Most are not. Natural stone and cementitious grouts are especially vulnerable to cleaning products that contain acid. These types of products should never be used to clean natural stone and their use on ceramic tile and grout should be limited.
Tile Maintenance
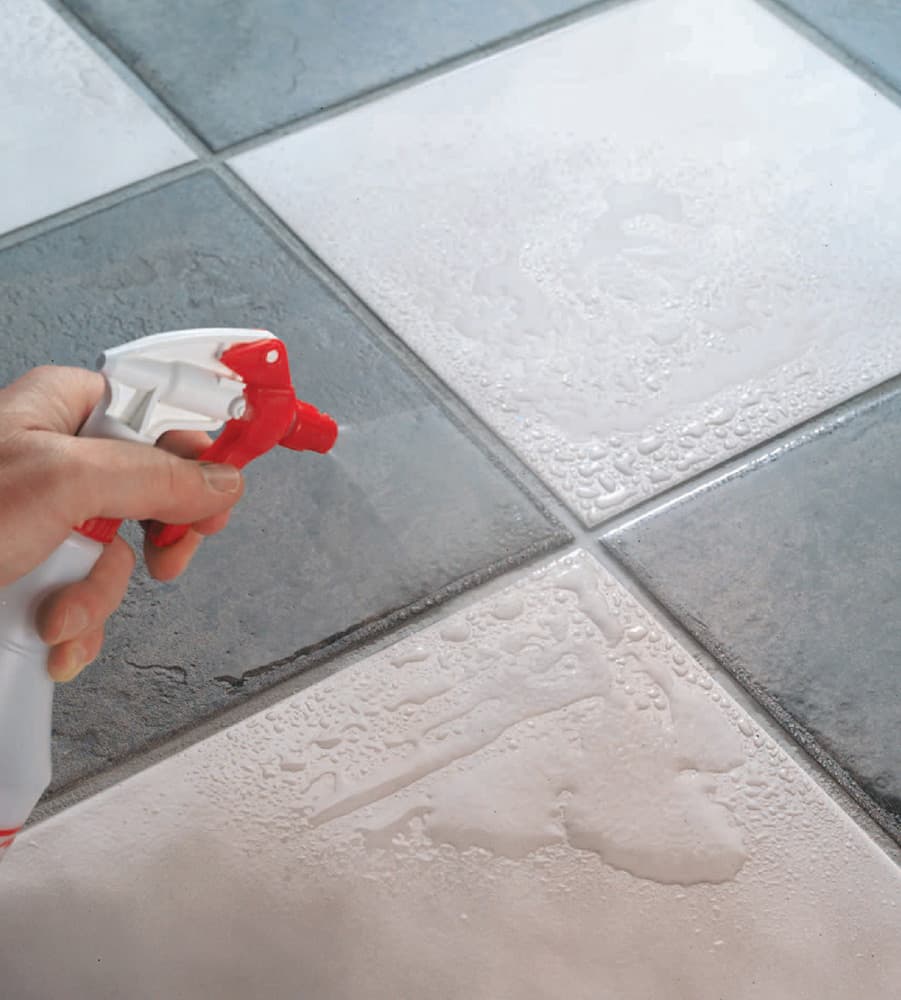
To determine if your grout needs to be resealed, test the existing sealer by putting a few drops of water on a grout line. If the water beads up, the sealer is still working. If the water absorbs into the grout, it needs to be resealed.
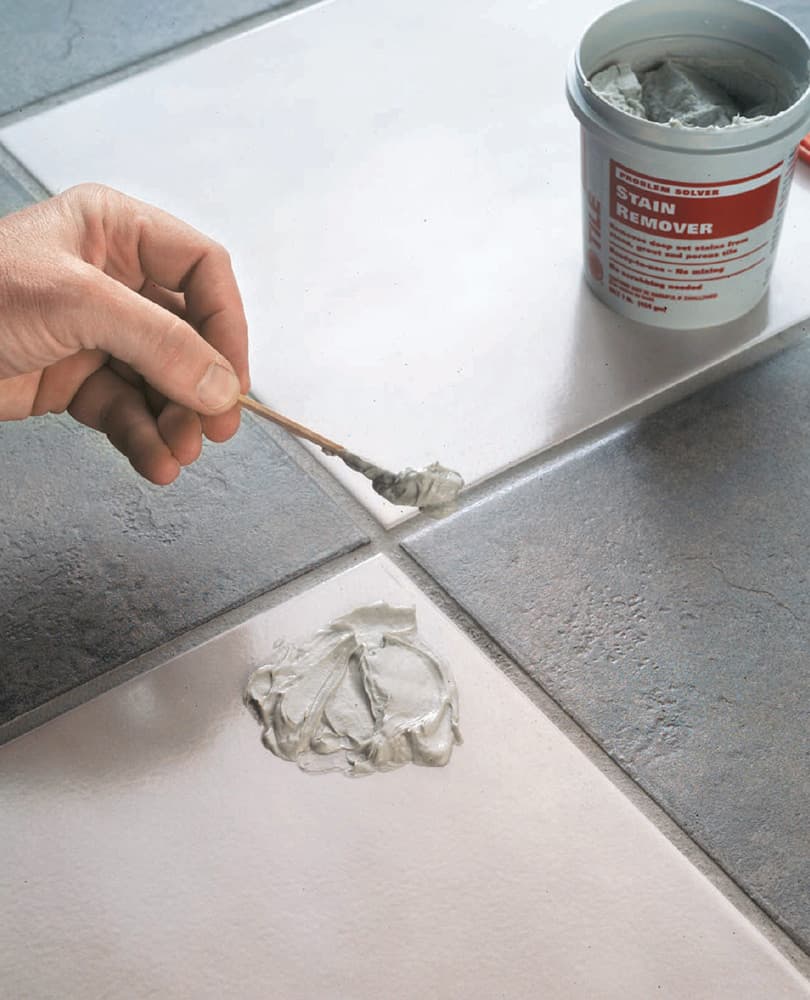
For heavy stains on natural stone tile, apply poultice made for cleaning porous stone materials. Cover the stain with the poultice, then tape plastic over it. Let the poulitice set according to the manufacturer’s instructions, then remove it.