DECEMBER
Here are some things you can do to make life easier for your veterinarian.
Your horse’s living quarters, whether stall, pasture, or paddock, should have well-drained footing.
If you plan to work your horse during the winter, he might need a body clip.
A front-end loader comes in handy during the winter.
Your horse’s holiday wish list.
THE LORD OF THE RINGS (2001)
Some of my most memorable and beautiful rides have been in deep winter snow. Plowing through the drifts, however, can be a lot of hard, sweaty work for a horse. So if I plan to do a lot of winter riding, now is the time of year to body-clip.
I appreciate my horses so much that every year I think hard about what I could do to show my appreciation for another wonderful year. And here it is, straight from the horse’s mouth: Be the best horsekeeper I can be.


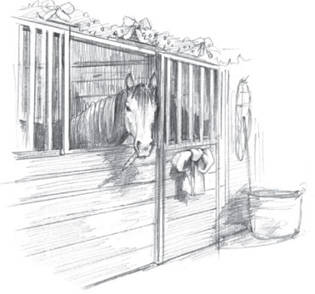
While it can be a month of extreme cold in many parts of the United States and Canada, December means perfect riding weather in the South and Southwest. If your area experiences an annual deep freeze, provide shelter in the form of a stall, shed, overhang, trees, and/or blankets. Make sure all horses can find protection from wind and moisture.
To Do
 Hoof trim and shoe
Scrub feed tubs and buckets
Move hay to barns
Winter clip
To Buy
Complete feed wafers
Grain
Dewormer
Carrots
In astronomy, the winter solstice is when a hemisphere is most inclined away from the sun, resulting in the shortest day and the longest night of the year. In the northern hemisphere, the winter solstice usually falls on December 21 or 22; in the southern hemisphere, on June 21 or 22.
Here are some things you can do to make life easier for your veterinarian.
• A veterinarian, like a farrier, should be able to get his or her truck close to the sheltered work space in the barn.
• Access to hot and cold water is a big plus, because many veterinary procedures involve washing various parts of the horse.
• The footing should be solid with good traction, and sloped to drain water away from the work area, so the vet doesn’t have to stand in water.
• Good lighting is especially important for vet work. Besides ample permanent lights, portable lights should be available to spotlight certain areas on the horse. Plenty of outlets installed in convenient locations will make it easier for the vet to use clippers, ultrasound, and other equipment.
O, Wind, If Winter comes, can Spring be far behind?
— Percy Bysshe Shelley, Ode to the West Wind
• A rubber mat over the textured concrete prevents excess hoof wear, as from pawing.
• A counter or table close to where the vet is working is very useful for setting down tools and keeping supplies at hand without having to place them on the floor.
Note that a wash rack can also double as a vet area.
TIPS & TECHNIQUES
A Handy Extra Stall
Having an extra stall in your barn, and rotating horses so one stall can dry out thoroughly, will minimize floor maintenance.
STOCKS. A professional palpation chute (stocks) is designed to safely contain a horse while allowing a veterinarian to work on him. The solid doors on the front and rear of stocks protect a person from being kicked or struck. The floor slopes to a drain located between the two stocks. With doors on both ends, the horse can be led in and then out of stocks without having to back up.
“Loose stocks” are roomier and multipurpose. Located next to a barn under a roof overhang, they are designed as a place to train young horses to stand quietly and to let a horse dry after a workout or a bath. They can also be used for vet work. The cross-ties and pipe rails allow some movement, but keep the horse from swinging too far sideways. There’s enough room in loose stocks for a farrier, vet, or groom to work on a horse.
Odd Word
stare. When a horse’s hair coat sticks straight out, it is “staring” rather than lying flat and gleaming.

Your horse’s living quarters, whether stall, pasture, or paddock, should have well-drained footing. The site for your barn should be properly prepared so that the soil and other materials beneath the floor percolate well. Ideally, the finished level of the barn site should be 8 to 12 inches above ground level. If the existing soil is well drained, the site can be prepared by the addition of 6 inches of crushed rock covered by soil. Pure clay (a traditional favorite) packs firmly but does not percolate well. Soil blends or synthetic materials (depending on locale) might work better than clay for site preparation.
A site with poorly drained soils requires excavation to between 3 and 10 feet. Several feet of large rock should be laid at the base of the excavation. Crushed rock of decreasing sizes should follow in layers, leaving about 1 foot for the site’s topsoil. A mixture of clay, sand, or other materials (such as road base or small gravel) usually works well.
Five Keys to Healthy Feet
Hoof health depends on:
 good facilities
sanitation
exercise
good nutrition
competent farrier care
Healthy (well-draining) pen footing.
Factors to consider when choosing flooring include:
Initial cost
Longevity
Maintenance
Cushion
Drainage
Odor retention
Ease of cleaning and sanitizing
Traction
The stall flooring is the layer added on top of the prepared site. Be sure to consider the type of bedding you plan to use, as some flooring/bedding combinations are undesirable.
TAMPED CLAY. For box stalls, the tamped clay floor has been a traditional favorite because it provides cushion and good traction and is warm and quiet. Tamped clay does not drain well, however, so clay stalls must be sloped to allow drainage. In addition, urine pools can create large potholes, requiring the clay floor to be leveled routinely and overhauled annually.
MIXTURES. Mixtures of clay and sand or clay and crushed rock are usually readily available and have improved drainage over pure clay, while retaining most of the desirable features of the clay floor. Road base is often such a mixture — a blend of crushed limestone and clay. While a road base blend may result in better sanitation, however, it can be more unstable under a horse’s movement so can become mixed in with the bedding, be ingested with the feed, and turn into a pawing horse’s delight.
Good stall flooring

Grids are suitable for outdoor application in high-traffic areas.
CONCRETE. Although it makes a low-maintenance, permanent floor that is fairly easy to sanitize, concrete requires very deep bedding because it can be hard, cold, and abrasive. A pawing barefoot horse can severely damage his hooves on a concrete floor. Concrete floors must be designed with a drain or a slope and should have a textured surface to ensure good traction.
“RUBBER” STALL MATS. Usually a combination of rubber, clay, nylon, and rayon, these mats act as an intermediary between the soil and the bedding. They have superior cushioning, so they are comfortable, can be easily sanitized, make stall cleaning easy, decrease dust so horses stay cleaner, and decrease the amount of bedding required by up to 50 percent. They also prevent a pawing horse from digging holes in the stall. Stall mats are initially expensive, however, and if they are not properly texturized, they can be slippery.
STALL MATTRESSES. A stall mattress system consists of two parts: a mattress and a cover. The mattress is a thick rubber-filled cushion. The cover is a Latex or rubber sheet fastened to the sides of the stall. Plenty of absorbent bedding must be used to soak up urine.
INTERLOCKING PLASTIC STALL GRIDS. The large holes and spaces in the grids are filled with sand or road base, providing a tough floor with good drainage. If properly installed, such a floor is impervious to a pawing horse; however, the sand may be ingested along with the feed.
WOOD. An old-time favorite for tie stalls, wood is really not appropriate for box stalls. Although it is warmer than concrete and fairly durable if treated, it can be slippery, is difficult to sanitize and deodorize, and can be noisy under a nervous horse.
Exercise Options
Riding
Turnout
Ponying
Longeing and long lining
Electric horse walker
Treadmill
Swimming
Exercise is essential for maintaining overall health and for the development of dense, tough hooves. All horses of all ages need exercise every day — either a ride or a minimum of two hours of turnout in a large pen or pasture. The many benefits of exercise include assistance in the development and repair of tissue. It can improve the quality and strength of bones, tendons, ligaments, and hooves. Regular, moderate stress creates dense, stress-resistant bones and hooves. Exercise also conditions and stretches muscles and tendons, resulting in less chance of injury and lameness.
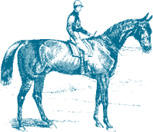
Riding is an ideal way to provide and get exercise.
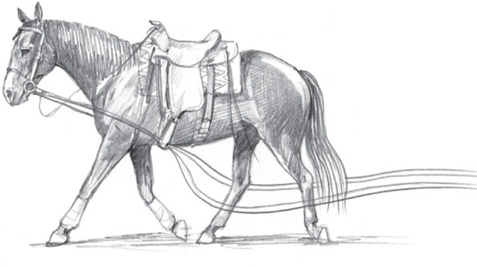
Ground driving is another great training and exercise tool.
It is important that any exercise area be safely fenced and free from hazardous objects. Footing should not be excessively deep. Hyperextension of the fetlock in deep sand can do permanent damage to tendons. Rocky footing can encourage the development of dense, tough hooves but can also cause hoof damage, especially if the horse’s hooves are weak and vulnerable when he is first turned out in a rocky pasture. (See June Training Pen for more details.)
Your routine examination (which can occur at each feeding) should include noting your horse’s overall stance and attitude, the condition of his legs, how he moves, and clues in his living area. If you notice a discrepancy in his legs or hooves, halter your horse and bring him to an area where you can give him a thorough visual check, clean his hooves, and palpate his legs. So that you have a baseline for comparison in relation to texture, temperature, and sensitivity of your horse’s legs and hooves, be sure to carry out a preliminary examination when everything appears normal.
Ponying is an excellent way to exercise two horses.
Feel the hoof for loose or rough clinches.
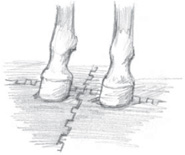
1. Notice which leg he is resting.
2. Notice if his front legs are both ahead of or behind their normal (vertical) configuration.
3. Notice if his hind legs are ahead of or behind their normal configuration.
4. Notice if he is reluctant to walk to the examination area.
5. Wipe any mud or manure off the hoof wall and coronet.
6. Pick out all of his hooves.
7. Note any sensitivity in the clefts of frog (including the central cleft) when using a hoof pick to clean them.
8. Look for embedded rocks, splinters, nails, or other objects in any part of the hoof, including the coronet.
9. Test each branch of the shoe to see if it is loose.
10. Sight down the bottom surface of the shoe to see if it is still flat. Sometimes the heel of a shoe will be stepped on and bent down and go unnoticed because it is still tight.
11. Note if the shoe has slipped or twisted off to one side.
12. Note if the shoe has slipped backward. (Be careful not to confuse this with a shoe that has purposely been set back by your farrier.)
13. Check the clinches to see they are tight or if they have opened up and started to pull through the hoof.
14. Look for signs of injury on the coronary band, bulbs, or lower leg.
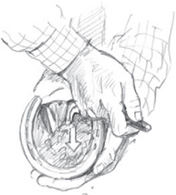
Here’s how I clean a hoof. First I use the side of the hoof pick to scrape mud off the outside of the hoof wall. A stiff brush will further clean the hoof wall and make it less messy for you or your farrier to handle. Then I pick up the foot. I hold the hoof pick with the blade facing away from me. I remove the debris from the sole and the clefts of the frog (the V-shaped rubbery cushion located between the heels on the bottom of the hoof). Then I turn the pick toward me and clean around the inside edge of the shoe if the horse is shod. I remove any remaining debris from the frog.
There is a great variety in hoof picks. Choose one that is comfortable in your hand so you will use it often!
Clean hooves daily.
Feeding horses can be a complex topic. The following nutrition guidelines relate specifically to hoof health. In short, supply required nutrients and do not overfeed, which can lead to laminitis, a debilitating condition of the hooves.
• Know each horse’s feed requirements. Commercial feeds or hays may not provide all a horse needs. Several important nutrients, such as biotin and methionine, that are necessary for high-quality hooves are often deficient in horses’ rations.
• Know exactly what you are feeding. Read and understand the feed tags of commercially prepared feed. If you buy large batches of hay, have it tested for its nutrient content.
• Monitor your horse’s weight routinely to determine the amount of feed required, to prevent obesity, and to minimize the chance of laminitis. A hundred extra pounds of body weight plus 200 pounds of tack and rider can be very harmful to your horse’s feet and limbs.
• Know exactly how much you are feeding. Weigh feed to prevent obesity.
• Feed grain only if a horse requires it: young, growing horses, horses in hard work, and lactating broodmares are in this category.
• When turning a horse out to pasture for the first time, be sure the horse has had a full feed of hay. Limit grazing to one half hour for the first two days. Then one half hour twice a day for two days, then one hour twice a day, and so on.
Monitor horses that are on pasture; they can quickly become overweight or suffer laminitis.
Cold Weather Feeding Rules
Increase roughage by 10 percent for every 10°F below freezing.
Make sure there is free-choice open water to drink. Provide water using tank heaters or automatic waterers, or break the ice in creeks, ponds, or troughs. Do not expect your horse to get his needed moisture from snow.

• Be sure it is impossible for a horse to get into the feed room. Horses do not know when to stop eating and can literally “eat themselves to death.” An excess amount of grain can cause colic or laminitis.
• Do not feed a horse immediately after hard work and do not work a horse until at least one hour after a full feeding. The horse is a digestively sensitive creature and requires consideration in work requirements surrounding meals.
• Feed the highest-quality hay you can find.
• Provide free-choice salt, minerals, and water.
• After formulating the hay and grain portion of your horse’s ration, choose a hoof supplement that provides any missing nutrients. Frequently hooves (and hair coat) benefit from the addition of DL-methionine, lysine, calcium, biotin, and other substances to the ration.
He doth nothing but talk of his horse.
— William Shakespeare, The Merchant of Venice
PASTURE PERFECT 
As long as there is at least a 4-inch snow cover on the pastures, the horses can be turned out to enjoy free exercise and a good roll. If the weather is mild, we often feed the pasture horses on the snow, which is a great, clean place to lay out the hay rations.
Killer bees, or Africanized honeybees (AHB), are a cross between Brazilian honeybees and aggressive African bees. Decades ago, the African bees were imported to Brazil for laboratory work. Some escaped, crossbreeding with native bees. They began moving north at a rate of about 200 miles per year. They entered Texas in 1990 and have spread through Nevada, Arizona, New Mexico, California, and other parts of the southeast United States.
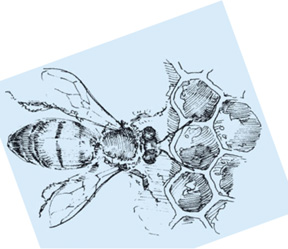
They are very defensive and aggressive. If a hive is disturbed, a person or animal can be stung up to 100 times. Although their venom isn’t any more potent than that of regular honeybees, they can cause serious injury or death because they attack in great numbers and pursue victims for great distances. Once disturbed, a colony can remain agitated for 24 hours, attacking people and animals within a quarter mile of the hive for no reason. In South America, there have been more than 1,000 fatalities; fewer than 10 deaths have occurred in the United States so far.
Be alert for the sight of bees coming into and out of an opening, such as a crack in a tree, cactus, or wall; a hole in the ground; or a vacant building. Check the box opposite for some tips.
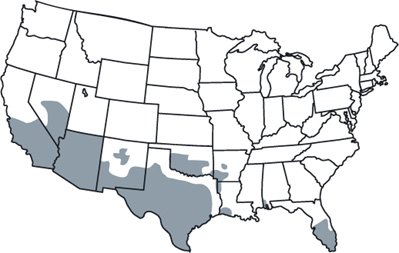
Range of Africanized Honeybee
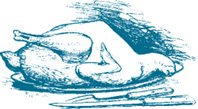
A few feet from our kitchen sink window is a huge, flat granite rock where we put extra treats for our cats — if they can beat the magpies to them! One day Richard and I were skinning and sectioning a huge turkey that I was going to use for a Christmas curry. As you may know, a raw turkey yields a huge bowl of fat and skin, so halfway through our task, I took the first of the orts out to the feeding rock.
Bee Safe
When working on your farm or ranch or riding your horse:
Listen for the sound of bee activity.
Wear light-colored clothing. Bees tend to attack dark things. Dark clothing, dark hair, or anything dark in color could draw the animus of the AHB.
Bees are sensitive to odors, both pleasant and unpleasant. The smell of newly cut grass has been shown to disturb honeybees. Avoid wearing floral or citrus aftershaves or perfume.
If you come upon bees when riding, whether killer bees or not, depending on the situation, it might be best to quickly escape. If you can control your horse at a gallop, that would be the best plan. If think your horse might panic, however, you could consider dismounting and leading him quickly but calmly away from the area. If possible, put a bandana over your face and a shirt over your horse’s head as you escape, because bees usually go for the head on both humans and animals.
When you are away from the threat, examine yourself and your horse. Removing the stingers soon after attack will lessen the amount of venom entering the body. Scrape the stingers off the skin with a blunt instrument or credit card. Don’t remove bee stingers with your fingers or tweezers, because the pinching action forces more toxin into your body or your horse’s.
It was less than a minute before the “mountain penguins,” as we call the magpies, showed up to feast. They would stand on a piece of skin with one foot and tear into it with their heavy black bills. We stood next to each other working and intermittently looking up to glance out the window and watch the penguins get a good meal.
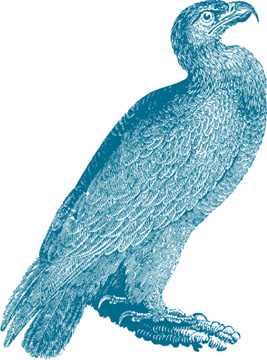
Once, when I was looking up and Richard was looking down, I saw a huge shadow pass over the rock. Before I could speak, it materialized into an enormous golden eagle who landed there — just a few feet from us. I grabbed a breath, and to be sure my pal also saw this fantastic site, without moving, I whispered intently, “Richard, Richard. Look, look.”
I had seen live eagles in raptor exhibits, but nothing prepared me for this wild eagle, so big, so close, so amazingly powerful. In a few seconds, he gulped what would have been a week’s meal for a family of magpies. And then he was gone.
We both said “Wow” about ten times, and before we could form any more coherent words, he graced us with another landing! This time he stayed much longer, allowing us to admire his wonderful leg feathers that went all the way down to his toes, his strong talons, and powerful hooked bill. He was truly majestic and a special Christmas present indeed. (See more about eagles in April Wild Life.)
I will not change my horse with any that treads but on four pasterns. When I bestride him, I soar, I am a hawk: he trots the air; the earth sings when he touches it.
— William Shakespeare, Henry V
Sanitation practices are essential for your horse’s hoof health. Urine breaks down into products that contain ammonia, with a pungent vapor that is injurious to the eyes and lungs. The combination of dung and urine is a perfect medium for the proliferation of bacteria, which can begin destructive processes on hoof horn. When certain fecal bacteria ferment, their secretions can dissolve the intertubular “hoof cement.” Moist manure softens, loosens, and encourages the breakdown of hoof horn cells.
A Healthy Balance
If your horse is getting adequate exercise and the footing of his stall, pen, or pasture is well drained, the moisture balance between the inner and outer layers of his hooves probably remains at a relatively constant, healthy level. If your horse stands inactive for long periods of time, however, sufficient moisture may not be delivered via the blood to the hoof, and his hoof walls may tend to contract.
On the other hand, if his hooves contain too much moisture from water, mud, frequent baths, or excessive hoof dressing, they become soft, the hoof spreads, and the layers separate.
MOISTURE CONTROL. By now you know that making a horse stand in mud is often the worst thing you can do — and that hoof dressing should not be indiscriminately slathered on your horse’s hooves to “moisturize” them. Since the modern riding horse evolved on semiarid plains, the healthy hoof is designed to be dry and hard. Your role as manager of your horse in confinement is to provide an environment that allows the hoof to be dry, hard, and healthy.
The effects of repeated wet/dry conditions can be devastating to hooves. Hoof conditions worsen during hot, humid weather, especially when horses are turned out at night in dew-laden pastures and then are either left out where the sun will dry the hooves or put in a stall where the bedding dries the hooves. Horses that receive daily baths or rinses or those that repeatedly walk through mud and then stand in the sun experience a similar decay in hoof quality. In both cases, the hoof is going through a stressful moisture expansion and contraction cycle, which is damaging to the hoof structures. In the process of drying out, the hoof develops cracks, and the cracks are packed with mud so they continue getting larger and spreading. In addition, the cellular cement that holds the hoof horn together breaks down. The result is a frayed, pulpy mass of fibrous tubules. Drying mud and water also leach out essential nutrients and oils that are responsible for maintaining hoof flexibility.
(See July Foot Notes for information on hoof dressings and sealers.)
Follow these guidelines to maintain your horse’s hooves at an optimal, constant moisture level:
1. Keep stalls dry.
2. Provide turnout areas that are not muddy.
3. Minimize bathing.
4. Minimize wet/dry episodes, such as hosing legs and then putting the horse in a stall with dry sawdust bedding.
5. Use hoof dressing discriminately.
6. Use a hoof sealer when appropriate, such as during the wet seasons, if the horse must be bathed frequently, if the hooves show signs of surface cracks, or if your farrier has rasped the wall of the hoof to shape it during trimming.
HOOF-HEALTHY BEDDING. Bedding should be easy to handle, absorbent, and comfortable. The bedding with the highest water-absorbing capacity, however, is not necessarily best. Extremely absorbent bedding sops up too much urine and if the bedding is not changed frequently, the horse’s hooves will be subjected to constant wetness. On the other hand, a bedding with very little absorbency lets too much moisture pass through to the flooring and can result in pooling. The ideal bedding in most cases has a moderate absorbency and is free from dust, mold, and injurious substances. (See October Clean-up Crew for more on bedding.)
The shorter days and longer, cooler nights of fall trigger a change in your horse’s hair growth. In temperate climates, in August or September, horses begin shedding their short summer hair and replacing it with longer winter hair. The fluffy coat characteristic of horses turned out in the northern states and Canada is usually completely grown in by November. For these horses, the natural coat is an ideal form of protection, as the long hair traps a layer of warm air next to the body, which acts as insulation. During cold temperatures, piloerector muscles make the hair stand up, which increases the coat’s insulating potential.
However, long winter hair can create difficulties for you if you intend to ride your horse actively during the winter. If you do plan to keep your horse in work throughout the winter, you should consider one of the following: blanketing, clipping, or a combination of clipping and blanketing.
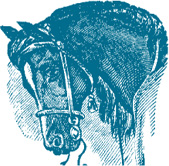
If you need to tidy up your horse’s ears for the winter, just clip them flush and maybe tweak the outline.
BLANKETING. To minimize the density of the winter coat your horse grows in the fall, you can begin blanketing him in August and using lights (see November Reproduction Roundup) so that his body receives the signal that only short to medium hairs are required to replace the summer coat. Of course, once you begin blanketing, you will need to continue blanketing your horse all winter.
Ear Clip
Certain places on a horse’s body have extra hair for a reason. The ears, for example, grow extra hair both inside and outside in the fall to keep them warm during the winter.
BODY CLIP. In areas with moderate to severe winters where horses grow a substantial winter coat, you may need to use a type of body clip to minimize grooming and cooling-out time. If you choose a conservative clip and your winter is mild, you may be able to turn out a clipped horse without blanketing him. In most wintry states, however, it is necessary to blanket a clipped horse.
Body clipping will allow you to work your horse vigorously during the winter. Clipped horses sweat less, and what sweat there is will be able to dry more quickly. The clipped horse can be cooled out much more effectively and safely than the unclipped horse. Also, the clipped horse is tidy in appearance and relatively easy to keep clean, an important factor in the nonbath months.
Body clipping won’t appreciably improve the appearance of an unhealthy horse — such a horse will just have a bad short coat instead of a bad long coat. But the healthy horse in active work can benefit greatly from a winter clip.
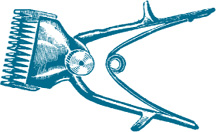
CLIPPER TIPS. Before you bring your horse in the barn for his clip, be sure your clippers are in working order and that you have several sets of sharp blades on hand.
In very general terms, there are two types of clippers: heavy-duty and light-duty. The heavy-duty clippers are suitable for body and leg clipping. They are designed to be used for extended periods of time because they cool while they are being used. Light-duty clippers are suitable for small jobs, such as trimming the muzzle, throat, ears, and bridle path, and perhaps a touch up on the legs. If you use light-duty clippers for removing heavy winter hair, not only will the blades quickly become dull, but the motor may overheat and burn out as well.
Horse Sense and Safety
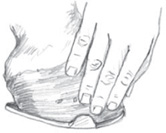
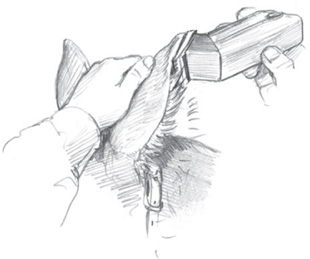
Don’t Wrap that Rope
Never wrap a rope or strap around your hand, arm, or other part of your body. If a horse spooks suddenly and bolts, you may be unable to free yourself from him and could be hurt badly.
TIPS & TECHNIQUES
Clipper Blades
For most body work, heavy-duty clippers with a wide head work best. Small clippers are necessary for the legs, head, and tight areas such as the elbows. The clippers for the body work should be outfitted with #10 or #15 blades, which cut hair to about a quarter inch. Never use a surgical blade (#30 or #40) for a body clip, as it would remove the hair right down to the skin.
Up rose the wild old winter-king And shook his beard of snow.
— Charles Godfrey Leland
There are three basic types of body clips, each with many variations and styles: the full clip, the hunter clip, and the trace clip. The full body clip consists of shortening the hair on the entire horse, including the head and legs. Immediately after a full body clip, most horses, especially bays and chestnuts, appear to be a lighter color.
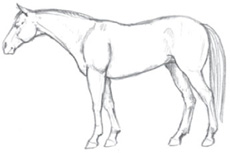
Full body clip
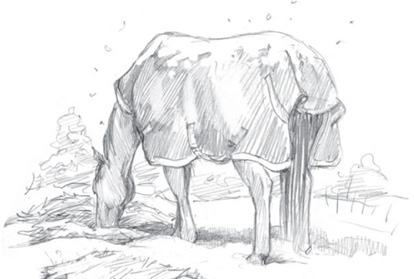
The (field) hunter clip. This is essentially a full body clip, except that long hair is left on the legs and saddle area. For protection when working in snowy fields, the winter hair remains on the legs from the elbows and stifles down to the coronary bands. In addition, a patch the shape of the saddle pad is also left so that the horse’s back is less prone to chill after work.
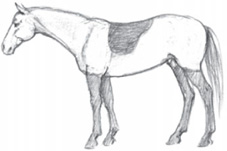
Hunter clip
The trace clip. This was originally designed for harness horses that worked in the winter. The hair is clipped in the areas where a horse sweats: the throat, chest floor, belly, inner thighs, and under the tail. A conservative trace clip may involve removing a strip of hair 8 to 10 inches wide from the throat under the belly to the anus. The basic trace clip can be embellished with sharp geometric designs and circles so it fits the needs of a more aggressive exercise program.
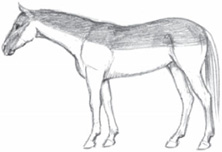
Trace clip
Begin clipping on the shoulder or the barrel with the large-headed clippers. To get a consistent clip, hold the clippers with the blades flat against the horse’s body for the entire session.
Aim the clipper head directly against the hair growth. You will probably be surprised at how many times the hair growth changes direction on the horse’s body.
Using short strokes rather than long strokes results in fewer “tracks,” or residual clipper lines.
As you clip, keep the blades clean and cool. With the clippers running, dip just the tips of the clipper teeth into a commercially prepared blade wash or kerosene. This will cut any oily or dirty residue that has built up on the blades. With the blades pointed toward the floor, shake the excess fluid off the blades before tipping them upright to resume.
If you notice that the sound of the motor changes, it may be that the blades need to be lubricated. Refer to your owner’s manual. Some models require oiling. Others recommend a spray lubricant be used directly on the blades. The lubricant cools the blades and removes small dirt particles, thereby further reducing friction.
Keep the air intake screen clear of hair, or the motor will not cool properly. If the clippers overheat, you must stop using them until they cool. Hot clippers not only can hurt your horse, but the motor can also burn up irreparably.
Once you finish clipping the fleshy body parts such as the shoulders, chest, barrel, belly, and thighs, use small clippers on the extremities such as the legs and head.
When you are finished, thoroughly clean your clippers before putting them away. Leaving hair, sweat, and scurf on the blades can result in rusted blades that will not clip well the next time you want to use them.
Finally, curry your horse vigorously, vacuum him, and rub some oil or conditioner into his coat. Groom the clipped horse daily to restore the oil and shine to his coat.
Here are some tips for the first time you clip a horse.
Take the time to outline a plan. Mentally go through each step of the procedure to be sure you will have everything on hand that you need. Budget enough time for the job. Figure about two to three hours to clip a horse.
Approach the task with patience. If you get frazzled or hurried, your clip will show it. If it is your first time doing a body clip, ask a knowledgeable friend to coach you through the tough spots.
Everyone stay calm. A calm, experienced horse will make your first clipping job easier. If you must clip a young or nervous horse, ask your veterinarian to recommend an appropriate tranquilizer.
Cleanliness is a virtue. Be sure the horse is very clean before you begin clipping. Dirt can dull clipper blades very quickly. If bathing is possible, wash the horse the day before clipping and let him dry unblanketed. If it is too cold for bathing, thoroughly groom the horse using a rubber curry and vacuum so that the clean hair stands out from the body when you are finished.
TIPS & TECHNIQUES
Clear the Deck
Braid the mane and wrap the tail to keep them out of the way while you are clipping.
Tack Room
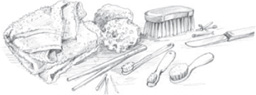
Leather-Cleaning Tools 
Having the right tools and products on hand for cleaning leather will help you do a good job. Here’s what I use:
Warm water, Turkish towels, and sponges
Special leather cleaning products that don’t strip oils or clog pores
Soft bristled brushes, including an old toothbrush, for lifting dirt out of tooled leather
A dull knife, wooden chopsticks, and wooden matches for removing those stubborn little “jockeys” (the dark, crusty buildup of sweat and dirt on the underside of leather)
(See more about leather care in January Tack Room.)
Hook-and-loop fasteners, commonly known as Velcro, are on all sorts of horse tack, from blankets to shipping boots to exercise boots. Velcro has a hook portion and a loop portion. The loop portion usually stays fairly clean, but the hook portion is a magnet for horse hair, thread, hay, lint, and other debris, which clogs the hooks and keeps them from gripping. To keep Velcro aggressive, fasten it when it is in use, when it is not in use, and when it is being laundered. However, if blankets and boots are fastened when they are put in the washer, they may not get thoroughly clean. As a remedy, I purchase some extra loop portion at my local sporting goods store, where it is sold in various widths by the yard. I cut it into the lengths I need to protect the hook portions in the washing machine.
Cleaning Velcro
To clean the hook surface of Velcro, you can run a large darning needle between the rows of hooks. This loosens and lifts the debris in a pad, which you can then remove with your fingers. Use a toothbrush to brush out the last bits, and make a loop of duct tape to pick up the final stragglers.
 FARM OFFICE
Boarding requires labor, patience, and a love of not only horses, but also dealing with people. Although inconsiderate owners are often part of the bargain, there are many wonderful people who appreciate a fine level of personal service.
Demand will vary greatly from region to region. You will need to spend money on facilities and advertising, and then wait until your reputation builds. And you will need to have boarding contracts, waivers, and other forms drawn up by an attorney specializing in equine law in your state.
TIPS & TECHNIQUES
Legalities
If you are thinking of taking in boarders, be sure to read about legal issues for horse owners (see Recommended Reading) and look through the horse motel guides.
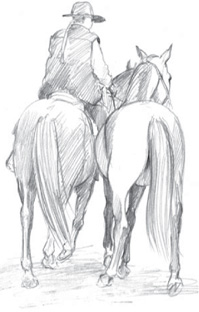
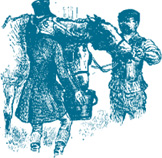
When I approach a horse to catch him, I do not walk right at his head, which could cause him to turn and move away from me. And I do not approach him directly from the rear in one of his blind spots, because I could surprise him and make him spook or even kick. Instead, I gaze indirectly at his neck and shoulder area, and as I approach I speak to him: “Hey, boy, how are you doing?” And when I get close enough to touch him, instead of touching him on the face, I touch his neck or withers, a place a horse likes to be touched, before I halter him.
Nothing can be so frustrating as a horse that refuses to be caught, and few things can be as dangerous as turning loose a horse that jerks away prematurely, often wheeling and kicking as it gallops off. The horse that keeps just enough distance between him and the approaching trainer and the horse that pulls away when being turned out have one thing in common — disrespect of the trainer and the equipment. As with most training situations, it is best to prevent such habits with regular sessions for young horses, in this case, catching, haltering, and unhaltering. Leaving a halter on a horse is dangerous and sidesteps the important lesson of haltering and unhaltering.
Once a horse has successfully avoided being caught several times, whatever the initial reason was, he may continue the behavior merely out of habit. There may no longer be an unpleasant condition to blame for the action, but the horse still shuns the handler. In other cases, avoiding the trainer may just be an enjoyable game of tag.
The Horse’s Point of View
Horses are generally difficult to catch because of fear, resentment, or habit. Unhandled horses move away from the unfamiliar sight, sound, and smell of the trainer. Other horses may evade the handler because they resent the treatment they get after they are caught: excessively hard work, ill-fitting gear, painful doctoring, or tactless training.
THE LORD OF THE RINGS (2001)
This magical trilogy is full of gripping horse scenes, from the squalling, frothing, roughshod black mounts handled cruelly by the Ringwraiths to the glowing spirit of Shadowfax, the Lord of All Horses, ridden bridleless by Gandalf. Look for the sensitivity of Strider’s horse Brego; the great lead changes and jumping of Arwen’s grey horse Asfaloth; and the Elvin spell that creates a thundering herd of water horses to defeat the Nazgul.
THE WALK-DOWN METHOD. Whatever the reason, and whether developing good manners in a young horse or retraining a problem horse, few methods produce such long-lasting results as the “walk-down method.” Because it is based on persistence, it may be time consuming at first, but it is worth the investment. Begin the lessons in a small enclosure and gradually increase the size of the area.
When approaching the horse, don’t be threatening in body language. Always walk toward the horse’s shoulder, never his rump or his head. Move at a smooth, slow walk. Don’t look directly at the horse, but keep him in your peripheral vision. When the horse stands and allows you to approach, scratch him on the withers and then walk away. Always be the first to turn and leave. Don’t catch and halter the horse each time he lets you touch him. Soon it will take just a few seconds for the horse to decide to stand still.
CORNERING THE HORSE. If a horse must be caught more quickly, he could be run into a chute or cornered by two or three experienced people. The natural tendency of a cornered horse is to turn his hindquarters toward danger. If a horse is unsure of humans, he will behave this way as a defensive measure. The object of whip-breaking a horse is to make him face the trainer. Using a whip on a horse’s hocks or rump will often cause him to turn around. But a whip in the hands of the wrong person can cause a horse to jump out of the enclosure, trample the trainer, kick, or strike. Whip-breaking should be attempted only by an experienced trainer.
When approaching a horse, don’t be threatening in body language.
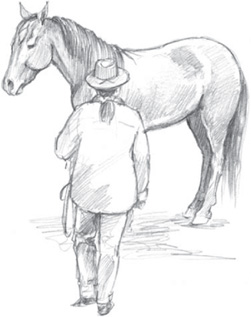
Whenever possible, approach a horse at his shoulder.
Because it is unsafe to go past a horse’s rump to reach his head in a corner, the horse must be taught to turn around. Usually, popping the horse over the tailhead with the end of the lead rope gets his attention and he turns to see what happened. Using a reassuring voice and a scratch on the neck or withers, the trainer should let the horse know that he has behaved properly.
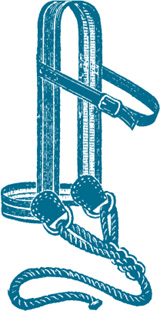
HALTERING. Haltering in a safe, organized fashion prevents mishaps and bad habits. Approach the horse from the near (left) side and hold the unbuckled halter and rope in your left hand. With your right hand, scratch the horse on the withers and then move your right hand across the top of the neck to the right side. Pass the end of the lead rope under the horse’s neck to your right hand and make a loop around the horse’s throatlatch. Hold the loop with your right hand. If the horse tries to move away at this stage, you can effectively pull his head toward you while levering your right elbow into the middle of his neck.
Good vs. Bad Habits
Horses can quickly develop bad habits regarding catching, haltering, and unhaltering. That’s why it is necessary to follow a regular routine until good manners are established.
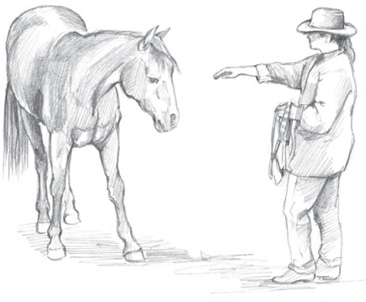
If you must approach from the front, reach out and touch his neck or shoulder, not his face.
To halter, hand the halter strap with the holes in it under the horse’s neck to your right hand, which is holding the loop. With your left hand, position the noseband of the halter on the horse’s face and then bring the hands together to buckle the halter.
Ranch Recipes 
Braunsweiger Balls
To give a deworming pill to my cats, I cut it in fourths with a pill cutter and then hide each tiny quarter inside a ball of irresistible (to cats) braunsweiger (liverwurst or liver sausage). Over the previous few days, I prime the pump by calling the cats to a series of large tree stumps we have at our back door and tossing them blank balls.
Once they have the routine down, it is time for the loaded balls. On deworming day, they get the dosed balls and gulp each one down quickly so one of the other cats doesn’t get it. With this method, I’ve never missed.
TURNING LOOSE. Turning a horse loose follows the same procedure in reverse order. First, apply the loop around the horse’s neck, and then remove the halter. Hold the horse momentarily with the loop, then release the loop and gently push the horse away with your right arm or hand. If you are dealing with a chronic bolter, try dropping a few feed wafers on the ground before you turn the horse loose. He soon will think more about inspecting the ground where he stands than about running away.


Haltering in a safe, organized fashion prevents mishaps and bad habits.
Although removing a mare’s ovaries is not as commonly performed as gelding is, there are circumstances in which spaying a mare can be advantageous. If a mare has developed dangerous behavior as a result of hormone imbalances resulting from an ovarian tumor, removing the ovaries can redeem the mare’s chance at a useful non-breeding role. Mares with granulosa tumors most often display wicked habits such as squealing, biting, kicking, and exhibiting stallionlike behavior. In 90 to 95 percent of cases, surgical removal of the tumor and/or ovaries eliminates the undesirable behavior.
Mares that have developed cresty necks and voice changes most often retain these characteristics after surgery. Less dangerous mares who have irritable, fussy, or silly periods every month may be unreliable in terms of show, race, or ranch work. If a mare is valued, but not for breeding purposes, spaying may provide the necessary alternative to produce a more solid performer.
A nonsurgical treatment for mares with undesirable estrous behavior is the administration of an oral synthetic progesterone. Progesterone is the calming female hormone responsible for maintenance of pregnancy, and its inhibiting effect on the occurrence of the estrous cycle might provide temporary help during a prospective broodmare’s show or race career.
If more permanent measures are required, the mare owner must look to surgical alteration. There are three methods of removing the ovaries: abdominal surgery, flank incision, and the vaginal approach.
en español
vamoose. Comes from vamos, meaning ‘let’s go ’.
concho. Comes from la concha, ‘a metal disk, usually of decorative silver, set on a leather rosette for decoration or for securing the saddle to the tree’.
Major abdominal surgery under general anesthesia is the most expensive method and involves the longest recovery period, yet may be the only option available to horse owners in many locations. The ventral midline incision made from the umbilicus toward the udder gives the practitioner easy access to the ovaries. The surgeon has absolute hemorrhage control, which is essential when dealing with the highly vascular ovary with a tumor. Major vessels are tied. The patient usually remains in the hospital for observation for 10 to 12 days, then is restricted to box-stall or paddock confinement for an additional 30 days. It is usually 90 days from the date of surgery until the mare can return to training. As with all major abdominal surgeries, there is the risk of anesthesia and postoperative complications such as colic.
“A lovely horse is always an experience. … It is an emotional experience of the kind that is spoiled by words.”
— Beryl Markham in West with the Night
Effects of Spaying
Spayed mares no longer have estrous cycles, so do not exhibit estrous behavior. Otherwise, there are no behavioral changes associated with an ovariectomy. Likewise, other than the absence of ovaries and the decrease in estrogen production, there are no physical changes. The mare’s metabolism does not slow down, so she does not become an easier keeper. Spayed mares do not lose their feminine features. Your mare will look as sweet as she did before surgery. More important, she will behave more consistently.
Removing a mare’s ovaries is a permanent way of altering her estrous cycle and behavior. After careful consideration of breeding potential and intended use, spaying may be the answer to one of your mare management questions.
The flank approach is usually performed with the horse standing in stocks, under the influence of a tranquilizer and local anesthetic. Often a 4-inch incision is made in each flank to allow the surgeon easier access to each ovary. Removal can be made with an emasculator, such as that used in the gelding process, or with a chain-loop ecraseur. Recovery is quicker than with abdominal surgery. Beginning with one day for observation in the hospital, the horse should spend 10 to 14 days in stall or paddock confinement and return to work 30 days from the date of surgery. Generally, the flank method has few complications but does yield minor scars.
The vaginal approach is the fastest, most inexpensive method, with a cost about a quarter that of abdominal surgery. However, the vaginal approach requires a higher level of technical expertise and may not be widely available. Mares must be free from reproductive tract infection and are routinely put on antibiotics before and after surgery. It is especially important when choosing this method to fast the mare for 24 to 36 hours prior to surgery to ensure minimal intestinal fill.
The mare is restrained in stocks, under the influence of a tranquilizer and local anesthetic. The surgeon makes entry through the vulva and a small incision is made in the vagina. The ovaries are severed from their attachments by utilizing a chain-loop ecraseur. No ligation of vessels is required and no vaginal sutures are necessary. There is little trauma or jeopardy involved in the vaginal approach. After surgery, the mare is usually kept standing in cross-ties for 24 to 48 hours, because lying down might allow protrusion of intestine through the incision. During this time she should be periodically hand-walked for exercise. After three to four days in a box stall, she can be turned into a paddock for a week, and then returned to work.
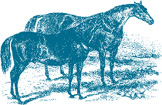
LOOKING AT HORSES
Topline
The ratio of the topline’s components, its curvature, the sharpness of the withers, the strength of the loin, the slope of the croup, and the length of the underline in relation to the length of back all affect a horse’s movement.
A rule of thumb is that the neck should be greater than or equal to the length of the back, and that the hip should be at least two-thirds the length of the back. The neck is measured from the poll to the highest point of the withers; the back from the withers to the loin, located above the last rib and in front of the pelvis; and the hip from the loin to the point of buttock.
Be sure to look at the neck from both sides because the mane side often appears shorter than the nonmane side.
When to spay a mare depends somewhat on the reason for the surgery and the subsequent method of choice. Abdominal surgery would be necessary for the mare with a large ovarian tumor and could be performed at any age. It would also be appropriate for routine ovariectomy of the yearling, as the longer recovery time would not interfere with a performance schedule. From a technical standpoint, both the vaginal and flank methods are best suited for a mare of two to three years of age whose mature proportions allow the surgeon room to operate.
 FINE FACILITIES
An important part of your facilities is an all-weather, level, well-lighted work area for your farrier so he can do his best work. Your farrier may have personal opinions about the type of floor he prefers or whether he likes to work in a small enclosure or a large, open area. However, certain amenities help any shoeing to proceed safely and efficiently, such as:
• The shoeing area should be well lighted, uncluttered, and level.
• The flooring can be concrete, rubber, wood, or asphalt. Tile, very smooth concrete, and some rubber mats can be slippery when wet.
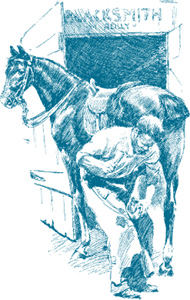
Your farrier should not be expected to shoe in a driveway, in the snow, out in the middle of a pasture, in a muddy or rocky paddock, or in a dusty barn aisle. Gravel can damage a freshly trimmed hoof in a matter of seconds while the farrier is preparing the shoe. Shoeing in a barn aisle full of potholes makes it very difficult for the farrier to assess limb balance accurately, not to mention for the horse to stand squarely.
In temperate climates, there should be a well-lighted indoor shoeing area that is out of the snow and wind. During the summer and in the southern states, some farriers prefer to work in a shaded outdoor area where the breeze can keep the farrier and the horse cool. Since most farriers use electric tools for shoe preparation, the shoeing area should have access to 110-volt electrical outlets.
Snow Day
During very deep snow periods, keep horses indoors. Monitor fence lines so that pasture horses do not inadvertently step over a fence and become entangled.
Tying Options
Some farriers prefer to have horses held by an experienced horseman for shoeing. It is best if the handler stands on the opposite side from the shoer to keep the horse from moving away from him. Other farriers would rather work with the horse tied at a hitching post or in cross-ties. The tie area should be strong and safe.
When tied at a hitching post, the horse should be tied at or above the level of the withers with approximately 2 to 3 feet of rope between the halter and the post. A shorter rope prevents the horse from attaining a comfortable head position and makes it difficult for him to move freely when asked by the farrier. A longer rope often allows the horse to lower his head too much and move his body around.
The height of cross-ties will vary according to the width of the alley spanned. Very wide alleys require long cross-ties that must be mounted high; cross-ties in narrow alleys are shorter and can be mounted so that the ties aim almost horizontally at the cheekpieces of the horse’s halter.
If your horses have come out of muddy lots, be sure to clean them, especially their shoulders, hindquarters, and legs, which the farrier will be contacting. Also, scrape and then wipe the mud off the hooves rather than hosing them off. Clean, dry hooves are much safer and more pleasant for the farrier to work on than slippery, wet hooves.
A front-end loader is a large bucket mounted on the front of the tractor and used for scooping up and moving quantities of material. On a horse farm, that material is most often manure, but a front-end loader can also move gravel, dirt, bedding, and even snow. If your tractor didn’t come with a loader, you can add one (made by the same manufacturer or a third party) along with an auxiliary hydraulic system, as long as the loader is specifically designed to work on your tractor.
When choosing a tractor and loader to perform the tasks you plan on doing, consider breakout force (a loader’s capacity to break through and lift hard-packed earth), which can range from 900 pounds to 9,000 pounds, and maximum load lift capacity, which can range from 515 pounds to 5,140 pounds.
Consider also maximum lift height, which can range from 75 inches to 169 inches clearance with the bucket in the dumped position, and the reach of the arms at maximum lift height. All of these figures will help you determine if a tractor has the power and scope to reach where necessary, such as over fences, panels, or walls, or deep into sheds.
A mid-mount loader frame, which attaches just ahead of the operator, is best, as it eliminates the need for bulky bracing at the front of the tractor. Valves and hoses mounted at the midsection instead of the rear of the tractor make hookup easier. Pay special attention to the mounting dimensions, size of the loader in relation to tractor horsepower, and operating clearance. As you shop, check to see what different-size buckets and other attachments are available that can interchange with your standard bucket.
TIPS & TECHNIQUES
The Time Factor
Other factors are bucket dump time, rollback time, dump angle, and rollback angle, all of which contribute to the time required to cycle through a repetitive task such as loading manure onto a spreader. If working rapidly is important, you might want to consider a self-leveling loader, as it will decrease spilling and allow you to keep a quick work pace.
If a tractor and equipment have been properly maintained all year, they will be ready to go to work when you need them for snow removal.
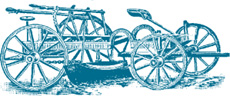
A pipe frame trip-bucket loader, usually found on older tractors, can be raised and lowered hydraulically, but the tipping of the bucket itself is an all-or-nothing situation. With their limited control, trip buckets are notorious for either skipping over the top of your intended load, or digging in too deep and tearing up the earth underneath.
Double-action hydraulic buckets are much more versatile than trip buckets because you can control the position of the bucket with a much finer degree of movement. This allows you to sprinkle the material you are unloading rather than just dumping it in a pile, as is the case with a trip bucket. You operate the bucket with a single joystick hydraulic control that is intuitive for many novice operators. All four movements (lifting bucket, lowering bucket, tilting bucket forward, and tilting bucket backward) are performed with one hand on one lever.
In order to go fast, one must go slow.
— Old horseman’s proverb
Often the slower you go, the faster you get there.
— Cherry Hill
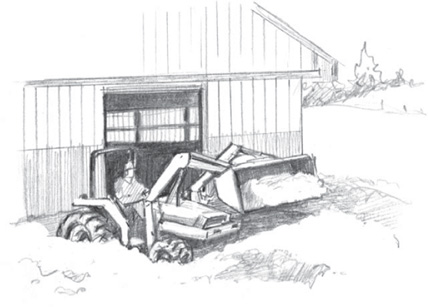
A front-end loader will help you dig out from those big snows.
If you plan to use several sizes of buckets, perhaps a large one for sawdust and a smaller, heavier one for gravel, a quick-attach option for the entire loader and/or the bucket is handy. It makes it simple to remove the bucket if it obscures your view and you want to remove it when not in use, or if you want to replace the bucket with another implement. Some quick-attach designs require tools and aren’t as convenient as the ones that only require the flip of a handle. Some implements can be added right to the bucket using bolts or chains, including such things as a manure fork, bale spear, or pallet fork. Some loaders even offer a skid steer loader-compatible quick-attach device, which enables you to use backhoe or posthole digger attachments designed for skid steers.
A tractor with a loader should have a grill guard to protect the front of the tractor from material or items falling out of the bucket. If shopping for a used loader, look for signs of stress: bowed arms, a bent bucket, welded repair spots, worn-out pins and bushings, and leaking hydraulic cylinders.
TIPS & TECHNIQUES
Loading Up
You may have to weight your tractor’s tires or add ballast elsewhere (on the frame or at the rear) to properly balance your tractor for loader operation. This is important, especially if you plan to attach other implements to your loader or carry heavy material in the bucket, which positions the weight much farther ahead, out in front of your tractor.
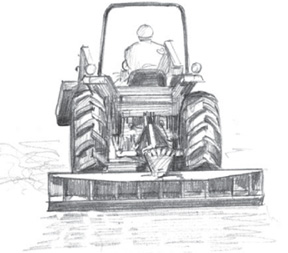
A blade can be used annually to level the footing in pens as well as to remove snow from driveways.
A blade is a moldboard with a cutting edge that is used for pulling or rearranging dirt, manure, bedding, or snow. The moldboard is curved to minimize drag and to roll dirt or snow off the blade. A blade can be rear mounted (most common), belly mounted (in the middle of the tractor) or front mounted, although a front-mounted blade is more commonly called a plow. A hydraulically operated front-mounted plow comes in handy in areas with high snowfall, especially if you have long lanes or roadways to barns and other buildings to keep clear. Most plows have adjustable skid shoes at the bottom edge to keep from digging into the road.
The typical horse farm blade is a 5- to 8-foot-wide, rear-mounted, three-point blade, although blades are available up to 14 feet wide. A blade can be used straight, at an angle, or swiveled completely around (by removing a pin) so that it can push backward. The three-point adjustment can keep the blade level or tilt it to one side or the other. Smaller blades have all manual adjustments; some larger blades have hydraulic adjustments. Depending on the setup, adjustment is done either manually — by a rope attachment from your seat or by getting off the vehicle and moving the blade by hand — or hydraulically from the driver’s seat.
A blade is handy for scraping pens, leveling driveways, and moving light snow. For moving heavy snow, a loader or plow works better. A V-plow will enable you to make an initial path through deep snow more easily than a straight plow. Another snow removal option is a snow blower/thrower that mounts like a plow at the front of the tractor to gather snow and blow it into a specified direction as dictated by the discharge chute.
A belly blade (usually 6 to 8 feet wide) is mounted just below the operator at the midpoint of the tractor where the operator can easily see what he or she is doing. There is no need to constantly turn around (which is hard on the back) or stand up (which is unsafe) to view your work. Belly blades are usually powered by hydraulics that raise, lower, or change the angle, tilt, and pitch of the blade and can shift the entire blade sideways. If you are a serious grader, you can even add an optional laser system for leveling. It is important to check on the compatibility of a belly blade with your tractor and loader. Most belly blades will not work with cab-model tractors.
Skid shoes are an optional bolt-on attachment that holds the blade off the ground a few inches to allow removal of snow or manure without digging into the road or pen surface. Another feature is that the cutting edge of many blades is either reversible or replaceable by removing bolts. Some blades have optional end plates that convert the blade into a box blade, a great help in moving or leveling material.
FYI
A Box Blade
You can buy a separate box blade, a combination ripper and blade with endplates. The box blade has adjustable teeth (scarifier shanks) at the front of the box that dig into the soil up to 4 inches and a blade, or tailgate, at the rear that can be adjusted to float or grade. A box blade is most useful for landscaping, road maintenance, loafing shed cleanup, or ditch digging.
Is there is a special horse on your Christmas list that you would like to thank in some way for his enjoyable partnership and devotion to duty? If so, show that you really appreciate him by choosing something that a horse would enjoy. Pass up the reindeer antlers and choose something from this horse’s Christmas wish list. As you might suspect, with horses, food items top the list.
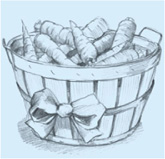
A TRUCKLOAD OF CARROTS. If you have several horses, you can wish them all happy holidays with a truck-load of carrots. Some farms sell a pickup load for $100 or so, delivered. If you have a cool, shady place to store them, they will likely keep until the last one is fed. Carrots provide a welcome diversion to the horse’s normal ration and can be a healthy reward for good behavior.
If a truckload is not an option, then set aside the money to buy large bags of carrots or apples, especially affordable if you belong to a warehouse club. If you’re on a tight budget, you’d be surprised at how many perfectly good (for horses) carrots and apples are thrown away by grocery stores every day. Befriend your local produce manager and arrange to pick up equine goodies regularly.
Carrots Count
Carrots are an excellent source of carotene, the precursor to vitamin A. Vitamin A is usually the only vitamin that ever needs to be supplemented in a horse’s diet. If a horse is not receiving green, sun-cured hay, he may not be getting adequate carotene.
HOT MASH. When the temperature dips, oatmeal makes a healthy and warming breakfast for you. Likewise, at the barn, during cold weather, your horse might relish a hot grain mash. It takes a little practice and some testing to see what grains and mash consistency appeal to each horse. Don’t think of wheat bran as the only choice for a mash (see January and November Ranch Recipes). Also experiment with mashes made from rolled oats, sweet feed, cracked corn, barley, shredded beet pulp, a handful of molasses or a pinch of salt, some oil, or chopped apples or carrots and you are on your way to satisfying your horse’s culinary pleasures (or at least enjoying the benevolent feeling you get from trying!).
Measure and mix the dry ingredients the night before and bring them to the house in a pail. When you put the water on for your tea the next morning, boil some extra water for the mash. Usually, a 4:1 ratio of grains to boiling water is satisfactory for most horses. It is best to err on the dry side rather than the mushy side. Stir as you pour the water. Let the mash steep in a warm place for about 30 minutes, preferably covered so it can steam. Check the temperature and serve.
Take a mug of hot tea out to the barn for yourself, find a warm corner to sit, and then listen to the contented slurpings of your appreciative buddies. And know that besides the nutritional benefits, a mash during cold weather can provide your horse with the needed moisture he might be reluctant to sip from a cold bucket.
Peppermint Water
Swirl a candy cane in your horse’s water pail? This is not just a frivolous holiday act but can have a practical application. Peppermint oil is one substance that can be used to disguise water for the horse that is often “on the road” and will be offered different types of water to drink. Using an aromatic and tasty substance in his water, while he is both at home and away, may be the best gift you give a reluctant drinker.

Being a Horse
Probably the next most popular request on a horse’s wish list is his desire to be allowed to be a horse.
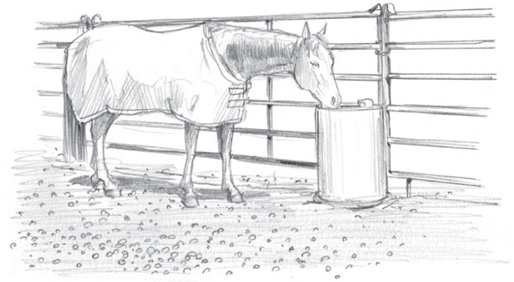
GRAIN BLOCK. A tasty treat that doubles as a pacifier for a horse that is stalled during cold weather is a molasses grain block. Sold across the country under hundreds of local feed mill labels, these blocks should be considered as an occasional supplement to the horse’s normal diet. Under most feeding circumstances, they are unnecessary, but horses dearly love them. Comprised of grain products, molasses, and minerals, the 40- to 50-pound cubes have a wonderful smell and a texture that entices horses to both lick and chew them. Similar products are made for sheep and cattle, but contain a synthetic source of protein called urea, which horses can’t utilize.
For horses, it is important to purchase the “premium” horse version, which contains protein from plant sources, such as soybean meal. Most horses appear to enjoy these large “candy bar” blocks and, in fact, some horses are determined to finish an entire block all at once. If your horse falls in this category, you will have to roll the block out of his stall or pen each day and only let him have access to it for a limited period of time. Be sure he always has adequate water available, as even the small percentage of salt in most of these blocks will increase your horse’s thirst reflex — which is a good thing during cold weather.
Now that it is near the end of the year, it is a good time to look back at what you and your horse have accomplished over the year. I thought it would a be perfect time to look at the big picture, too: where horses have come from and their marks in history, with special emphasis on current statistics related to North America.


A horse never knows who may buy him, or who may drive him; it is all a chance for us, but still I say, do your best wherever it is, and keep up your good name.
— Anna Sewell, Black Beauty
TURNOUT. Many horses like nothing better than to nose around a pasture inspecting roots and sticks and tracing recent equine history. From observations, it seems as though a roll in the mud or the snow is hard to beat on the equine list of all-time favorite recreational activities. Contrary to our guidelines, horses see absolutely nothing wrong with being dirty or having their manes flop over to both sides of their necks.
STILL TRUE TODAY
Historical Horsekeeping
“The importance of strict regularity in feeding is underestimated by nine-tenths of the ordinary feeders, and by fully one-half of the stablemen having the care of well bred horses. The horse, for whatever purpose he is used, if actively employed, should not get less than three feeds a day, besides the hay he eats during the night. All fast working horses should have four feeds a day. The hours of feeding are of prime importance. These should be, as closely as possible, at six in the morning, at noon, and at six at night, except at those pressing seasons of extra labor when the morning feed may be an hour earlier and the evening feed an hour later. In this case, however, nose bags should be carried to the field or they should be turned to the wagon at 10 a.m. and at 4 p.m. to take one-third their usual allowance.”
— Gleason’s Horse Book by Prof. Oscar R. Gleason, 1892
If you feel you must give an actual present to your horse, perhaps an innovative stall toy is the answer. Designed to while away the hours and discourage wood-chewing and other vices, stall toys can channel pent-up energies toward nondestructive play. Commercial models are often huge rubber balls, but a gallon milk container can work, too. Experiment with hanging the toy from various heights. Note that if your horse becomes obsessed with playing with a toy, you may see some undesirable changes in the curvature of his neck, so monitor how he plays and what height is optimal. A variation on this idea is to give a horse a sturdy beach ball to play with in a small paddock or indoor arena.

TO GROOM OR NOT TO GROOM. Depending on the type of winter management that you follow, you may wish to groom, or not. A pasture horse, left to his natural devices, grows a thick, protective coat and further seals his skin from wind and moisture by accumulating a heavy, waxy sebum at the base of his hairs. Horses that are turned out for the winter should not be extensively groomed, lest you inadvertently remove your horse’s valuable oily protection. The best gift for the pastured horse is to let his waxy layer stay intact (without vigorous currying), let his coat be fluffy (not smoothed down by brushing), and to offer him shelter from wet weather or piercing winter winds.
BLANKETS. If your horse would be more comfortable with a winter blanket, be sure to choose a waterproof, breathable one that can be easily laundered so you’ll perform that task when necessary.
BODY STROPPING. The stalled horse that is in work not only appreciates but also requires vigorous grooming. A special Christmas session might include body stropping, which is an isotonic muscle exercise. You can use a cactus cloth or a wisp for the stropping. It’s a vigorous exercise that includes pounding the large muscle masses of the neck, shoulders, and hindquarters with moderate pressure, which stimulates circulation, and then casting off waste products with a sweeping motion. Massage your horse’s legs with your hands using a circular motion toward the heart. Massage your horse’s head, with an ear rub for the finale — inside and out, ending with a slight pulling as you slide your fingers off the tips of your horse’s ears. Be forewarned: Horses given such a body rub are likely to melt in a puddle! And ask for more.
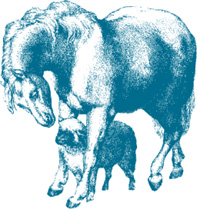
COMPANIONSHIP. If the cold weather has kept your horse in and he is lonely, he might appreciate a stall companion. Some friendships just happen and do not have to be arranged. Cats, chickens, lambs, and dogs have been known to voluntarily take up quarters with a compatible horse. The daily treks and routines of both horse and companion provide interest and comfort for each other. Pygmy goats and other pets or small livestock can sometimes be successfully transplanted in a lonely horse’s stall.
As we know, the holiday season is not complete without family and friends. And so it is with equines. A real treat, especially for a stalled horse, is to be turned out with a favorite (compatible) companion. There is nothing quite so joyous as two buddies ripping and tearing in the paddock, playing all the bucking and twisting games that are so important in the horse world. Even though mutual grooming can mess up a lovely mane, it provides unequaled satisfaction and contentment for a horse that is starved for socialization.
I pray that gentle hands May guide my feet; I ask for kind commands From voices sweet; At night a stable warm With scented hay, Where, safe from every harm, I’ll sleep till day.
— Pony’s Prayer
SHOEING. Horses are appreciative when we make their work easier and more comfortable. One way to do this is to make sure your horse is shod for balance, comfort, and safety year-round. A consultation with an equine veterinary specialist or a master farrier may turn up some helpful ideas regarding your horse’s shoeing. Besides checking for proper breakover and flat landing, you may be introduced to new ways to provide safe footing for winter riding.
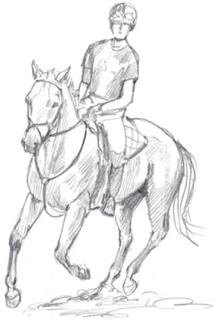
RIDING WELL. Another way to make a horse’s work easier is to become a more physically fit and athletic rider. Give your horse the gift of becoming a more effective rider. Promise to stick with the suppling exercises that help you to mount smoothly and ride more fluidly. Lose a few pounds to ease his burden. Strengthen your body and become a working member of the team, not just a passenger. Make a New Year’s resolution to take some riding lessons to improve yourself so that you are a better partner with your horse.
PEACE AND QUIET. Finally, let your horse luxuriate in some peace and quiet. Offer him a comfortable place where he can doze or lie down without distracting lights and noises. Let him sigh and whinny in his sleep and wake when he’s ready. Peace.
Ask Cherry
Winter Fitness
Q
Do you have tips for the horse to stay fit during the winter months?
A
A In many ways, winter is my favorite time to ride — there are no bugs, and it’s invigorating for both of us. But winter riding can pose its problems, such as early darkness if you don’t have a lighted indoor arena to ride in after work. Also, the temperature here really plummets at about 4:00 p.m. and makes proper cooling-out difficult.
If you are going to keep your horses in active work, consider a combination of body clipping and blanketing. Clipping will reduce sweating during a vigorous workout and will allow you to cool your horses out more quickly and safely. Be sure to use a cooler on your horse as soon as you return after a work session. Consider using a quarter sheet when you ride. Also, winter riding might require specialized shoes for your horse. Maybe I’ll see you on the trail this winter!
Blanket/Unblanket
Q
When do I blanket my horse? Is it okay to blanket him when it’s below 0°F and then remove it once the temperatures are around 20°F or warmer? Or am I better off not to blanket at all if I don’t keep it on all the time?
A
It depends on your horse’s winter coat and his type of shelter. If he has a good winter coat, you don’t do a lot of grooming or bathing in the winter, and he has shelter to get out of the wind and wet, he doesn’t need a blanket. If he has a thin hair coat, if you groom or bathe him, or if he has to stand out in the wind and wet, then by all means, yes, use a winter blanket in temperatures below 15°F.
Choose a blanket that is lightweight but warm. Heavy blankets flatten the hair, so when you remove them there is no natural loft to provide air insulation. If you are blanketing your horse in cold temperatures for weeks rather than just days, then you might need to “wean” him off the blanket when the weather warms up. When days are in the 30s but the nights are in the teens, you still might want to blanket your horse at night or at least put a waterproof, windproof, breathable sheet on him as a “transition” blanket. There is no absolute or easy answer, as all horses, shelters, management, and weather patterns are so different.


 FEED BAG


 CLOTHES HORSE
 Movie of the Month
 RPMS & PTOS
 MORE IN DEPTH