Chapter 12
Kid-Friendly Styles and Products
IN THIS CHAPTER
 Making hair styling fun for you and your child
Detangling before you style
Discovering how to create the hairstyle your child wants
Finding kid-friendly hair products
If you’re having trouble figuring out how to style your child’s hair, this chapter can help. Or maybe you’re already a pro at a couple of styles, but you want to try some new ones. This chapter can help you, too. If you just need a crash course on which products to use and how, you’ve come to the right place.
Whether you’re a complete newbie to the world of natural and curly hair or you’re an old pro, this chapter walks you through how to give your child a style that’s all their own.
Yes, figuring out your child’s hair and style might take some practice and a lot of patience, but stick with it. Remember that helping your child express themselves through their hair is a fun and empowering experience. Flip through and read this chapter together. Look at the photos. Talk it over with them and let them select the style that speaks to them.
In this chapter, I take you through how to detangle before you start styling — a key first step in all great hairstyles. Then, you get to the super fun part — choosing a style. In this chapter, I give you a few ideas, but I encourage you and your child to make up your own designs and styles. Hair is so fun! Finally, I give you some guidance about kid-friendly products.
Setting the Stage for Styling Success
If styling your child’s hair seems beyond your skill level, don’t fret. Just be patient, move in small steps, and enjoy the learning process. Your child’s hairstyle doesn’t have to be perfect. In fact, the perfect hairstyle doesn’t exist. Make the main goal having a fun and positive experience for both of you.
The beauty salon is such a cornerstone of the Black community for a reason — it provides a space to come together, catch up with each other, and look good for the day or week ahead. If you do want to bring your child to a salon when you need professional styling, choose a place and stylist who’s experienced with kids. Look for someone who’s patient, kind, engaging, and works well with them.
When doing your child’s hair at home, you both can have the same experience as a salon but on a smaller scale, if you want it. Granted, you may not find doing your child’s hair as easy as a pro would, and you might have a marked lack of gossip about what really went down at that barbeque after church last weekend.
 Each child’s hair is different. Between genetics, environment, activity level, and personal style, your child has a mix that is truly all their own. Plus, your child’s hair texture might change over time. Expect to do a lot of experimentation throughout their childhood.
Detangling Before You Style
Before you style your child’s textured hair in any way, detangle it first. Don’t forget this major fundamental rule. Curly, natural, textured hair can tangle easily, and if you want your child’s hair to stay healthy and look good, you must detangle each wash day. I’ll be honest with you: Detangling is a time-consuming step, and many kids don’t like it. But it’s a vital part of their hair care and styling, and the more you embrace it, the more they will, too. In Chapter 11, I give you tips on how to help your child find a comfortable position and other ways of making the detangling process comfortable and fun for them.
 Children are fragile and impressionable, so take care that you don’t make a beautiful experience a traumatic one. I have clients who have all kinds of memories of getting burnt with pressing combs and relaxers, or getting their hair pulled and yanked at for hours. Their body stores that trauma, and I see them flinch in my chair involuntarily. But it doesn’t have to be that way. You can make your child’s experience positive, and they can build upon that for their whole lives.
To detangle your child’s hair, follow four basic steps: Soak it, section it, condition it, and comb it. For a detailed detangling step-by-step and all of the tools you need to do it, turn back to Chapter 4. I discuss more about styling products designed for children in the section “Styling with Kid-Friendly Products,” later in this chapter.
Go slow and take breaks when you (or your child) need to. Plan for a detangling session to last at least 30 minutes. If your child has a lot of hair or that hair seems extremely tangled, or if you’re just beginning to figure out how to detangle, allow for more time. You definitely don’t want to rush this step.
 You can use distraction to make the detangling process more tolerable and fun. Find a new or special toy your child can play with or a favorite program that they can watch during the detangling process to help them focus their attention away from the process and sit still a little longer.
Styling Ideas for Your Child
When you style your child’s hair, you have two main goals: Keep your child’s hair healthy and protected, and help them express themselves in a way that makes them feel happy, proud, and radiant.
Textured hair can tangle easily. And when you’re talking about kids — who are constantly in motion — that’s even more true. Remember to periodically use protective styling (such as braids or twists) to keep your child’s hair healthy. Please flip back to Chapter 9 if you want details on how protective styling can benefit natural and curly hair.
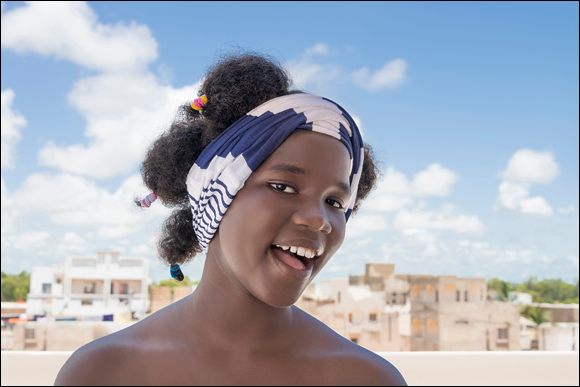
Everyone knows how great it feels when your hair makes you feel and look good. Kids get that same feeling (see Figure 12-1).
Wash-and-go’s
A wash-and-go is about the simplest hairstyle that you can use, as shown in Figure 12-2. They’re exactly what they sound like: You wash your child’s hair, then apply a leave-in conditioner and your favorite styling product to help define and hold their curl. That’s it! They can go out into the world with their hair wet, air-drying over the next few hours. Or you can dry it by using a hair appliance, either a blow-dryer that has a diffuser attachment or a hooded dryer.
© Diversity Studio/Adobe Stock
FIGURE 12-1: Kids can create their own styles using scarves or other accessories.

© Diego Cervo/Adobe Stock
FIGURE 12-2: A wash-and-go is a good option for kids who don’t want to sit through a long styling process.
On very young children, use wash-and-go’s almost exclusively. If your child is younger than 2 years old or has very little hair, they don’t need much styling, so a wash-and-go is your best option.
Wash-and-go is also a great styling method for kids who just can’t sit still very long, or if you’re nervous at all about your styling skills. And giving your child a wash-and-go can help you to understand your child’s hair texture. Just by having your hands in their strands, you can figure out so much about how it behaves and what it might need. Also, because it’s so low-manipulation, it sets you and your child up to have a very positive, successful hair experience together to build upon in the future.
Although you don’t have many steps to follow for a wash-and-go, if you prefer to see it laid out step by step, flip back to Chapter 9, where I give you a full play-by-play.
Wash-and-go’s can get more easily tangled on kids because they are always in motion, and they have their hands in their hair. This may mean you’ll need to spend more time detangling.
Ponytails
After the wash-and-go, the second easiest way to style your child’s hair involves giving them a ponytail or two. You don’t need a lot of tools, and you don’t have to know how to braid. And if you make a mistake or run into trouble, you can take out a ponytail pretty easily and start again.
However, if your child has a lot of hair, it can take a little more effort to gather that hair into a single ponytail. But overall, a ponytail gives you a good choice if you’re looking for a basic first style to try.
If your child likes to wear ponytails often, switch up the position from time to time to prevent too much wear and tear on their hair.
A ponytail is a great and easy style to use to keep your child’s hair out of the way. Just remember that a lot of kids are too busy playing to keep their ponytail looking fresh all day, so you have to manage your expectations. You can start it out looking great, but by the end of the day, it might look a little messy. But it still does its job of keeping your child’s hair back and out of their face while they live their busy lives.
You can start with dried wash day hair or daily detangled, moisturized hair (see Chapter 11). Then, follow these steps to give your kid a ponytail:
-
Choose a location for the ponytail, and brush your child’s hair using a boar bristle brush while gathering it all into your dominant hand.
Chapter 8 goes into your different brush options and why a boar bristle brush is the most effective choice for keeping hair smooth and put together without separating.
- Comb your child’s hair using a rat tail comb to make it nice and smooth.
- Once it’s all smooth and flat, take your hair tie of choice and wrap it snugly (taut but not tight) around the hair.
- To get the hair tie positioned even more snugly, separate the ponytail in two sections and pull lightly in separate directions so the hair tie slides down towards the skull.
- You can use gel or pomade around the base of the ponytail and the hairline to finish the style and keep flyaways down.
If you need to refresh your child’s ponytail, you can re-wet it and then smooth in a bit of leave-in conditioner with your hands.
Never use rubber bands on hair, particularly on textured hair. The rubber is porous and absorbs the moisture from the hair, leading to tangles, damage, and a lot of hair pulling, which could lead to traction alopecia over time. You should use silicone elastic bands or fabric-covered bands instead.
Twists and braids
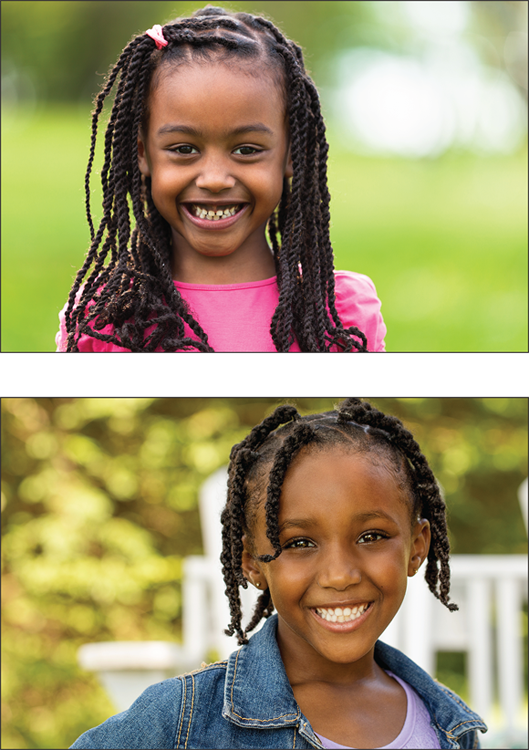
I give the step-by-step instructions of all kinds of twists and braids in Chapter 9 but are shown in Figure 12-3. To braid or twist your child’s hair, you can follow the exact same steps that appear in that chapter. If you braid your child’s hair and happen to notice that their hair is breaking in braids, try two-strand twists instead. They tend to be gentler on the hair.
This bears repeating — especially for children. Don’t braid their hair too tightly. Over time, too-tight braids may damage their scalp from the tension, leading to hair loss due to traction alopecia. (I go into more detail on the dangers of braiding too tightly in Chapter 9, as well.)
© Samuel Borges Photography/Shutterstock
© pixelheadphoto digitalskillet/Shutterstock
FIGURE 12-3: Two different twist styles.
Afros and puffs
Afros and afro puffs are fun and easy options for your child. An afro is super simple: Just allow natural growth to do its thing, loose and free. And afro puffs are basically an afro smoothed into a single updo or divided into two (or more) curly sections, called puffs.
Follow these steps to style your child’s afro, as shown in Figure 12-4:
-
Spray your child’s hair with water to get it damp (not dripping wet).
Make sure to spray the front, sides, and back of their head.
-
Apply leave-in conditioner or oil from the root of their hair to the tip, covering the hair completely. If your child’s hair is dense or thick, you may have to section it for this step.
The section “Styling with Kid-Friendly Products,” later in this chapter, gives you some ideas for what types of conditioners or oil to use.
-
Brush with a boar bristle brush back around the hairline.
Chapter 8 goes into the benefits of boar bristle brushes.
-
Rub a small amount of gel onto your palms and smooth the hair back around their hairline.
Brush their hair with a soft toothbrush if you need extra help smoothing the hair.
Step 5 is adding an optional accessory.
-
Use an elastic headband or ribbon-like hair tie to contain and shape the afro.

© Getty Images
FIGURE 12-4: A few steps is all it takes to style your child’s afro.
Here is how to use a headband or hair tie:
- Headband: Put the headband over their head and down on their neck, like a necklace. Then bring it up to their front hairline and push it up and over their ears. If the headband is too loose, twist it and wrap it around their hair once more.
- Hair tie: Wrap it around the back of their head and tie it in front — in a bow or decorative knot.
If you want to do a more protective style, you can tie a silk or satin scarf around their hairline or use a silk or satin-lined headband. If you go this route, use bobby pins to secure the scarf because it may slip because your child is so active.
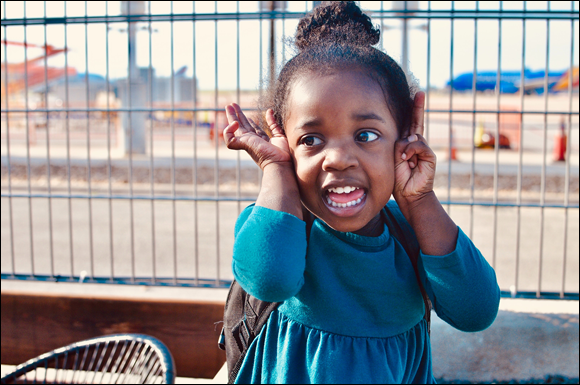
If you want to try an afro puff, as shown in Figure 12-5, or puffs, follow the preceding instructions through Step 4. Then, follow these steps:
- Gather the hair into one high ponytail or two ponytails on either side of the head, using fabric-covered hair ties.
-
Shape the puff or puffs gently, using a pick and your hands.
Mold them into the puff shape you want.
-
Mist the hair lightly if it starts to dry to help you shape the puffs.
Just don’t oversaturate because it will be too wet to shape.

© 5D Media/Adobe Stock
FIGURE 12-5: A child with an afro puff.
Buns
Buns can keep hair up and out of the way (see Figure 12-6). The easiest way to give your child a bun is probably with a bun donut, which you can find at any local beauty supply or drugstore.
The bun donut looks like a spongy donut, and it comes in various colors so that it can blend in with hair. You can also DIY by cutting the top off a tube sock at home, but I don’t recommend it because the donut gives you a near-perfect result every time, and it doesn’t cost much at all. Using a sock is more challenging because it’s looser and your bun may not come out as tightly and neat. For a few bucks, go get yourself one at the local drugstore. Most bun donuts come with instructions, but follow these basic steps to use one:
- Apply a bit of gel to your child’s very moisturized hair.
-
Brush the hair with a boar bristle brush to gather it into a high or low ponytail.
Hold the hair in one hand.
- Push the hair through the bun donut.
-
Fold, wrap, and smooth your child’s hair over the donut, tucking in all bits of hair.
Use hair pins if you need to secure any loose ends.
© Ilona Virgin/Unsplash.com
FIGURE 12-6: A bun keeps a child’s hair out of the way of their busy hands.
If you don’t want to use a bun donut, I offer another method in Chapter 10.
Mohawks
Okay, so if your child wants a mohawk, you probably need to take a trip to the barber or salon. That said, mohawks are possible for kids who have natural and curly hair are extremely popular right now. And mohawks have been a mark of the cool kids for decades. Mohawks look super fresh when done by the right professional, and your kid can work with the stylist to choose how fancy or unique they want it to look. Some options you can talk over with your stylist include
- Curly hair mohawks — a wash-and-go cut into a mohawk shape where your curls are left out on top, but the sides are super short (see Figure 12-7).
- Graphic mohawks — a mohawk where the stylist shaves designs into the side of your head.
- Braided mohawks — your hair is braided flat on the sides with loose braids in the middle on top.
- Faded undercut mohawks — the sides are shaved very close to the skin on the sides, and there’s a fade under the hair on top.
- Short mohawks — this is when your hair on top isn’t very long, but is cut into a strip or mohawk, and is still is longer than the sides.
© DenisProduction.com/Adobe Stock
FIGURE 12-7: A child with a curly mohawk.
Styling with Kid-Friendly Products
I offer a complete rundown of what to look for in hair care and styling products in Chapter 7. Although my specific product recommendations are more geared towards adults, the information about ingredients, what to look for and stay away from, and even how to make or use your own natural hair products all apply to products for children, as well.
Here are some general tips for you when you’re out there trying new products for your child. Keep in mind, they may be different from what works for you:
- Look for sulfate-free and paraben-free products.
- Select products that are marked as gentle and/or tear-free.
- Look for products that clearly boast ingredients that are vegan and gluten free if you have any allergy concerns.
- Ask for product recommendations from parents of other children who have textured hair.
Always let your child style or cut their hair however they want, no matter what your own opinion is. Remember that all hairstyles are temporary. Hair will grow back. Sometimes you might think they’re going to end up hating their idea. So what? Resist the urge to stop them from trying. Let them try. If they hate it, well — now they know. But let them have fun while trying a different hairstyle.