[3]
Veneziano Polished Italian Plaster
RIK LAZENBY
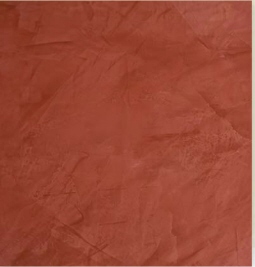
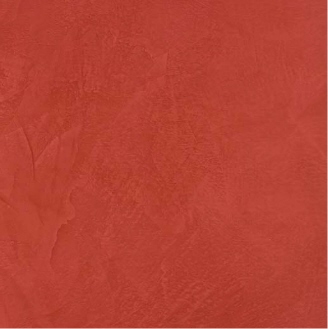
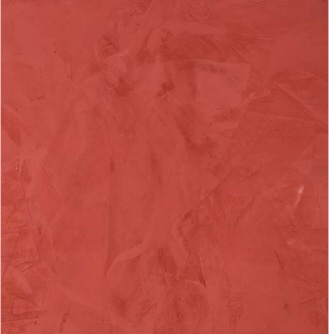
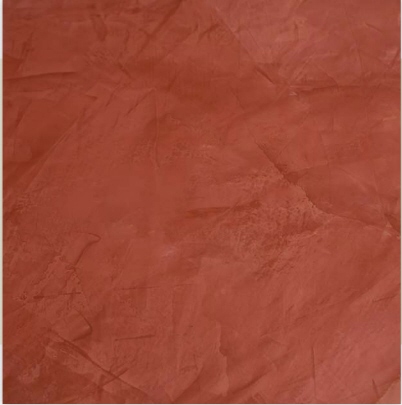
Veneziano plaster is an exquisite finish created with materials that have been imported from a small town near Verona, Italy. This beautiful finish is produced by applying thin layers of primer and finish plaster, thus creating a final product that has depth and a stunning first impression. It is the type of finish that makes the viewer want to touch it. Veneziano Polished Italian Plaster is easily taught but is somewhat labor intensive.
However, the end result is fit for royalty.
MATERIALS
 4-inch (10cm) paint brush
Plastic pail
Safra Colors Firmonovo
Stainless steel beveled trowel
Metal scraper (spatula)
Drill with mixing attachment
Arte Nova Stucco Veneziano Primer
Arte Nova Stucco Veneziano Finisher (Neutral)
Arte Color Colorants:
#4 Bordeaux
#13 Magenta
#7 Blue
Cheesecloth
Soft cotton rags
Safra Colors Millennium Wax
Sparkle Gold Mica Powder
 PRO TIPS
1. Firmonovo Tips
Firmonovo is clear. I add a small amount of the plaster colorant (Bordeaux) into the diluted mixture. This allows me to better see the mixture as I apply it and to be sure I have 100 percent coverage. I do not prep the wall and ceiling areas with tape until after Step 1 because the Firmonovo will cause the tape to release.
2. Troweling
Use a clean metal scraper (spatula) to dip the Vene-ziano Primer and Finisher from the bucket and apply it to the stainless steel trowel. This places the plaster on the trowel properly. The metal scraper is also used to keep the trowel clean. A dirty trowel will scratch the primer and finish layers.
3. Burnishing
When burnishing, be sure that your trowel is clean and the beveled edges are free of nicks, as this will cause scratches in the surface of the plaster. Also, quite often, sections of the wall become ready for burnishing before you can apply the finish plaster to the entire wall. It’s helpful to have a second person available to burnish these sections as they are ready, so that you can continue to apply the finish coat.
STEP 1: Using a 4-inch (10cm) paint brush, apply a thin 100% coverage of Firmonovo to the wall area. The Firmonovo should be diluted 200% with water. This 200% dilution is recommended for applying over a nonporous surface such as primed gypsum board. Firmonovo adds strength to the substrate and helps the plaster bond with the substrate. Let it dry thoroughly before proceeding. (See Pro Tip #1.)
STEP 2: Load a small amount of Veneziano Primer onto the stainless steel trowel and apply the primer to the wall in short, choppy strokes in various directions. Keeping the blade of the trowel at a 45° angle, pull the primer as far as possible across the wall. The end result should be a surface that is as smooth as possible, so pull the primer tightly. Allow the Veneziano Primer to dry for 24 hours.

STEP 3: Tint the Veneziano Finisher with colorants (I used Arte Color Bordeaux, Magenta and Blue) and mix with an electric drill and mixing attachment. Load a trowel with a small amount of finish plaster and apply it to the wall. Keeping the blade of the trowel at a 45° angle, pull the plaster across the surface in different directions as far as it will go before reloading. This first layer of Veneziano Finisher should be smooth with a minimum of high areas in the plaster. Let dry.
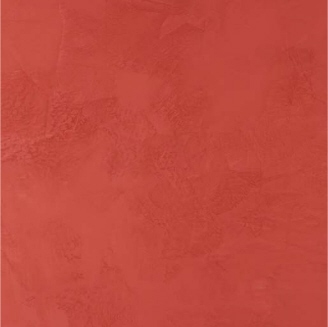
STEP 4: Begin the second and final layer. Load the trowel with a small amount of the tinted Veneziano Finisher and apply it to the wall. Use the same choppy technique, pulling the plaster in different directions. Smooth any high areas of plaster as you work across the wall. When the second layer of Veneziano Finisher is almost dry, it must be burnished.
STEP 5: The second layer of the Veneziano Finish plaster should be burnished shortly before it dries. Depending upon the thickness of application, the humidity and temperature, the plaster is usually ready to burnish between five and twenty minutes from the time it is applied. When burnishing, first lightly run the beveled edge of the trowel across the wall to close off the plaster.
With minimal pressure, begin to burnish. Laying the beveled edge of the trowel against the wall at a 30° angle, begin to run the blade against the section that you are burnishing. This motion feels as though you are trying to push the plaster across the wall. You will eventually burnish the entire surface of the plaster by pushing or pulling the trowel in all four directions: right to left, left to right, top to bottom and bottom to top. Every time that you change the direction of the trowel, you can add more pressure to the trowel as you move it across the wall. This will intensify the shine. The more you burnish, the deeper the shine.
To finish the burnishing process, use a soft cloth and rub the burnished section of the wall with a circular motion. This brings out the shine and ensures that all areas are burnished, including the low spots in the plaster. (See Pro Tip #3.)
FINISH: The burnished Veneziano plaster must be totally dry before waxing. Millennium wax with gold mica powder is applied using cheesecloth to small sections of the plaster. The wax should be applied in a thin coat and immediately removed with a soft, clean cloth. I apply the wax by softly rubbing it onto the surface of the plaster in a circular motion. The wax is then removed with a soft, clean cloth by rubbing in a circular motion. The wax will intensify the shine of the plaster and the gold mica powder will remain in the low areas of the plaster.