[29]
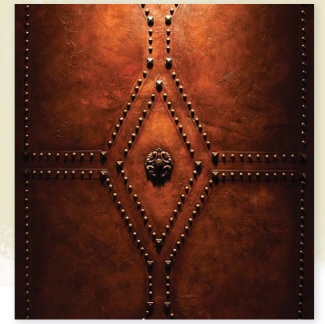
Faux Leather Fireplace Surround
SUSAN ANSPACH
This massive fireplace took center stage in a Mediterranean-style home complete with wooden beams and terra cotta tile floor. The homeowner wanted a strong, masculine statement, which was achieved with faux leather accented with bronze-toned decorative nail heads and center medallions. Faux leather (“Finte Pelli”) begins with a textured base to mimic the look of hide, and ends with dark-colored stains and glossy sealers for a smooth finish.
MATERIALS
 AquaBond: Off-White and Dark Brown
Aqua Extender
Venetian Gem Base Coat
Stain & Seal: Natural Cherry
AquaGard Gloss
Decorative nail heads
Paint tray
Whizz Roller
Chip brush
220-grit sandpaper
Stainless steel trowel
Japan scrapers
See-through quilting ruler
Hot glue gun
Nail clippers
Viva paper towels
Staining pad
Cheesecloth
 PRO TIPS
1. Working on Large Surfaces
When working on large surfaces, use a 9-inch (23cm) roller to speed up the application of the basecoat color.
2. Substituting Acrylic Paint
You can use any good 100 percent acrylic paint from a home center for your wall prep and basecoat. Use an off -white that matches the color shown in Step 1.
3. Try Using a Quilting Ruler
See-through quilting rulers are clear plastic with the measurement lines and grids printed on one side. You can see your work through the ruler, which makes it so much easier to measure and mark accurately.
4. Finding Decorative Nail Heads
You can find these items at stores that sell upholstery materials, or search for them online. They come with a nail attached so you can hammer them into any wooden or drywall surface. However, if your surface is concrete, as this fireplace was, you will need to clip off the nail portion and use a hot glue gun to attach the head.
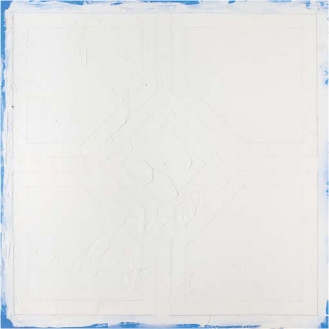
STEP 1: Basecoat your surface with two full coats of Off-White Aqua-Bond. Using a stainless steel trowel, apply a medium thickness layer of Venetian Gem Base Coat. Allow folds and trowel marks to show. Let dry, gently sand with 220-grit sandpaper, and repeat to add more depth. Measure and lightly pencil in the design using a see-through ruler. Our design has 1-inch (25mm) raised “straps” with a 1-inch (25mm) recessed area between.
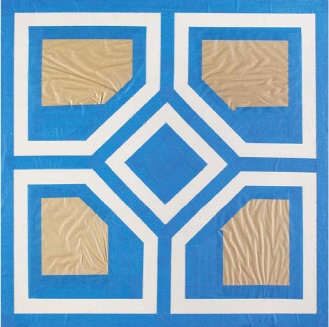
STEP 2: Use 1-inch (25mm) blue painter’s tape and mask to the outside of your straplines. Continue masking to protect all areas that are not straps. Here I’ve used masking paper just to speed up the process in the larger areas, or you can continue to use blue painter’s tape as shown in Step 3.
STEP 3: Once all your masking is complete, use the trowel or a Japan scraper to apply an additional layer of Venetian Gem Base Coat to the exposed straps. Let this layer dry and apply one last layer to build the appearance of raised straps on your surface.
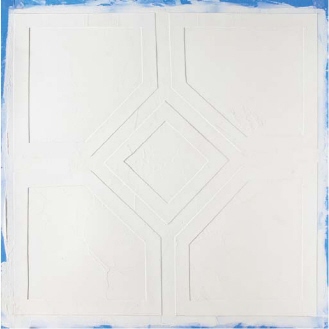
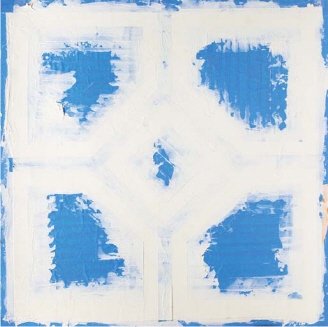
STEP 4: Once the Venetian Gem Base Coat is dry, carefully remove all your blue masking tape to reveal the design. Lightly sand with 220-grit sandpaper.
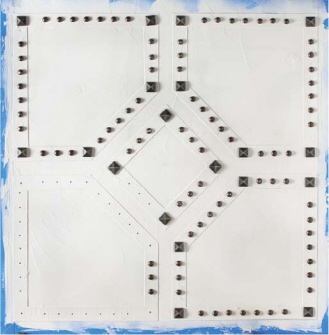
STEP 5: Use the see-through ruler to apply light pencil dots evenly spaced down the center of each raised strap (as shown in the lower left quadrant). Attach the decorative nail heads and corner pyramids with hot glue if your surface is concrete, or by hammering them in if your surface is wood or drywall (see Pro Tip #4).

STEP 6: Create a mix of Dark Brown AquaBond with 25 percent Aqua Extender added. Roll this on in small sections using a Whizz roller. Immediately blot the area with a damp staining pad, feathering the edges of the mix. While the area is still wet, use a large wad of Viva paper towels and press into the wet paint. This creates more texture and pattern. Follow this process covering the entire area and working section by section. Let dry.

FINISH: Use a chip brush or Whizz roller and apply Natural Cherry Stain & Seal to small workable areas. Make sure to cover the decorative nail heads and use a chip brush to scumble the stain up to the edges of each nail head. While the Stain & Seal is still wet, rub it softly with a piece of cheesecloth, keeping a feathered edge. Repeat this process over the entire area, working in small sections. When complete, let dry. Finally, apply AquaGard Gloss as a final, protective sealer and topcoat.