Making a Wetland Home
What a miracle-worker water is: life just seems to flourish in it. Hardly a day goes by when I don’t go out to my pond and peer through the glassy surface into the parallel universe beneath. It is inhabited by a minibeast world of bulging-eyed monsters, tiny swimmers and rowers, and love-struck amphibians.
People clearly love and need water – think of all the pools, lakes, reservoirs, canals and fountains we have made everywhere. But at the same time we have had a monumental impact on our natural wetlands. We have drained huge – and I mean huge – areas of the countryside, while underneath our fields are hundreds of thousands of miles of land drains. Together with street drains, gutters and ditches, we seem to want to channel water away as fast as we possibly can.
Against this chequered background, garden ponds have become vital homes to many creatures. Individually they may be tiny, but collectively they are fantastic.
Ponds are a triple-winner for wildlife. First, they support those creatures, such as water lice and pond snails, that spend their whole life in water and would otherwise never get a look-in in your garden.
You will also see far more of those animals that spend part of their life in water, such as frogs and toads, dragonflies and damselflies. If you don’t have a pond, they might still pass through your garden but won’t have a reason to stop.
And just as exciting are those animals that don’t live in water at all but benefit from the flush of food that ponds create, or turn to it as a vital drinking and bathing hole.
Making a wildlife pond of some sort is probably the single most effective thing you can do to boost the biodiversity in your wildlife garden, and everyone’s got room to do something. The larger you can make your mini-wetland home, the more life it is likely to host. But even if all you have room for is a pond in a pot, life will still find it, and there are workable options, too, for families with small children who need to think safety-first.
KEY SPECIES
—Amphibians
—Grass Snakes
—Dragonflies and damselflies
—Birds (coming to drink and bathe)
—Bats (coming to catch insects and drink)
—Pond creatures (galore!)
—Many fly species
—Water plants
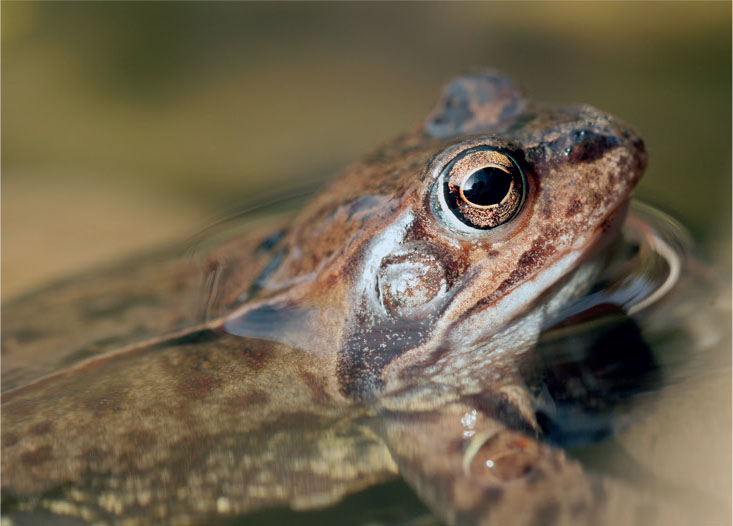
Frogs are one of the best loved, and most easy to cater for, pond visitors.
The inspiration
It’s hard to find a ‘natural pond’ in the countryside these days. Almost every pond out there has been made or modified by human hands. But we can nevertheless take inspiration from all sorts of larger ponds and lakes in the countryside.

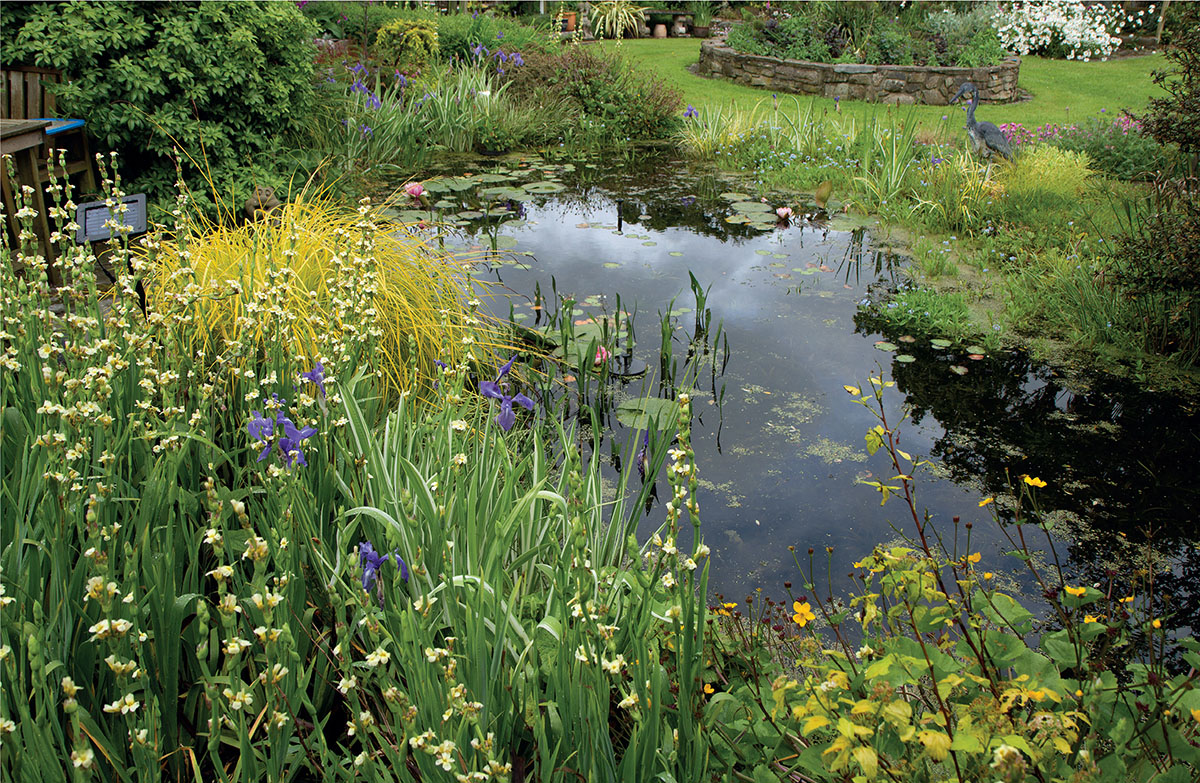
Dense vegetation growing along the margins provides flowers and seeds, as well as perches for dragonflies and nesting sites for Moorhens.
A little bit of shade is useful so that creatures which like to stay out of the heat can do so.
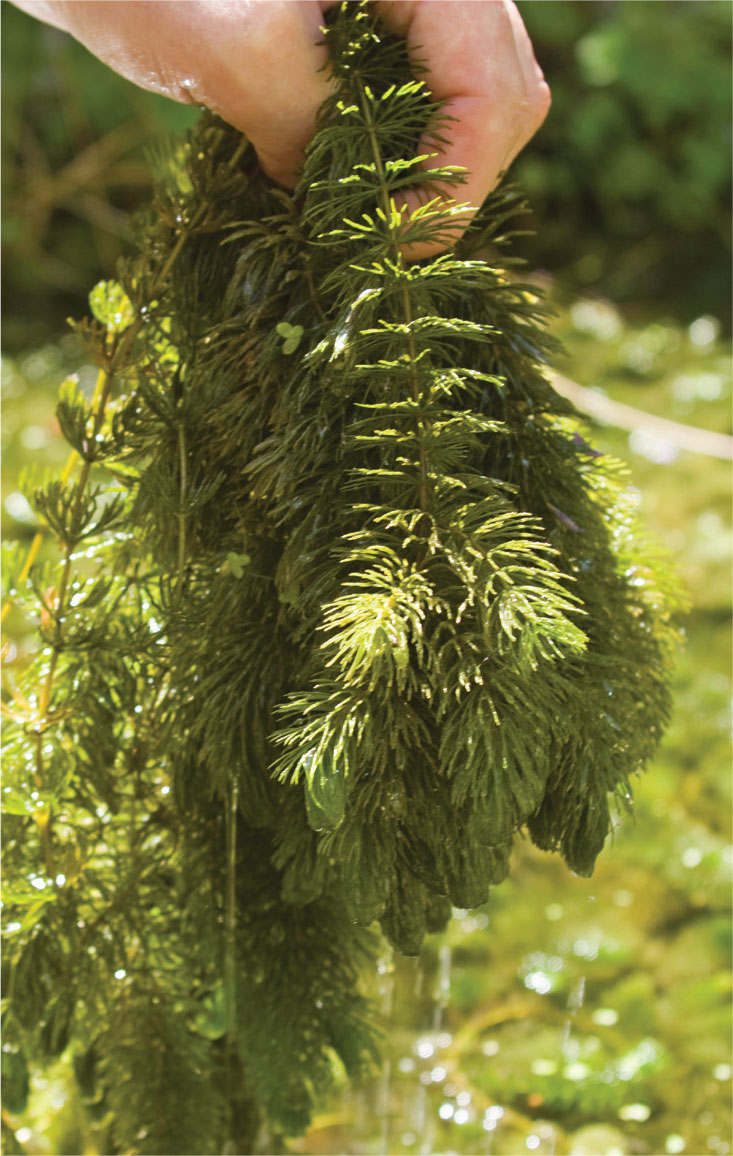
Submerged aquatic vegetation is vital for the health of the pond, keeping the water crystal clear, while offering a hiding place and hunting ground for pond minibeasts.
Areas of shallow water warm up quickly and offer safe bathing for birds and mammals.
Flat open areas around the margins offer safe access to the water’s edge for birds and mammals to drink and for dragonflies to sun themselves.
Areas of deeper water provide a sanctuary for underwater life during cold weather and safety from predators such as Herons.
Floating aquatic vegetation provides perching pads for insects, and places for dragonflies, damselflies and pond snails to lay their eggs.
Out of sight on the pond-bed, muddy sediments and gravels are a roving ground for some of the pond’s cleaners which tidy up the debris that falls from above.
How to make your wetland: step by step
1. Choose the right site
The pond should get direct sunlight for at least some of the day. If you put it beneath trees, be aware that leaves will fall in and you’ll either need to fish them out or they will rot, robbing the pond of oxygen and creating a right stink. I like to have a pond within view of the house, as it is such a focal point for wildlife.
2. Design it on paper
Don’t worry if your drawing skills are ropey – it will be worth it. Devise its shape from above and also its cross-section. Include deep bits and shelves where plants can sit but most importantly include lots of shallows; this is vital to help wildlife get in and out of the pond. If you are planning to use a rubber-type liner, be aware that it won’t do right angles.
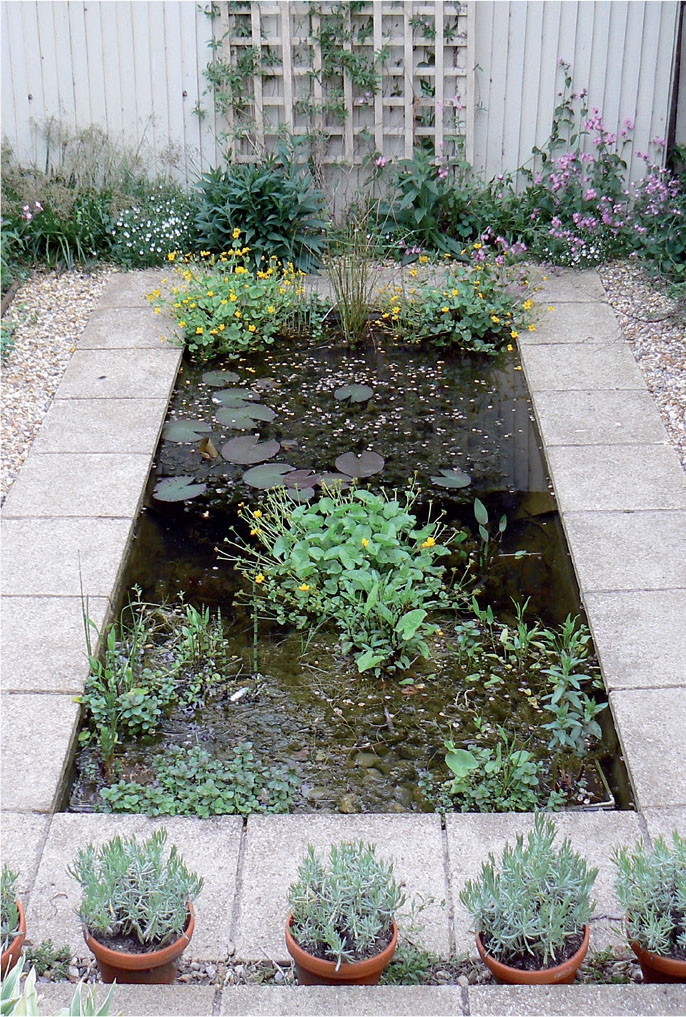
The pond can be as small or large as you like, but just be aware that very small ponds are more difficult to plant and maintain, and the larger the pond the more wildlife of more species it is likely to hold. The pond I made, shown here, was 3.2m x 1.4m, and I wished I’d been braver and gone even bigger!
In larger ponds, I like to make the middle at least 60cm deep; it isn’t to stop it freezing solid (it would take a vicious winter indeed to do that to any UK garden pond that was 20cm deep!) but I find that amphibians love having the opportunity to escape into deeper water, and the pond will also hold a more stable temperature than one with less volume.
There are no hard and fast rules for shape – wavy edges increase the length of shoreline in relation to the area of the water surface, but if you want to go perfectly rectangular or circular, wildlife won’t hold it against you.
I like to dig a ‘U’ shaped trench around the margin to create a planting pocket which I fill with gravel and which also helps anchor a rubber-type liner.
Not many of you will have the space to create the astonishing wetland habitats that Ennis and Richard Chappell have crafted from scratch in their Gloucestershire garden, but that’s not the point. The important thing is to take inspiration about how ambitious you can be with water.

Digging is the heavy-duty part of creating a pond. You’ll be surprised how much spoil it creates.
It is essential that any creature that wants or needs to get in or out can do so. Use ramps and beaches so that anything that falls can easily climb out again. Make sure you can get close to it too!
3. Always think safety
Water can be dangerous, especially for children who love ponds but are incredibly prone to falling in. To create a wetland feature with safety in mind, try one of the following:
 Create a pond but fence it off with a secure gate
Buy special metal grills to go over the top of the pond – they can be decorative
Make a water feature in a pot.
Or make a bog garden or rain garden.
4. Choose a liner – and don’t skimp!
There are a number of choices for making a pond watertight:
Concrete ponds either need a timber frame (‘shuttering’) as a mould into which the concrete is poured, or can be made from concrete blocks. It will need to be made waterproof with a special render and seal.
Clay is natural but expensive and liable to cracking.
Pre-cast fibreglass moulded liners can last well, but are quite expensive and you are restricted to the shapes available.
Stretchable synthetic rubber liner is the preferred option for most ponds, either butyl or EPDM rubber. It comes as heavy black sheets and you can usually order the exact dimensions you need. The size of liner to buy should be (greatest width + 2x greatest depth) by (greatest length + 2x greatest depth), so for example for a 10m x 5m pond that is 1.5m deep you will need a liner 13 x 8m. The liners come in varying thicknesses; 0.75mm is usually adequate for most ponds, but choose 1mm if you want a bit more durability. Just be aware that these liners are surprisingly heavy; when I made a pond that was 16m x 8m, the liner weighed 350kg!
5. Dig!
Feel free to make a pond at any time of year, but the going can get boggy in winter.
Mark out the outline on the ground using sand or a hosepipe, or use taut string if your design is geometrical. If fitting a preformed pond, it is a good idea to make a template using cardboard of the shape of the rim to then guide you as you dig.
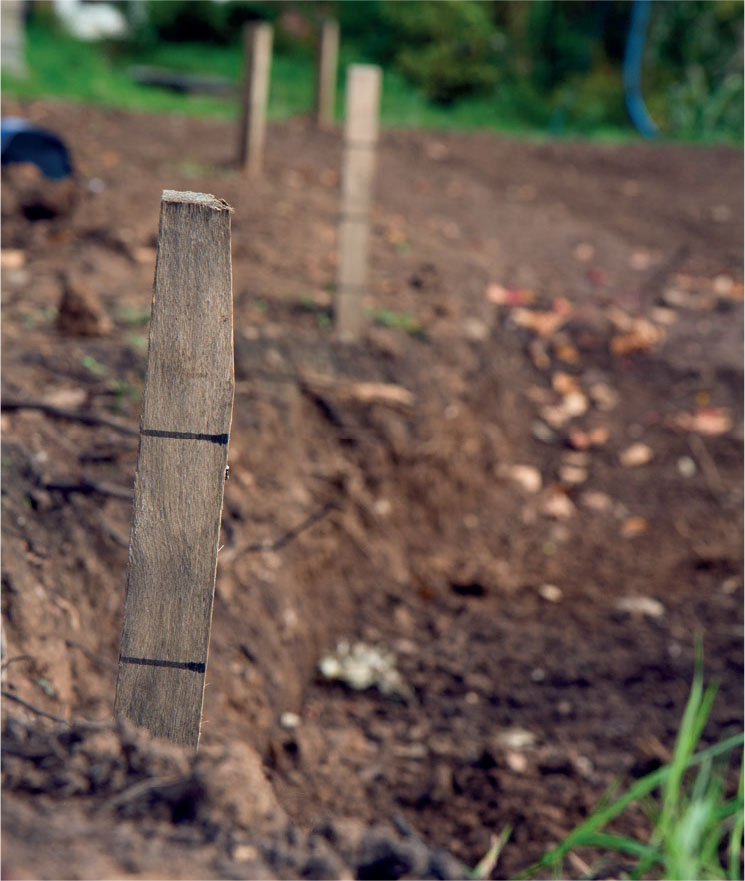
Hammer marked posts into the ground and use a spirit level to check that the pond edges will be level.
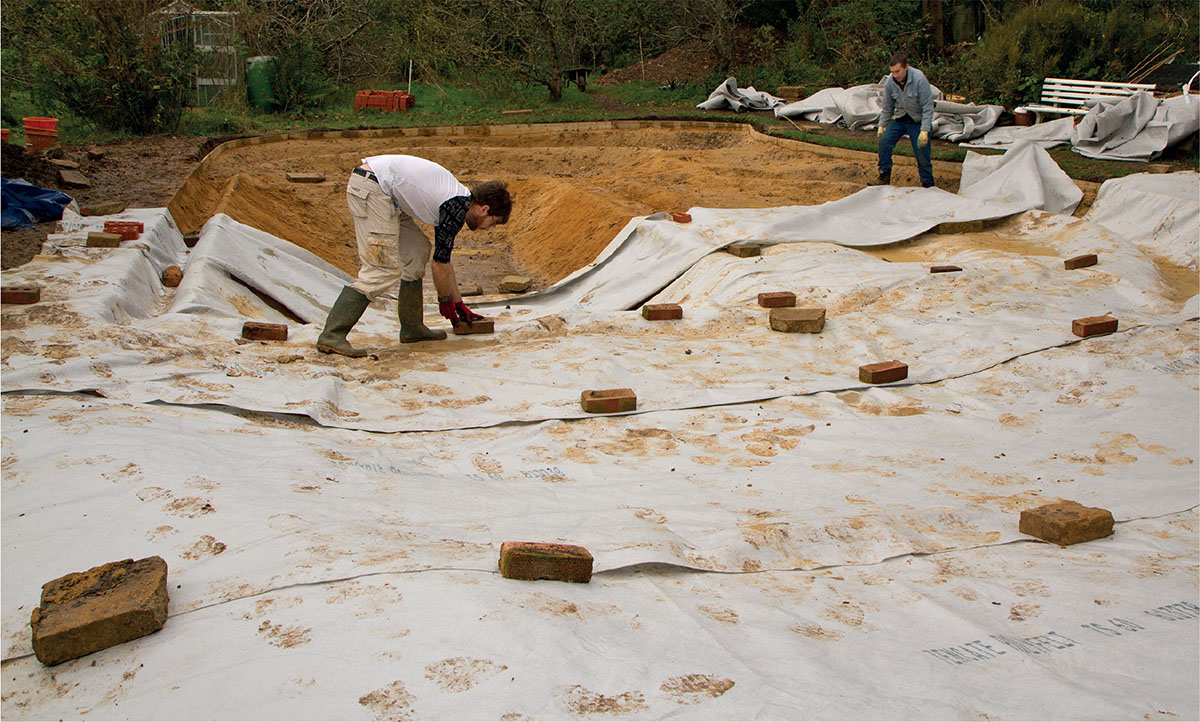
Here, I’ve laid a layer of sand, and over the top are going sheets of fleece underlay held in place temporarily by bricks.
Then start digging. It creates mountains of spoil, so plan where it will all go (for example, you could create raised mounds and banks). Dig out an area at least 5cm deeper and wider than the size you want your pond to be.
Work hard to make the pond level in all directions – you’ll feel like a muppet if you end up with one side of the pond sticking way out of the water. A spirit level is your greatest ally.
If using a rubber-type liner, it will easily puncture so remove every stone or hard root jutting out from the pit sides.
6. Line the pond
Even after removing all the rocks and roots you can see, others will work their way through the soil over time, so create a cushion for the liner using old pieces of carpet, soft builders’ sand or pond underlay fabric, or all three! (hence the extra 5cm digging you did earlier).
7. Laying a liner
If using a rubber-type liner, roll the liner out across the pond (in your stockinged feet!) and push and pull it so that it is stretched as neatly as possible. You may need to pleat and fold it where it goes around bends. Anchor the outer edge with bricks or logs.
If using a preformed liner, try and make the hole as close a match to the 3D shape of the liner, plus a few centimetres extra. Then use soft builders sand to get a snug fit.
8. Edging the pond
To cover the edges of the liner, here are four options:
Turf offers wildlife a safe margin to crawl into, but it will need a deep layer of soil and the grass will suck up water like a sponge.
Paving slabs can be mortared around the edge as in the pond here, with the liner sandwiched between them and concrete blocks below. With the slabs’ surface angled very slightly towards the pond, rainwater will run into the pond helping to keep it topped up.
Large rocks, again mortared in place, make great hidey-holes for amphibians, but can make access to the edge tricky for you.
Gravel boards inserted vertically around the edge allow the liner to be neatly folded over the top; they will rot eventually but can serve you well for years.
9. Extra protection?
If there is a risk that larger wildlife such as Grey Herons, Foxes or deer may visit and damage the liner (or excited children for that matter!), consider adding a layer of fleece underlay over the top of a rubber-type liner. Be careful, however, that the fleece does not extend above the pond surface or it will wick up water.
10. Don’t add soil
It can be tempting to fill the pond with a nice thick layer of rich soil to plant in. Don’t! It will flush the pond with nutrients, prompting algae to bloom and the water to become murky.
Instead, either use very poor subsoil (put it in before you fill the pond) or just grow your pond plants in special mesh pots. A bed of smooth pebbles is a great alternative for hiding the liner, while I like to use a thick bed of gravel and sharp sand which doesn’t slump or roll down a shallow slope. Whatever you use, make sure you add nothing that will jag the liner.
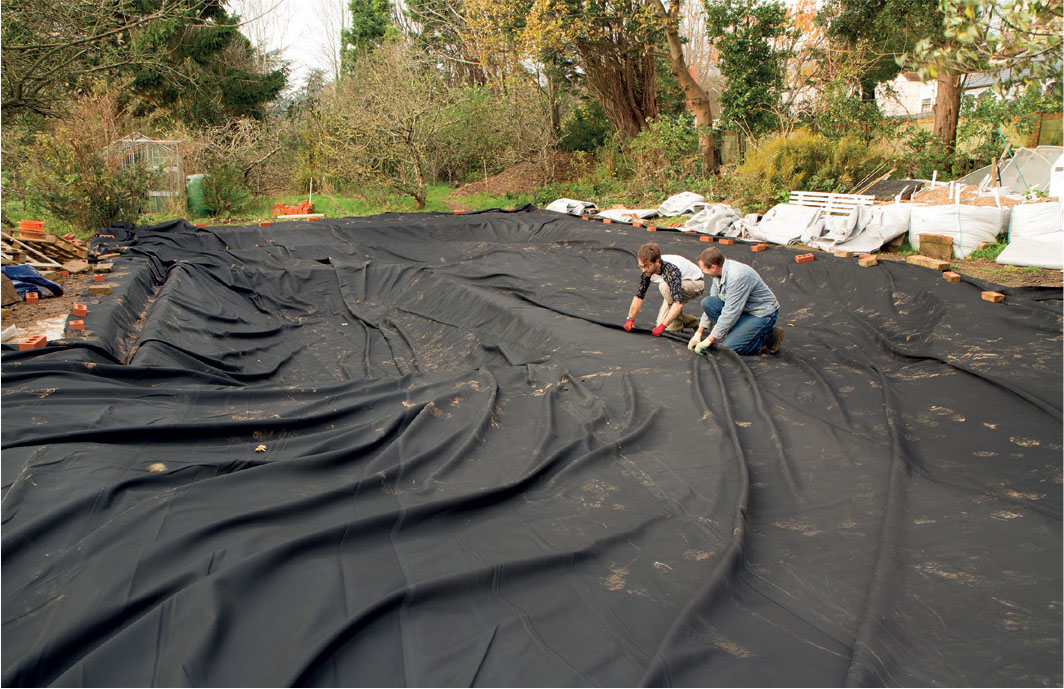
The liner is heavy and needs to be pulled bit by bit into position.
11. At last, add water!
Wherever possible, use rainwater either from the sky or from a water butt. If that really isn’t possible, then take it from the tap, but be aware that tap water contains nitrates and phosphates, exactly the thing to cause algal blooms.
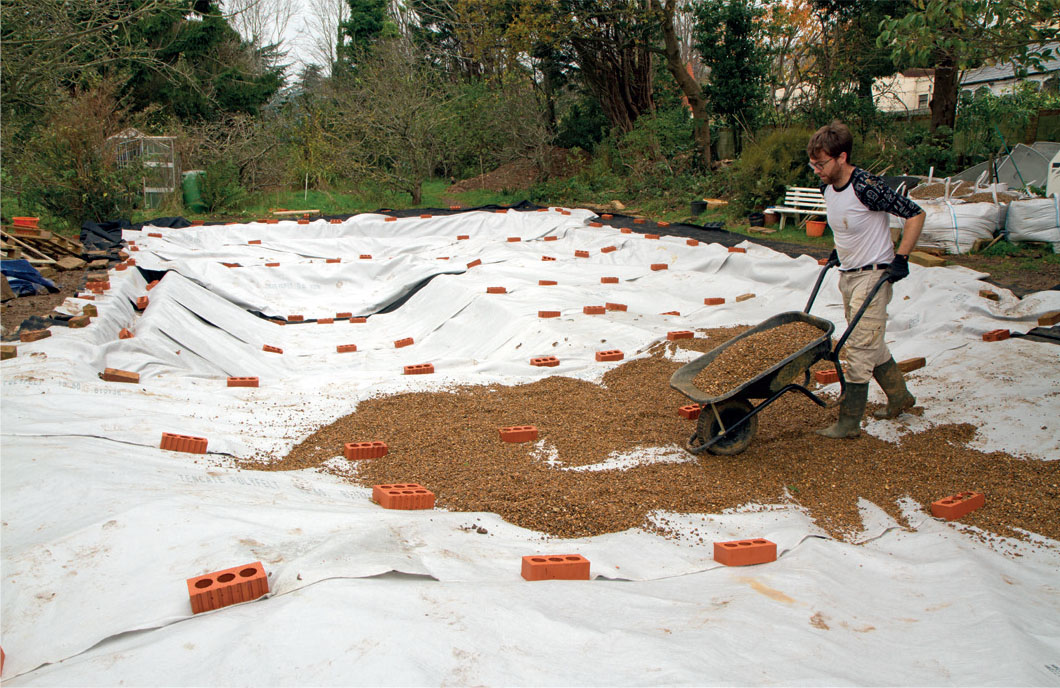
Here I’ve put underlay over the top of the liner, and then gravel over the top of that.
12. Planting up the pond
Be very careful to only use plants that are right for the size of your pond, see my recommendations here.
Avoid non-native invasive plants at all costs (see here). There are wild ponds all around the world that are clogged with alien plants that escaped from garden ponds.
Also avoid plants with needle-sharp roots that have been known to pierce pond liners – Bulrush and Lyme-grass are particularly problematic.

The finished pond, six months after filling.

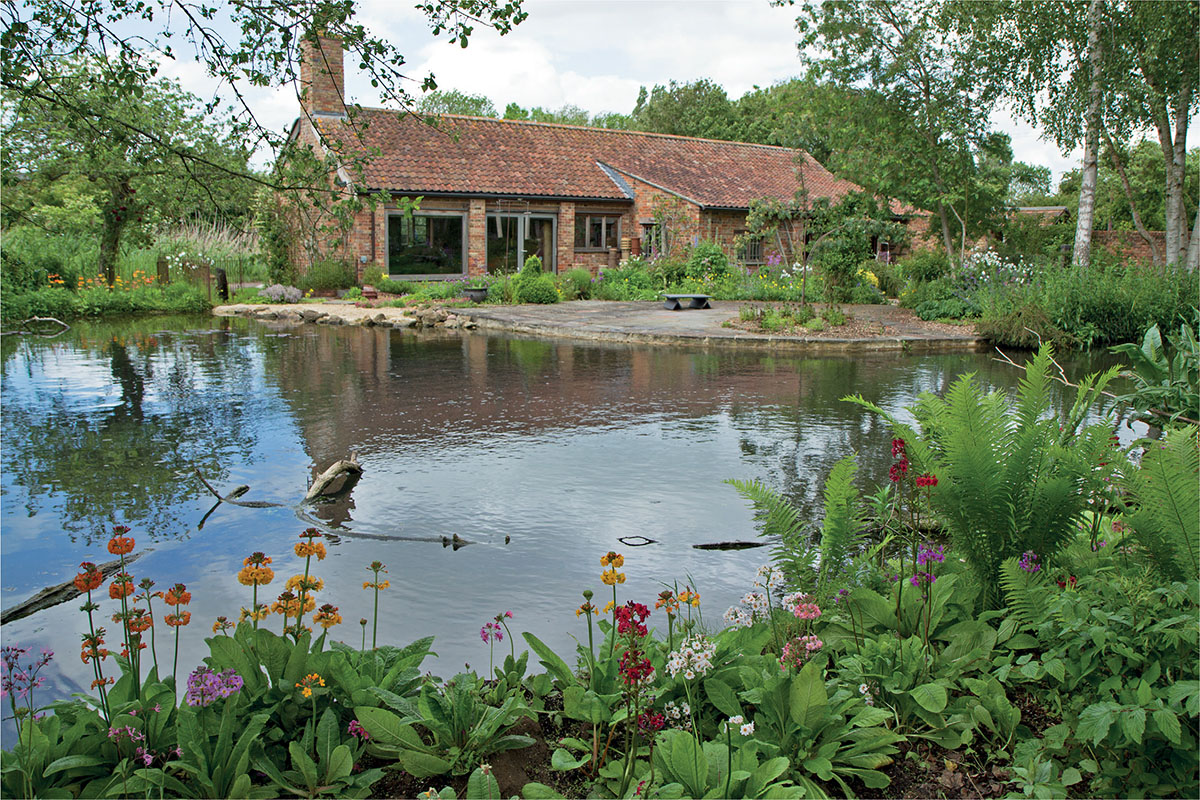
A finished pond is a constant source of delight. Even Kingfishers visit this superb pond in Sue Camm’s Devon garden.
13. Stocking the pond with wildlife
Don’t bring in frog or toad spawn from another pond – it risks spreading the terrible diseases that are currently afflicting amphibians.
You might be tempted to throw in a bucket of water or lump of mud from another pond to introduce some minibeasts, too, but this runs the risk of transferring fragments of invasive plants.
So the safest and most rewarding route is just to fill the pond and see what comes. Creatures that look incapable of life out of water, such as water beetles and pond skaters, are actually excellent flyers that habitually seek out new ponds.
As you lift weed out, give it a shake to encourage pond life to dive back into the water.
Ensure that animals that fall in can get out. Steep-sided ponds in particular are a death trap for creatures such as Hedgehogs. A log angled into the water will often do the trick, but having shallows around the margins is even better.
14. Annual maintenance
If waterweeds are beginning to dominate the pond, lift out small amounts at a time, and leave them on the pond edge for a day or two before composting. This lets any creatures within the weed crawl back into the pond.
In autumn, keep the pond clear of leaves, either by covering the pond with netting or by fishing them out with a net once they’re in.
15. Dealing with a frozen pond
When a pond freezes, wildlife beneath the ice has no problem surviving unless there is rotting vegetation in there, in which cases the gases are trapped and may poison the inhabitants. If you want to maintain a hole in the ice:
Don’t smash the ice, which can cause shockwaves through the pond.
Don’t bother with the oft-quoted ‘trick’ of floating a ping-pong ball on the surface.
You can melt a hole through the ice by resting a saucepan of boiling water on top, but it does take an eternity to melt your way through (believe me, I’ve done it!).
Me? I just leave the pond as it is, frost is natural, after all!

It takes several visits back to the cooker to heat the saucepan and its contents back up to steam a hole in the ice.
MAKING A FORMAL WILDLIFE POND
These six pictures show how I made a formal pond that is still good for wildlife.
It is a ‘brimming’ pond, where the water surface is designed to be at the level of the slabs, making access into and out of the water easy for even small creatures.

1. The pond is marked out using string and a spirit level – accurate horizontals are vital if the water surface is to sit flush with the edges.

2. The dug pond is bordered with concrete blocks and lined with a thick layer of sand. See how there are lots of shallows as well as a deeper area.

3. A thick butyl liner is laid into the pond and pleated into deeper areas. The weight of the water will help push it into shape.

4. Slabs are laid on mortar over the top of the liner along the lines of the concrete blocks and allowed to set.

5. The edges of the liner are brought up the outside of the slabs and cut off neatly (here hidden by shingle). The pond is filled with rainwater and plants.
6. The completed pond was home to frogs, toads, newts, dragons and damsels within a year.
Ponds and wildlife Q&As
Can I have a fountain or pond pump?
Ah, the gentle sound of water splashing into a pond. It adds oxygen, which creates a healthier home for most pondlife and helps keep the water clear. Unfortunately, pumps have a huge carbon footprint, with some using 500 watts of power. A well-made pond in a good position with a healthy community of plants and animals should look after itself without needing energy-guzzling solutions; if you do want a little fountain, use a solar-powered one.
Can I introduce fish?
Fish, whether non-native goldfish or wild species such as Three-spined Sticklebacks, aren’t usually recommended for wildlife ponds because they will eat many pond creatures (including tadpoles and water fleas). But some natural ponds have fish, and a well-designed pond with shallows and hideaways can still host all sorts of creatures. It’s your call.
How do I deal with blanket weed?
A problem that almost any pond will face at some point is the dreaded algae. Long green filaments spread through the water, or it turns into a green or brown soup. The simple solution is to wind it around a bamboo cane like spaghetti. You can also try bundles of barley straw, which appear to kill algae as they decompose. The key, however, is ensuring no nutrients are getting into the pond, be it tap water or garden run-off. And it if happens in Year 1, don’t worry, that’s totally normal while the pond ecosystem establishes itself.
The bog garden
There are places in nature where drainage is poor and the ground waterlogged, but there’s rarely any standing water at the surface. These bogs, mires and quagmires may not attract all the dragonflies and aquatic creatures that a pond does, but they are home to all sorts of fantastic plants that like these conditions, such as Meadowsweet, Snake’s-head Fritillary and Marsh Woundwort. In among their stems it remains lush and cool all summer, offering a perfect home for many damp-loving creatures to chill out.
To make your bog garden:
Dig out a suitable area to a depth of at least 60cm and line the pit with a waterproof liner. Spike some drainage holes in the bottom, and cover the base with a layer of gravel.
Then refill the hole with the soil you removed. You can then add water, or let rain do it.
And get planting!
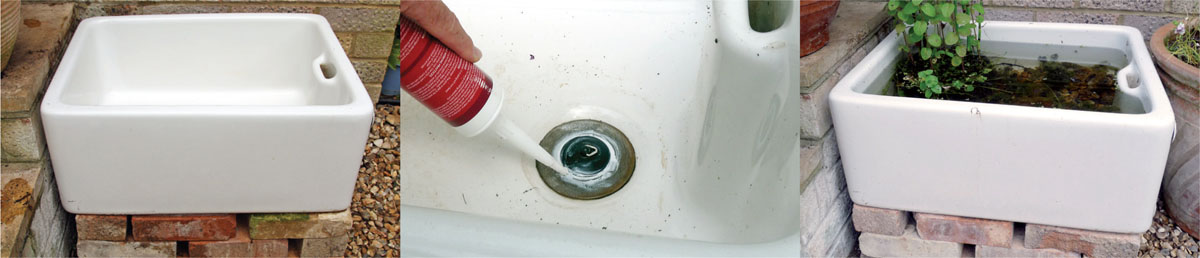
Making a pond in a pot
If you have a small garden or have concerns about children, why not make a container pond.
Take a large glazed bowl, half-barrel or container. Reclaimed ceramic sinks are great (below left, raised on a brick den for frogs and toads).
Seal up any drainage holes using a silicone sealant (below centre). If the pot is at all porous or if you’re using barrels, paint on special pond waterproofing from a specialist shop. Alternatively you can use a rubber-type pond liner, but getting it to look neat within a round barrel can be hard.
Place it where it only receives a little full sun each day, but not in deep shade or under trees..
Create shallows and deeper areas, with submerged plants and marginals. But limit yourself – about three plants is as much as a small water garden can take (below right, with Hornwort, Water Mint and Equisetum hyemale).
And a word of warning: the smaller the water area, the more difficult it is to establish a wildlife community that regulates itself and keeps the water clear.
Ensure wildlife can get in – and out – easily.
Rain gardens
The term ‘rain garden’ has a rather magical air, don’t you think? But what it is? Well, it’s a solution to what you can do with all the water that lands on your house. For decades, the basic premise has been to send it as fast as possible into drains and soakaways. Of course, the problem is that, as a result, someone or somewhere further down the system gets flooded.
In contrast, nature – in its eternal wisdom – is very good at holding water back, thus spreading the impact. So what happens if we take nature’s example and ‘slow the flow’, giving water places to linger along its route? Well, that’s what rain gardens are, usually a depression in the ground filled with lush vegetation, where much of the water gets soaked up or drains away gradually, creating great new habitats for wildlife in the process. They are part of the modern idea called Sustainable Urban Drainage Systems (SUDS), which aims to create win-win solutions to flood risk in our towns.
You can create your own rain garden by digging a very shallow hollow either next to a paved area or by redirecting your downpipes into it. You don’t line it and it will only occasionally – and temporarily – hold water, so it is quite different from a pond and easier to create. Aim for your rain garden to be about 30cm deep and cover about 10 percent of the area it is receiving water from. The plants you grow there must be able to cope with periods of dry as well of damp, so try native waterside species such as Hemp Agrimony, Meadowsweet and Yellow Flag. On clay soils work in some shingle into the base to ensure that it will ultimately drain and not overflow. It should work a treat.

This is a type of rain garden on a new housing estate where excess water collects after heavy rain. You can create a mini version of this in your garden.

A rill is in effect a long thin pond. Plant-free, it is good for bathing and drinking; planted up would be even better.
Rills
Here is a cheap and simple way to bring some damp mini habitats to your garden. Basically, all you do is dig a shallow trench through part of the garden; it doesn’t really matter where, and it can be straight or winding and as long as you wish.
Yes, you’ve sussed it out: effectively what I’m asking you to do is create a ‘ditch’! I realise that doesn’t sound very glamorous, so call it a ‘rill’ and I guarantee you will impress your friends and neighbours.
Unless you line it, it will probably not hold standing water very often, unless you are on clay or in wetter parts of the country. However, it will be appreciably damper than the surrounding areas, not much but enough for the vegetation in to be more lush and for wildlife to feel the benefit. It is exactly the kind of habitat used by Ringlet and Orange-tip butterflies, by Slow-worms, and by Song Thrushes.
I like to dig my rills about 30cm deep and with gently sloping sides and a very gentle gradient from start to finish. If you finish with a larger pond-like area, any flows will have somewhere to end up. You may find that plants such as Lady’s Smock, Angelica and Meadowsweet grow better here than elsewhere in the garden.