The foundational recipes in this chapter are the bedrock of the Sweet Laurel approach to baking. Without them, you won’t be able to make many of the recipes in the book. Some of these ingredients can be purchased at the market (coconut yogurt, vegan chocolate chips, etc.), but we recommend making them yourself at least once so you can see the difference in taste and quality. Particularly if you have food allergies, being able to completely control what’s in your food is paramount, and store-bought equivalents for our recipes in this section—such as grain-free vanilla extract—are hard to find in the market.
This chapter is where we reveal the secrets to our baked goods. When you remove butter (for moisture and tenderness), sugar (for stability, caramelization, and crunch), and flour (for structure), the right texture can seem elusive to even the most experienced home baker. Without these three ingredients, cake can become heavy, piecrust chewy, custard rubbery, and bread crumbly.
So how is Sweet Laurel different? Well, as we discuss on this page, we don’t use any weird stuff. Most of the ingredients we call for will be familiar to any home cook, and we always try to use them in their whole, simple form. This usually leads to simpler recipes, too. We meet the challenges that arise from replacing conventional ingredients or techniques with our grain-free, refined-sugar-free, and dairy-free alternatives by finding new ways to balance moisture, texture, lightness, and stability. In our style of baking, the simplest solution is usually the best one.

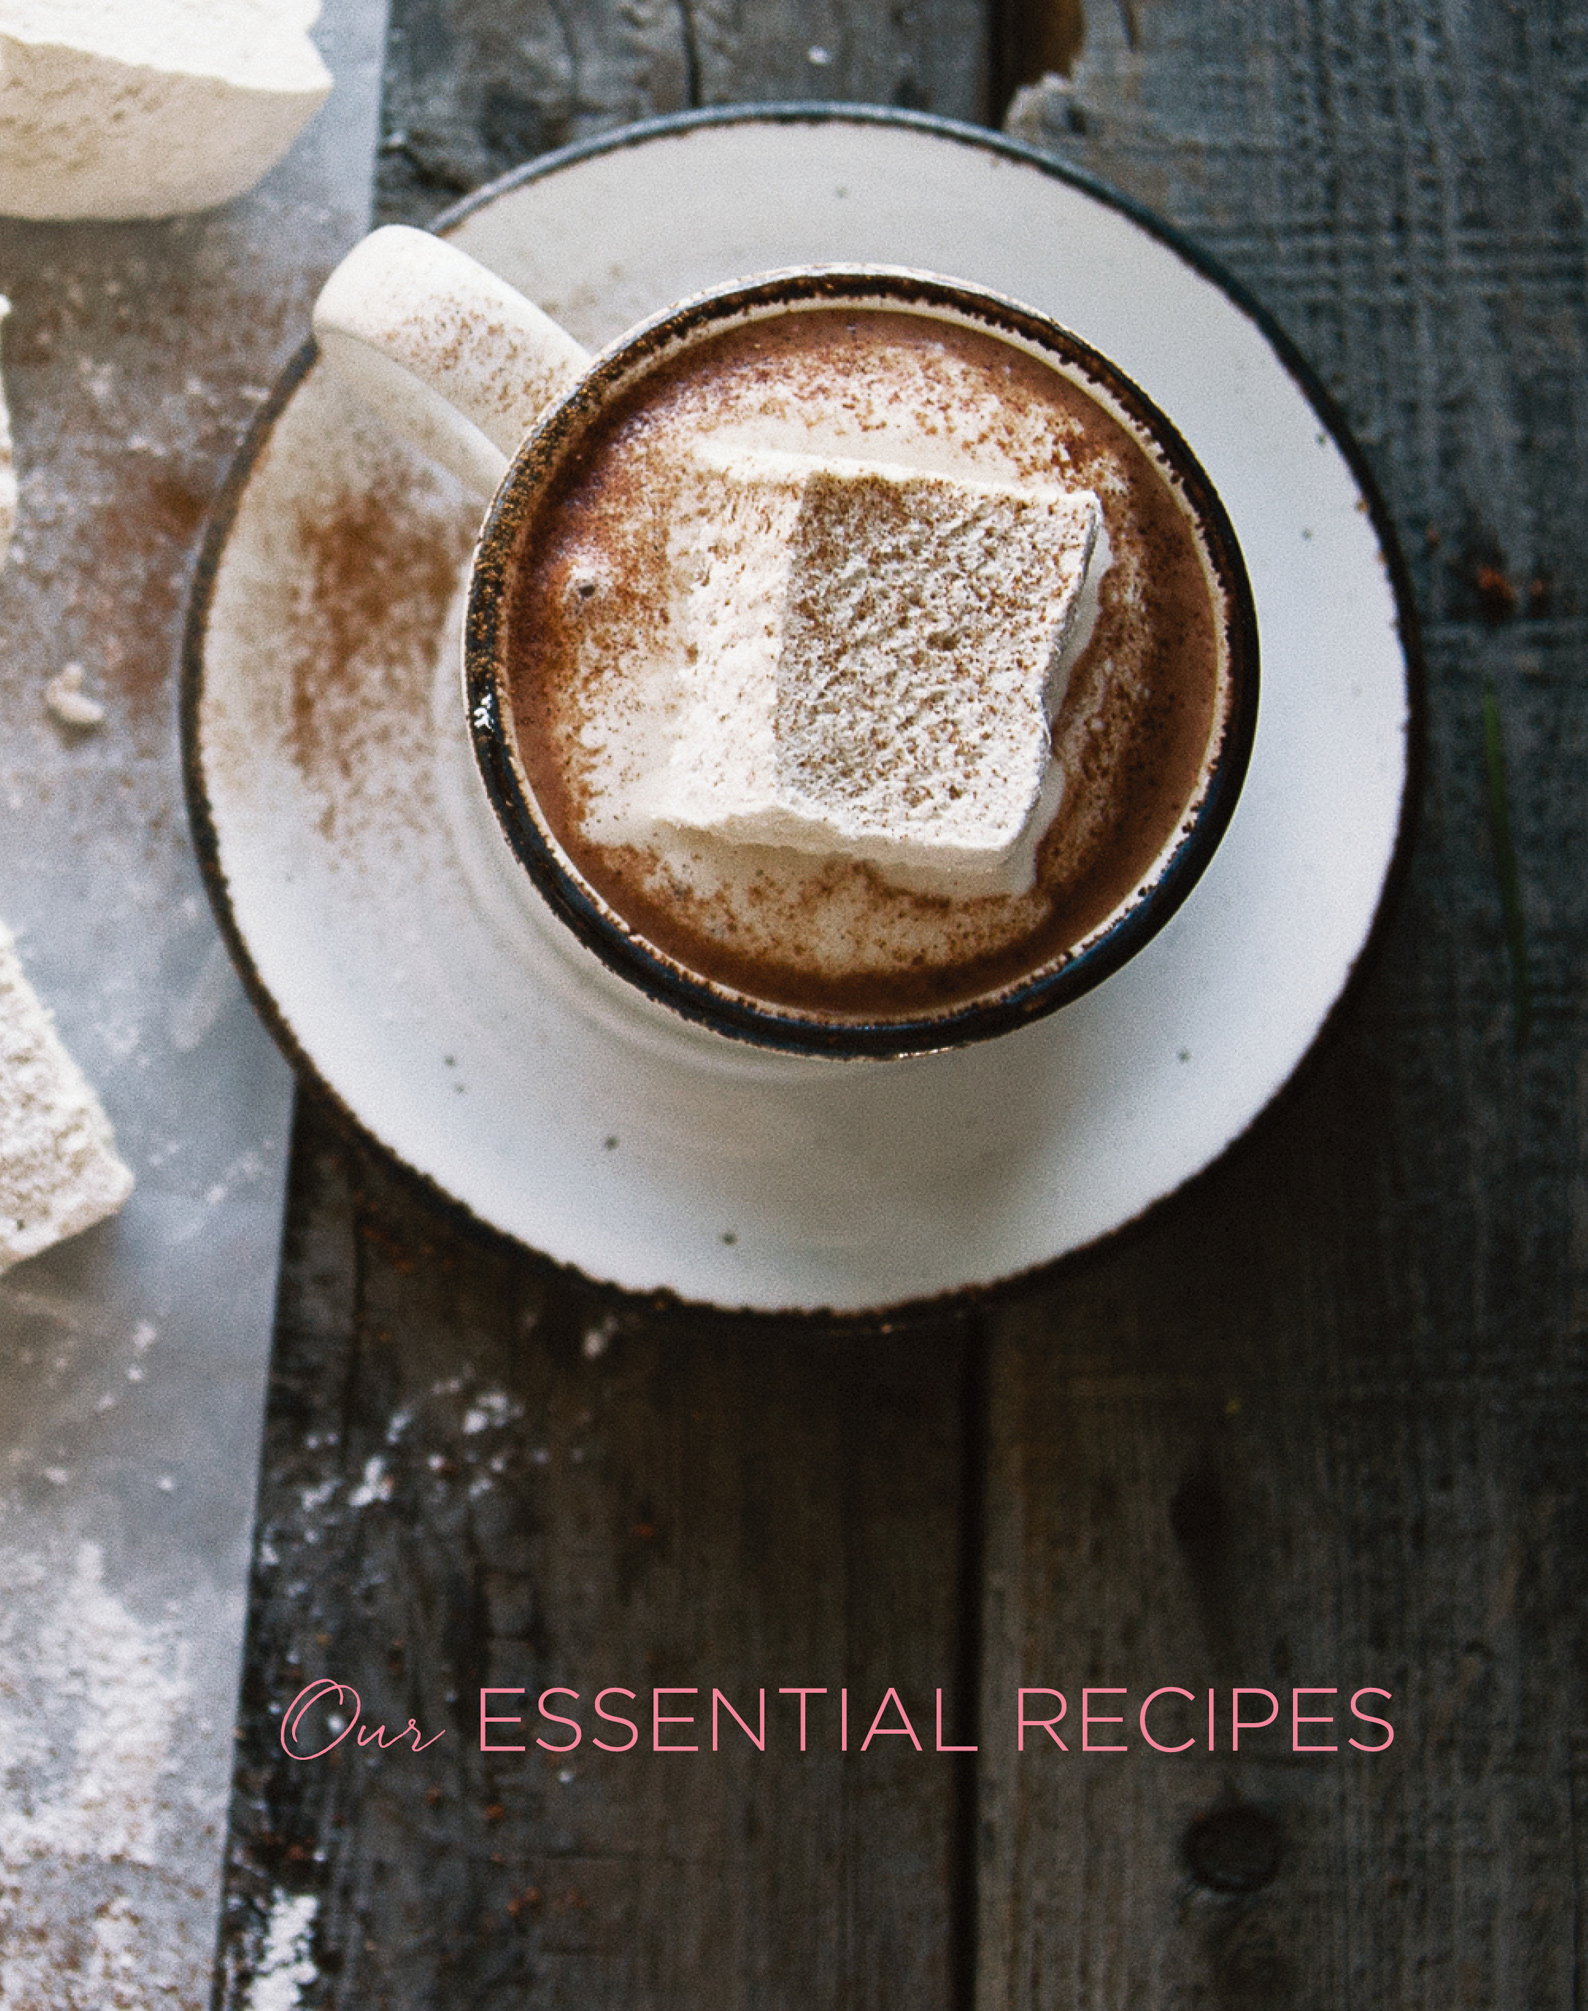
MARSHMALLOWS
Happiness is a homemade marshmallow nestled in a cup of steaming hot cocoa. Or actually, happiness is about one minute later, when the marshmallow starts to melt, slowly enveloping the chocolate in a blanket of white sweetness. Of course, it’s easiest to reach into a bag and pop a jet-puffed marshmallow on top of your cup, but if you have twenty minutes, making marshmallows from scratch really makes a difference. Not only is the texture much more tender, but you can also add any flavor you please. And you can make a super-clean, refined-sugar-free version!
MAKES 16 LARGE MARSHMALLOWS
Arrowroot powder for coating
3 tablespoons gelatin powder
1 cup maple syrup
1 tablespoon vanilla extract
¼ teaspoon Himalayan pink salt
1.Line an 8 × 8-inch square pan with parchment paper, and lightly dust the parchment with sifted arrowroot powder. This will prevent the marshmallows from sticking.
2.Pour ½ cup hot water into the bowl of a stand mixer fitted with the whisk attachment. Sprinkle the gelatin on top to soften, stirring gently to fully dissolve it.
3.In a medium saucepan over medium heat, combine another ½ cup water, the maple syrup, vanilla, and salt. Bring the mixture to a simmer and cook, using a candy thermometer to monitor the temperature, until it reaches the soft-ball stage at 240°F. Careful! This happens quickly, so keep a close watch once the syrup reaches 220°F.
4.With the mixer on medium-high speed, blend the gelatin mixture. Slowly pour in the syrup and continue to beat for about 10 minutes, until the steam disappears and soft peaks form. The mixture will become white and super fluffy.
5.Immediately pour the mixture into the prepared pan and allow to set at room temperature for about 4 hours. Sift a light coating of arrowroot powder over the pan, coat a chef’s knife with arrowroot powder, and cut the marshmallows into squares. Lightly toss the marshmallows in the pan to evenly coat with arrowroot powder to ensure they do not stick to each other. Lightly dust off excess arrowroot and store in an airtight container at room temperature. They’ll keep for up to 1 week, but are best within the first day or so.
Note
To make vegan marshmallows, use soy gelatin powder.

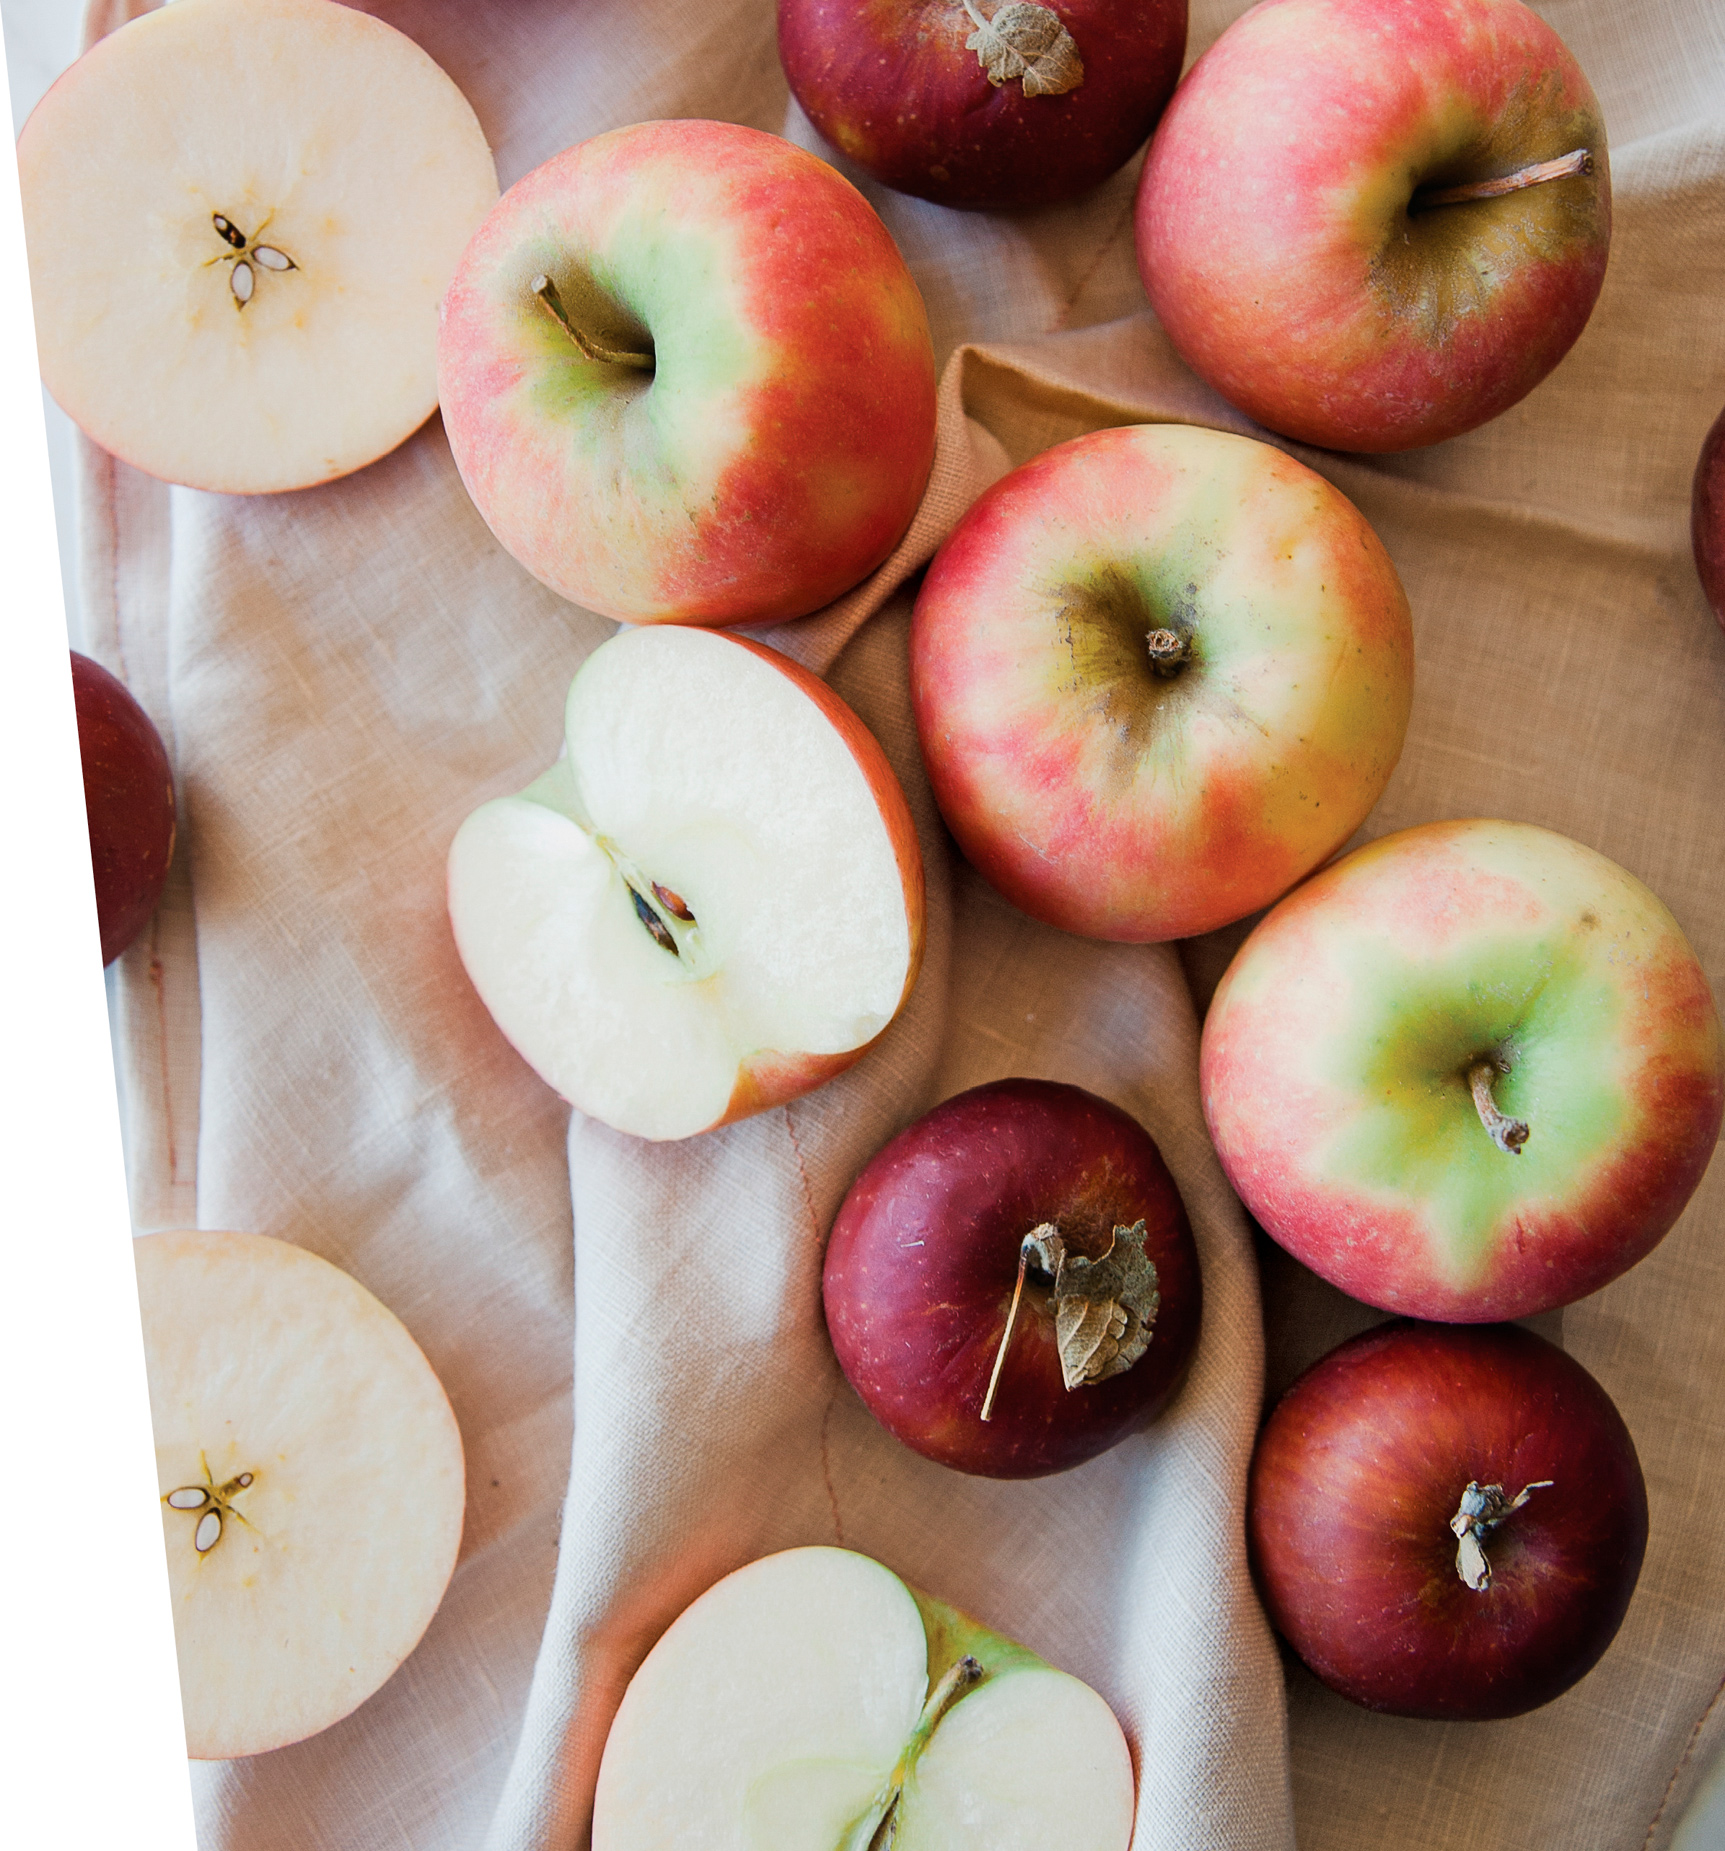
APPLESAUCE
Especially in vegan baking, applesauce is an important ingredient to have in your arsenal. It can add moisture and sweetness to almost any recipe, and can even take on some of the binding properties of eggs. We make our own at home, and love taking advantage of the farmer’s market with its seasonal varieties of heirloom apples.
MAKES 4 CUPS
3 pounds apples, peeled, cored, and sliced
Juice of 1 lemon
2 cinnamon sticks
Pinch of Himalayan pink salt
Honey or maple syrup to taste
Ground cinnamon
1.Place the apples, lemon juice, cinnamon sticks, salt, and ½ cup water in a slow cooker and cook on low for about 4 to 6 hours until thick and jammy.
Alternatively, place the apples, lemon juice, cinnamon sticks, and salt in a large saucepan with enough water to barely cover, and simmer for about 50 minutes. The apples should be completely tender and barely golden brown.
2.Let the applesauce cool to room temperature. Remove the cinnamon sticks and transfer to a blender. Pulse the applesauce until it reaches your preferred consistency. Add a little honey or maple syrup for extra sweetness, and serve with a sprinkling of ground cinnamon on top. Refrigerate in a sealed jar for up to 2 weeks.
COCONUT WHIPPED CREAM

Without a doubt, the most frustrating thing to prepare in our bakery is coconut whipped cream. You do everything right, and yet you’re staring down into a bowl of goop with a naked cake waiting impatiently on the table to be iced. After one too many restless nights worrying about whether the coconut cream would set, we figured out some workarounds to add stability and guarantee perfect coconut whipped cream, every single time.
First, be sure your coconut milk is left untouched in the coldest part of your fridge (but above 40°F to avoid freezing) at least overnight. (As long as possible is even better. Right after we come home from the market, the can of coconut milk goes straight into the fridge and lives there until we need to use it.) This gives the thick, white cream a chance to rise to the top and settle, making it easy to separate the cream from the clear, liquid coconut water. Second, whip still-solid coconut cream until completely smooth, but no further. This sounds counterintuitive, but if you overwhip the coconut cream, it will soften and become liquid. Once it’s whipped to soft or stiff peaks, you can use it as is, or pop it in the fridge overnight for a super-stable cream to fill cakes.
MAKES 2 CUPS
Two 13.5-ounce cans full-fat coconut milk, refrigerated overnight
2 tablespoons maple syrup
1 tablespoon vanilla extract
1.Remove the solid coconut cream that has risen to the top of the can, and spoon it into a stand mixer fitted with the whisk attachment. Beat the coconut cream on high speed until it begins to thicken and peaks form. The remaining coconut water can be added, a teaspoon at a time, if the whipped cream is too thick. Otherwise, discard it.
2.Using a rubber spatula, slowly fold in the maple syrup and vanilla. Transfer the whipped cream to a metal or glass bowl, cover, and refrigerate until ready to use.
Notes
For filling cakes, we like to chill the coconut whipped cream in the fridge overnight, covered. This will stiffen the cream and make it stronger for holding layers of cake together. However, it becomes more difficult to style the cream on top of the cake, so we tend to do this only for the filling between cake layers.
The brand of coconut milk you purchase (see this page) is not the only thing that can affect the final outcome. If coconut milk has accidentally been frozen or overheated, it can struggle to separate properly. For this reason, we recommend your not ordering coconut milk online, but buying it from a store familiar with storing the product properly, like Whole Foods.
CHAI COCONUT WHIPPED CREAM
WHILE PROCESSING, ADD:
¼ teaspoon ground cinnamon
¼ teaspoon ground ginger
⅛ teaspoon ground cloves
⅛ teaspoon ground cardamom
ESPRESSO COCONUT WHIPPED CREAM
2 teaspoons espresso powder
¼ teaspoon Himalayan pink salt
Combine the espresso and salt with 2 tablespoons hot water. Stir together and let cool. Fold into the coconut whipped cream.
LEMON LAVENDER COCONUT WHIPPED CREAM
WHILE PROCESSING, ADD:
1 teaspoon grated lemon zest
¼ teaspoon ground lavender
GRAPEFRUIT COCONUT WHIPPED CREAM
WHILE PROCESSING, ADD:
2 tablespoons grated grapefruit zest
Additional 2 tablespoons raw honey
CINNAMON-GINGER COCONUT WHIPPED CREAM
WHILE PROCESSING, ADD:
1 teaspoon ground cinnamon
Ginger syrup from Candied Ginger Syrup (this page) in place of maple syrup
LIME COCONUT WHIPPED CREAM
WHILE PROCESSING, ADD:
Grated zest of 1 lime
VANILLA EXTRACT
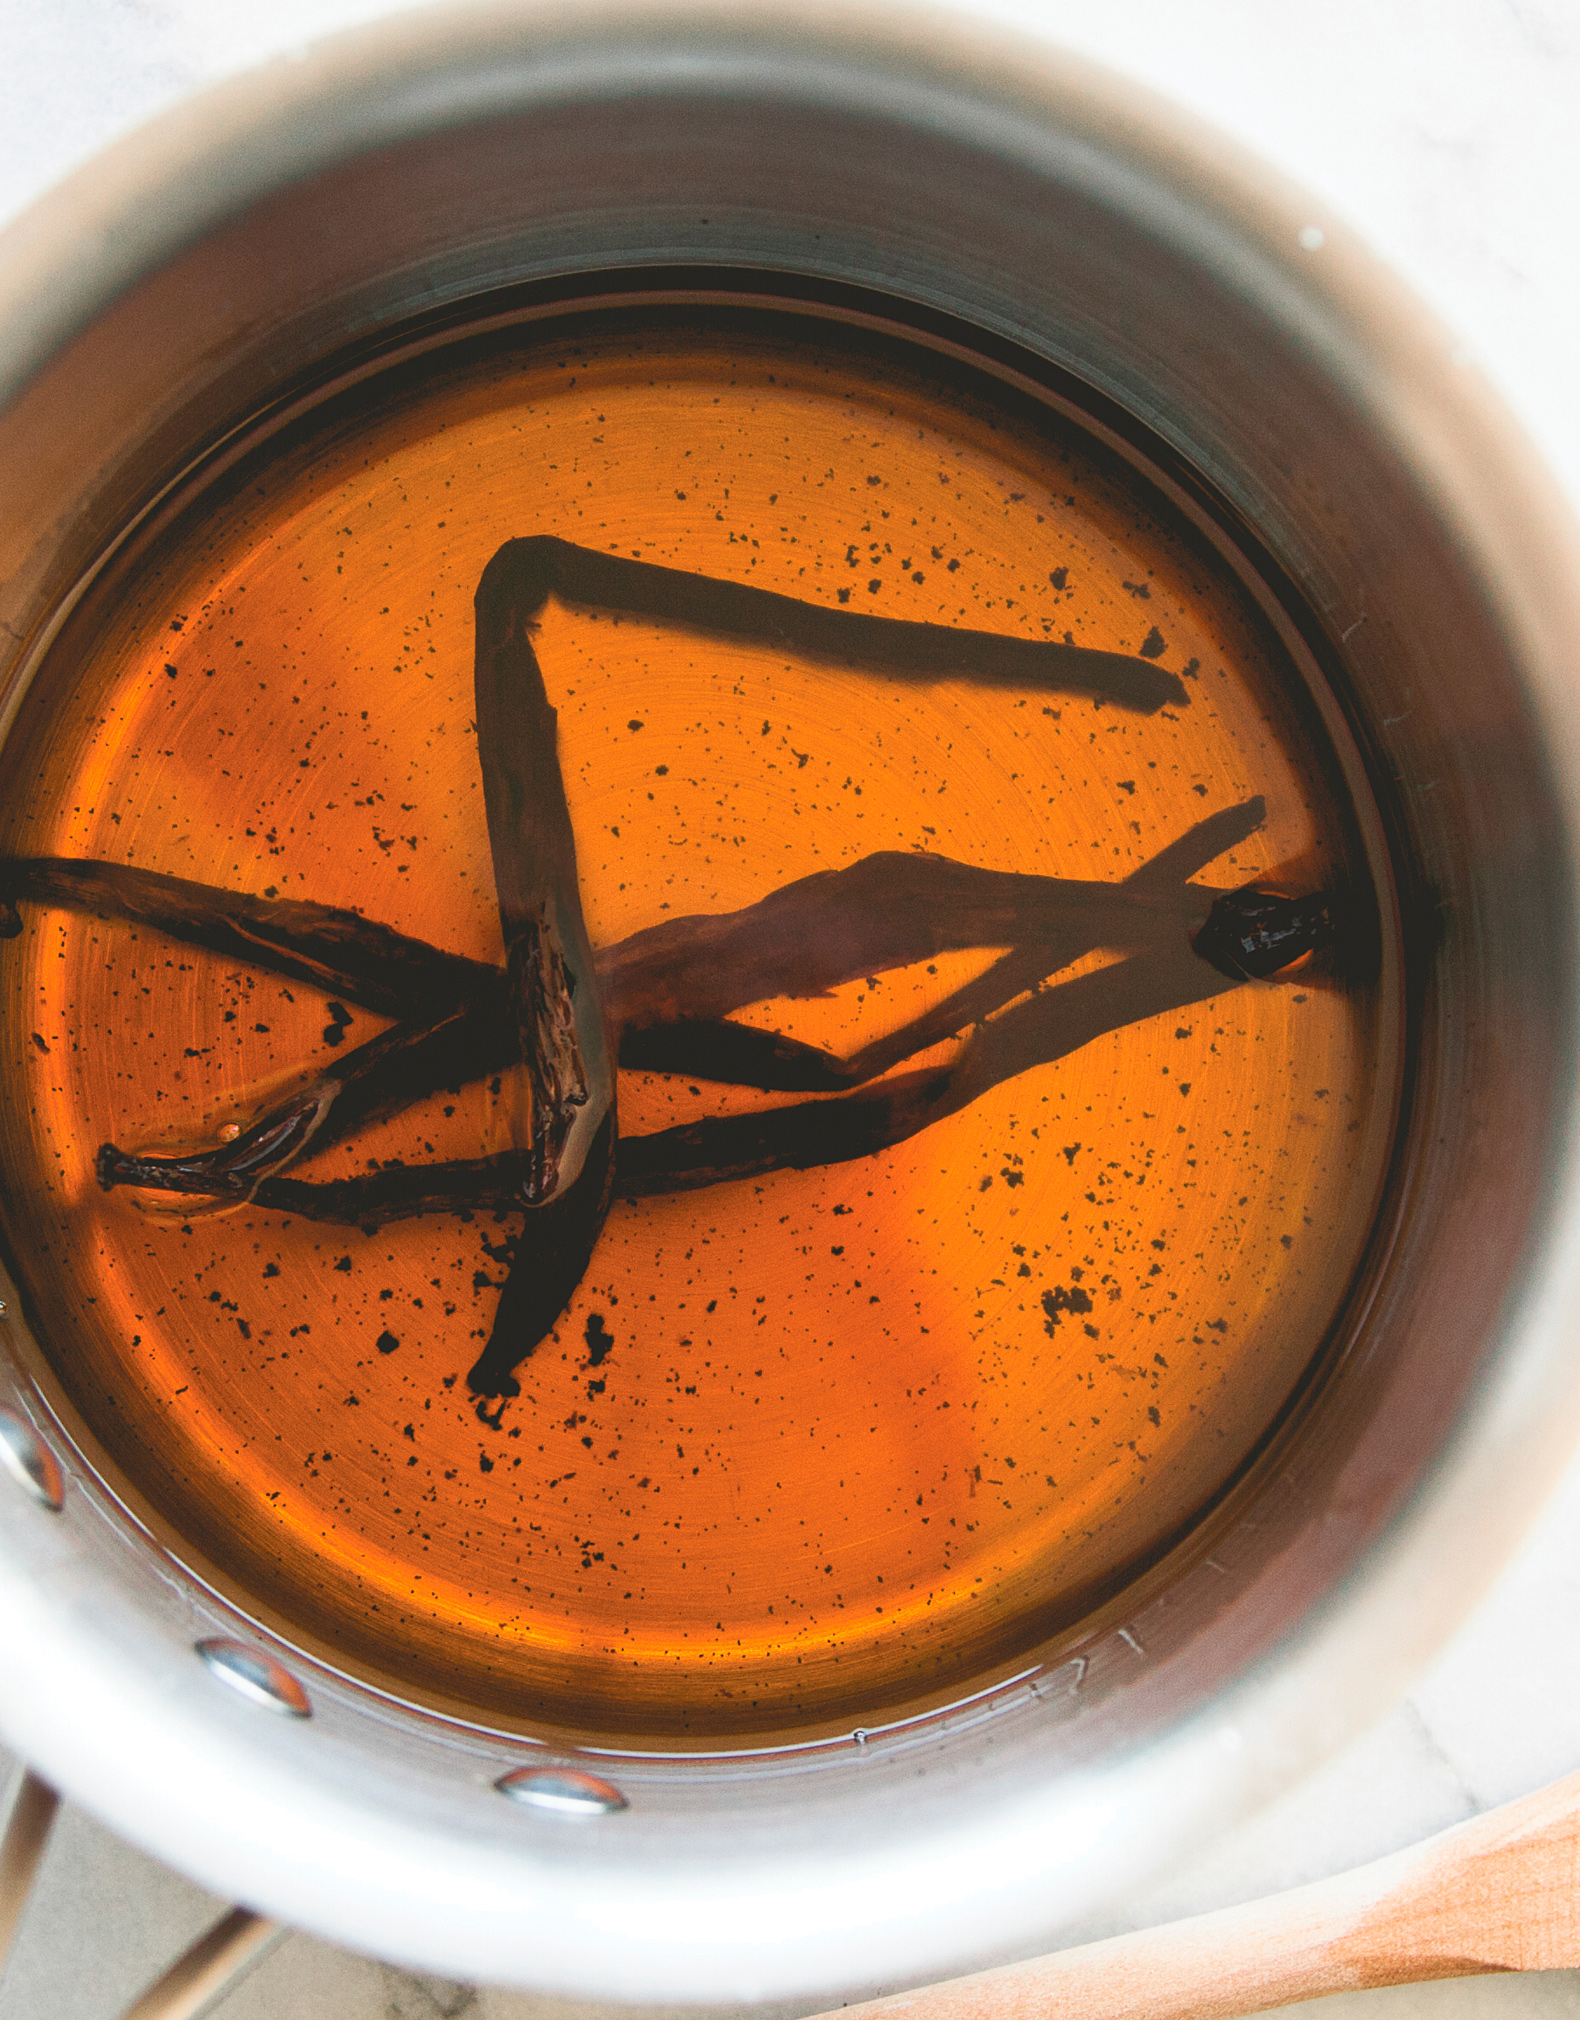
Our grain-free vanilla extract has been the surprise star of our line of pantry ingredients. When we first started baking grain-free, vanilla extract was impossible to find at the store since most base alcohols come from grains or refined starches with gluten. So what’s a girl to do? We quickly zeroed in on tequila (we may or may not have had margaritas in our hands at the time) and started brewing our own extract for baking. The best part? It’s easy to make, gets better with time, and even makes a beautiful gift.
MAKES 2 CUPS
2 cups tequila blanco
1 tablespoon vanilla bean powder (see this page) or 2 whole vanilla beans, seeds scraped
1.Pour the tequila into a large Mason jar with a tight-fitting lid.
2.Add the vanilla bean powder or seeds and pods to the jar. Tighten the lid, shake the contents to blend everything together, and put the jar in a dark place, as light can cause organic compounds to break down (it’s one of the reasons extracts and good olive oil are sold in dark bottles).
3.Each day, give the vanilla extract a shake. It will be ready to use after about 6 weeks. We run out of the extract before ever hitting an expiration date, but if stored in a cool, dry place with the bottle securely sealed, it should last indefinitely.
BAKING POWDER
This is an incredibly simple pantry staple, and a DIY version probably seems unnecessary. However, conventional baking powders can have additives like aluminum, so we prefer to make our own clean, natural version. Once you whip this up yourself, you’ll always have a batch ready for baking.
MAKES ¾ CUP
½ cup cream of tartar, sifted
¼ cup baking soda, sifted
Sift together the cream of tartar and baking soda into a small jar. Tighten the lid and keep in a cool, dry place.
VEGAN EGGS

Every now and then we get vegan orders for our cakes, which, when you consider all of the other things not in our cakes, makes for a baking challenge. Luckily, there are some fabulous vegan binder replacements. Ground flaxseed creates a nice gooey texture and has a lovely nutty flavor. Chia seed has a similar effect but with greater health benefits, such as impressive amounts of omega-3 essential fatty acids, protein, and fiber per gram. Psyllium husk powder is great when you need something with super-binding or super-rising qualities, such as for custards or quick breads, or are making a lighter-colored cake. (It’s also used as a supplement to improve and speed up digestion.)
For all of these replacements, just mix with hot water and add them to the recipe when you would add a regular egg. (Note that flax and chia seed needs to “gel” in the refrigerator for a few minutes.) Scale up the amounts as needed for the number of eggs desired.
EACH VEGAN EGG REPLACES 1 LARGE CHICKEN EGG
FOR 1 FLAXSEED EGG
Grind 1 tablespoon flaxseed in a spice grinder (or use flaxseed meal) and stir into 3 tablespoons hot water. Set for 15 minutes in the fridge before using.
FOR 1 CHIA SEED EGG
Grind 1 tablespoon chia seed in a spice grinder and stir into 3 tablespoons hot water. Set for 5 minutes in the fridge before using.
FOR 1 PSYLLIUM EGG
Stir 1 tablespoon psyllium husk powder into ¼ cup hot water. Use immediately.
Note
Vegan eggs do not work well with coconut flour, as it requires so much additional moisture. If you must swap regular eggs for vegan eggs, and are using coconut flour, add an additional 2 tablespoons of coconut milk for each vegan egg.
When to Use Which Vegan Egg
Flaxseed: Perfect for loaves, bars, and dark cakes. For a lighter hue, use golden flaxseed rather than brown. Bake for an additional 5 to 10 minutes.
Chia seed: For lighter-flavored loaves, bars, and dark cakes, as it has a more delicate flavor than flax. However, chia is darker than flax. It also has a gentler hold, so we tend to mix it with flax or psyllium husk powder for a little extra strength. Bake for an additional 5 to 10 minutes.
Psyllium husk: Perfect for cakes and loaves, especially savory breads or anything that needs elasticity. Psyllium has a much lighter color, so it works well in vanilla and lemon cakes. Bake for an additional 5 to 10 minutes.

ALMOND MILK

We love almond milk. In our coffee, in our cereal, in our cakes, or just in a glass, we sip, gulp, and practically luxuriate in it. Homemade almond milk has a rich, velvety texture that’s unlike anything available in the store, plus you know exactly what’s in it. (Store-bought versions can include binders and emulsifiers, and tend to be much thinner in texture.) Better yet, you can add flavoring to get it exactly how you like it. This recipe is our simplest version, but we love almond milk mixed with matcha, rose water, or turmeric for something different. You can also make milk from cashews, Brazil nuts, hazelnuts, and walnuts! Just soak and process them the same way.
MAKES 2 QUARTS
4 cups raw almonds
2 tablespoons date paste, store-bought or homemade (this page)
1 teaspoon vanilla extract
Pinch of Himalayan pink salt
1.Place the almonds in a large bowl and cover completely with water. Refrigerate for at least 8 hours.
2.Drain the almonds and put them in a blender. Working in batches as needed, add 10 cups water, the date paste, vanilla, and salt. Blend on high for about 2 minutes, until the mixture starts to look creamy.
3.Strain the mixture through a cheesecloth or nut-milk bag, squeezing the almond milk into a large bowl. Transfer to a jar and tighten the lid. Reserve the leftover almond meal in the refrigerator to make almond flour (recipe follows), if desired. The almond milk will keep for 3 to 5 days in the fridge. You can tell it’s no longer good when it smells sour, just like regular milk.
Notes
Do you have to soak? Yes, even though it’s an extra step. Not only does it make the nut milk creamier, but it also reduces the phytic acid, which can inhibit your body’s absorption of minerals and enzymes.
Avoid nut skins where possible. Purchase blanched almonds and pecans, or with hazelnuts and pistachios, remove the skins by soaking the nuts and then rubbing them between clean kitchen towels. The skins can create a slightly chalky flavor, so getting rid of them gives you the best-tasting milk.
ALMOND FLOUR
When our bakery launched, California was in the middle of a historic drought. Almond prices skyrocketed, and the idea of using an ingredient so drought-intolerant weighed on us as we were baking our first cakes. Luckily, we came up with a sustainable solution. We bought the almond meal left over from milk production and dehydrated it to make our own flour. The residual meal is quite dry, as the fat has been stripped from the almonds, so in our recipes, we like to use a 50/50 mix of homemade and store-bought almond flour.
MAKES 4 CUPS
8 cups almond meal, reserved from preceding almond milk recipe
1.Place the almond meal on the trays of a dehydrator. Spread the meal evenly throughout the tray, making sure not to overcrowd. Dehydrate at 110°F for 12 hours. If you don’t have a dehydrator, you can do this overnight in the oven. Spread the meal evenly over 2 rimmed baking sheets. Turn your oven to the lowest setting (200°F or lower) and leave the door cracked slightly.
2.Once the meal is completely dry, transfer it to a blender. Pulse on high for about 8 seconds, or until the meal looks like flour. Keep a close watch, being careful not to overblend, which would lead to almond butter. Store in an airtight container at room temperature. The almond flour will turn if there is residual moisture or it gets wet; otherwise, it lasts as long as any store-bought grain-free flour.
Note
Fresh almond meal that is still wet freezes beautifully, which is a good thing, because wet almond meal has a shelf life of only about 18 hours. In the freezer it can last for several months.
CASHEW PUREE or BUTTER
Cashew puree, also known as cashew butter, is a vegan culinary building block. It can make a soup creamy and rich, become cheese if agitated correctly, or whip into a beautiful frosting—all while retaining a delicate, simple flavor that nestles comfortably into the background. We fold it into our recipes for extra moisture and a velvety, rich texture, or use it as the base for a light and simple frosting.
MAKES 2 CUPS
4 cups raw cashews
Pinch of Himalayan pink salt
1.Place the cashews in a large bowl and cover completely with water. Refrigerate for at least 8 hours.
2.Drain the cashews and dry them off completely with a kitchen towel. Place the cashews and salt in a high-powered blender and puree until creamy.
3.Transfer the puree to a glass jar, tighten the lid, and refrigerate for up to 2 months.
ALMOND BUTTER
Almond butter is one of the cornerstone ingredients at Sweet Laurel. More than just a favorite snack swiped across a piece of toast, it’s the base for our ganache frosting and our vegan caramel. Just like almond milk, it’s incredibly versatile and begs for experimentation. We’ve shared some of our favorite variations. Our base almond butter is roasted to bring out the nuts’ oils, but you can skip this step to keep it raw.
MAKES 1½ CUPS
3 cups raw almonds
1.Place the almonds in a large bowl and cover completely with water. Refrigerate for at least 8 hours. Drain and dry off completely with a kitchen towel.
2.Preheat the oven to 400°F.
3.Spread the almonds on a baking sheet and roast for about 7 minutes. You should be able to smell them roasting.
4.Transfer the almonds to a food processor or high-powered blender and allow to process for about 30 minutes, stopping and scraping down the sides with a rubber spatula periodically. The almond butter is ready when smooth and creamy—this takes more time than you’d expect, so be patient!
5.Transfer the almond butter to a glass jar, tighten the lid, and refrigerate for up to 2 months.
HONEY ALMOND BUTTER
WHILE PROCESSING, ADD:
2 tablespoons raw honey
¼ teaspoon Himalayan pink salt
CINNAMON ALMOND BUTTER
WHILE PROCESSING, ADD:
1 teaspoon ground cinnamon
1 tablespoon maple syrup
¼ teaspoon Himalayan pink salt
CHOCOLATE SPICE ALMOND BUTTER
WHILE PROCESSING, ADD:
¼ cup 100% cacao unsweetened baking chocolate, melted
½ teaspoon ground cinnamon
3 tablespoons maple syrup
¼ teaspoon cayenne
¼ teaspoon Himalayan pink salt
CHAI ALMOND BUTTER
WHILE PROCESSING, ADD:
1 teaspoon ground ginger
½ teaspoon ground cardamom
¼ teaspoon ground cinnamon
⅛ teaspoon ground cloves
3 tablespoons raw honey
¼ teaspoon Himalayan pink salt

COCONUT YOGURT
We have a problem. A coconut yogurt problem. Meaning, we’re obsessed with its creamy but sharp deliciousness. After almost purchasing a $40 quart of coconut yogurt at our local health food store, we decided things had gotten out of hand, and it was time to make our own. You can use a yogurt maker or just let it ferment in your oven, and you’ll get a delicious ingredient to enjoy with fruit for breakfast or as a buttermilk replacement in pancakes, waffles, and more. You can also make an unsweetened version of this yogurt by leaving out the vanilla extract and maple syrup. Laurel loves her unsweetened coco yogurt!
MAKES 2 CUPS
Two 13.5-ounce cans full-fat coconut milk, refrigerated overnight
2 probiotic capsules (see this page)
½ teaspoon raw honey or maple syrup
½ teaspoon vanilla extract, optional
1.Remove the solid coconut cream that has risen to the top of the cans and spoon it into a large, sterilized glass jar, leaving just enough room to add the additional ingredients.
2.Open the probiotic capsules and stir the contents into the coconut cream along with the honey or maple syrup and the vanilla, if using. Loosely screw on the lid.
3.Place the jar in a dehydrator set to 110°F for 18 to 24 hours. If you don’t have a dehydrator, place the jar in your oven with the light on. The light emits a bit of heat, making the oven a good place for fermentation. After the fermenting period, refrigerate the yogurt until ready to use, for up to 1 week.
VEGAN CARAMEL
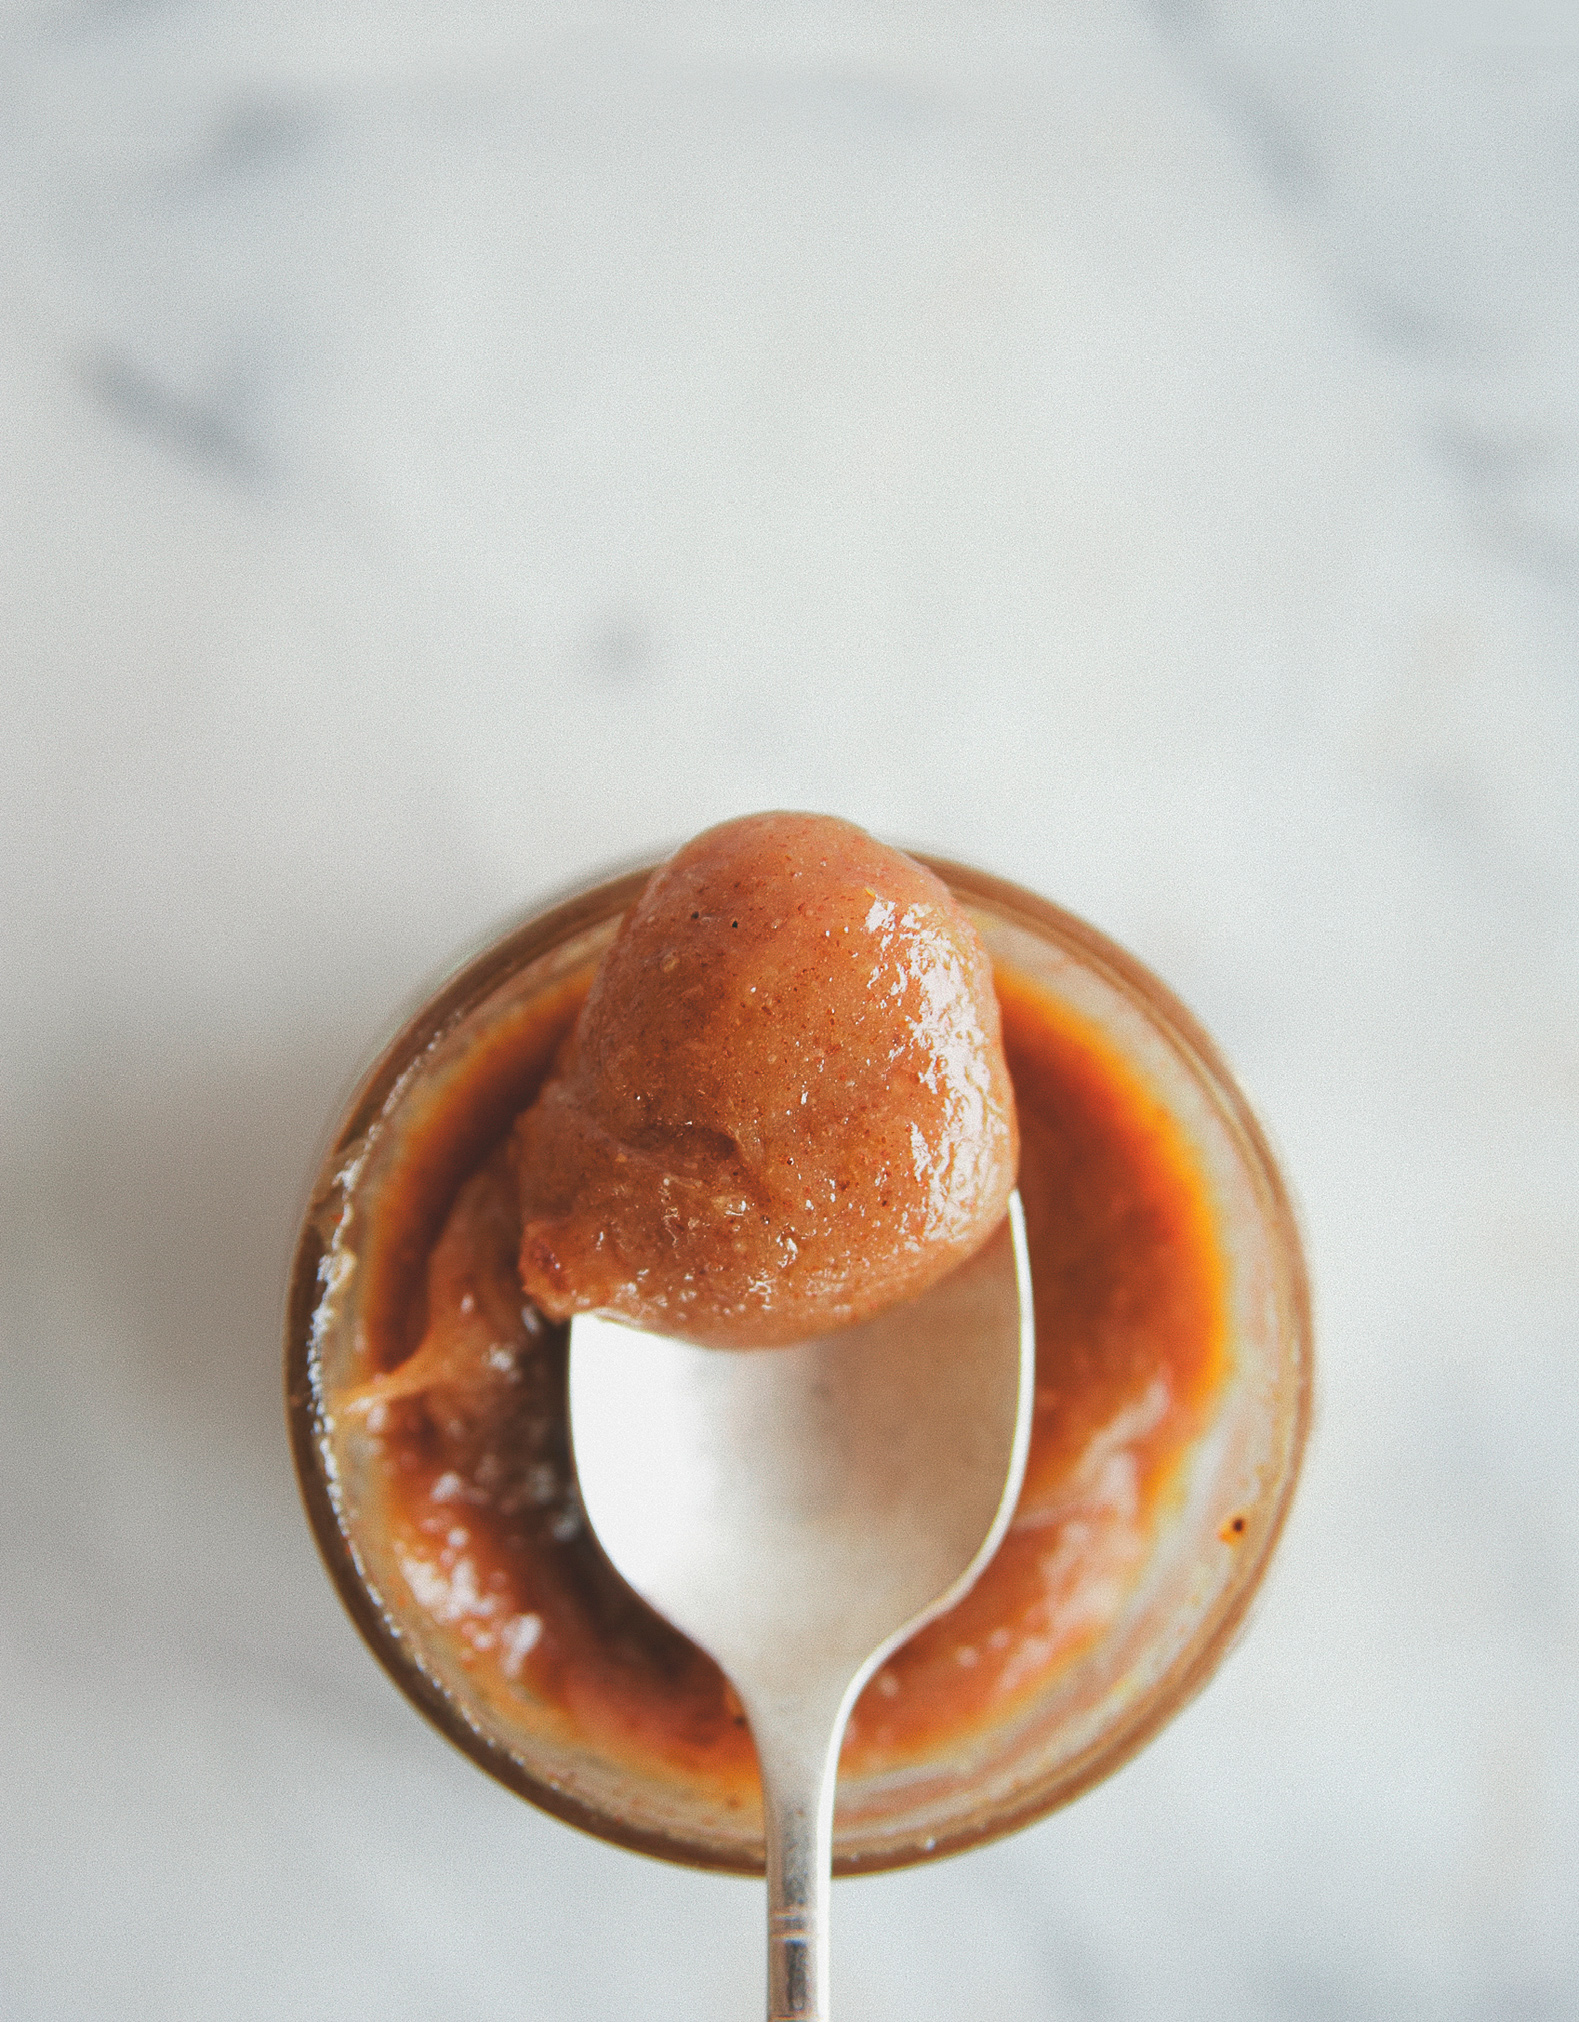
We believe our early success has a lot to do with this recipe. There have been vegan caramel super fans since day one (seriously, one guy has a weekly order), and once you try it, you’ll know why. You’ll see it pop up in a few recipes in this cookbook, but we won’t judge if you eat this straight out of the jar with a spoon! Our favorite way of serving it is on top of sliced bananas, or with a piece of dark chocolate. You can buy ours at sweetlaurel.com, but here’s our secret recipe.
MAKES ½ CUP
¼ cup almond or cashew butter or puree, store-bought or homemade (this page)
¼ cup maple syrup
2 tablespoons coconut oil, melted
1 or 2 fresh dates, pitted
1 teaspoon vanilla extract
Pinch of Himalayan pink salt
1.Place all of the ingredients in a blender or food processor and puree until smooth.
2.Transfer the caramel to a glass jar and place in the refrigerator to chill. The caramel will stiffen up in the refrigerator, so if your recipe calls for it to be spreadable, let the caramel sit at room temperature for 30 minutes to an hour, and give it a good stir before using. The caramel will keep for about 1 month, refrigerated.
Note
If you want a thinner sauce to drizzle on top of a dessert, just add another 2 tablespoons maple syrup. For a denser, caramel candy texture, add 2 more dates. For spreading on cake layers, add 2 more tablespoons almond or cashew butter.
VEGAN CHOCOLATE CHIPS
We both keep a flashlight under our bed and these chocolate chips in the pantry, just in case of emergencies. Making your own chocolate chips sounds fussy, but these require just three ingredients, are easy to make, and are completely customizable.
MAKES 1 CUP
4 ounces 100% cacao unsweetened baking chocolate, roughly chopped
1 tablespoon coconut oil, solid
2 to 3 tablespoons maple syrup
1.Line a large, rimmed baking sheet with parchment paper.
2.Melt the cacao and coconut oil in a medium saucepan over very low heat, stirring constantly. It’s easy to burn chocolate, so be sure to watch the pot and keep the mixture moving.
3.When the mixture is almost completely melted, remove the pan from the heat. Slowly stir in the maple syrup. For bittersweet chocolate chips, add 2 tablespoons syrup; for sweeter, add 3 tablespoons. Pour the mixture onto the baking sheet and use a rubber spatula to spread it evenly. Place the baking sheet in the freezer for at least 30 minutes, or until the chocolate is matte and hard.
4.Once the chocolate has hardened completely, remove it from the baking sheet and chop it into ¼- to ½-inch-wide pieces. Stored in an airtight container, the chocolate chips will keep in the freezer or refrigerator for at least 2 months.
Note
We keep our Vegan Chocolate Chips in the freezer, which not only extends their shelf life, but also means they won’t soften and stick together.
DATE PASTE

Date paste is one of our favorite secret ingredients. Put a piece in almond milk for a creamier, richer texture; mix it with cacao powder to make instant truffles; or just serve it on a cheese board—it’s ridiculously versatile. Our favorite date company actually makes its paste using a meat grinder, to get an even consistency. If you’re planning on doing quite a bit of refined-sugar-free cooking, having a pound of date paste in your fridge, kept the way you would a pound of butter, is a great idea. It will always be ready and convenient to use.
MAKES 1 CUP
20 Medjool dates, pitted
1.Place the dates in a medium bowl, cover with hot water, and soak for about 5 minutes, until very tender and falling apart when squeezed between your thumb and forefinger. If the dates are extra tough, you may need to soak them longer.
2.Strain the dates and place them in a blender or food processor. Pulse until the dates are blended but not completely smooth.
3.Transfer the date paste to a sealed glass jar or wrap tightly in plastic wrap; refrigerate for up to 3 months.
