4
Simplicity
The idea of simplicity in ikebana dates back to its roots as three-stemmed floral offerings at Buddhist altars (see A Short Primer on the [Long] History of Ikebana), and the practice has evolved as a contemplative art in which few ingredients are used and subtleties like a branch’s sculptural line are emphasized. What’s not present in the arrangement is as important as what is; there is a disciplined striving toward less.
The projects in this chapter invite you to explore pared-back presentations that demand a deeper look. Take Winter Whites , a two-ingredient arrangement exploring the duality of winter as represented by a soft, bleached white fern and a rugged curly willow branch. The ingredients may be straightforward—their dramatic juxtaposition is anything but. In Glass, a striking glass vase allows three branches to be visible both above and below the water, showcasing their full form.
It can be easy to trivialize what is simple, to assume it is rustic or quaint and to take it at face value. But simplicity is often a call to contemplate an arrangement’s greater meaning. The less external visual information that is offered, the more space is opened for personal storytelling. It’s an opportunity not only to capture the beauty of the flowers themselves but also to invite viewers to look at things in a new way.
Intertwined
Japanese Wisteria Branches
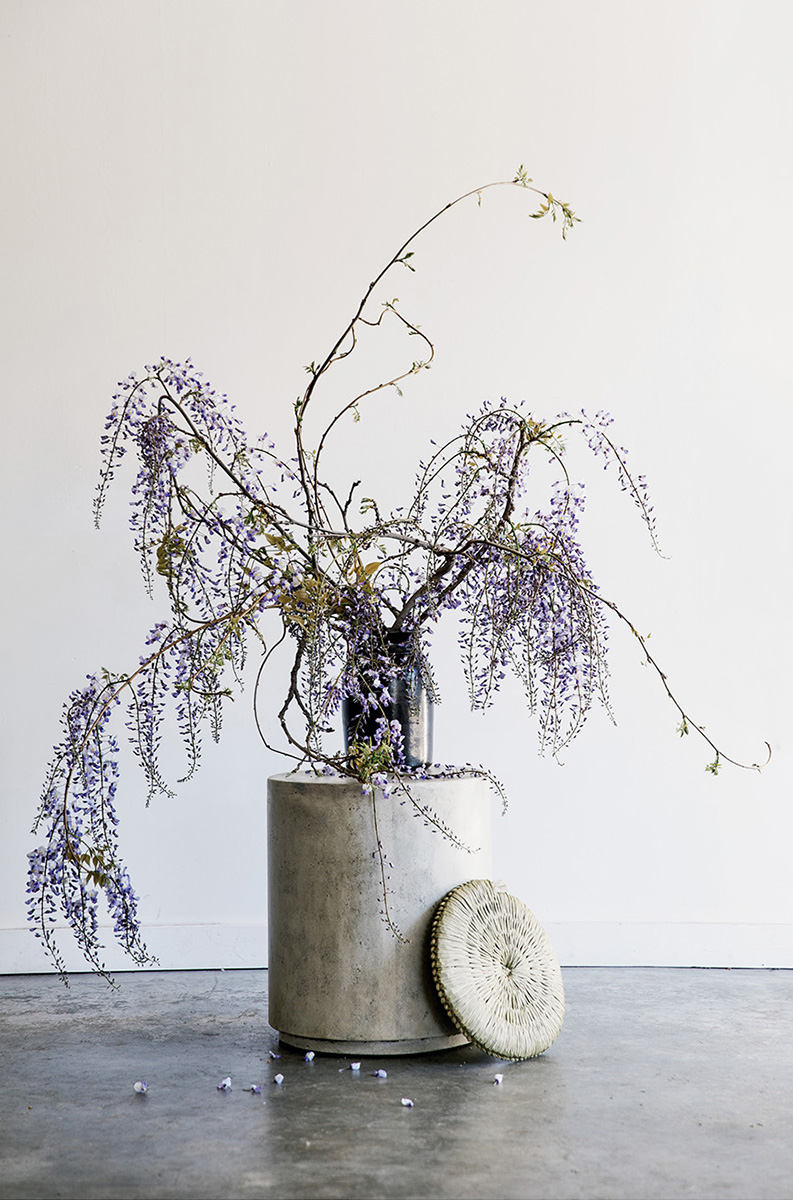
When wisteria season hits San Francisco, these magnificent flowers create mounding purple canopies on old Victorian homes throughout the city seemingly overnight! Wisteria’s defining characteristic is its sheer scale. To celebrate its innate grandness, we constructed a large arrangement using only Japanese wisteria. The branches were cut just as the racemes (or flowers) were beginning to drop and new leaves were starting to unfurl. At that precise moment in the plant’s maturation, we can behold both the soft lavender and purple blooms and the peachy golden green foliage. Nature’s colors are truly breathtaking in spring.
Creating the Arrangement
Arrange the Japanese wisteria as you encounter the plant in nature: spiraling about itself and scaling vertiginous heights. Mirror the natural clockwise twining of the stems (see page 141) by arranging them so that they rise and drape to the right, creating a pinwheel-like motion around the vase. A large, heavy vessel is needed to support the weighty branches. Be sure to place the arrangement high enough from the ground, with ample space on all sides: For the natural elegance of wisteria to be expressed, its branches need to hang in midair with plenty of room below for the flowers to drape without obstruction.
1. Fill a large, heavy urn with water.
2. Insert a branch of wisteria leaning to the right. Add a long branch on the left to balance the first. Let its stems spill out of the vase and cascade toward the ground.
3. Arrange a curved branch so that it faces front, breaking the line of the edge of the vase.
4. Select a tall, arching branch with long arms and no blooms to be the tallest point of the arrangement. Position it off center, to the left.

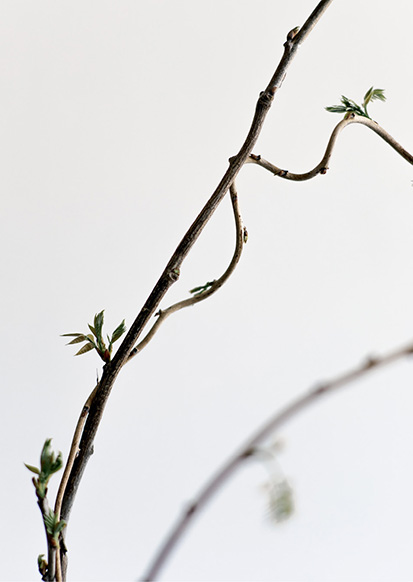
Keep the individual stems as long as possible. If cut too short, these beauties lose their essential “wisteria-ness,” the very thing that makes them elegant and breathtaking.
Arranging with Wisteria branches
Consider each branch carefully before cutting your wisteria. Choose stems with more densely clustered racemes for the center of the vase, to build volume; those that have fewer racemes but a more delicate, graceful shape are perfect for adding softness around the edges. (It’s the negative space around these daintier stems that allows the viewer to appreciate the unique markings, coloring, and delicate shape of the flowers on the racemes.)
Once detached from the plant, wisteria branches can look limp and lifeless. All is not lost: Just re-cut the ends and plunge the branches into a deep bucket of water before arranging. Selective trimming and twining (or untwining) of the stems can help create volume and softness once it’s time to assemble.
All wisteria climb by twining their stems around any nearby support. Japanese wisteria, shown here, twines its stems in a clockwise motion. Chinese wisteria, on the other hand, twines in a counterclockwise motion.
Dogwood
‘Cloud Nine’ Flowering Dogwood Branches
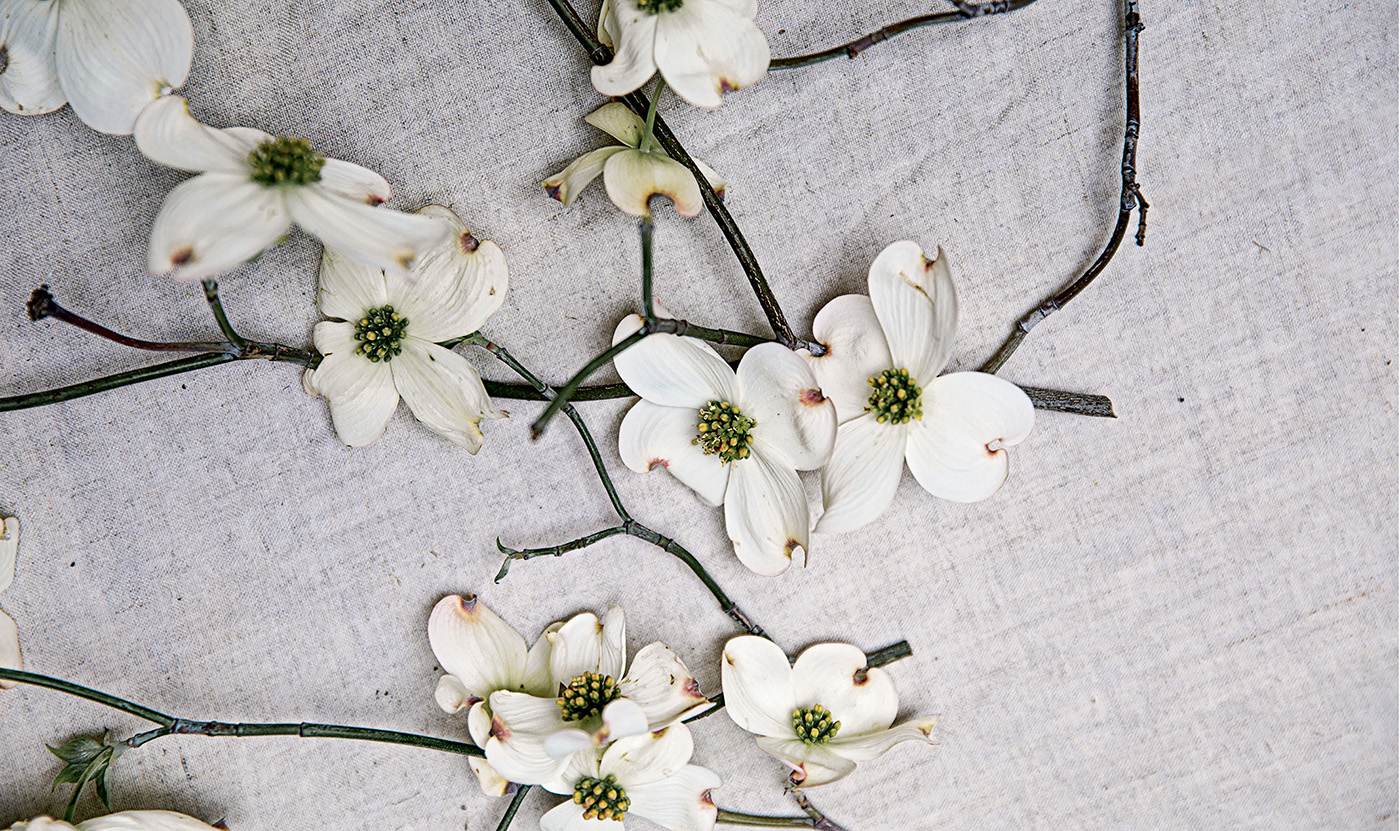
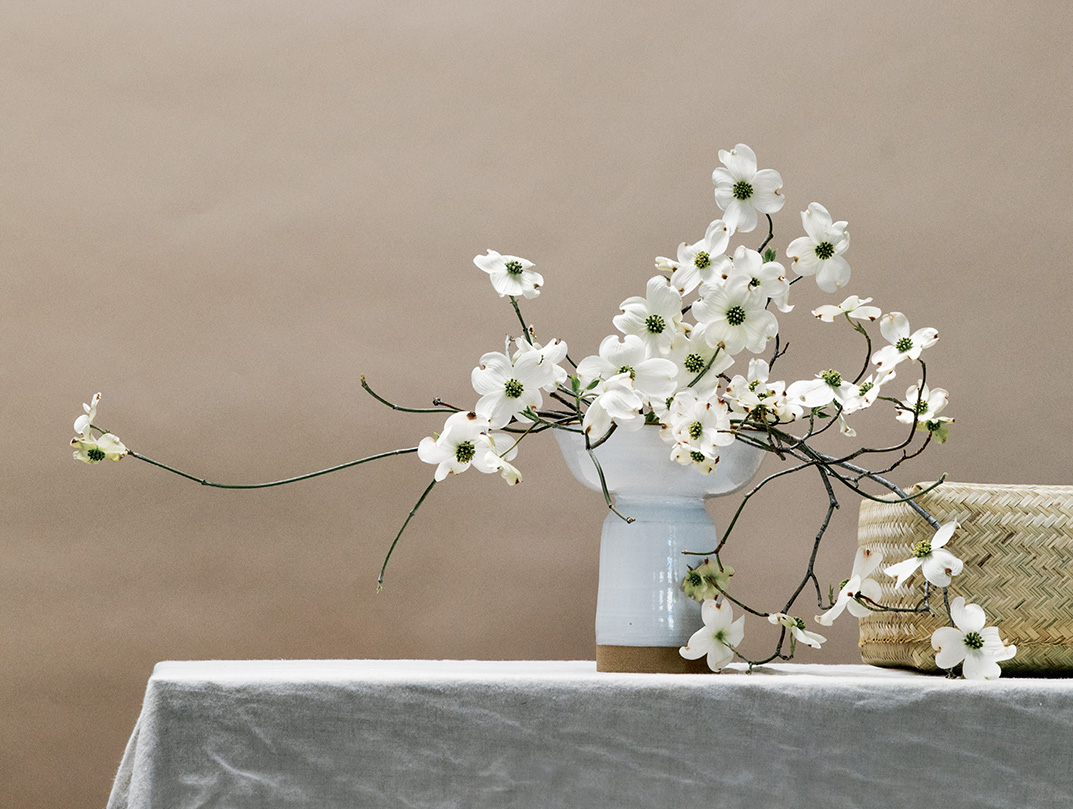
As a subject, flowering dogwood is multifaceted: It contains the potential to appear heartbreakingly tender and bare (when displayed as a single stem with one wispy flower), but also, thanks to how densely it grows, it can be arranged in a way that feels lush and abundant. All of its contradictions and literal twists and turns got us thinking about how to manipulate the law of visual weight. Given that the eye is trained to see the center of an arrangement as an origin point—a safe, familiar zone—by positioning objects farther from that expected place, you imbue them with greater impact. In this composition, we distribute the mass of fuller stems off center, to the right side of the arrangement—creating a rich, over-the-top moment balanced by a single delicate stem reaching to the left. The dramatic distance between this solitary arm and the heavy cluster to its right gives the branch the power to counterbalance the visual weight, creating a dynamic arrangement from deceptively simple beginnings.
Creating the Arrangement
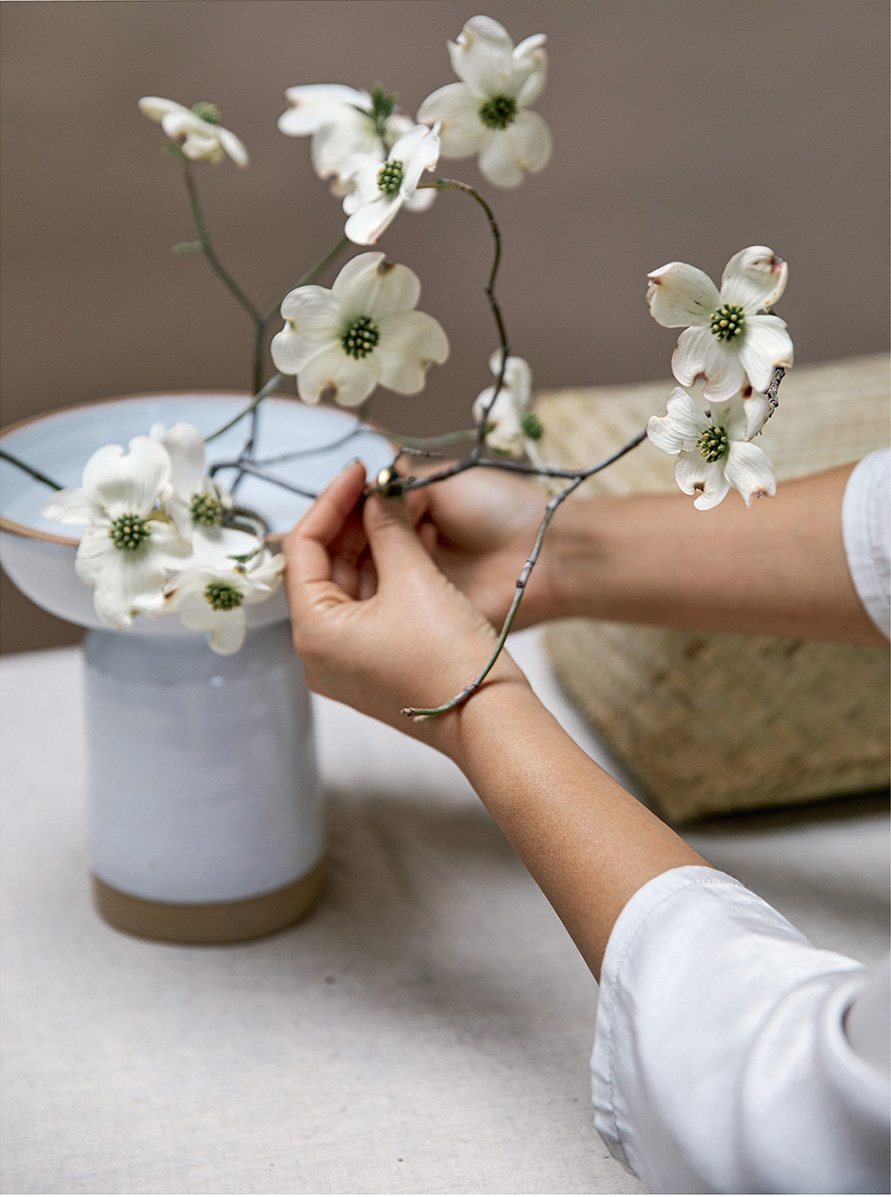
The way the exaggerated limbs of the flowering dogwood spill out of this pedestal vase adds tension, curbing any monotony one might have expected from a single-ingredient arrangement. Build the composition so that it is visually heaviest on the right side, counterbalanced on the left with a long, trailing branch with a single bloom.
1. Secure a pin frog in a vase. Fill the vase with water.
2. Lodge a short branch of dogwood just off center to anchor the composition. (If necessary, cut the branches vertically, about half an inch up through their centers, so that they can be secured to the frog.)
3. Arrange a branch to tilt toward the front, dipping past the rim of the vase. Then add a longer branch toward the front, building up layers and dimension within the arrangement.
4. Place a long, naturally curved dogwood branch toward the front right side, letting it spill onto the table.
5. Insert a tall branch behind the existing dogwoods to serve as the highest point in the arrangement.
6. Trim the offshoots from a long branch to feature the clean contour of a stem with one terminating blossom. Position it to extend out the left side of the composition to create balance.
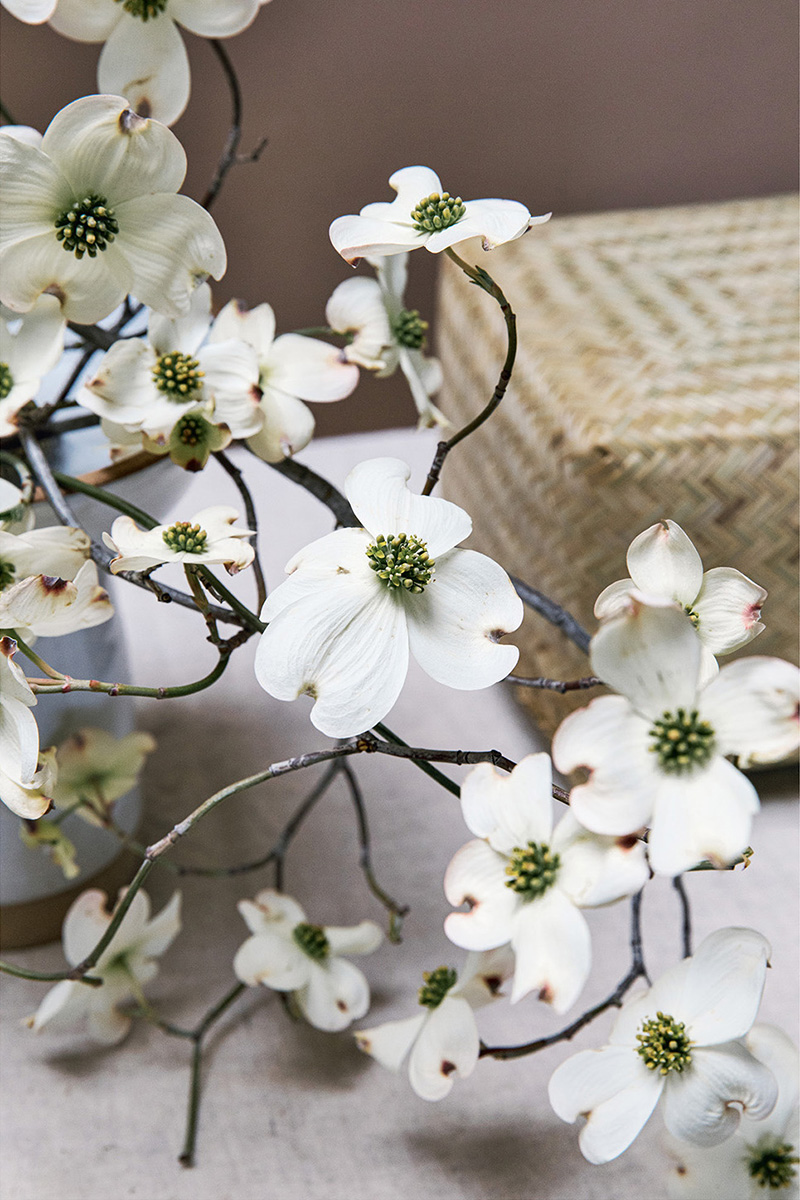
Those showy white “petals” are not petals at all! They are the bracts of the dogwood flower. The flower itself is the small green cluster at the center of the bracts.
Arranging with Dogwood Branches
We have access to many dogwood varieties in the Bay Area, and they each bloom in their own time; it’s always exciting to see what variety appears at the flower market each week. The cultivar we used in this arrangement is Cornus florida ‘Cloud Nine’, which flowers in April or May.
Woody dogwood branches will drink their fair share of water. Be sure to re-cut the branches once a day at a sharp angle to ensure that they continue receiving water. You can also add a drop of bleach to the vase to inhibit bacteria growth (which can make it hard for the branches to drink water).

The soft, creamy white of the dogwood blooms and the complementary vessel create harmony here. Working in a muted palette enhances the lines of the arrangement and keeps the emphasis on form.
Three Truths
Tuberous Nasturtium, Bear Grass, and Privet
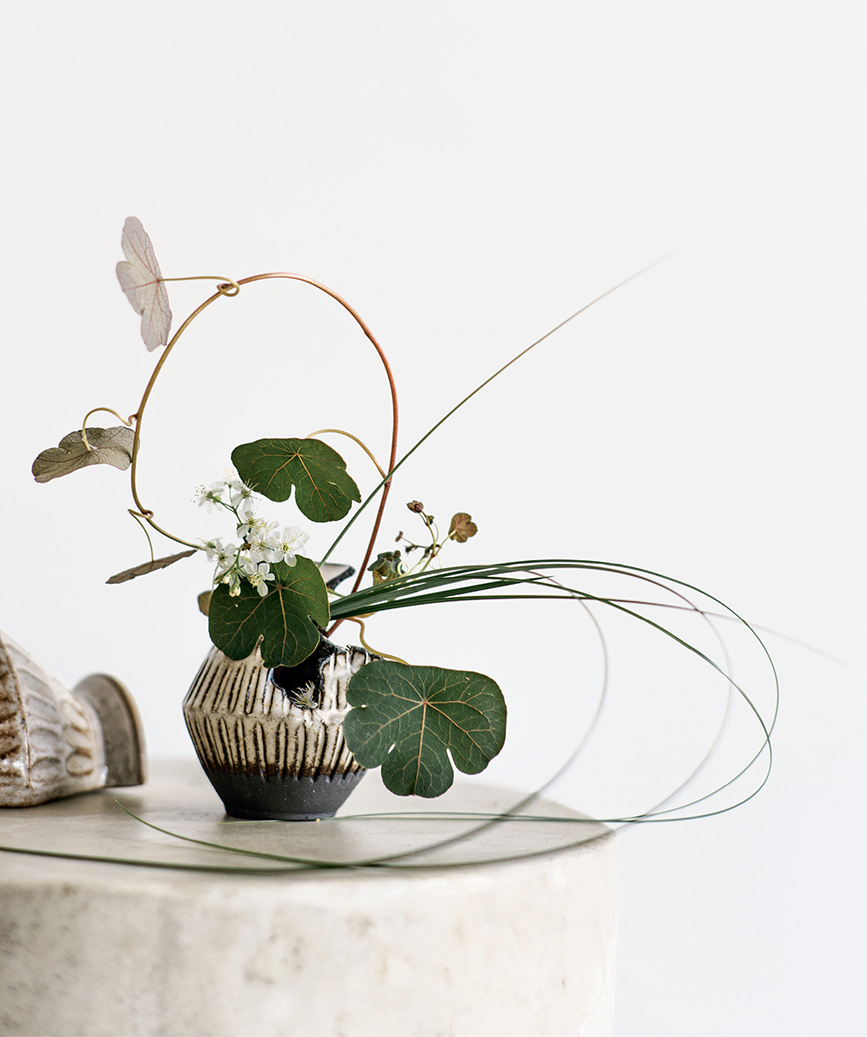
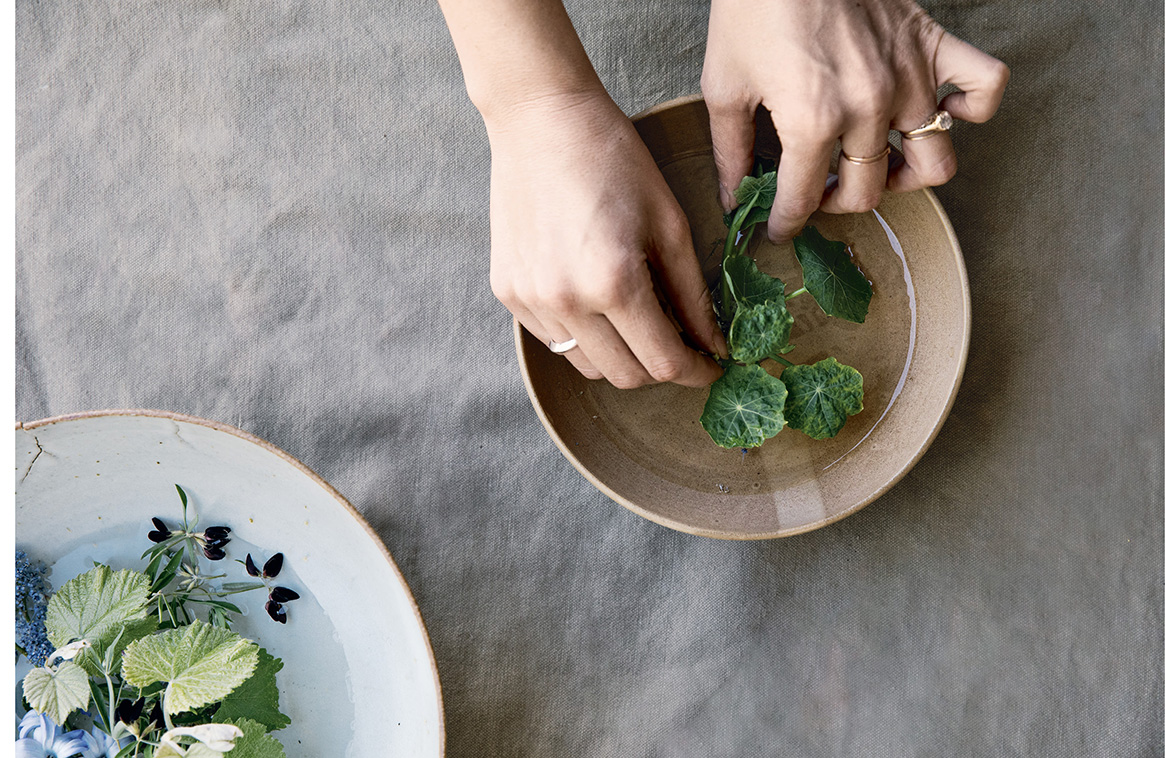
The idea of “perfect imperfection” is a guiding principle in the Japanese aesthetic of wabi-sabi. This diminutive vessel, a piece created by ceramicist Sam Lee, served as a jumping-off point for us to explore the concept of wabi-sabi as it relates to flower arranging. At its core, wabi-sabi can be both an aesthetic and a daily practice when we acknowledge three simple truths: all things are transitory, all things are incomplete, and all things are imperfect.
Nearly any vessel with a slight flaw can be used to similar effect, with flowers carefully arranged so as to decorate and even highlight its imperfection. We always browse the “second stock” inventory at pottery shops and home goods stores, looking for hidden treasures with charming irregularities. Local colleges’ studio ceramics sales are another hiding place for these gems.
Creating the Arrangement
Gently manipulate a tender cutting of nasturtium to provide the arrangement with both a focal point, due to its distinctive leaves, and a sense of movement thanks to the delicate arc of the vine. A knotted bunch of bear grass echoes and balances the dramatic sweep of nasturtium above, springing forth from the vessel en masse. The individual privet flowers, separated from their bunches and carefully arranged inside the vessel to float on the water’s surface, add a subtle grace waiting to be discovered, in line with the idea of yugen within the wabi-sabi aesthetic (see “The Principles of Wabi-Sabi,”). Using just three simple ingredients in moderate proportions results in an arrangement much greater than the sum of its parts.
1. Fill a small vase with water.
2. Cut a few privet blooms and let them float on the surface of the water.
3. Place a stem of nasturtium on the right side of the vase and loop the tip toward the left, creating an imperfect circle. Hook the top leaves around the stem to hold it in place.
4. Place a very short stem of privet blossoms just off center, to the left.
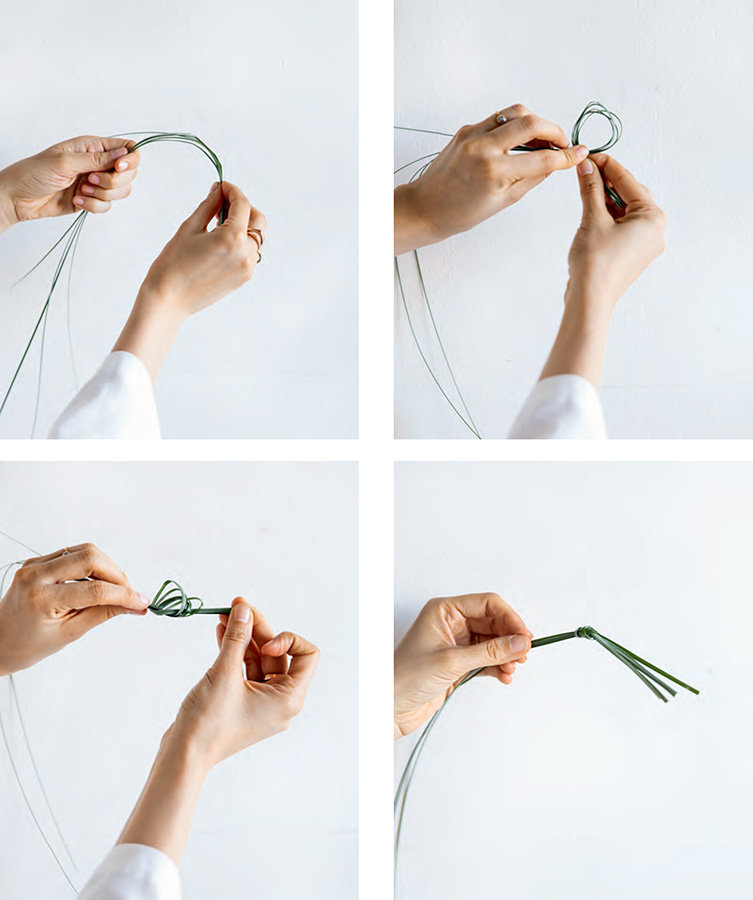
5. Hold five stems of bear grass in a bunch and knot the ends of the stems together (see “Get the Technique,”). Place the bunch of bear grass on the right side of the vase, looping out to the right and back onto the surface below the vase.
Wabi-sabi is a Japanese aesthetic based on the acceptance of what is imperfect and ephemeral. There are seven principles within this aesthetic that we find particularly relevant to flower arranging:
1. Kanso: Simplicity (represented here by the diminutive scale and few ingredients used in this composition)
2. Fukinsei: Asymmetry or irregularity (represented here by the vessel and the right-weighted shape of the arrangement)
3. Shibumi: Beauty in the understated (represented here by the hushed palette of the rhubarb-tinted nasturtium, the soft white privet blooms, and the earth-toned vase)
4. Shizen: Naturalness without pretense (represented here by grasses that are left to fall where they will)
5. Yugen: Subtle grace (represented here by the hidden privet flowers and gentle curve of the nasturtium stem)
6. Datsuzoku: Unbounded freedom (represented here by the bear grass splayed out from the vase)
7. Seijaku: Tranquility (represented here by the tiny floating flowers inside the vessel)
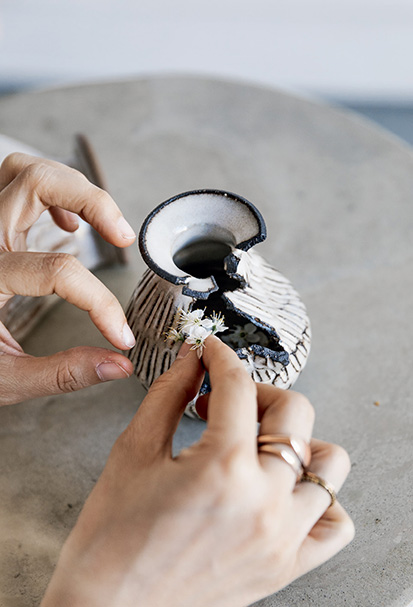
It seems as though an entire puzzle piece has been carved out of this vase. Tucking a few floating privet flowers inside draws the viewer in to explore the tiny arrangement at even closer range.
Rose Garden
Koko Loko, Red Drift, ‘Climbing Cécile Brünner’, and ‘Gourmet Popcorn’ Roses
Perhaps no other flower has captured the collective consciousness of the Western world the way the rose has. This floral ingredient is so familiar to us, so synonymous with notions of primness and romance, that it can border on the cliché. And yet the rose as most people know it is a commodity flower, a long-stemmed, uniform bloom divorced from its wild origins and heirloom varieties.
Because ikebana attempts to access the simple essence of flowers, for this arrangement we sought to portray the rose in its myriad naturally occurring forms—whether low to the ground and clustered (as in the Red Drift roses), climbing (‘Climbing Cécile Brünner’ and ‘Gourmet Popcorn’), or upright and bushy (Koko Loco).
Creating the Arrangement
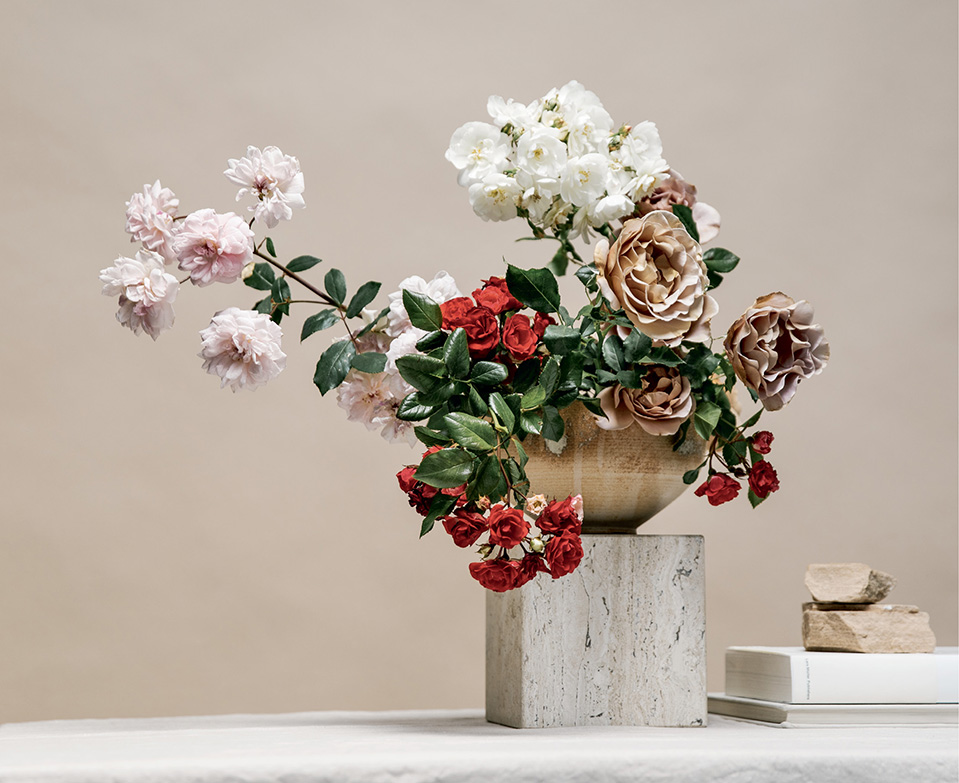
Four rose varieties are on display here. The large focal rose is Koko Loko, a coveted mauve-taupe garden rose grown by our friends at Rose Story Farm. The other varieties, which are foraged, include Red Drift ground-cover rose, ‘Climbing Cécile Brünner’ pink rose, and climbing ‘Gourmet Popcorn’ white rose. Different varieties of roses have unique growing habits: Some have just one flower to a stem, others have many flowers clustered on a single stem. Choosing rose types that all have a clustered habit allows us to create a color-blocked effect and disperses the visual weight across the entire arrangement.
Because the eye can become fatigued navigating all the intricate details of roses’ ruffled blooms, place just one type of large focal rose in the center of the arrangement, then select smaller supporting roses to feather toward the edges to give the eye a reprieve.
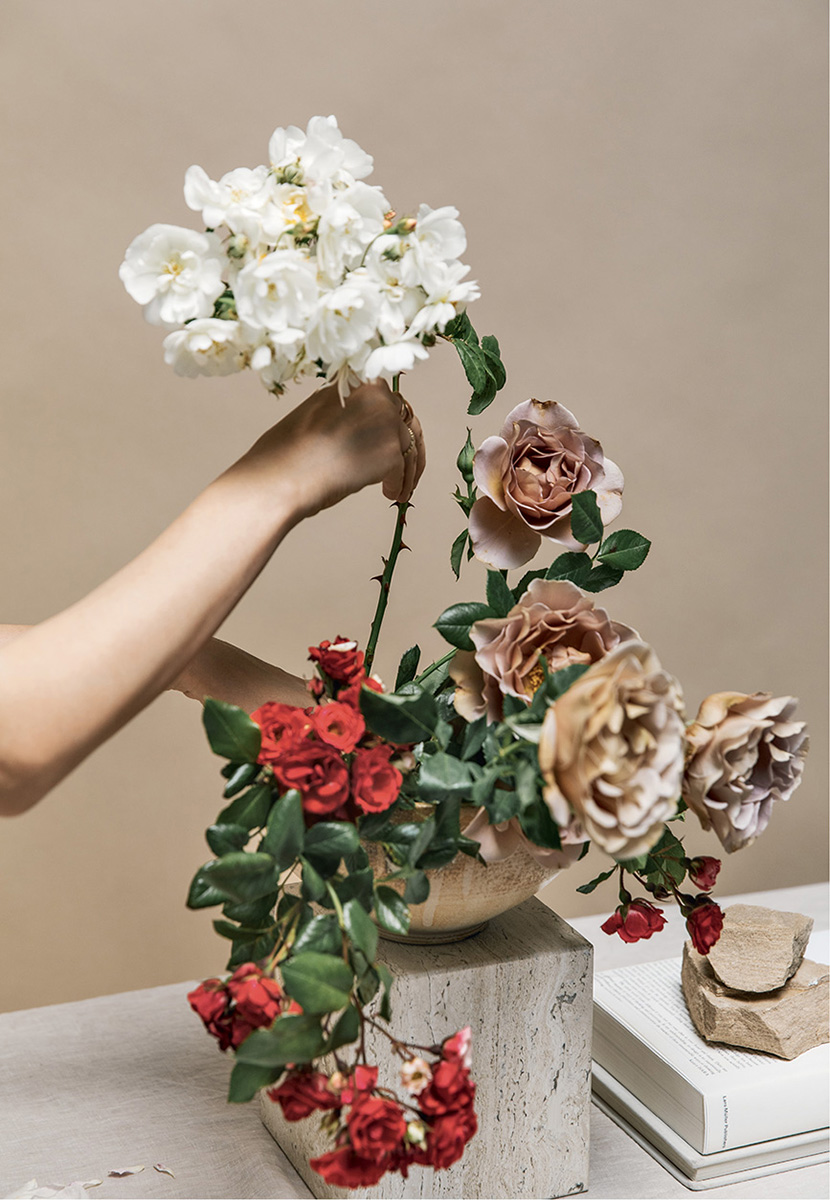
1. Secure a pin frog in a large bowl. Fill the bowl with water.
2. Begin with three stems of Koko Loko rose. Anchor the first close to the frog, with its bloom facing you. Stack the second right above the anchoring rose, again facing you. Lean the third over the lip of the bowl, facing right.
3. To create another layer of dimension, add a longer stem of Koko Loko in front of the first level of roses to reach toward you. Place a second long Koko Loko behind the roses you have already incorporated, pointing it slightly to the right.
4. Now, working with the Red Drift roses, position a long stem on the right side of the arrangement so that it spills out of the bowl. Place another long stem to the left of the Koko Loko roses and let it arch out of the bowl, following its natural shape. Add a shorter, bloom-heavy Red Drift near the lip of the bowl to ground these roses.
5. Secure a long stem of ‘Gourmet Popcorn’ to the frog off center to the right, with the stem facing inward to the left. This will be the highest point of your arrangement.
6. Add a short stem of ‘Climbing Cécile Brünner’ on the left, leaving negative space in the middle of the composition. Finally, place a long stem of ‘Cécile Brünner’ to the far-left side, almost parallel to the ‘Gourmet Popcorn’ rose, facing the blooms toward you.
We spent a lot of time looking for the perfect transitional color for this arrangement—a bloom that could bridge the contrasting hues and clashing undertones of the other rose varieties used. What makes the Koko Loko rose a fantastic fit is that it reads as both cool and warm, because the edges of the petals are a pale lavender that shifts to a honey or butterscotch color in the center. The warmth connects to the ‘Gourmet Popcorn’ roses, which are a buttery off-white with golden centers, while the cool undertone guides the eye to the frosty pale pink ‘Climbing Cécile Brünner’ roses without skipping a beat. The Koko Loko is also a few values darker than the pastel roses, giving the overall palette richness and depth.
Arranging with Roses
Store roses in plenty of water and keep any foliage above the waterline. Cutting rose stems on a sharp angle opens up more surface area for water absorption, extending the life of your blooms (the same goes for most flowers). Garden roses’ buds will continue to open in the vase, so long as the stem was cut after the sepals (those green, leaf-like guard petals surrounding a rosebud) have dropped.
Roses’ thorns are a natural pest deterrent. They are not necessary once roses are cut, so you may decide to remove thorns along the rose stem for ease of arranging. Do this carefully with a sharp knife or with clippers, making sure not to cut the main stem. (Gloves are recommended, especially when de-thorning garden roses that have short, sharp, and dense thorns.)
Many florists remove the guard petals that surround the rose, as they tend to crinkle up or appear shredded. We often elect not to remove the guard petals, as their inclusion adds a certain wabi-sabi authenticity to the arrangement.
Red Drift and ‘Climbing Cécile Brünner’ roses are typically landscaping plants and not commonly found as cultivated cut roses. The Koko Loko rose, on the other hand, was bred for disease resistance, repeat bloom, and a long vase life.
Miniature Worlds
Nasturtium and Grape Leaves, Hyacinth, California Lilac, Angel Vine, White Bleeding Heart, Chervil, and Foraged Flowering Weeds
We took great pleasure in making these tiny, intimate landscapes inspired by Japanese gardens. Their diminutive size meant that every ingredient had to be carefully considered. A single poorly chosen leaf might have overwhelmed the entire composition, stripping these tiny meditations of their grace.
Much of this arrangement lives below the lip of the bowls, compelling the viewer to peer over and in. It might not capture our attention from across a room, but this more intimate viewing affords us a moment of quiet contemplation. We see this principle at play in Japanese gardens, which are designed to engage and be engaged with—whether you’re contorting your body to fit through a small arch or carefully tiptoeing along the perimeter of a rock garden. Finding moments to commune with and humble ourselves to the natural world feels more vital now than ever before.
Creating the Arrangement
Lots of tiny textural elements are used to create these miniature floating meditations. Look for ingredients that would be passed over or lost in larger arrangements. The ratio of blooms to greenery is also important: Be careful not to overwhelm the composition with too many flowery focal points. Instead, rely on the structure of tender new leaves and stems to create gentle movement and rhythm.
1. Secure a pin frog in each of two different-sized bowls. Fill the bowls with water to one-third their height.
2. Begin with the larger bowl: Secure grape leaves on either side of the frog. Tuck flowering weeds in between the grape leaves, clustered toward one side.
3. Insert a stem of California lilac to the left of the flowering weeds. Trim down a hyacinth to just four florets and place it to the right of the lilac.
4. Moving to the small bowl, cut a single nasturtium leaf and secure it off center in the frog to ground the arrangement. Add two stems of nasturtium leaves, concentrated in one half of the bowl. Arrange the leaves so that they peek slightly out of the bowl. Tuck a stem of angel vine in the other half of the bowl, weaving it through the nasturtium.
5. Position a very short stem of California lilac in the center of the bowl, and cluster two more lilacs to one side.
6. Add the hyacinth florets: one on each side of the bowl, one under the nasturtium leaves, and one under the California lilac.
7. Position a short stem of bleeding heart upright in the center of the bowl, next to the California lilac. Then add one stem of chervil diagonally across from the California lilac.

Leaves (whether nasturtium or grape) serve as the foundation of each bowl, their broad shapes grounding the entire composition. As they are the largest single ingredient in the bowls, trim them carefully so they don’t overwhelm the accent flowers.

Gentle handling is especially important with ingredients that are so small and delicate. Consider using a pair of tweezers to pinch off the hyacinth florets and to make adjustments to the placement of the components within the bowls.
Glass
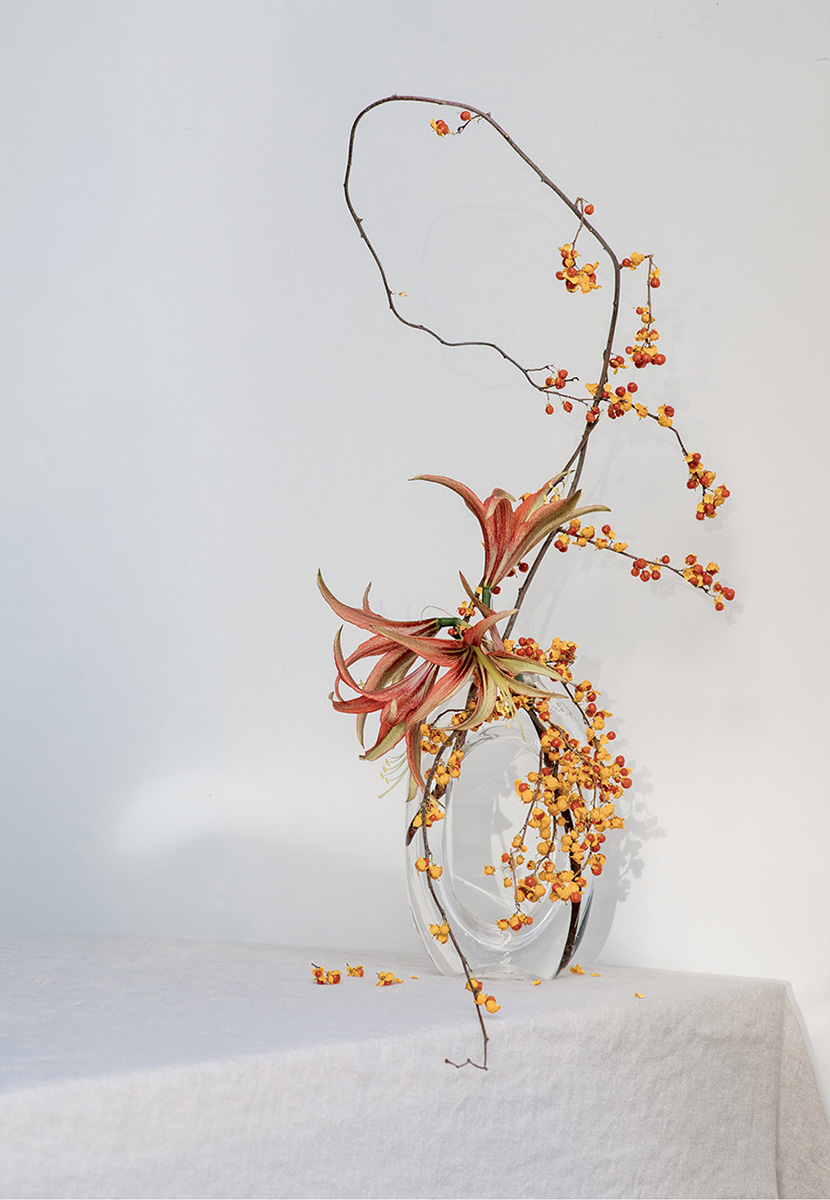
‘La Paz’ Amaryllis and Bittersweet Vine
There is something decidedly bold about complete transparency—it can be a quiet, confident way to say something emphatically. And so we selected a vintage glass vessel for this project, allowing the arrangement to be viewed in its entirety. Paring down the ingredients to just two—‘La Paz’ amaryllis and bittersweet vine—allows us to focus on their essential nature: dynamic, powerful, and dramatic.
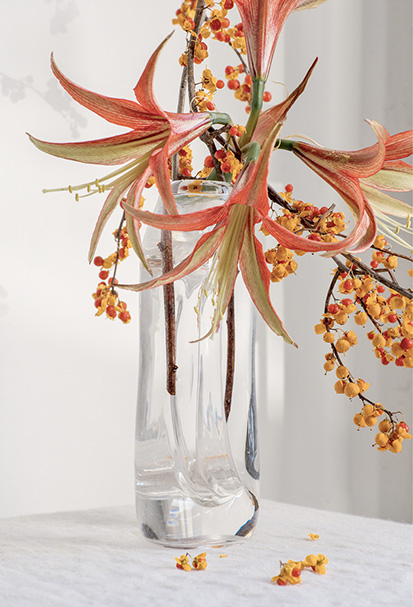
The unusual shape of the vase, with its narrow mouth and sloped sides, informs the composition. The stems’ placement echoes the gentle curves of the vase and extends the visual lines. The amaryllis, hugging the bottom lip of the vase, draws the eye in and upward toward the loop of bittersweet above. A second bittersweet vine sweeps back down the vase and off the table. Mirroring the form of the vase with the flowers keeps the overall shape of the arrangement in harmony.
Creating the Arrangement
Visually, the heaviest moment in this arrangement should be at the mouth of the vase. Cuff the left side with a single stem of ‘La Paz’ amaryllis, with its many flowering heads. To balance this, allow the bittersweet vine to sweep down the right side of the composition and onto the table. Add another bittersweet vine, formed into a loop, to echo the cutout in the vase and preserve negative space within the arrangement.
1. Fill a clear glass vase with water.
2. Cut a single stem of amaryllis on the bias so that it rests on the mouth of the vase at an angle, allowing the flowering heads to sit on the left side of the vase lip.
3. Add the heaviest bittersweet vine, draping it along the right side of the vase.
4. Create a soft loop with a long, thin, and tender bittersweet vine (see “Get the Technique,”); wrap the vine tendril around the stem to hold the loop in place. Insert this stem into the vase along the right side, leveraging the other two stems for stability.
5. Position one final graceful bittersweet vine toward the front of the vase to trail down onto the table.
This particular amaryllis variety (Hippeastrum cybister ‘La Paz’) is one of our favorites for its chameleon-like ability to cool down or warm up an arrangement.
Color Theory
On a traditional six-color wheel (featuring red, orange, yellow, green, blue, and purple), the colors adjacent to one another—greens, blues, and purples, for example—create a visual unity when used in concert. These combinations lend a sense of order and stability to an arrangement. Colors that are opposite each other on the six-color wheel—green and red, blue and orange, purple and yellow—are called complementary colors, and they represent high contrast. These pairings often feel discordant, even chaotic. Harmony is achieved when the combination of colors is visually stimulating but neither overpowering (too contrasting) or underwhelming (too similar).
To create a simple yet dramatic color story, work within a small section of the color wheel. Here the colors go from the earthy iron oxide red of the amaryllis to the saturated cinnabar red of the bittersweet. The bittersweet vine discards its orange hulls, revealing a stunning annatto red. In this composition, the frosty lime throats of the blooms are the perfect foil to the spicy reds and oranges. One of our best tips for creating arrangements that feel naturalistic is using color in a ratio of 90 percent warm to 10 percent cool.

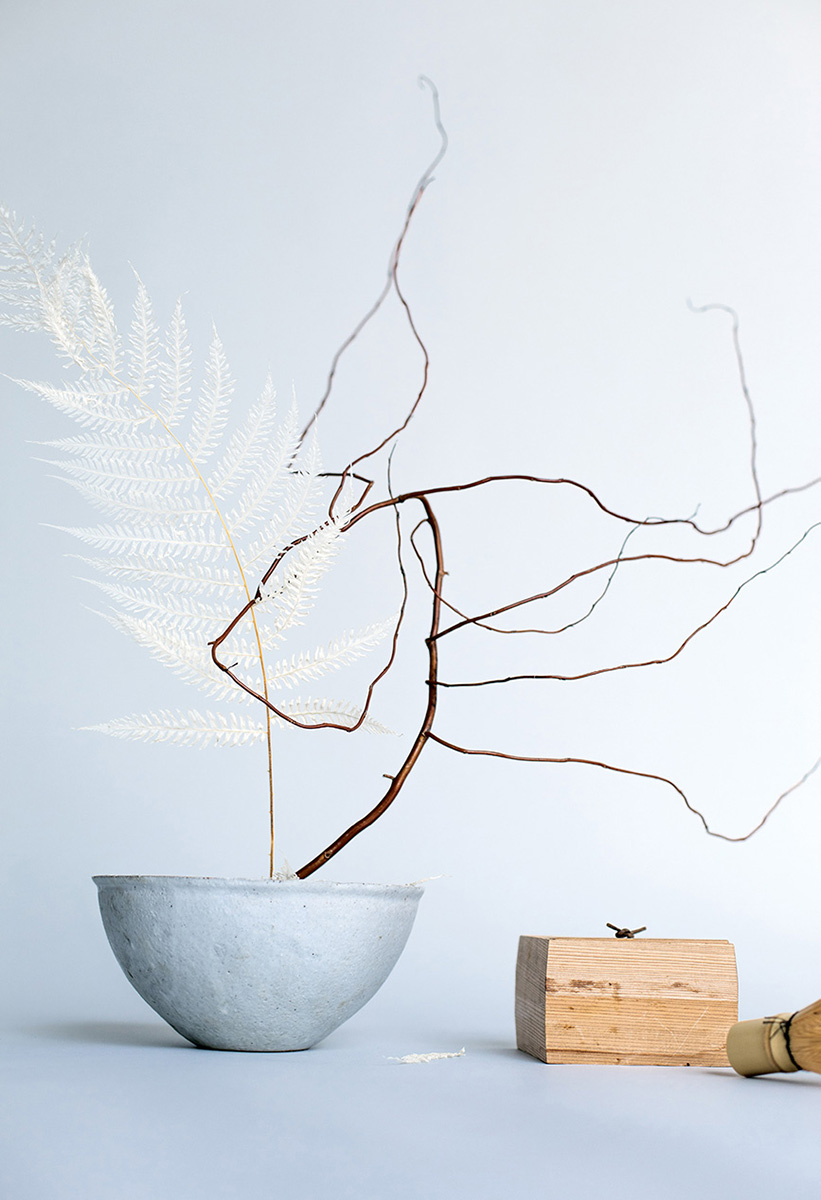
Winter Whites
Bleached Japanese Fern and Dried Willow
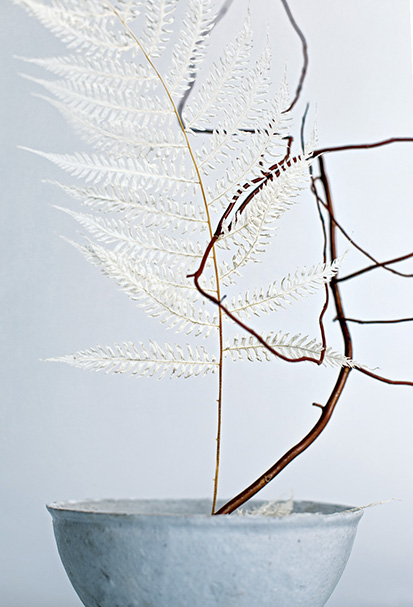
Choosing ingredients for winter arrangements is fraught with peril. The holidays span just a week or two, but the season is three months long. Why, then, are all the available materials flocked, glittered, or both? Add to that the glut of imported flowers during the winter, when local fields are dormant, and it takes more than a little restraint to honor the essence of this season of solitude and peacefulness.
For this composition, we work with one stem each of bleached Japanese fern and dried willow. The delicate bleached fern speaks to the fragility observed in winter and evokes the peacefulness of a snowfall. The dried willow branch, in contrast, honors the ruggedness of the season and recalls the old growth of bare trees. It serves as a reminder that while winter appears to be a quiet and contemplative time, the natural world is fighting a battle of survival.
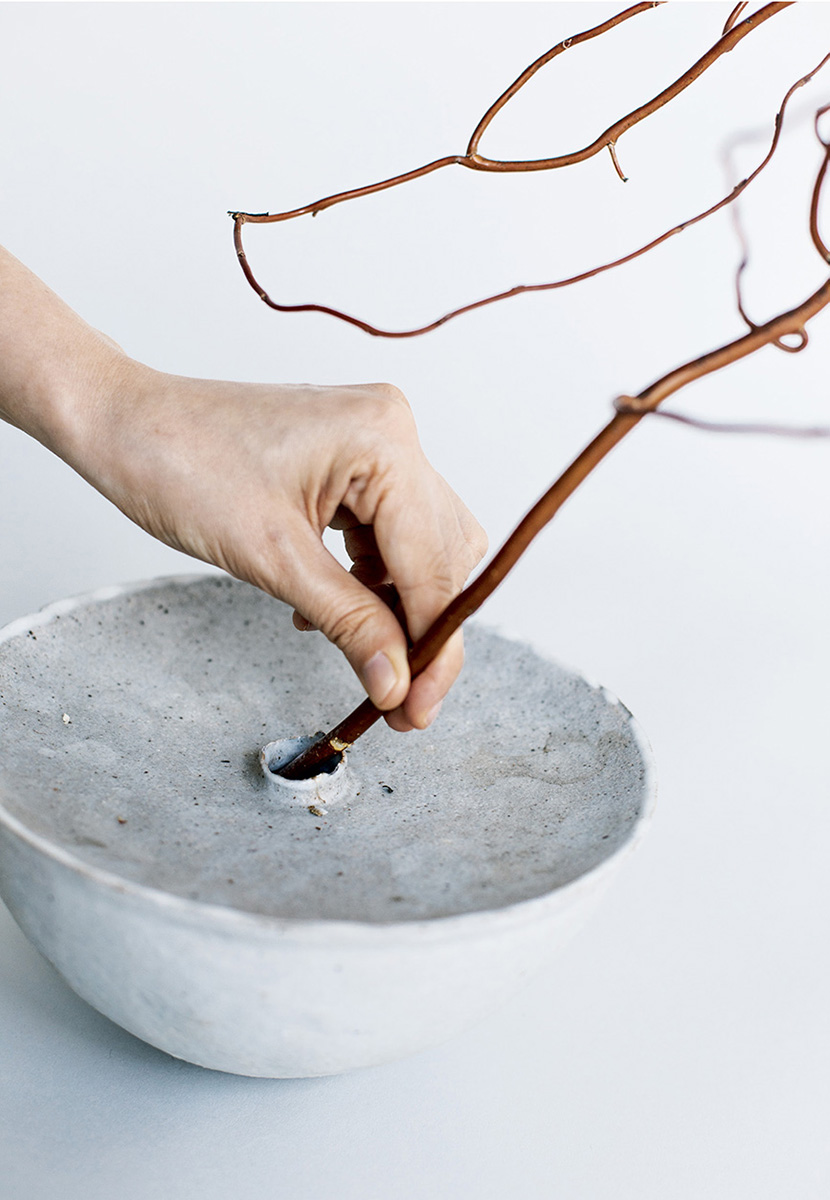
Creating the Arrangement
Two impressions of winter with two stems: a delicate fern frond to the left, and a wild, gnarled willow to the right. The bleached Japanese fern and willow used here are both easy to find online through dried floral retailers (see Resources for sources). The willow may catch you by surprise—if not properly dried, it can yield new green growth when kept in water and in a warm corner!
The bowl we chose has a small mouth at the center, which allows it to support fewer stems without the use of a floral frog. But if you have a ceramic bowl and frog, use the two together!
1. Fill a bowl with either water or sand. (The ingredients need not be kept in water, but the addition of water or sand will help stabilize the arrangement.)
2. Score the willow branch to create a notch that can sit along the lip of the vase (see “Get the Technique,”). Place the notched branch in the vase, allowing the wispy willow branches to fly out to the right.
3. Balance the willow branch with a single stem of bleached Japanese fern flying out of the vessel to the left.
Odd numbers tend to harmonize visually, so being confronted with just two ingredients, especially ones that are this contrasting and visually distinct from each other, inspires the viewer to take a longer look at each.
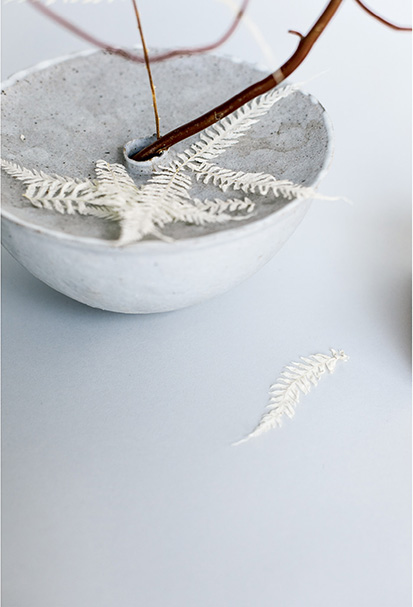
The individual lacy fronds of the fern remind us of the first snowflakes of the season, so we opted to “dust” the entire composition with a botanical snowfall.
Brushstrokes
Lady’s Slipper Orchid, Sweet Peas, and Troll Hair Grass
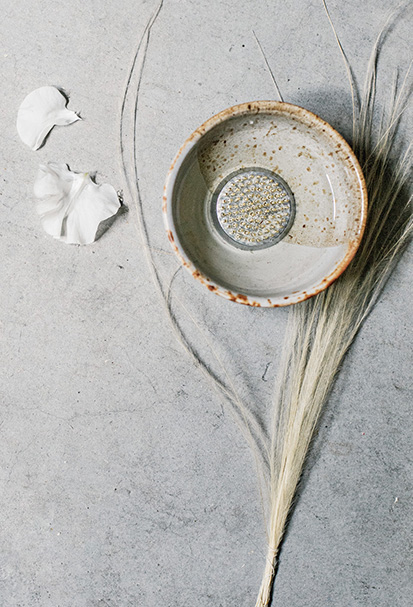
This diminutive arrangement is a departure from the natural landscapes often explored in ikebana flower arranging. Instead, we’ve created an abstract design meant to evoke painterly swipes, dashes, and splatters of color. The strong, emphatic line of troll hair grass looks like a heavy brush being dragged across a canvas. White sweet peas conjure the swirling motions of paint being pulled away from the center of the painting. And a painter’s careless splatters appear in the freckles of the lady’s slipper (Paphiopedilum exul) orchid and on the cup serving as a vase.
The use of light is a central element in any piece of art, and this composition is no exception: The glossy lady’s slipper orchids radiate as if lit from within. The sweet peas, in contrast, seem to swallow the light, tucking it away between their ruffles. And the troll hair grass, like many dried elements, has an ethereal way of scattering the rays so that it looks like spun gold silk.
Creating the Arrangement
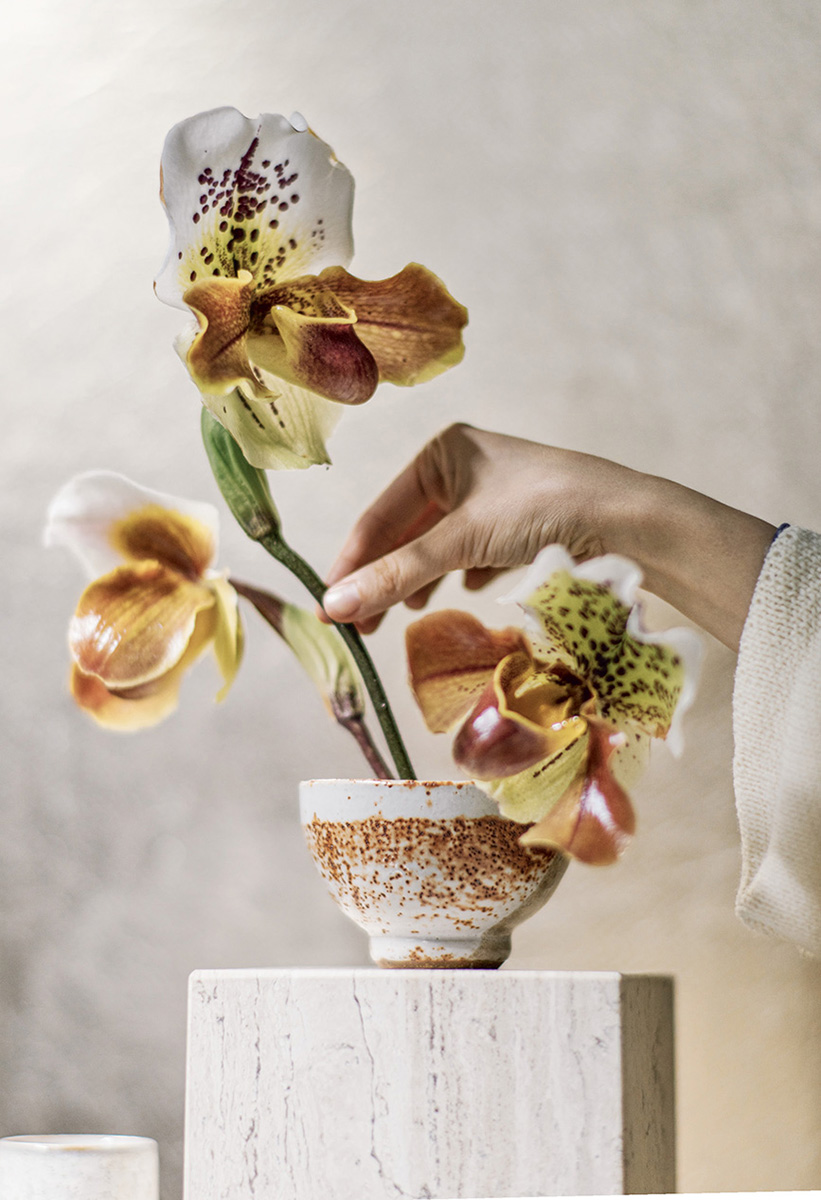
The small vessel used here makes the flowers seem oversize in comparison. In reality, the arrangement features very few stems, all cut short so that they rest fairly closely to the cup’s edge. The cup seems to merge with the orchid draped along its lip, offsetting the larger and taller orchid stem along the top-left corner, and adding visual balance to the arrangement. A smaller-scale composition allows the viewer to experience the simple brushstroke-like movements across the composition in more detail.
1. Secure a pin frog in a small cup, slightly off center to the right. Fill the cup with water.
2. Using three orchid stems of different lengths, anchor a short stem into the frog with the flower head resting on the vessel’s edge. Add a slightly longer orchid facing left, and insert the tallest stem facing forward.
3. Arrange the sweet peas so they feather out behind the orchids and to the right, creating the highest point in the arrangement.
4. Arrange a bundle of troll hair grass starting at the center and sweeping to the left side of the composition, so that the grass floats in front of the middle orchid. Place a second bundle next to the cup for visual balance.
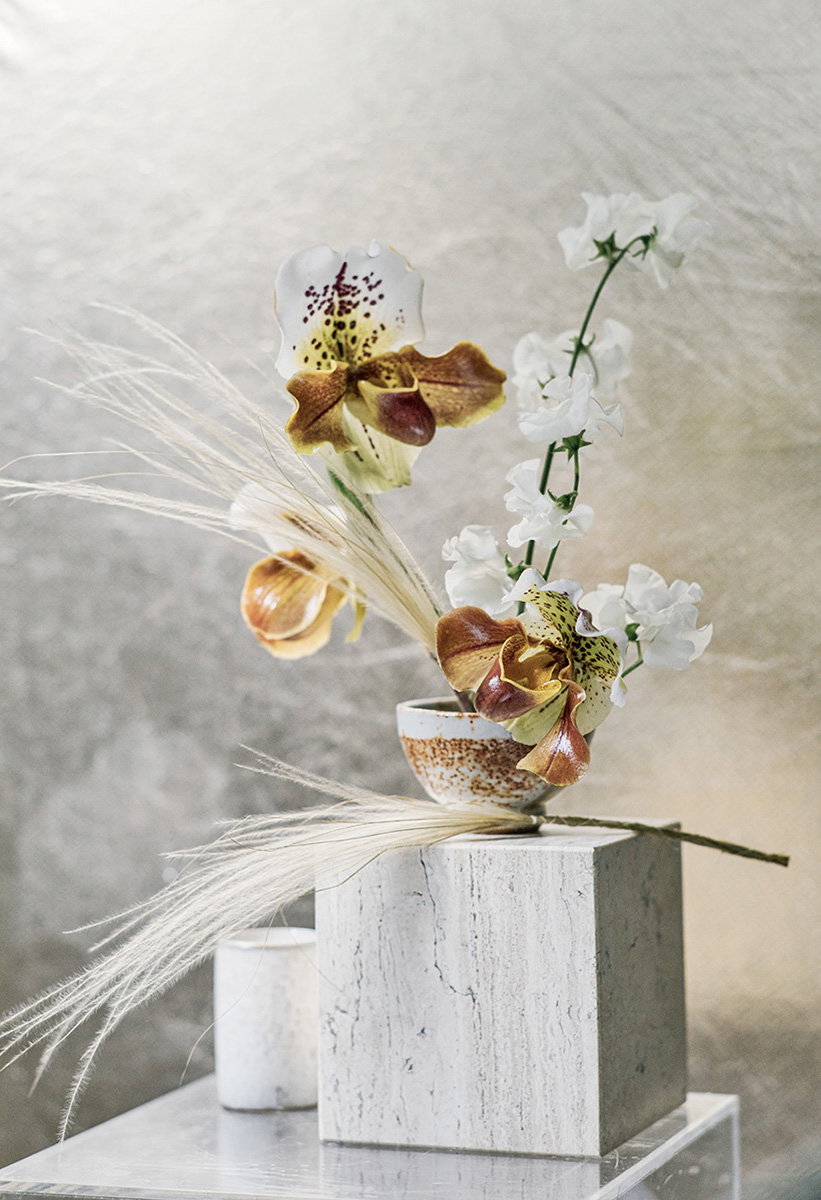
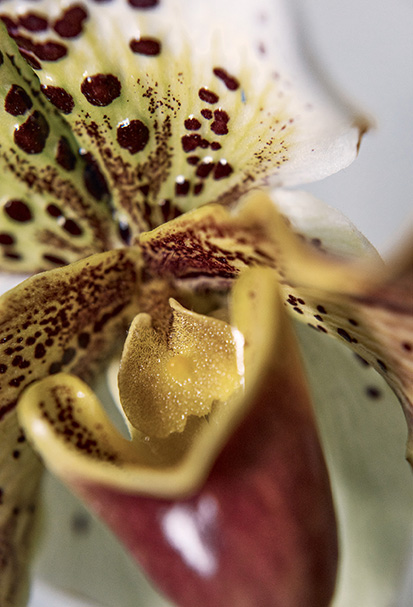
The details on the petals of this lady’s slipper orchid are mesmerizing. Little “paint splatters” travel from the faces of the orchids onto the surface of the vase, creating a beautiful continuity. The entire composition becomes the canvas.
Placing the floral frog slightly off center provides greater stability for the entire arrangement, allowing you to create a top-heavy, left-weighted design without fear of it tipping over.
Lady’s slipper orchids can be clipped from plants or purchased as cut flowers. When precut, their stems are often short (no more than six inches), so the best way to store them is upright in a wide, water-filled shallow vase or bucket. You may want to line the lip of the vase with foam padding (orchids are often shipped with this) to protect the delicate, waxy flowers from any bruising or rubbing that might discolor them.