Over time, the removal of crops from the land slowly depletes the soil minerals, especially phosphorus, so you need to add nutrients in order to keep your soil healthy. Adding nutrients in the form of organic matter also helps to support more soil organisms, which are important for making nutrients available to plants.
It is particularly important to look after the soil on your heavily cropped vegetable beds and in the polytunnel or greenhouse, where year-round cropping can take a heavy toll. Organic matter can be added as compost or manure, as well as by growing green manures. Compost in particular is key to a healthy soil, and this chapter describes the composting process and methods in detail. It also discusses crop rotations: the system of growing crops in different beds from one year to another, rather than in the same bed year after year. This traditional approach has long been used to prevent the build-up of disease and pests.
It’s very easy and tempting just to add artificial fertilizers to your soil to provide nutrients. Artificial fertilizers contain nutrients in a form that is readily available to plants, for example as nitrates, so when they are added to the soil they are taken straight up by the plant roots, bypassing the soil completely. It’s no surprise that over time, soil organisms and soil organic matter decrease and the soil becomes simply a medium to anchor the plant roots. As a result, it becomes necessary to add artificial fertilizer every year.
A much better way is to feed the soil itself, by adding organic matter. Growing green manures – plants grown as a ground cover and later incorporated into the soil – is also beneficial. These all provide food for soil organisms, especially the decomposers such as bacteria and fungi. There are other benefits too: a soil rich in organic matter will retain more water and nutrients and have a rich and diverse soil food web, making nutrients available to plants and helping to suppress disease.
All crops take up nutrients from the soil as they grow, so those nutrients must be replaced.
You can use a range of organic materials to boost fertility, such as homemade garden compost and various farmyard manures. Composts and manures vary in their pH and their nutrient content.
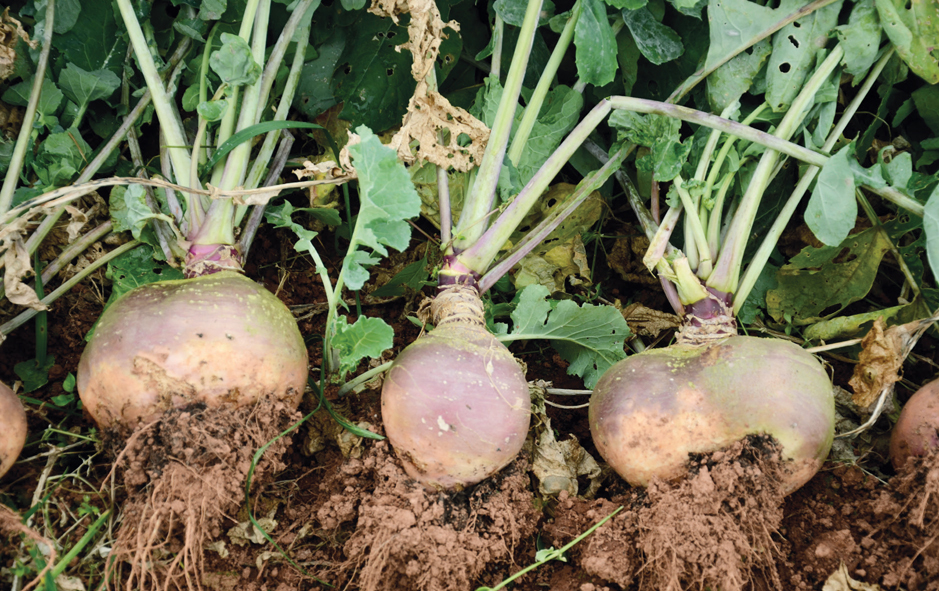
Fresh animal manure has much of its NPK (nitrogen, phosphorus, potassium) content in readily available form, so great care should be taken if it is used on the plot. The abundance of nutrients in a fresh manure can cause more harm than good, as the high nutrient levels can depress the activity of microorganisms, and the soluble nitrogen is readily leached from the soil and may even pollute nearby watercourses. It is far better to use a well-rotted manure, which will help to build up soil fertility over a long period of time, but will not feed the plants directly. The description ‘well-rotted’ indicates that it has been allowed to age and break down, and can be safely added to soil.
Composts are made from a mix of organic materials. They have been stabilized (broken down into new compounds that may be harder to decompose, and some of these become bound to the soil particles), so there is more dry matter. The percentages of NPK in readily available form are much lower, so there is much less risk of nitrogen leaching. Composts tend to be a good source of potassium and phosphorus, providing a longer-term supply of nutrients. They are bulky, so are usually added as a mulch, or dug in as a long-term soil improver.
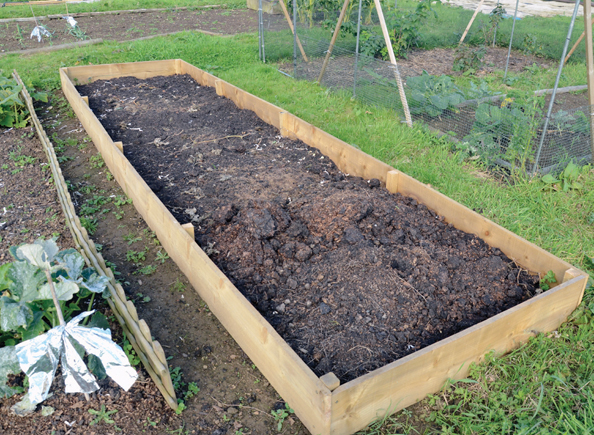
This new raised bed has been filled with well-rotted horse manure.
Composting is the breakdown of organic materials by microorganisms, and is an essential part of the biological cycle of growth and decay. It is readily visible in natural habitats – look at a woodland floor and you will see a layer of leaf litter. It doesn’t stay there long, because the bacteria, fungi and other microorganisms break down the complex organic compounds such as proteins into simpler inorganic ones such as nitrates and phosphates, which plants can use. The end product of decomposition is humus: a brown, crumbly, organic material rich in nutrients and soil life.
There are three phases to composting. The first stage is when the materials start to break down as a result of the activity of the microorganisms, especially bacteria. This process generates heat. The temperature rises steadily and after a few days will exceed 50°C (122°F). This temperature kills off the first-stage microorganisms, and they are replaced by others that can tolerate higher temperatures. To kill off pathogen organisms in the compost you need to achieve at least 55°C (131°F), but if it rises above 65°C (149°F), beneficial organisms will be killed too, so the compost has to be turned and aerated, lowering the temperature. This mixing also helps to incorporate more oxygen, keeping all the breakdown processes aerobic. This high-temperature stage can last for days, weeks and in some cases months. The final stage is when the activity of the microorganisms declines as the supply of high-energy compounds has been exhausted. The temperature falls and the first set of microorganisms takes over again, and other organisms arrive in the mix, such as woodlice and tiger worms.
The microorganisms involved in composting include bacteria of many different types, each adapted to working at a different temperature. They release enzymes that digest many substances, in particular the nitrogen-rich foods. The fungi and actinomycetes (a type of bacteria) are capable of breaking down tough woody materials. The actinomycetes are related to fungi, and they give soil its characteristic earthy smell. Fungi and actinomycetes are particularly important in the final stages of composting, when all that is left is the tough woody material rich in lignin and cellulose, and they help to form the humus.
It is important during composting to make sure there is plenty of oxygen for the beneficial microorganisms to function. As soon as the oxygen levels fall or there are pockets that lack oxygen, the process of decomposition slows down. When there are anaerobic (oxygen-free) conditions, other microorganisms take over. They work more slowly than the aerobic ones, do not generate much heat, and their by-products are smelly gases. If your compost heap is turning into a putrid, smelly mess, you have anaerobic microorganisms at work.
When people talk about compost, they often discuss the importance of the carbon-to-nitrogen ratio (C:N) and how it affects the breakdown process. Carbon makes up much of a plant’s support structures – the cellulose in the cell walls and the lignin in the woody parts – while nitrogen is an essential component of proteins, which are found in all cells. Cardboard, paper and woodchip all have a high C:N, of around 400:1, because they are made from woody fibres, while animal manure, grass clippings and other lush green plant material is rich in nitrogen, with a C:N of 25:1 or less. The optimum C:N for creating a sweet-smelling, fertile compost is 25-30:1, but this ratio doesn’t exist in many plant materials, so they have to be mixed – ‘green’ (high in nitrogen) with ‘brown’ (high in carbon). If there is too much carbon, decomposition will be slow, but if there is too much nitrogen, as in a pile of grass clippings, decomposition will be rapid and you get left with a smelly, slimy mush.
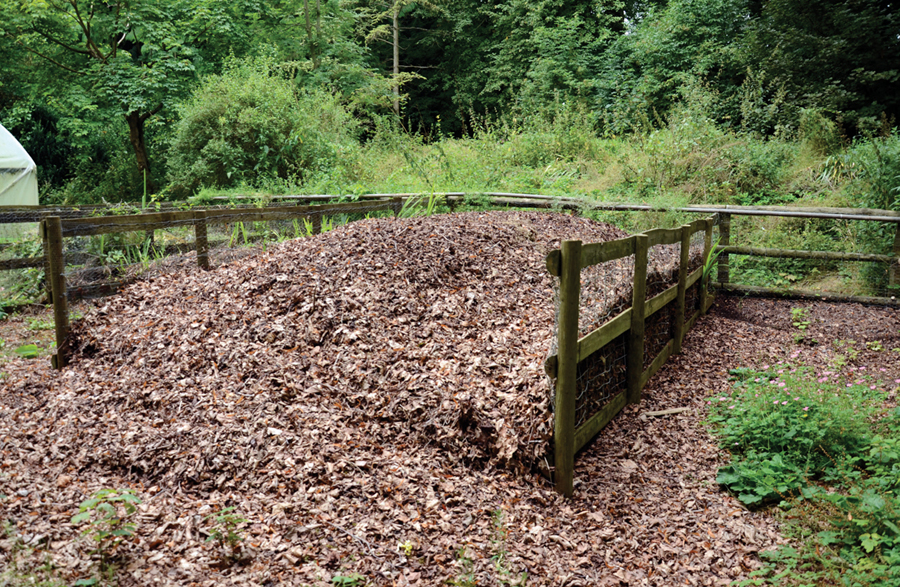
Dead leaves are high in carbon and, in the absence of other materials, break down very slowly. The resulting leafmould is low in nutrients but is a valuable soil improver.
The balance of C:N is critical to soil life too. Compost with a lot of visible (undecomposed) woody material has a high carbon content, and when you spread this compost on soil it can create problems. To break down the carbon, the microorganisms use the nitrogen in the soil, depriving the plants (this is known as ‘nitrogen robbery’). To stop this happening, you need to make sure that the materials you add have a good balance of carbon to nitrogen – a C:N of about 25-30:1. If you have compost with a lot of undecomposed woody pieces, you should add it to the soil in autumn, to give the microorganisms all winter to finish the decomposition and to allow time for the nitrogen levels in the soil to build up again.

A classic row of compost bins in Perth, Australia.
Composting is an absolutely essential element of a productive small plot, allowing you to recycle all the organic matter, so you can return nutrients to the soil for the next crop of plants. Whole books have been written on the composting process and everybody has their preferred way, so here I will just touch on the basics of making a good compost.
Composting takes time. Many of us, I suspect, have a compost heap in the corner of the vegetable garden where we toss the weeds and grass clippings and let nature take its course. That will work . . . it’s just that it will take time and often creates a compost that is full of weed seeds and pieces of twigs and tougher materials. Alternatively, the process can be completed in 6 months or less by using the right mix of materials and turning it several times.
On my plot I have a number of compost heaps. In my raised-bed area, I simply designate a bed as a compost heap and pile up the materials as I weed, trying to have a mix of about a third to a half ‘green’ and up to two-thirds ‘brown’, adding shredded paper, cardboard or straw as needed to balance the ratio. The green material will break down quickly, uses up oxygen and generates some heat, which will fuel the decomposition process. I cover it up with black plastic and each week add fresh material from my weeding and pruning. By the end of the growing season I have a good-sized heap, which I leave over winter and use the next year for the hungry crops such as potatoes. In this system, the temperatures may not rise high enough to kill the weed seeds, so there will be a good flush of weeds, which I hoe off as they germinate.
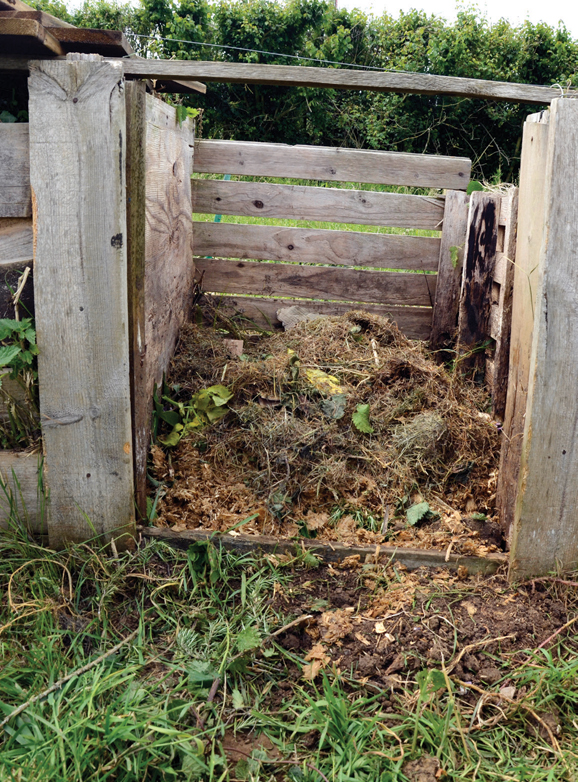
In addition, I have a traditional row of compost bins made from recycled pallets, which I fill in much the same way as on the raised bed. The slats allow air into the compost – an essential element for composting, as it keeps the process aerobic, and I don’t keep them covered all the time, so water can reach the heap too (it shouldn’t be too dry but not too wet either!).
A compost bin made from pallets has plenty of gaps to aerate the heap as it builds up. The slats across the front have been removed while the bin is filled.
By carefully controlling the mix of composting materials, you can produce a compost that is either rich in bacteria or rich in fungi, which can be put to different uses. A bacteria-rich compost is one that has had more nitrogen-rich materials present, such as legumes, grass clippings and manure. These are rich in protein and sugars, which fuel the growth of bacteria. The resulting compost is good for mulching soils to grow vegetables (especially brassicas), flowers and herbs. It’s also the preferred compost for making compost teas (see page 55).
A compost that is rich in woody material has a high fungal component, and is good for mulching fruit trees and bushes, new hedgerows and other perennial plants.
Compost colour
Colour tells you a lot about the quality of a compost. The final compost should be dark brown: aim for the colour of a 70%-cocoa chocolate! If it gets too hot, the compost will be very dark brown, almost black, indicating that anaerobic conditions were experienced, so the compost will lack nutrients and microorganisms. A white, ashy layer indicates that there was compaction in the compost heap, which can be caused by having too much fine material.
| ‘Brown’ materials (high in carbon – C:N 50-600:1) | |
| Bracken (C:N of 50:1) |
Can be readily obtained in some areas. |
| Cardboard, newspaper and shredded paper (C:N of 350+:1) |
These should be torn or shredded to create a larger surface area for the microbes to work on, and dampened. Avoid finished glossy papers, which don’t rot down easily. Sheets of cardboard and newspaper can also be used as a weed barrier at the bottom of a new no-dig bed, dampened and covered with other mulching materials. |
| Dead leaves (C:N of 40-80:1) |
Readily available from many gardens. |
| Straw (C:N of 50-150:1) |
Straw is dried stems, with little sugar content. You may be able to get spoiled bales of straw for free locally. |
| Wood shavings, woodchip, sawdust (highest C:N, of 300-600:1) |
Your local timber yard or tree surgeon may be able to provide these for free, but avoid treated wood and yew. Wood chippings are also great for mulches and on hugelkultur beds (see page 54). |
| Woody garden waste (C:N of 50-400:1) |
Shred your woody garden waste, as smaller pieces will break down more quickly. |
| ‘Green’ materials (high in nitrogen – C:N 5-25:1) | |
| Animal manure (C:N of 5-20:1) |
Animal manure has a high nitrogen content. You can use poultry manure from your chicken houses or buy manure in from local farms or stables. |
| Coffee grounds and teabags (C:N of 20:1) |
Easily obtained and often available from coffee shops. |
| Comfrey leaves (C:N of 10:1) |
The leaves of this excellent plant can be cut and used as a mulch, added to the compost heap or rotted in water to make a foliar feed. See page 57 for more details. |
| Grass clippings (C:N of 9-25:1) |
A readily available green material. Be careful not to add too thick a layer of clippings, as they can rot down to create a dense, impenetrable mat. Ideally, mix with shredded paper or newspaper, or cardboard. |
| Green garden waste (C:N of 5-25:1) |
Weeds and prunings from the garden. |
| Hay (C:N of 15-25:1) |
Hay is rich in sugar, which is good for feeding bacteria in the heap. Dampen to activate this process. On the downside, hay is likely to contain seeds, which will germinate, and if used as a mulch it can encourage slugs and snails. |
| Seaweed (C:N of 5-25:1) |
This is high in nutrients and makes an excellent mulch as well as compost activator. If you live near or have easy access to the coast, you may be able to harvest seaweed from the shore for free, especially after a storm, but check that there are no local laws restricting its collection. |
| Other materials | Other ‘green’ materials include old cut flowers, vegetable and fruit waste, citrus fruit skins, pondweed, spent hops, wool (fleece from shearing), shredded silk clothing – and urine! |
Do not add the following materials to your compost heap:
Diseased plants; persistent weeds (such as bindweed and ground elder, which regrow from tiny pieces); soot and coal ash; dog or cat faeces and cat litter; glossy paper; meat, fish, fat and cooked foods (which smell and attract vermin); grass clippings from lawns treated with weedkiller.
Sometimes, your compost heap needs a little help. You may have a lot of brown material and not enough green, or the weather may be cool and the microbiological activity low. In these circumstances you can use activators – substances that are high in nitrogen – to kick-start the whole process. Activators include blood-meal, bonemeal, comfrey tea (see page 57), fresh animal manure, seaweed and urine.
Hugelkultur (hoo-gul-culture) beds have been used for hundreds of years in Eastern Europe. They are heaped or mound beds – neither raised beds nor compost heaps, but something in between – and make use of woody waste, that is fallen branches and logs. They are great for long-term fertility, moisture retention and increasing the surface area available for planting. As they contain a lot of rotting wood, there is a supply of nutrients for crop plants for 10 to 20 years, plus the decomposition generates heat, which gives the beds an early start in spring. There is excellent aeration from the plentiful air spaces between the logs and branches, while water is retained rather like in a sponge. This means that there is little need to water the bed in all but the driest summers.
These beds are built by first digging out a trench about 30cm (12") deep, which is filled with logs and thick branches. These are covered by smaller branches and woodchip, then topped with compost or well-rotted manure. Some people prefer to make steep sides to the beds so that compaction is avoided; others prefer a more shallow bed. It’s all a matter of preference. Since the logs and branches are carbon-rich materials, they take up nitrogen as they decompose, so it’s important to have a thick layer of nitrogen-rich compost and initially to grow nitrogen-fixing plants such as legumes. Once the wood starts to decay, nitrogen is released. To kick-start the decomposition process, some people add green matter, leafmould or seaweed around the logs.
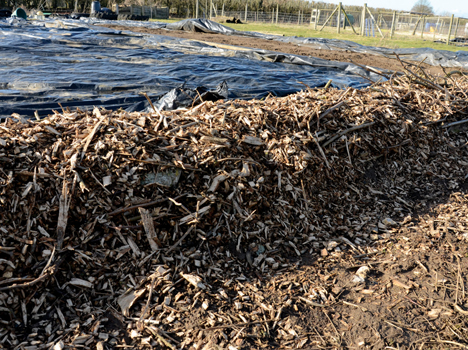
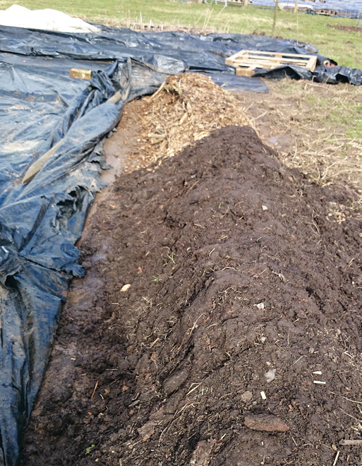
Our small hugelkultur bed has a base of logs and branches, which were then covered with woodchip and a thick layer of compost.
A compost ‘tea’ is another source of nutrients and can be used as a boost for cropping plants. It also helps to beat disease-causing organisms by adding beneficial ones. It is made by adding some good bacteria-rich compost or some vermicompost (worm compost – see below) to a container of water for a couple of days, and the resultant liquid is used as a foliar spray. Some users claim that a compost tea can boost yield by 10-20 per cent.
To make a tea you will need a large container, such as a 20-litre bucket (approx. 4 gallons / 5 US gallons), an aquarium pump, tubing, air stones, a long stick for stirring, molasses, a source of microorganisms such as a good compost, and something to strain the tea, such as old tights or a pillowcase. Aeration is key, as the organisms will quickly use up the oxygen and the liquid will become anaero bic. If you are using tap water, let it stand for a day or so to get rid of the chlorine. Half-fill your container with your compost and connect the air stones to the tubing and pump, making sure they extend to the bottom of the bucket. Then, add your water so that it comes to 10cm (4") below the rim of the container. Start the pump and aerate the liquid. After 10 minutes, add about 2 tablespoons of molasses and stir. This will feed the bacteria and boost their growth. Leave to bubble for 2 to 3 days, stirring vigorously a couple of times each day to stir up the compost. Don’t leave for any longer without feeding again. Turn off the pump, allow the compost to settle and strain the liquid to another container. You must use the tea straight away, while it is full of beneficial microorganisms, and don’t waste the solids. They can be mixed into soil or popped back on to the compost heap.
A bacteria-rich compost tea is claimed to be effective as a foliar spray to combat many diseases, especially those carried by airborne spores that land on leaves, such as mildews and blight. But don’t spray compost tea directly on to leaf crops that are to be harvested within 2 to 3 weeks, as there could potentially be harmful bacteria in the liquid. Compost tea can be applied to seedlings at the two-leaf stage to reduce disease such as damping off, and then again at 2 months to give them protection from other diseases and pests.
Kitchen waste cannot be fed to your animals, because of the risk of transmitting disease, but much of it can be either popped on your compost heap or fed to worms. A wormery is simply the name for a colony of worms living in a container and feeding on organic matter. Their activity converts the kitchen waste – such as vegetable peelings and rotten fruit, bread and cooked food such as pasta – into a fine compost, while the water content of the fruit and vegetable matter is released and can be collected as a nutrient-rich liquid to be used as a plant feed.
These worms can be kept in any one of a range of different types of container, from an old plastic dustbin or water butt to a purpose-made multilayered system with a sump for collecting the liquid waste. A wormery needs to be kept in a sheltered place, out of direct sunlight, where the temperatures will be constant: for example, a garage, a shed, under a lean-to or in a shady spot on the plot.
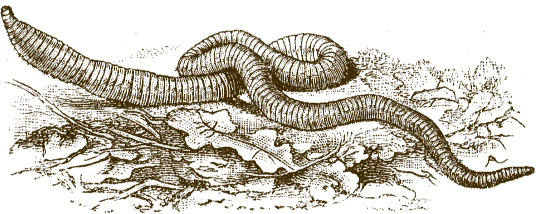
Compost worms are different from earthworms, which prefer soil. Of the several types of worm found in compost, those used in wormeries are usually tiger worms, also known as brandlings (Eisenia fetida). When setting up a wormery from new, you can order a supply of worms to get the whole process started. If you have a multi-layered system, you place some old compost or coir as bedding on the bottom layer and add the worms. Water it a little, so it is moist but not wet. Then add the kitchen waste, starting with a thin layer. Then, at weekly intervals, add more food, small amounts at a time and preferably shredded, as this is easier for the worms to manage. Don’t keep on adding food if the worms are not coping with it – a thick layer of rotting food will only create a stench and attract flies.
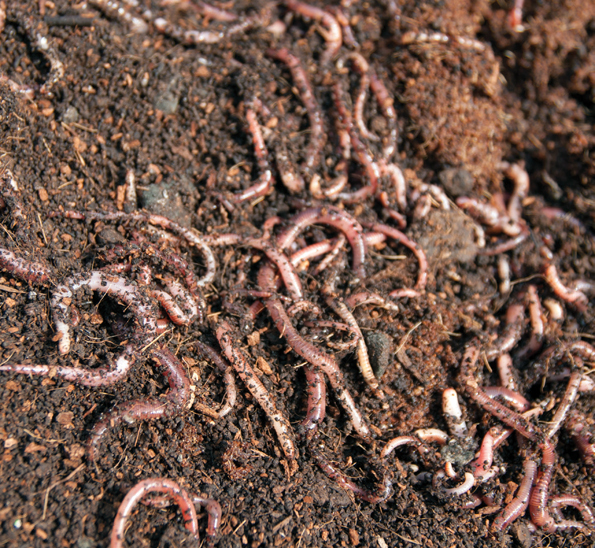
Tiger worms, also known as brandling worms.
Composting worms tackle most foods, but you should avoid citrus peel, spicy foods, onions, milk products, fats and oils, and any meat or fish, as well as tough materials like nuts or woody stems, as these will be avoided by the worms. To prevent too much liquid coming off, add about 20-30 per cent brown waste such as shredded newspaper, cardboard or even wood shavings. Once one layer is full, add another layer on top. The worms will move up as they search for a fresh supply of food, leaving a fine compost behind. A liquid will start to collect after about 10 to 12 weeks, which needs to be drained off regularly. You can use this as a liquid feed, diluted with water to a ratio of 1:10, as it is very concentrated. The vermicompost that the worms produce is really good for making compost teas (see page 55).

This wormery consists of several layers. The kitchen waste is added to the top layer, where the tiger worms are to be found. When a layer is full, a new one is added on top.
Comfrey is a must on any plot. This attractive plant, a relative of borage, is known as a ‘bioaccumulator’ because its roots grow deep into the subsoil and draw up nutrients. The result is leaves with a particularly high nutrient content, especially NPK. Analysis shows the leaves to be about 17 per cent nitrogen and to contain two to three times more potassium than farmyard manure. These nutrients are released when the leaves decompose. Not surprisingly, comfrey has many uses, in particular in the form of a concentrate feed for plants. But take care – if you grow the wild form of comfrey it will set seed everywhere, and its deep roots make it a devil to remove. Instead, buy the sterile variety ‘Bocking 14'. It establishes quickly, and you can cut it back to ground level several times during the summer months. All it needs by way of care is a bit of mulching or compost to replenish nitrogen in the soil around its roots. It can be propagated by root cuttings.
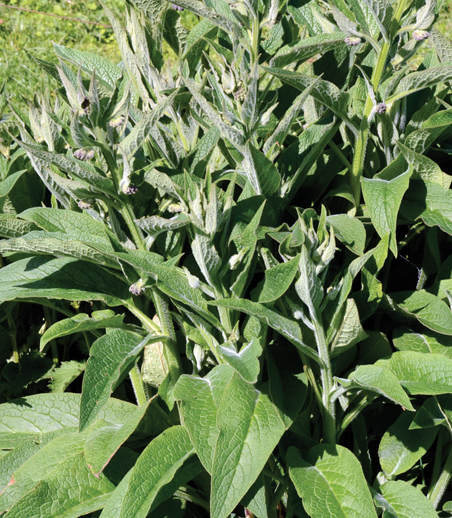
The spring growth of comfrey can be cut and will soon regrow.
For a plant feed, pull off some comfrey leaves and stuff them into a large plastic bottle that has had the bottom cut off. Remove the cap and turn the bottle upside down over another container. As the leaves rot, a very smelly black liquid oozes out into the container. Alternatively, fill a bucket with shredded leaves, pack down and add a weight (do not add water). After a short time, the black liquid will be found at the bottom of the bucket. This liquid has been found to be as effective as ready-made plant feeds. As it is very concentrated, dilute with water by 1:20 before using.
To make a comfrey tea, shred some leaves, place them in a bucket or plastic dustbin and add water. Leave it for a few weeks. The leaves rot, creating a smelly dark liquid which can be drawn off and also used as a plant feed. To replenish, simply add a bit more water and fresh leaves to the bucket, and you will have a constant supply of nutrients for your plants. You can also use the liquid as a foliar spray, and this is believed to help plants resist mildew. It helps to add a drop of detergent for a foliar spray, as this helps the tea stick to the leaves. You can even spray your apple trees with it, to help reduce the incidence of disease.
Often a lack of nitrogen slows down the breakdown process in a compost heap, and this can be overcome by adding an activator. Comfrey leaves make a pretty good compost activator, as they rot down quickly, releasing lots of nitrogen. When you have a plentiful supply of leaves you can use them as a thick mulch around plants such as tomatoes, where the potassium will be of benefit, or put them in a sack and allow them to rot down to form a leafmould, as you would fallen tree leaves in autumn. The leaves can also be used to line a bean trench, where they will rot down and release their nutrients.
Comfrey is also great for animals, as the leaves are about 25 per cent protein (much higher than that found in alfalfa or soya) and also low in fibre, making it suitable for feeding to chickens and pigs. Don’t feed it fresh, as the animals will not like the prickly leaves; instead, let the leaves wilt for a few days or so first. You can also dry it and use it in poultry feed as a nutritional supplement.
 More options for liquid feeds
It’s not just comfrey that makes a great liquid feed. Other plants have high levels of nutrients, for example nettles and ground elder. Their leaves can be seeped in water or even mixed in with comfrey and left for several weeks. The rotten gunge left at the bottom of the container can be added to the compost heap. Nettles are rich in nitrogen, iron, magnesium and sulphur, but do not have the levels of phosphate and potassium found in comfrey. Choose young plants that have not yet flowered.
A green manure is a ground cover of mostly fast-growing plants, which is sown after a main crop has been harvested. The plants protect the soil and smother weeds. The green manure is either turned into the soil before the next crop is sown, so it can be broken down by soil decomposers, or it’s chopped up and left on the surface to rot down, creating a mulch layer. Either way, a green manure helps to improve water retention and prevent the loss of nutrients by leaching, especially in the case of nitrogen and in particular on lighter soils, and it helps drainage on heavy clays. It also adds some nutrients and improves soil structure too, by adding bulk.
Green manures are cheap and easy to establish, and there are a number of plants that are suitable for the purpose. The choice depends on the time of year and whether the requirement is for protecting the soil, building fertility or both.

Phacelia sets seed readily if it’s allowed to flower.
Some green manures, such as fenugreek, crimson clover and Persian clover, germinate and create a thick cover in a few months. They are used as a break in the crop rotation and, being nitrogen fixers (see below), they will boost nitrogen levels. Others, such ryegrass, phacelia and buckwheat, can be sown in autumn and left in the ground until the spring. These overwintered green manures are valuable in giving protection from nutrient loss, but they do not boost soil nitrogen significantly, even if they are nitrogen fixers, as the winter temperatures are too low for nitrogen fixation to take place (a minimum of 8°C/46°F is needed). Some green manures, for example lucerne (also called alfalfa) and chicory, have deep roots, so sowing these plants helps to extract nutrients from deep in the soil and to further improve the soil structure, especially on compacted soils.
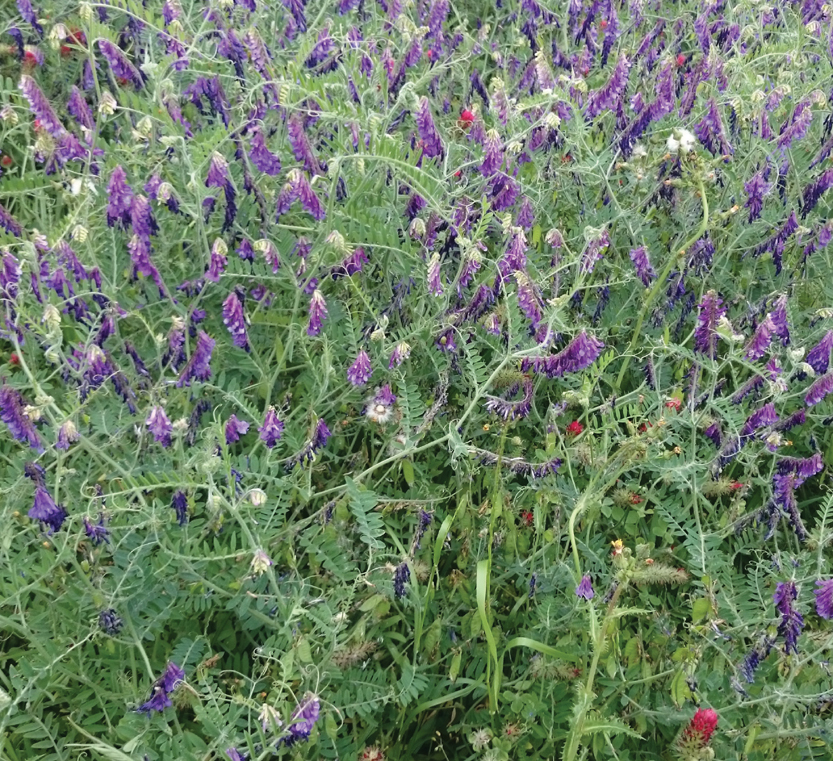
One of the best ways of boosting soil nitrogen and improving soil structure at the same time is to grow a green manure of nitrogen-fixing legumes such as clover, vetch or lucerne. Legumes are a family of plants with small nodules on their roots which are filled with N-fixing bacteria: the bacteria take nitrogen from the air and convert it to nitrates that the plant can use. It’s a mutual relationship, as the bacteria get sugars from the plant while the plant gains nitrogen. Fast-growing legumes, such as crimson and Persian clover, tend to be used in summer, when the temperatures are warm.
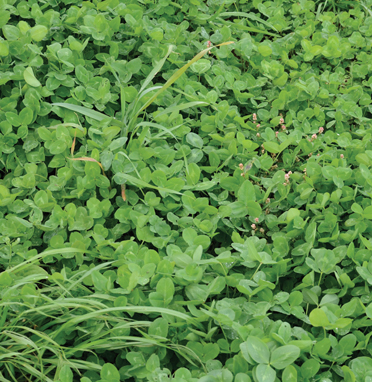
Clover grows quickly and also fixes nitrogen.
A crop rotation, as the name suggests, is the practice of moving crops from one area to another each year, so they are not grown in the same soil for 2 years running. This helps to prevent the build-up of pests and disease. Crop rotation can also help to control weeds, maintain soil organic matter and ensure that enough nutrients are available to the different crops each year.
There are various rotation systems to choose from, depending on how much space you have and how long-term a rotation you want. They vary from just a couple of years to 8 or more years. Most organic growers opt for as long a cycle as possible, especially when growing onions, and also include a fertility-building crop such as a green manure in their rotations. However, rotations are only a guide and can be tweaked to suit your own needs, so don’t feel that you have to stick to a rigid planting order. It is more important that you have a healthy soil with a rich diversity of soil life than that you slavishly follow a rotation plan. Indeed, some of the latest thinking is that crop rotations are not always essential: those following ‘Natural Agriculture’ systems such as Shumei, for example, will grow the same crops on the land with a no-dig approach for many years.
The main crop groups for a rotation are as follows:
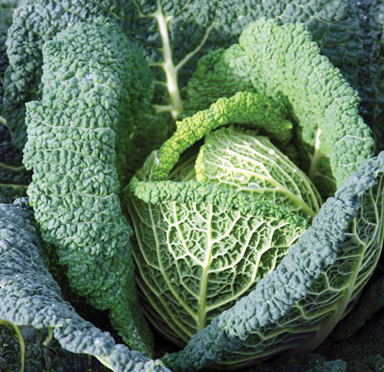
Brassicas: Brussels sprouts, cabbage, cauliflower, kale, kohlrabi, oriental greens, radishes, swedes and turnips
Legumes: beans and peas
Alliums: garlic, leeks, onions, shallots
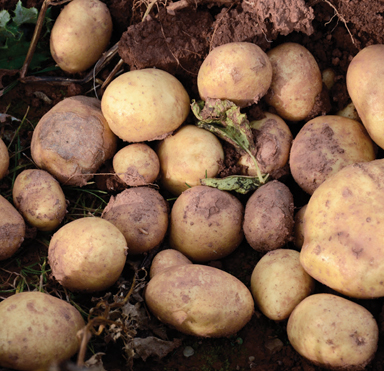
Potato family: potatoes, tomatoes (also aubergines and peppers, but they suffer from fewer diseases and can be used anywhere in the rotation)
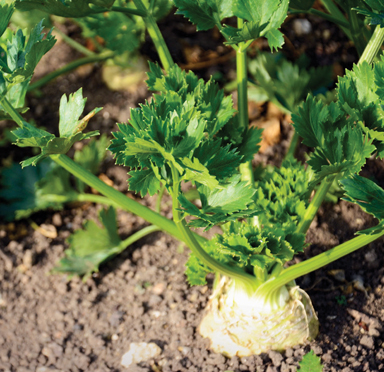
Roots: beetroot, carrots, celeriac, celery, Florence fennel, parsley, parsnips and all other root crops.
When a crop rotation is used, crops that require the same soil treatment are kept together as much as possible, to ensure that they have the best possible growing conditions. This also makes the soil management more straightforward, as it means that over the course of the rotation a whole growing area receives the same treatment. For example, a well-rotted farmyard manure can be added to the soil prior to growing potatoes, leeks, brassicas and marrows, but not on beds designated for carrots, parsnips and beetroot, as the manure tends to be high in magnesium, which can encourage forked roots. It is also linked to white rot in alliums. Lime can be added to the soil before planting if necessary in order to maintain a neutral soil pH, for example added to the brassica beds the autumn before planting to help discourage club root, but it is not spread on potato beds as it can encourage scab. Brassicas are hungry crops, so planting them after a legume crop will mean there should be a good level of nitrogen present in the soil.
Crops such as cucurbits (courgettes, pumpkins, squash, marrows and cucumbers), French and runner beans, peppers, spinach, chard, salads (e.g. endive, lettuce and chicory) and sweetcorn do not suffer from soil-borne diseases, so can be dropped anywhere into the rotation, but it is good practice to avoid growing them too often in the same place.
Crop rotation also helps to suppress weeds, as some plants have dense foliage (courgettes, cabbage and lettuce, for example) and their shade keeps the weeds down. Other crops, such as onion and carrot, are more erect, so do not compete for light. Alternating plants with these different growth habits helps to keep weeds under control over successive years.
A 4-year rotation is the most common:
Year 1 Potatoes/tomatoes plus squash, preceded by adding manure to the plot
Year 2 Legumes
Year 3 Brassicas, preceded by liming the soil
Year 4 Roots and alliums, followed by manure.
Year 1

Year 2
Year 3
Year 4
Ideally, an equal area is allotted to each group, but in reality there is no point putting aside a large area to grow a particular crop if you don’t like it! Instead, you could keep to the general rotation plan but drop in a larger area of salad leaves or spinach. Also, changes may have to be made mid-season due to failures or problems with the weather. And, should disease crop up – in particular white rot in the allium family – you may need to extend the rotation.
Longer rotations give more balanced soil fertility, a greater gap between crops of the same family, and the opportunity to include green manures to help build fertility.
For example, an 8-year rotation might be:
Year 1 Potatoes
Year 2 Sweetcorn or green manure or mulch
Year 3 Brassicas
Year 4 Legumes
Year 5 Tomatoes
Year 6 Legumes
Year 7 Roots and alliums
Year 8 Squash.
Some crops are perennials and will have a permanent location. Examples include artichokes and asparagus (see Chapter 4, page 75).
Ideally, you should aim to include some of your livestock in the rotation, to boost fertility. This can be achieved on larger plots rather than on small vegetable beds. For example, pigs will turn the soil of a plot, add nutrients in the form of manure, and generally clear the ground. Once the pigs are removed in autumn, any remaining weeds can be pulled out and the ground can be covered. It is best to use it for hungry crops such as potatoes the following year. After potatoes, the ground can be seeded with a grass mix for chickens. Chickens, too, will add fertility, and they will clear some of the vegetation by scratching the ground. Once the chickens are moved, check the soil pH, as chicken faeces can make the soil acidic, so you may need to add lime. The ground can then be used for crops such as squash, spinach, or even brassicas. Then the ground is cleared and re-seeded with a grass mix, ready for the return of the pigs – giving a 4-year cycle that breaks soilborne disease in crops as well as parasitic disease in pigs and poultry.
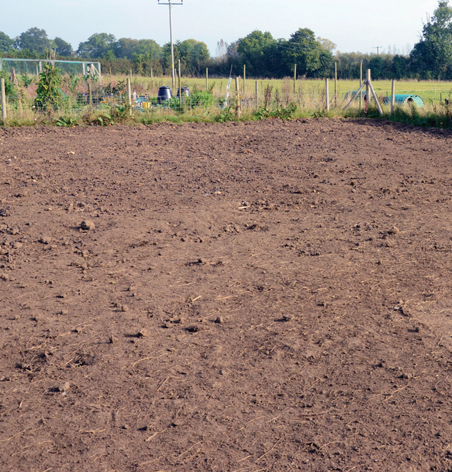
This ground has been cleared by pigs. Once they have gone, we rake over the soil as seen here, and cover it for the winter.
Green manures should also be included in your crop rotations. For example, a white-clover cover can be sown under squash or brassicas. The clover will grow slowly during the summer, as it gets shaded by the leafy plants, but will persist. By the end of autumn the white clover will have spread out and created a good winter cover. The following spring, it can be dug in or left in place and the next crop planted into it.
Traditionally, a legume crop is included in the rotation after a hungry crop, such as potatoes, to boost nitrogen levels. But the benefits to the next crop come only when the above-ground residues of the legumes, together with the roots and nodules, are dug into the soil and decompose. If you are growing the legumes as a crop, you will be removing a lot of the nitrogen when you harvest the peas and beans, so any benefits are surprisingly small. This is why a nitrogen-fixing green manure should always be included in your rotation.
Once the crops are harvested on my plot, the beds are sown with various green manures, which cover the soil over winter and for much of spring.
Here is an example of a 5-year rotation that makes good use of green manures to maintain fertility. As described below, green manures are integrated into the rotation at each stage of the cycle:
Year 1 Potatoes or sweetcorn
Year 2 Onions, leeks and garlic
Year 3 Brassicas
Year 4 Roots (carrots, beetroot) and legumes
Year 5 Clover
Here, the potatoes are cleared by autumn of the first year and the ground is sown with a rye and vetch mix. Sweetcorn can be undersown at the time of planting with low-growing trefoil or white clover, which remains through the winter. Any garlic and onions for overwintering can be planted in autumn too. Once the onions and garlic (or leeks) have been harvested, by autumn of the following year, a green manure of red or crimson clover can be sown, to remain until next spring when the brassicas are planted out. Any early brassicas can be followed by a summer green manure of crimson or red clover, buckwheat or phacelia, while the main-crop brassicas can be undersown with white clover. In year 4, carrots, beetroot and legumes are grown and, as they are harvested, the bed is sown with a mix of rye grass, clovers and vetches. This remains for 16 months until the next potatoes are planted. The year-4 legumes are undersown with white clover, which also remains through year 5.