14 Using Illustrator CC With Other Adobe Applications
Lesson overview
In this lesson, you’ll learn how to do the following:
-
Place linked and embedded graphics in an Illustrator file.
-
Transform and crop images.
-
Create and edit clipping masks.
-
Use text to mask an image.
-
Make and edit an opacity mask.
-
Work with the Links panel.
-
Embed and unembed images.
-
Package a document.

This lesson takes approximately 60 minutes to complete. Please log in to your account
on peachpit.com to download the lesson files for this chapter, or go to the “Getting Started” section
at the beginning of this book and follow the instructions under “Accessing the lesson
files and Web Edition.”
Your Account page is also where you’ll find any updates to the chapters or to the
lesson files. Look on the Lesson & Update Files tab to access the most current content.
You can easily add images created in an image-editing program to an Adobe Illustrator
file. This is a great way to incorporate raster images into your vector artwork to
combine the two.
Starting the lesson
Before you begin, you’ll need to restore the default preferences for Adobe Illustrator
CC. Then you’ll open the finished art file for this lesson to see what you’ll create.
 Note: If you have not already downloaded the project files for this lesson to your computer
from your Account page, make sure to do so now. See the “Getting Started” section
at the beginning of the book.
Note: If you have not already downloaded the project files for this lesson to your computer
from your Account page, make sure to do so now. See the “Getting Started” section
at the beginning of the book.
-
To ensure that the tools function and the defaults are set exactly as described in
this lesson, delete or deactivate (by renaming) the Adobe Illustrator CC preferences
file. See “Restoring default preferences” in the “Getting Started” section at the
beginning of the book.
-
Start Adobe Illustrator CC.
-
Choose File > Open. Locate the file named L14_end.ai in the Lessons > Lesson14 folder
that you copied onto your hard disk.
This is a small poster for a vacation destination.
-
Choose View > Fit Artboard In Window and leave it open for reference, or choose File
> Close.
Note: The fonts in the L14_end.ai file have been converted to outlines (Type > Create Outlines)
to avoid having missing fonts, and the images have been embedded.
-
Choose File > Open. In the Open dialog box, navigate to the Lessons > Lesson14 folder,
and select the L14_start.ai file on your hard disk. Click Open to open the file.
This is an unfinished version of the poster for a travel company. You will add and
edit graphics to it in this lesson.
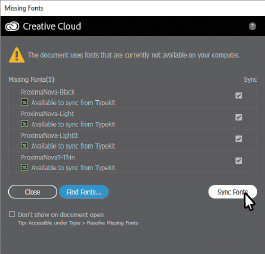
Note: You need an Internet connection to sync the fonts. The syncing process may take a
few minutes.
-
The Missing Fonts dialog box will most likely appear. Click Sync Fonts to sync all
the missing fonts to your computer. After they are synced and you see the message
stating that there are no more missing fonts, click Close.
If you can’t get the fonts to sync (a “Syncing Typekit fonts…” message doesn’t go
away), you can go to the Creative Cloud desktop application and choose Assets > Fonts
to see what the issue may be (refer to the section “Changing font family and font
style” in Lesson 8, “Adding Type to a Poster,” for more information on how to resolve it). You can also just click Close in the Missing Fonts dialog box and ignore the missing
fonts as you proceed. A third method is to click the Find Fonts button in the Missing
Fonts dialog box and replace the fonts with a local font on your machine.
Note: You can also go to Help (Help > Illustrator Help) and search for “Find missing fonts.
-
Choose File > Save As. In the Save As dialog box, navigate to the Lesson14 folder,
and open it. Name the file GreenIsle.ai. Leave the Format option set to Adobe Illustrator (ai) (macOS) or the Save As Type
option set to Adobe Illustrator (*.AI) (Windows) and then click Save. In the Illustrator
Options dialog box, leave the Illustrator options at their default settings. Click
OK.
-
Choose View > Fit Artboard In Window.
-
Choose Window > Workspace > Reset Essentials to reset the Essentials workspace.
Combining artwork
You can combine Illustrator artwork with images from other graphics applications in
a variety of ways for a wide range of creative results. Sharing artwork among applications
lets you combine continuous-tone paintings and photographs with vector art. Illustrator
lets you create certain types of raster images, and Adobe Photoshop excels at many
additional image-editing tasks. The images edited or created in Photoshop can then
be inserted into Illustrator.
This lesson steps you through the process of creating a composite image, including
combining bitmap images with vector art and working between applications. You will
add photographic images created in Photoshop to a small poster created in Illustrator.
Then you’ll mask an image, update a placed image and then package the file.
Placing image files
You can bring raster artwork from Photoshop or other applications into Illustrator
using the Open command, the Place command, the Paste command, drag-and-drop operations,
and the Libraries panel. Illustrator supports most Adobe Photoshop data, including
layer comps, layers, editable text, and paths. This means that you can transfer files
between Photoshop and Illustrator without losing the ability to edit the artwork.
Note: Illustrator includes support for DeviceN rasters. For instance, if you create a Duotone
image in Photoshop and place it in Illustrator, it separates properly and prints the
spot colors.
When placing files using the File > Place command, no matter what type of image file
it is (JPG, GIF, PSD, AI, etc.), it can be either embedded or linked. Embedding files stores a copy of the image in the Illustrator file, and the Illustrator file
size increases to reflect the addition of the placed file. Linked files remain separate external files, and a link to the external file is placed in
the Illustrator file. A linked file does not add significantly to the size of the
Illustrator file. Linking to files can be a great way to ensure that image updates
are reflected in the Illustrator file. The linked file must always accompany the Illustrator
file, or the link will break and the placed file will not appear in the Illustrator
artwork.
Placing an image
First, you will place a JPEG (.jpg) image into your document.
-
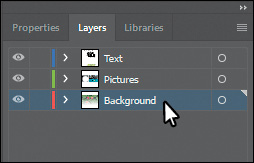
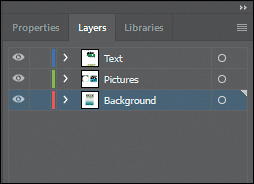
Click the Layers panel tab to open the Layers panel. In the Layers panel, select the
layer named “Pictures.”
When you place an image, it is added to the selected layer. The layer already includes
several shapes in the document.
-
Choose File > Place.
Note: You may need to click the Options button in the Place dialog box to reveal the Link
option.
-
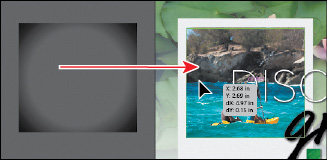
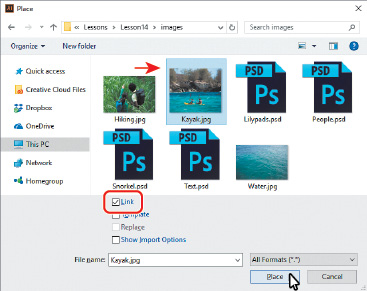
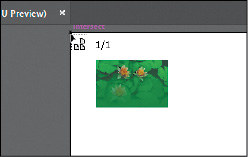
Navigate to the Lessons > Lesson14 > images folder, and select the Kayak.jpg file.
Make sure that Link is selected in the Place dialog box. Click Place.
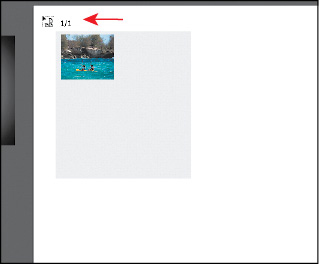
The pointer should now show the loaded graphics cursor. You can see “1/1” next to
the pointer, indicating how many images are being placed (1 of 1), and a thumbnail
so you can see what image you are placing.
-
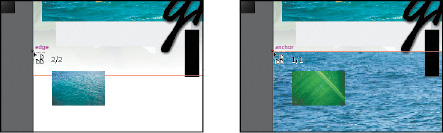
Position the loaded graphics cursor near the upper-left corner of the artboard, and
click to place the image. Leave the image selected.
 Tip: The X on a selected image indicates that the image is linked (with edges showing,
View > Show Edges).
Tip: The X on a selected image indicates that the image is linked (with edges showing,
View > Show Edges).
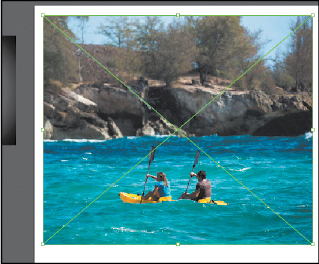
Position the loaded graphics cursor.
Click to place the image.
The image appears on the artboard, with the upper-left corner of the image placed
where you clicked. The image is 100% of its original size. You could also have dragged
with the loaded graphics cursor to size the image as you placed it.
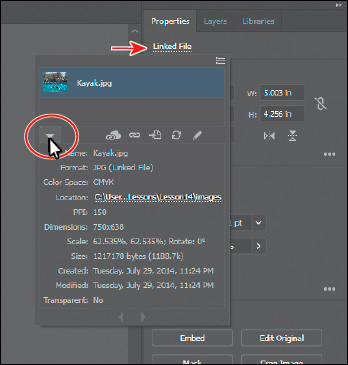
Notice in the Properties panel that, with the image selected, you see the words “Linked
File,” indicating that the image is linked to its source file, together with other
information about the image. By default, placed image files are linked to their source
file. So, if the source file is edited (outside of Illustrator), the placed image
in Illustrator is updated. Deselecting the Link option while placing embeds the image
file in the Illustrator file.
Transforming a placed image
You can duplicate and transform placed images just as you do other objects in an Illustrator
file. Unlike vector artwork, you need to consider the resolution of the raster image
content in your document since raster images without enough resolution may look pixelated
when printed. Working in Illustrator, if you make an image smaller, the resolution
of the image increases. If you make an image larger, the resolution decreases. Next,
you will transform the Kayak.jpg image.
Note: Transformations performed on a linked image in Illustrator, and any resulting resolution
changes, do not change the original image. The changes apply only to the image within
Illustrator.
Tip: To transform a placed image, you can also open the Properties panel or Transform
panel (Window > Transform) and change settings in either.

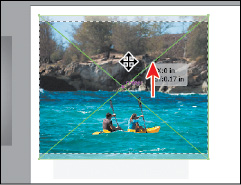
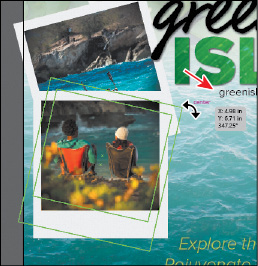
-
Holding down the Shift key, use the Selection tool ( ) to drag the lower-right bounding point toward the center of the image until the
measurement label shows a width of approximately 5 in. Release the mouse button and
then release the key.
) to drag the lower-right bounding point toward the center of the image until the
measurement label shows a width of approximately 5 in. Release the mouse button and
then release the key.
Tip: Much like other artwork, you can also Option+Shift-drag (macOS) or Alt+Shift-drag
(Windows) a bounding point around an image to resize from the center, while maintaining
the image proportions.
-
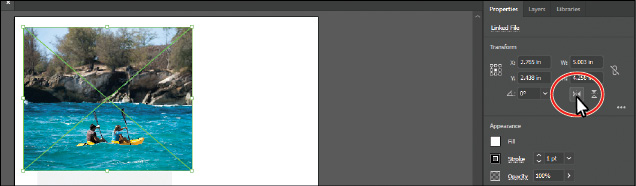
Click the Properties panel tab to show that panel.
-
Click the text “Linked File” at the top of the Properties panel to see the Links panel.
With the Kayak.jpg file selected in the Links panel, click the Show Link Info arrow
in the lower-left corner of the panel to see information about the image.
You can see the scale percentage as well as rotation information, size, and much more.
Specifically, notice the PPI (Pixels Per Inch) value is approximately 150. PPI refers
to the resolution of the image. Other transformations like rotation can also be applied
to images using the various methods you learned in Lesson 5, “Transforming Artwork.”
-
Press the Escape key to hide the panel.
-
Click the Flip Along Horizontal Axis option ( ) in the Properties panel to flip the image horizontally, across the center.
-
Leave the image selected, and choose File > Save.
Cropping an image
In Illustrator, you can mask or hide part of an image, as you’ll learn about in this
lesson, but you can also crop images to permanently remove part of an image. While
cropping an image, you can define the resolution, which can be a useful way to reduce
file size and improve performance. Next, you’ll crop part of the image of the kayakers.
Tip: To crop a selected image, you can also choose Object > Crop Image or choose Crop
Image from the context menu (right-click or Ctrl-click on the image).
-
With the image still selected, click the Crop Image button in the Properties panel.
Click OK in the warning dialog box that appears.
Linked images, like the kayak image, become embedded after you crop them. That means
that if you update the original image, Kayak.jpg, outside of Illustrator, say in Photoshop,
the image in Illustrator will not be affected. You should now see a dotted box with
eight handles around the selected image. The rest of the artwork is dimmed, and you
cannot select it until you are finished cropping.
-
Drag the top crop handle down to cut off a bit of the trees at the top of the image.
You can drag the handles that appear around the image to crop different parts of the
image. You can also define a size in the Properties panel (width and height) to crop
to.
Note: A lower PPI may result in an image that is not suitable for printing.
Note: Depending on the size of your kayak image, the “Medium (150 ppi)” option may not
be dimmed and that’s okay.
-
Click the PPI (resolution) menu in the Properties panel.
The PPI is the resolution of the image. Any options in the PPI menu that are higher
than the original resolution of the image you are cropping are disabled. The maximum
value that you can enter equals the resolution of the original image or 300 PPI for
linked artwork. Choosing a lower resolution than the original can be useful if you
want to save file size.
-
Move the pointer over the image, and drag the crop area to make it more centered,
vertically on the image.
-
Click Apply in the Properties panel to permanently crop the image.
-
Choose Select > Deselect and then choose File > Save.
Placing a Photoshop image with Show Import Options
When you place image files in Illustrator, you have the ability to change image options
when the file is imported (when available). For instance, if you place a Photoshop
file (.psd), you can choose to flatten the image or even to preserve the original
Photoshop layers in the file. Next, you’ll place a Photoshop file, set import options,
and embed it in the Illustrator file.
-
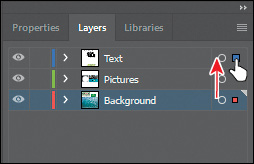
In the Layers panel, click the eye icon ( ) for the Pictures layer to hide the content, and then select the Background layer.
-
Choose File > Place.
-
In the Place dialog box, navigate to the Lessons > Lesson14 > images folder, and select
the Lilypads.psd file. In the Place dialog box, set the following options (if you
don’t see the options, click the Options button):
-
Link: Deselected (Deselecting the Link option embeds an image file in the Illustrator file. Embedding
the Photoshop file allows for more options when it is placed, as you’ll see.)
-
Show Import Options: Selected (Selecting this option will open an import options dialog box where you can set import
options before placing.)
-
Click Place.

The Photoshop Import Options dialog box appears because you selected Show Import Options
in the Place dialog box.
Note: Even though you select Show Import Options in the Place dialog box, the Import Options
dialog box will not appear if the image doesn’t have multiple layers.
Tip: To learn more about layer comps, see “Importing artwork from Photoshop” in Illustrator
Help (Help > Illustrator Help).
Note: A color mode warning may appear in the Photoshop Import Options dialog box. This
indicates that the image you are placing may not be the same color mode as the Illustrator
document. For this image (and going forward), if a color warning dialog box appears,
click OK to dismiss it.
-
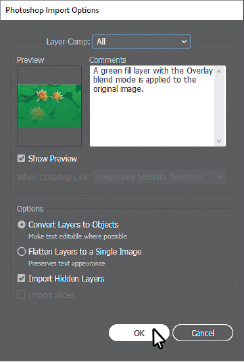
In the Photoshop Import Options dialog box, set the following options:
-
Layer Comp: All (A layer comp is a snapshot of a state of the Layers panel that you create in Photoshop.
In Photoshop, you can create, manage, and view multiple versions of a layout in a
single Photoshop file. Any comments associated with the layer comp in Photoshop will
appear in the Comments area.)
-
Show Preview: Selected (Preview displays a preview of the selected layer comp.)
-
Convert Layers To Objects: Selected (This option and the next one are available only because you deselected the Link
option and chose to embed the Photoshop image.)
-
Import Hidden Layers: Selected (to import layers hidden in Photoshop)
-
Click OK.
Note: When the pointer snaps to the upper-left corner of the artboard, the word “intersect”
may appear. It may also be hidden by the top edge of the Document window.
-
Position the loaded graphics cursor in the upper-left corner of the artboard, and
click to place the image.
Rather than flatten the file, you have converted the Lilypads.psd Photoshop layers
to layers that you can show and hide in Illustrator. When placing a Photoshop file
in particular, if you had left the Link option selected (to link to the original PSD
file), the only option in the Options section of the Photoshop Import Options dialog
box would have been to flatten the content.
-
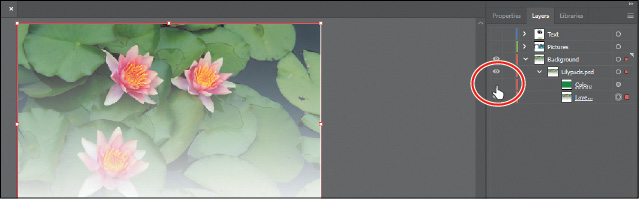
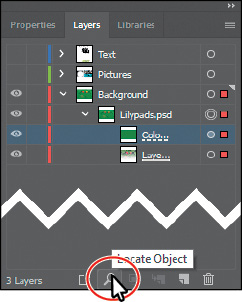
In the Layers panel, click the Locate Object button ( ) to reveal the image content in the Layers panel.
Notice the sublayers of Lilypads.psd. These sublayers were layers in Photoshop and
appear in the Layers panel in Illustrator because you chose not to flatten the image
when you placed it. Also notice that, with the image still selected on the page, the
Properties panel shows the word “Group” at the top.
When you place a Photoshop file with layers and you choose to convert the layers to
objects in the Photoshop Import Options dialog box, Illustrator treats the layers
as separate sublayers in a group. This particular image had a layer mask in Photoshop
applied to Layer 0, which is why the image appears to fade.
Note: The Color Fill 1 sublayer was a layer in Photoshop that was filled with a green color
and blended via Blend Mode into the lily pad image beneath it.
-
In the Layers panel, click the eye icon ( ) to the left of the Color Fill 1 sublayer to hide it. You may want to drag the left
edge of the Layers panel to see more of the layer names.
) to the left of the Color Fill 1 sublayer to hide it. You may want to drag the left
edge of the Layers panel to see more of the layer names.
-
Choose Select > Deselect and then choose File > Save.
Placing multiple images
In Illustrator you can also place multiple files in a single action. Next, you’ll
place two images at once and then position them.
-
In the Layers panel, click the disclosure triangle ( ) to the left of the Background layer to collapse the layer contents. Click the visibility
column of the layers named “Pictures” and “Text” to show the contents for each and
then ensure that the Background layer is selected.
) to the left of the Background layer to collapse the layer contents. Click the visibility
column of the layers named “Pictures” and “Text” to show the contents for each and
then ensure that the Background layer is selected.
-
Choose File > Place.
Tip: You could also select a range of files in the Place dialog box by pressing the Shift
key.
-
In the Place dialog box, select the Water.jpg file in the Lessons > Lesson14 > images
folder. Command-click (macOS) or Ctrl-click (Windows) the image named Text.psd to
select both image files. On macOS, click the Options button, if necessary, to reveal
other options. Deselect Show Import Options, and make sure that the Link option is
not selected. Click Place.
Note: The Place dialog box you see in Illustrator may show the images in a different view,
like a List view, and that’s okay.
Tip: To discard an asset that is loaded and ready to be placed, use the arrow keys to
navigate to the asset, and then press the Escape key.
-
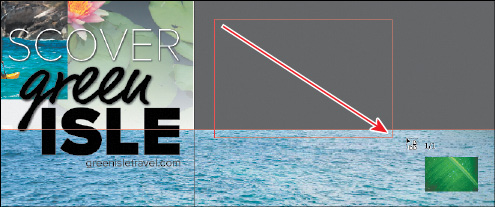
Position the loaded graphics cursor on the left side of the artboard. Press the Right
or Left Arrow key (or Up and Down Arrow keys) a few times to see that you can cycle
between the image thumbnails. Make sure that you see the water image thumbnail, and
click the left edge of the artboard, about halfway down, to place the image.
Whichever thumbnail is showing in the loaded graphics cursor when you click in the
Document window is placed.
-
Press and hold the spacebar and drag to the left so that you see the area off the
right side of the artboard. Release the spacebar.
-
Move the loaded graphics cursor off the right side of the artboard. Click and drag
down and to the right, stopping when the image is roughly as big as you see in the
figure. Leave the image selected.
You can either click to place an image at 100% or click and drag to place an image
and size it as you place it in the Document window. By dragging when you place an
image, you are resizing the image. Resizing an image in Illustrator will most likely
result in a different resolution than the original.
-
With the Text.psd image (the image of the green leaf) still selected, drag the selected
art indicator (the colored box) in the Layers panel up from the Background layer to
the Text layer to move the image to the Text layer.
Later, you will mask the image with text on the Text layer.
-
Choose View > Fit Artboard In Window.
Masking images
Note: You will hear people use the phrases “clipping mask,” “clipping path,” and “mask.”
The way most of us refer to them, they mean the same thing.
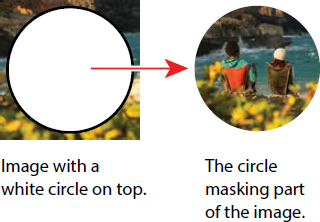
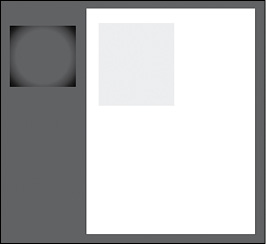
To achieve certain design effects, you can apply a clipping mask (clipping path) to
content. A clipping mask is an object whose shape masks other artwork so that only areas that lie within the
shape are visible. In the first part of the figure to the right is an image with a
white circle on top. In the second part of the figure, the white circle was used to
mask or hide part of the image.
Only vector objects can be clipping paths; however, any artwork can be masked. You
can also import masks created in Photoshop files. The clipping path and the masked
object are referred to as the clipping set.
Applying a simple mask to an image
In this section, you’ll see how to let Illustrator create a simple mask for you on
the Kayak.jpg image so that you can hide part of the image.
-
With the Selection tool () selected, click the Kayak.jpg image to select it (the first image you placed).
Tip: You can also apply a clipping mask by choosing Object > Clipping Mask > Make.
-
Click the Properties panel tab to show that panel. Click the Mask button in the Properties
panel.
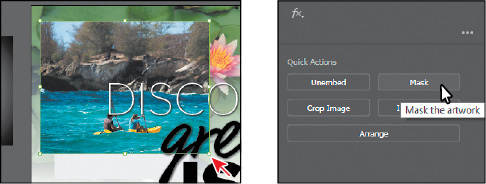
Clicking the Mask button applies a clipping mask to the image in the shape and size
of the image. In this case, the image itself does not look any different.
Note: You may need to drag the left edge of the Layers panel to the left to see more of
the names, like I did for the figure.
-
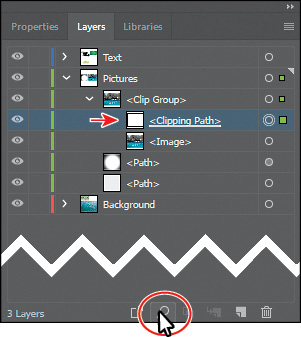
In the Layers panel, click the Locate Object button () at the bottom of the panel.
Notice the <Clipping Path> and <Image> sublayers that are contained within the <Clip
Group> sublayer. The <Clipping Path> object is the clipping path (mask) that was created,
and the <Clip Group> is a set that contains the mask and the object that is masked
(the cropped, embedded image).
Editing a clipping path (mask)
In order to edit a clipping path, you need to be able to select it. Illustrator offers
several ways to do this. Next, you’ll edit the mask you just created.
-
Tip: You can also double-click a clip group (object masked with a clipping path) to enter
Isolation mode. You can then either click the masked object (the image in this case)
to select it or click the edge of the clipping path to select the clipping path. After
you are finished editing, you can then exit Isolation mode using a variety of methods
as discussed in previous lessons (like pressing the Escape key).Click the Properties
panel tab to show the panel. With the kayak image still selected on the artboard,
click the Edit Contents button ( ) at the top of the Properties panel.
-
Click the Layers panel tab, and notice that the <Image> sublayer (in the <Clip Group>)
is showing the selected-art indicator (small color box) to the far right of the sublayer
name.

-
Back in the Properties panel, click the Edit Clipping Path button ( ) at the top of the Properties panel, and <Clipping Path> will now be selected in
the Layers panel.
) at the top of the Properties panel, and <Clipping Path> will now be selected in
the Layers panel.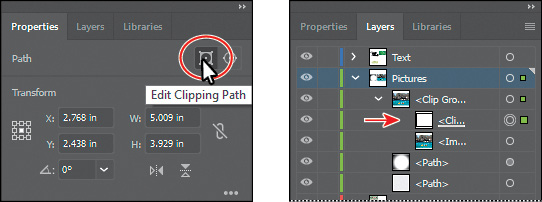
When an object is masked, you can edit the mask, the object that is masked, or both.
Use these two buttons to select which to edit. When you first click to select an object
that is masked, you will edit both the mask and the masked object.
-
Choose View > Outline.
-
Tip: You can also edit a clipping path with transformation options, like rotate, skew,
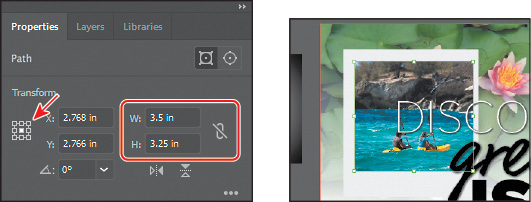
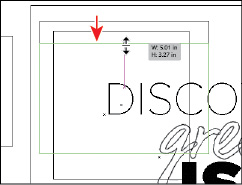
etc., or by using the Direct Selection tool ( ).With the Selection tool () selected, drag the top-middle bounding point of the selected mask down until the
measurement label shows a height of approximately 3.25 in.
).With the Selection tool () selected, drag the top-middle bounding point of the selected mask down until the
measurement label shows a height of approximately 3.25 in.
-
Choose View > GPU Preview (or Preview On CPU if that is all that is available).
-
Make sure that the center of the reference point is selected ( ) in the Properties panel. Make sure that Constrain Width And Height Proportions is
off (
) in the Properties panel. Make sure that Constrain Width And Height Proportions is
off ( ), and change Width to 3.5 in. If you see that Height is not 3.25 in, go ahead and make it so.
-
Click the Edit Contents button () at the top of the Properties panel to edit the Kayak.jpg image, not the mask.
Tip: You can also press the arrow keys on the keyboard to reposition the image.
-
With the Selection tool (), be careful to drag from within the bounds of the mask down a little bit and release
the mouse button. Notice that you are moving the image and not the mask.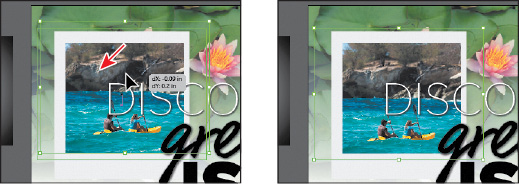
With the Edit Contents button () selected, you can apply many transformations to the image, including scaling, moving,
rotating, and more.
-
Choose Select > Deselect and then click the image again to select the entire clip
group. Drag the image onto the light gray rectangle, and position it like you see
in the figure.
-
Choose Select > Deselect and then choose File > Save.
Masking an object with text
In this section, you’ll use text as a mask for an image you placed. To create a mask
from text, the text needs to be on top of the image, as you’ll see.
-
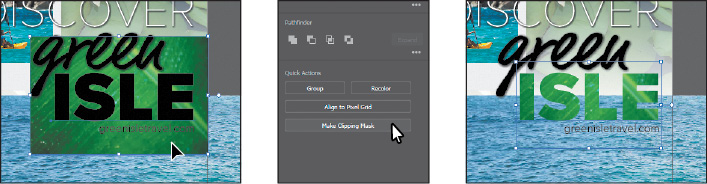
With the Selection tool () selected, drag the green leaf image (Text.psd) from off the right side of the artboard
on top of the “ISLE” text.
Note: If the image Text.psd is not as wide as the “ISLE” text, make sure you resize the
image, holding down the Shift key to constrain the proportions. Don’t worry if it’s
larger than you see in the figure.
-
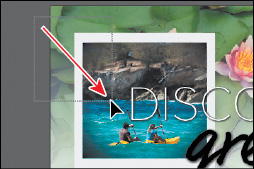
Choose Object > Arrange > Send To Back. You should see the “ISLE” text now. Make sure
that the image is positioned roughly like you see in the figure.
-
With the image still selected, Shift-click the “ISLE” text to select them both.
-
Click the Make Clipping Mask button in the Properties panel.
Tip: You can also right-click over the selected content and choose Make Clipping Mask
from the context menu or choose Object > Clipping Mask > Make.
You can edit the Text.psd image and the clipping mask separately, just as you did
previously with the masked Kayak.jpg image.
-
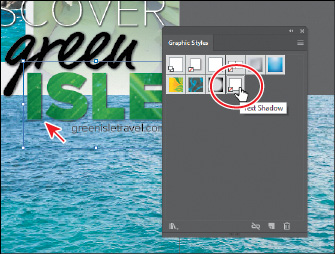
With the text still selected, choose Window > Graphic Styles to open the Graphic Styles
panel. Select the Text Shadow graphic style to apply a drop shadow. Close the Graphic
Styles panel.
-
Choose Select > Deselect and then choose File > Save.
Creating an opacity mask
An opacity mask is different from a clipping mask because it allows you to mask an object and also alter the transparency of artwork.
You can make and edit an opacity mask using the Transparency panel. In this section,
you’ll create an opacity mask for the Water.jpg image so that it fades into the water
lilies image.
-
In the Layers panel, click the disclosure triangles for all layers ( ) to hide the content for each layer, if necessary. Click the eye icon () to the left of the Text and Pictures layers to hide their contents.
-
Choose View > Zoom Out.
-
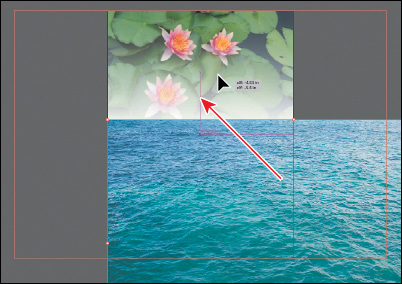
With the Selection tool selected, drag the water image into the center of the artboard.
Make sure the bottom of the image is aligned with the bottom of the artboard.
-
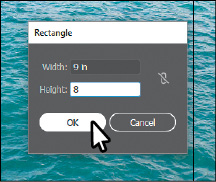
Select the Rectangle tool ( ) in the Tools panel, and click in the approximate center of the artboard. In the
Rectangle dialog box, make sure the Constrain Width And Height Proportions is off
(), change Width to 9 in and Height to 8 in. Click OK. This will become the mask.
) in the Tools panel, and click in the approximate center of the artboard. In the
Rectangle dialog box, make sure the Constrain Width And Height Proportions is off
(), change Width to 9 in and Height to 8 in. Click OK. This will become the mask.
-
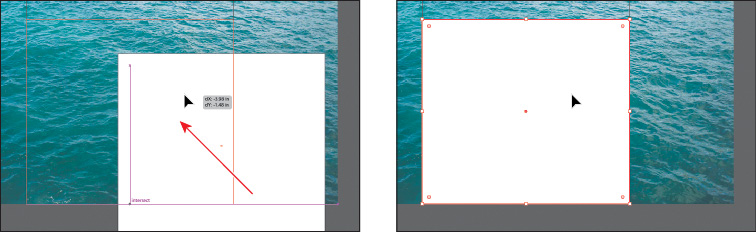
Press the D key to set the default stroke (black, 1 pt) and fill (white) for the new
rectangle to more easily select and move it.
Note: The object that is to become the opacity mask (the masking object) needs to be the
top selected object on the artboard. If it is a single object, like a rectangle, it
does not need to be a compound path. If the opacity mask is to be made from multiple
objects, they need to be grouped.
-
Select the Selection tool (), and drag the rectangle to align it into the bottom center of the artboard.
-
Press the Shift key, and click the Water.jpg image to select it as well.
-
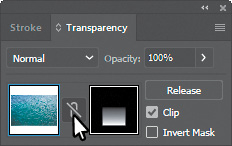
Choose Window > Transparency to open the Transparency panel. Click the Make Mask button,
and leave the artwork selected.
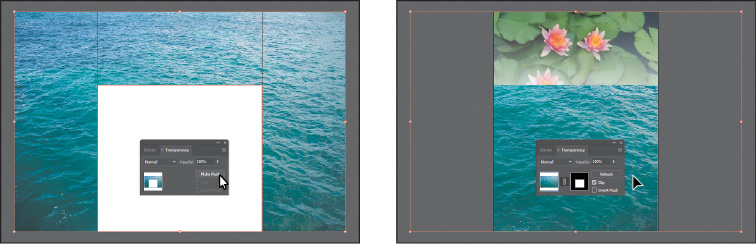
After clicking the Make Mask button, the button now shows as “Release.” If you were
to click the button again, the image would no longer be masked.
Tip: You can also click the word “Opacity” in the Properties panel to reveal the Transparency
panel.
Note: If you wanted to create a mask that was the same dimensions as the image, instead
of drawing a shape, you could have simply clicked the Make Mask button in the Transparency
panel.
Editing an opacity mask
Next, you’ll adjust the opacity mask that you just created.
Tip: To disable and enable an opacity mask, you can also choose Disable Opacity Mask or
Enable Opacity Mask from the Transparency panel menu.
-
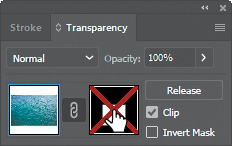
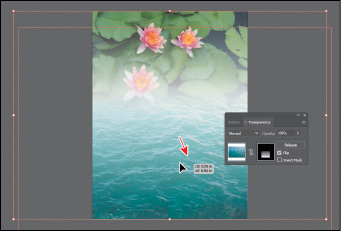
In the Transparency panel, Shift-click the mask thumbnail (as indicated by the white
rectangle on the black background) to disable the mask.
Notice that a red X appears on the mask in the Transparency panel and that the entire
Water.jpg image reappears in the Document window.
-
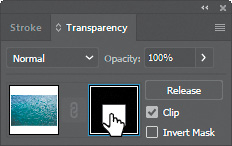
In the Transparency panel, Shift-click the mask thumbnail to enable the mask again.
Tip: To show the mask by itself (in grayscale if the original mask had color in it) on
the artboard, you can also Option-click (macOS) or Alt-click (Windows) the mask thumbnail
in the Transparency panel.
-
Click to select the mask thumbnail on the right side of the Transparency panel. If
the mask isn’t selected on the artboard, click to select it with the Selection tool
().
Clicking the opacity mask in the Transparency panel selects the mask (the rectangle
path) on the artboard. With the mask selected, you can’t edit other artwork on the
artboard. Also, notice that the document tab shows (<Opacity Mask>/Opacity Mask),
indicating that you are now editing the mask.
-
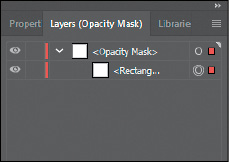
Click the Layers panel tab and click the disclosure triangle ( ) for the <Opacity Mask> layer to reveal the contents, if necessary.
In the Layers panel, notice that the layer <Opacity Mask> appears, indicating that
the mask—rather than the artwork that is being masked—is selected.
-
With the mask selected in the Transparency panel and on the artboard, change the fill
color to a white-to-black linear gradient, called White, Black, in the Properties
panel.
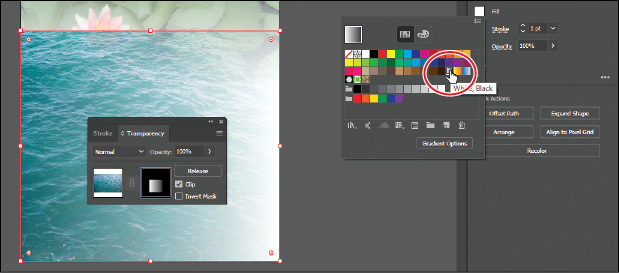
You’ll now see that where there is white in the mask, the Water.jpg image is showing,
and where there is black, it is hidden. The gradient mask gradually reveals the image.
-
Make sure that the Fill box toward the bottom of the Tools panel is selected.
-
Select the Gradient tool ( ) in the Tools panel. Holding down the Shift key, position the pointer close to the
bottom of the Water.jpg image. Click and drag up to just below the top of the mask
shape, as shown in the figure. Release the mouse button and then release the Shift
key.
) in the Tools panel. Holding down the Shift key, position the pointer close to the
bottom of the Water.jpg image. Click and drag up to just below the top of the mask
shape, as shown in the figure. Release the mouse button and then release the Shift
key.

Notice how the mask has changed appearance in the Transparency panel. Next, you’ll
move the image but not the opacity mask. With the image thumbnail selected in the
Transparency panel, both the image and the mask are linked together by default so
that if you move the image, the mask moves as well.
Note: You have access to the link icon only when the image thumbnail, not the mask thumbnail,
is selected in the Transparency panel.
-
In the Transparency panel, click the image thumbnail so that you are no longer editing
the mask. Click the link icon ( ) between the image thumbnail and the mask thumbnail. This allows you to move just
the image or the mask but not both.
) between the image thumbnail and the mask thumbnail. This allows you to move just
the image or the mask but not both.
Note: The position of Water.jpg does not have to match the figure exactly.
-
With the Selection tool, drag the Water.jpg image down. After dragging a little, release
the mouse button to see where it’s positioned.
-
In the Transparency panel, click the broken link icon ( ) between the image thumbnail and the mask thumbnail to link the two together again.
-
Choose Object > Arrange > Send To Back to send the Water.jpg image behind the Lilypads.psd
image.
It probably won’t look like anything has changed on the artboard, but later you will
attempt to select the Lilypads.psd image, and it will need to be on top of the Water.jpg
image.
-
Choose Select > Deselect and then choose File > Save.
Working with image links
When you place images in Illustrator and either link to them or embed them, you can
see a listing of these images in the Links panel. You use the Links panel to see and
manage all linked or embedded artwork. The Links panel displays a small thumbnail
of the artwork and uses icons to indicate the artwork’s status. From the Links panel,
you can view the images that have been linked to and embedded, replace a placed image,
update a linked image that has been edited outside of Illustrator, or edit a linked
image in the original application, such as Photoshop.
Finding link information
When you place an image, it can be helpful to see where the original image is located,
what transformations have been applied to the image (such as rotation and scale),
and more information. Next, you’ll explore the Links panel to discover image information.
-
In the Layers panel, make sure that all of the layers are collapsed and then click
the visibility column to the left of the Text and Pictures layers to show the layer
contents on the artboard.
-
Choose Window > Workspace > Reset Essentials.
-
Choose Window > Links to open the Links panel.
Tip: You can also double-click the image in the Layers panel list to see the image information.
Note: The link information you see may be different than what you see in the figure, and
that’s okay.
-
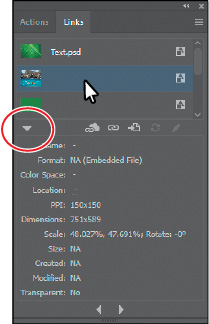
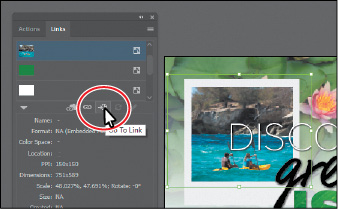
Select the Kayak.jpg image in the Links panel. Click the toggle arrow in the lower-left
corner of the Links panel to reveal the link information at the bottom of the panel.
Looking in the Links panel, you’ll see a listing of all the images you’ve placed.
You can tell whether an image has been embedded by the embedded icon ( ). You’ll also see information about the image, such as the fact that it’s embedded
(Embedded File), the resolution, transformation information, and more.
). You’ll also see information about the image, such as the fact that it’s embedded
(Embedded File), the resolution, transformation information, and more.
-
Click the Go To Link option ( ) below the list of images.
The Kayak.jpg image will be selected and centered in the Document window.
-
Choose Select > Deselect and then choose File > Save.
Embedding and unembedding images
As was mentioned previously, if you choose not to link to an image when placing it,
the image is embedded in the Illustrator file. That means that the image data is stored
within the Illustrator document. You can choose to embed an image later, after placing
and linking to it, if you choose. Also, you might want to use embedded images outside
of Illustrator or to edit them in an image-editing application like Photoshop. Illustrator
allows you to unembed images, which saves the embedded artwork to your file system
as a PSD or TIFF file (you can choose) and automatically links it to the Illustrator
file. Next, you will unembed an image in the document.
-
Choose View > Fit Artboard In Window.
-
Click to select the water image at the bottom of the artboard.
The water image was embedded when you originally placed it. With an image embedded,
you may realize that you need to make an edit to that image in a program like Adobe
Photoshop. You can just as easily unembed an image, which is what you’ll do next to
the water image.
Tip: You can also choose Unembed from the Links panel menu ( ).
).
Note: The embedded Water.jpg image data is unembedded from the file and saved as a PSD
file in the images folder. The water image on the artboard is now linked to the PSD
file.
-
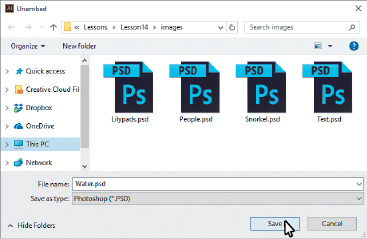
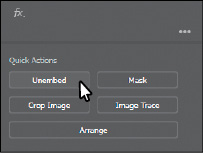
Click the Unembed button in the Properties panel.
-
In the Unembed dialog box, navigate to the Lessons > Lesson14 > images folder (if
you are not already there). Make sure Photoshop (*.PSD) is chosen in the File Format
menu (macOS) or the Save As Type (Windows) menu, and click Save.
-
Choose Select > Deselect.
Replacing a linked image
You can easily replace a linked or embedded image with another image to update the
artwork. The replacement image is positioned exactly where the original image was,
so no adjustment should be necessary if the new image is of the same dimensions. If
you scaled the image that you are replacing, you may need to resize the replacement
image to match the original. Next, you’ll replace an image.
-
Select the Selection tool () and drag the gradient-filled rectangle off the left edge of the artboard on top
of the Kayak.tif image, centering it on the image using the Smart Guides.
-
Choose Object > Arrange > Bring To Front to bring the gradient-filled rectangle on
top of the image.
-
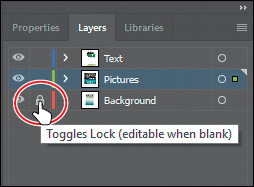
In the Layers panel, click the edit column to the left of the Background layer to
lock the layer content on the artboard.
-
Drag across the kayak image, the gradient-filled rectangle, and the light gray rectangle
beneath it to select the artwork. Make sure not to select the text.
-
Choose Object > Group.
-
Choose Edit > Copy and then choose Edit > Paste to paste a copy.
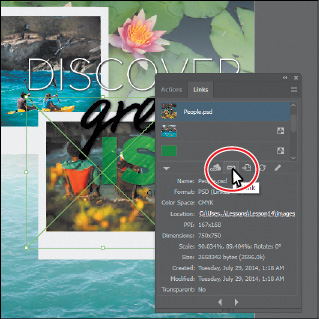
Note: The figure shows the image already replaced. The pointer is simply pointing to the
Relink button for reference.
-
In the Links panel, with one of the kayak images selected, click the Relink button
( ) below the list of images. In the Place dialog box, navigate to the Lessons > Lesson14
> images folder, and select another image like People.psd. Make sure that the Link
option is selected. Click Place to replace the kayak image with the People.psd image.
) below the list of images. In the Place dialog box, navigate to the Lessons > Lesson14
> images folder, and select another image like People.psd. Make sure that the Link
option is selected. Click Place to replace the kayak image with the People.psd image.
-
Drag the kayak image group and the image group with the people into position like
you see in the figure.
-
Position the pointer just off the upper-right corner, and when you see the rotate
arrows ( ), click and drag to rotate. Alternate the rotation like you see in the figure.
-
Choose File > Save.
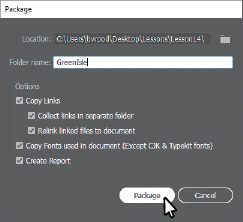
Packaging a file
When you package a file, you create a folder that contains a copy of the Illustrator document, any
necessary fonts, copies of the linked graphics, and a report that contains information
about the packaged files. This is an easy way to hand off all necessary files for
an Illustrator project. Next, you’ll package the poster file.
Note: If the file needs to be saved, a dialog box will appear to notify you.
-
Choose File > Package. In the Package dialog box, set the following options:
-
Click the folder icon ( ), and navigate to the Lesson14 folder, if you are not already there. Click Choose
(macOS) or Select Folder (Windows) to return to the Package dialog box.
), and navigate to the Lesson14 folder, if you are not already there. Click Choose
(macOS) or Select Folder (Windows) to return to the Package dialog box.
-
Folder name: GreenIsle (remove “_Folder” from the name)
-
Options: Leave at default settings.
-
Click Package.
Note: The Create Report option, when selected, will create a package report (summary) in
the form of a .txt (text) file, which is placed in the package folder by default.
The Copy Links option copies all the linked files to the new folder it creates. The Collect Links In Separate
Folder option creates a folder called Links and copies the links into there. The Relink
Linked Files To Document option updates the links within the Illustrator document
to link to the new copies.
-
In the next dialog box that discusses font-licensing restrictions, click OK.
Clicking Back would allow you to deselect Copy Fonts Used In Document (Except CJK
& Typekit fonts).
-
In the final dialog box to appear, click Show Package to see the package folder.
In the package folder should be a copy of the Illustrator document and a folder named
Links that contains all the linked images. The GreenIsle Report (.txt file) contains
information about the document contents.
-
Return to Illustrator.
Creating a PDF
Portable Document Format (PDF) is a universal file format that preserves the fonts,
images, and layout of source documents created on a wide range of applications and
platforms. Adobe PDF is the standard for the secure, reliable distribution and exchange
of electronic documents and forms around the world. Adobe PDF files are compact and
complete and can be shared, viewed, and printed by anyone with software such as the
free Adobe Reader.
You can create different types of PDF files from within Illustrator. You can create
multipage PDFs, layered PDFs, and PDF/x-compliant files. Layered PDFs allow you to
save one PDF with layers that can be used in different contexts. PDF/X-compliant files
ease the burden of color, font, and trapping issues in printing. Next, you’ll save
this project as a PDF so that you can send it to someone else to view.
-
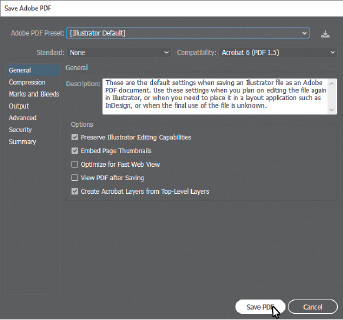
Choose File > Save As. In the Save As dialog box, choose Adobe PDF (pdf) from the
Format menu (macOS) or Adobe PDF (*.PDF) from the Save As Type menu (Windows). Navigate
to the Lessons > Lesson14 folder, if necessary. Notice that you have the option, at
the bottom of the dialog box, to save all of the artboards in the PDF or a range of
artboards. Click Save.
-
Note: If you want to learn about the options and other presets in the Save Adobe PDF dialog
box, choose Help > Illustrator Help and search for “Creating Adobe PDF files.”In the
Save Adobe PDF dialog box, click the Adobe PDF Preset menu to see all of the different
PDF presets available. Ensure that [Illustrator Default] is chosen, and click Save
PDF.
There are many ways to customize the creation of a PDF. Creating a PDF using the [Illustrator
Default] preset creates a PDF in which all Illustrator data is preserved. PDFs created
with this preset can be reopened in Illustrator without any loss of data. If you are
planning on saving a PDF for a particular purpose, such as viewing on the Web or printing,
you may want to choose another preset or adjust the options.
Note: You may notice that the file currently open is the PDF (GreenIsle.pdf).
-
Choose File > Save, if necessary, and then choose File > Close.


 ) in the Links panel.