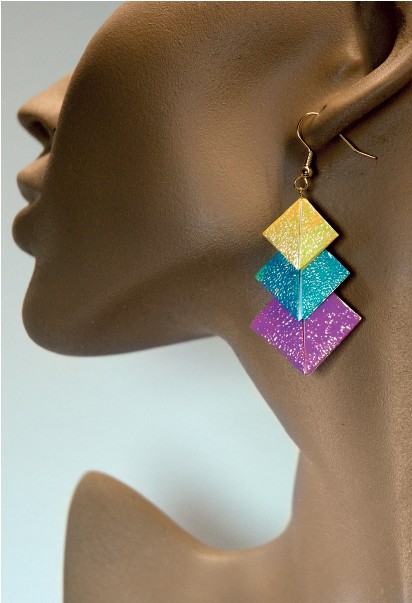
The preliminary form is a classic origami base that is used to begin many thousands of folded paper designs. We use Preliminary Form Connectors (PFCs) in our origami jewelry system as a connecting device; there are four distinct forms: Square Front and Back; Kite Front/Square Back; Kite Front and Back; and Opposed Kites.
The Square Front and Back is used to connect Square Beads to Square Beads. Its square corners provide a perfect fit. A Kite Front/Square Back unit connects one acute corner of a Rhombus to the square corner of a Square Bead: The narrow corner of the kite measures 45 degrees, which matches an acute corner of the Rhombus. By folding the Rhombus in half and adding another Kite Front/Square Back, we can form an isosceles triangle loop for hanging. We use the Kite Front/Square Back to connect the two acute corners of a Rhombus after being folded in half, forming an isosceles triangle loop.
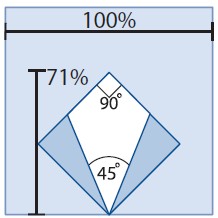
The diagonal height of the connector is the most useful measure for design consideration, as the visual scale below indicates. Connectors of varying sizes may be used depending upon the desired proportions of the design. Although the connectors will be invisible in the final piece, the length of the lock they provide is significant: the larger the connector the more overlap between joined pieces.
Glue need not be used during the design and fitting stages, but it should be used at final assembly for permanent results.
Square Front/Square Back PFC
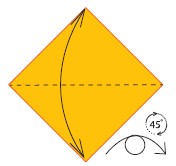
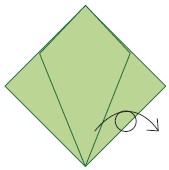
1. Begin display side up. Valley-fold in half diagonally, bottom corner to top. Unfold. Turn over and rotate 45 degrees.
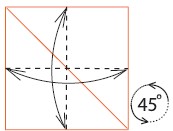
2. Valley-fold in half, edge to edge, both ways, unfolding after each. Rotate 45 degrees.
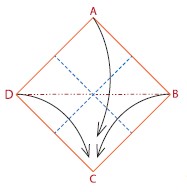
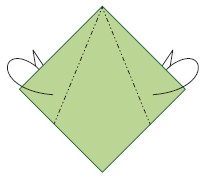
3. Use the existing creases to collapse the form, moving the four corners to the bottom.

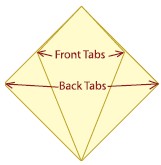
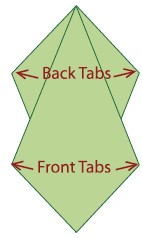
4. The completed Square Front/Square Back Preliminary Form Connector. Note the identification of the front and back tab sets.
Kite Front/Square Back PFC
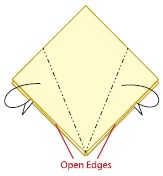
1. Mountain-fold the bottom, open edges of the front tab set, forming a kite shape on the front of the connector.
2. The completed Kite Front/ Square Back Preliminary Form Connector. Note the identification of the front and back tab sets.
Kite Front and Back PFC
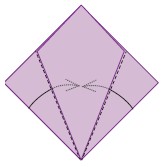
1. Begin with a Kite Front/ Square Back PFC shown to the left, with the wide end of the kite positioned at the top. Valley-fold the bottom left and right edges of the square in to the center, behind the front kite.
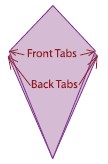
2. The completed Kite Front and Back Preliminary Form Connector. Note the identification of the front and back tab sets.
Opposed Kites PFC
1. Begin with a Kite Front/ Square Back PFC (above) with the wide end of the kite positioned at the top. Turn over, left to right.
2. Mountain-fold the top left and right edges of the square to the hidden vertical inside folds.
3. The completed Opposed Kites PFC. Note the identification of the front and back tab sets.
Connecting Two Square Beads with a PFC
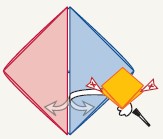
1. Apply glue to one side of the connector and insert it, glue side in, behind the slot on the front side of a Square Bead. Slide the connector into the bottom corner of the Square Bead and close the bead tightly.
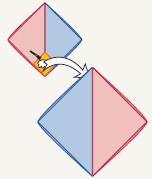
2. Apply glue to the front side of the connector and fit its tabs into the back slot of another Square Bead, positioning and closing the new bead as desired.
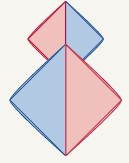
3. Two Square Beads connected. You may connect many square beads in this way and use the same or different sizes. Chains of connected beads can be made into hoops for bracelets.
Pendant Mount
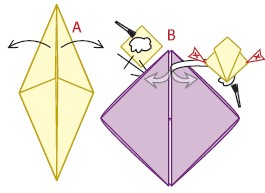
1. You can use two Kite Front/ Square Back Preliminary Form Connectors to attach a Rhombus Base (page 27) for a pendant mount. (A) Have ready a Rhombus Base, folded to any desired size for the design, and unfold the top flaps. (B) Apply glue to the square sides of the two Kite Front/Square Back Preliminary Form Connectors. Insert these two connectors—one in front and one in back—into the top slotted corner of a Square Bead, kites exposed.
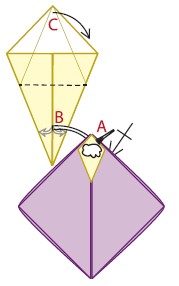
2. (A) Apply glue to the kites of the connectors. (B) Insert the kite of one side into the bottom acute corner slot of the partially opened Rhombus Bead. (C) Valley-fold the top half of the Rhombus Base down in front of the Square Bead.
3. Mountain-fold the open flaps of the Rhombus Base behind the layers of the kite side of the connector, trapping it.
4. The completed Square Bead with Rhombus Base Pendant Mount.
Other Preliminary Form Connector Usage Ideas
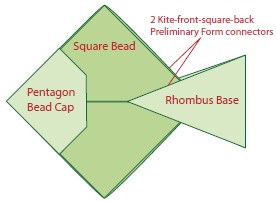
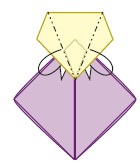
Here is a playful idea that uses a Square Bead, a Pentagon Bead Cap, two Kite-Front-Square-Back Preliminary Form Connectors, and a Rhombus Base (see opposite) to form a Fish-shaped bead or brooch.
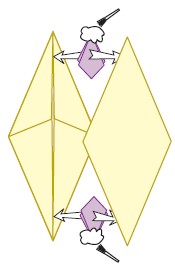
Kite Front and Back Preliminary Form Connectors may be used to connect two Rhombus Bases, back to back.
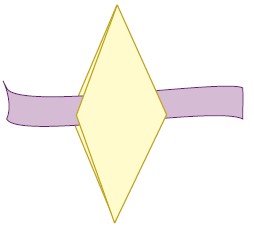
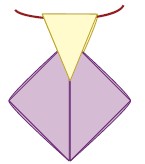
You may pass a ribbon through the open space for stringing.
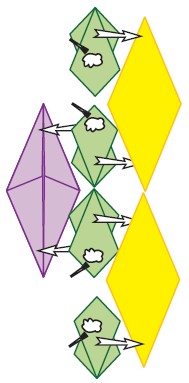
Use the Opposed Kites Preliminary Form Connectors to build chains of alternating Rhombus Bases.

Here is a partial chain of alternating Rhombus Bases (see opposite). You may vary the size of the Rhombus Bases that make up the chain.