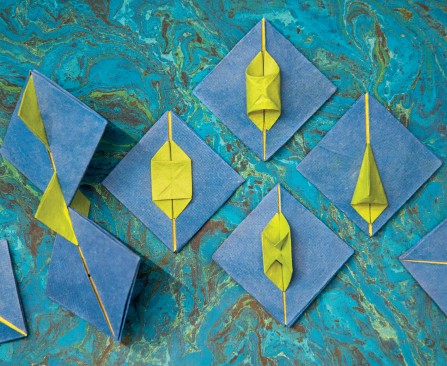
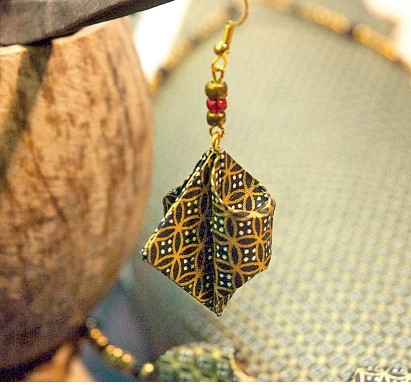
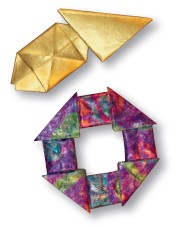
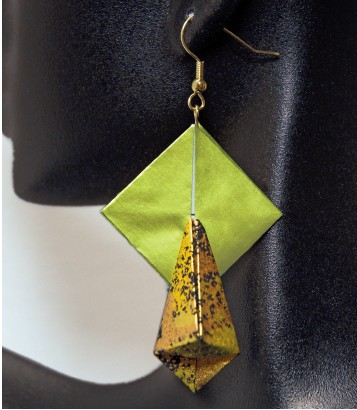
Triangle Bead Morphs with Tabs
The flaps hidden inside all of the triangle beads (and morphs) can be pulled out, squashed, and put to use as versatile tab connectors. There are three tab set configurations, each with a strategic mounting purpose. These tabs fit into any bead unit containing slots. The diamond-shaped “tab sets” each consist of a squashed triangular flap. There will be a minimum of two triangular flaps and a maximum of four.
Triangle Bead Base with Two Square Tab Sets
All of the Triangle Bead morphs can be made from this base—with added mounting options. Use these tabs to connect different beads in a variety of combinations.
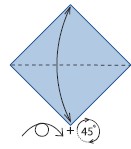
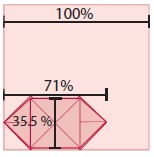
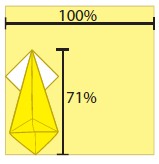
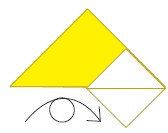
1. Begin with the display side up. Valley-fold in half, bottom corner to top. Unfold. Turn over and rotate 45 degrees.
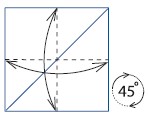
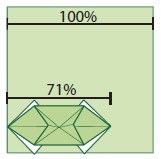
2. Valley-fold in half, edge to edge, both ways, unfolding after each. Rotate 45 degrees.
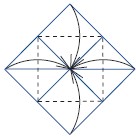
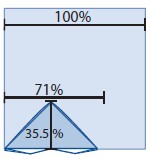
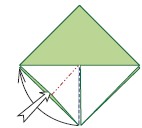
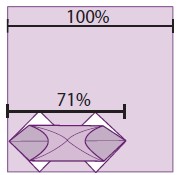
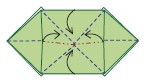
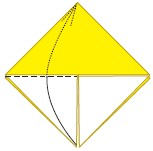
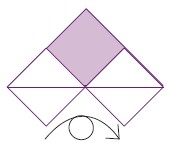
3. Valley-fold each corner to meet in the middle, where the creases intersect.
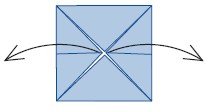
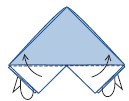
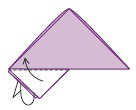
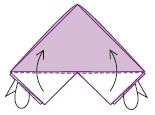
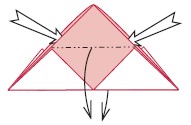
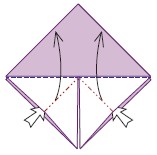
4. Unfold the left and right corner flaps.
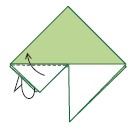
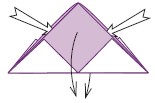
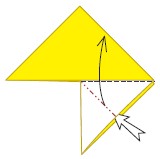
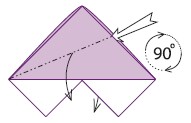
5. Use the existing mountain and valley creases to collapse the model, mountain-folding the left and right corners in half and moving them to the bottom corner.
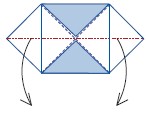
6. Inside-reverse-fold the two bottom flaps to form two sets of twin triangle flaps.
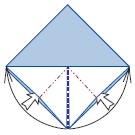
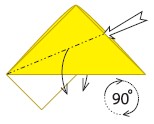
7. Valley-fold the triangular flaps to be perpendicular to the Triangle Bead.
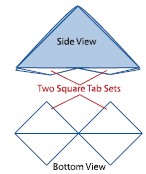
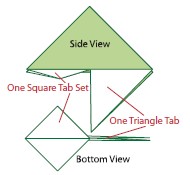
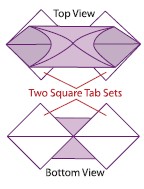
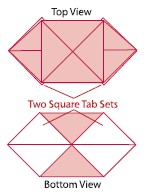
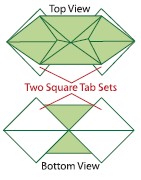
8. Side and bottom views: The completed Triangle Bead Base with Two Square Tab Sets.
Connecting Beads with Tabs
To use the Triangle Bead Base with Two Square Tab Sets to mount additional components, refer to the following sequence of photos.
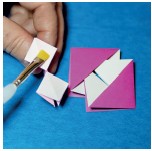
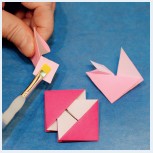
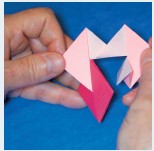
1. Apply paste to each of the tab sets, or “feet.”
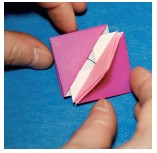
2. Insert the pasted tabs, hiding them inside the slot as the two triangle beads are brought together.
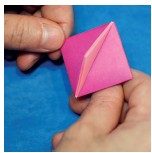
3. Keep all of the components held tightly together until the paste sets.
Triangle Bead Base with One Square Tab Set

1. Fold through step 5 on the facing page. Inside-reverse-fold only one triangular flap; valley-fold to tuck the other flap up inside the bead.
2. Valley-fold the triangular flaps to be perpendicular to the Triangle Bead.

3. Side and bottom views: The completed Triangle Bead Base with One Square Tab Set.
Triangle Bead Base with One Square Tab Set and One Triangular Tab
1. Fold through step 5 on the facing page. Inside-reverse-fold only one of the triangular flaps.
2. Valley-fold the triangular flaps to be perpendicular to the Triangle Bead.
3. Side and bottom views: The completed Triangle Bead Base with One Square Tab Set and One Triangular Tab.
To use the Triangle Bead Base with One Square Tab Set and One Triangular Tab to mount additional components, refer to the following sequence of photos, where tab sets on the pink bead perpendicularly suspend the red bead.
1. Apply paste to each of the two square-shaped tab sets, one on each lower half of the pink bead components.
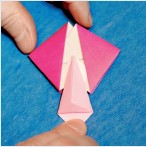
2. With all components pasted, insert one tab set into the red bead, slide the other half of the pink bead close enough to insert the second tab set into the other side of the red bead.
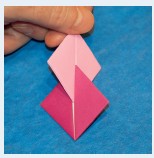
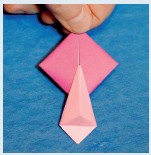
3. The red bead pasted onto the pair of tab sets at the lower half of the pink bead.
As with Triangle Beads, any morphs can also be connected with tabs.
1. Fold through step 6 for the Triangle Bead Base with Two Square Tab Sets (page 34). Valley-fold the triangle flaps up on both sides.
2. Gently open each of the two pockets found along the short edges of the triangle. Press and spread open into a cylindrical shape. Smooth the edges all around, making a neatly rounded, symmetrical shape.
3. Top and bottom views: The completed Barrel Bead with Tabs (two square tab sets).
Flattened Barrel Beads with Tabs
1. Fold step 1 for the Barrel Bead with Tabs (above). Gently open each of the two pockets found along the short edges of the triangle. Press and spread open into a cylindrical shape and then flatten.
2. Top and bottom views: The completed Flattened Barrel Bead with Tabs (two square tab sets).
1. Fold step 1 for the Flattened Barrel Bead with Tabs (below, opposite). Valley-fold the diagonals and mountain-fold the horizontals to form a hollow bow tie shape from the center square.
2. Top and bottom views: The completed Lantern Bead with Tabs (two square tab sets).
Let’s learn the single tab set version of the Teardrop Bead first.
Teardrop Bead with One Square Tab Set
1. Fold through step 5 for the Triangle Bead with Tabs (page 34). Valley-fold the bottom left triangular flap up into the bead.
2. Squash-fold the remaining triangular flap up.
3. Your paper should look like this. Turn over, left to right.
4. Gently open only the pocket at the end opposite the tab set. Press and spread open into an elongated pyramid.

5. Top and bottom views: The completed Teardrop Bead with Tabs (one square tab set at the top).
To use the Teardrop Bead with One Square Tab Set to mount additional components, refer to the following sequence of photos.

1. Apply paste to all tabs, including those for the Square Bead.
2. Insert the square tab of the Teardrop Bead at desired position.
3. Close the surrounding Square Bead elements and secure until dry.
Teardrop Bead with Two Square Tab Sets
1. Fold through step 5 for the Triangle Bead with Tabs. Squash-fold each of the two triangular flaps up.
2. Your paper should look like this. Turn over, left to right.
3. Gently open only one of the two pockets found along the short edges of the triangle. Press and spread open into an elongated pyramid.
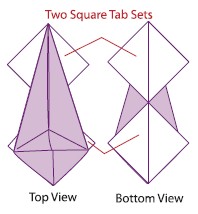
4. Top and bottom views: The completed Teardrop Bead with Two Square Tab Sets.