2
SELECTING, PLANTING, AND MAINTAINING COMPACT PLANTS
Walking into a garden center filled to the brim with plants may seem a little intimidating, especially for those new to gardening. But, if you take some time to ask yourself a few questions before you walk in the door, you’ll be better prepared for a successful shopping trip.

SELECTING THE BEST COMPACT PLANTS FOR YOUR GARDEN
There are many things to consider when deciding which compact plants to include in your landscape. Here’s a simple step-by-step process to follow, whether you’re planting a whole new garden area or adding new plants to an existing one.
STEP 1: START BY THINKING ABOUT THE SPECIFICS OF THE GARDEN AREA YOU WANT TO PLANT IN. Site conditions and purpose dictate plant choices in a big way. If your objective is to spruce up the foundation plantings around your house, you’ll be using different compact plants than you would use if you were putting in your first vegetable garden. This step involves looking at not just the area itself but also its purpose. Are you planting an edible garden, one that appeals to pollinators, a border for a children’s play area, or a patio planting that’s especially appealing at night?
Also jot down notes about the physical conditions of the site—things like how much sun the area receives throughout the day and whether the soil there is waterlogged, gritty and dry, or somewhere in between. Use these pieces of information to inform your decisions and make sure that each plant you choose is suitable to both the site’s growing conditions and its purpose.
STEP 2: WHAT’S YOUR GOAL? Next, you’ll want to take a hard look at what goal you’re trying to achieve with the planting and match that goal with a specific group of plants. Take notes about how the space is to be used and what you’re hoping to accomplish by planting there. For example, if your goal is to add a pop of color down your front walk, you should walk right past the compact evergreens and head straight to the compact perennials. If you want to create a defined border between your house and your neighbor’s, low-growing herbs shouldn’t be your first choice. Instead, opt for columnar trees, narrow ornamental grasses, or a low hedge of compact evergreen shrubs.
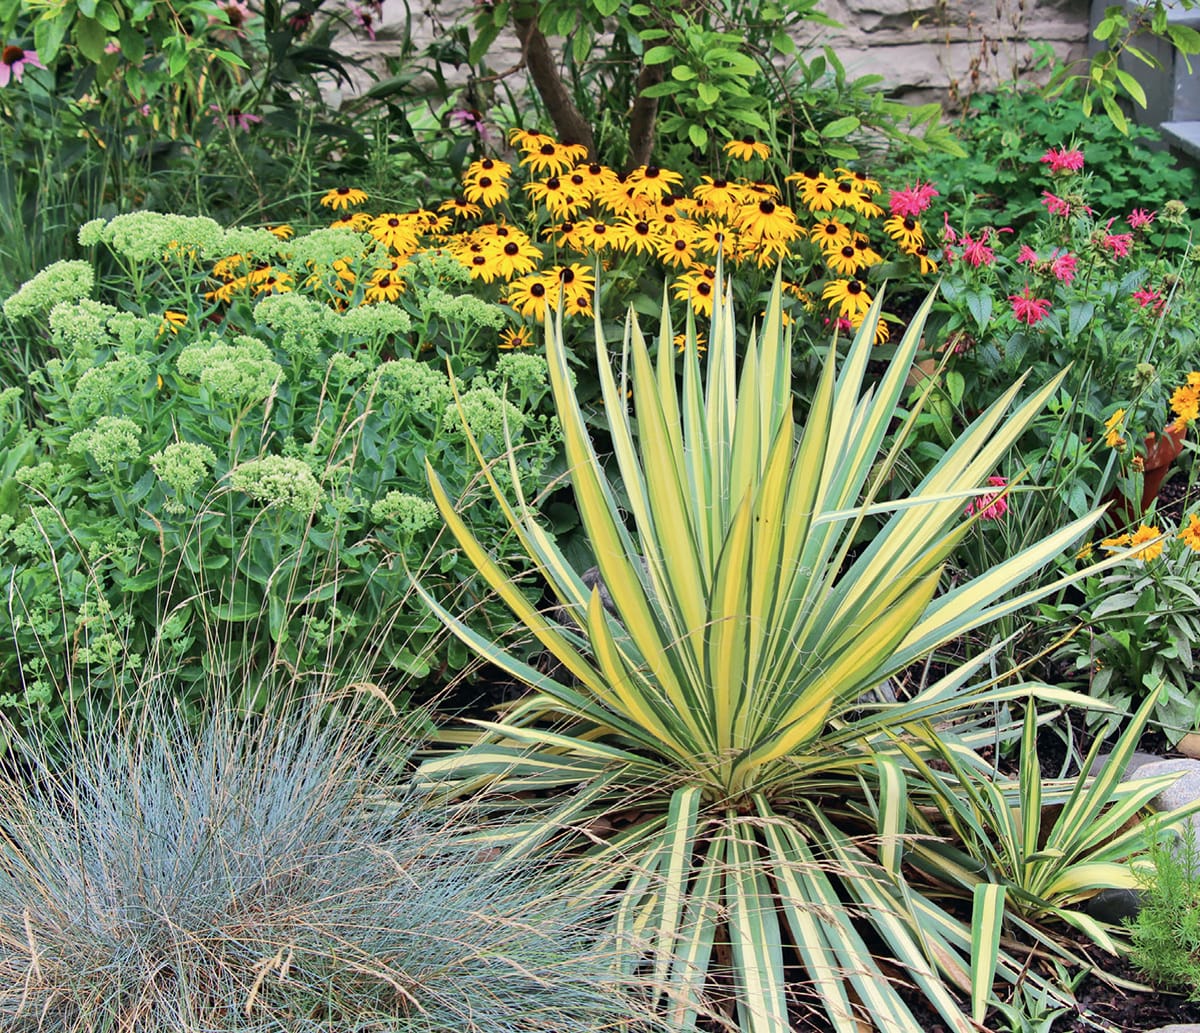
When selecting compact plants for your garden, it’s important to consider what the space will be used for and what the growing conditions are.
There are lots of factors to take into consideration, such as whether you want a plant that flowers or a nonflowering specimen. Or, are you hoping to harvest something edible or do you just want pretty flowers? Is a low-maintenance landscape your goal? Then maybe perennials that need to be sheared back three times a season aren’t the best choice. Write down your goals for that area and which groups of plants you think best accomplish it.
Chapter 4, “Compact Plants with Purpose,” is aimed at simplifying this step by providing you with lists of specific compact plant varieties that accomplish particular goals, making your trip to the garden center a whole lot easier. It’s particularly useful if you have a challenge to overcome, beyond just wanting to beautify your outdoor living space. There are plant lists for eight different purposes, from covering sloped sites to adding winter interest.
STEP 3: CHOOSE PLANTS TO MEET YOUR GOALS. The third and final step in the process also tends to be the most overwhelming. Paring down your choices to ensure that each and every one of them is a perfect match to the site, its purpose, and your goals, all while considering how they’ll look when paired together, is a complicated task. Some gardeners love this step, adding new plants to their garden on a regular basis, while others struggle to make their decisions, perhaps fearing they’ll make a bad choice and waste time and money.
If you’re intimidated by the thought of having to hand-select every plant and decide what to plant where, chapter 3, “Designing with Compact Plants,” will come in handy. In it are ten professionally designed landscape plans featuring compact plants in small spaces. Use these plans and plant lists in your own yard to simplify the process and create a garden space that meets all your goals without requiring a ton of effort.
PLANTING COMPACT PLANTS
Once your plant babies are home from the garden center, it’s time to put them into the ground. Planting compact plants is really no different than planting their full-sized kin, though if you’re new to gardening, you may question whether or not your technique is up to par. To cover all our bases, let’s discuss the best planting technique for each of the three types of hardy compact plants discussed in this book: perennials, shrubs, and trees.
I’ll leave you to your own devices when it comes to planting the last group of compact plants covered in a later chapter: fruits and vegetables. There are many books dedicated to the topic of starting seeds and vegetable gardening, so I’ll not dive into the subject here. Plus, many of the vegetable seed companies mentioned in the source list at the end of the book also have planting information on their websites.
Before I get to the actual process of planting, it’s worth taking the time to explain the importance of root loosening when planting potted perennials, trees, and shrubs. It’s a critical step in all of the following highlighted processes.
Plants that have been growing in a container for a long time are often potbound, which means their roots are growing in a circular fashion around the inside of the pot. In order for that plant to be successfully transplanted into the garden, the circling roots must first be loosened and untangled. If you skip this step, the roots could end up girdling (strangling) the plant, and they’ll be reluctant to spread out into the existing soil to access nutrients and water.
Root loosening is done by teasing the roots apart with your fingers, but if the plant is very potbound, a pair of pruners, a scissors, or even a pruning saw is needed to cut through the roots and loosen them. Regardless of which method is used, don’t be afraid to get a little aggressive. It’s better to cut the roots out of their pot shape vigorously than be too gentle with the process and leave them in the form of a perfect cylinder. The same is true whether planting potbound trees, shrubs, or perennials.
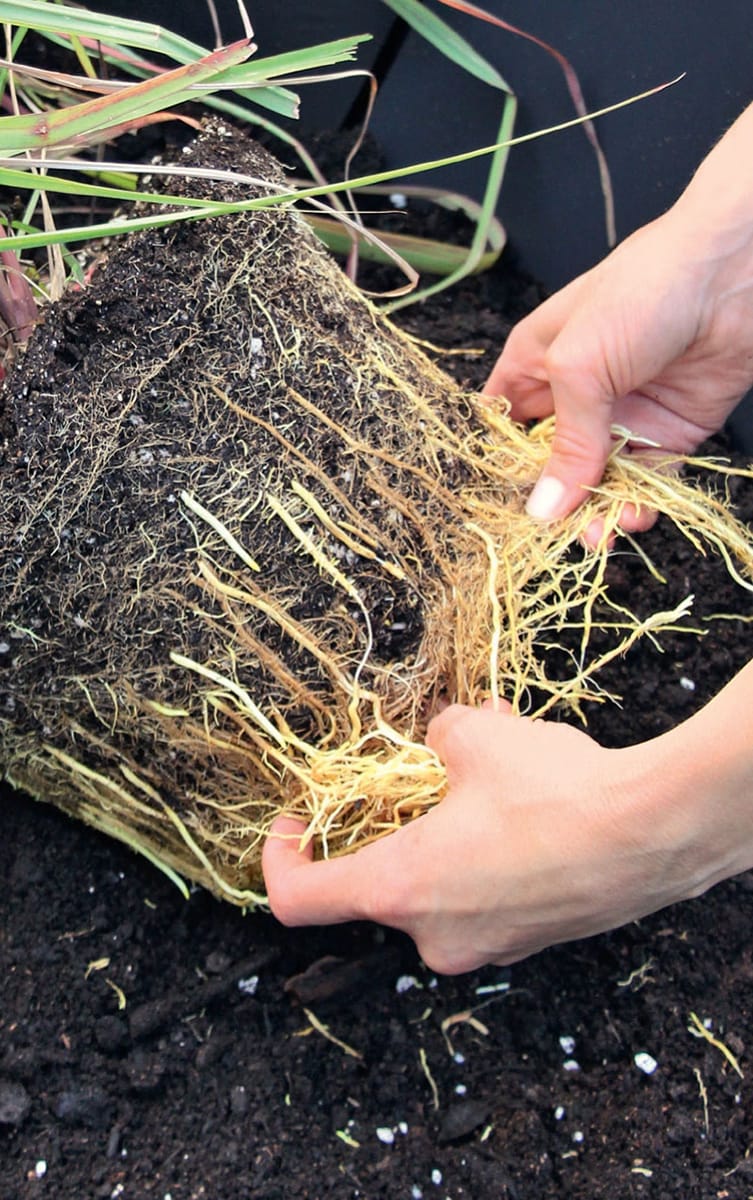
HOW TO PLANT A COMPACT PERENNIAL
Though dormant bare-root perennials (meaning with no soil on their roots) are available in the late winter or early spring via various mail-order sources, the vast majority of perennials are sold potted in containers. In some cases, the plant has been growing in the pot for only a few weeks, while in other cases, especially close to the end of the growing season, it’s been in the pot for several months.
Regardless of how established the plant is in its pot, start by digging the properly sized hole. Aim for a hole size of approximately twice as wide as the plant’s current spread. The depth of the hole should be exactly as deep as the root mass of the plant and no deeper. Planting perennials too deeply results in plant crowns that slip below the soil surface as they settle into their new home, yielding a bad case of crown rot and perhaps even death.
Toss a few shovels full of organic compost onto the top of the mound of backfill soil or work it into the entire planting area before digging the hole. Compost is a great soil amendment that adds not only plant nutrients to the area but also beneficial soil microbes, in addition to improving the soil’s structure.
Slip the plant out of its pot, being careful not to snap off any top growth. Inspect the roots carefully and loosen them as described previously before placing the plant in the center of the hole and backfilling it with the compost-amended soil.
Settle the soil back into the hole and around the plant’s roots by tamping it in with the palms of your hands. When planting is complete, the crown of the plant should sit exactly at ground level, not too deep and not too shallow. Readjust the plant if necessary.
Once the soil has been replaced, water the plant in well, soaking the root zone repeatedly. Don’t worry about overwatering your perennials at planting time; any excess irrigation water will drain away with a little time. Keep the plants regularly watered until they’re established, about 6 to 12 months later.
HOW TO PLANT A COMPACT SHRUB
Compact shrubs are primarily purchased growing in pots or with their root ball wrapped in burlap and twine (called balled and burlapped). Some shrubs may be available bare-root through mail order sources, but this is much less common.
POT-GROWN SHRUBS: When planting a compact shrub grown in a pot, begin by digging a hole two to three times as wide as the pot, but no deeper. Much like perennials, shrubs that are planted too deeply or too shallowly have a reduced chance of success. As you’re digging, loosen the soil that comes out of the hole by breaking up any large chunks. Also, be sure to rough up the sides of the planting hole with a cultivator or shovel, especially if the soil contains a lot of clay. Slick sides in the planting hole make it hard for the roots to penetrate as they grow.
Once the hole is prepared, tip the shrub out of its container and loosen the roots as described here.
Set the plant into the hole, making sure the root ball sits at the proper depth, and backfill with the soil that came out of the hole. While some recommend amending the backfill with compost, most of the existing research indicates that your best bet is to backfill with whatever soil came out of the hole. This helps the shrub better adjust to the existing soil conditions and keeps the roots from circling around in the planting hole. Water it in well and continue to regularly irrigate it for the first year after planting.
BALLED-AND-BURLAPPED SHRUBS: If your compact shrub came balled and burlapped, follow the preceding hole-digging instructions and then set the entire root ball—burlap and all—down in the hole. Once you confirm that the depth of the hole matches the depth of the root ball, untie and remove all the twine from around the plant. Then, use scissors to cut away all the burlap except for the small circle of it that sits beneath the root ball at the bottom of the hole.
After all the twine and most of the burlap have been removed, it’s time to backfill the hole with the soil that was taken out of it, being sure to break up any large chunks along the way. Step the soil down into the hole to ensure no air pockets are left behind.
After backfilling the planting hole, spread a 1- to 2-inch-thick layer of shredded bark mulch or arborist wood chips around the base, being careful to keep it a few inches away from the bottom of the stems of the shrub. Essentially, create a doughnut of mulch around the shrub and over its root zone.
Water the shrub in well by setting the hose on a trickle and leaving it at the base of the plant for a few hours. The water seeps in slowly and thoroughly waters both the root ball and the surrounding soil. Keep the shrub well watered until it’s established, about a year later.

HOW TO PLANT A COMPACT TREE
Like shrubs, compact trees are available either in pots or balled and burlapped. Some trees, primarily fruit-bearing types, are also available bare-root during the late winter and early spring. Here’s the lowdown on the planting steps necessary for each of these three options.
POT-GROWN TREES: Trees grown in pots can be a struggle to get established, particularly if they’re very potbound. It’s absolutely essential that you dig a big planting hole that’s at least three times the width of the pot, but no deeper. If you don’t want to take a measuring tape out to the garden, use the handle of your shovel to compare the depth and width of the pot to the size of the planting hole.
Be extra sure to loosen or trim off any roots that were circling around inside the pot, and carefully inspect the base of the trunk to make sure no roots have begun to wrap around it. If you find one, simply cut it away with a sharp pair of pruners.
On seriously potbound trees, I sometimes use a pressure washer set on low or a sharp stream of water from the hose to remove every bit of soil from the roots, leaving behind just the roots, which can then be teased apart and spread out into the planting hole. This technique isn’t easy, but it’s one I’ve had good success with for very potbound trees. If you do this, you may still have to trim off a few roots, but you’ll find the roots establish quickly, as long as the plant is well watered through the first 12 to 18 months after planting.
After placing the tree into the hole, backfill with the same soil that was removed, being sure to break up any large clods prior to filling the hole. After planting, the natural flare at the base of the tree’s trunk must remain above soil level. If the tree was grafted and the graft union is clearly visible as a swollen knob at the base of the trunk, the site of the graft must stay several inches above the ground to prevent the root stock from sprouting any unwanted growth or suckers.
Make a doughnut of shredded bark mulch or arborist wood chips around the base of the tree, extending out to the tree’s outermost branches. Keep the mulch from touching the base of the trunk. This deters bark-chewing rodents, insects, and rot.
Water the tree in well and continue to water regularly for at least a year.
BALLED-AND-BURLAPPED TREES: Planting a balled-and-burlapped tree is much the same as planting a balled-and-burlapped shrub, but with two important differences. Yes, the width of the planting hole should be three times the width of the root ball, but no deeper; and the twine and burlap should be cut away after the tree is situated in the planting hole. But, here’s where the two differences come into play:
• First, if the tree’s root ball was surrounded by a cage of wire, it’s essential that you cut off and remove that cage with a wire cutter before backfilling the planting hole. Failure to do so could lead to strangled roots years after planting.
• Second, when you remove the burlap, if soil from the root ball is piled up against the base of the trunk such that the natural flare at the base of the tree’s trunk is covered, clear the soil away with your fingers until the flare is fully exposed.
As with potted tree planting, be sure the knob of the graft union remains several inches above the ground if the tree is a grafted variety. Then, backfill with the same soil that came out of the hole, mulch the tree, and then water it in well.
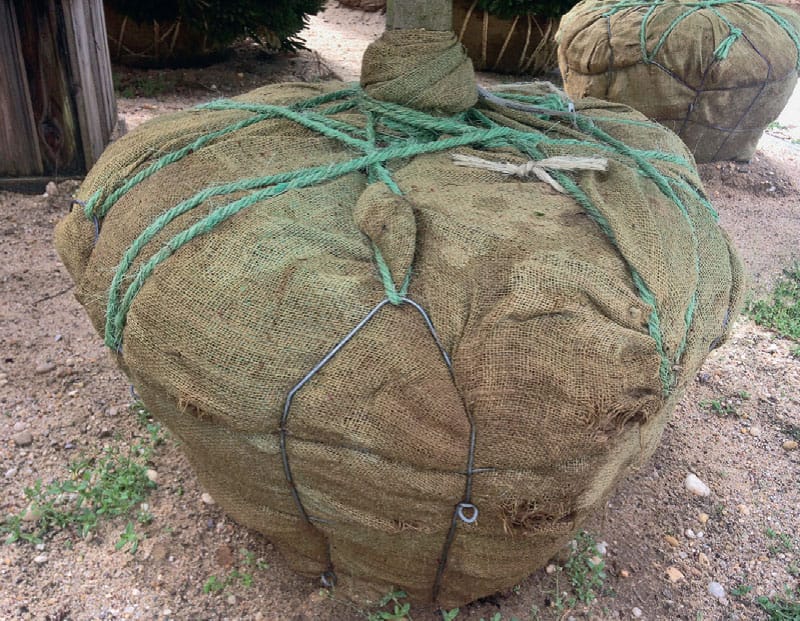
Planting a large balled-and-burlapped tree, like this one, is a challenging task. Be sure to remove the wire cage, twine, and the top section of the burlap prior to filling in the planting hole.
BARE-ROOT TREES: Occasionally, trees are also available in bare-root form, meaning there’s no soil on the roots and the trees are in a dormant state. Dwarf fruit and nut trees, as well as some compact ornamental trees, are often sold bare root.

Dwarf Alberta spruce are popular compact garden plants often found growing in containers at the nursery. Planting them properly is essential for the plant to thrive.
Prior to planting bare-root trees, soak their roots in a bucket of tepid water for 8 to 10 hours. Begin the planting process by carefully examining the base of the trunk for the soil line. You’ll be able to see exactly how deeply the tree was planted in the field based on this line of soil. For grafted trees, it’s typically several inches below the swollen graft union. That soil line is the depth to which the tree should be planted.
Dig a nice, wide hole and create a mound of soil at the bottom of it so the peak of the mound sits just below ground level. Place the bare-root tree on top of the mound and spread the roots out over the mound’s sides. Backfill the hole with the soil that was removed from it. Be sure the soil line on the trunk sits level with the soil’s surface in the new planting site, then press down the backfill soil with a hand or foot.
Create a doughnut of mulch around the tree and keep it well watered for the next 12 to 18 months or until it’s established. There’s no need to stake the tree unless the site is particularly windy or unstable.
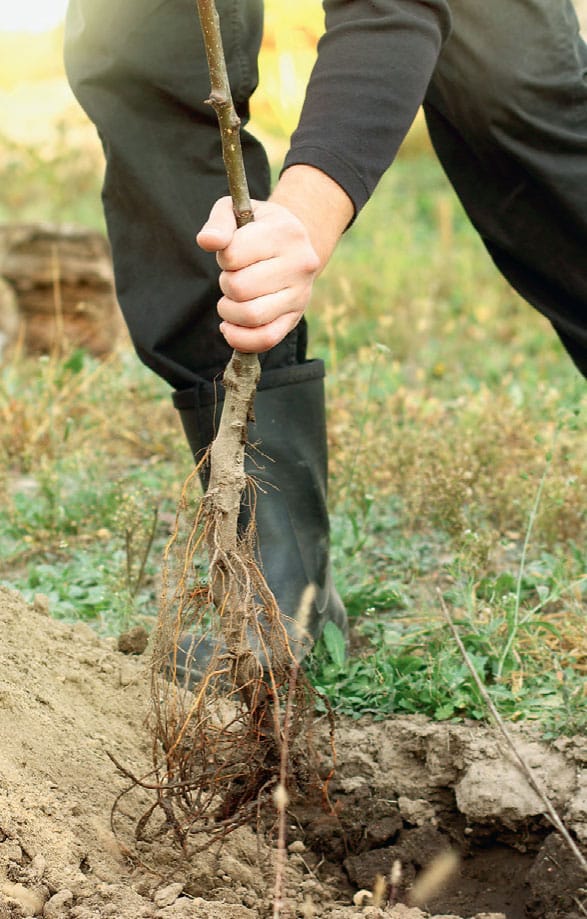
Bare-root trees have no soil on their roots. At the nursery, they’re stored at a temperature that keeps them in a state of dormancy. But, once they arrive on your doorstep, bare-root trees should be planted within a few days.
MAINTAINING COMPACT PLANTS
Though, as a whole, compact plants require less maintenance than their full-sized counterparts, there are some things to be done to keep these plants in tip-top shape. It’s just good plant parenting to spend some time tending to your plants on a regular basis, even when they’re as low maintenance as many compact varieties are. The following general maintenance chores are ones to add to your to-do list from time to time throughout the growing season, though other than watering, none of them are do-or-die tasks. If you skip pruning or fertilizing, it’s likely that your plants will be no worse for the wear. They certainly won’t die from it. That’s what’s so appealing about these plants, after all, their maintenance is amazingly minimal.
THE MAGIC 7 MAINTENANCE TASKS
Task #1: Watering (it’s the only one you can’t neglect!)
Of the seven maintenance tasks listed here, this is the only one that’s absolutely essential. Plants, whether compact or not, cannot live without water; so this is the one maintenance task you cannot neglect. The trouble is, of course, that it’s tough to determine exactly how much water to apply to a plant and how often to do it.
HOW MUCH WATER TO APPLY: Plants should always be watered in after planting by repeatedly soaking the soil around the base of the plant and allowing the water to percolate down to the root system. At planting time, it’s pretty much impossible to overwater because any excess water will eventually drain away. But, the weeks and months after planting a new compact plant are also critical irrigation times to ensure proper plant establishment. More often than not, homeowners are prone to using the “splash-and-dash” method when watering their plants. They simply squirt some water on the plant itself using a hose or a sprinkler, and maybe get a little on the soil, and then call it a day. That is not good watering.
Good watering involves applying enough water to thoroughly soak the entire root system and the surrounding soil. Deep watering encourages rapid root spreading and growth. For perennials, this means adding at least a gallon or two of water to each plant every time it’s watered. For smaller trees and shrubs, 3 to 5 gallons is adequate; and for compact trees and shrubs that were in large containers, opt for 6 to 10 gallons of water per irrigation session. The water should be added slowly and in a gentle fashion (rather than via a sharp stream of water from the hose); it’s better able to soak slowly into the soil and you’ll lose less water to runoff.
Yes, roots need air; and if the soil is constantly wet, the roots can’t breathe and the plant wilts and eventually dies. Waterlogged soil is a big no-no, especially when it comes to trees and shrubs planted in heavy clay soils. The trick, of course, comes in finding a balance. That coveted balance comes when you add the right amount of water at the right frequency.
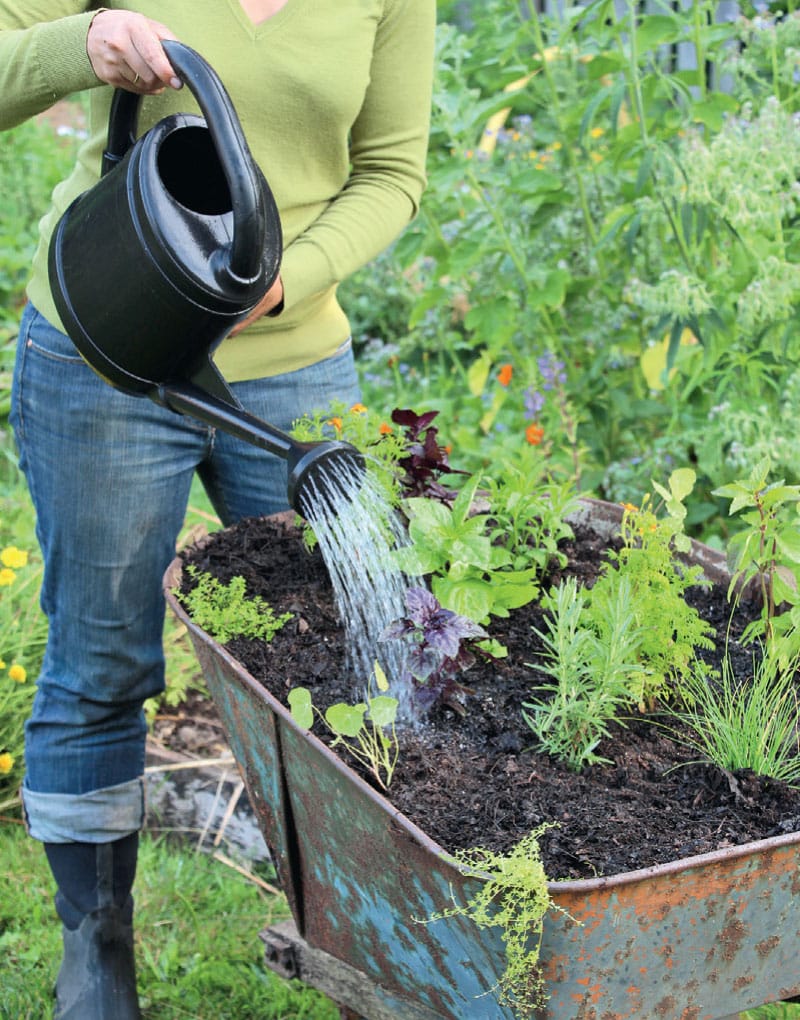
Watering is an ongoing task in any garden, but knowing how much and how often to water can be tricky.
HOW OFTEN TO WATER: Now that you know how much water to add to any particular plant, consider how often you should apply it. The frequency of irrigation depends on a number of different factors, including your soil type, the amount of sunlight the area receives, the size of the plant and its root zone, how thirsty the plant is, and how much natural rainfall has occurred.
Typically, newly planted specimens need more frequent watering than established plants do. Water can come from rain (invest in a good rain gauge and keep track) or from the end of your hose. For newly planted trees and shrubs, this means watering them with the appropriate amount of water every week to 10 days until they’re established. For perennials, perhaps once or twice a week if no significant rainfall occurs. By the time a plant wilts, drought stress has already occurred. That stress can impact the health and future performance of that plant, so aim to water just before the symptoms of drought stress appear.
Once trees and shrubs are established a year or two after planting, they aren’t nearly as dependent on you for irrigation. Except in cases of extreme drought, established trees and shrubs have root systems capable of accessing enough water on their own.
Task #2: Pruning
All of the compact plant varieties featured in this book require little, if any, pruning. In fact, if you want to skip this task completely, feel free to do so. But, there may be times when pruning is desired to either remove dead growth or improve flower or fruit production. Here are a few tips to help with the process:
1. Any time is a good time to prune out dead wood. Just be sure to use a sharp pair of clean pruners to avoid spreading any disease.
2. The pruning of trees and shrubs requires careful timing as follows:
• For spring-flowering shrubs and trees that bloom on the previous year’s growth, such as lilac, forsythia, azalea, and magnolia, prune immediately after bloom, as they typically form their flower buds the season before the flowers actually appear.
• For summer-flowering shrubs and trees that bloom on growth produced earlier in the same season, such as spirea, rose-of-Sharon, buttonbush, and smoke bush, prune in the spring to encourage lush growth and a greater number of flower buds.
• For evergreen trees and shrubs that don’t produce showy blooms, such as arborvitae, boxwood, junipers, and pines, pruning can be done anytime in the early spring, before new growth begins. You can also prune in the winter if you’d like to use the trimmings for holiday decorations.
• Most deciduous trees are best pruned in late winter through very early spring, when the tree is dormant. Maples and birches “bleed” a lot of sap when pruned in the late winter. Instead, trim these trees in the summer, though the loss of sap in the winter doesn’t really harm the tree.
• Dwarf fruit trees and berry shrubs are best pruned during the dormant season, in late winter. Consult a fruit-pruning guide for how-to instructions on this important job. Proper pruning greatly affects fruit production and quality.
3. Avoid pruning shrubs and trees in late summer and early autumn, as new, late-season growth is susceptible to winter injury.
4. When pruning, be sure to keep your equipment clean. A spray of disinfectant on the blades should be used when moving from plant to plant to prevent the spread of disease.
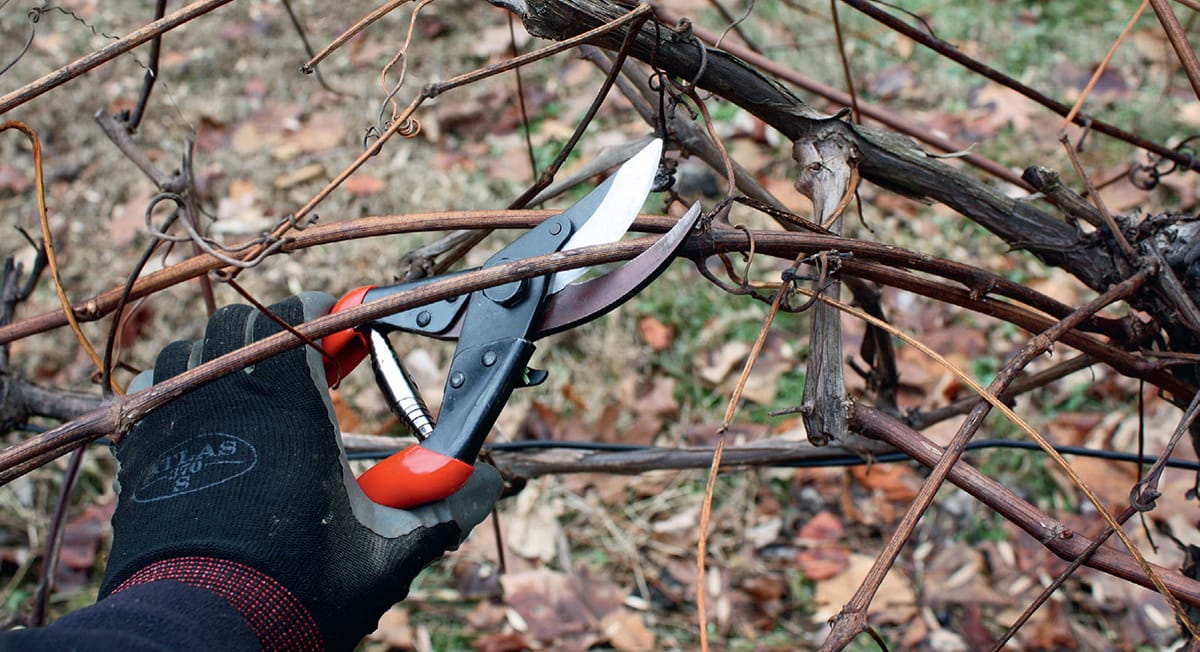
Yearly pruning tasks are certainly reduced when growing compact varieties, but there will be times when a little haircut is necessary. Fruiting trees, shrubs, and vines are particularly in need of an annual pruning to increase vigor and production.
Task #3: Deadheading
Deadheading is the removal of spent flowers, and while it isn’t a necessary garden chore by any means, it improves the appearance and flower production of your plants, regardless of whether they’re annuals, perennials, shrubs, or trees. Though each specific plant has slightly different deadheading needs, in general, this process is completed by trimming the spent flowers off the plant with a pair of garden shears. For perennials that produce a lot of tiny flowers, deadheading is best done with a pair of long-bladed loppers. For many plants, regular deadheading also increases future bloom production and keeps the plant in flower for months on end.
There are a few cases where you don’t want to deadhead: in the berry patch, orchard, and vegetable garden, for example. There, the spent flowers will hopefully turn into fruits and veggies. Or, if you plan to save seeds from any of your plants, skip the task of deadheading.
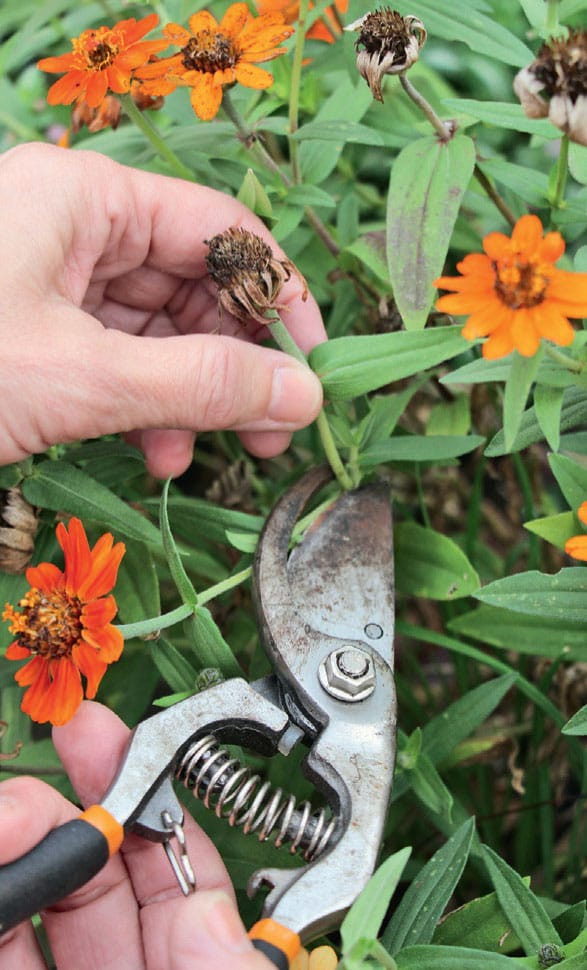
Deadheading involves using a sharp pair of pruners or scissors to remove any spent flowers. This encourages the formation of new blooms.
Task #4: Mulching
Mulching is an important way to limit weed growth and reduce watering needs, though most compact plants will survive just fine without it. It also dresses up the garden and stabilizes soil temperature fluctuations. In most cases, a yearly layer of mulch between 2 and 3 inches thick is more than adequate. Which mulches to use around each particular planting area is up to the gardener’s preferences, but here are some guidelines to get you started:
• Shredded hardwood mulch, pine chips, arborist wood chips, and pine straw are excellent mulch choices for deeply rooted trees and shrubs. They break down more slowly than other mulches and really help hold in soil moisture.
• Straw, untreated grass clippings, compost, leaf mold, and shredded leaves are ideal for the vegetable garden, where they’ll eventually break down into organic matter that can be turned into the soil to add plant nutrients and serve as food for beneficial soil microbes.
• Compost, mushroom soil, shredded leaves, and leaf mold are prime mulching choices for perennial flower beds. They help feed these fast-growing plants and limit competition from weeds.
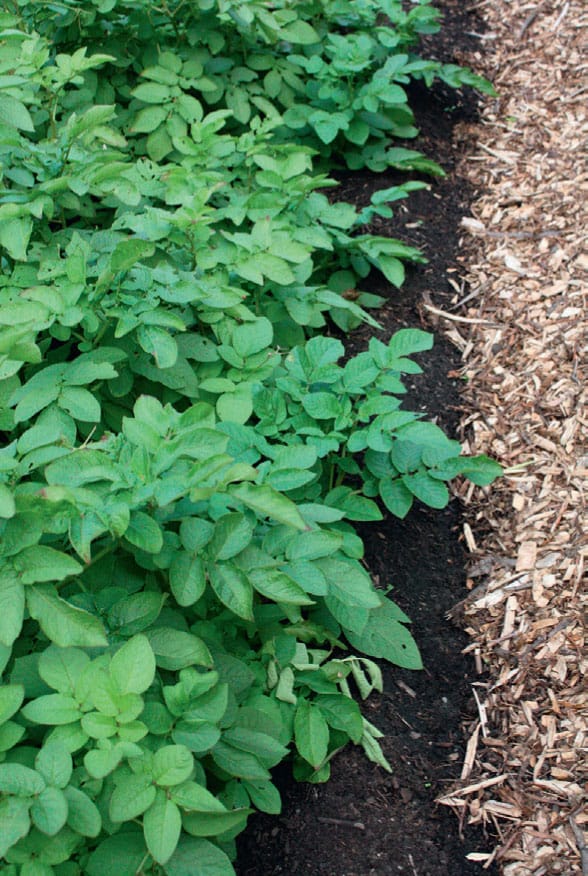
The best mulching material to use depends on the garden area you’re caring for. Compost is a good choice for vegetable beds, but wood chips are an excellent choice for pathways and deeply rooted trees and shrubs.
Task #5: Fertilizing
Thankfully, the vast majority of compact plants require very little in terms of supplemental fertilization. Most are able to readily access the nutrients they need from the surrounding soil. There are, however, times when a good fertilization program boosts bloom power and plant performance.
• Nearly all compact evergreen plants, both broad-leaved and needled, as well as blueberries and camellias, prefer growing in soils with an acidic pH. Improper soil pH results in stunted growth and yellow leaves or needles (chlorosis), especially in the areas between the leaf veins. To make sure your soil pH is optimum, take a soil test every few years, either through an independent soil-testing laboratory or the extension service at your state’s land-grant university. A fertilizer formulated specifically for acid-loving plants, such as Holly-tone®, is ideal for these plants.
• If you’re finding that your compact flowering shrubs aren’t producing blooms as planned, a soil test may indicate the need to add a balanced, complete fertilizer to the planting site.
• In the vegetable garden, fertile soil is key to good production, and so is maintaining a target pH of 6.5. A soil test (as described previously) is the only way to get an accurate assessment of your soil’s pH, and since soil pH influences the availability of nearly every plant nutrient, it’s an important number to know and adjust as necessary according to your test results. Most vegetables gain adequate nutrition from yearly additions of compost or aged animal manures, but a high-quality, granular organic fertilizer added to the beds also adds necessary nutrients if a soil test indicates the need.
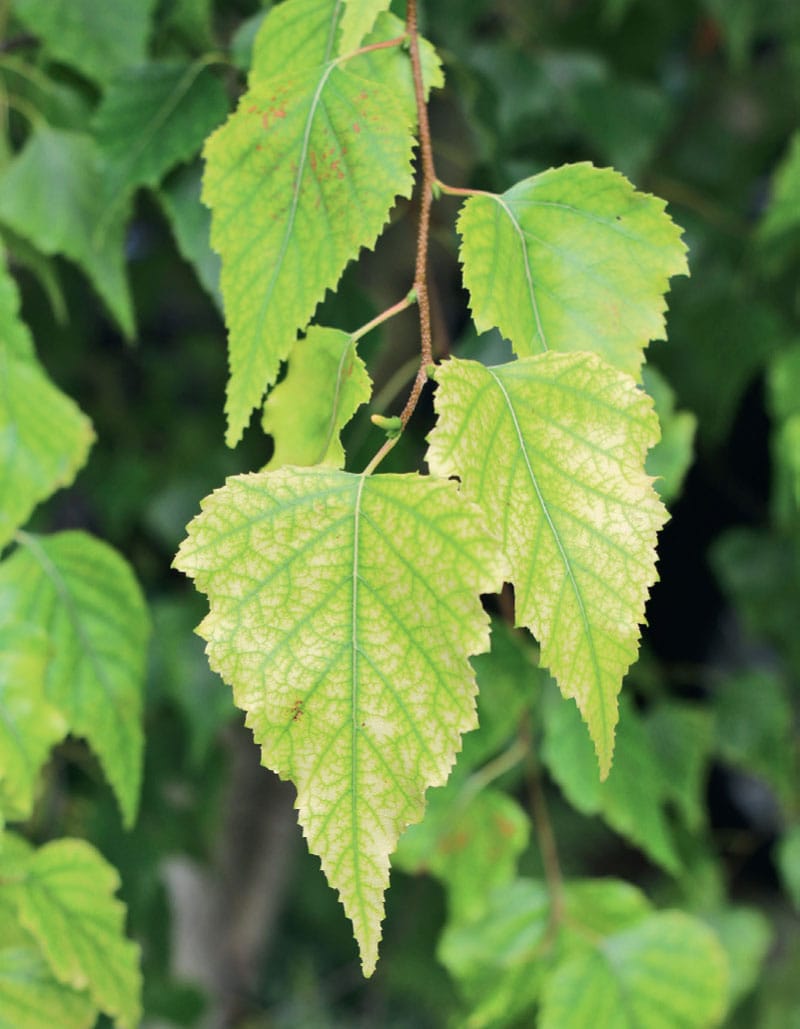
The leaf yellowing on this birch tree indicates there’s an issue with the health of the soil. Take a soil test to determine if the soil’s pH is correct and if nutrient levels are adequate to support optimum plant growth.
Task #6: Winter protection
In some cases, protection from the elements during the winter months improves the health of certain trees and shrubs. If the site has high winter winds or heavy deer browse, it’s beneficial to surround sensitive trees and shrubs with a fence of burlap or a layer of deer netting or fencing.
Antidesiccant spray products are helpful if you’re growing broad-leaved evergreen compact plants, like azaleas, laurels, boxwoods, and rhododendrons, and they’re exposed to drying winter winds. These sprays are applied to the leaves in the early winter. They block the openings in the plant leaves and protect them from moisture loss, improving winter survival rates and reducing winter leaf burn.
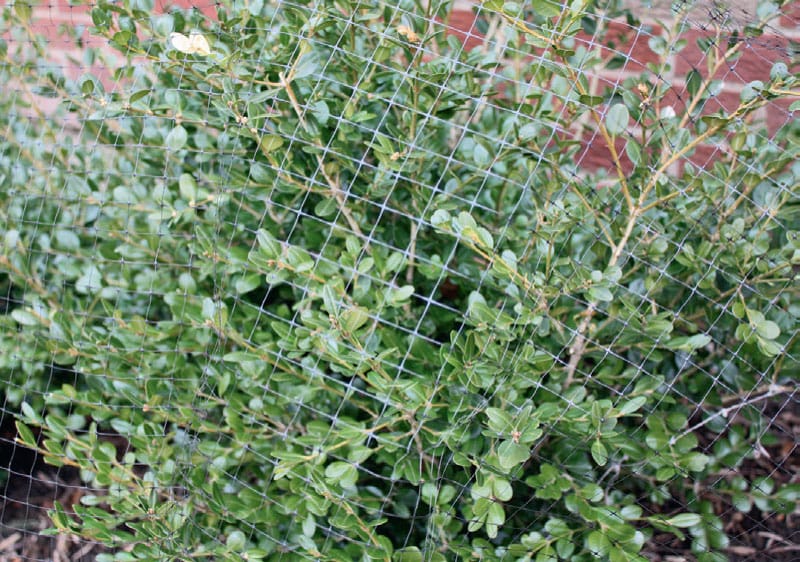
Protecting compact shrubs, such as this boxwood, from winter deer damage requires a layer of netting or fencing or the use of a deer-deterrent product.
Task #7: Yearly garden clean-up
If your garden contains a lot of perennials, an annual garden cleanup keeps things tidy. While it was once thought that the best time to do this chore was in the autumn, recent research shows that spring cleanups are best. Leave perennials and other plants standing in the garden for the winter to provide habitat for native bees, butterflies, and other beneficial insects, as well as birds and other wildlife. Cut back perennials and clean out garden beds as soon as the daytime temperatures are regularly in the 50s each spring. Compost the trimmings and shred the leaves to use them as mulch in your planting beds.
For compact shrub and tree plantings, a spring garden cleanup primarily consists of raking out any autumn leaves that haven’t blown over to the neighbor’s house during the winter. That’s it.
Though it might sound like a long list of gardening tasks to be done, keep in mind that ignoring or forgetting them from time to time does not spell certain death for your compact plants (with the exception of watering, of course). With time, you’ll come to see that the limited maintenance needs of these small-statured plants definitely make a gardener’s job easier. As always, it’s important to be aware of your plants’ health and what you might be able to do to improve it.
Now it’s time to dive into the more creative aspects of gardening with compact plants and learn some great ways to include these plants in your own garden through design tips and landscape plans.
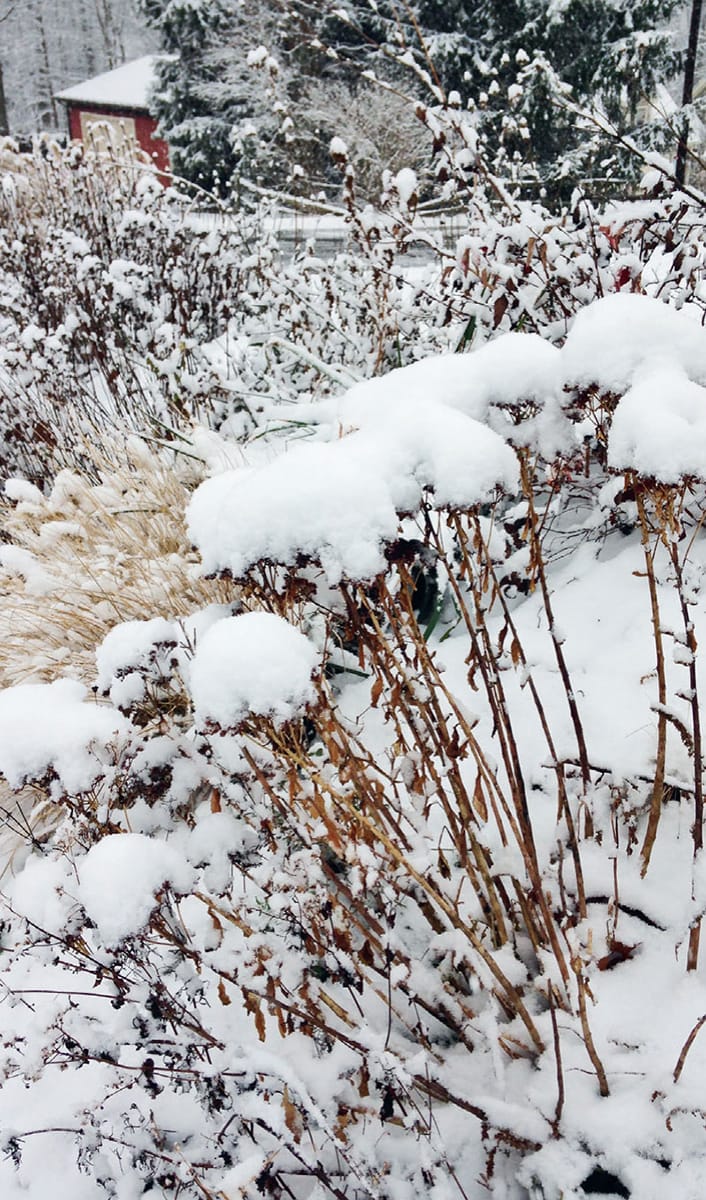
Winter is an important time for the wildlife living in your garden. Hold off on doing garden clean ups until the spring to provide habitat and shelter to bees, butterflies, beetles, and other beneficial insects.
