10
A Look at Hydroponics
The Grower and the Growing Medium
You now know that plants need a base material, called the medium, that holds nutrients and minerals, drains well and allows air to get to the roots. As you begin to experiment with soil types and mixtures, you may want to investigate the use of alternative mediums to soil, such as rockwool, clay pebbles, and other artificial grow mediums.
In the early days of experimenting with artificial grow mediums, growers discovered that the roots didn’t always respond well to the “soil-less” medium. Then, someone had the bright idea of creating a small unit to hold water and nutrients separate from the plant and medium. The roots then accessed the water after they grew down through the medium. Plants respond quite well to the use of a soilless medium in conjunction with this new design, which became the basic model for all hydroponic systems.
Hydroponics is a very successful way of growing marijuana if you’re looking for large bud quantities or bud all year long. Hydroponics is the technique of growing plants without soil in beds of sand, gravel, or artificial mediums that are flooded with a nutrient solution.
Hydroponics is a highly popular cannabis cultivation technique, but new growers should note that it does require a certain degree of maintenance and expertise. If a hydroponic system is not well maintained, the whole unit can fail and kill your plants very quickly. This is the biggest problem that the hydroponic grower has to contend with. On the other hand, the results can be simply incredible!
Hydroponics, when done correctly, can produce a flowering plant in only 3/4 of the average time it would take with a soil grow. That’s right! Hydroponics can grow bigger and better buds in 3/4 the time it takes to grow the same strain in soil.
Hydroponic Systems
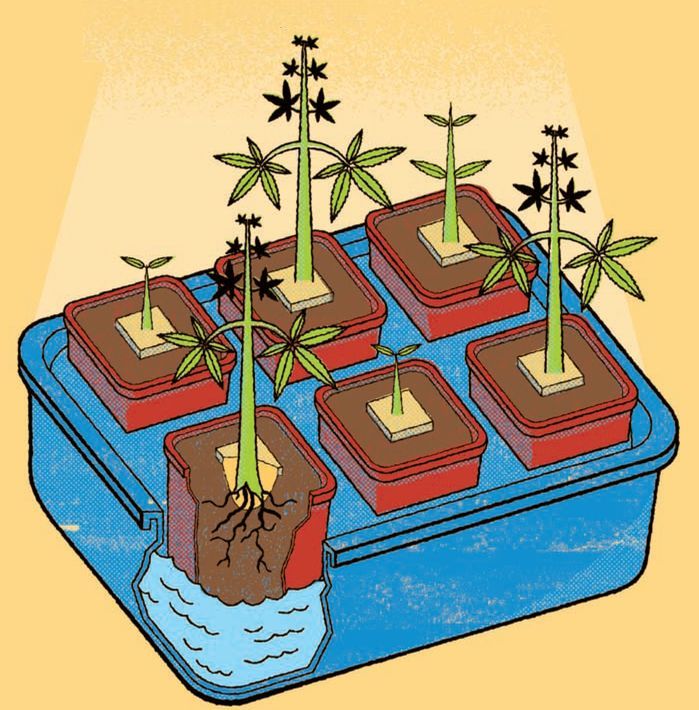
A simple hydroponic system consists of a pot, a reservoir, a grow medium, a pump, and a complete set of nutrients. The system is set up in two layers: the top layer holds the grow medium and the bottom layer holds the water with added nutrients. The plant is grown in the medium where it will develop a stem and a set of roots. The roots will grow through the medium and down into the nutrient solution. Water and nutrients are pumped into the lower portion of the tank through a reservoir at timed intervals. The plants drink the solution and expose their roots to the air. If this is timed correctly, and the growing solution is maintained properly, the plants will flourish.This is because the plant can devote the energy it would normally spend using its roots to search for water, air, and nutrients towards upper growth. That said, hydroponic systems produce massive root clusters. One can easily pick up a three-gallon bucket full of root growth from a single plant.This is because roots thrive in hydroponic systems.
Nutrient Film Technique (NFT)
NFT systems are usually bought as all-in-one hydroponic tray systems. In other words, the reservoir that holds the pumps and nutrient solution is contained in the same system, although the grower can separate it if they wish. NTF systems are generally very flat and long, but some are sloping in their design to allow the nutrients to run towards and through the plant roots and medium. The unused nutrients are recycled to create a constant flow of nutrients to the roots and back into the reservoir.
Two NFT trays. Notice how both trays are neatly slotted into an L-shape allowing for the grower to move left or right between modules.
In an NFT system, the plants sit on a rockwool slab that is cut to meet the NFT tray’s length and width. Most NFT systems come with a lid that divides the space between the medium and solution to allow root growth for you. You should use this as a guide for how thick your rockwool slab should be.
Some NFT systems do not use a rockwool slab. Instead, the trays have holes in the lid where “net pots” should sit. A net pot is a plastic pot with lots of holes in the sides and a base that allows roots to grow out from the gaps and down into the nutrient solution. Clay pebbles are the most popular medium used by growers in conjunction with these pots because they are very good at supporting cannabis stems and tend not to escape through the net pots into the nutrient solution like vermiculite or perlite do.
Flood and Drain / Ebb and Flow
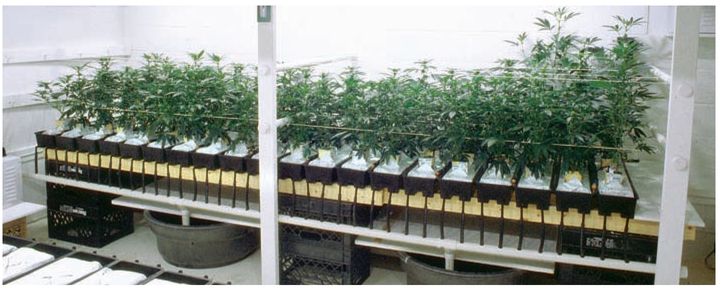
The flood & drain, also known as ebb & flow, system is another all-in-one system that is easily distinguished from other types of hydroponic systems by its greater depth.The grow medium is located above the reservoir, which delivers the nutrients and water to the roots at a set time and at a fixed rate. This means that throughout the day the plant will go through spells of dryness as the nutrients flow down through the roots and back into the reservoir again. The rate of flood and drain is measured so that the nutrient solution does not overflow the apparatus. An overflow hole in the system also helps to control flow by allowing the nutrients to spill back into the nutrient reservoir.
The nutrient solution is pumped into the medium and is slowly drained back into the reservoir again. The whole unit recycles the nutrient solution at timed intervals. These systems are generally flat to ensure that the nutrients find their way to all the plants. If it were sloped there would be an increased chance of some of the plants not receiving any nutrients at all.
Some systems have a separate reservoir, which sits under the system. A hose connects the reservoir to the system and a pump is used to push the nutrients from the reservoir and into the system, where it will flow back down into reservoir again. This setup requires less pumping than an NFT system, in some cases pumping nutrients to the plants only two or three times a day.
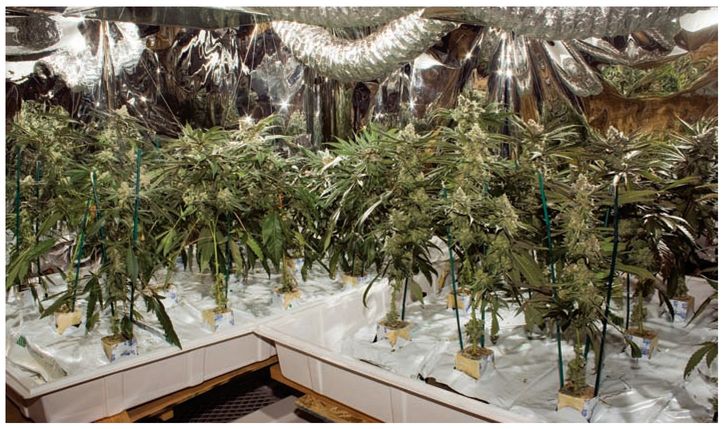
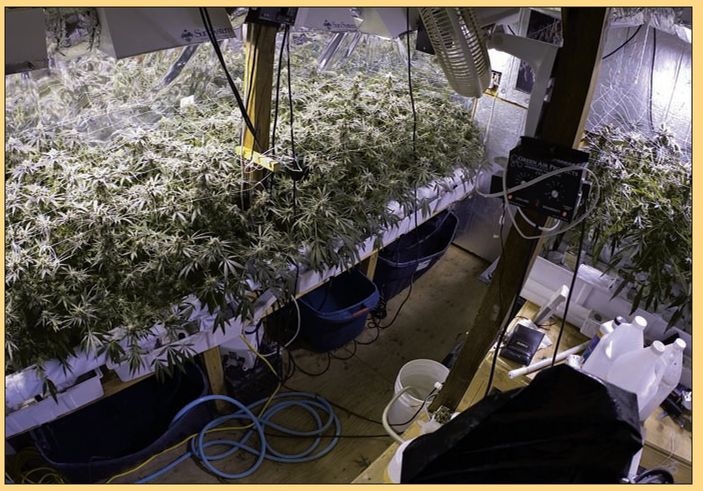
This is a hi-tech Ebb & Flow system. There is plenty of space to handle recirculation of the water and like the most effective systems, it is well organized and clear of clutter.
Ebb & Flow units are so efficient that the distribution and control of nutrients work over long distances meaning one table can literally run the length of a large grow room.
Drip Irrigation
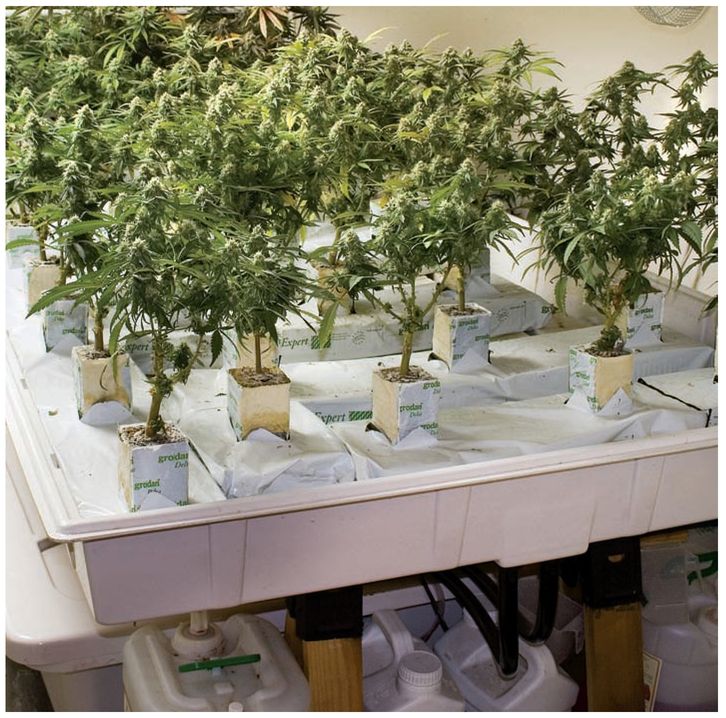
Drip irrigation works much like the ebb & flow method, except that the nutrients are moved to and from the plants much more slowly, via a dripper. In most setups, each plant is located in a separate chamber within the system. The nutrients are fed to the medium through a small dripper, which regulates the nutrient flow to and from the reservoir.
Most drip irrigation systems include separate compartments for plants to ensure that each plant receives nutrients. Some drip irrigation systems do not have separate chambers and, instead, plants are placed together in the same tray. In this kind of setup you must ensure that the nutrient solution reaches the base of the plants, where it can be distributed evenly to all of the plants in the tray. In drip irrigation systems, plants receive ample amounts of air and nutrients together, causing them to flourish in a well-maintained growing environment.
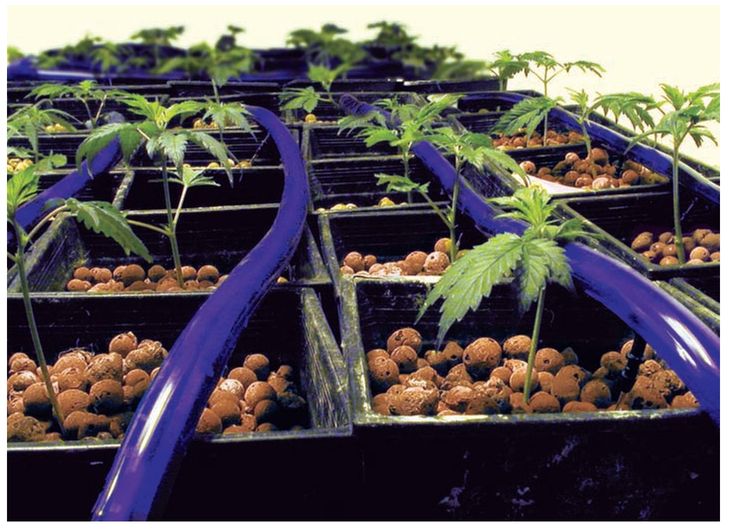
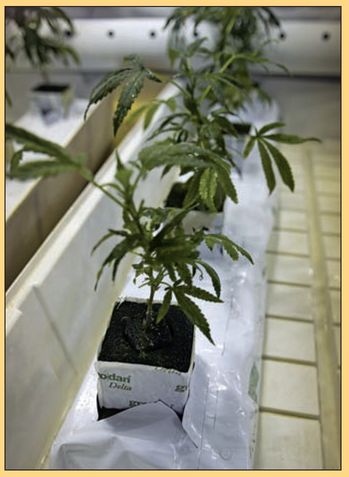
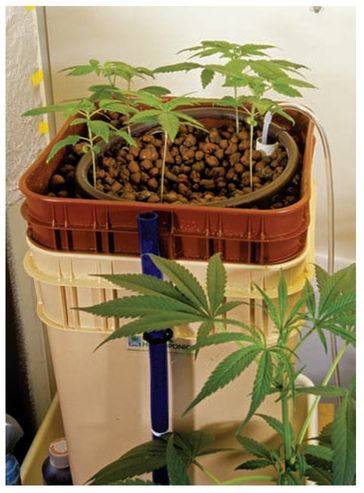
This hydroponic system uses drip irrigation. The young clones are growing in a medium of expanded clay pebbles.
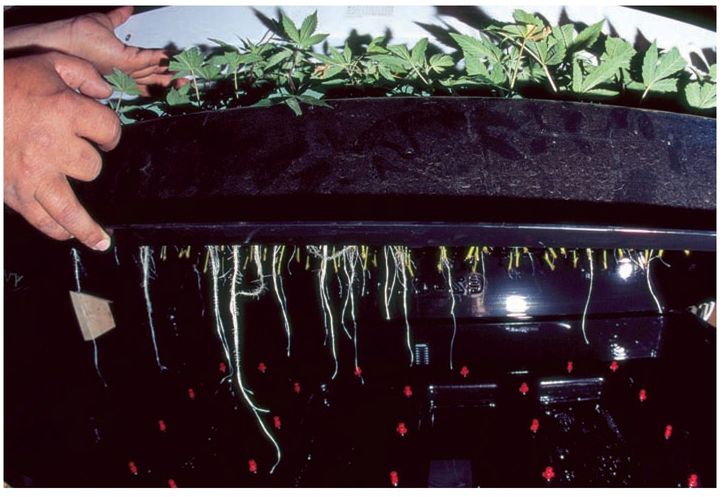
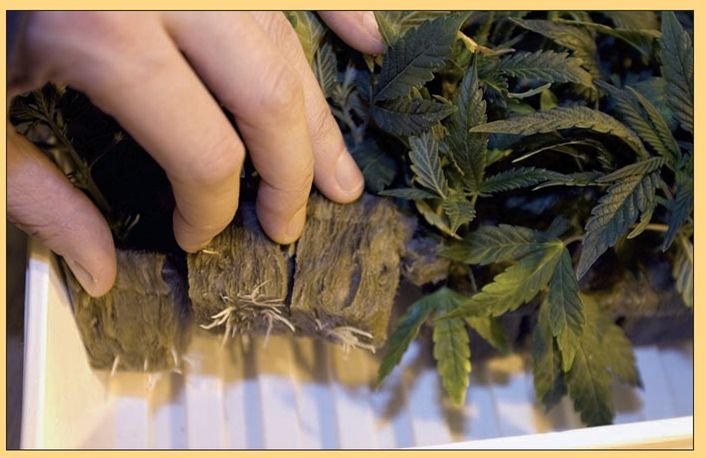
The underside of a drip irrigation system reveals a healthy beginning to a root system that will eventually form a more complex mass to manage.
Aeroponics
Aeroponics is a branch of hydroponics that has steadily been developing into a field of its own. These systems are generally expensive and are used by professional growers. The unit itself is easily recognizable by its unique design, which uses tubes. The plants are grown in a medium that is placed into slots along a lengthy tube. The tubes can run anywhere from 1 to 60 feet in length. Inside the tube are nozzles that mist the roots of each plant with grow nutrients at regular intervals. The reservoir, which contains nutrients, is kept outside of the tube in a tank. The nutrients are pumped from the tank to the nozzles and then the remaining solution that drips from the plants is drained into another tank that is normally checked before being reused again.
Wick
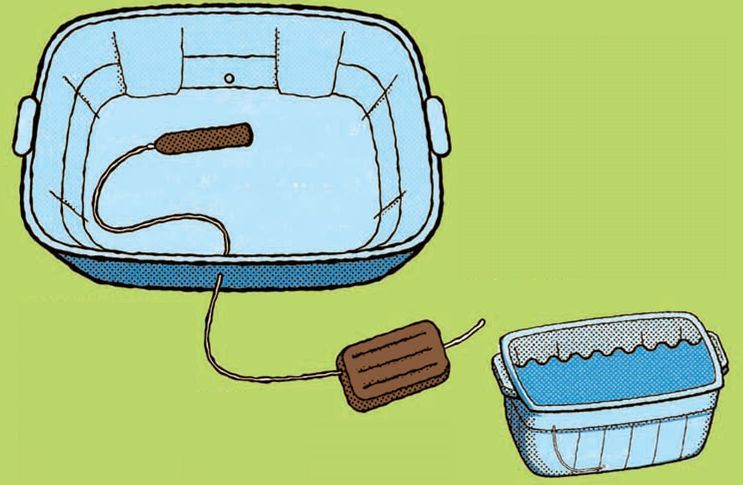
The wick system is one of the easiest hydroponic systems to make because it relies on a simple wick (or multiple wicks) to absorb nutrients from a reservoir and deliver them into the growing medium. In a wick system, the nutrient solution is held in a reservoir (a nutrient solution container) above which another container—the grow container—is placed. The grow container holds rockwool, or another type of soilless substrate, and the plants.
Building the system is simple. Before you add the substrate and plants, make several holes in the bottom of the grow container. Push the wicks down through the holes into the nutrient solution below. Something as simple as cotton strips from an old T-shirt can be used as wicks. The tops of the wicks are secured in place in the grow container to guarantee that the nutrients absorbed are evenly distributed to all areas of the substrate. This ensures that your plants have access to adequate nutrients and water.
This clone nursery setup uses a wick system. At the back of the grow room you can see a large cluster of plants in a kiddy pool.
Less sophisticated than other hydroponic systems, the wick system does not offer growers much control over the rate of feeding. In a wick system, capillary action causes the nutrient solution to travel upwards along the wick. The problem with capillary action is that the amount of time it takes for the nutrients to travel up the wick and into your medium may be much less than the time it takes for your plants to use up those nutrients. To control nutrient delivery to your plants, you need to either add wicks to, or remove wicks from, your system. If you use too many wicks, you risk overwatering or overfeeding your plants. If you find that you need to add more nutrients and water quickly, then you should hand water the medium from above. Wick system growers often have to hand water to compensate for slow capillary action of the wicks.
Gravity
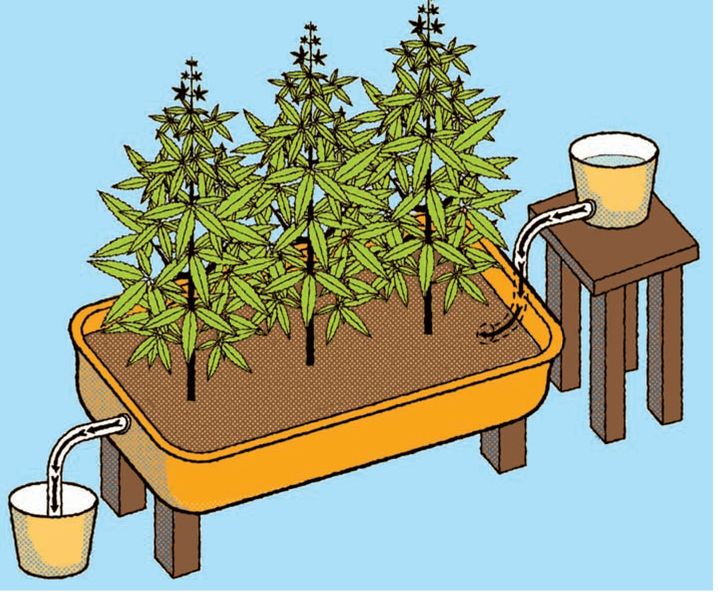
The gravity system is another hydroponic system that is easy to make. Aptly named, it relies on gravitational forces to deliver nutrient solution into your substrate and feed your plants. Gravity Systems are either sloped or horizontal.
In a sloped system, the nutrients are held in a reservoir above the grow container and are allowed to flow from the reservoir to the grow container, where they will naturally flow downwards through the substrate to the plant roots. The solution is then delivered to another reservoir on the other end of the grow container. When the nutrients have completely run out of the original reservoir it is swapped around with one full of nutrient solution and the process is repeated again as needed.
The horizontal system works in much the same way, except that there is only one reservoir that is moved manually from an upward position (where nutrients drain out) to a downward position (where the nutrients are captured) after it is emptied into the grow container.
In both types of gravity system, the reservoirs and containers should each be equipped with a tap so that the nutrients are allowed a certain amount of time in the substrate before being released back into the reservoir again. Some advanced gravity systems use pumps to feed nutrients from the catching reservoir back into the original reservoir again.
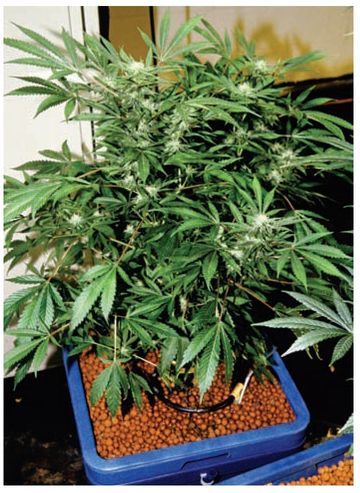
Automatic Hydroponic Pots and Manual Hydroponic Pots
These are pots that are used for growing one plant at a time. In each pot, a pump delivers the nutrients into the bottom of the pot until the nutrients reach the roots (or they are manually fed by hand). The roots then drink as much as they can until they’re dry. Once the roots are exposed, the pot is fed again with more nutrient solution. These units are good for the grower who wishes to grow one or more big, bushy cannabis plants in a simple stand-alone unit—note, however, they do require lots of supervision to ensure that they do not dry out for too long.
EBB AND FLOW SYSTEM
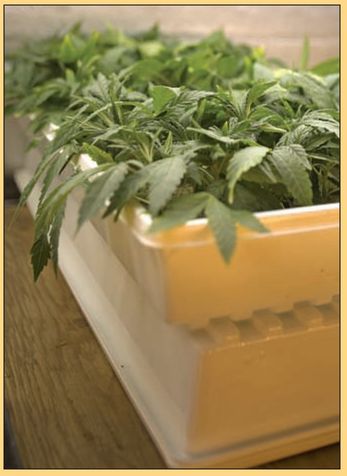
Cleanliness is important at these early stages to prevent any disease-producing agents (pathogens) from infecting cuttings. Keeping them healthy is half the battle.
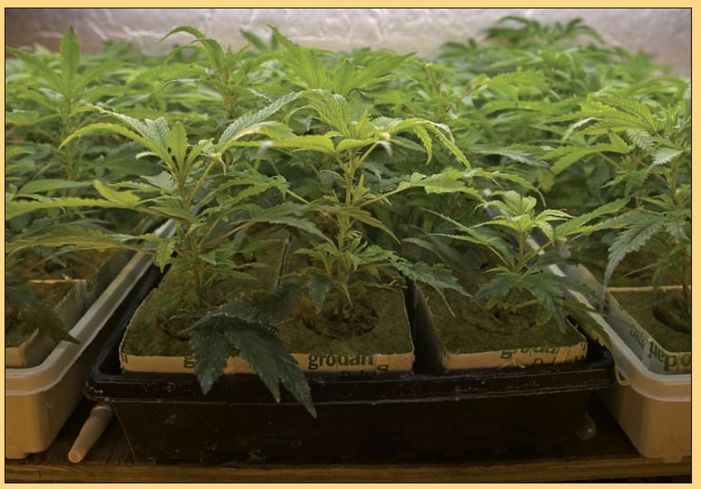
Healthy cuttings in rockwool show their vigor, as the roots are abundant and tightly packed with very few going out for a longer reach than others.
These healthy cuttings have even more densely and shorter packed root mass.
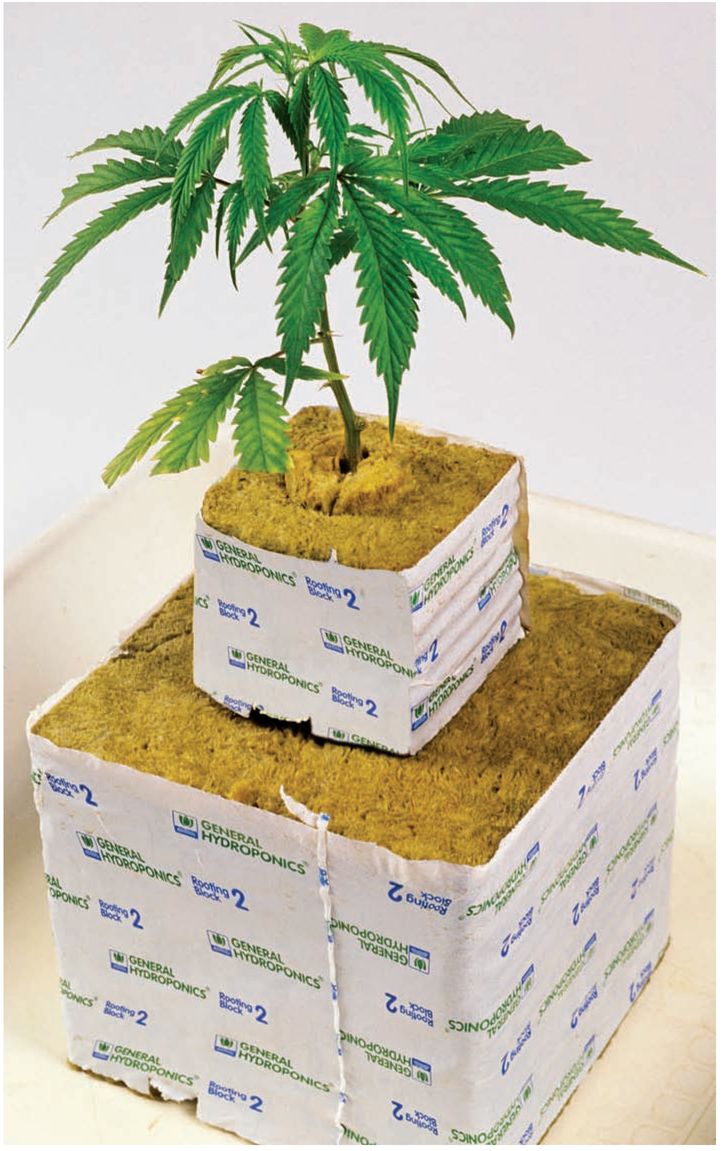
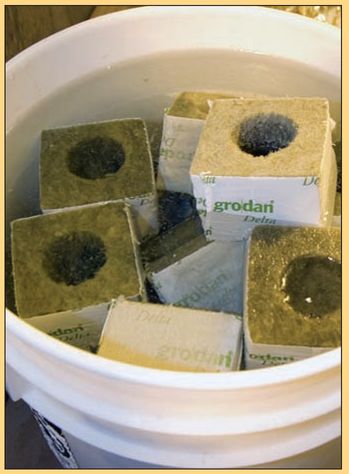
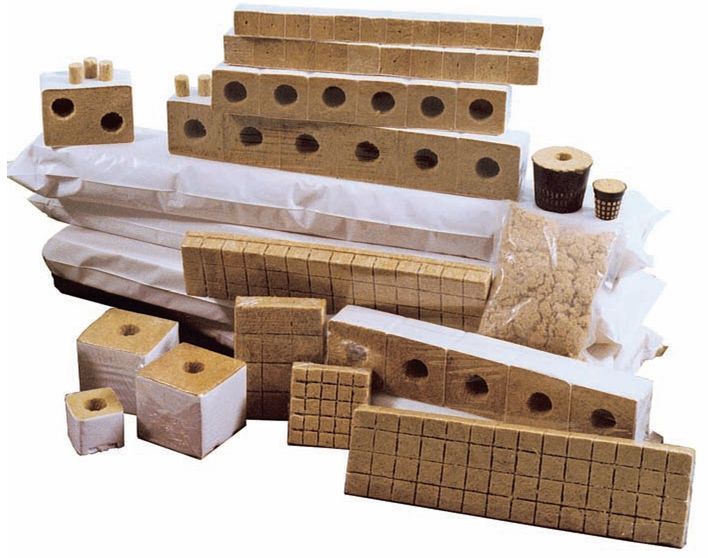
Propagation products like these rockwool blocks with hollow cores are reliable aids to successful cloning techniques.
The mini-version of the rockwool block can be inserted into the hollow blocks sometimes called delta blocks.
The proof is in the success rate. Experienced growers find that they can start hitting an optimal 90% or higher success rate.
EBB AND FLOW SYSTEM
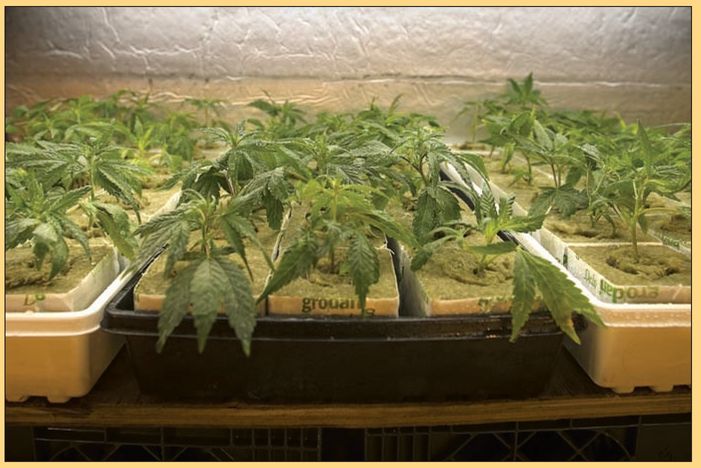
These cuttings under lights have flat or upward pointing leaves and there has been more growth.
A very important part of cutting propagation is to keep them from stretching and creating long internode length. Less crowding and low lights helps deter this.
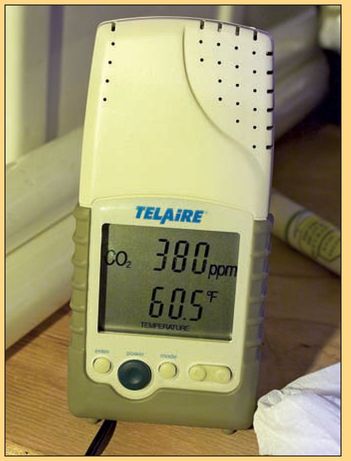
Digital measuring devices offer a higher degree of accuracy when maintaining control of nutrients, CO2, humidity and temperature.
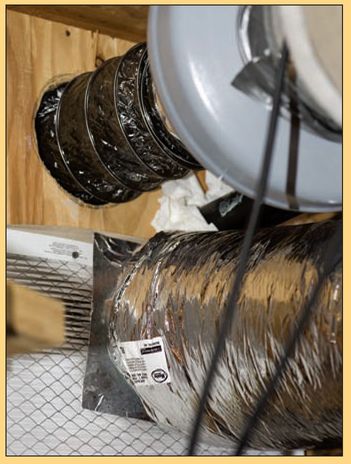
Here the vent outtakes are well sealed to prevent light and smell leakage. The tight fit helps to keep airflow under your control.
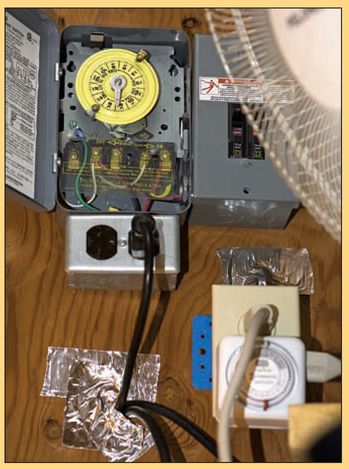
Sophisticated timing systems are worth investing in especially for safety. These electrical components are wall mounted to avoid contact with water.
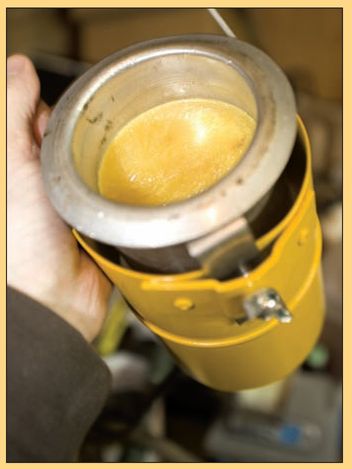
This filter helps cut down on the smell. Skunk has a particularly strong odor and filters are essential.
EBB AND FLOW SYSTEM
If you have trouble visualizing any hydroponics design then visit You Tube. All hydroponics are somewhat similar but vary in design.
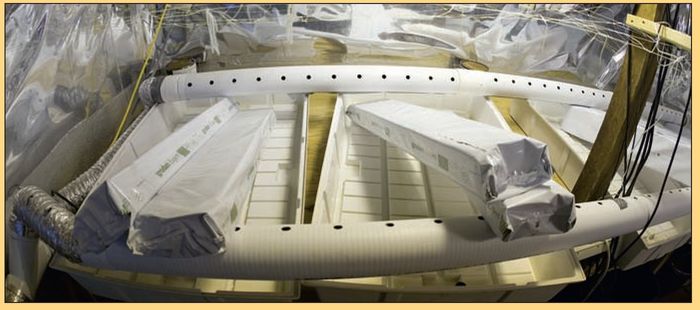
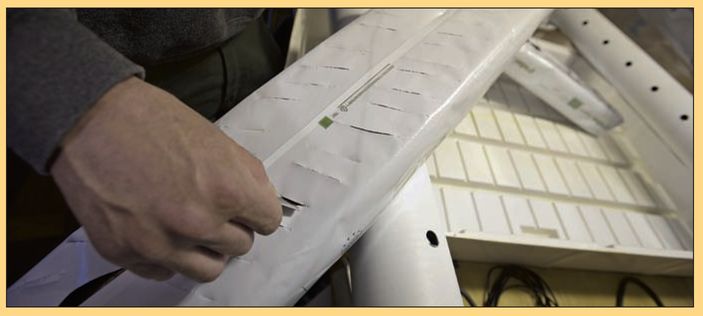
Here the substrate is being prepared. In the background the trays are waiting for a nutrient solution to be added.
The substrate is placed in the nutrient solution in the tray. Notice how they might float? Adding plants will weigh them down.
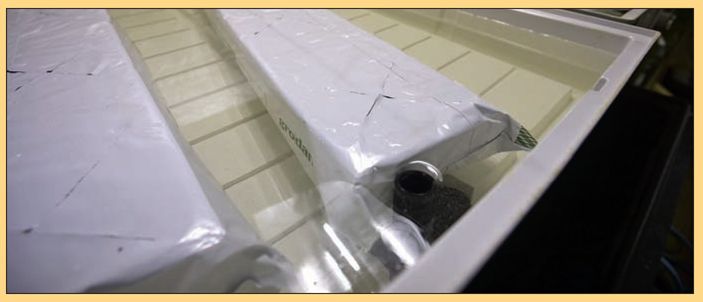
The nutrient solution has diffused not only into the substrate but also into the rockwool cube.
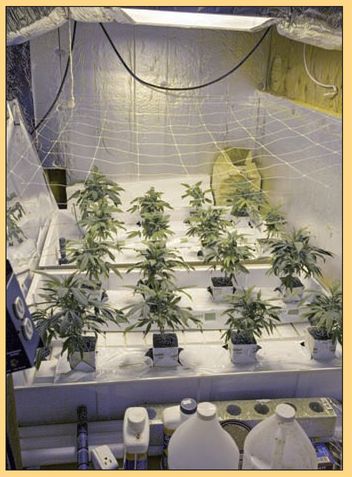
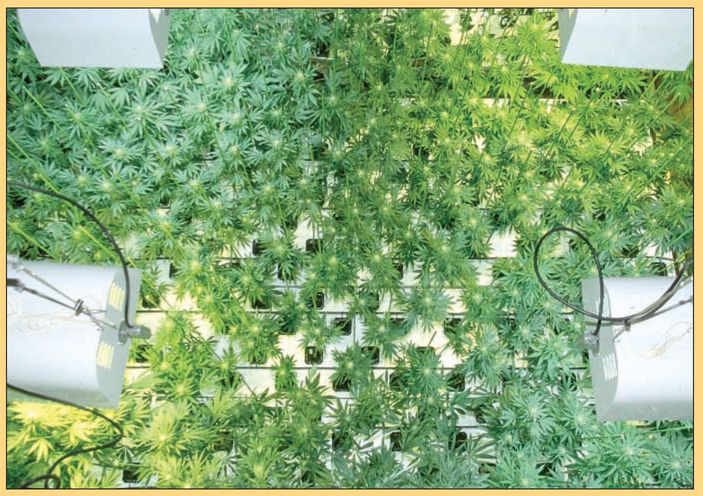
Mesh is prepared above the canopy to make it easier to engage later. This view of this part of the garden shows an even spaced 16 plant layout.
With room enough to work in this hydroponics garden is going to produce 40 plants of high quality cannabis.
EBB AND FLOW SYSTEM
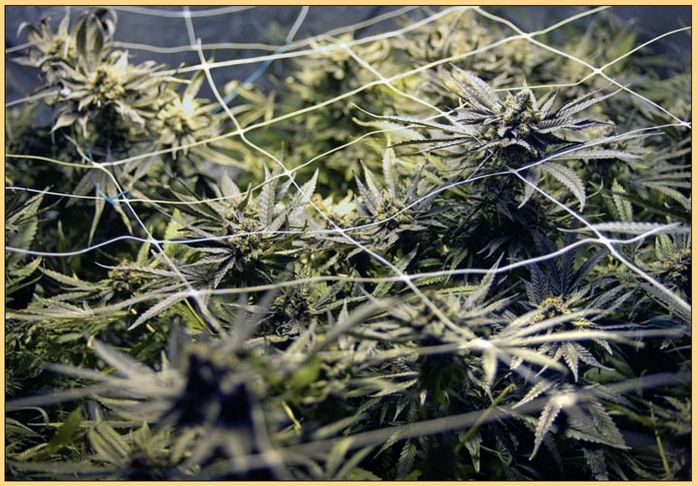
The canopy starts to break through the screen. Now it is time for the grower to begin directing where those colas should grow. The screen is mainly there for support.
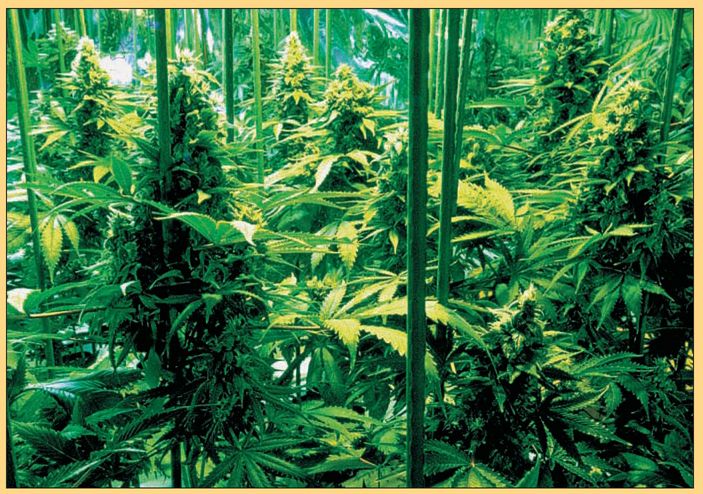
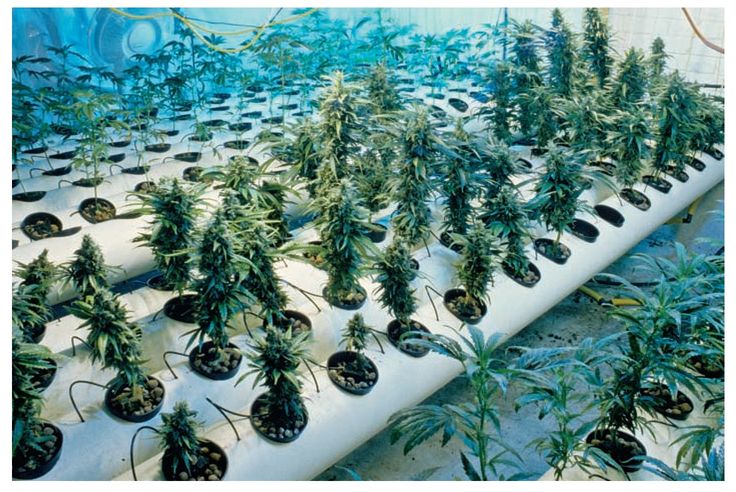
The density of the canopy from hydroponics systems clearly suggests a yield that makes it worth all the effort. This harvest would make any grower proud.
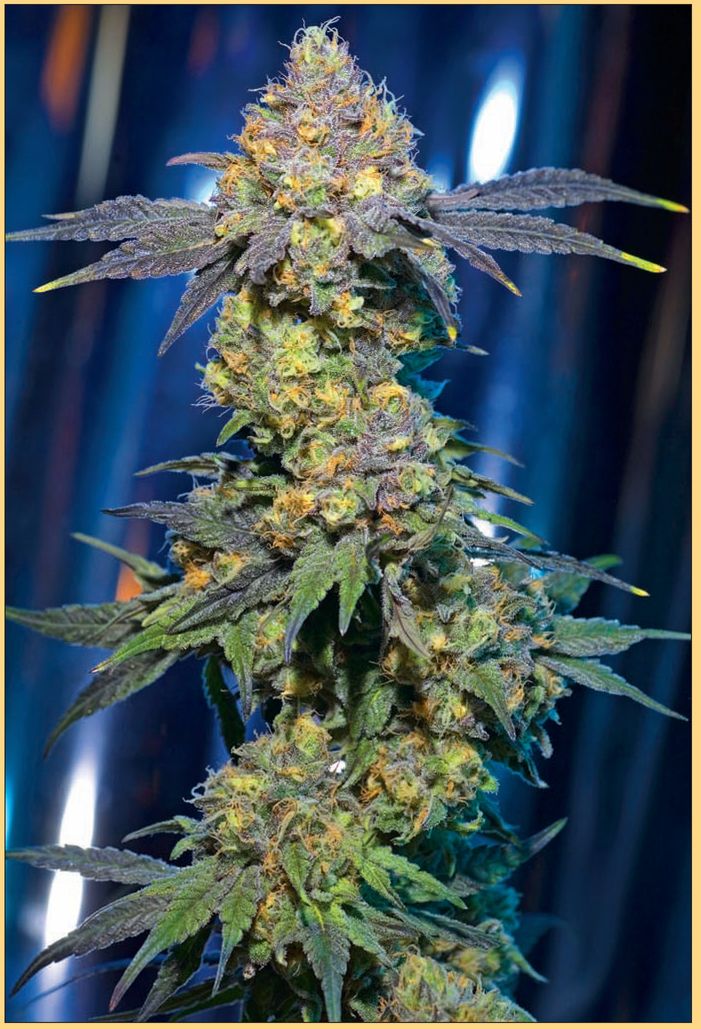
Trichome-covered colas of end-goal glory with a magazine quality look. This can be achieved with a little growing experience and the right know-how, but don’t underestimate the power of genetics.
Setting up the Hydroponic Environment
Hydroponic Nutrients
Nutrients are the most important part of your hydroponic setup. Nutrient solutions come in a number of different forms. It is vital to check that the solution you use is the best for your type of plant and setup. Some solutions should only be used with soil as they contain the wrong elements for hydroponic use. There are soil-based supplements/fertilizers and then there are hydroponic nutrients.
Most hydroponic nutrient solutions are complete nutrient solutions, meaning that they provide every element and compound needed for proper plant growth. Because of this, hydroponic nutrients can be pricey. Always spend your money on the correct nutrients because shortcuts can be expensive in more ways than one: they could lead to total devastation of your crop. In a hydroponic system especially, plants are entirely dependent on you, the grower, for nutrients and an imbalance in the system can quickly kill all of your plants.
Single Packs
If all the required nutrients are contained in a single pack, there is a chance that the elements will combine and precipitate in the pack. This can cause the solution to become unbalanced, making it useless to you and your plants. Keeping this in mind, get a complete nutrient solution that is contained in several bottles called twin or triple packs.
One brand, called Formulex, has managed to hold all the elements in a single pack using certain chemicals to prevent precipitation. This pack is very good for starting clones or seeds in a rockwool SBS tray and can be used in soil grows as well.
Specialized indoor twin nutrient pack that comes with indoor vegetative and indoor flowering formulas.
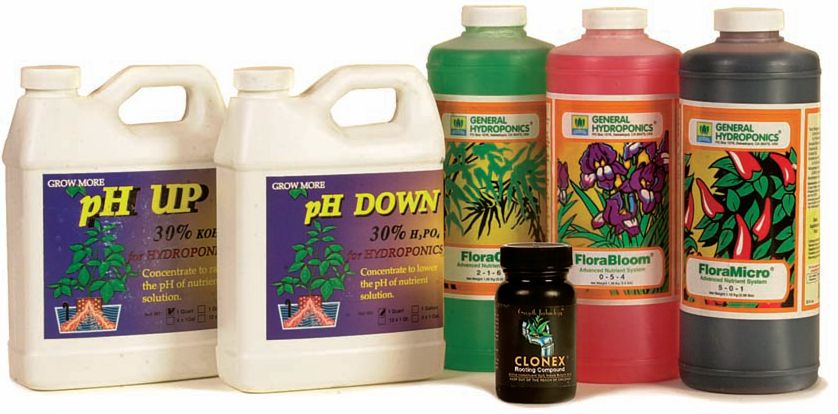
Twin/Triple Packs
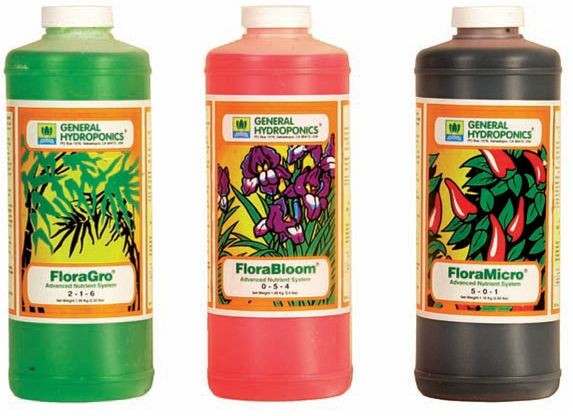
For best results, the hydroponic grower should consider a twin or even a triple pack. Basically, in these multi-packs, the chemicals are separated in order to prevent precipitation. Optimum, Power Gro, Ionic, Earth Juice, and General Hydroponics (G.H.) Flora Series are the most common multi-part nutrient solutions. The most popular one for cannabis cultivation is the G.H. Flora Series, a three-part system with Gro, Micro, and Bloom components. An experienced grower can adjust these nutrients to get optimum performance from their plants. These packs have instructions on the bottles as to how to mix the nutrients in water at different strengths, according to the grower’s needs.
Nutrients can also come in components A and B with mixing instructions on the label.
The Hydroponic Growing Medium
There are many hydroponic mediums to choose from. Rockwool is probably the most popular, is easy to work with, and comes in either slabs or cubes. The cubes vary in size from one to six inches cubed. The slabs can be cut to suit the shape of your pot or container.
Rockwool
Many growers like to use the cubes for seed germination and for rooting cuttings. This seems to be the easiest method. Many growers claim that rockwool should be pre-soaked for 24 hours in water with a pH level of 5.6 (7.0 for soil grows) in order to stabilize the pH level of the rockwool.
Expanded Clay Pellets
Expanded clay pellets are also called “grow rocks” and come in a variety of different sizes. They are an ecologically sustainable medium, usually manufactured into round shapes by baking clay in a rotary kiln at very high temperatures (at these temperatures clay will pop like popcorn, becoming porous). They are also inert, pH-neutral, and contain no nutrients. They are good for use in hydroponic systems, as they add needed support to the cannabis plants’ stems. Clay pellets are full of tiny air pockets, which make them light. Most clay pellets will float.
A three-part system usually consists of an additional micronutrient bottle, a great supplement for strains that suffer often from micronutrient deficiencies.
Clay pellets can also be reused. Just mix 10ml of hydrogen peroxide with 1 gallon of water and let them steep in the mix for a few minutes before drying them out. After a few hours they should be ready for reuse. Expanded clay pellets tend to be a bit more expensive than most other soilless substrates, but the fact that they can be reused makes this extra expense worthwhile. They can be used on their own as a growing medium in a hydroponic system, but since they are quick draining they should be mixed with another substrate when used with soil or soilless growing techniques.
Oasis Cubes
Oasis cubes also come in several formats, including Horticubes and Rootcubes. They are like rockwool cubes but are made from different materials. Prior to use, Oasis cubes should be completely saturated with water. If you use a tray to soak them, you can drain away the excess water by tilting the tray over on its side, leaving about an eighth of an inch of water in the tray. Feel the weight of the tray—it should feel heavy. Oasis holds a lot of water! Like rockwool, growers can expect a high success rate using Oasis cubes. Oasis should never be allowed to completely dry out.
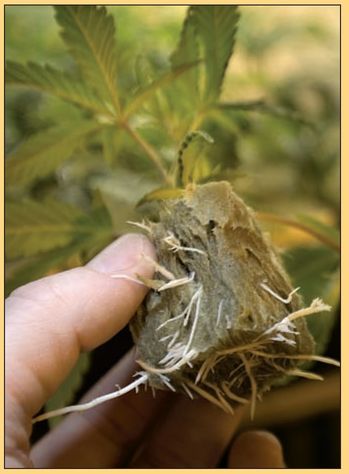
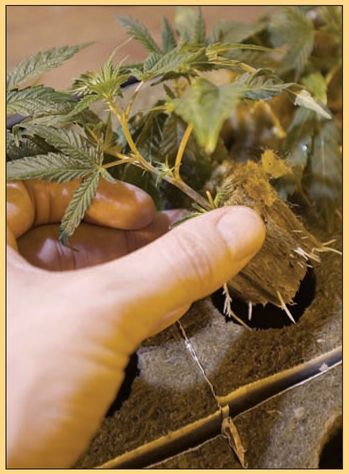
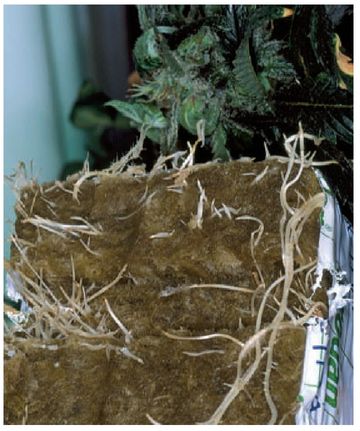
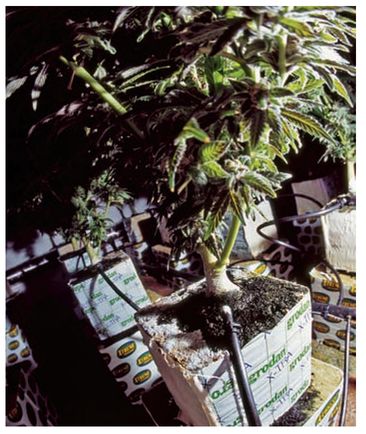
A delta rockwool cube showing healthy roots protruding from the base in search of nutrients.
Note the thick base of the plant where the stem meets the cube. It is important to have a medium that can hold it firm.
Rockwool is a popular choice for many growers and comes in a large variety of forms.
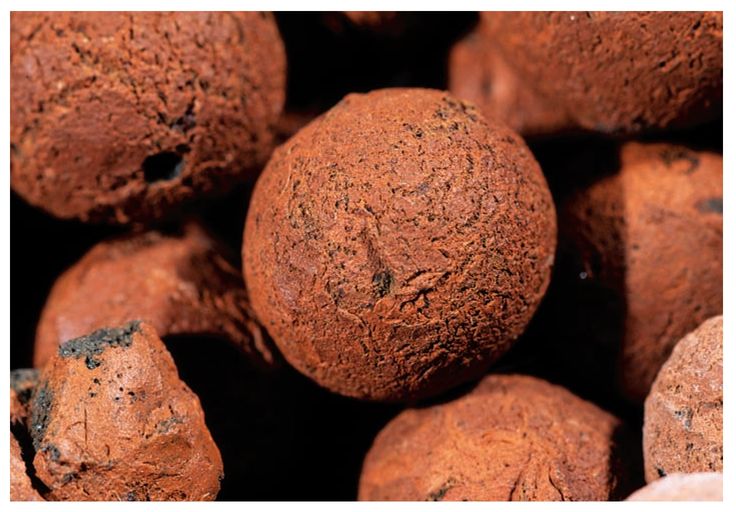
Close up of clay pebbles.
Coconut Fiber
Coconut fiber provides added protection from root diseases and fungus infestation. It also contains natural rooting hormones. Coconut fiber comes dry and compressed, usually in block format. It must be re-hydrated to a texture similar to that of wet ground coffee. When re-hydrated, most of the compressed blocks expand to roughly nine times their original size. Coconut fiber can also be purchased in different thicknesses and lengths of mats (1/2-inch thick and 24 to 36 inches widths). These mats are very suitable for hydroponic systems as they can be placed directly into the tray without requiring much shaping. Coconut fiber also retains moisture, which helps to prevent the roots from drying out between watering cycles.
Soilless Mixes
Soilless mixes are pre-packaged bags of combinations of soilless substrates. The soilless substrates and ratios used are usually printed on the bag. They can include the following: vermiculite, screened peat, peat, perlite, composted bark, fine silica sand, quartz, construction grade sand and coconut fibers. Most growers prefer to prepare their own soilless mixes because it is cheaper and offers them more control.
Re-hydrated coconut fiber.
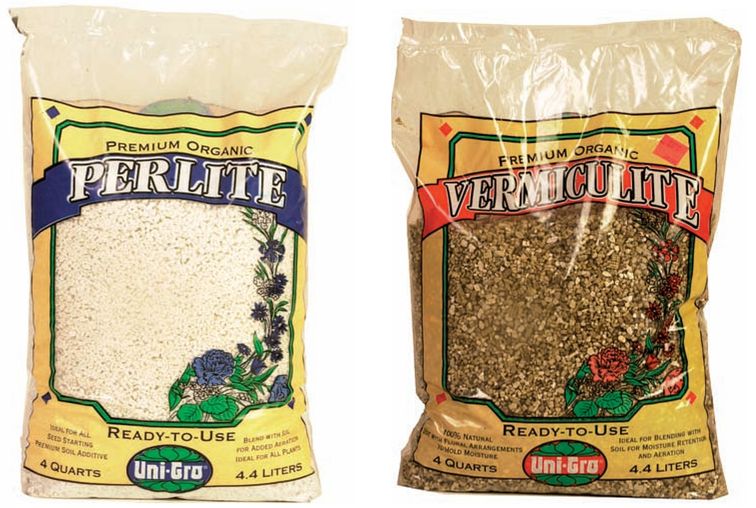
Perlite
Perlite is the name for a naturally occurring, silicon-based rock. Perlite is distinguished from other rocks by its ability to expand to up to twenty times its original size when heated. This increase is due to water present in the raw rock. When heated, the rock pops like popcorn into large pieces of nutrient- and water-retaining, puffy perlite. Perlite is a form of natural glass and is graded as chemically inert. It usually has a neutral pH of 7.
Vermiculite
Vermiculite is the name given to “hydrated laminar magnesium-aluminum-ironsilicate.” When heated, vermiculite expands into worm-like pieces (the name vermiculite comes from the Latin vermiculare, which means to breed worms). These pieces can expand up to thirty times their own size. This makes vermiculite a good water and nutrient retaining material for horticultural use.
Preparing Nutrient Solutions
Always follow the instructions on the products and dilute to the strength that best suits your strain. All you need is a container in which to mix the nutrient solution and the nutrients themselves. Each of the packs should have A, B, and C written on them, and this method of tagging is used to calculate the mixture instruction on the label. A usually represents the primary nutrients, B the secondary nutrients, and C the micronutrients. In some cases, A represents the vegetative food, B the flowering food, and C either the secondary nutrients or a secondary and micronutrient mixture. Check your pack for specific details.
Analysis of Perlite*
| Element | Percent |
|---|
| Aluminum | 7.2% |
| Bound water | 3.0 |
| Calcium | 0.6 |
| Iron | 0.6 |
| Magnesium | 0.2 |
| Oxygen | 47.5 |
| Potassium | 3.5 |
| Silicon | 33.8 |
| Sodium | 3.4 |
| Trace elements | 0.2 |
| TOTAL | 100.0 |
Analysis of Vermiculite*
| Element | Percent |
|---|
| Silicon | 30.6% |
| Aluminum | 14.4 |
| Magnesium | 19.7 |
| Calcium | 4.3 |
| Potassium | 5.1 |
| Iron | 9.9 |
| Titanium | 3.2 |
| Water | 11.8 |
| Trace elements | 1.0 |
| TOTAL | 100.0 |
| *Some elements subject to change |
In most cases the mixture is about 3.5 ml of each (A, B, and C) per liter of water. This is called a 100 percent strength mixture if you follow the instructions on the pack.
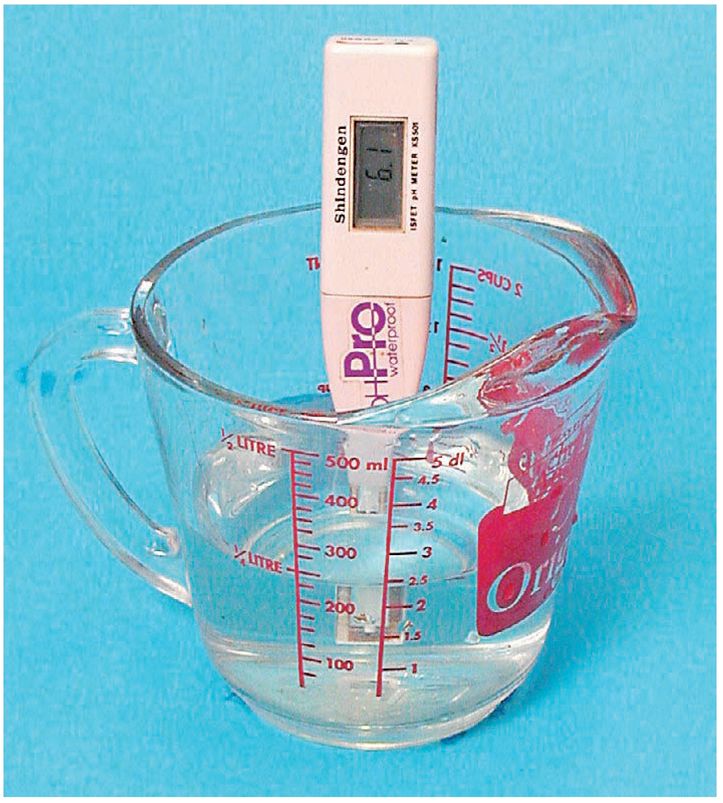
Hydroponic pH
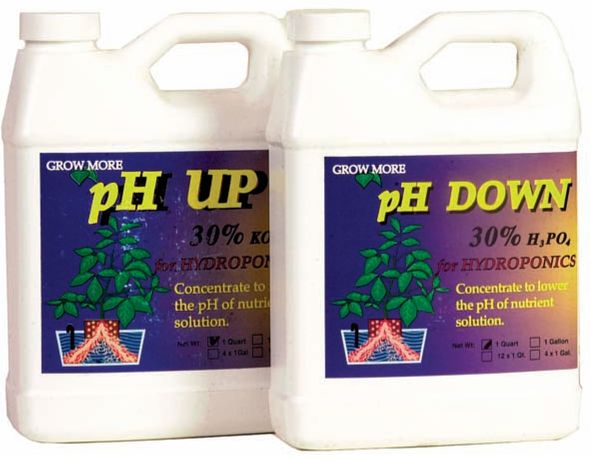
After you have mixed your nutrient solution you’ll want to take a pH reading of it. Just as in soil growing, you may need to adjust your pH level; however, you do not adjust pH to the same levels. For hydroponics, you will need a pH up and pH down adjusting solution. These are relatively inexpensive and can be added to your solution to balance the pH level. Cannabis plants in a soil system like a pH of 7, but in hydroponic systems they like a pH of 5.2 to 6.3. You’ll discover it is easier to maintain a pH range than a set level. Check your hydroponic pH level as often as you can, as it can change very quickly in hydroponic systems.
All hydroponic growers will need a pH tester.
Algae
Algae is part of a large group of non-vascular, mainly aquatic eukaryote capable of photosynthesis. Always keep your container away from exposure to direct light, as algae will grow if you do not. Most hydroponic kits are manufactured to be lightproof
1 to eliminate this problem. If you built your own system, like the bubbler described later in this chapter, then you will want to keep your solution sealed from the light using thick black tape to cover the lid and the entire reservoir. This will help prevent algae from growing in your system. A thick, black garbage bag also works well to keep the light out and algae from forming.
If you notice algae growth then you will need to clean your system. Wash the unit and replace the nutrient solution with a fresh mix. Throw out all old, algae-infested nutrients. Also try to find the source of the light leak and patch it up.
Grow and Bloom
Some of the double nutrient packs come in two different sets: grow and bloom. The grow solution is used during the plants’ vegetative growth stage and the bloom is used during the flowering stage. The bloom formulas contain more phosphorus and potassium and less nitrogen. Other packs have a complete all-in-one function, but beware: they may lack important nutrients or minerals.
When your pH is off you can use commercial products to bring it either up or down.
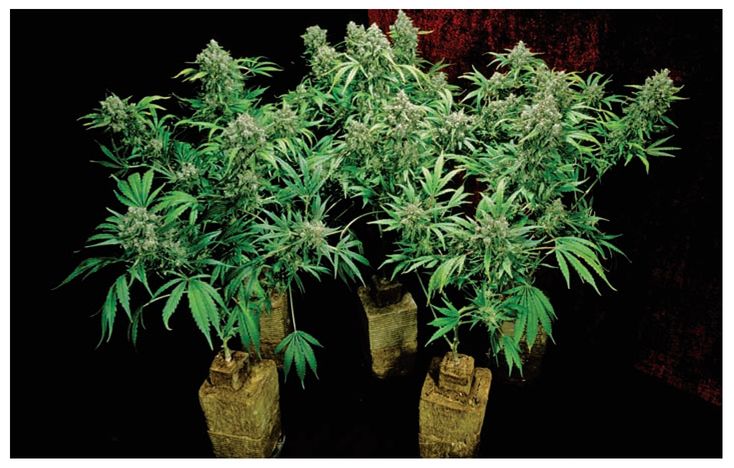
With the root mass removed these recently harvested plants have just been taken from the hydroponics medium. Notice the thick nutrient fed colas.
A Word About Nutrient Strengths
When nutrients are mixed at full strength, cannabis has a tendency to suffer from chemical burn. It’s suggested that when using any hydroponic formulations with cannabis you do so in moderation for your first grow. Many cannabis growers have bought these products anticipating the production of great big buds only to get great big plant burns.
In fact, even medium-strength formulas have the power to burn your plants. Consult the information on the packs, but in general 3.5 ml of A, B, and C per liter is called 100 percent strength.The same amount mixed with two liters or of water is 50 percent strength. Marijuana can grow very well with nutrient solutions of between 30 and 50 percent. It’s best to start off with 30 percent strength and then increase as needed. You’ll be surprised at how rich a bud content you’ll produce with a nutrient strength of only 30 percent.
The most common problem associated with hydroponics is plant burns. I have rarely heard of anyone underfeeding plants in a hydro system. I have heard plenty of reports about overfeeding plants in hydro systems. Over time you’ll get to know your strain and what it likes. The better you know your strain the better you’ll be able to control the feeding amounts.
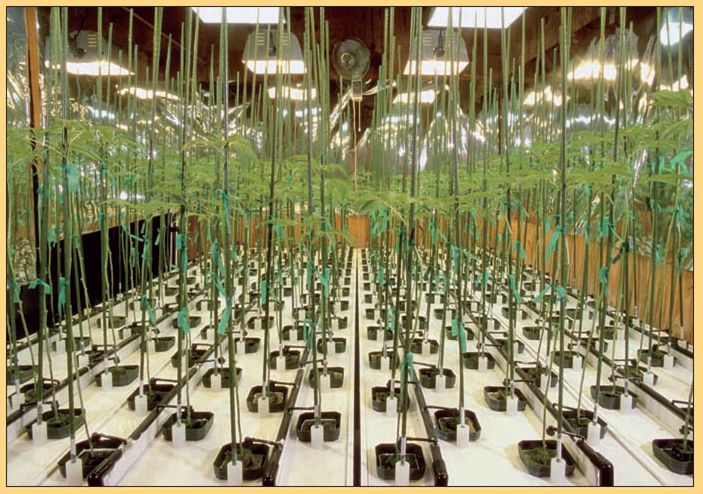
TRICHOME TECHNOLOGIES CUSTOM NFT SYSTEM
Trichome Technologies, voted Best Growroom in the 25 year history of High Times magazine.
This custom built NFT setup is simply amazing in it’s size, organization and efficiency.
Here, the plants are just a couple of weeks from full maturation and harvest.
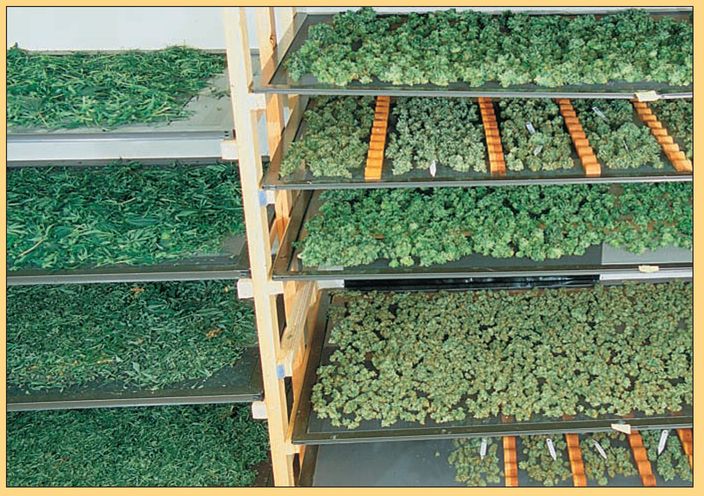
This drying rack holds many different varieties of marijuana, separated by dividers.
Controlling the Hydroponic Environment
Monitoring Recycle Systems
Depending on the setup you’re using, you may find it beneficial to recycle your water and nutrient solution. As the plants extract nutrients and minerals from the solution it will be depleted of its resources over time. For this reason we must understand how to monitor nutrients so that we know when to recycle and when to replace the solution. Monitoring systems are a bit expensive. If you have a ppm reader, also known as a total dissolved solids (TDS) meter, you can understand how much of your nutrients have been used and how much more you need to add to reach the optimal nutrient level. All reservoirs will become unbalanced and need replenishing. As a general rule, an initial amount is used to fill the reservoir. As the plants use up the solution, top up the reservoir to maintain a constant, appropriate level. If you start with 10 gallons of solution then you need to top up to that total of 10 gallons every few days.
If you don’t have a ppm reader you can still grow a good crop using hydroponics, but it takes practice to get it right. If a hydroponic grower doesn’t have a ppm reader, they tend to replace the reservoir more often instead of topping it up. That way the grower is certain that the new solution contains everything the plants need. If you have a ppm reader, you only need to top off the reservoir as needed. These readers can be expensive, but over time they’ll help save money on the cost of pricey hydroponic nutrients.
Hard Water Problems
Hard water is the most common problem found in domestic water supplies. Water is classified as “hard” if it contains minerals other than H2O in amounts above 1 GPG (grain per gallon). Soft water contains minerals other than H2O in amounts below 1 GPG. Very hard water reaches levels above 7 GPG.
If you observe scales forming in your reservoir or what looks like kettle rust, then you haven’t been maintaining your pH level in the correct range. Minerals will build up into grains in the solution, causing it to become hard. Your local water company can provide you with a readout on your water. You can also buy nutrient products to use with hard water. If scaling persists, just drain and clean your reservoir and mix a new batch of nutrients to the correct pH level. Some growers use a reverse osmosis water-filtering system to clean their tap water, producing distilled water that has a stable pH level of 7.0.
When to Add More Nutrients
Beginners should rely on a ppm meter, but a veteran grower learns to read the plant. The plant will reveal if it is has too much, too little, or just enough nutrients. It takes a few grows to learn to read the plant and this is part of growing experience. The plant may have siphoned all the nutrients or just some of them. Some nutrients are taken up by the plant and stored until it needs more. A top up can be done if you don’t want to change the reservoir completely.
If you don’t have a ppm meter to calculate nutrient levels accurately, simply record your nutrient mix ratio from day one. Let’s say you used 3.5 ml of A, B, and C in a one-liter container. If the plant has used 1/2 a liter, all you need is to make another liter of 3.5-ml mix in another container and add 1/2 of that to the reservoir. This is a simple way of doing it, but you’re left with 1/2 a liter of solution. By doing your math and making a mixing chart, you can mix different amounts as needed. Every now and again you will need to mix a fresh batch of nutrient because topping up becomes increasingly inaccurate over a period of time.
Affordable Hydroponics
Growing using hydroponics is not rocket science. It’s a simple process that varies slightly depending on what kind of setup you choose. Most of the nutrient mixes are explained on the packs. If you follow the instructions and remember that cannabis only needs 30 to 50 percent strength nutrients, then you’ll do just fine.
Over the years, many cannabis cultivators have experimented by building their own growing contraptions. There are more than 100 different types of systems that can be handmade at home. Out of these 100, about 15 are ideal for cannabis. One of the most famous and simplest systems is DWC (deep water culture), also known as the bubbler. This system is very cheap to assemble and yet still provides excellent growth rates. There′s nothing like it for the price and it can be quite a rewarding way to grow.
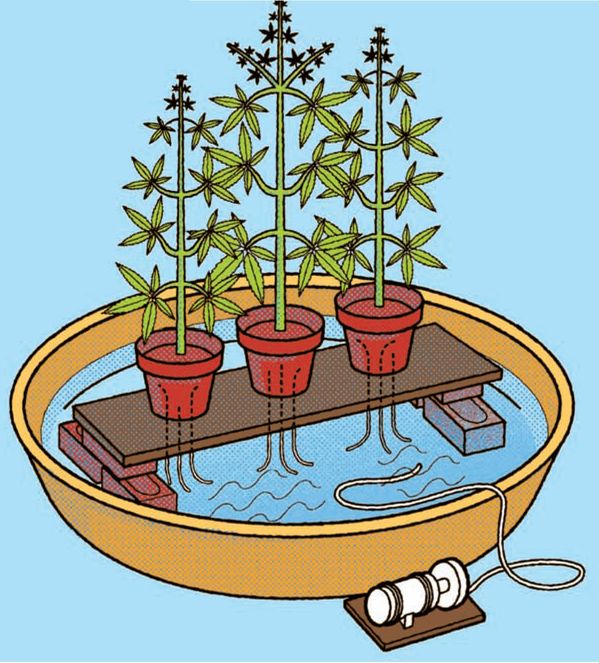
The Bubbler
The bubbler is simply an all-in-one nutrient and plant holding container with a lid and a pump, but it produces extraordinary results! Using the bubbler method, you can produce optimal growing conditions for top yielding strains, as long as it is maintained and managed well, by you, the grower.
The pump will send air through the tube to the air stone and this releases air into the water. The air “bubbles” the solution causing it to splash at the surface, wetting the bottom of the net pot.
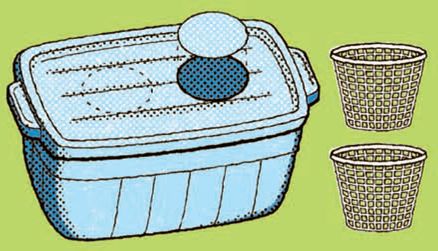
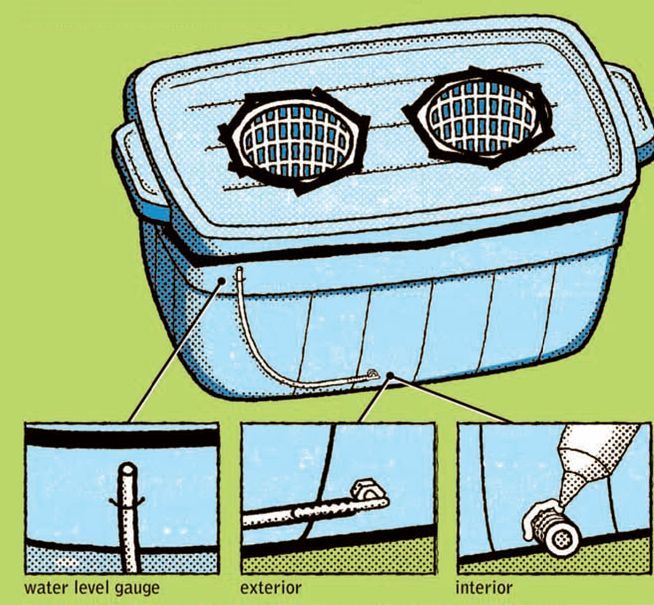
THE BUBBLE BUCKET
1. Get a container that can hold roughly 3 gallons of nutrients per plant. For a double bubbler use a container that can hold 6 gallons. For a single plant you can use a 3 gallon bucket. Make sure that the container comes with a lid.
2. Wrap the entire unit and lid with black gaffer tape. This will keep light out of the unit and prevent algae from forming in the nutrient solution.
3. Get some 6-inch net pots.
4. Cut circular holes in the lid, enough to allow the entire net pot to rest fully down into the lid. The rim of the net pot should be enough to keep it from slipping into the container totally.
5. Cut a hole in the bottom of the container. Insert a small valve in here and use some waterproof sealing around the sides. A good glue will work too. Make sure that the valve can accommodate the pump’s air tube without leaking.
6. Insert the pump’s air tube into the valve.
7. Attach an air stone to the air tube inside the container. Let it rest on the bottom somewhere around the middle of the container.
8. Attach the air tube to your pump.
9. Fill the container with your nutrient solution so that it covers about an inch of the bottom of the net pot.
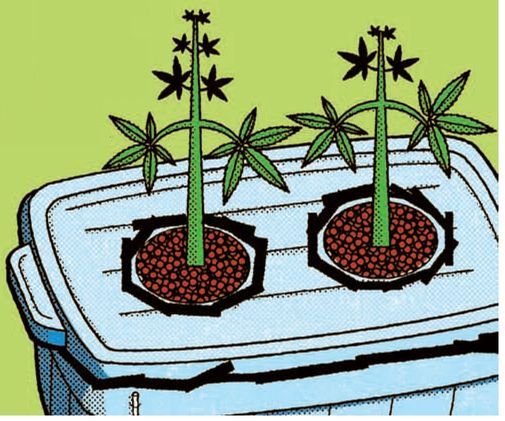
10. Get your growing medium together - raekwflal, clay pebbles and place these into the net pots.
11. Transplant your rooted clone to the net pot.
12. Fill up the remaining area of the net pots with more clay pebbles to support the clones.
13. Turn on your air pump 24-hours a day.
That’s all there is to it!
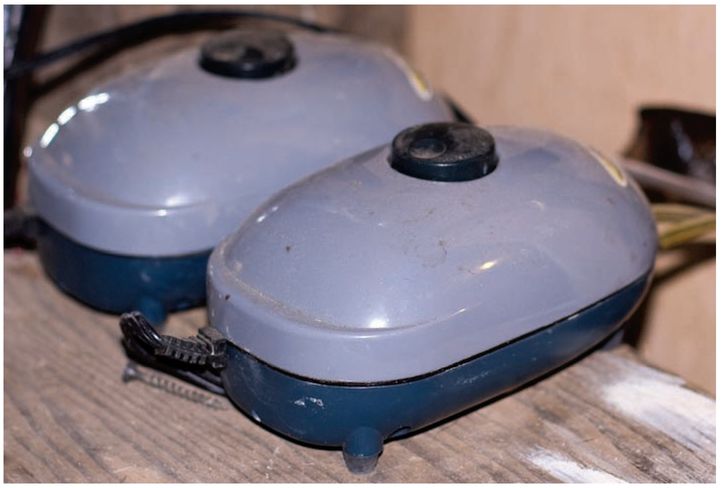
Aerators add air to your nutrient solution reservoirs, keeping the solution full of oxygen and preventing stagnant water.
You Tube features hundreds of different homemade and commercial standalone hydroponics systems. Viewing them is a good idea.
A single standalone hydroponics system might just be what a novice or low-key grower is looking for.
NASA brings us one of the most important revolutions in hydroponics-type cultivation. This is called aeroponics and many hydro growers are turning to it for better results.
The clones will be able to live from the nutrients and water that is in the clay pebbles. As the roots grow down they will experience water bubbles coming into contact with them. They will gradually grow through the net pots and down into the nutrient solution, where they will drink until the unit is dry or the roots no longer touch the nutrient solution. Check the bubbler every day to see how much your plant has absorbed.
Let your roots get air periodically by letting a root zone form. To do this, simply let the solution level drop a few inches below the net pot. Do not constantly top up your reservoir; it is sometimes better to let the water level drop one gallon per 3 gallons and then just replace the missing gallons. Once a good root mass has developed, your plants will exhibit unprecedented growth!
You can also keep a spare container of the same size handy for when you want to completely change your nutrient mixture. Simply swap the lid over with the plants and root mass into the new bucket. You can do this by lifting the whole plant and root mass out by pulling on the lid with both hands. Just lift the plant and roots out by the lid and put it into the other container. Empty out the nutrients from the old one and replace it with new nutrients. This is a great and cheap hydroponics system that comes highly recommended.