14
Harvesting and Curing Your Bud
Harvesting is the act of reaping your rewards and is without doubt the most fun you’ll have in your garden. Assuming that you have followed the guidelines for flowering times the breeder set forth and that your grow was successful, you should be in a position to harvest an extremely high yield from your crop.
First of all, you should know that harvesting is smelly and dirty work. It stinks up the place, so keep this in mind. Also, resin rubs off on nearly everything. Your fingers will be covered in a mass of resin and this will stain everything from metal to plastic, clothes, furniture, paper, books, equipment and other pieces of bud. Resin is sticky stuff that is very hard to wash off. It must be scrubbed off using a metal-type cleaning pad. Keep this in mind when you are harvesting your crop.
At the end of the flowering stage, examine your bud to see if it is ripe and ready for harvest. Here are some indicators to help you identify that it’s harvest time; however, please note that not all of these indicators will appear on every strain.
• 50 percent to 70 percent of the pistils have changed color
• Plants have stopped producing crystals
• Plants have stopped producing resin
• The fan leaves and lower leaves have turned yellow and are starting to drop off
• The smell has reached a peak
• Bud mass has not increased in the past few days
Another good way to determine when to harvest is to create multiple tasters of the same bud. You can do this by harvesting plants from the same strain at different times. If you do not have enough plants to do this you can take selections of bud from a single plant. These samples can be tested to gauge the optimal harvest time for the strain. The next time you grow this strain, you will know exactly when to harvest. It must be said, however, that breeders′ flowering times are generally pretty accurate. The experience of growing a strain more than once will also undoubtedly result in a more accurate timing of your harvest.
The Harvest
There is really only one way to harvest marijuana—anything else is just a variation on this theme. It should be noted that there are slight differences between harvesting an Indica and a Sativa plant.
If you are growing multiple strains, you should have a method of labeling which strains are which before you harvest. Otherwise, you will end up harvesting your bud into one big pile. This means that your entire labeling process from seedling stage to harvest will have been in vain. Keep your buds separate if you want to know your bud strain type when it is time to sample the results of your hard work.
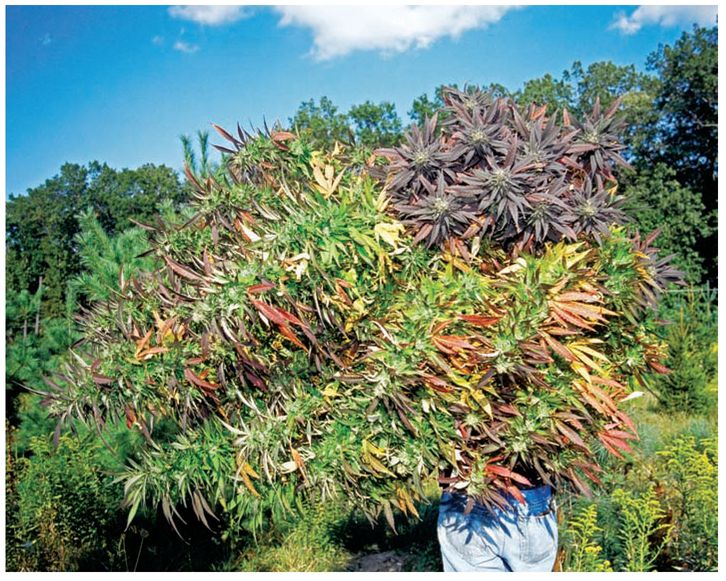
A harvest of several different colorful strains conceal this grower in a shield of green.
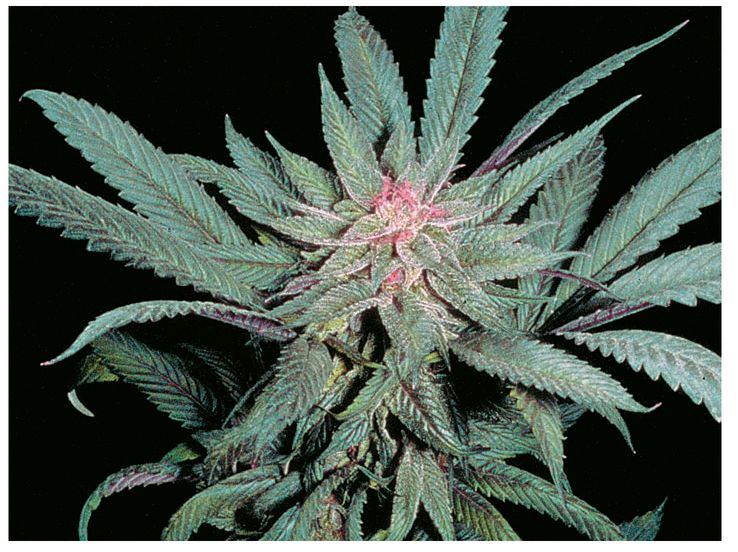
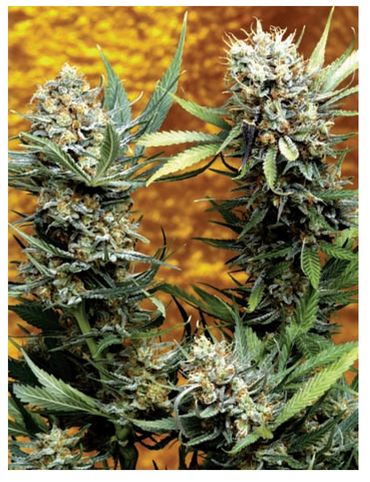
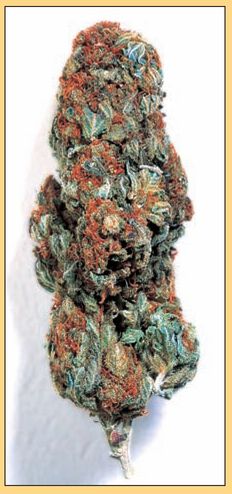
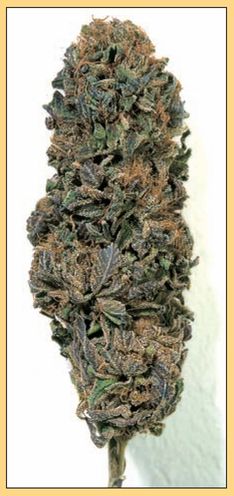
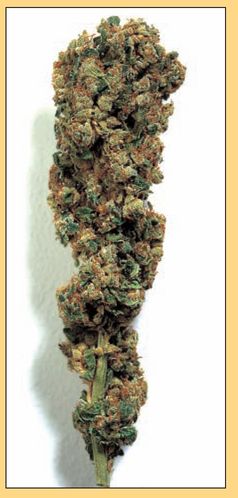
Connoisseur bud is not all about yields but all about the quality and looks. This Ultra Violet from Trichome Technologies looks great.
Quick Bud Samples
Some growers just can’t resist a tester, but remember that these testers do not in any way reflect the final quality of well-cured bud. Just take a fresh bud sample and put it on a dish. Place the dish in a microwave on medium heat for about two minutes. Check the bud to see if it feels dry and brittle. If it doesn’t, heat it a bit more. Once it feels dry and brittle it can be smoked. The smoke will be harsh and the microwave heat will destroy a good portion of the cannabinoids in the bud, but you should get something from your sample.
Another way of producing a quick bud sample is to take some fresh bud and put it into a sheet of paper. Fold the paper and press the bud down lightly. Place the paper on top of a working radiator and let the heat dry the bud. Check your bud later on in the day and it should be dry enough to smoke.
Expert Harvest Indication
There is a method that will allow you to determine precisely when to harvest. All you need is a magnifying aid and a little experience.
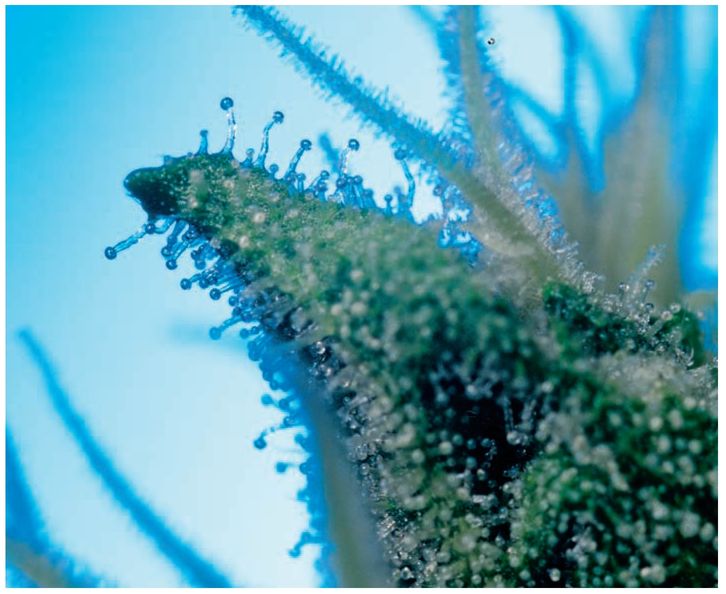
As the pistils grow out from the calyx they form resin glands (trichomes), which gradually change in color before they shrink and wither. This withering of the trichomes affects the look of the pistils, which in turn fade and tend to look burnt and dry. This “unhealthy” appearance of the trichomes is perfectly natural. The plant has completed the blooming period and the trichomes are no longer needed to gather pollen. The cannabinoid content of these trichomes is not lost, however. It is simply converted into other psychoactive cannabinoid compounds. THC will also degrade as it is converted into other psychoactive compounds. Eventually, exposure to light will further degrade these cannabinoid compounds to next to nothing if the plant is not harvested.
The trichome withering process does not occur rapidly. It can take up to two weeks before the plant has withered its trichomes and pistils entirely, but even then new trichomes and pistils can be found growing among the faded pistils. Eventually, the old pistils will die, to be replaced by the new pistils. The process will continue until there is a change in the photoperiod or a cellular breakdown in the plant and it dies.
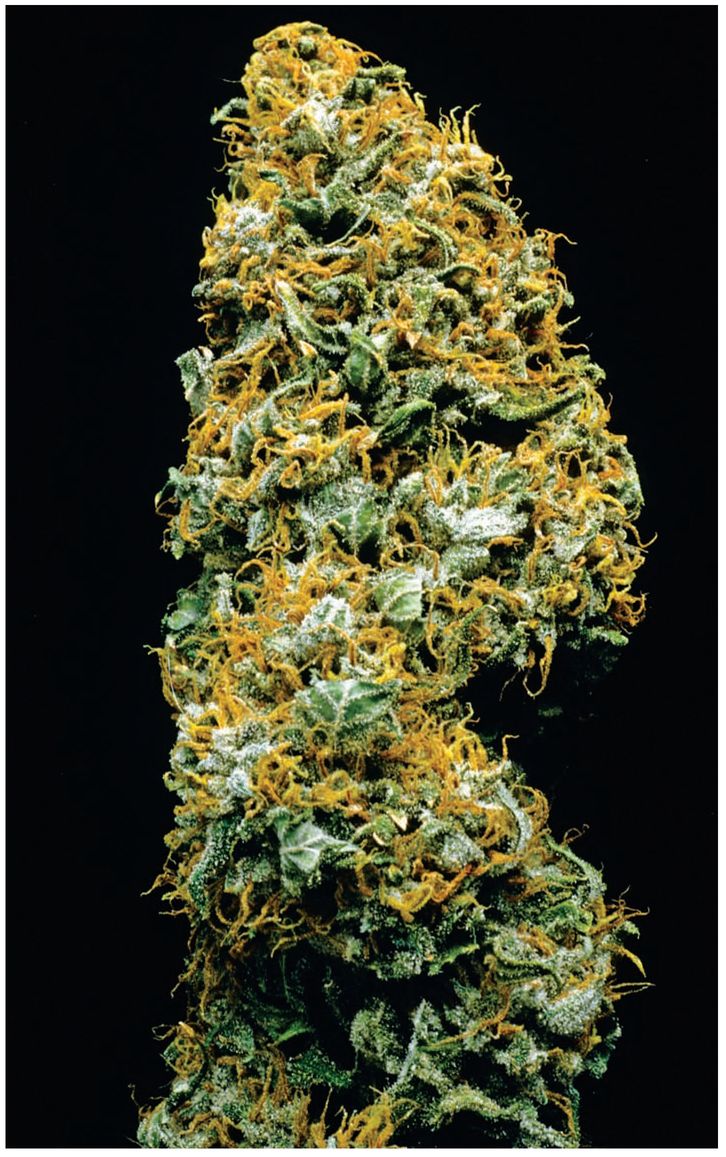
Connoisseur bud may have a super amount of trichomes on the leaf. That frosted look could cover the whole cola without there being a large number of pistils.
As the plant reaches its peak bloom, many of the pistils will change in color. Using a magnifying aid, you can observe this change in the trichomes themselves, which then affects the overall look of the pistils. By checking these trichomes daily you will be able to detect when the plant is nearing peak potency. The more trichomes change color, the more some will start to wither. The ones that wither first are usually in the minority because they were the first trichomes to form on the first pistils during the early days of flowering.
It is important to keep harvests in mind when cultivating. Here you can see a grower has devoted adequate space for the plants to grow in. This comes with experience.
As some of these older pistils wither, the other pistils begin a visible transformation in color from white to orange, red or brown. At this point, you should be anticipating the “harvest marker” of 50 to 70 percent. When 50 to 70 percent of the pistils change color, the plant will have stopped producing new crystals (trichomes) and resin (cannabinoids secreted from the trichomes), the smell will have reached its peak and the bud mass will not have increased in a few days. At this stage, any of the major bud masses on the plant can, theoretically, be observed as follows:
1. Less than 5 percent of the pistils are withering.
2. Approximately 90 percent of the pistils have reached maturity.
3. Less than 5 percent of the pistils appear to be in the early stages of growth.
The 90 percent group is the one that you should gauge your harvest with. Compare these to the ones that have gone past their peak bloom and harvest the plant just before they reach this stage. You should note that this usually corresponds with the breeders’ flowering times. In the case of a plant with an unknown flowering time, you can use this expert method to predict when to harvest.
Timely harvesting is all about careful observation of the trichomes and their comparison to withered ones. Don’t forget that trichomes can be harvested early or allowed to grow past their peak in order to affect the eventual high of the finished product.
Indica Harvest
Your one to four foot plant should be hacked at the base and picked up in its entirety. The weight of the Indica plant will probably amaze you if you have done everything right. Try not to let it touch the ground, where the bud can gather up unwanted dirt or dust. The plant should then be hung upside down in a cool room with fresh air but no light.
When you hang the plants upside down the stems and branches automatically separate the buds, allowing space for air to flow around the freshly harvested flowers. The best temperature is between 60 and 75 degrees Fahrenheit. Relative humidity is best kept at around 55 percent. Light degrades the overall THC quantity and quality. Light can also change the cannabinoid composition in your bud. Your room doesn’t have to be lightproof, but you should take care not to expose your harvest to any direct light. Most growers use the bottom branches of the plant as support when hanging them up. By tying some fishing line to the walls, you can snag the bottom branch over the line to hang your buds upside down.
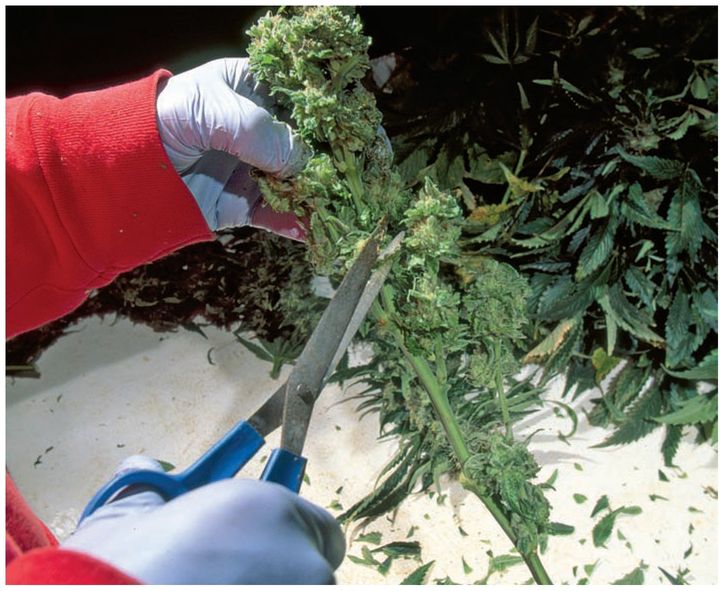
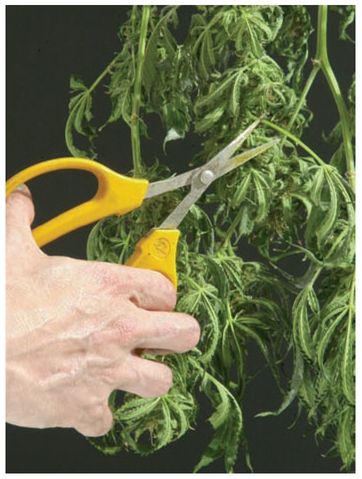
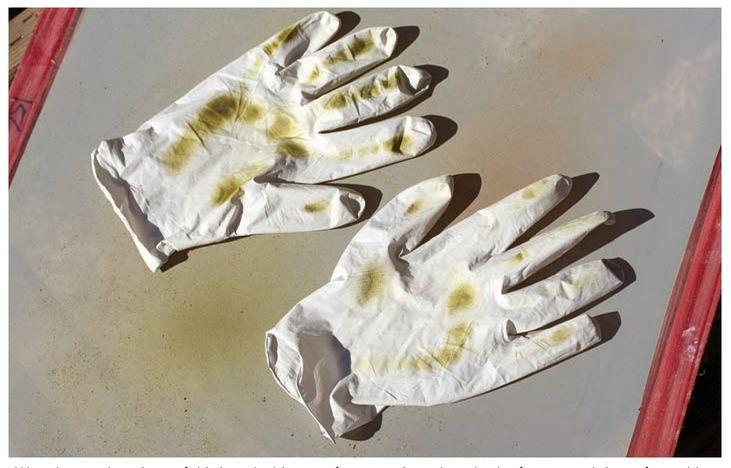
What is important here is that the grower is wearing gloves. These will become thick with resin and so will the tips of these scissors.
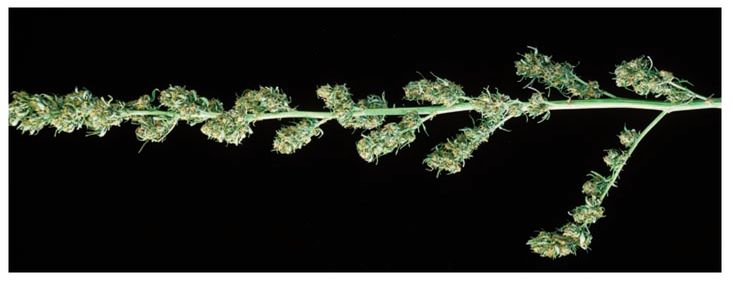
This plant has been fully trimmed of everything but the bud and stems.
Next, take a pair of clippers and remove as many of the fan leaves as possible. Then remove the secondary leaves and put these into a separate pile. Last but not least, gather some of the major trim leaf that can be removed easily from the bud. Trim refers to the small leaves that surround the bud and are usually covered in resin. This is a preliminary manicuring step only, designed to help ease the drying process. The real manicuring comes later. Leave the trim areas that are hard to remove for now; the trim you need to remove right after harvesting should pull away with ease. If there is no branch on the trim area that you are trying to remove, then leave it alone. Chances are that it will not pull free without taking some bud with it and you do not want to do this.
Leave the plant like this until a branch can break easily; it should literally snap between your fingers. This process takes about two to three weeks from start to finish, although some strains can take up to four weeks before the branches snap easily.
Now you have four different qualities of weed to choose from. The fan leaf will be an okay smoke, the middle leaves a little better and the trim will be very good. The bud is the prime stuff, though, and this will give you the best quality high.
Sativa Harvest
Outdoor growers like to grow Sativa plants, which can grow up to 12 feet, carrying more than 20 oz of bud each. It is not uncommon for some Sativa varieties to produce over 2lbs of bud per plant. However, these large plants are not harvested easily.
The process is similar to Indica except that the harvest itself can be quite laborintensive. You need a canvas spread or another means of carrying the bud. The plant should be chopped at the base and spread out on the canvas. The canvas is then rolled up and tied tight for transport. Obviously, if you have more than one plant you might need more than one canvas sheet.
Do not underestimate the amount of work that goes on during harvesting. Even a few plants could have you working the day through and then some.
The plant should then be hung upside down in a cool room, with fresh air and no light. Because of the plant’s size and bushiness, you may have to cut the branches and hang these up separately. Take a pair of clippers and remove the leaves and trim as suggested in the Indica harvest section.
Fan Leaves, Leaves, and Trim
These are cured by letting them dry on a flat surface, away from direct light and with plenty of fresh air. The leaves will dry after three weeks and are easily smoked at that stage. Test them out to see what you like and what you don’t like. Another thing you could do with the trim is to make hash from it. We’ll talk about this in Chapter 17. Don’t try to speed up your drying process with ovens, microwaves or heat; let them dry out naturally and you’ll have a much better smoke from the leaves. Cannabis connoisseurs will discard the leaves in favor of the more pleasing and potent bud that is also far less harsh to smoke. Remember, though, that even if you are a connoisseur, the leaves can be used to make hash.
HARVEST
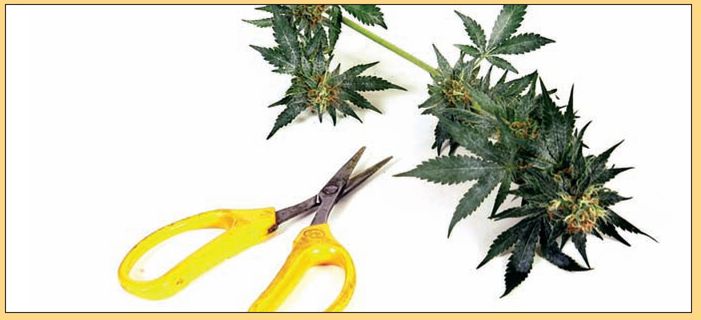
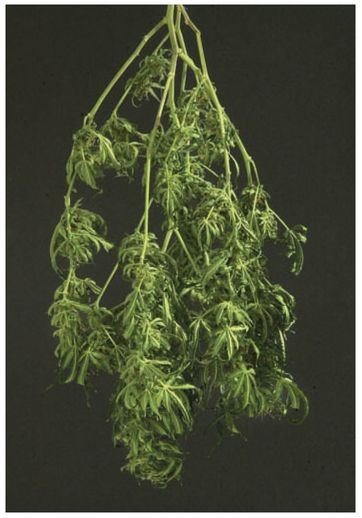
A nice sized harvested branch awaiting manicuring.
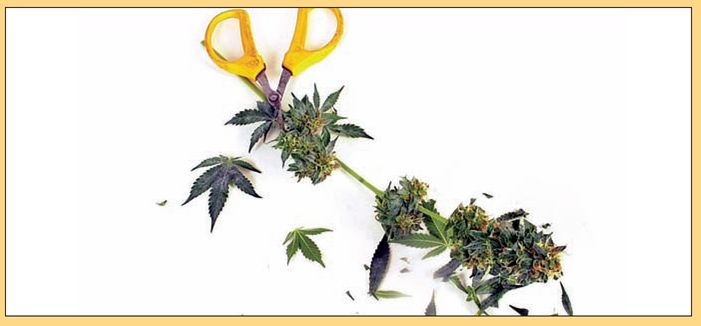
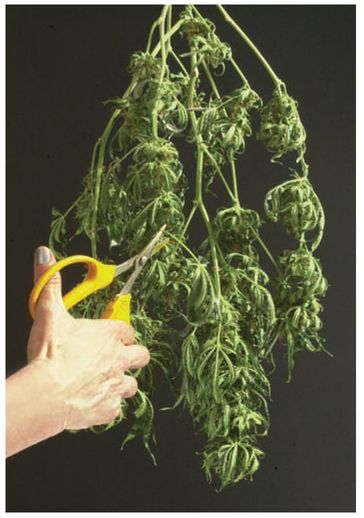
Half the trim has been removed.
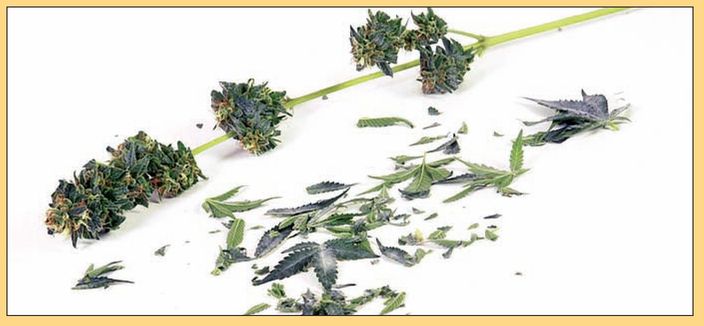
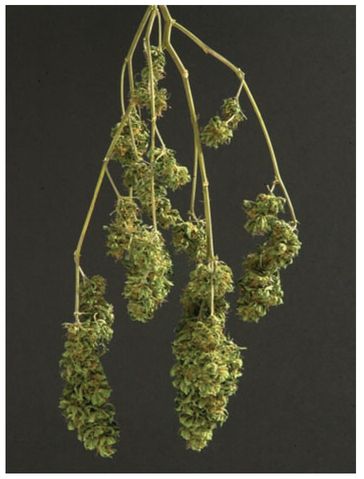
All the trim has been removed and the branch is ready for drying.
Manicuring
This is one of the most important parts of preparing your bud for the curing process. Manicuring is a type of aesthetic bud treatment that will also help you to separate the best from the rest. You will need a tray (or two, depending on how much bud you have) of some description, a black plastic bag, a sharp pair of small fine scissors and some rubbing alcohol. Rubbing alcohol can be used to remove resin strains from your scissors, which after a while will become sticky, dull, and even jammed with resin. The manicuring process can take a long time so some people like to set up their manicuring system in front of the television. Manicuring will get your fingers covered with resin, so prepare everything that you will need beforehand—food, drinks, joints, bongs, etc.
Take as much hanging bud as possible and place it down in a heap on top of a black plastic bag. Try to keep the strains separate and even label each heap so that you remember which strain is which. During the manicuring process it is easy to get buds mixed up. Place another black plastic bag over this lot to avoid light degrading THC levels.
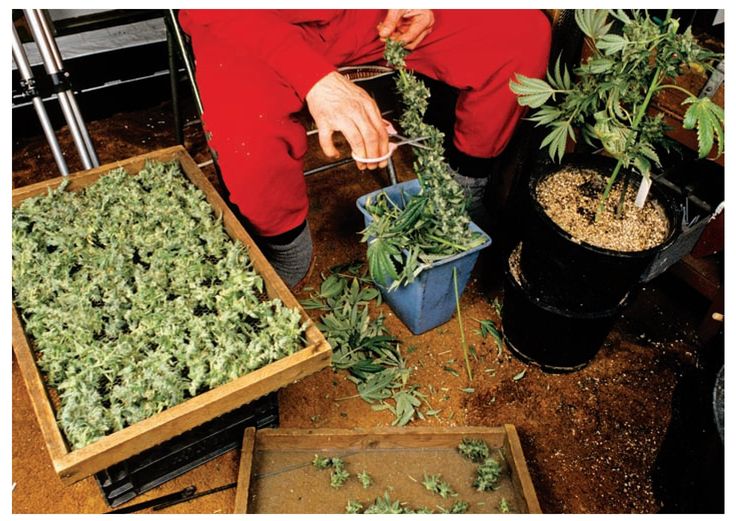
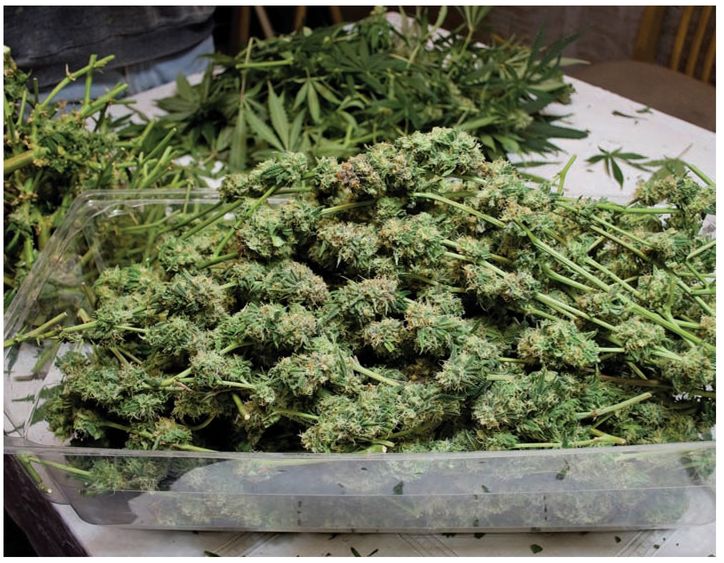
Already the bud is starting to pile up. Remember that everything you see in this dish is prime bud with some stems. In the background the stripped parts can be seen.
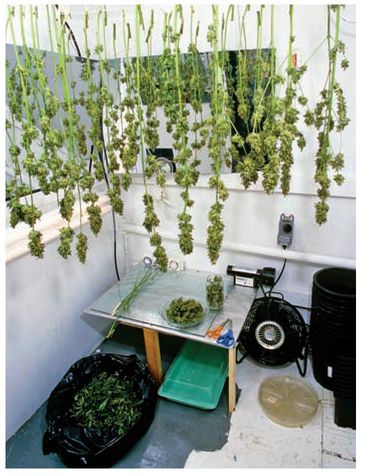
Plants should be suspended upside down in a cool dark room.
Once the plant is dried out, the manicuring can begin.
It is important to use sharp scissors or shears to cut away the excess leaves.
You are then left with a mound of fresh bud.
Get your first plant out from the heap and use your fingers to remove as many of the branches and leaves as you can. This is your chance to remove trim matter that you may have missed during the preliminary manicure step. Chop the remaining branches into convenient workable sizes for hand-held manicuring. Repeat this process with all the other plants until you fill your tray with the first-round, handmanicured plants.
Next you will start the more precise, second-round manicure. Pick up your first piece of bud and clip away as much of the branch or stem as possible. Now work your scissors in between the bud and leaf. In one quick pinch you should be able to separate the leaf from the bud by snipping the leaf at the base. Notice that the stem of the leaf is covered in trichomes; hang onto these leaves as they are very high quality trim. Repeat the process until you have removed as much leaf as possible. If you find that you cannot get at the leaf, then simply snip away as much of the leaf as you can by sheering them in half or as close to the bud as possible.
Rotate the plant by the stem to gain access to the other side of the manicured bud. This rotation movement is the quickest way to access all of the leaf sites on the plant.
When hanging up the bud a grower may decide to convert the grow area into a dark room to let their bud dry while others choose to keep growing. Whatever you decide, keep the bud in a dark place.
Take care when cutting not to remove pistils or calyx along with the leaf. To avoid pistil removal, try using the very tips of the scissors when you snip so that the blades do not go past the piece you want to cut. Repeat this process with the other first-round, hand-manicured pieces and you will eventually end up with very nice manicured pieces of bud that are ready for curing.
How much you remove depends on what quality of manicured bud you want to end up with. Undoubtedly the method above produces the best quality manicured bud from your harvest; however, the weight of the overall product will be reduced. Leaving on lots of trim leaves will allow them to actually dry in with the bud to create a medium quality manicured bud that weighs more than the best quality manicured bud. Ultimately, it is your choice: you can manicure your bud for maximum weight or for quality.
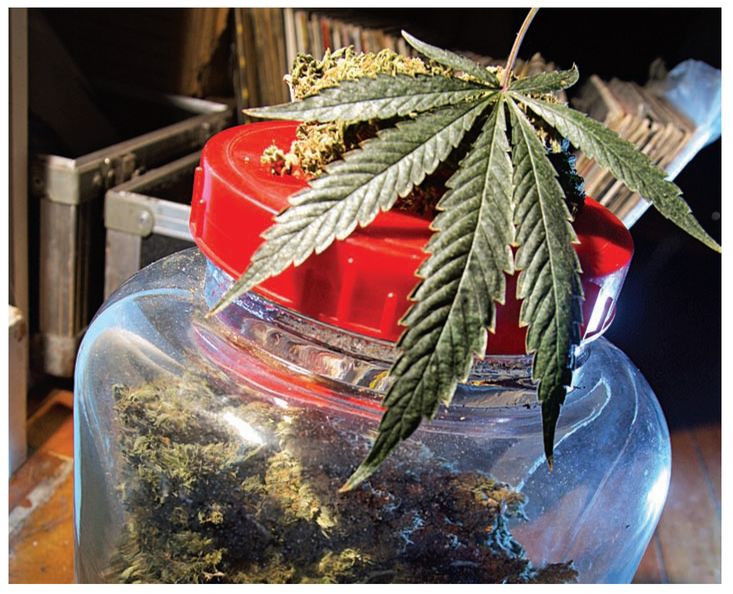
Placing a fan leaf in a curing jar overnight will re-hydrate over-dried bud.
You will end up with several separate piles of leaf, both from the preliminary manicure step and the more intensive manicuring process. Some people dump this leaf. Others smoke it. Still others will make hash from it. Most of the leaf will be harsh to smoke but will contain some cannabinoids.The better leaf will have visible trichomes. You can easily locate the leaf that is high in trichome content using a microscope. A microscope is a useful aid for separating the better leaf from the rest for hash making, especially if you are planning to use the cold water extraction technique using bubble bags described in Chapter 17. Of course, what you do with your leaf is entirely up to you.
Curing
As soon as the branches are brittle, consider curing your bud using the canning method. Canning is a great way to get the most from your bud. Find a can with a removable lid. The more cans you have on hand, the better.
Wear harvesting gloves, fold them inside out after use, place them in the freezer and then after taking them out shake away the trim for some prime product.
Using a pair of scissors, clip your bud from the branch and place it into the can. The branches and stems are not much good to you. They do contain THC, but only in small quantities. Most stems and branches go on the compost heap.
Now take the can and place it in a cool, dark room or cupboard.
1 Every day, open the lid for a few hours (six hours is good) and then seal it again. Also, move the bud around a bit every couple of days.This is the most common curing technique, and it works best. Bud that is cured well smokes the best! Give the canning process between three and four weeks before sampling your goods. Eight-week old bud can smoke extremely well and year-old bud is vintage stuff but can lose potency.
Fresh bud (eight-weeks canned curing) is the pinnacle point of cured bud. After that the THC cannabinoids rapidly change composition and lose potency. Fresh bud is far better than aged bud. You may hear of other curing processes, but canning works wonders and is affordable too.
Canning sweats the bud, which causes it to retain its smell and flavor and allows the bud to burn more effectively. By opening and closing the can at different intervals you can control how damp or dry you want your buds to be. Try to use cans that have a large opening at the lid—enough to allow your whole hand to fit inside. This is because some of the trichomes will fall from the bud into the bottom of the can. Use your fingers to get at these trichomes. You can gather these into a small mass that can be smoked later on.
TRICHOME TECH BUD
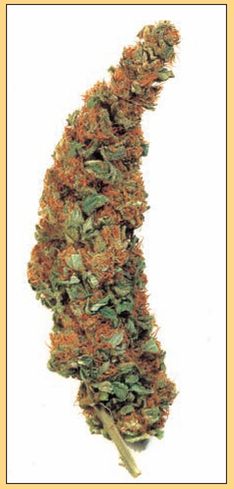
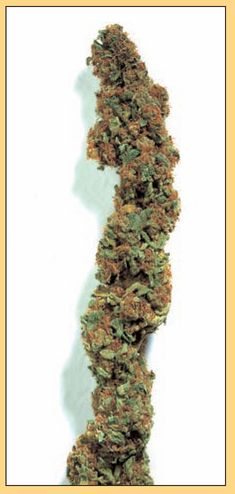
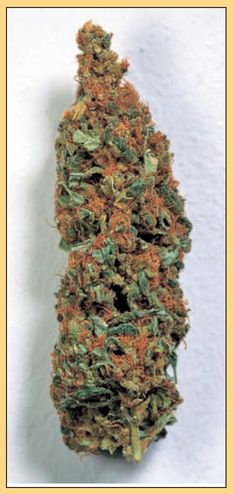
B1 is harvested after 50 days.
Kryptonite has over 16% THC.
NLx6 has over 22% THC.
Juicy Fruit has over 26% THC.
Ultra Violet has over 16% THC.
G-13 is harvested after 45 days.
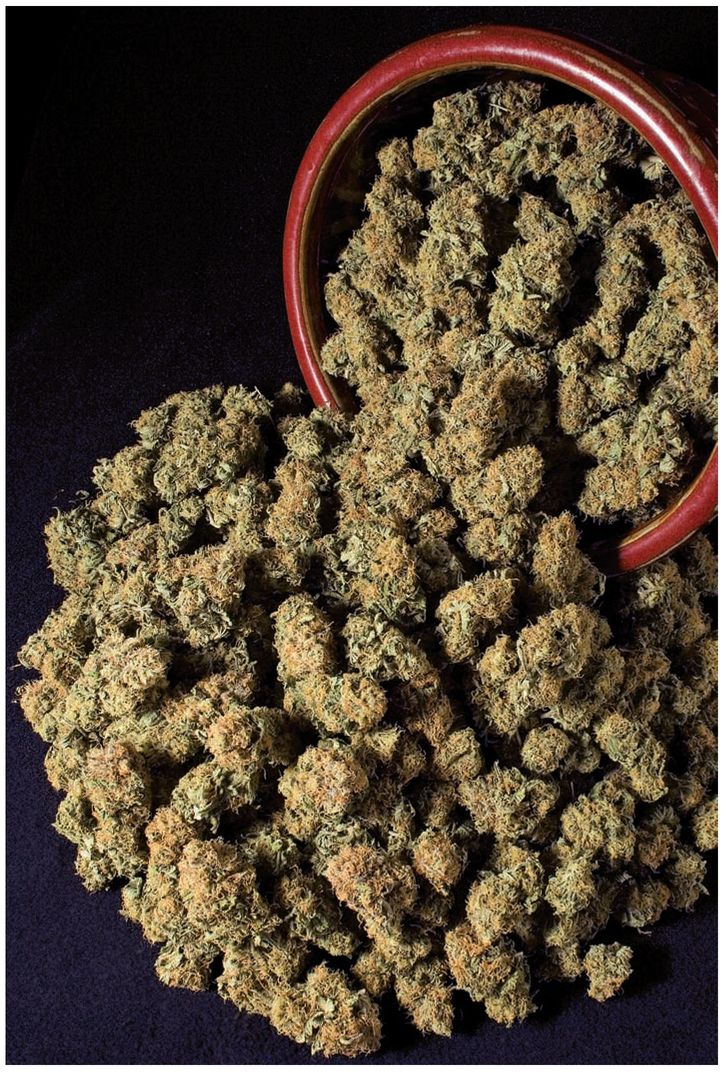
A successful grow can keep a grower well supplied for months.
Drying your bud helps to relax THC particles by removing water from the bud. This makes THC easier to burn and thus more psychoactive than when it is damp. Applying heat will remove water and will affect the overall cannabinoid content of the bud. It is not a good idea to press bud or to pack tightly during the curing process, because bunching of THC particles makes them harder to burn.
Curing helps to break down chlorophyll, which has magnesium-containing green pigments. Magnesium is responsible for the sharp and harsh taste in the back of your throat when smoking fresh bud. This is another good reason to cure your bud.
If you over-dry your buds you may loose too much moisture, resulting in bud that has less taste and aroma than it should. The best way to add moisture back into your buds is to introduce new fresh bud to your cans. The new fresh buds will share their moisture with the dried bud, bringing them back to a more even level of moisture and restoring their aroma and taste. Some people uses fruit slices to bring back moisture, such as apple or orange slices. These fruit slices will also add their own aroma to the buds.
If you have dried your plants for three weeks hanging upside down you can subtract that time from the canning time. Although you can have good bud to smoke two weeks after your harvest, it is better to wait for four weeks or more.
• Chop your pants at the base.
• Cut them into manageable amounts and hang them upside down in a cool, dry and dark place.
• Clip/pull the major leaf away.
• Allow to dry until the branches snap between your fingers.
• Clip the trim from the bud.
• Store in cans in a cool, dry place away from direct light.
• Check for mold.
