Some of our seafood might be new to you; it might even seem unusual. I can relate: I didn’t have much access to seafood until I left Uruguay. But now these are some of my favorite ingredients to cook with, from oysters to razor clams to mackerel.
The key is to source quality seafood, which, depending on your proximity to a good fishmonger, might need to be done online.
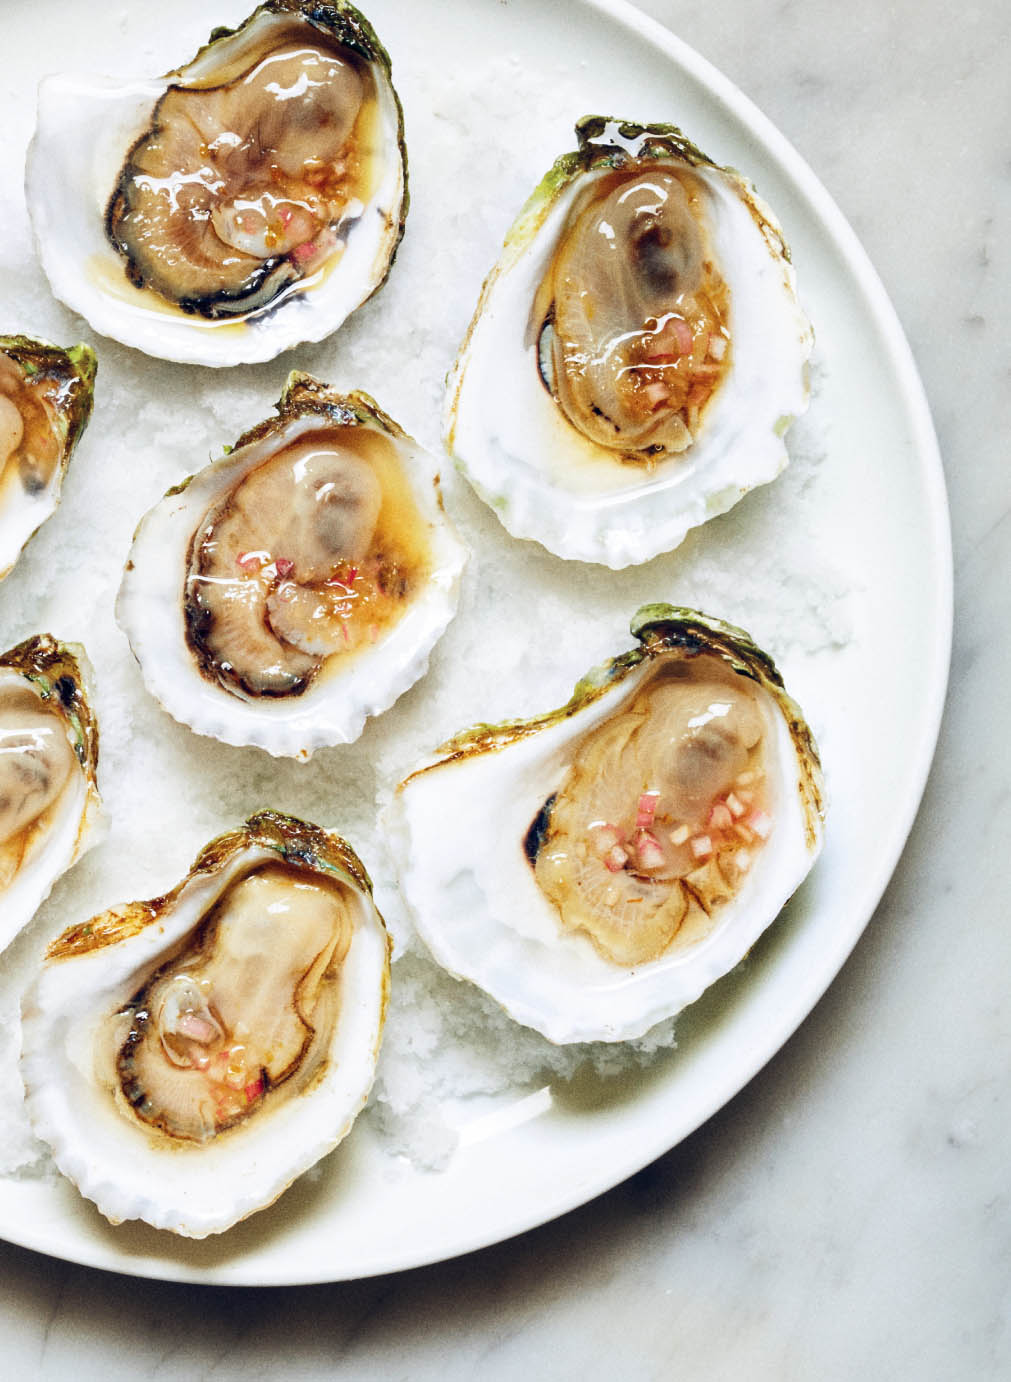
Oysters with Yuzu Kosho Mignonette
Oysters are a great way to start any evening, particularly one at home if you’re having guests. Shucking can be tedious if you have a big group coming over, so it’s always good to get someone to help. You could even preshuck the oysters and refrigerate them on a lined baking sheet coated with salt.
Keep it simple: This mignonette is clean, vibrant, and super easy to prepare.
Serves 4 to 6
1 tablespoon finely diced shallot
½ teaspoon yuzu kosho (see Estela Essentials)
¼ cup (60 ml) chardonnay vinegar
Food-grade rock salt
18 oysters
For the mignonette, stir together the shallot, yuzu kosho, and vinegar in a small bowl. Set aside.
Spread a thick layer of rock salt on a large serving platter and moisten with water until the texture of wet sand, then get to work on shucking your oysters. You’ll need an oyster knife and a clean kitchen towel. Fold the towel a few times so you have a bit of padding and put it on a work surface. Lay your first oyster, cup side down, on the towel, fold the towel over the oyster, place your nondominant hand on top of that, and fold the towel back over your hand. This makes a barrier between your hand and the knife in case it slips, while giving you a good grip on the oyster. Insert your oyster knife into the narrow tip of the oyster, at the hinge, and apply pressure until you feel like you’ve begun to open things up. Then twist the knife back and forth horizontally to separate the top shell from the bottom, and once you do, run the knife carefully along the inside of the top shell to detach the meat. Pull off the top shell, carefully loosen the oyster from the bottom shell so it’s easier to eat, and gently nestle the shell into the salt. Make sure to wipe away any dirt or wayward bits of shell. Add a small spoonful of mignonette, then open and dress the rest of your oysters and serve.
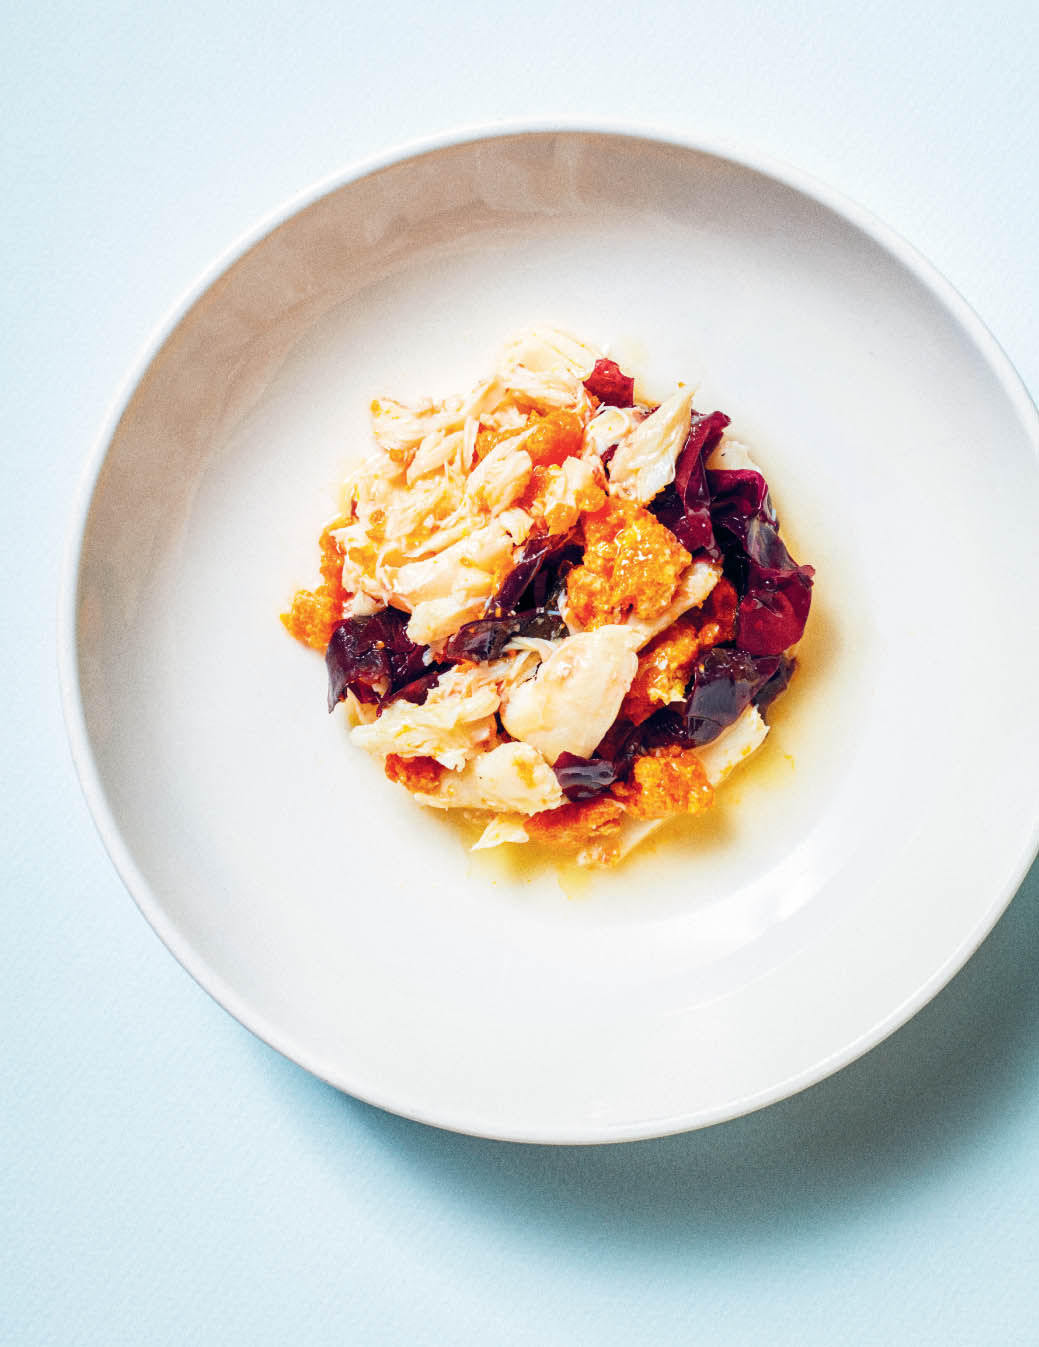
A Perfect No-Roll Crab Roll
This might be the best crab roll I’ve ever tasted, and it doesn’t even come in a bun. At the restaurant, we serve this with a slice of miche on the side, but I wouldn’t blame you if you put it in a potato roll or set it over toast.
If you don’t know crab tomalley—the crab’s fatty innards—this is a great introduction to an ingredient with a pleasantly grainy richness. But I won’t lie: It will be a challenge to find tomalley unless you have a relationship with your fishmonger, have time to search through your local Chinatown (where they sometimes display the crabs with their innards), or learn how to disassemble a live crab.
Serves 4
2½ tablespoons (35 g) unsalted butter
3 ounces (85 g) cooked Jonah crabmeat
2 tablespoons crab tomalley
Rasps of lemon zest
¼ cup (60 ml) pickling liquid from Pickled Ramps
¼ cup (60 ml) chardonnay vinegar
6 or 7 strips dulse seaweed, preferably from Maine
¼ cup (60 ml) Kombu Butter Stock, warmed
Gray salt
Melt the butter in a small saucepan over medium heat and cook until it turns a nutty golden brown and smells toasty and fragrant. Take it off the heat and pour it into a small cup. As it cools, the dark bits will settle to the bottom. Transfer the brown butter to another cup, leaving the browned milk solids behind (they should be a dark auburn color).
Gently fold together the crabmeat and tomalley in a small bowl, being careful not to break them up too much. Add a few rasps of lemon zest and the brown butter and fold to incorporate.
Pour the pickling liquid and vinegar into a small shallow bowl. Add the dulse and let soften for about 30 seconds. Pick out the dulse and squeeze and shake out any excess liquid, then incorporate the dulse into the crab mixture. Discard the excess pickling liquid and vinegar.
To serve, put a ring mold in the center of a shallow bowl and spoon in half the crab mixture. Remove the ring mold and repeat in a second bowl with the remaining crab. Pour 2 tablespoons of the kombu stock around each portion. Finish with a touch of gray salt.

Octopus with Potatoes and Pimentón
When I’d visit my aunt Ana in Galicia, she would take me to street markets where old ladies boiled octopus in pots so big they were practically cauldrons. The women would pull out the octopus—perfectly cooked, still with a bite to it—and serve it sliced, with boiled potatoes, a generous drizzle of olive oil, and a sprinkling of pimentón and sea salt.
Build flavor by brushing the boiled octopus with garlic and fish sauce and then searing it to create a crust. There’s also a good amount of aioli, which makes it particularly indulgent.
Serves 4
Kosher salt
1 small octopus (about 2 pounds/900 g)
2 bay leaves, preferably fresh
2 medium Yukon Gold potatoes, scrubbed
Extra-virgin olive oil
2 tablespoons Garlic Oil
2 teaspoons fish sauce
⅓ cup (80 ml) Aioli
½ teaspoon pimentón dulce
Bring a large pot of salted water to a boil. Add the octopus and bay leaves and gently boil the octopus for 20 minutes.
Meanwhile, put the potatoes in a medium saucepan, cover them generously with water, and add salt until it’s salty like the sea. Bring to a boil, then reduce the heat slightly and boil gently for about 20 minutes, until the potatoes are cooked through but a cake tester inserted into them meets the slightest bit of resistance. (You don’t want them mashed-potato soft.) Drain the potatoes and transfer to a medium bowl. Let cool slightly, then break the potatoes into rough, irregular 1-inch chunks and lightly crush with a fork.
Transfer the octopus to a cutting board, cut off a tentacle, and taste it—it should be toothsome but not chewy. If it’s not ready, throw the tentacle and the rest of the octopus back in and cook for up to 10 minutes longer, depending on your octopus. When the octopus is ready, drain it and cut off 6 or so tentacles; save the rest for tomorrow’s dinner. Pat the tentacles dry.
Heat a large carbon-steel or cast-iron skillet over medium heat, then coat it with a bit of olive oil. Add the tentacles, brush with a bit of the garlic oil, and cook for 10 minutes, flipping and brushing with garlic oil every 2 minutes. After the first 5 minutes, deglaze the pan with 1 teaspoon fish sauce and continue cooking, flipping and glazing with garlic oil, until the skin crisps up, darkens, and chars in a few places. Add the remaining 1 teaspoon fish sauce in the last minute of cooking.
Remove the tentacles from the pan and cut into 1-inch-thick pieces. If any of the tentacles are particularly big, you can cut them in half. Discard (or snack on) the crispy curled ends.
Mix the aioli into the potato chunks to make a chunky potato salad. Put a 6-inch ring mold in the center of a plate and arrange half the potatoes in the mold. Distribute and press the potatoes down, creating some empty space at the top of the mold to lay in the octopus. Add half the octopus. Repeat on a second plate with the rest of the potato mixture and octopus. Sprinkle each serving with 1/4 teaspoon of the pimentón and serve. (You can use a fine-mesh strainer to dust the dish with the pimentón for a more even coating. This applies anytime you want to finish with a dusting of a spice or other ingredient.)


Razor Clams and Horseradish
I find that razor clams are sweeter and friendlier in texture than regular clams, and I like how there’s more to eat and more exterior to crisp up. At Estela, we prepare them similarly to the way they do in Spanish taverns, a la plancha. You can easily create the same effect at home, with a quick sear in a very hot pan. Here we add to them a mixture of bread crumbs, parsley juice, and horseradish.
Serves 4
20 razor clams (1 to 1½ pounds; 450 to 675 g)
Extra-virgin olive oil
¼ baguette, cut into ½-inch cubes
Chile flakes
Kosher salt
1 bunch parsley
1 bunch sorrel
½ teaspoon fresh lemon juice
½ cup (120 ml) Garlic Oil
A 2-inch piece of fresh horseradish, peeled
A few rasps of lemon zest
With a butter knife, open each razor clam and scrape along the inside of each side of the shell to release the meat without completely detaching the clam (the idea is to expose as much of the flesh as possible to the hot pan when cooking the clams). Lift up the foot (the long extremity that allows the clam to burrow into sand or sediment and acts as an anchor) and cut out the dark stomach lining on the underside. Push out any dirt or sand you find. Snip the siphon located at the top of the razor clam, which looks like a set of eyes. (Dirt and sand tend to collect in that part because that’s where the clam’s filtering system is located.)
Put the clams in a colander and rinse under cold running water for 20 to 30 seconds to remove any remaining grit or dirt. (If you’re worried that your clams are particularly sandy or dirty, you can soak them in salt water in the refrigerator for an hour or so, then drain and rinse them well.) Drain the clams and pat dry, then transfer to a bowl and refrigerate.
Pour ¼ inch of olive oil into a large carbon-steel or cast-iron skillet and heat over medium-high heat until hot. Add the bread cubes and fry, stirring occasionally, until golden brown. Drain on a paper towel–lined plate and let cool.
Crush the bread cubes with the bottom of a heavy pan, until they are the consistency of coarse panko. Season with a few pinches of chile flakes and a pinch or two of salt.
Using a juicer, juice the parsley and the sorrel separately and pour the juice into two small bowls.
Combine 2 tablespoons of the parsley juice, 1 tablespoon of the sorrel juice, the lemon juice, and 2 teaspoons olive oil in a small bowl and mix well. Set aside.
Season each clam with a pinch of salt and a good spoonful of the garlic oil. Heat a large carbon-steel or cast-iron skillet over medium-high heat until very hot (you will need to cook the clams in two batches—or use two pans, if you have them). Add a touch of olive oil to the pan, increase the heat to high, and then add the clams, flesh side down. Cook the clams, pressing down on them so they don’t seize up and close, for 2 to 3 minutes, until they brown lightly.
Add a little olive oil to the pan to help release the clams and arrange the clams on four plates. Dress each one with a few drops of the green juice and a small spoonful of the bread crumbs. Shave a generous layer of horseradish over each plate using a Microplane shaver, add a few rasps of lemon zest, and serve.


Razor Clams with “XO” Sauce
This take on razor clams incorporates our version of XO sauce, a robust and habit-forming condiment that includes dried seafood, chile peppers, and onions.
Serves 4
20 razor clams (1 to 1½ pounds; 450 to 675 g)
2 bunches parsley
1 bunch sorrel
Kosher salt
Extra-virgin olive oil
½ cup (120 ml) XO Sauce
Good olive oil, for drizzling
With a butter knife, open each razor clam and scrape along the inside of each side of the shell to release the meat without completely detaching the clam (the idea is to expose as much of the flesh as possible to the hot pan when cooking the clams). Lift up the foot (the long extremity that allows the clam to burrow into sand or sediment and acts as an anchor) and cut out the dark stomach lining on the underside. Push out any dirt or sand you find. Snip the siphon located at the top of the razor clam, which looks like a set of eyes. (Dirt and sand tend to collect in that part because that’s where the clam’s filtering system is located.)
Put the clams in a colander and rinse under cold running water for 20 to 30 seconds to remove any remaining grit or dirt. (If you’re worried that your clams are particularly sandy or dirty, you can soak them in salt water in the refrigerator for an hour or so, then drain and rinse well.) Drain the clams and pat dry, then transfer to a bowl and refrigerate.
Using a juicer, juice the parsley and sorrel separately and pour the juice into two small bowls.
Combine ¼ cup (60 ml) each of the parsley and the sorrel juice in another small bowl. Set aside.
Season each clam with a pinch of salt and a good spoonful of the garlic oil. Heat a large carbon-steel or cast-iron skillet over medium-high heat until very hot (you will need to cook the clams in two batches—or use two pans, if you have them). Add a touch of olive oil to the pan, increase the heat to high, and add the clams, flesh side down. Cook the clams, pressing down on them so they don’t seize up and close, for 2 to 3 minutes, until lightly browned.
Add a little olive oil to the pan to help release the clams and distribute the clams on four plates. Top each serving with a tablespoon or so of the XO sauce, then drizzle generously with good olive oil. Pour the green juice over the clams and serve.
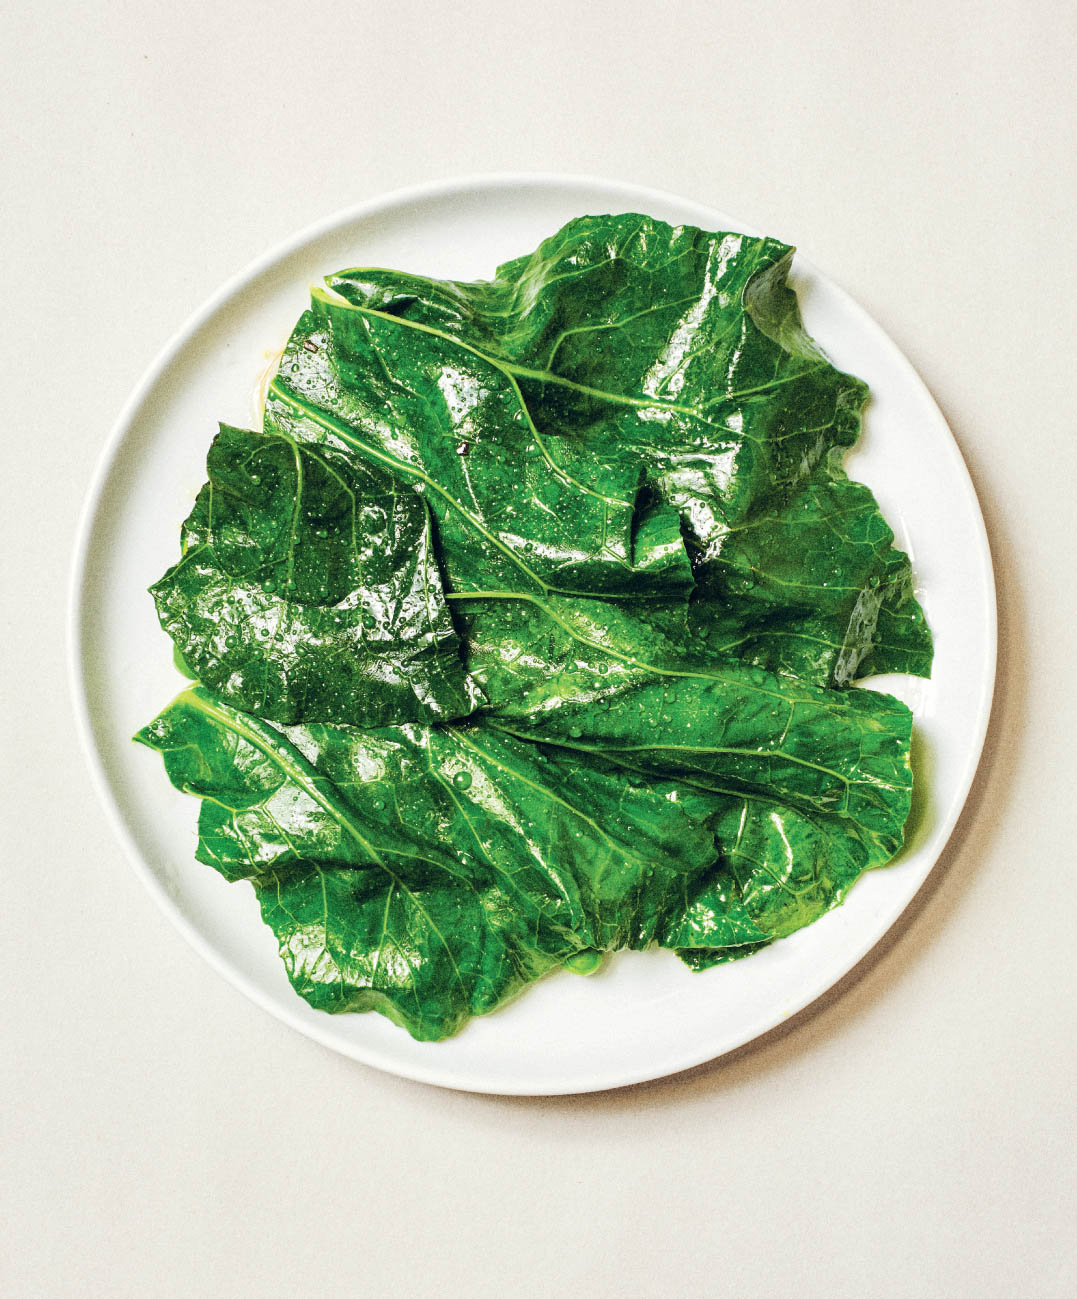
Scallops with Peas, Lardo, and Collard Greens
This one will always be dear to me, thanks to the satiny greens cooked in lardo, the pop of the fresh peas, and the caramelized surface of the scallops—everything barely cooked. It feels grown-up and just right. Make sure the scallops are dry so they sear well.
Serves 4
6 large scallops (see Note), patted dry
Kosher salt
Extra-virgin olive oil
½ cup (about 100 g) cubed (¼-inch) lardo
2 tablespoons lard
1 cup shelled fresh peas (see Note)
3 collard leaves, torn into roughly 2 by 3-inch pieces
½ lemon
Practical Notes: We use U-10 scallops here; the size designation means there are only 10 of these large scallops per pound. Just grab the biggest ones you can find.
Get the freshest and most tender peas possible.
Heat a large carbon-steel or cast-iron skillet over medium-high heat until hot. Salt both sides of the scallops, then place them in the dry pan, pressing down on them with a spatula so they develop a good crust. Cook for 2 minutes, or until browned on the first side, then add a thin spill of olive oil, carefully flip the scallops, and cook for 20 to 30 seconds on the other side; the scallops should be just barely cooked through. Transfer to a plate.
Warm the lardo and lard (one is cured, the other is not) in a small saucepan over medium-low heat for about 30 seconds, until the lardo begins to turn translucent and the edges soften. Add the peas and a splash of water to help them cook and cook just until the peas are bright green, about 2 minutes. Add the collard leaves and cook until they wilt, then season with a pinch of salt and remove from the heat.
Remove the collard leaves from the peas and place a spoonful of the peas and lardo on each of four plates. Top with the scallops, season with a squeeze of lemon juice, then top with the collards and serve.


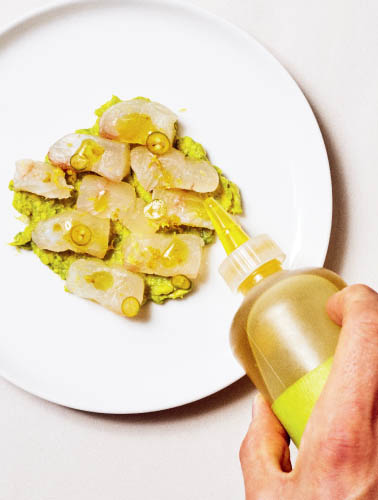
Raw Scallops with Green Tomatoes and Basil
In a funny way, this both looks and eats like a bright, oceanic Caprese salad. Is it better? That’s up to you, but I happen to think so.
Serves 4
4 cups (scant 1 l) water
¾ cup (150 g) kosher salt
6 large scallops (preferably U-10; see Notes)
Gray salt
⅛ teaspoon yuzu kosho (see Estela Essentials)
About 2½ teaspoons pickling liquid from Pickled Thai Chiles
About 2 teaspoons Arbequina olive oil
¼ teaspoon mandarin orange olive oil
A few basil buds if you can find them, or 3 basil leaves
1 lemon
2 firm green tomatoes, sliced into ⅛-inch-thick rounds
Chardonnay vinegar (optional)
To brine the scallops, combine the water and kosher salt in a small nonreactive container, stirring to dissolve the salt. Add the scallops and refrigerate for 20 minutes.
Drain the scallops and pat dry. Put them on a paper towel–lined plate and refrigerate for 20 minutes.
Slice the scallops into ¼-inch-thick rounds: Lay a scallop on one flat side and slice into coins in one smooth movement for each cut, starting near the heel of the knife. You should get 5 or 6 slices per scallop. Repeat with the remaining scallops.
Arrange the scallop slices on a large plate or baking sheet and sprinkle each one lightly with gray salt. Smear a tiny amount of yuzu kosho onto each slice.
To serve, drizzle half the pickling liquid, olive oil, and mandarin orange olive oil over the center of a plate, then arrange half the scallop slices on top in a circular shape, overlapping the slices. Repeat on a second plate with the remaining pickling liquid, oils, and scallops.
If you have them, break up 3 or 4 basil buds and scatter them over the scallops. Tear the basil leaves into tiny pieces and lay those atop the scallops. Grate 4 or 5 rasps of lemon over each plate. Finish each one with about 10 green tomato slices, arranging them so they overlap a bit and cover the scallops completely. If the tomatoes aren’t very acidic, dress them with a tiny amount of vinegar.
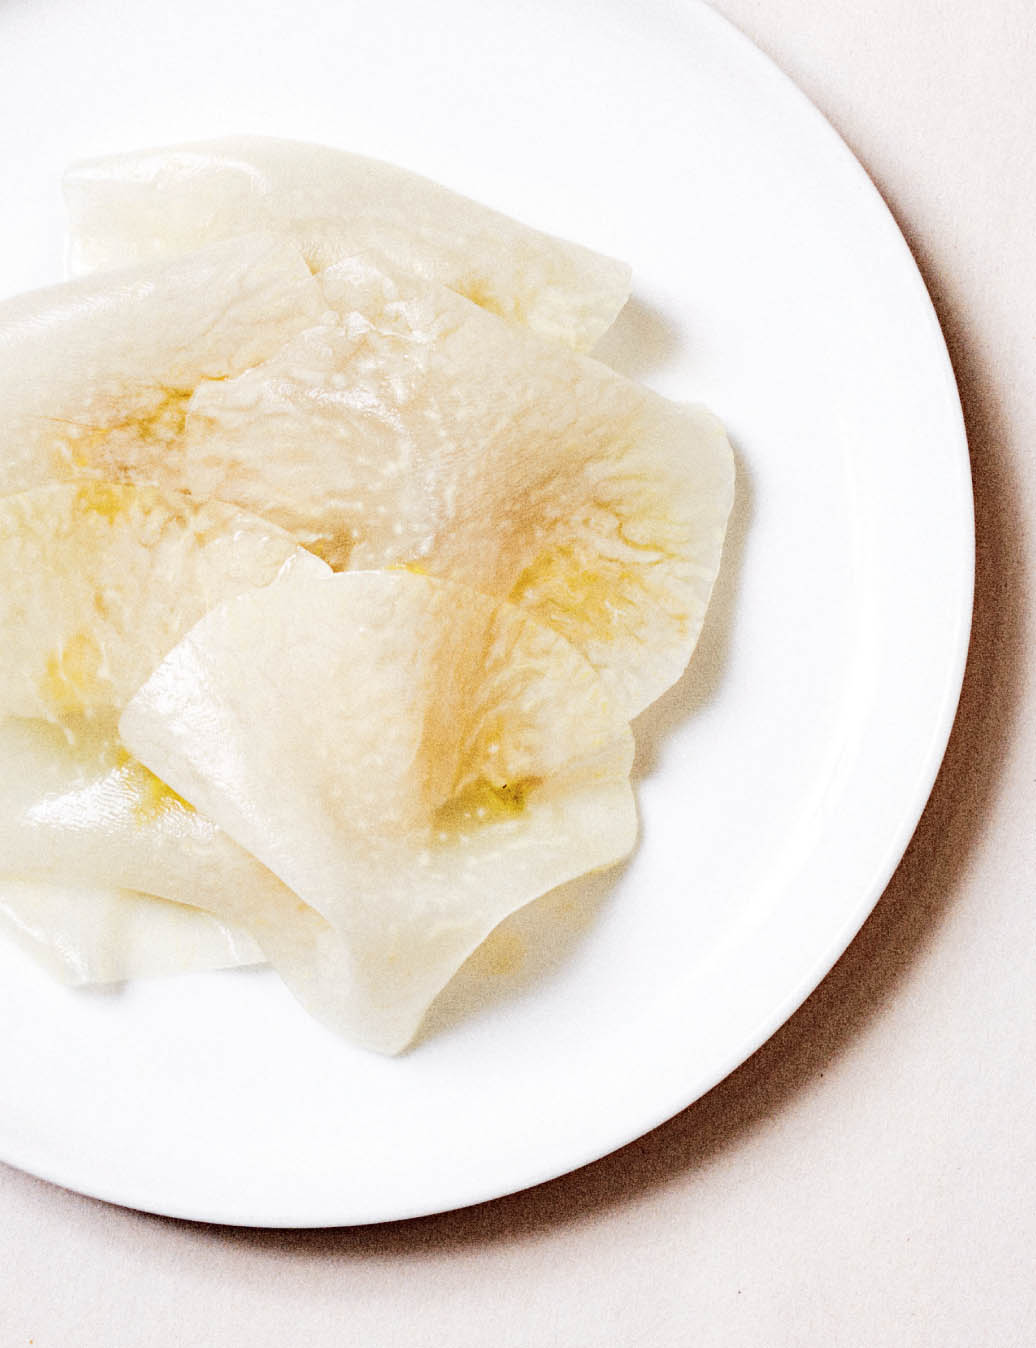
Cured Fluke with Kohlrabi and Avocado
Not too many of our dishes have a Mexican feel, but this one, which we serve in late summer, is an exception. The smashed avocado and slivers of serrano peppers give off the vibe, but so does the kohlrabi, which has something in common with jicama.
Serves 4
¾ cup (150 g) kosher salt, plus a couple of pinches
¼ cup (50 g) sugar
One 6-ounce (170 g) fluke fillet
Olive oil
1 ripe avocado
1 teaspoon fresh lemon juice
1 small kohlrabi (green or purple)
2 teaspoons yuzu juice (or substitute fresh lemon juice)
2 teaspoons chardonnay vinegar
¼ teaspoon yuzu kosho (see Estela Essentials)
1 serrano pepper, sliced into coins
Rasps of white grapefruit zest (preferably oro blanco) or pomelo
2 teaspoons white grapefruit juice
½ teaspoon mandarin orange olive oil
Gray salt
Practical Note: You’ll need to start curing the fish at least 6 hours before serving it. You can even cure it a day ahead, if that’s easier.
Combine the ¾ cup salt and the sugar in a bowl until thoroughly incorporated. Then spread half the mixture on a plate or baking dish that’s about the size of the fish fillet. Lay the fish on the mixture and cover with the remaining mix. Make sure the fish is thoroughly coated. Let cure in the refrigerator for 20 to 25 minutes.
Rinse the fish and pat dry. Put it on a paper towel–lined plate and refrigerate, uncovered, for 5 to 6 hours, until very dry and firm.
To slice your fish, first grease your knife with a bit of olive oil—just a teaspoon or so—to keep it from sticking. Cut the fillet into slices about ¼ inch wide, then slice these into 2-inch lengths.
Halve, pit, and peel the avocado. Transfer the flesh to a bowl and mash with a fork until you have a smooth paste. Add the lemon juice and a good pinch of kosher salt. Set aside.
Cut off the top and bottom of the kohlrabi, then peel it with a sharp paring knife, removing the waxy outer skin and the beige flesh just underneath it. Using a mandoline, slice it into 1/16-inch-thick rounds. It should be slightly translucent, with only a bit of crunch. Transfer to a bowl and dress with the yuzu juice, vinegar, and a pinch of kosher salt.
To serve, spoon a tablespoon of the avocado mixture in a small circle in the center of each of four plates. Cover each one with about 10 strips of fluke, then dab each strip with a tiny bit of yuzu kosho. Top each with a slice of serrano. Dress each one with a few rasps of grapefruit zest, a scant teaspoon of grapefruit juice, a few drops of the mandarin orange olive oil, and a tiny sprinkle of gray salt. Cover with the kohlrabi circles in an attempt to hide everything else. Serve immediately.

Cured Fluke with Green Beans and Avocado
This is best in summer when you can get crisp and juicy green beans.
Serves 4
¾ cup (150 g) kosher salt, plus a couple of pinches
¼ cup (50 g) sugar
One 6-ounce (170 g) fluke fillet
Extra-virgin olive oil
1½ teaspoons Arbequina olive oil
1 teaspoon mandarin orange olive oil
6 green beans, cut into ⅛-inch-wide coins
1 teaspoon chardonnay vinegar
1 teaspoon yuzu juice (or substitute fresh lemon juice)
½ avocado
½ teaspoon fresh lemon juice
¼ teaspoon yuzu kosho (see Estela Essentials)
Rasps of white grapefruit zest (preferably oro blanco) or pomelo
1 tablespoon white grapefruit juice
Practical Note: You’ll need to start curing the fish at least 7 hours before serving it. You can even cure it a day ahead, if that is easier.
Combine the ¾ cup salt and the sugar in a bowl until thoroughly incorporated. Then spread half the mixture on a plate or baking dish that’s about the size of the fish fillet. Lay the fish on the mixture and cover with the remaining mix. Make sure the fish is thoroughly coated. Let cure in the refrigerator for 20 to 25 minutes.
Rinse the fish off and pat dry. Put it on a paper towel–lined plate and refrigerate, uncovered, for 5 to 6 hours, until very dry and firm.
To chop your fish, first grease your knife with a bit of olive oil—just a teaspoon or so—to keep it from sticking. Slice the fluke into strips about ¼ inch wide, then roughly chop into ¼- to ⅛-inch cubes; don’t worry about being too precise. Transfer the fluke to a small bowl and mix with the Arbequina and mandarin orange olive oils, gently massaging the oils into the fish with the back of a spoon.
Put the chopped beans in another small bowl and season with the vinegar, yuzu juice, and a pinch of salt.
Put the avocado in a small bowl and mash with a fork until you have a smooth paste. Add a pinch of salt and the lemon juice.
Put a 3¼-inch ring mold in the center of a serving plate and spread half the avocado in the mold, leaving a bit of a border all around. Layer on half the sliced beans and then half the fluke, gently pressing the fluke down to cover everything. Spread it with ⅛ teaspoon of the yuzu kosho. Remove the ring mold and repeat on a second plate with the remaining avocado, beans, fluke, and yuzu kosho. Dress each plate with a few rasps of grapefruit zest, half the grapefruit juice, and a few drops of olive oil.
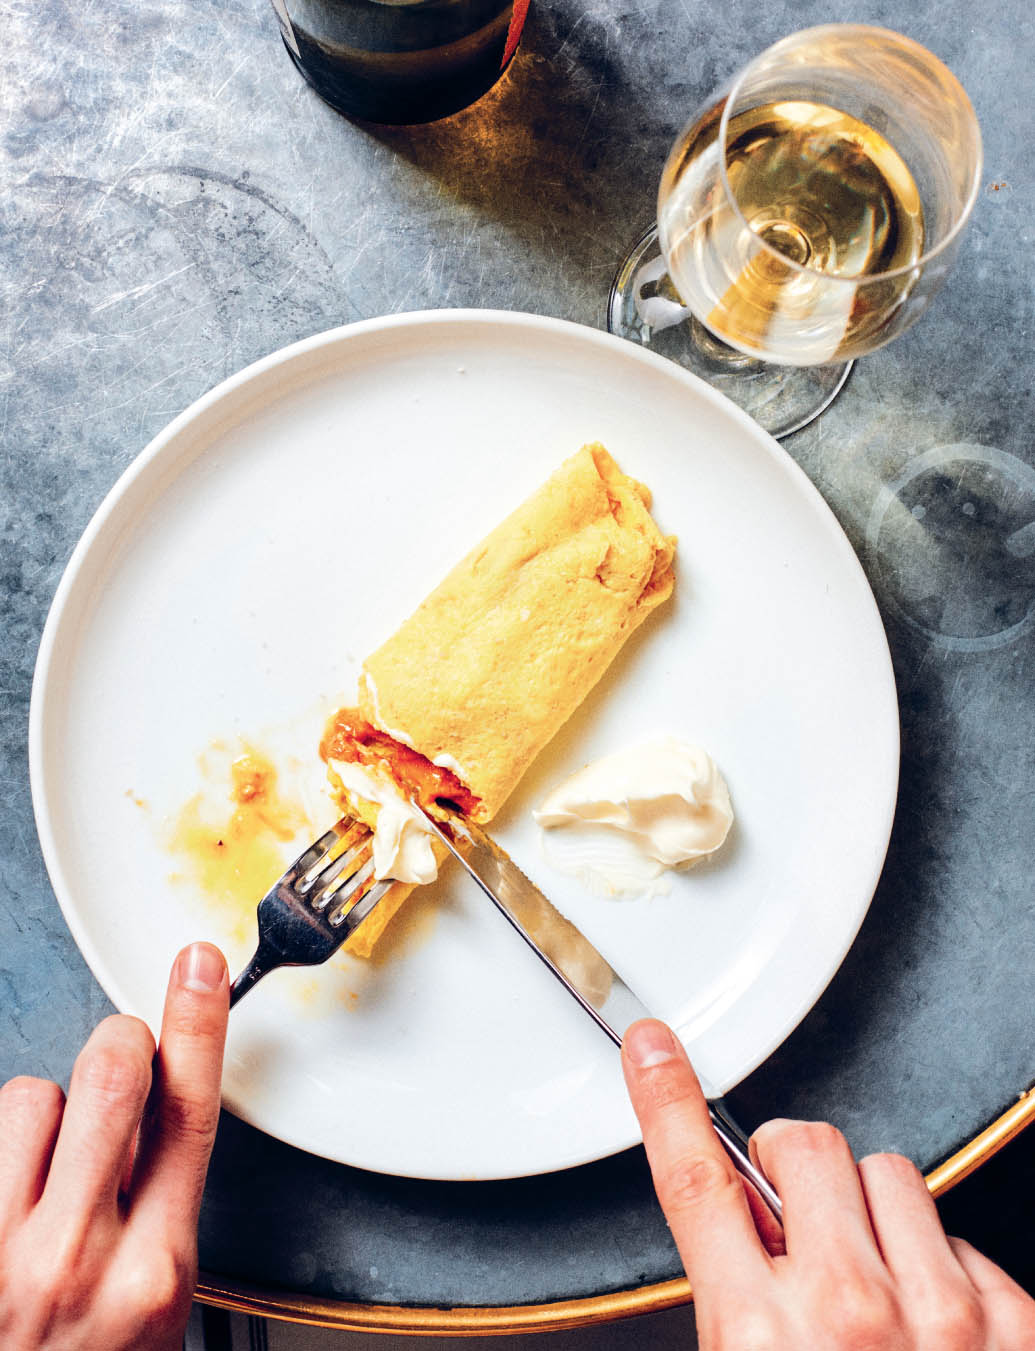
Omelet with Sea Urchin and Crème Fraîche
Seeing an omelet on an American menu at any other time than breakfast may invite suspicion, but not for me. This is an homage to Elizabeth David’s An Omelette and a Glass of Wine.
Serves 1 or 2
2 large eggs
⅛ teaspoon kosher salt
1½ tablespoons (21 g) unsalted butter, cut into a few pieces
3 pieces sea urchin roe (uni; see Estela Essentials)
Crème fraîche
Gray salt
Whisk the eggs and kosher salt together with a fork in a small bowl so that the yolks and whites are thoroughly combined.
Heat the butter in a large nonstick skillet over medium heat. Once the butter melts completely and becomes foamy, add the eggs. As soon as they hit the pan, begin stirring them constantly with a heatproof spatula in a gentle circular motion. The key is to agitate the eggs over the entire surface so you don’t overcook it in certain spots. Use your other hand to tip and swirl the pan, allowing the uncooked egg to flow under the cooked egg and hit the hot surface. Periodically scrape down the sides of the pan to keep the edges of the omelet from drying out.
Once you have a good layer of set eggs, after about 30 seconds, stop stirring, turn off the heat, and let the heat of the pan continue to cook the eggs. When there’s just a thin slick of runny egg on top, add a line of the sea urchin roe just off center. Fold the narrower half of the omelet over it, then fold that over itself in the pan.
Fold the omelet over the last bit of itself as you roll it gently out of the pan onto the plate (a plastic dough scraper can be helpful here). Add a dollop of crème fraîche on the side of the plate. Finish with a sprinkle of gray salt.
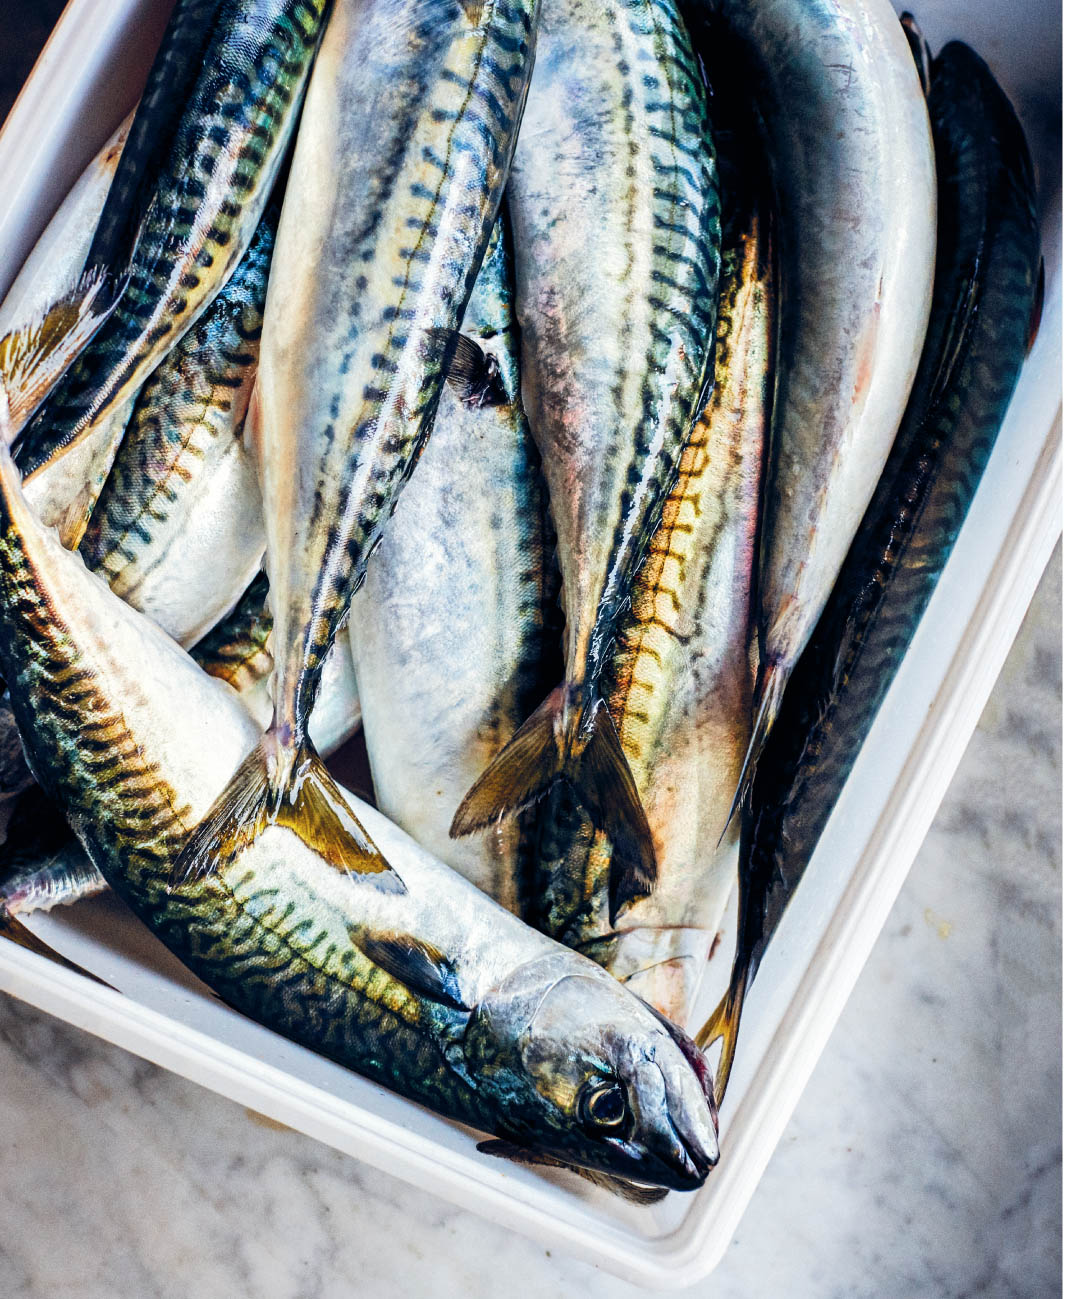
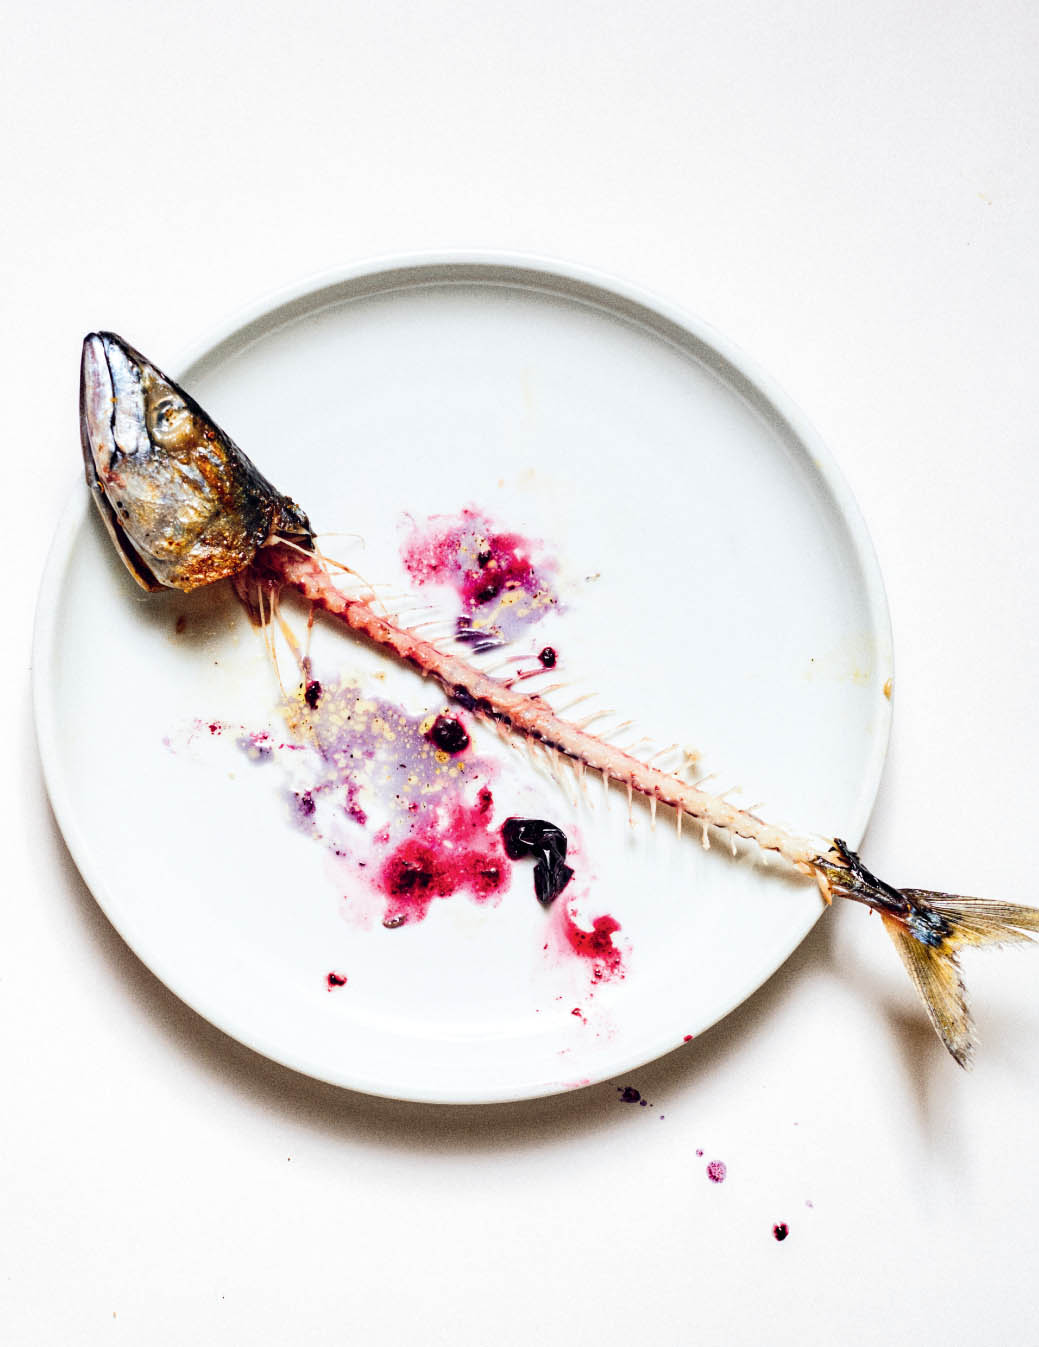
Sardines and Mackerel
Sardines and mackerel are rich, oily, delicious, healthy, sustainable—and well suited to assertive seasonings and garnishes. Keep in mind that they have a short shelf life, so sourcing them fresh is key. They’re also fun to grill over quality charcoal or wood, should you be so inclined.
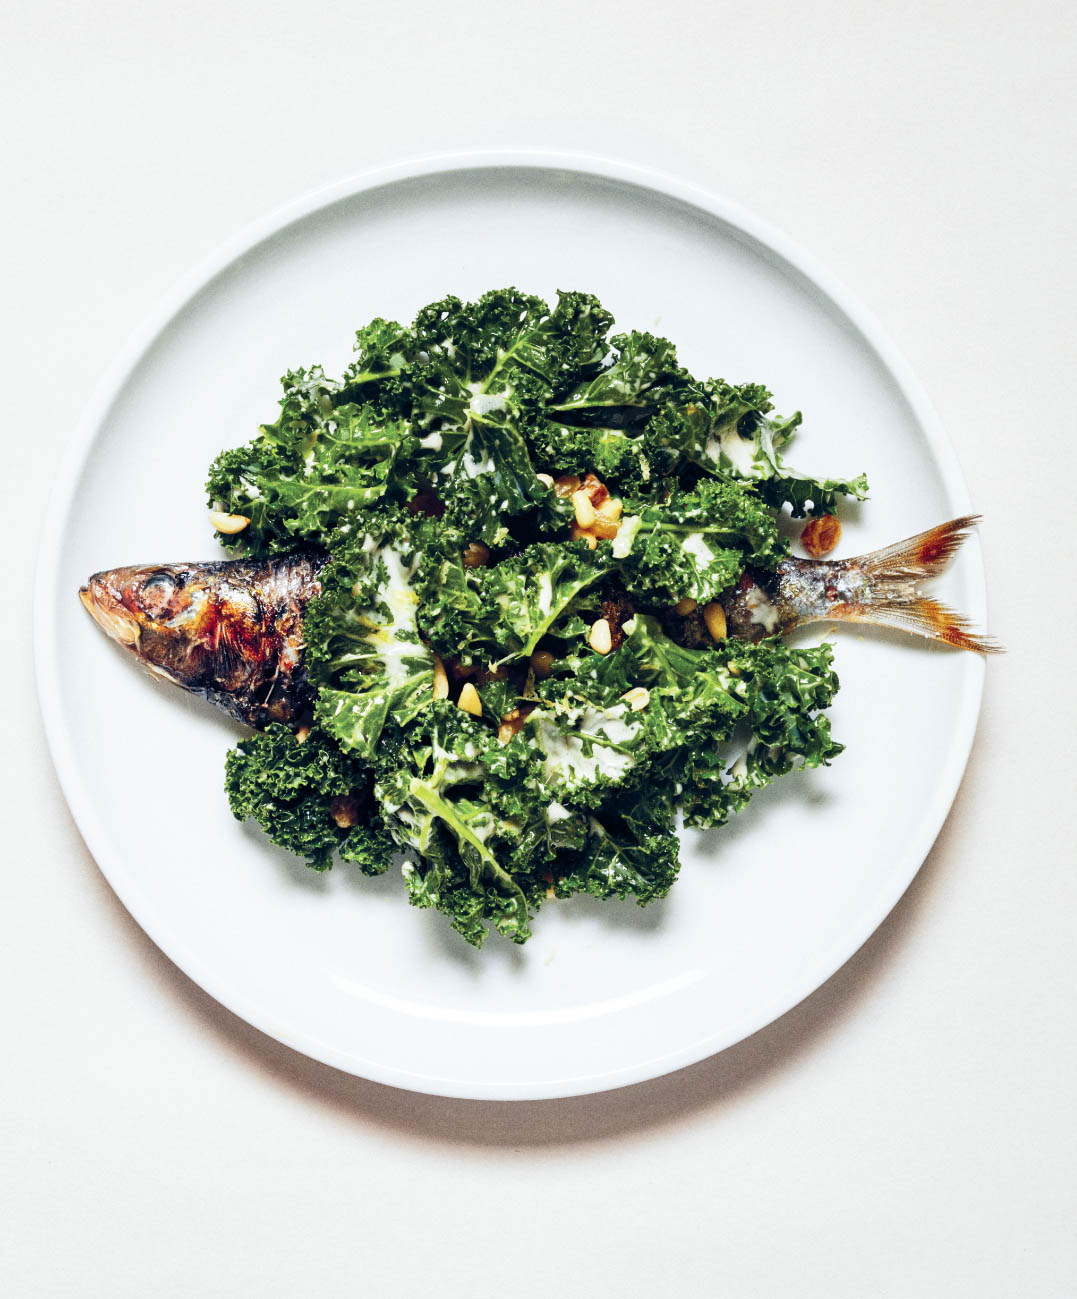
Sardines with Kale, Pine Nuts, and Raisins
Creamy kale, raisins soaked in vinegar, and a juicy sardine. This could be a nice appetizer, but feel free to double, triple, or quadruple the recipe based on your appetite.
Serves 4
8 to 12 fresh sardines (5 to 6 inches long), scaled and gutted
5 leaves curly kale, washed, stemmed, and torn into large bite-sized pieces
⅓ cup (80 ml) Ajo Blanco
Kosher salt
3 tablespoons pine nuts
2 tablespoons golden raisins
1½ teaspoons chardonnay vinegar
1 tablespoon warm water
2 tablespoons Garlic Oil
Chile flakes
Extra-virgin olive oil
Sherry vinegar
Fish sauce
Flaky salt
Rinse the sardines and pat dry, then transfer to a plate and let them come to room temperature while you prepare the salad.
Put the kale in a bowl and pour over the ajo blanco. Massage the sauce into the kale for a minute or so, until it softens and becomes more pleasant to eat. Try a bite, and add a pinch of kosher salt if necessary.
Roughly chop the pine nuts—just run your knife through them once or twice—and set aside. Soak the raisins in the chardonnay vinegar and warm water in a small cup.
Give your sardines a good pinch of kosher salt on each side, as well as inside. Coat them with the garlic oil, then give the whole plate of them a pinch or two of chile flakes.
Heat a large carbon-steel or cast-iron skillet over medium-high heat until hot. Add a tablespoon or two of olive oil, enough that you have a good layer of it so the fish won’t stick, and heat it. Add the sardines and cook for 1½ minutes. Flip them carefully, with a fish spatula if you have one, and cook until their flesh becomes opaque, another 1½ minutes or so. Just before you remove the fish, splash them with the sherry vinegar and fish sauce, both for flavor and to help release the skin from the pan.
Drain the raisins. Place 2 or 3 fish on each plate and arrange a pile of kale, topped with a sprinkle of the pine nuts and raisins, next to them. Finish the greens with a pinch of flaky salt and serve.

Boston Mackerel with Grapes and Lardo
Get some good grapes and see what happens when you cook them in pig’s fat. The crust (here and here) is strong and aromatic, balancing the richness of the fish.
Serves 4
4 whole mackerel, gutted and cleaned
1 tablespoon green peppercorns
1 tablespoon coriander seeds
2 tablespoons Garlic Oil
Scant 2 teaspoons kosher salt, plus a pinch
1½ tablespoons extra-virgin olive oil, or as needed
1 tablespoon fish sauce
½ cup (about 100 g) cubed (¼-inch) lardo
1 tablespoon lard
1 cup (150 g) thin-skinned light-colored seedless grapes
4 teaspoons sherry vinegar
Practical Note: We like Bronx grapes, sometimes described as a cross between Concord and Thompson seedless, but they can be tough to find, so simply use the best grapes you can get.
Remove the mackerel from the refrigerator about an hour before you plan on cooking it and let it come to room temperature.
Grind the peppercorns and then the coriander seeds in a spice grinder or using a mortar and pestle until finely ground but not a powder.
When the mackerel has warmed to room temperature, brush each fish on both sides with some of the garlic oil. Sprinkle generously on both sides with the salt, then pat on the spices to make a crust. Set aside.
Heat a large carbon-steel or cast-iron skillet over medium-high heat. Once it’s good and hot, add the olive oil, then add the fish. If you need to cook the fish in two batches, you can keep the first batch warm in a 200°F (95°C) oven on a wire rack set atop a baking sheet, then give it a quick go in the pan again before serving. Cook for 2 minutes, or until golden brown on the first side, then flip and cook for 2 to 3 more minutes, until the fish has a nice golden brown crust on the second side. A cake tester inserted into the thickest part of a fish should feel warm when pressed to your lip. Just before you remove the fish, splash it with the fish sauce, both for flavor and to help release the crispy skin from the pan.
Warm the lardo and lard in a small saucepan over medium-low heat for 30 seconds to 1 minute, until the lardo begins to turn translucent and the edges soften. Add the grapes and cook, stirring, until they begin to burst, about 2 minutes. Season with a pinch of salt and turn off the heat.
Arrange the fish on four plates and dress with the vinegar. Place a pile of grapes next to each fish and serve.
Boston Mackerel with Cherry Tomatoes and Lovage
A perfect summer dish that features one of my favorite herbs, lovage, which tastes like a burst of celery. If you can’t find fresh lovage, or simply don’t like it—some people hate it—cilantro would be fine. I’d suggest some potato salad on the side.
Serves 4
4 whole mackerel, gutted and cleaned
1 tablespoon green peppercorns
1 tablespoon coriander seeds
2 tablespoons Garlic Oil
Scant 2 teaspoons kosher salt, plus more as needed
20 to 24 cherry tomatoes, quartered
2 garlic cloves, very thinly sliced
1 shallot, sliced ⅛ inch thick and soaked in ice water for 1 hour
½ teaspoon chardonnay vinegar
½ teaspoon garnacha vinegar
4 basil leaves
4 lovage leaves
1½ tablespoons extra-virgin olive oil, or as needed
1 tablespoon fish sauce
4 teaspoons sherry vinegar
Remove the mackerel from the refrigerator about an hour before you plan on cooking it and let it come to room temperature.
Grind the peppercorns and then the coriander seeds in a spice grinder or with a mortar and pestle until finely ground but not a powder.
When the mackerel has warmed to room temperature, brush each one on both sides with some of the garlic oil. Sprinkle generously on both sides with the salt, then pat on the spices to make a crust. Set aside.
Put the tomato quarters on a plate, cover half with the sliced garlic, and let sit for a few minutes. Drain the shallot slices, pat dry, and toss with the chardonnay vinegar and a pinch of salt.
Remove a few garlic slices from the tomatoes—this sounds fussy, but it will leave some garlic flavor without being overpowering. Divide the tomatoes among four plates, leaving room for the cooked fish. Top each serving with a few shallot slices and a sprinkling of the garnacha vinegar. Season with a pinch of salt. Lay the basil and lovage leaves over the top.
Heat a large carbon-steel or cast-iron skillet over medium-high heat. Once it’s good and hot, add the olive oil, then add the fish. If you need to cook the fish in two batches, you can keep first batch warm in a 200°F (95°C) oven on a wire rack set atop a baking sheet, then give it a quick go in the pan again before serving. Cook for 2 minutes, or until golden brown on the first side, then flip and cook for 2 to 3 more minutes, until the fish has a nice golden brown crust on the second side. A cake tester inserted into the thickest part of a fish should feel warm when pressed to your lip. Just before you remove the fish, splash it with the fish sauce, both for flavor and to help release the crispy skin from the pan.
Arrange the fish next to the tomato salads and dress with the sherry vinegar. Serve immediately.