BREADS
The Staff of Life

Harriet Jacobs was the enslaved daughter of a South Carolina planter who published an 1861 memoir, Incidents in the Life of a Slave Girl, Seven Years Concealed, in which she reminisced about, among other things, her devotion to her Aunt Marthy, the benevolent grandmother who made crackers at night to sell.
Aunt Marthy was “much praised for her cooking,” Jacobs mused, “and her nice crackers became so famous in the neighborhood that many people were desirous of obtaining them. She asked permission of her mistress to bake crackers at night, after all the household work was done; and she obtained leave to do it…after working hard all day for her mistress, she began her midnight baking assisted by her oldest children. The business proved profitable; and each year she laid by a little, which was saved for a fund to purchase her children.” Baking mattered.
The relationship between plantation cooks like Aunt Marthy, house servants, free people of mixed race, and the black privileged class was dynamic. House servants, having had exposure to white practices in the big house, used these as pathways for creating their own opportunities and autonomy. Steeped in West African cooking techniques, such as steaming pudding in banana leaves, baking pones in hot ashes, or frying pounded dough in deep oil, they “arrived without material possessions but equipped with sensibilities of marketing and trading foodstuffs into other consumer goods,” Psyche Williams-Forson observed in Building Houses Out of Chicken Legs: Black Women, Food, and Power. They maintained these culinary habits in the privacy of the slave village and in the isolated neighborhoods where free people of color lived and worked. They developed new skills in landowners’ kitchens, taverns, restaurants, inns, and hotels. And they combined the two in food service businesses—some became street vendors who dominated the marketplace, and others established bakeshops that enriched their families for years.
In the years following the Civil War and Emancipation, many in this group went on to pursue educations to enhance skills of personal service at schools for the newly freed, such as Hampton Normal and Agricultural School, not far from where the first Africans landed in Virginia in 1619. Learning to cook “scientifically” improved a black woman’s social status. It helped her obtain a degree of independence, provided food, clothes, and education for her children, and allowed her to participate in community work.
I looked in history books for evidence of the knowledge and skills achieved by these new “domestic science” students, but their accomplishments were generally overshadowed by the black bourgeoisie, a small group of African Americans who established their livelihoods in education, business, ministry, and medicine. A Book of Recipes for the Cooking School, published in 1921 by Hampton’s director of the Home Economics School, Carrie Alberta Lyford, changed that, and opened a path of stories for me to explore.
Lyford established herself as a font of baking wisdom. Her book featured tested recipes from cooking schools across the country. She offered succinct lessons on baking chemistry that covered subjects like the “methods of entangling air or gas in a batter” and “the thickness of batters and doughs.”
African American cooking school teachers in the private sector, including Mrs. T. P. (Sarah Helen) Mahammitt and caterer Cleora Butler, transferred baking competencies in their writings as well.
Mahammitt’s Recipes and Domestic Service, published in 1939, was the textbook for the Mahammitt School of Cookery in Omaha, Nebraska. In it, she introduced basic recipes, such as baking powder biscuits, plain muffins, “hot roll foundation,” and popovers, then she advanced the reader to more complex variations: Danish pastry, flavored biscuits, strudel, and quick breads.
Butler traced her family history, then published the stories in Cleora’s Kitchens: The Memoir of a Cook & Eight Decades of Great American Food in 1985. Her mother, Maggie, was an excellent baker. She baked bread “so highly esteemed in Muskogee that she could charge twenty-five cents a loaf when the going rate for bread was a nickel.” Cleora studied Maggie like a book. By age ten, Cleora had made her first batch of biscuits, using a new baking powder and cookbook supplied by Calumet. She went on to become a successful caterer and pastry shop owner, baking sourdough French bread and inventing new dishes from native ingredients and Southwestern cooking techniques—like other migrating African American families, Cleora’s people were lured to the West, to Indian Country, by the promise of free land, liberty, and self-sufficiency.
With so much knowledge and experience in the community, it’s no surprise that black inventors developed ways to turn out perfect loaves, rolls, muffins, and cakes without all the strenuous and time-consuming effort. In 1875, Alexander P. Ashbourne devised a spring-loaded die cutter that cut biscuits into a variety of thin, uniform shapes. Two years later, Joseph Lee, known as the “bread specialist,” designed a bread crumb machine to reuse stale bread. In 1884, Willis Johnson of Cincinnati patented an improved mechanical egg beater with two chambers that allowed a cook to beat eggs in one section and mix batter in the other, and Judy Reed patented a hand-operated dough kneader and roller. And in the mid-twentieth century, Lucille Bishop Smith, a chef, home economist, entrepreneur, and author, developed and sold the first packaged hot roll mix—a commercial product that was a boon to housewives.
Lucille’s All-Purpose Hot Roll Mix, begun as a fundraiser for Smith’s church in the mid-1940s, promised convenience and effortless results. Its premeasured ingredients saved time and reduced the guesswork ordinarily associated with homemade bread, while its moist, easy-to-handle dough yielded fine-textured dinner rolls, sweet and cinnamon rolls, doughnuts, and pizza crust that made baking a joy. She continued to excite bakers with the versatility of yeast breads in a recipe card collection, Lucille’s Treasure Chest of Fine Foods published in 1945. (Among the suggestions for turning hot rolls into special occasion fare were tea rolls flecked with parsley and sweet rolls drenched in preserves.)
Distinctively endowed. Professionally grounded. Supremely industrious. The recipes in this chapter memorialize these innovators as role models, equipped as they were with an inheritance from ancestors who fashioned flatware from oyster shells, carved mortars and pestles from tree logs, sewed baskets for winnowing rice using bones and sweetgrass, burned corncobs to make baking soda, and distilled salt from the soil under a smokehouse.
Through them, I discovered my inner baker. When I’m happy, I bake; when I’m blue, I bake. For me, it is fun and relaxing, the ultimate expression of cooking with joy. The main requirement you’ll need is, as 1960s soul-era cookbook author Ruth Gaskins puts it, “a light hand and a good heart.”
Biscuits

White flour biscuits were once considered a delicacy, a Sunday treat, something special on Christmas morning. Made with what the enslaved called “seconds,” or “shorts,” meaning the coarsest leavings from processing wheat into white flour, and a little pig fat, this crude fare still reveals the delight African captives took in simple pleasures like hot bread for breakfast.
Millie Williams remembered the experience this way: “Heep o’ times we’d eat coffee grounds fo’ bread. Sometimes we’d have biscuits made out o’ what was called de 2nd’s. De white folks allus got de 1st’s.”
The story was different if you were a free person of color operating a baking business. Access to white flour and new technologies such as baking powder made it possible to produce biscuits of fine quality. In 1866, if you wanted to make biscuits similar to what we know now—light and fluffy—you would have to be a baker proficient in the chemical reactions of multiple leaveners. For instance, Malinda Russell’s recipe for biscuits got its lift from a balanced mix of egg, yeast, and baking soda. But with the popularization of new baking powder brands like Calumet and Rumford, and with white flour being made inexpensive by industrial mills, “baking powder biscuits” start showing up in black cookbooks in the early twentieth century. By midcentury, the biscuits that once were a special-occasion food, treasured on weekends, were everywhere.
Whenever I look to experienced cooks for lessons about biscuit making, though, the story is usually about the same: The recipe is plain and simple, too easy to write down.
But to tell you the truth, good biscuit making is a science and an art. And it takes practice, however you do it and whatever you use—shortening, lard, or butter; more or less baking powder; buttermilk or milk.
The science lies in keeping the mixture cool, blending the flour and fat well, and adding just enough liquid to moisten and make a soft, somewhat sticky dough. The amount of milk you’ll need varies, depending upon the density of your flour and, believe it or not, the humidity in the air.
The art is in your hands—in the motion of your fingers during mixing and your unique way of kneading the dough.
BAKING POWDER BISCUITS
MAKES 12 BISCUITS
This Sunday morning, conduct your own experiment. Bake this recipe as it is here, then, the next time, give your biscuits a rich flavor by mixing half butter and half shortening. See which one you prefer. Serve it with my family’s favorite spread, honey butter—or with homemade jam, or a mix of molasses and butter.
2 cups all-purpose flour
4 teaspoons baking powder
¾ teaspoon salt
¼ cup shortening, cut into pieces and chilled
⅔ cup whole milk, or as needed
-
Preheat the oven to 450°F.
-
In a bowl, whisk together the flour, baking powder, and salt. Sprinkle the shortening over the dry ingredients. Using your fingertips, a pastry blender, or two knives, cut in the shortening until the mixture resembles coarse crumbs. Using a fork, blend in enough milk to make a slightly sticky dough that pulls away from the sides of the bowl. Turn the dough out onto a lightly floured surface. (Keep two things in mind: Add as little flour to the kneading board as possible. And the less you handle the dough, the better.)
-
To knead properly, use only the heel of your hand to push the dough away from you so that the heat from your hands does not warm up the dough. Then, working quickly, pick up the dough, sprinkle the board with a little flour and return the dough to the board. Fold the dough in half and push it away from you again. Repeat this technique several times for biscuits that are light and airy. Ruth Gaskins recommends kneading the dough just 6 to 8 times; Edna Lewis prefers 8 to 10. Knead the dough just until the dough comes together and is smooth. Do not overwork.
-
Roll or pat the dough to a ½-inch thickness. Cut with a floured 2-inch round biscuit cutter, pressing down firmly and pulling the cutter straight out of the dough. Do not twist. Cut the biscuits close together, leaving no space between. (After rolling and cutting my biscuits, I gather the leftover dough on the board and lightly pinch together the scraps into a scraggly shaped biscuit that I reserve for myself rather than re-rolling and cutting the dough.)
-
Place the biscuits on an ungreased baking sheet. Bake until puffed and golden brown, 12 to 15 minutes, rotating the sheet halfway through the baking time for even baking.
VARIATION
CREAM BISCUITS
Substitute chilled heavy whipping cream for the milk.
ANOTHER SORT OF BISCUIT
The Southern Cookbook: A Manual of Cooking and List of Menus, Including Recipes Used by Noted Colored Cooks and Prominent Caterers, S. Thomas Bivins, 1912

Rub into a pound of flour six ounces of butter, and three large spoonfuls of yeast, and make into a paste with a sufficient quantity of new milk, make into biscuit and prick them with a clean fork.
Another Sort: Melt six or seven ounces of butter with a sufficiency of flour into a stiff paste, roll thin, and make into biscuits.
BUTTERMILK BISCUITS

MAKES 12 BISCUITS
The difference between these biscuits and those leavened with baking powder alone is the addition of baking soda, which you’ll need to stabilize the dough. Do this when you introduce any type of acid, whether that’s buttermilk, yogurt, sour cream, molasses, vinegar, or lemon juice. The reaction between the acidic ingredient and the baking soda produces more lift in the dough, and a lighter biscuit.
2 cups all-purpose flour, plus more for the work surface
1 tablespoon baking powder
½ teaspoon baking soda
½ teaspoon salt
¼ cup shortening, cut into pieces and chilled
¾ to 1 cup buttermilk
Melted salted butter (optional)
Honey butter, jam, or molasses and butter, for serving
-
Preheat the oven to 450°F.
-
In a bowl, whisk together the flour, baking powder, soda, and salt. Sprinkle the shortening over the dry ingredients. Using your fingertips, a pastry blender, or two knives, cut in the shortening until the mixture resembles coarse crumbs. Using a fork, blend in enough buttermilk to make a slightly sticky dough that pulls away from the sides of the bowl. Turn the dough out onto a lightly floured surface.
-
It’s time to knead the dough. Keep two things in mind: You should add as little extra flour to the kneading board as possible, just enough to let you handle the dough. And the less you handle the dough, the better.
-
To knead properly, use only the heel of your hand to push the dough away from you so that the heat from your hands does not warm up the dough. Then, working quickly, pick up the dough, sprinkle the board with a little flour, and return the dough to the board. Fold the dough in half and push it away from you again. Repeat this technique several times for biscuits that are light and airy. Ruth Gaskins recommends kneading the dough just 6 to 8 times; Edna Lewis prefers 8 to 10. Knead the dough just until the dough comes together and is smooth. Do not overwork, which makes it tough.
-
Roll or pat the dough to a ½-inch thickness. Cut with a floured 2-inch round biscuit cutter, pressing down firmly and pulling the cutter straight out of the dough. Do not twist. Cut biscuits close together, leaving no space between. (After rolling and cutting my biscuits, I gather the leftover dough on the board and lightly pinch together the scraps into a scraggly shaped biscuit that I reserve for myself rather than re-rolling and cutting the dough.)
-
Place the biscuits on an ungreased baking sheet. Bake until puffed and golden brown, 12 to 15 minutes, rotating the sheet halfway through baking time for even baking.
-
Brush with melted butter after baking, if desired. Serve immediately with honey butter, jam, or molasses and butter.
Biscuits for Teatime
I have a theory that the sweet biscuits in black cookbooks generally evolved from the British practice of afternoon tea; enslaved and free people would have observed this habit.
While studying recipes, I found lush formulas for biscuits laced with fresh herbs, lemon juice, cinnamon, and raisins; spread with raspberry jam; or garnished with a fruit juice–soaked sugar cube tucked in the center—with pineapple juice as Sallie Miller did it in Mammy’s Cook Book in 1927, or with orange juice as Lucille Bishop Smith did it in midcentury. Miniature sweet biscuits are still an afternoon tea tradition. Today we call them scones.
ORANGE BISCUITS
MAKES 12 BISCUITS
Of all the flavors of sweet biscuit I have found in African American cookbooks, orange biscuits particularly can be traced to the Brits’ fondness for orange marmalade. But it surprised me to learn that it was the Moors who, in the tenth century, introduced bitter oranges, the basis of orange marmalade, to Europe in the first place.
That North African heritage gives new meaning to the black penchant for a citrus fruit that was once considered exotic, expensive, and out of reach for cooks.
For biscuits with a delightful flavor of orange, author Dorothy Shanklin Russey in the book Forty Years in the Kitchen: A Collection of Recipes, rolled her dough ¾ inch thick and spooned marmalade into a little dip she pressed into the center with her finger. I roll the marmalade inside the biscuit dough, jelly-roll fashion, and add orange zest and a touch of juice to the dough itself. A brush of melted butter and the richness of heavy cream takes these dainties right over the top.
Butter, for the baking pan
2 cups all-purpose flour, plus more for the work surface
4 teaspoons baking powder
1 teaspoon salt
⅓ cup butter or shortening, chilled and cut into pieces
⅔ cup heavy whipping cream
2 teaspoons grated orange zest
2 teaspoons fresh orange juice
½ cup orange marmalade
1 tablespoon butter, melted
-
Preheat the oven to 400°F. Lightly butter a 9-inch baking pan.
-
In a large bowl, whisk together the flour, baking powder, and salt. Sprinkle the butter pieces over the dry ingredients. Using your fingertips, a pastry blender, or two knives, cut in the butter pieces until the mixture resembles coarse crumbs. Set aside.
-
In a small bowl, combine the cream, orange zest, and orange juice. Using a fork, gradually blend three-quarters of the cream-juice mixture into the flour mixture, stirring gently. Stir in enough of the remaining cream-juice mixture to make a slightly sticky dough that pulls away from the sides of the bowl. Depending upon your flour, you may have a couple of teaspoons of the liquid left over.
-
Turn the dough out onto a lightly floured surface. Knead 8 to 10 times, just until the dough comes together and is smooth. (See this page for more detail on my preferred technique, or let your hands guide you.)
-
Roll or pat the dough into a rectangle about 12 inches long and ¼ inch thick. Spoon the marmalade over the dough, spreading it to the edges. Starting with a long side, roll up the dough, jelly-roll fashion, and cut the roll crosswise into 1-inch slices. Place the biscuits in the prepared baking pan, leaving no space in between. Brush with melted butter.
-
Bake for 10 minutes. Reduce the oven temperature to 375°F and bake until puffed and golden brown, about 10 minutes longer. Serve warm.
QUICK CINNAMON ROLLS

MAKES 12 ROLLS
In 1931, a new time-saving baking mix came to market as an inexpensive solution to the “slavery of housework.” What the manufacturer of Bisquick neglected to mention was the catalyst behind the product was an African American chef who, in 1919, composed a baking mix to help him crank out hot biscuits fast, as Linda Civitello divulged in Baking Powder Wars: The Cutthroat Food Fight That Revolutionized Cooking. Unfortunately, the chef’s name has so far been lost to history.
Decades later, Vera Beck—my first test kitchen cook at the Cleveland Plain Dealer—devised her own biscuit mix recipe, which appeared in the PD Food Section, along with instructions for baking variations, so that fresh breads could be prepared in an instant.
You can make these cinnamon pinwheels as I do, from scratch, or use my adaptation of Vera’s Master Mix (see Note).
Butter, for the muffin tin
2 cups bread flour, plus more for the work surface
4 teaspoons baking powder
1 teaspoon salt
2 tablespoons shortening, cut into pieces and chilled
4 tablespoons (½ stick) butter, cut into pieces and chilled
¾ to 1 cup whole milk
¼ cup sugar
1½ teaspoons ground cinnamon
FROSTING
1 tablespoon butter, softened
¼ cup powdered sugar
1 tablespoon whole milk
-
Preheat the oven to 425°F. Butter a 12-cup muffin tin or a baking sheet.
-
In a bowl, whisk together the flour, baking powder, and salt. Sprinkle the shortening and 2 tablespoons of the butter pieces over the dry ingredients. Using your fingertips, a pastry blender, or two knives, cut the shortening and butter into the flour mixture until the mixture resembles coarse crumbs.
-
Using a fork, blend in ¾ cup milk to make a slightly sticky dough. Stir in enough of the remaining ¼ cup milk until the dough pulls away from the sides of the bowl. Turn the dough out onto a lightly floured surface. Knead 8 to 10 times, just until the dough comes together and is smooth. (See this page for my preferred kneading technique, or let your hands guide you.)
-
Roll the dough into a rectangle about 12 inches long and ¼ inch thick. In a bowl, combine the sugar and the cinnamon.
-
Sprinkle the dough with the cinnamon sugar and dot with the remaining 2 tablespoons butter. Starting with a long side, roll it up, jelly-roll fashion, and cut crosswise into 1-inch slices. Place the pinwheels in the prepared muffin cups or on the greased baking sheet, about 1 inch apart. Bake until golden brown, 15 to 20 minutes.
-
Meanwhile, make the frosting: In a small bowl, combine the softened butter, powdered sugar, and milk and stir with a spoon until smooth.
-
Let the rolls cool in the pan for 5 minutes, then transfer to a wire rack. Spoon frosting onto the rolls.
NOTE: You may use 2 cups Country-Style Master Biscuit Mix (recipe follows) in place of the flour, baking powder, salt, shortening, and 2 tablespoons of the butter. Place the baking mix in a bowl and proceed with the recipe, starting with adding the milk.
COUNTRY-STYLE MASTER BISCUIT MIX
MAKES ABOUT 12 CUPS
Adapted from Vera Beck and Mildred Council
10 cups sifted all-purpose flour
5 tablespoons baking powder
1 tablespoon salt
1½ cups shortening, cut into pieces and chilled
In a large bowl, combine the flour, baking powder, and salt. Sprinkle the shortening over the dry ingredients. With a pastry blender or 2 knives, cut in the shortening until the mixture resembles coarse crumbs. Store in an airtight container in the refrigerator or freezer.
Batter Cakes
A batter of flour, eggs, milk, and leavening cooked on an iron griddle or waffle iron is everywhere on Southern menus and in African American cookbooks, variously titled Flannel Cakes, Griddle Cakes, Hotcakes, Pancakes, or Flapjacks, and adapted from the Dutch, according to food historian Frederick Douglass Opie.
On occasion, when flour supplies were exhausted, the enslaved fashioned breads from dried beans, rice, potatoes, or mashed peas, making batters out of these ingredients—just as they would have before captivity—or from starchy fruits and vegetables such as cassava and plantain. The dough was shaped into cakes, flat loaves, or pones that were fried or baked, as Dwight Eisnach and Herbert C. Covey documented in their study, What the Slaves Ate: Recollections of African American Foods and Foodways from the Slave Narratives.
Since then, black cooks have been inextricably associated with expertly prepared batter cakes, whether characterized in literature by the Old South’s plantation mammy, in advertising trademarks such as Aunt Jemima, or in any one of many fictionalized maids, including Delilah in Fannie Hurst’s 1933 novel and its follow-up film, Imitation of Life.
From America’s Colonial days to the present, an assortment of tricks have earned black cooks this great legacy. One doubled the eggs in the recipe to substitute for baking powder. Another mixed in sour cream or buttermilk instead of whole milk to give the waffles a subtle tang. For texture, cornmeal or crisp, cooked bacon might be stirred into the recipe. The type of fat could vary from rendered salt pork or chicken fat to butter, depending upon the pantry of the cook, while the choice of grain changed according to the region of the country the cook was in. Wheat, buckwheat, or rice flour; leftover cooked rice; hominy grits; and cornmeal all made appearances in black cookbooks. And the secret to the commercial success of Aunt Jemima pancake mix, according to the marketing legend, was a delicate balance of wheat, corn, rye, and rice, attributed to a mythical black cook.
GINGERBREAD WAFFLES AND CREAM
MAKES 6 WAFFLES
Who can resist rich, golden waffles? Few, including Thomas Jefferson, who first enjoyed the crisp batter cakes in France, bought a waffle iron, and returned to the States with a new recipe for his enslaved French-trained chef, James Hemings, to perfect. Since then, African Americans have enjoyed plain waffles made slightly tangy with sour milk, stretched for a crowd (when white flour was scarce) with sweet potato flour, and lightened, in the rice-growing regions of South Carolina, with cooked rice instead of yeast.
Spiced gingerbread waffles are one version of the honeycombed cakes that endured tests of locale and economy. I experimented with Nebraska cooking teacher Sarah Helen Mahammitt’s way of cutting together the flour and fat as for biscuits and sweetening the waffles with blackstrap and sorghum molasses. But for this recipe, I mixed Lucille Bishop Smith’s Recipe #15 with Norma Jean and Carole Darden’s family formula, folding in stiffly beaten egg whites for waffles that are light and sweet. The waffles will be soft when you remove them from the iron, but crisp up a bit after a few minutes.
2 cups all-purpose flour
¼ cup packed dark brown sugar
1 teaspoon ground ginger
¼ teaspoon ground cinnamon
1 teaspoon baking powder
1 teaspoon baking soda
¼ teaspoon salt
⅓ cup butter, melted and cooled
½ cup molasses (blackstrap, sorghum, or a blend of both)
1 cup buttermilk
2 large eggs, separated
Oil, for greasing the waffle iron
Freshly grated nutmeg, for finishing (optional)
-
Preheat a waffle iron.
-
In a bowl, whisk together the flour, brown sugar, ginger, cinnamon, baking powder, baking soda, and salt. In a separate bowl, combine the melted butter, molasses, and buttermilk, stirring until smooth. Beat the egg yolks together and stir them into the liquid mixture. In a third bowl, beat the egg whites to stiff peaks using a whisk, hand mixer, or stand mixer. Stir together the flour mixture and buttermilk mixture, then gently fold the whipped whites into the batter.
-
Grease the heated waffle iron and bake the waffles, following the waffle iron’s instructions, to desired doneness. Sprinkle with nutmeg, if desired.
WAFFLES FOR BREAKFAST
What Mrs. Fisher Knows About Old Southern Cooking, Abby Fisher, 1881
Two eggs beat light, one pint of sour milk, to one and a half pint of flour, one teaspoonful of soda sifted with the flour, one tablespoonful of butter, teaspoonful of salt, mixed well, and then add the eggs. Always have your irons perfectly hot and well greased. In baking, melt butter before mixing in flour. Place them in a covered dish and butter them on sending to the table.
OLD-FASHIONED PANCAKES WITH BERRY SYRUP

SERVES 4 TO 6
In Colonial America, pancakes were made with buckwheat or cornmeal. Another type of griddle cake, made from stale, leftover bread crumbs and served with homemade syrup, epitomized the kind of economical scratch cooking old-time cooks perfected before packaged mixes became affordable. Soul cooks celebrated both during the 1960s, adding recipes for homemade brown sugar syrup, flavored with maple or wild berries, honoring their ancestors’ ingenuity when maple syrup was out of reach.
Here, I combine an homage to those cooks and Edna Lewis’s way with the breakfast dish, from her acclaimed cookbook, The Taste of Country Cooking.
2 cups all-purpose flour
4 teaspoons baking powder
2 teaspoons sugar
½ teaspoon salt
2 to 2½ cups whole milk
2 tablespoons butter, melted and cooled, plus 3 tablespoons room-temperature butter (or oil), for the griddle or skillet, plus more for serving
2 large eggs, beaten
Warm Berry Syrup or Homemade Pancake Syrup, for serving (recipes follow)
-
In a bowl, whisk together the flour, baking powder, sugar, and salt. In a separate bowl, stir together 2 cups milk, the melted butter, and eggs. Add the milk mixture to the flour mixture, stirring just until the batter is smooth enough to pour, but a few small lumps still remain. Stir in additional milk, as needed, for thinner cakes.
-
Heat a griddle or a large skillet over medium-high heat and lightly grease with the softened butter. Spoon ⅓ cup batter for each pancake onto the griddle or skillet and cook until bubbles begin to form on the surface and the edges look dry. Flip and cook on the other side until golden brown. Do not turn again. Serve the pancakes with butter and syrup.
WARM BERRY SYRUP
MAKES ABOUT 1½ CUPS
½ cup sugar
1½ cups blueberries or blackberries
½ teaspoon fresh lemon juice
In a heavy saucepan, combine the sugar and ½ cup water and bring to a boil. Reduce the heat, add the berries and lemon juice, and simmer until the berries are tender, 8 to 10 minutes. Use a wooden spoon to mash half of the berries against the side of the pot. Simmer a few minutes, until the syrup thickens to desired consistency. Serve warm.
HOMEMADE PANCAKE SYRUP
MAKES ABOUT 1 CUP
1 cup packed light brown sugar
Pinch of salt
¼ teaspoon vanilla extract or ⅛ teaspoon maple flavoring
In a heavy saucepan, combine the brown sugar, salt, and ½ cup water and bring to a boil. Reduce the heat and simmer until the mixture thickens to your desired consistency, 10 to 12 minutes. Stir in the vanilla. The syrup keeps, covered and refrigerated, for about 1 month.
BUCKWHEAT CAKES
Farmer Jones Cook Book, The Fort Scott Sorghum Syrup Company, 1914
Mix at night one pint of pure buckwheat flour, with enough warm water to make a thick batter. Add yeast, using one-half cake of dry yeast dissolved in warm water. Stand this batter in warm place over night and next morning add one tablespoonful Farmer Jones’ Sorghum, soda size of a pea, dissolved in little water, one teaspoonful salt and enough milk to make batter as thin as cream. Bake on hot griddle. (Use left-over batter to start the next cakes.)
Soul Bread—The Cornbread Flight
Thin, light cornmeal cakes, baked on a hot cast-iron “spider”—an old-fashioned skillet with three short legs—hold a special place in the hearts and minds of Southern cooks. They trigger memories of Mother stirring and tasting her cornmeal mush as it bubbled on top of the stove; of African bondswomen who “took Indian maize and turned it into hoe cakes, mush, and dumplings akin to African Fufu and Kenkey,” as scholar John W. Blassingame explained in The Slave Community: Plantation Life in the Antebellum South.
Eliza Leslie, the nineteenth-century cookbook author who penned household management and etiquette books for white women, attributed the recipe for Aunt Lydia’s Corn Cake to a “Southern colored woman” and affirmed it “the very best preparation of Indian cakes” in 1857 in Miss Leslie’s New Cookery Book.
Aunt Lydia and cooks like her perfected one of the enduring symbols of Southern cuisine: cornbread, in all its forms. “Cornbread has been called the staff of life in the South, and it comes in a real conglomeration of shapes, sizes, mixtures and names. There’s corn cake, corn pone, corn dodgers, batter cake, spoon bread, corn muffins, hoecake, hushpuppies—plus the varied combinations of corn meal and flour, corn meal and rice, corn meal and hominy,” chef Jimmy Lee said in the Soul Food Cook Book.
And the variations on these themes have seemed endless.
I marveled at the attention to detail and skill associated with the creation of one notable form: cornbread cooked directly in hot ashes. There is a narrative, recorded for the Federal Writers’ Project of 1936 by Austin Pen Parnell of Arkansas, who recalls his grandmother’s “art” of making ash or hoe cakes in the years following the Civil War:
“My father rented it from the big man named Alf George for whom he worked. Mr. George used to come out and eat breakfast with us. We’d get that hoecake out of the ashes and wash it off until it looked like it was as clean as bread cooked in a skillet. I have seen my grandmother cook a many a one in the fire. We didn’t use no skillet for corn bread. The bread would have a good firm crust on it. But it didn’t get too hard to eat and enjoy. Two-thirds of the water used in the ash cake was hot water, and that made the batter stick together like it was biscuit dough. She could put it together and take it in her hand and pat it out flat and lay it on the hearth. It would be just as round! That was the art of it!”
Aleck Woodward, a formerly enslaved man from South Carolina, also fondly remembered cracklin’ bread—cornbread baked with crumbled fried pork skin: “De cracklin’ bread was called on our place, ‘de sweet savor of life.’” African captives also pounded sweet potato into pones to serve with pigeon and stretched cornmeal batter with persimmon pulp, inspiring home economics teacher Ethel Brown Hearon, author of Cooking with Soul: Favorite Recipes of Negro Homemakers, to mix sweet potato and cornmeal together. She called the concoction “soul bread.”
With all of these variations in mind, I bundled recipes here in a “cornbread flight.” Think of the grouping as a timeline, or a family tree. First, a coarse mix of meal, lard, and water was baked in the ashes of a roaring fire or cooked on a flat surface above a fire—what the authors of The Picayune’s Creole Cook Book called “Southern darky cake,” and what is more commonly known as ashcake, hoecake, or hot water cornbread. That mush was improved with egg and milk and fried into golden brown griddle cakes, or turned into a cake-like cornbread when leavened with eggs, baking powder, and buttermilk. Cornbread also traveled out of the South, taking on flavors from other regions, like the chiles and cheese of the Southwest. And other cooks delighted special-occasion diners with cornmeal soufflés, otherwise known as spoonbread.
HOT WATER CORNBREAD
SERVES 4 TO 6
Whether shaped into small pones, dropped by the spoonful onto a hot griddle, or baked into one large cake in a skillet, hot water cornbread is likely the original form of cornbread—a simple, unleavened corn batter that historian Fred Opie described as “a facsimile” of the cornbread that African women in Angola and São Tomé had wrapped in banana leaves and baked in the “cinders of fires.”
1 cup cornmeal
½ teaspoon salt
¾ teaspoon sugar (optional)
1½ cups boiling water or scalded whole milk
2 tablespoons melted butter, shortening, lard, or bacon drippings
-
In a small bowl, stir together the cornmeal, salt, and sugar (if using). Stir in the hot water and let stand 1 hour.
-
Heat a cast-iron griddle or skillet over medium heat and grease well with the butter. Drop the batter by rounded tablespoonful onto the cooking surface. Smooth with the back of the spoon, if needed, to make disc-like cakes. Cook until golden, 1 to 2 minutes, then turn and brown the other side.
CORNMEAL GRIDDLE CAKES
MAKES 20 SMALL PANCAKES
Visitors to Thomas Jefferson’s Monticello praised his enslaved French-trained chef, James Hemings, for a special meal of fried chicken with corn cakes and cream gravy. In early twentieth-century Charleston, gubernatorial butler William Deas was honored for the identical meal. And the recipe for cornmeal batter cakes earned a cook named Marcellus star status in Minnie C. Fox’s Blue Grass Cook Book. I brought the 1904 edition of Blue Grass back to life, publishing a facsimile edition in 2005, because of its tributes to the black cooks of the region. Marcellus followed a recipe for cornbread, stirring in less milk to make cakes that were just thick enough to drop from a spoon and cook on a hot surface rather than in an oven.
After tasting dozens of updated and classic versions to compose this recipe, I am convinced that finely milled or medium-grind cornmeal is a fine alternative to the stone-ground variety that would have originally been called for. These cakes cook up light, making them a surprising alternative to plain bread at any meal. If you lean more toward the authentic, you can make a more rustic, textured version with coarser stone-ground cornmeal (see Note).
1 cup cornmeal (see Note)
1 tablespoon sugar
½ teaspoon baking soda
1 teaspoon baking powder
½ teaspoon salt
2 large eggs
1 tablespoon melted butter, shortening, lard, or bacon drippings, cooled, plus more for greasing the pan
1 cup buttermilk
-
In a bowl, whisk together the cornmeal, sugar, baking soda, baking powder, and salt. In a separate bowl, combine the eggs, melted butter, and buttermilk. Mix the buttermilk mixture into the cornmeal mixture and stir just until blended.
-
Heat a lightly greased griddle or skillet over medium-high heat. Drop the batter by tablespoon onto the hot pan. Cook until bubbles form on the surface and the edges are set, then flip and cook another 30 seconds to 1 minute.
NOTE: To substitute stone-ground cornmeal in the recipe above, stir together ½ cup water and 1 cup stone-ground cornmeal and let stand for 10 minutes for the cornmeal to soften and the water to be absorbed. Proceed with the remaining ingredients.
PLANTATION CORN BREAD OR HOE CAKE
What Mrs. Fisher Knows About Old Southern Cooking, Abby Fisher, 1881
Half tablespoonful of lard to a pint of meal, one teacup of boiling water; stir well and bake on a hot griddle. Sift in meal one teaspoonful of soda.
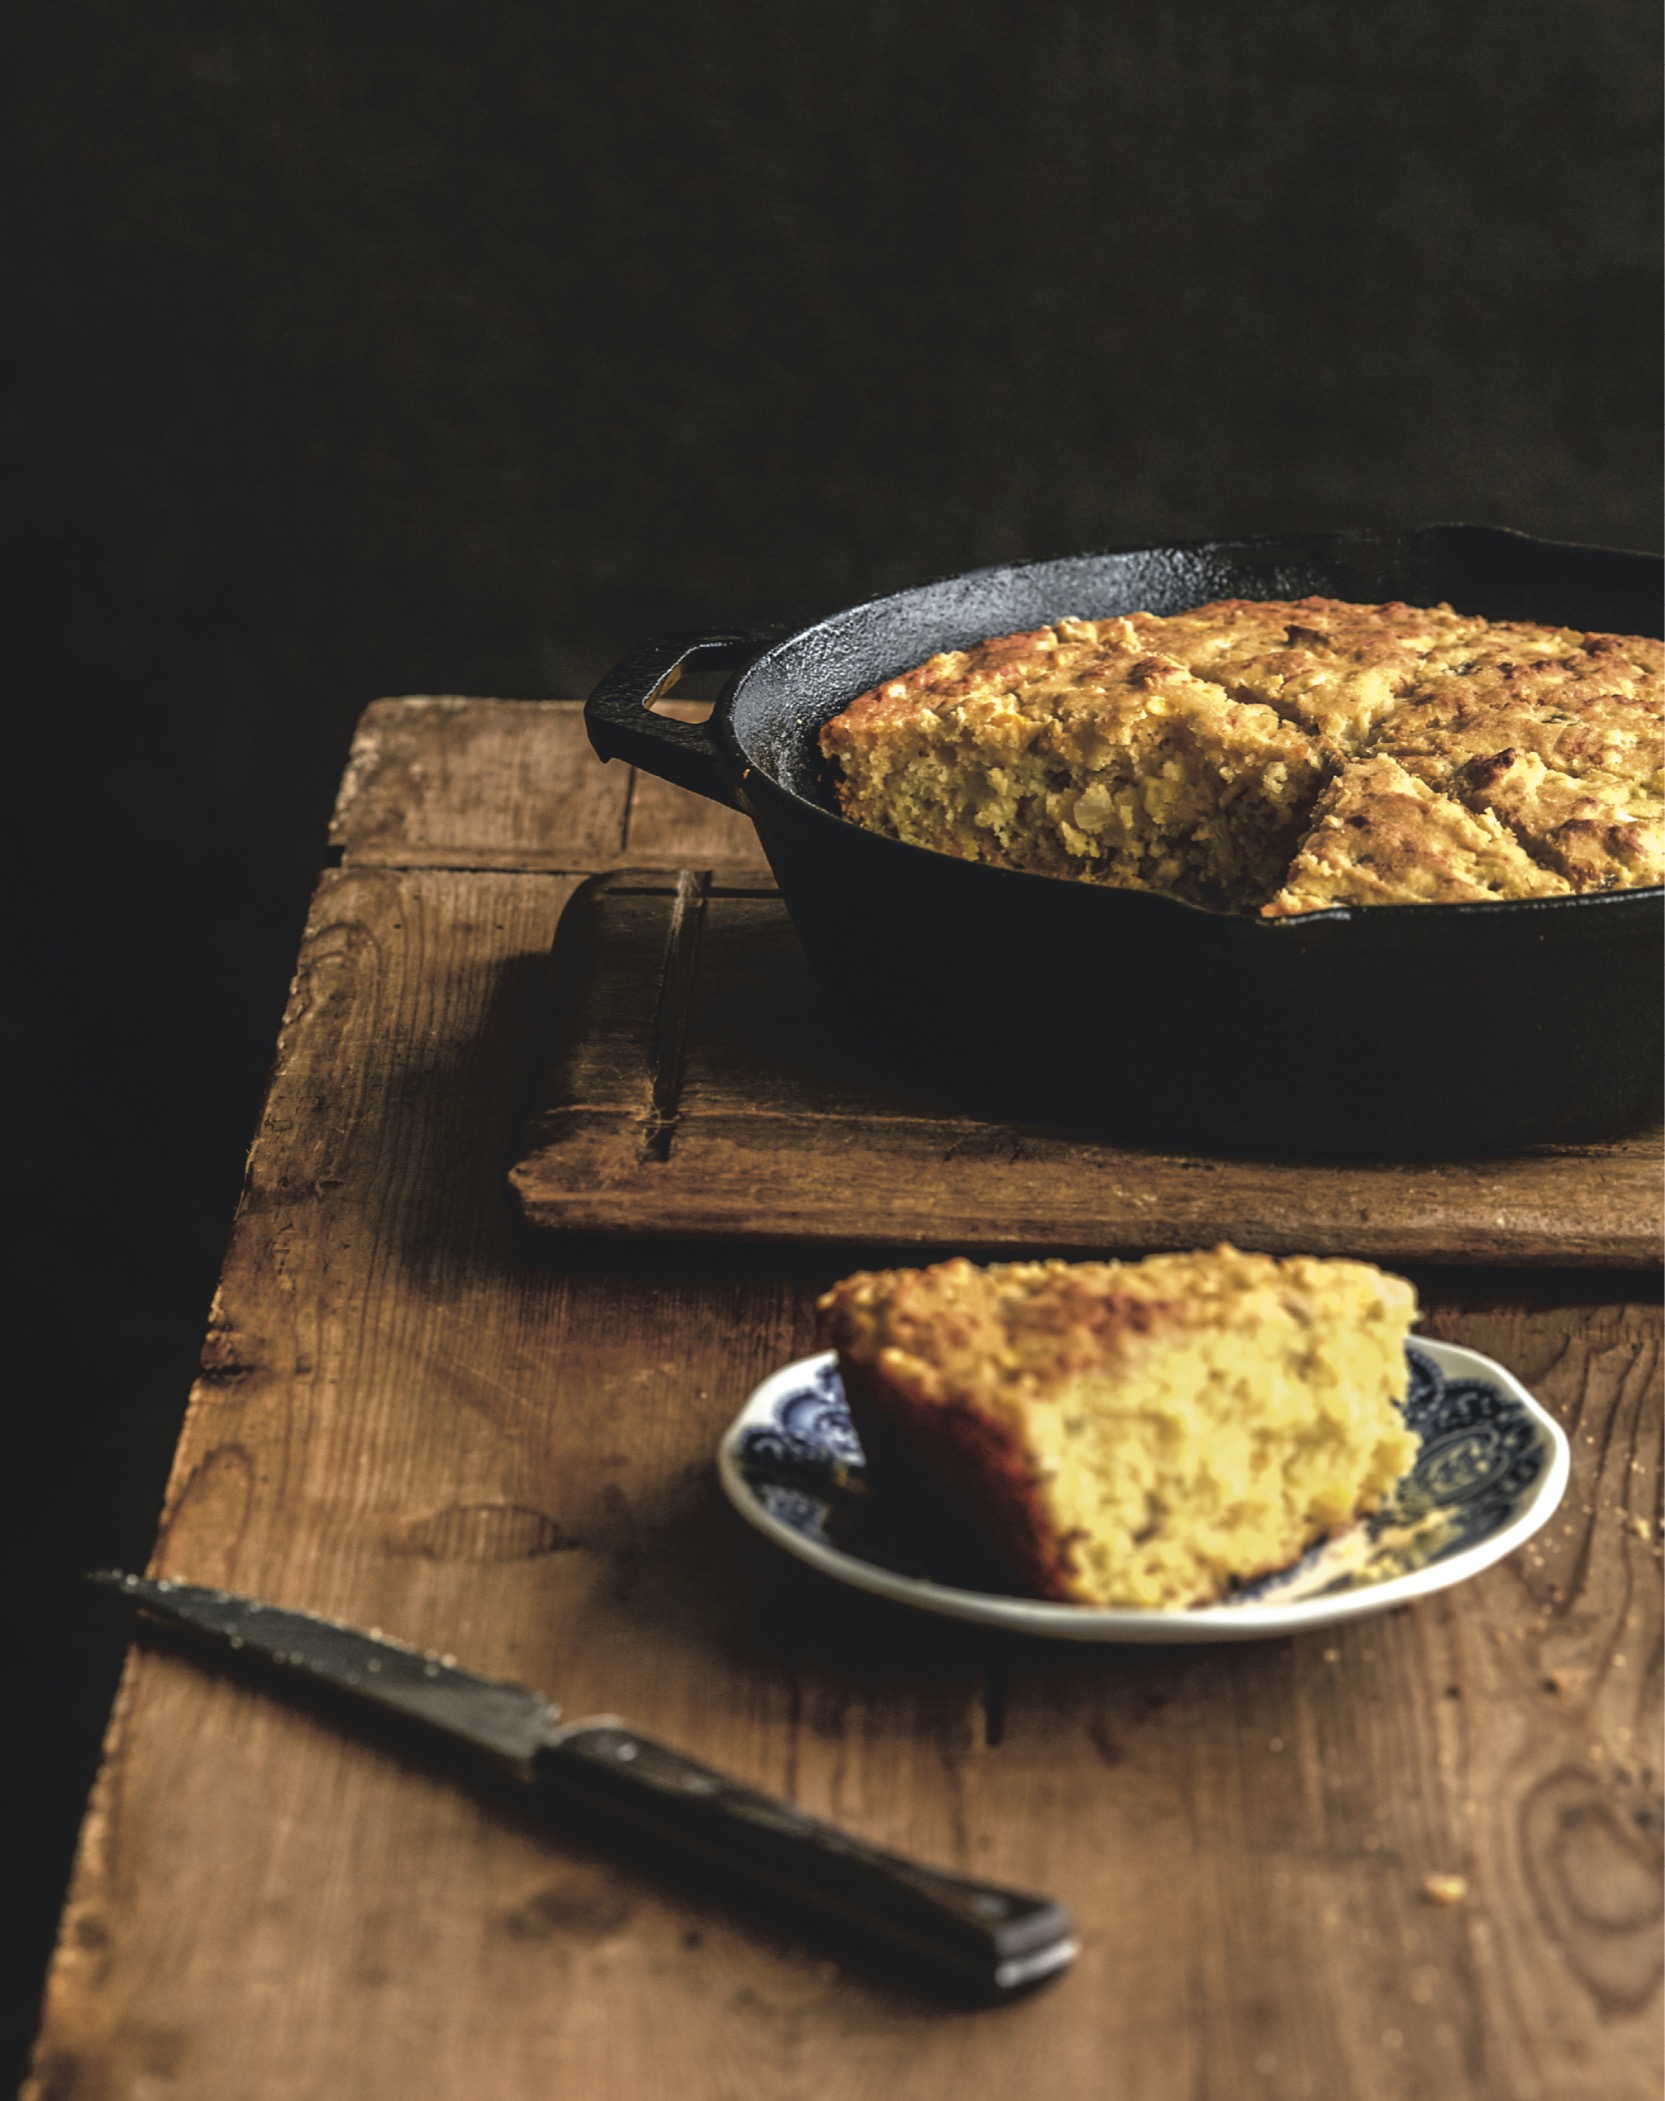
EXTRA-LIGHT BUTTERMILK CORNBREAD
SERVES 8 TO 10
Asking a Southern cook whether sugar belongs in cornbread is like pouring gasoline on a smoldering fire. I was there once when the embers ignited. It happened the year that corn was the topic of the Southern Foodways Alliance’s annual symposium at the University of Mississippi. Ronni Lundy, the beloved Appalachian cookbook author, declared that anyone who put sugar in their cornbread batter might as well go ahead and call that dish cake.
I sat meekly in the back of Barnard Observatory, thinking, “If you are African American and you don’t put sugar in the batter, it isn’t cornbread.” But I waited until Ronni and I were alone to share my thoughts. After much theorizing, we agreed that recipes for classic “Southern” cornbread seldom, if ever, call for adding sugar to the batter, and that sugar in cornbread was probably a regional habit—a response to cornmeal ground outside of the South, which could be less sweet.
Our assumptions went up in smoke when I discovered that sweeteners have appeared in cookbooks written by African Americans since Tunis Campbell added molasses to the mix in 1848, in the book Hotel Keepers, Head Waiters, and Housekeepers’ Guide. And there was a plantation habit of pouring sorghum molasses over cornmeal mush in a West African dish the Cajuns adapted for breakfast that they called coosh-coosh. Obviously, there are more connections between black folks and sweet cornbread than we know.
By the time Arturo Schomburg compiled his list of African American recipes during the 1930s, unsweetened cornbread was set off by the modifier: “Southern.” Today, with so many writers investigating the distinctions between Southern and soul food, that modifier has changed to “skillet,” as in skillet cornbread.
But just to show you how far some cooks have gone to impart their own sense of cornbread flair, Joyce White explained in Soul Food: Recipes and Reflections from African-American Churches that a Mrs. Esther Mae Archie followed a classic recipe, then stirred in fresh fruit and sugar. I call that cake.
This recipe, adapted from Mrs. Archie’s formula, tones the sugar way down, but if sweet is the way you like it, double the sugar.
Heating the butter in the pan until sizzling will ensure your cornbread has a crisp, crusty edge. Fruit, of course, is optional.
1 cup cornmeal
1 cup all-purpose flour
2 tablespoons sugar
1 tablespoon baking powder
½ teaspoon baking soda
1 teaspoon salt
1 large egg, beaten
1 cup buttermilk
6 tablespoons butter
-
Preheat the oven to 425°F.
-
In a large bowl, whisk together the cornmeal, flour, sugar, baking powder, baking soda, and salt. Stir in the egg and buttermilk until just mixed.
-
Place the butter in a 9-inch cast-iron skillet and heat in the oven until the butter is foamy. Swirl the butter around to coat the bottom and insides of the hot pan, then pour the hot butter into the batter and stir until well mixed. The batter will be thick. Immediately pour the batter into the hot buttered pan and return to the oven. Bake until golden, about 20 minutes.
SPANISH CORNBREAD
SERVES 12
Black authors living and publishing in the Southwest and West developed a fondness for including ingredients associated with Mexican cooking, such as tomatoes and hot chile peppers, and calling them “Spanish.” Here, cheese and canned corn give the bread its moist character.
1¼ cups yellow cornmeal
1¼ cups all-purpose flour
¼ cup sugar
2 teaspoons baking powder
½ teaspoon baking soda
1 teaspoon salt
1 cup cream-style corn
1 cup buttermilk
1 (4-ounce) can diced green chiles
½ cup minced onion
1 egg, lightly beaten
1 cup shredded sharp Cheddar cheese
4 tablespoons butter, cut into pieces
-
Preheat the oven to 400°F.
-
In a large mixing bowl, whisk together the cornmeal, flour, sugar, baking powder, baking soda, and salt.
-
In a separate bowl, combine the corn, buttermilk, chiles, onion, and egg, and mix well. Stir in the cheese.
-
Pour the liquid ingredients into the dry and stir together just until combined. Heat the butter in a 10-inch cast-iron skillet in the oven until foamy. Swirl the butter to coat the pan, then stir the hot butter into the batter, and then immediately pour the batter into the hot skillet. Bake for 30 minutes, or until golden brown.
SPOONBREAD
SERVES 6 TO 8
In 1927, Katharin Bell published a collection of Southern recipes with a Virginia flavor, Mammy’s Cook Book. The dishes were created and perfected by her mammy, Sallie Miller, a “famous cook” whose memory and culinary lore Bell was determined to preserve. Of all the recipes enshrined in the collection, Virginia Spoon Bread stands out for its unique combination of white cornmeal and cooked hominy grits; another white author who recorded black recipes called that “Batter Bread Mulatto Style.”
I have presented here the classic recipe for spoonbread, which resembles an airy pudding or a soufflé more than a traditional cornbread. To achieve this soft texture, some authors stir the cornmeal into scalded liquid and let it stand a few minutes. Others cook the mixture 5 minutes or so before baking.
1 cup boiling water
1 cup cornmeal
2 tablespoons butter, plus more for the baking dish and for finishing (optional)
1 cup whole milk
1 teaspoon sugar
1 teaspoon salt
2 large eggs, separated
1 teaspoon baking powder
-
Preheat the oven to 350°F. Butter a shallow 2-quart baking dish.
-
Pour the boiling water into a heatproof medium bowl. Pour the cornmeal in a thin stream into the hot water, whisking constantly until smooth. With a wooden spoon, stir in the butter until incorporated. Slowly beat in the milk, sugar, and salt until smooth and no longer thick. Let cool slightly. Beat in the egg yolks and baking powder. In a separate bowl, with a whisk or hand mixer (or in a stand mixer), beat the egg whites to stiff peaks, then gently fold them into the batter.
-
Pour the batter into the prepared baking dish. Bake until puffy and browned, 35 to 45 minutes. To serve, spoon onto serving plates and top with a pat of butter, if desired.
VIRGINIA SPOON BREAD
Mammy’s Cook Book, Katharin Bell (for Sallie Miller), 1927
½ cup white cornmeal
½ cup cooked hominy grits
1½ cup water
1 cup milk
1 tb. shortening
1 egg
1 t. salt
½ t. sugar
Heat water to boiling point, stir in cornmeal, and cook about 3 minutes, stirring smooth. Add shortening and grits while hot. Beat smooth, adding half of the quantity of milk. Add sugar, salt, and well beaten egg, and gradually beat in remaining milk. Put mixture in buttered pan, and bake about 40 minutes. This serves about 4 persons.

Quick Breads and Muffins
It might seem strange now, but in the days before supermarket shelves were lined with enough bread to feed an army, cooks relied upon both simple and complex breads that could be stirred together fast to bring variety to mealtime.
Quick breads are economical batters leavened without yeast, sometimes called tea breads. The name derives from the fact that you can mix and bake the bread immediately without setting aside time for it to rise—perfect for last-minute preparation when a neighbor stops by.
It’s hard to imagine serving plain, sweet batter bread as is, without any added ingredients, but that’s just how cooks did it for generations. Plain muffins, made from just white flour, sugar, butter, baking powder, eggs, and milk before baking in a special “gem” pan, resemble quick Sally Lunn, a light, sweet batter bread that is cut into squares after baking. The batter is easy to make and versatile; the long list of quick breads and muffins testifies to that virtue.
In time, cooks embellished ordinary muffins with ingredients harvested from the nearby woods or their own backyard—a handful of wild hickory nuts or berries carted home in an apron, fruits they dried themselves, fragrant spices. In another version, boiled hominy was part of the mix.
In those parts of the Old South where sugar cane was king, molasses, a by-product of the refining process, was known as the sweetener of poverty. Despite its reputation as a lowly ingredient, molasses tastes richer than sugar. It turns ordinary sweet batter bread into something luxurious when mixed with cooked, mashed sweet potatoes, pumpkin, or bananas. Sorghum, which Africans and the enslaved grew and stewed into a porridge, also was savored as a heritage sweetener for quick breads.
During the early years of the twentieth century, a handful of nut bread recipes appears in our cookbooks; one was a lean batter, made without eggs or sugar, found in The Federation Cook Book: A Collection of Tested Recipes, Contributed by the Colored Women of the State of California. Another, from 1912, was a less austere, grainy loaf, perfect hot from the oven with coffee or tea for breakfast, or sliced and toasted the following day. Tender cakes dotted with nutmeats occur more consistently until midcentury. With almost interchangeable recipes, both nut breads and nut cakes were made tame with pecans or walnuts, or, for a seductive taste of the wild, with black walnuts or hickory nuts in the batter.
BLUEBERRY MUFFINS
MAKES 8 MUFFINS
I’ve reworked several versions of blueberry breakfast cake, including the one baked in a hot gem or muffin pan, published in 1912 in Kentucky Cook Book: Easy and Simple for Any Cook, by a Colored Woman. The hint of orange or lemon is what makes these blueberry muffins so delightful. The addition of whole wheat flour, which used to also be called graham flour, reflects early twentieth-century health food cooking trends. For muffins that are a touch lighter, substitute whole wheat pastry flour or all-purpose white flour for half of the whole wheat flour.
Softened butter, for the muffin tin
1 cup whole wheat flour
½ cup cornmeal
1½ teaspoons baking powder
½ teaspoon salt
4 tablespoons (½ stick) butter, cut into chunks
¼ cup sugar
1 large egg
⅔ cup whole milk
1 teaspoon grated lemon or orange zest
1½ teaspoons fresh lemon or orange juice
1 cup blueberries
-
Preheat the oven to 400°F. Grease 8 cups of a muffin tin or line with paper liners.
-
In a medium bowl, whisk together the flour, cornmeal, baking powder, and salt. In a medium bowl, with an electric mixer, cream together the butter and sugar until light. In a small bowl, whisk together the egg, milk, lemon zest, and lemon juice. Beat the flour mixture into the butter-sugar mixture in three additions, alternating with the egg-milk mixture, beginning and ending with the flour. Carefully fold in the blueberries.
-
Pour the batter into the muffin cups and bake until golden, about 20 minutes.
GRAHAM MUFFINS
Pauline’s Practical Book of the Culinary Art for Clubs, Home or Hotels, Carrie Pauline Lynch, 1919
2 cups Graham flour
1 tablespoon butter
1 tablespoon sugar
½ cup white flour
1 teaspoon baking powder
1 egg
½ teaspoon salt
1½ cups milk
Mix all to make a batter as thick as for griddle cakes, bake in pans in muffin rings about 20 minutes in a quick oven.
RICE MUFFINS

MAKES 12 MUFFINS
Lessie Bowers’s grandmother was born into slavery in South Carolina, where she was recognized as refined, beloved, and wise—the best midwife and cook the community knew. She learned early in life that health and good food are closely related. By the age of twelve, she was alone in the kitchen preparing Sunday dinner for her family of eleven, the minister, his wife, and guests. As a college student at Claflin University in Orangeburg, South Carolina, she proposed, planned, and partnered with the Rosenwald Fund to build a community school.
Like her grandmother, Bowers baked her muffins in a “gem pan” until golden, and added hot cooked rice to the mixture, a reflection of her Carolina roots. In the rice-growing region of South Carolina and parts of North Carolina, rice, grits, and sweet potatoes extended slave rations of salt pork, cornmeal, and molasses.
The gems, inspired by a recipe in Bowers’s Plantation Recipes (1959), are a great alternative to biscuits, a good use of leftover rice, delicious with meat and gravy—not too sweet, crisp on the outside, and pillowy inside. Preheating the pan adds an extra boost of heat at the start of baking time, which is what gives these muffins their crunch.
1⅓ cups whole milk
½ cup white cornmeal
1 cup hot cooked rice
1 cup all-purpose flour
1 tablespoon sugar (optional)
1 teaspoon salt
1 teaspoon baking powder
2 large eggs, separated
2 tablespoons melted butter, plus more for the pan
Softened butter, for serving (optional)
-
Preheat the oven to 400°F.
-
In a bowl, whisk together the milk and cornmeal. Let stand 5 minutes. In a separate bowl, use a fork to fluff the rice and separate the grains. Use a wooden spoon to stir the rice into the milk and cornmeal mixture. Whisk in the flour, sugar (if using), salt, and baking powder. Whisk in the egg yolks and melted butter and stir until the batter is smooth. Place a 12-cup muffin tin in the preheated oven and heat until hot.
-
Meanwhile, in a bowl, with a whisk or hand mixer (or in a stand mixer), whisk the egg whites until stiff peaks form. Carefully fold the whites into the batter.
-
Remove the hot tin from the oven. Carefully brush with butter and return to the oven until the butter is sizzling hot. Pour the batter into the muffin cups. Bake until the muffins are lightly browned, 20 to 25 minutes. Serve immediately with softened butter, if desired.
SWEET POTATO BREAD

SERVES 8 TO 10
The sweet potato batter bread featured in Mildred Council’s Mama Dip’s Family Cookbook is the pumpkin bread of yesterday. Inspired by that recipe, and chock-full of dried cranberries and pecans, this loaf is sweet, with a firm crumb that tastes like Thanksgiving. I toss the fruit and nuts with a bit of the flour to prevent them from sinking to the bottom of the pan during baking.
Softened butter and flour, for the loaf pan
½ cup chopped pecans
½ cup dried cranberries
1½ cups all-purpose flour
2 teaspoons baking powder
½ teaspoon salt
1 cup packed light brown sugar
1 teaspoon ground cinnamon
1 teaspoon ground or freshly grated nutmeg
¼ teaspoon ground ginger
1 cup mashed cooked sweet potatoes, at room temperature
2 large eggs, beaten
1 stick (4 ounces) butter, melted
½ cup whole milk
-
Preheat the oven to 350°F. Butter and flour a 9 × 5-inch loaf pan, and tap out any excess flour.
-
In a small bowl, toss together the pecans, cranberries, and 2 tablespoons of the flour and set aside. In a large bowl, whisk together the remaining 1 cup plus 6 tablespoons flour, the baking powder, salt, brown sugar, cinnamon, nutmeg, and ginger. Make a well in the center and add the sweet potatoes, eggs, melted butter, and milk. With a wooden spoon, stir the batter until lightly mixed. Gently fold in the nut mixture.
-
Spoon the batter evenly into the loaf pan. Bake until a toothpick inserted in the center comes out clean, 50 to 60 minutes. Let cool for 5 minutes in the pan, then turn out of the pan onto a wire rack to cool slightly. Serve warm.
VARIATION
SWEET POTATO MUFFINS
To make muffins, pour the batter into 12 greased or paper-lined muffin cups, filling each cup three-quarters full. Bake until the muffins spring back when lightly touched, about 20 minutes.
ISLAND BANANA BREAD
SERVES 8 TO 10
The sweet ripe bananas that grow all over the Caribbean islands, pecans, and molasses are the secret to this alluring dark breakfast cake, adapted from B. Smith’s Entertaining and Cooking for Friends. For the best banana flavor, be sure to use very ripe, nearly black bananas. I stash peeled whole ripe bananas in the freezer so I can bake this bread anytime I need a hostess gift. Thaw the bananas just before using.
Softened butter and flour, for the loaf pan
½ cup chopped pecans
½ cup chopped dried Medjool dates
1¾ cups all-purpose flour
1 teaspoon baking soda
½ teaspoon salt
½ teaspoon ground cinnamon
½ teaspoon ground or freshly grated nutmeg
¼ teaspoon ground allspice or ginger
1 stick (4 ounces) butter, at room temperature
1 cup packed dark brown sugar
2 large eggs
1¼ cups mashed very ripe bananas
2 tablespoons molasses
⅓ cup buttermilk
1 teaspoon vanilla extract
-
Preheat the oven to 350°F. Grease and flour a 9 × 5-inch loaf pan, and tap out any excess flour.
-
In a small bowl, toss together the pecans, dates, and 2 tablespoons of the flour and set aside. In a large bowl, whisk together the remaining 1½ cups plus 2 tablespoons flour, the baking soda, salt, cinnamon, nutmeg, and allspice. In a bowl, with an electric mixer, beat the butter and brown sugar until light. Beat in the eggs, one at a time, beating well after each addition. In a third bowl, combine the bananas, molasses, buttermilk, and vanilla. Beat the flour mixture into the butter-sugar mixture in three additions, alternating with the banana mixture, and beginning and ending with the flour. Gently fold in the nut and date mixture.
-
Pour the batter into the loaf pan. Bake until a wood skewer inserted in the center comes out clean, about 1 hour. Transfer to a wire rack to cool for 10 minutes. Invert onto a wire rack and cool to room temperature before serving.
PAULINE’S NUT BREAD
Pauline’s Practical Book of the Culinary Art for Clubs, Home or Hotels, Carrie Pauline Lynch, 1919
One egg beaten in cup, fill same cup with milk, add another cup milk, 1½ cups sugar, 4 cups flour, 4 teaspoons baking powder, 1 teaspoon salt, stir well, add 1 cup slightly chopped nuts and 1 of raisins, grease pans, pour in dough, let stand 20 minutes, then bake slowly 1 hour.
Hot Dinner Rolls
So many hot roll recipes, so little time. Black cooks have been proficient yeast bread bakers since way, way back, despite limited access to ingredients. “Light bread” was mentioned often in the Slave Narratives, a special-occasion treat baked in a skillet with coals on top, and the form continued to evolve from then.
Potato rolls trace their heritage to the days before commercial leavening agents, when cooks baked bread with a fermented potato starter. In the early years of the twentieth century, for instance, Carrie Alberta Lyford taught students her method for making a liquid yeast starter from hops, sugar, and potatoes in A Book of Recipes for the Cooking School. The practice produced rolls that were light and airy, so that even with the advent of yeast, a variation of the recipe lives on. From there, novelist and cookbook author Dori Sanders wrote a recipe using sweet potatoes instead of white; the resulting rolls have a moister texture, a touch of sweetness, and are delicious served with roast beef and grilled vegetables.
Icebox rolls are another iteration of hot yeast bread and rolls. Taking advantage of the technical innovations that made commercial yeast and refrigeration commonplace, caterer Herman Clark’s popular rolls were so easy to make they didn’t require kneading and rose slowly in the refrigerator. Shortening appeared regularly in the dough, too, proof that some black cooks were excited by the versatile, less expensive fat; others, of course, preferred the luxurious richness contributed by butter alone.
How rolls are shaped is a matter of style, whether the choice is for Parker House rolls that are shaped simply, the more elegant cloverleaf rolls for special occasions, or monkey bread, a sweet yeast loaf that is just plain fun.
When I was growing up, monkey bread was a layered loaf of rich, buttered bread that was perched like an edible centerpiece on the dinner table. It was made by rolling yeast dough into balls, or rolling and cutting it into shapes, then layering the pieces in a tube pan and brushing each layer generously with butter. Since then, I have tasted a sweet bubble loaf made by sprinkling the layers with cinnamon sugar, and a savory pull-apart that seasons the layers with garlic, herbs, and cheese—both sharing the name of monkey bread. The “monkey” part comes, possibly, from the idea that, since the bread is made up of buttery bites stuck together, bites may be snatched off the loaf with the fingers, like a monkey would.
Today, I double either of the recipes that follow and bake them in these shapes to add variety and grace to my Thanksgiving table.
SWEETENED POTATO ROLLS
MAKES ABOUT 12 SERVINGS (2 DOZEN PARKER HOUSE ROLLS OR 1 DOZEN CLOVERLEAF ROLLS)
Carolyn Quick Tillery collected recipes and remembrances from three historically black colleges: Alabama’s renowned Tuskegee Institute, the Hampton Institute in Virginia, and Howard University in Washington, DC. She included potato rolls in all three of them. While fermented potatoes are no longer required to raise these rolls—commercial yeast takes care of that—the use of potato harkens back to the past and provides moisture and lightness. The dough can be a little sticky, which produces a slightly dense crumb. The first time you make this sweet dough you may need a bit more flour to help you through the kneading, rolling, and cutting, but once you get the hang of it, you will love the results.
1 medium russet potato (6 to 8 ounces), peeled and diced
1 (¼-ounce) package active dry yeast (2¼ teaspoons)
¼ cup warm water (110°F to 115°F)
⅓ cup shortening, plus more for greasing
⅓ cup sugar
¼ teaspoon salt, plus more for pot
1 large egg
½ cup whole milk, lukewarm
3½ to 4 cups bread flour, plus more for the work surface
Melted salted butter, for brushing the pan and the rolls
Coarse salt (optional)
-
In a small pot, cover the potato with lightly salted water. Bring to a boil over medium-high heat. Reduce the heat to a simmer and cook until tender, about 20 minutes. Drain, reserving ½ cup of the cooking water. Mash the potatoes until completely smooth. Measure out ½ cup of mashed potatoes (reserve leftover potatoes for another use). Let the mashed potatoes cool.
-
In a small bowl, sprinkle the yeast into the warm water and whisk until dissolved. Let stand 5 minutes.
-
In a large bowl, with an electric mixer, beat the shortening, sugar, and salt until smooth. Add the cooled mashed potatoes and egg and mix on medium speed about 1 minute, scraping the sides of the bowl halfway through the beating time. Scrape the bowl again. Add the milk, reserved potato water, and the yeast mixture and continue to blend until thoroughly mixed.
-
Gradually add 3½ cups of the flour to the mixture, 1 cup at a time, adding additional flour, if necessary, to make a stiff tacky dough. Scrape the bowl between additions. Flour your work surface and turn the dough out. Knead until the dough is elastic and smooth, sprinkling with additional flour, 1 teaspoon at a time, as needed to keep the dough from sticking. Grease a large bowl and place the dough in it. Turn the dough over to lightly coat all sides with shortening. Cover it with wax paper, a bowl lid, or a damp towel. Let it rise in a warm place until doubled, about 1 hour. (After this rise, the dough may be refrigerated overnight, but allow it to come to room temperature and rise again before rolling and shaping.)
-
For Parker House rolls: Lightly brush a 15 × 9-inch rimmed baking sheet with butter. Divide the dough in half. Working with one half at a time, roll the dough on a lightly floured surface to ¼ inch thick and cut with a floured 3-inch round cutter or floured glass. Brush each roll with melted butter and fold in half. Place the rolls ½ inch apart on the greased baking sheet. Gather, re-roll, and cut scraps. Place on the baking sheet. Brush with additional butter, if desired. Cover loosely with a clean towel. Allow to stand until doubled in size, about 1 hour.
-
For Cloverleaf rolls: Lightly brush 12 cups of a muffin tin with butter. Divide the risen dough into 12 pieces of equal size. Divide each piece into 3 smaller pieces. Roll them between the palms of your hands into round balls. Place 3 small balls close together in each muffin cup. Brush with melted butter, cover loosely with a clean towel, and allow to rise until doubled in size, about 1 hour.
-
Preheat the oven to 350°F.
-
Bake the rolls until golden, about 30 minutes. Brush with additional melted butter and sprinkle with a pinch of coarse salt, if desired.

NO-KNEAD ICEBOX ROLLS
MAKES 2 DOZEN ROLLS
In Uncle Herman’s Soul Food Cookbook, Herman Clark’s dough is so forgiving it doesn’t require kneading. It is firm and easier to handle than most, resulting in rolls that are airy and light with a tender crust.
¼ cup shortening, cut into 4 pieces
2 tablespoons sugar or honey
1 teaspoon salt
1 cup boiling water
1 (¼-ounce) package active dry yeast (2¼ teaspoons)
¼ cup warm water (110° to 115°F)
1 large egg, lightly beaten
4 cups all-purpose flour
Softened butter, for the baking pan
⅔ cup salted butter, melted
Coarse salt (optional)
-
In a large bowl, combine the shortening, sugar, and salt. Pour the boiling water over and stir until the shortening is melted. Set aside to cool until lukewarm.
-
In a small bowl, sprinkle the yeast over the warm water and whisk until dissolved. Let stand 5 minutes. With a wooden spoon, stir the yeast mixture into the cooled shortening mixture, until combined.
-
Stir in the egg, mixing well. Add the flour, 1 cup at a time, stirring after each addition until well blended. Cover tightly and refrigerate overnight.
-
The next day, remove the dough from the refrigerator and cover loosely with a damp towel. Place in a warm place and allow to rise until doubled in bulk, 2 to 4 hours.
-
Butter two 9-inch baking pans, a 13 × 9-inch baking pan, or muffin tins. Divide the dough in half. On a lightly floured surface, roll the dough into 2 logs 12 inches long. Pinch off 12 pieces of equal size from each log for a total of 24. Roll into balls, then place ½ inch apart in the baking pan(s) or in the muffin tin. Brush with melted butter. Cover loosely with a clean towel and let rise in a warm place until they reach the top of the pan, about 1 hour.
-
Preheat the oven to 375°F.
-
Bake the rolls until lightly browned, 25 to 30 minutes. Brush with melted butter immediately and sprinkle with coarse salt.
VARIATION
Edna Lewis substitutes half lard and half butter for the shortening.
HAMPTON UNIVERSITY’S LIQUID YEAST
A Book of Recipes for the Cooking School, Carrie Alberta Lyford, 1921
2 ounces hops
2 quarts water
½ pound brown sugar
2 teaspoons salt
1 pound flour
3 pounds potatoes
Boil the hops and water 1 hour. Add the sugar, salt, and flour. Let stand for three days in a warm place. If it foams over the top of the jar stir it well. On the third day add the potatoes, boiled and mashed. On the fourth day strain, bottle, and keep in a cool place. Use one cup of yeast to one quart of liquid when starting bread.
Fritters
Fried dough? Yes, that’s what we have here.
“Frying in deep oil is one of western Africa’s gifts,” Jessica B. Harris wrote in The Africa Cookbook: Tastes of a Continent. It’s a technique that has produced great pleasures all over the continent, and therefore throughout the African diaspora. We’re frying pounded cassava, yams, or plantains mixed with water for West African fufu and cou cou; little doughnuts known as “sweet balls” in Ghana; Nigerian bean balls (akara) and Senegalese pastel; maasa, the sweet millet and brown rice fritters of Mali; Creole rice fritters (calas) that black street vendors once sold on street corners in New Orleans to buy back their own freedom; long pones sweetened with sugar and served with jerk pork that the Jamaicans call “festival”; hushpuppies (also remembered by some old cooks as hominy puffs) and corn fritters from the Old South; and Caribbean fruit fritters with chopped mango or mashed banana. Recipes for fried dough abound in black cookbooks.
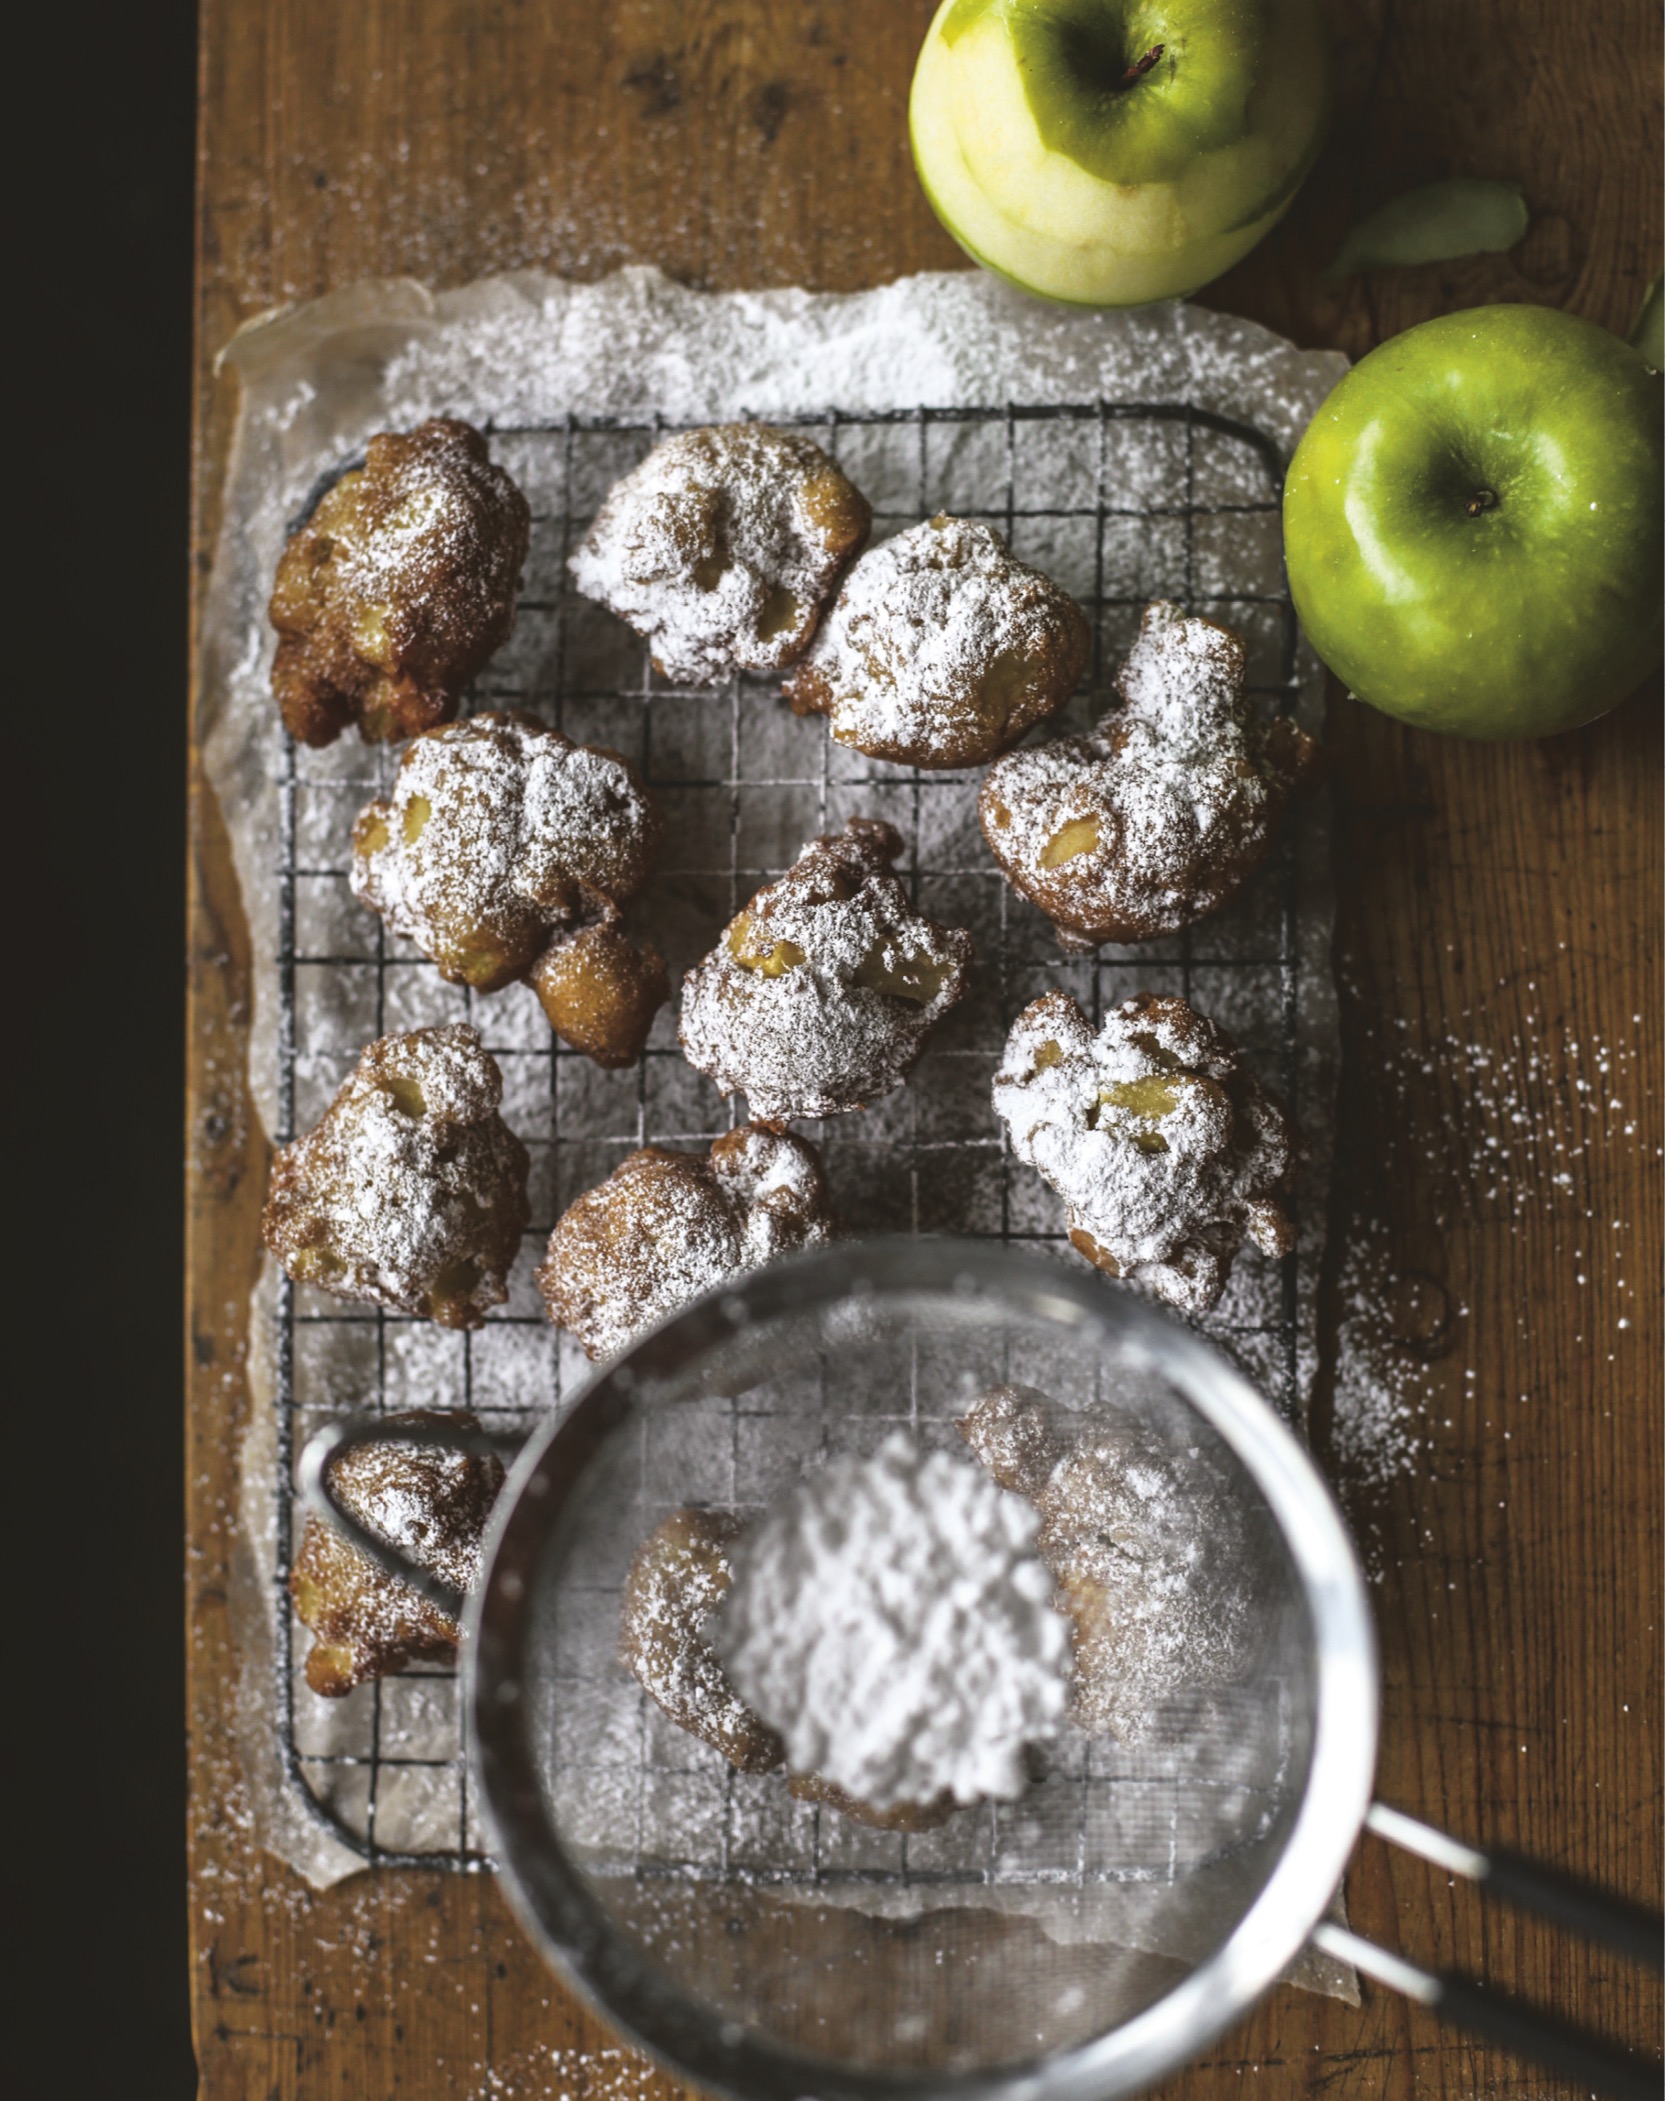
FRUIT FRITTERS
SERVES 4 TO 6
Georgia caterer William Mann Jr. kept a handwritten book of his best recipes since the 1920s. A few of them appeared in a spiral-bound collection, Four Great Southern Cooks, including a light, sweet batter studded with spiced apples and deep-fried to golden brown.
This is a flexible batter recipe with which you can make fritters like Mann’s, with apples, or go farther afield and take inspiration from chefs like Jeanne Louise Duzant Chance, author of Ma Chance’s French Caribbean Creole Cooking, who bakes banana fritter batter like little pancakes on a griddle so they are crisp, with lacy edges on the outside, and sweet and chewy on the inside. (You can certainly use this batter that way.) Or do like contemporary Senegalese chef and cookbook author Pierre Thiam, who dips banana slices in a coconut-infused batter before frying them. This batter recipe also works wonderfully with pears, mangoes, or other firm-fleshed fruit.
They are a sweet ending to any meal, dusted simply with powdered sugar. Rum in the batter is the secret ingredient.
1½ cups all-purpose flour
3 tablespoons granulated sugar
2 teaspoons baking powder
½ teaspoon salt
¼ teaspoon ground cinnamon
¼ teaspoon ground mace
¼ teaspoon ground or grated nutmeg
2 large eggs, beaten
⅔ cup whole milk
1 tablespoon rum (optional)
2 tablespoons butter, melted
1 teaspoon vanilla extract
2 cups peeled and diced Granny Smith apples, mangoes, diced bananas, or other firm-fleshed fruit
Peanut oil, for deep-frying
Powdered sugar or maple syrup, for serving
-
In a large bowl, whisk together the flour, granulated sugar, baking powder, salt, cinnamon, mace, and nutmeg. Make a well in the center of the dry ingredients. Add the eggs, milk, rum (if using), melted butter, and vanilla to the well. Stir the mixtures together until just combined. Fold in the diced fruit.
-
Pour a few inches of oil into a large Dutch oven or other wide deep pot (making sure you have plenty of clearance to prevent the oil from bubbling over) and heat to 375°F over medium-high heat. Drop the batter by rounded tablespoon into the hot oil. (A small cookie dough scoop also may be used; it helps the fritters maintain their shape when dropped in the hot fat.) Deep-fry until the fritters are golden brown, 3 to 4 minutes. Remove them with a slotted spoon and drain on paper towels.
-
Sprinkle with powdered sugar or drizzle with maple syrup to serve.
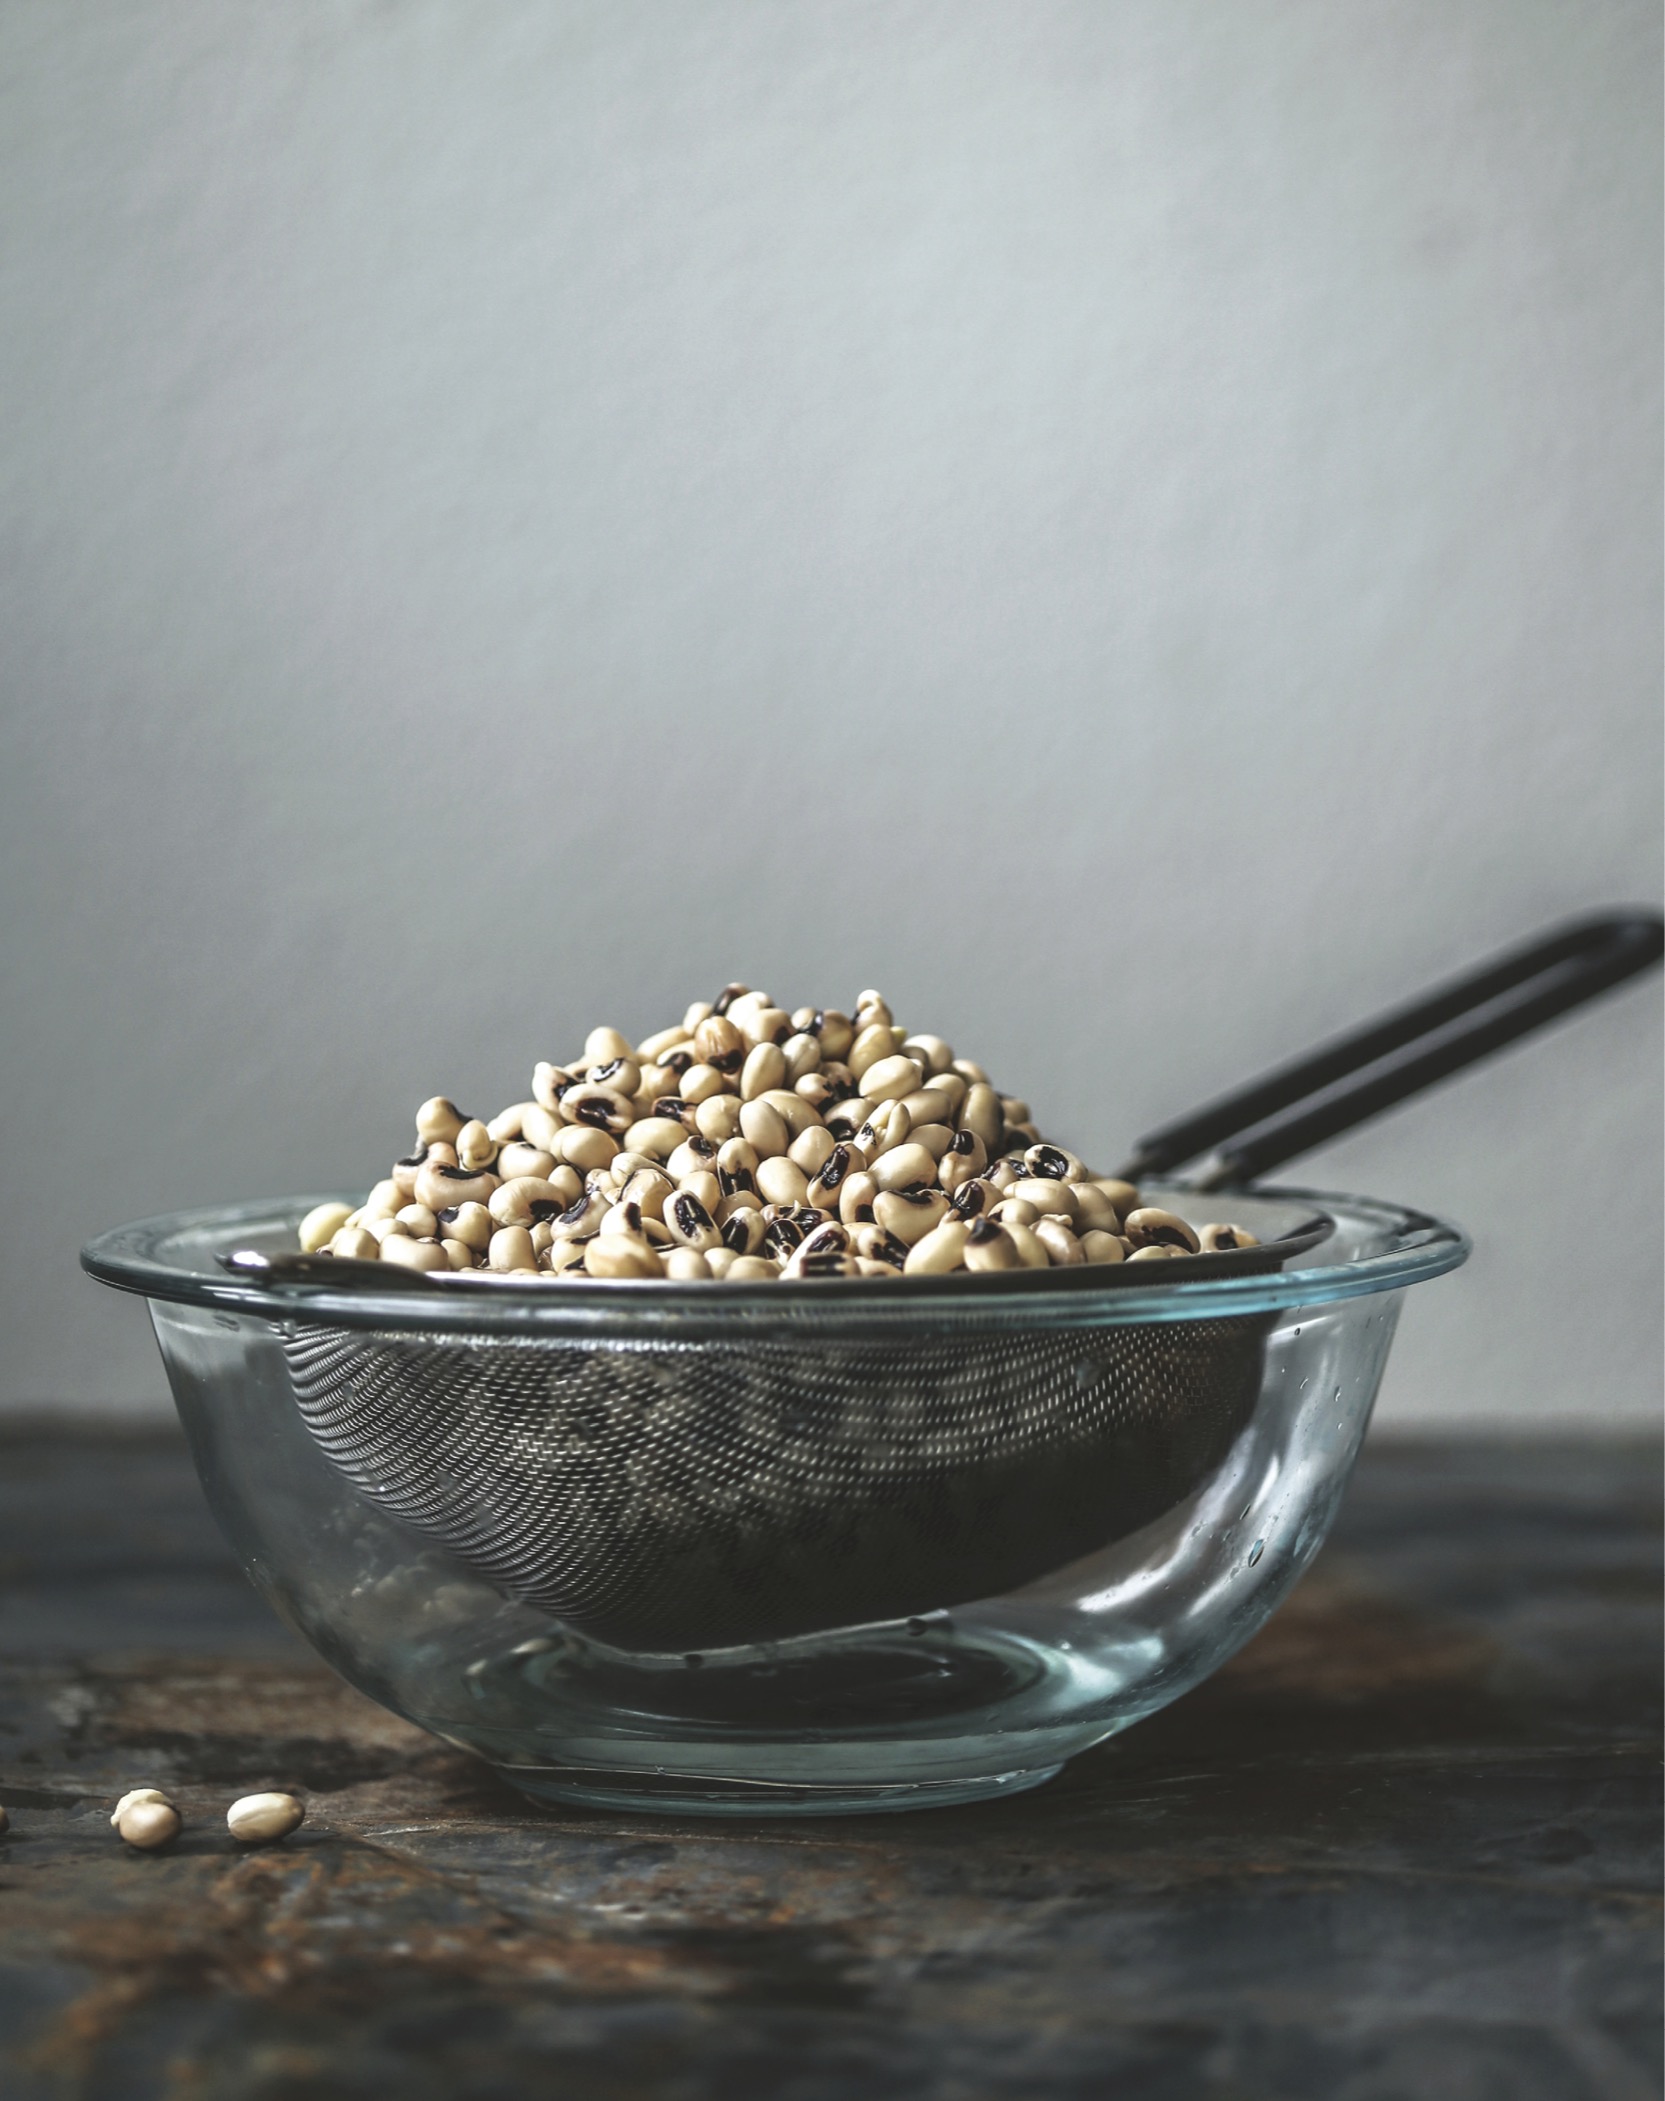
NIGERIAN BLACK-EYED PEA FRITTERS (AKARA)
SERVES 4 TO 6
In the early 1970s, African idealists Monica Odinchezo Oka, Helen Mendes, Dinah Ayensu, and Bea Moten wrote books about heritage cuisine, treating audiences to authentic African recipes adapted to American cooking methods and ingredients. They also spread knowledge about African nations, each country’s unique culture, and the ways that the African diaspora paved the way for Southern cooking.
From them, we learn that the rich, savory fritters called akara may have inspired the cornmeal fritters Southerners know as hushpuppies. Akara can be made from black-eyed peas, red peas, or navy beans, depending upon the cultural tradition of the cook; they may contain a variety of optional ingredients, such as okra, cheese, diced tomatoes, or egusi (West African gourd seeds); and in Brazil, women vendors sell akara with shrimp sauce.
Traditionalists separate the fleshy pulp of the peas from the skins by rubbing a few peas between the palms of the hands. I save time and effort by pressing small amounts of the peas with the back of a wooden spoon through a fine-mesh sieve.
Here is a recipe for a foundational akara, which you can personalize by adding minced hot chile peppers, sweet or roasted bell peppers, ground cumin, chili powder, or smoked paprika to serve as a side dish. For a surprise on your appetizer buffet, accompany with pico de gallo, salsa, or chutney.
1 pound dried black-eyed peas, picked over for stones and rinsed
1 cup minced onion
1 tablespoon minced garlic (about 3 cloves)
1 teaspoon cayenne pepper
1 teaspoon salt, or to taste
Peanut oil, for deep-frying
-
Soak the peas overnight in enough water to cover. Drain them in a colander and discard the soaking water. Working with about ¼ cup at a time, rub the peas between the palms of your hands or press with the back of a wooden spoon in a fine-mesh sieve to remove the skins (discard the skins).
-
Transfer the peas to a food processor. With the machine running, gradually add enough water (about ¼ cup) so the mixture forms a stiff paste. Press the pulse button 2 or 3 times to mix in the onion, garlic, cayenne, and salt.
-
Pour a few inches of oil into a large Dutch oven or other wide deep pot (making sure you have plenty of clearance to prevent the oil from bubbling over) and heat the oil to 375°F over medium-high heat. Scoop the mixture by the tablespoon and drop into the hot fat. (Using a small cookie dough scoop will help the akara maintain its shape.) Deep-fry until golden, turning occasionally to ensure even cooking, 2 to 3 minutes per side. Drain on paper towels before serving.