CHAPTER 12
Ensuring Correct Implementation of the Decorator Pattern
WHAT’S IN THIS CHAPTER?
- Using a decorator to neatly solve a real-world problem
- Using a “fake” to stand in for the decorated object during unit tests
- Using test-driven development to create a reliable decorator
WROX.COM CODE DOWNLOADS FOR THIS CHAPTER
You can find the wrox.com code downloads for this chapter at www.wrox.com/go/reliablejavascript on the Download Code tab. The files are in the Chapter 12 download and are individually named according to the filenames noted throughout this chapter.
The Decorator Pattern is a way of augmenting the capabilities of an object without changing it. You have already met some examples in this book. The memoization aspect in Chapter 8 decorates the function to which it is attached, giving the function the added ability to return a result without doing much work, when it is called with parameters it has seen before. When you set up a Jasmine spy with .and.callThrough(), you are decorating the spied-on function, augmenting it with the ability to report how many times it was called, and so on.
In this chapter, you will take the decorating process further. Instead of decorating an isolated function, you will decorate an object that has multiple, coordinated functions. You will also get more practice with the Promise object you encountered in Chapter 6. Finally, this will be another in-depth case study of test-driven development.
The case study is inspired by something we encountered in real life, but it will make more sense if we cast it in the now-familiar terms of the JavaScript conference’s website.
At the conference, attendees will be able to register in person. For the benefit of the in-person registrar, you have written a web page that lists the current attendees. If someone shows up who is not on the list, the press of a button invokes another page on which the registrar can key in a record for the newcomer.
People will be waiting in line, so response time is critical. That’s why you decided on a fire-and-forget strategy. The New Attendee page issues an HTTP POST to the server and returns immediately to the Attendee List page without waiting for the POST to resolve its Promise. (See Chapter 6 for more on HTTP wrapped in Promises.) The Attendee List then does an HTTP GET for a fresh list, on which you expect to see the new registrant.
Except you don’t!
A little debugging tells you that even though the POST was issued microseconds before the GET, the GET can return pre-POST data. Your research confirms that the HTTP specification does not guarantee that requests will be completely processed in the order received. Oops!
With response time being so important, you really don’t want to hold your user hostage on the New Attendee page, not returning her to the Attendee List page until the POST completes. A POST failure will be extremely rare. It would be a shame to hobble the application because of such an unlikely event. Is there a better way?
Where there’s a will, there’s a way.
- Before POSTing the new record, store it in an array of pending posts.
- When the POST’s
Promiseresolves (see Chapter 6), remove the record from the array. - In the meantime, append those pending records to GET’s results (to the extent that the results do not already include them). This will let the Attendee List page show the POSTed record right away. The pending-post records will not yet have their attendee IDs, which are generated by the database. Those would be needed to carry out an update or delete, but in the meantime, at least you can list the names.
- When the POST does return an attendee’s ID, it should be plugged into any records that were appended to a GET in Step 3, enabling updates or deletes.
- In the unlikely event that the POST fails, the application will display a message and remove the attendee from the Attendee List page, if the user is still there. In the meantime, the presence of what turns out to be a bogus entry on the list will have done no harm: Until that ID comes back (Step 4), your UI will not allow the record to be updated or deleted.
The preceding fives steps simplify a real production situation, which would also have to account for pending updates and pending deletes, but it will serve to illustrate the point.
You have an object, attendeeWebApi, which has methods post(attendee) and getAll(). They return Promises in the way that you saw in Listing 6-7 in Chapter 6, where an XMLHttpRequest’s success or failure caused a Promise to be resolved or rejected, and then the Promise was returned.
Implementation of the pending-post idea could get complicated, and will have nothing to do with the Single Responsibility of the attendeeWebApi object. Adhering faithfully to the Open/Closed Principle (see Chapter 2), you decide to leave attendeeWebApi alone but put the new functionality in an object that wraps attendeeWebApi. The wrapping object will have post and getAll methods that have the same parameters as the underlying ones, and the same semantics. The wrapper will take care of everything pertaining to the pending-POST list and delegate the real work to the wrapped attendeeWebApi. Your dependency-injection framework will cause the wrapper to be used everywhere instead of attendeeWebApi.
This is the Decorator Pattern, so you artfully name the outer object attendeeWebApiDecorator.
DEVELOPING A DECORATOR THE TEST-DRIVEN WAY
The first principle of unit-testing is to test the “unit” and no more. In the present case, you want to test attendeeWebApiDecorator but not the underlying attendeeWebApi. The next section describes the first step.
Writing a Fake for the Decorated Object
Usually, spies can stand in for an object that is not under test, but spies work most naturally on one function at a time. In this case, there are two functions that work together: The action of the post function should affect how getAll behaves. A small object that fakes this behavior will be more convenient than coordinated spies.
Listing 12-1 shows the result. The post method stores attendees in the attendees array, which acts as a pseudo-database. The getAll method returns them from there. To avoid doing the tests any unintentional favors, copies of the attendees are used rather than the original objects. (In real life, fresh attendee objects would be made from the database, and it’s safest to duplicate this behavior.) A setTimeout mechanism is used to mimic the behavior of the real object.
You are now ready to begin test-driven development, starting with error-handling. As previously mentioned, it is best to get the negative tests out of the way early. If you defer them to the end of development, you will be writing them when you’re least interested in doing so, and it will be easy to do a less-than-adequate job. With a decorator, the negative tests have an additional advantage: They will often produce the shape of your finished product, as you will now see.
Writing Tests for Pass-Through of Errors
The getAll() method will ultimately delegate to the base attendeeWebApi’s getAll(). If the underlying method returns a rejected Promise, you want that rejection to flow up through the wrapper to the code that called it. After reviewing Chapter 6 on Promises, you code the test in Listing 12-2.
As you read from the top of that listing, the decoratedWebApi is the subject under test. The baseWebApi is what the decorator wraps—a fakeAttendeeWebApi in this case. A beforeEach constructs them freshly for each test so there is no possibility of cross-test contamination.
This test is about failure so you code a spy on the fake’s getAll that returns a rejected Promise. You want the spy to be as realistic as possible. Here, that means the Promise should not be rejected immediately, but asynchronously. You decide on a low-tech setTimeout to achieve this. If you were using one of the Deferred libraries mentioned at the end of Chapter 6, you could be more clever. The only disadvantage of setTimeout for the current case study is that you must be sure to make the timeout intervals longer for the posts than for the getAlls in order to simulate the real-life situation you’re addressing. That sort of hidden dependency is a little ugly but it will do for the moment.
It is now time to create the subject under test.
Writing a Do-Nothing Decorator
Following the test-driven philosophy, you begin with the absolute minimum for your subject (see Listing 12-3).
Not surprisingly, this fails (see Figure 12.1).

Because getAll() is empty, it returns undefined, which, of course, does not have a then method. The do-nothing decorator has served its purpose of sketching the overall shape, but now it’s time to add some minimal functionality.
Adding Pass-Through Functionality to the Decorator
If the first step was to code a do-nothing decorator, the second step is to code one that has just a pass-through, as shown in Listing 12-4.
Lo and behold, this makes the test pass (see Figure 12.2).

You do something similar for the post method and then turn your attention to another error condition: a post of a record that is already pending. You code the test in Listing 12-5. Recall from Chapter 6 that it is wise for a Promise to be rejected with an Error object, not just a bare message, and that a unit test should verify the exact message received so it knows that error was the expected one.
In order to make this test pass, the decorator must remember what it did in the first call to decoratedWebApi.post, and must expose its messages. Suddenly, the module grows to Listing 12-6.
Things are starting to take shape, with the following new features added just to handle the error condition:
- The
pendingPostsarray stores the attendees passed topost. - The
indexOfPostForSameAttendeefunction can tell whetherpendingPostsalready has a given attendee. (It uses a new method inConference.attendeecalledisSamePersonAs. See this chapter’s downloads if you want the trivial details.) - If the error condition is encountered,
postreturns a rejectedPromise. - The error message is exposed so the unit test can verify that it is getting the correct message.
The tests pass. With error pass-through working, maybe success pass-through is working as well? Could you be that lucky?
Verifying Pass-Through of Successes
In test-driven development, you’re supposed to write code only to cause a failing test to pass. However, in the present case you have a hunch that the pass-through functionality you coded in order to make your negative tests pass will also cause simple positive tests to pass. You write the tests in Listing 12-7 to find out.
The tests just verify that the decorated object behaves like the original. The post method returns a Promise that resolves to an attendee that now has an attendee ID. The getAll method returns the results from the decorated object’s getAll.
The tests pass, but whenever you are writing tests after the code, it’s a good idea to step through the new tests with a debugger and verify that all is going according to plan. You do, and it is.
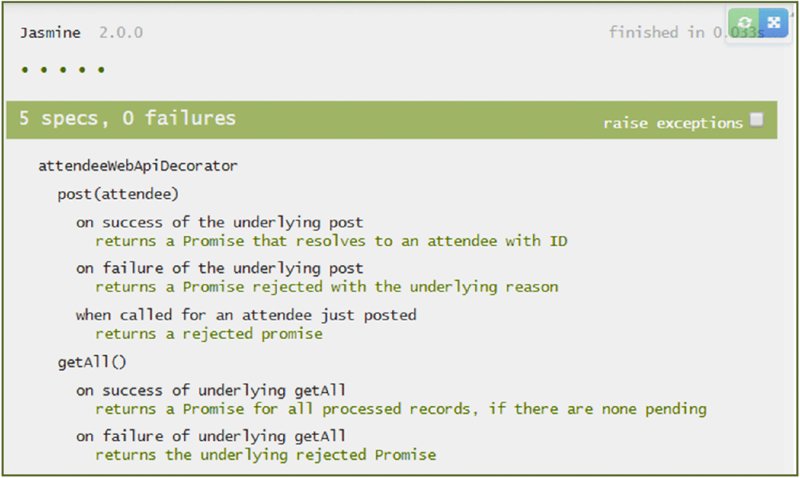
You have now verified that the decorator follows the Liskov Substitution Principle, leaving intact the positive and negative semantics of the object it decorates (see Figure 12.3).

Now it’s time to make the decorator do what it’s here for.
Adding the Decorator’s Features
At its heart, the attendeeWebApiDecorator exists so the getAll function will return pending POSTs. That seems like a good place to start, so you code the unit test at the end of Listing 12-8.
In the test, you post attendeeA and then wait patiently for the post to resolve. After posting attendeeB, however, you do not wait but proceed immediately to getAll(). Where is getAll()? Because this is the second time you had to code the pattern of issuing a getAll() and testing its successful result, and because that’s kind of a nuisance, you refactored the pattern to the function at the top of the listing, getAllWithSuccessExpectation.
Your expectation in the test is that getAll() returns both attendees—the first with an ID and the second without (because it’s pending).
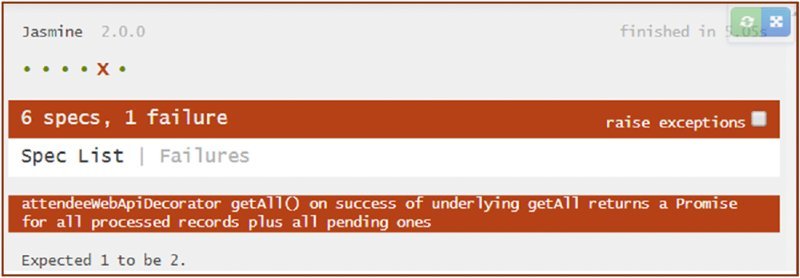
As expected, the test fails, with getAll() returning only one attendee (see Figure 12.4).

You fix this quickly by changing the getAll function in the decorator, as shown in Listing 12-9.
The decorator’s getAll is now complete! It’s time to test how post and getAll cooperate. The tests in Listing 12-10 express your intent.
The first test verifies that getAll is able to pick up pending records (those without attendee IDs). The second verifies that getAll will furnish records that have gotten their IDs, if they are available.
The final test verifies that if getAll returns a pending record, but the Promise corresponding to that record later resolves, then an ID will be injected into the record. You can use this as a signal to enable the update and delete functionality for this record on the Attendee List. The first two pass, but the third fails (see Figure 12.5).

The failure is in the final expectation of Listing 12-10. You can remedy it by adding the then block to the post in Listing 12-11.
The last thing to consider is what happens to getAll when the post fails. Before the post comes back, getAll should be none the wiser. Afterward, however, the failed record should not be included in getAll’s results. Listing 12-12 shows these final tests.
In the first test, a getAll that is processed before the failure is known should still return the pending (soon-to-fail) record. However, as the second test asserts, once the failure does become known, the record should not appear in getAll’s results. The first test happens to pass, but not the second (see Figure 12.6).

The problem is that post is not purging the pending records whose posts failed. That’s easy to remedy with the bolded code in Listing 12-13.
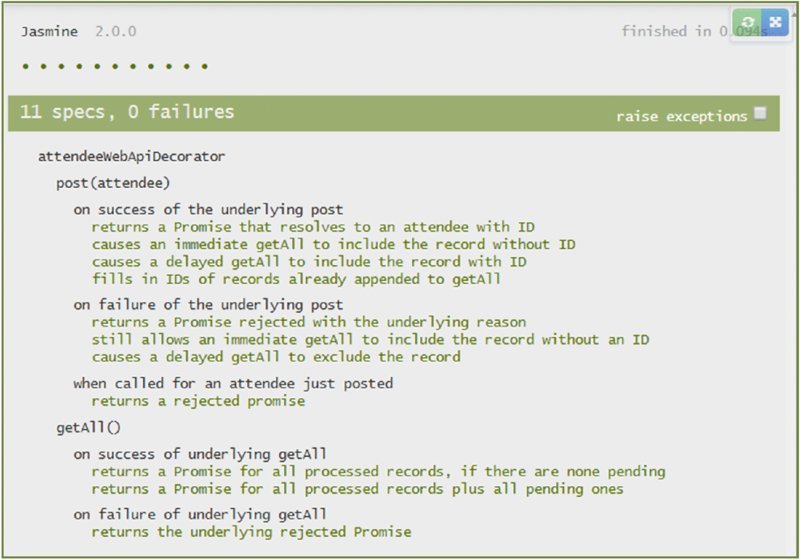
The final test output in Figure 12.7 shows how far you’ve come.

Generalizing the Decorator
The next logical step, which is beyond the scope of this chapter, would be to generalize the decorator. In a real-world application, there may be many objects that encapsulate related HTTP POSTs and GETs—not to mention PUTs and DELETEs. How might you generalize the decorator so you could use it in all cases? That is left as an exercise for you to do on your own. We mention it here to point out a final benefit of the Decorator Pattern: It can eliminate duplicate code.
SUMMARY
In this chapter, you used the Decorator Pattern to address a real-world limitation of an HTTP-based object, without modifying that object. The decorated object maintains focus on its Single Responsibility, while the decorator isolates the complicated new feature and, if generalized, can reduce code duplication.
You developed a decorator using a test-driven approach, with the following steps.
- Code a fake for the decorated object (optional).
- Write unit tests to verify that errors are passed up the call stack from the decorated object, through the decorator, and to the caller.
- Write a do-nothing decorator and watch the tests fail.
- Add pass-through functionality to the decorator so the tests pass.
- Write tests to verify that the decorator will also pass signs of success to its caller.
- Make those tests pass, if they do not already.
- Add the decorator’s special features, writing the unit tests first.
- Consider generalizing the decorator.
The next chapter takes up another classic design element: the Strategy Pattern.