Orchard Fruits
Orchard Fruits
And still she slept an azure-lidded sleep/In blanched linen, smooth and lavendered/While he from forth the closet brought a heap/Of candied apple, quince, and plum, and gourd.
~ John Keats, ‘The Eve of St. Agnes’
THE ORCHARD has traditionally been a place where magic happens. The mythical land of Avalon, legendary resting place of King Arthur, possibly derives its name from the Old Cornish for ‘apple tree’, and is often depicted as a land of abundant orchards. Pomona, goddess of plenty and harvest in ancient Roman mythology, takes her name from the Latin pomum, meaning orchard fruit. In Celtic myth, passage to the Otherworld is granted only to bearers of a magical silver apple branch. Golden apples from Hera’s mystical Garden of the Hesperides feature in several ancient Greek legends, associated with love and desire. Keats’s Porphyro woos the innocent Madeline on the mysterious Eve of St. Agnes by presenting her with baskets of succulent orchard fruit, ‘filling the chilly room with perfume light’. It works: the lovers elope together into the storm, never to be seen or heard from again.
Few fruits hold more luscious promise than those of the orchard. The golden spritz of citrus or the musky perfume of tropical mangoes and pineapples have their place, but it is the orchard fruits that beg, most of all, to be coaxed to full flavour with the darker, richer sweeteners: muscovado sugar, thick honey, maple syrup. ‘Orchard’, of course, refers to a space in which we can grow myriad fruits – including the vibrant specimens of the Mediterranean – but in this chapter I am thinking specifically of those fruits that we associate with the British summer and early autumn: pears, apples, peaches, quinces, plums and cherries. Of course, many of these are Roman or Eastern imports (domestication of apples is thought to have begun in Anatolia, and quinces originate from the foothills of the Caucasus mountains), but we have come to think of them as our own. These are the fruits that soften most deliciously and pleasingly under the crust of a homely pie, or the buttery rubble of a crumble. They will often give you the most reward when you apply a little heat: translucent pears become butter-soft bubbled in caramel or spiced red wine; cherries plump and darken in their own juices; plums, which can be disappointingly woolly or unnervingly gelatinous when raw, collapse into a thick compote when roasted or poached, taking on some of the sticky, red-wine notes of their dried relatives, prunes.
No fruit embodies this lesson more than the quince. I have long had a soft spot for this esoteric specimen, with its apple/pear appearance and coating of baby-soft fuzz that belies the rock-hard sourness within. The culinary heyday of the quince in Britain was the medieval period, a hedonistic era of stuffed fantasy animal sculptures and roast swans, when the line between sweet and savoury was deliciously blurred in a sugary, spicy, rosewatery haze. During this time, the down from the fruit’s skin was mixed with wax and spread on the head as a ‘cure’ for baldness, but nowadays we tend to just rub it off with a cloth before cooking – what a waste! Dubious medical applications aside, it is also a fruit of romance: quince trees were said to spring up wherever the goddess Aphrodite walked, Greek wedding ceremonies often featured quinces baked in a cake with honey and sesame seeds, and women were advised to eat quince to sweeten their breath before entering the bridal chamber. It is also, of course, the fruit that the Owl and the Pussycat enjoy as part of their wedding dinner (eaten with a runcible spoon) in Edward Lear’s famous poem. Some venture that the original fruit of knowledge in the garden of Eden was a quince, rather than an apple, which would certainly explain the catastrophic results of Eve’s temptation: only bad things can come of biting into a raw quince, whether or not one is urged on by a serpent. Anaemic, tough and slightly gritty when raw, quinces mellow into beautiful glowing tenderness when gently simmered in liquid. The flesh deepens in colour to a luscious red and the fruit’s perfumed aromas come to the fore. As the Vietnamese writer Monique Truong put it, ‘watch their dry, bone-coloured flesh soak up the heat, coating itself in an opulent orange, not of the sunrises that you never see but of the insides of tree-ripened papayas, a colour you can taste’. Or, put rather more bluntly, the quince before cooking has ‘the colour of an impassioned and scrawny lover’, according to a Spanish poem from the tenth century. Somewhere between a fragrant apple and a succulent, sweet pear, the quince also has a slight citrus note to it. It works well with rich meats and cheeses, for this reason: in a classic lamb and quince tagine, perhaps, or a thick slab of honey-coloured membrillo with sharp manchego cheese. It is most at home when accompanied by other Eastern spices and flavours, sits well alongside its relatives, apples and pears, and is particularly gorgeous when partnered with dark sugar or caramel.
‘Do I dare to eat a peach?’ asks T. S. Eliot’s J. Alfred Prufrock, famously, in his eponymous poem from 1915. Were he to ask this question today, I might be tempted to answer in the negative. Peaches (and their close relations, nectarines) are notoriously unreliable, particularly those purchased from the supermarket. Sometimes they fail to ripen altogether, remaining astringent and hard, and sometimes they ‘ripen’ into distastefully spongy specimens that even cooking cannot salvage. As legendary food writer Jane Grigson put it, ‘you are gambling rather than choosing’ when you select peaches for purchase: ‘All you can do is make sure your horse is not lame or blind, by refusing peaches that are bruised or soft’. I find a good strategy is to smell them – promising, ripening fruit will have a heady, sweet aroma. If your fruit is fine texturally but a little more sour than you would like, it is an excellent contender for the peach recipes in this book, which put the fruit to savoury uses and so benefit from that extra tartness.
At one point when I lived in Denmark, I was given a bag of apples from a friend’s garden. Until I took that bag in my hands, I would probably have argued that raw apples have no smell. Yet this plastic bag, crammed with blushing apples in all shapes and sizes, was redolent with a crisp, heady perfume. Hints of rose, orange and honey mingled in a glorious waft of pure apple essence that was still strong even after the apples had spent a week in my fridge. One sniff and I was walking through an orchard in late summer, or strolling through the storehouse of a cider press. You would never find such apples in the supermarket, and they were probably of some obscure variety that has long since died out commercially. Straight from the tree, they were the best apples I have ever tasted in my life, and made me wonder: what other wonderful fruit epiphanies – what smells? – are we missing out on through having our tastes governed by commercial convenience? What excitement, discovery and experimentation?
The horrible truth is that farmers are forced to throw away wonky carrots, wrinkly tomatoes and improperly curved bananas because the supermarkets, conscious of an apparent consumer desire for perfection, will not sell them. It is somewhat bizarre that certain chains offer bags of ‘weather-blemished’ apples and pears, priced slightly lower than their other orchard offerings – which, presumably, have had zero contact with any form of weather and are grown in some kind of vacuum pod lined with bubble wrap under light simulators. If we have to be reminded that some of our fruit and veg may be less than beauty-pageant-worthy because it has been besmirched by the hands of Mother Nature, something is very wrong indeed.
Some of the best pears I have ever tasted were from a crate generously left outside the front garden of one of the houses I pass every day on my way to work. I have absolutely no idea what variety they were, and the garden owners probably didn’t know either. The modern pear unfortunately seems to suffer an even worse fate than the apple, with supermarkets largely confining their stocks to the sturdy Conference variety. I have nothing bad to say about this reliable stalwart, but would we content ourselves with only ever eating a single type of meat, fish, cheese or bread? Exactly. First cultivated by the Romans, the pear is thought to have originated in western China, and you will sometimes spy the Asian or Nashi pear for sale in supermarkets. There are thousands of varieties out there, but the fragility of a quality pear means that very few make it to our shelves. Although lacking the useful tartness of the apple, the pear has a greater complexity of fragrance and texture, making it doubly rewarding if you stumble across an unusual variety. I have been known to sit down for a few precious moments with just a perfectly ripe pear, a plate and a knife – something I have never found myself doing with an apple. The glassy flesh, brimming with delicately floral juice and perhaps a whisper of bracing tannin, is a genuine treat, particularly if you look outside the generically-branded supermarket box (the musky Comice, sinfully juicy Williams and russet-coloured Bosc are some of my favourites).
You can buy plums almost year-round in cheap supermarket punnets, where they tend to resemble indigo golf balls, both in appearance and in hardness (the cheery ‘ripen at home’ label is used to excuse all manner of supermarket sins). Unnaturally uniform in shape and shine, they look like they have gone through some kind of polishing process. I avoid eating these raw, as they tend to have a nasty woolly texture and very little flavour to speak of beyond unpleasant tannin. However, they can be rescued with the application of a little sugar and heat – roast plums with orange, brown sugar and star anise is one of my favourite breakfasts, and forms the basis of my ultimate crumble recipe (here). When the first British plums – the Victoria, Czar and Opal varieties being among the most widespread – start appearing in the markets, though, it’s a whole different story. Quivering, gelatinous, often festooned with a halo of wasps, these are plums to remind you of what plums actually taste like. They are a far cry from what the supermarkets would have us believe plums are. Oddly shaped and mottled in colour, their skins often sport a slight dusky bloom.
Greengages, when you find them, glow like swollen jade pearls; it is no accident that their French name is the regal Reine Claude, in honour of the medieval queen Claude, Duchess of Brittany. This pleasing idiosyncrasy cannot be cultivated on a supermarket scale, so seek out markets and independent grocers for an autumnal feast. While these can and should be enjoyed raw, they also make very fine desserts, and there are few things more delicious than a pan of greengages briefly simmered with vanilla and a delicious local honey.
Moving away from the seductive lure of sugar, orchard fruits have a plethora of savoury uses. A safe rule of thumb is to add salty cheese, greens and toasted nuts to make a variety of seasonal salads: apples with kale, walnuts and blue cheese, for example, or plums with feta, rocket and pine nuts. I have never understood the lure of the cherry for desserts, finding the fruit curiously bland and lacking in complexity – and for me it conjures up all sorts of artificially sweet American confections – but their sharpness and glamorous crimson colouring render them surprisingly wonderful in savoury applications, particularly when lightly pickled to serve alongside sharp cheeses. In Wisconsin a law was once passed banning the consumption of apple pie without cheese, and your dentist would probably thank you for adhering to this rule of thumb: a piece of cheese helps to mitigate the tooth-damaging acidity of the apple. Luckily, it also works from a flavour point of view. Enjoy a crisp Cox apple or tender, ripe plum with a crumbly slice of Wensleydale. Tuck slivers of orchard fruits alongside roasting or pan-fried meat, particularly pork and chicken. Simmer gluts into compotes and use them to top porridge, ice cream, yoghurt or granola, or to form the basis for an upside-down cake or crumble tart. It is tempting to think of these fruits as quotidian (literally – we are, after all, encouraged to eat ‘an apple a day’) perhaps because they grow so abundantly in British climes, but this is also cause for celebration and experimentation.

However, our orchards are under threat. Despite Britain once producing over two thousand varieties of apple, supermarkets now stock only a handful of types, seventy per cent of which are imported and many of which were originally foreign cultivars. Over the past fifty years, ninety per cent of cherry orchards in Britain have disappeared, with foreign imports constituting a shocking ninety-five per cent of all fruit sold. It’s a depressing fate for a fruit that has existed in Britain since Roman times (it is famously said that you can locate old Roman roads by the wild cherry trees growing alongside them, which sprang from the stones spat out by marching soldiers). Two thirds of our total orchards have been lost since 1960, to housing projects or cereal agriculture, and with them have disappeared hundreds of unusual, unique fruit varieties – many of which are highly regional, such as the Kentish Quarrenden apple or the Black Worcester pear – and the knowledge of how to cultivate them. Supermarkets, which choose fruit for appearance, longevity and consistency rather than flavour (the ‘Knobby Russet’ apple is never going to win any beauty pageants) now dictate our tastes. As Hugh Fearnley-Whittingstall puts it, ‘such apples are the horticultural equivalent of intensively farmed chicken: mass produced to uniform standards, dosed with protective chemicals, harvested too early and shipped too far. In the end they leave a taste in the mouth that, if not actively nasty, is certainly on the dull side. We can do better.’
While these recipes will work with any orchard fruits, try to seek out local or unusual specimens where possible, in order to support small orchards and the cultivation of historic fruit varieties. Farmers markets are good locations, and many growers are now offering their unique produce online. Friends with trees or allotments are even better. There is much joy to be had in discovering a new variety that will awaken your taste buds from the homogeneity of supermarket offerings, and in choosing recipes to showcase its unique flavours and qualities.
Let us try not to lose the magic of the orchard: a quiet, ancient space of plenty and poetry that has so captivated the mythological and culinary imagination over the centuries.
Tips & tricks
*The core of a quince is solid, gritty and unpleasant, even after long, slow cooking. With apples and pears you can get away with leaving a little bit of the core on the fruit, but be sure to remove every trace of it from a quince.
*If poaching quinces, put the peelings and cores in a muslin bag and add to the poaching liquid – they contain a surprising amount of flavour, and important pectin that helps thicken the syrup (which also makes quinces excellent for jams and jellies).
*William Lawson, writing in the seventeenth century, advised against storing quinces near other fruit, ‘for the scent is offensive both to the other fruit, and to those that keep the fruit or come amongst them’. While we can probably agree that he is wrong about the scent – quinces in a bowl give off a beautiful perfume – he was in fact correct about storage. Quinces can keep for weeks in a bowl and months in the fridge, but you should not store them touching one another or other fruit, as this can cause everything to overripen and rot. You can also freeze them whole or in slices, and you can of course freeze them in cooked form (like the compote here) for cakes or breakfast.
*Quince trees take up little space, have gloriously fragrant blossom and are relatively easy to care for. For an excellent overview of growing, harvesting and cooking quinces, I direct you to the wonderful book Quinces: Growing and Cooking by Jane McMorland Hunter and Sue Dunster.
*The word ‘marmalade’ was originally used for a preserve made from quinces (the Portuguese for quince is marmelo), and modern-day membrillo, cut into small cubes or slices, is a great substitute for fresh quince in savoury pies and tarts.
*Sixteenth-century medical writers urged pregnant women to eat quince in order to have more intelligent children. If true, mine will be prodigies.
*Some apple varieties collapse completely when heated. Establish whether your chosen variety will hold its shape before attempting something like a tarte tatin, where the integrity of the fruit is quite important.
*I find the best way to test the ripeness of a pear is to press it gently with a fingernail where the bulbous lower half starts to taper into the slender stalk end. If it yields, it’s ready; if you have to press harder, it’s probably not. Remember, though, that some varieties of pear stay quite hard even when ripe, such as the Packham or Anjou.
*If you have an apple tree, gluts of the fruit freeze well for later cooking. Simply peel, core and chop the apples into chunks, then freeze in bags. Use them for jams, compotes or crumbles at a later date. You can also simmer peeled, cored and chopped apples into a purée with a little water, then freeze this in bags for later – it works well as a base for homemade granola, or as a substitute for some of the butter or oil in cake recipes.
*When roasting, poaching or baking plums or greengages, leave the skins on. The tannin in the skin contributes colour and flavour to their pellucid flesh. You can always remove the skins later, if desired.
Halloumi flatbreads
with spicy chipotle peach & basil salsa
As with strawberries, the sweetness of peach pairs beautifully with the sharp aniseed tang of basil. In this recipe, peaches are combined in a riotous, smoky–sweet salsa that is perfect alongside the squeaky richness of grilled halloumi. This is a fun, messy, do-it-yourself dinner. You can make it even quicker and easier by buying flatbreads, if you don’t fancy making your own – I recommend hunting down a Middle Eastern grocer for some khobez.
Serves 4
For the peach & basil salsa
juice and finely grated zest of 1 lime
½ red onion, very finely chopped
¼ teaspoon caster sugar
4 ripe but firm peaches, stoned and cut into rough 1cm dice
1 teaspoon chipotle paste
25g basil leaves, shredded
½ cucumber, deseeded and chopped into 1cm dice
salt and freshly ground black pepper
For the flatbreads
300g strong white flour
200g wholemeal flour
2 teaspoons salt
7g fast-action dried yeast
2 tablespoons sesame seeds, nigella seeds or linseeds (optional)
3 tablespoons olive oil
For the filling
500g halloumi, cut into 1cm slices
Greek yoghurt or soured cream, to serve
chopped avocado, to serve
For the salsa, put the lime zest and juice in a bowl and add the onion and sugar and a good grinding of salt. Mix well, then leave for 15 minutes or so while you get the flatbreads going.
For the flatbreads, put the flours in the bowl of an electric mixer fitted with a dough hook, or a large bowl if you plan to make the breads by hand. Add the salt to one side of the flour mixture in the bowl and the yeast to the other, then add the seeds, if using, and the olive oil and 280ml of water. Knead well using the dough hook or your hands for 10 minutes, or until you have a soft but not sticky dough. Cover the bowl with a clean tea towel and leave the dough to rise for about 1 hour, until doubled in size.
Continue with the salsa while the dough is rising. Add the peaches, chipotle paste and half the basil to the bowl with the lime and red onion mixture and stir well to combine. Set aside.
When the dough has risen, divide it into 8 equal pieces. Heat a large frying pan over a high heat. On a floured work surface, roll out each piece of dough to a circle of about 15cm in diameter and 5mm thick. Put 1 circle of dough in the frying pan and cook it for a couple of minutes, then flip it over and cook it for another couple of minutes on the other side, until both sides are lightly golden and slightly puffy and blackened in places. Repeat with the remaining pieces of dough, stacking them onto a plate under a clean tea towel (or placing them in a large plastic container with the lid on) as you cook them – this helps keep them soft and pliable by steaming them slightly.
Once the breads are cooked, use the same frying pan, over a high heat, to fry the halloumi slices for a couple of minutes on each side, until golden and slightly crispy all over. While the halloumi is cooking, add the remaining basil and the cucumber dice to the peach salsa. Stir well to combine and season to taste.
To serve, put a couple of pieces of halloumi inside a warm flatbread, top with the salsa and a dollop of yoghurt or soured cream, then a little chopped avocado. Serve immediately. Provide napkins – it gets messy.

Halloumi flatbreads
Blue cheese risotto
with toasted pine nuts & sweet balsamic pears
Putting sweet, caramelised pears with a deeply savoury risotto might sound odd, but in fact it lifts the creamy starch of the rice and balances out the flavours perfectly. Blue cheese and pears work so wonderfully in any context, and this is no exception, but the toasted pine nuts and slight aniseed hint of the fennel in the risotto lift it to a new level.
Serves 4
For the risotto
2 litres chicken or vegetable stock
1 tablespoon rapeseed or olive oil
1 onion, finely chopped
1 fennel bulb, finely diced
1 tablespoon finely chopped rosemary needles
40g butter
350g risotto rice
150ml white wine
150g blue cheese (Stilton, Gorgonzola or Danish blue works well)
70g rocket leaves
4 tablespoons pine nuts, toasted
salt and freshly ground black pepper
For the pears
20g butter
4 ripe but firm pears (Conference are best), each cored and sliced lengthways into 8
1 tablespoon runny honey
1 tablespoon balsamic vinegar
Put the stock in a large saucepan and bring it to the boil over a high heat. Lower the heat to a very gentle simmer while you make the risotto – the stock needs to be hot so it doesn’t stop the cooking process.
In a large, high-sided frying pan or saucepan, heat the oil over a medium heat. Add the onion and fennel, and sauté for about 10–15 minutes, until soft and golden. Don’t rush this stage and don’t allow the vegetables to brown – they should be very soft and sweet. Add the rosemary and butter and cook until the butter melts, then add the risotto rice. Cook for 2–3 minutes, stirring to coat the rice in the butter, then pour in the white wine. Stir the rice constantly until the wine has been absorbed, then add a ladleful of the hot stock. Stir the rice frequently until the stock has been completely absorbed, then add another ladleful. Repeat this process until the rice is just al dente (you may not need all the stock) – it should take 20–25 minutes.
Meanwhile, prepare the pears. Melt the butter in a large frying pan over a high heat, then add the pears. Allow them to cook without stirring or turning for 4–5 minutes, so they caramelise on one edge, then flip them over and allow them to caramelise on the other side. Once they are golden and burnished, lower the heat slightly and add the honey and balsamic vinegar. Stir to coat the pears in the syrupy liquid, then set them aside until the risotto is finished.
Once the risotto rice is ready, add a final ladleful of stock and the blue cheese, and stir vigorously until the cheese has melted and the liquid has been absorbed. Season to taste – cheese and stock are both salty, so you may not need much salt.
Divide the risotto equally between four plates or bowls. Top each plate with a handful of rocket leaves, 1 tablespoon of the toasted pine nuts, and a quarter of the balsamic pear slices. Serve immediately.

Blue cheese risotto
Apple, goat’s cheese, honey & hazelnut tarts
This is one of the most versatile dishes in the book. These tarts work as a quick snack, starter or main course (with a salad), and you can vary the fruit, cheese, nuts and herbs to suit your taste or what you have in the kitchen already – just keep the quantities roughly the same. Pears, Stilton and walnuts/figs, ricotta and almonds/peaches, Gorgonzola and pecans – try experimenting to make these your own. I see these as a savoury recipe, but they so wonderfully bridge the savoury–sweet divide that you could easily add more honey and serve them as a dessert, or even instead of a cheese course.
Makes 12
320g ready-rolled puff pastry
1 egg, beaten, to glaze
300g soft goat’s cheese log, sliced into 1cm rounds
3 teaspoons thyme or lemon thyme leaves, or 1 heaped teaspoon dried thyme
30g hazelnuts, finely chopped
4 apples or pears, cored and cut lengthways into 5mm slices
5 teaspoons runny honey
Pre-heat the oven to 220°C/200°C fan/gas mark 7. Line two baking sheets with baking parchment.
Lay the pastry out on a worktop. Cut it into 12 equal squares (about 8 x 8cm). Using a sharp knife, lightly score a border around each square, about 1.5cm in from the edges, without cutting completely through the pastry. Lightly brush the borders of the squares with beaten egg.
Place the pastry squares on the prepared baking sheets, with at least 5cm between each square.
Lay the goat’s cheese slices over the pastry squares, avoiding the borders. The squares don’t have to be completely covered in cheese, but you probably want about 3–4 slices per pastry square – enough to not leave any big gaps. Scatter half the thyme and half the hazelnuts over the cheese.
Place the apple or pear slices in a bowl with 3 teaspoons of the honey and toss well.
Lay the apple or pear slices over the top of the cheese – 2–4 slices per pastry square, depending on the size of your fruit.
Sprinkle the remaining thyme leaves and hazelnuts over the pastries, trying to keep them off the borders. Drizzle the pastries with the remaining honey.
Bake the tarts for 20–25 minutes, until the pastry has puffed up and turned golden, the cheese is bubbling and the fruit is starting to become golden and burnished. Leave to cool for a couple of minutes before serving.

Apple, goat’s cheese, honey & hazelnut tarts
Honeyed quince & sweet cheese pastries
Vaguely based on a Cretan pastry (and approved, much to my relief, by my Greek friend Vana), these sumptuous little pies showcase the versatility and honeyed sweetness of quince. Historically, quince has made a perfect partner for cheese (think of membrillo), and here it nestles perfectly on a cloud-like bed of feta and ricotta. I love to eat these for breakfast or brunch, but they also make an excellent mid-afternoon snack. You can adjust the recipe to suit your taste – use a higher ratio of feta to ricotta if you want a more savoury pie, or use all ricotta to keep things sweet. Incidentally, if you happen to have any leftover quince, apple and saffron compote (here), you can use this to top the tarts instead of making the honeyed quince from scratch.
Makes 14–16
For the quince
juice of 1 lemon
2 tablespoons runny honey
2 quince, peeled, cored and cut into 2cm dice
1 tablespoon quince jelly
For the pastry
125ml extra-virgin olive oil
100g golden caster sugar
130g half-fat crème fraîche
1 egg
500g plain flour
2 teaspoons baking powder
finely grated zest of ½ orange
For the filling
1 egg, lightly beaten
250g ricotta
200g feta, crumbled
50g icing sugar
¼ teaspoon ground cardamom or cinnamon
50g flaked almonds or roughly chopped blanched hazelnuts
2–3 tablespoons runny honey, for drizzling
First, prepare the quince. Put the lemon juice, honey and 250ml of water in a medium saucepan over a high heat, and bring to the boil. Add the quince pieces, then lower the heat to a gentle simmer. Cover the pan with a lid and cook for 40 minutes, until the quince is just tender to the point of a knife. If the pan starts to dry out, add a little more water to keep the quince moist.
Meanwhile start the pastry. In an electric mixer or with an electric hand whisk, beat the olive oil with the caster sugar for a couple of minutes on high speed, until slightly increased in volume. Whisk in the crème fraîche and egg, then sift in the flour and baking powder. Add the orange zest, then use the mixer or your hands to bring everything together into a soft, but not sticky dough. Knead for a couple of minutes, then set aside in a bowl under a clean tea towel for 30 minutes to rest.
Remove the lid from the quince pan and add the quince jelly to the quince pieces. Simmer gently, uncovered, for another 10 minutes. The quince should have turned golden red and become glazed in the jelly, and very soft to the pressure of a spoon. There should be only a little liquid left, and it should look sticky and jammy. Remove the pan from the heat and set aside.
Make the filling. Reserve 1 teaspoon of the beaten egg. Use a whisk or wooden spoon to beat together the remaining egg with the ricotta, feta, icing sugar and cardamom or cinnamon in a medium bowl. Set aside.
Pre-heat the oven to 210°C/190°C fan/gas mark 6–7. Grease two muffin tins with olive oil.
When the dough has rested for 30 minutes, roll it out on a floured work surface to a circle roughly 3mm thick. Using an upside-down bowl (or pastry cutter) of about 8–10cm in diameter, cut 14–16 circles out of the dough (the amount will depend on the size of your circles), re-rolling the trimmings as necessary until you have used it all up. Place one dough circle in each hole of the muffin tins and press down gently to shape it into a small cup.
Divide the cheese mixture between the dough cups, placing about 1 heaped tablespoon in each. Gently crimp the edges of the dough with your finger and thumb, gathering it together around the cheese filling at the sides. You don’t want to cover the cheese, simply gather the dough around it so the filling sits neatly in the middle.
Divide the honeyed quince between the pastries, placing a heaped teaspoon or so on top of the cheese filling in each, until it is all used up.
Brush the pastry around the cheese mixture with the reserved teaspoon of beaten egg.
Bake the pastries for about 20–25 minutes, until the cheese filling has set and the pastry is golden. Remove from the oven and set aside to cool. As the pastries are cooling, put the 50g flaked almonds or hazelnuts on a small baking tray and toast in the oven for 10 minutes. Remove and set aside to cool.
To serve, drizzle the pastries with honey and sprinkle with the toasted nuts.

Honeyed quince & sweet cheese pastries
Aubergine burgers
with feta, walnuts, sour cherries & garlic tahini sauce
Vaguely inspired by falafel, these combine all my favourite flavours from Middle Eastern mezze: smoky, burnt aubergine, earthy chickpeas, bitter walnuts and creamy feta. Jewel-like sour cherries are a surprising but wonderful addition, peppering the mixture with a little sweetness and harmonising all the other flavours. These are a nod to my love of dried fruit in the savoury dishes of Middle Eastern and North African cuisine. You could even use fresh cherries in season, although dried ones will have a slightly richer flavour. Dried cranberries or chopped dried apricots will work in place of dried cherries, if you prefer.
Serves 4
For the burgers
2 aubergines
70g dried sour cherries
50g walnuts
1 tablespoon rapeseed or olive oil, plus extra for frying
1 red onion, very finely chopped
½ teaspoon ground cumin
½ teaspoon ground coriander
1 teaspoon sumac
¼ teaspoon sweet smoked paprika
¼ teaspoon ground cinnamon
50g fresh breadcrumbs
400g can of chickpeas, drained well
20g flat-leaf parsley leaves, roughly chopped
120g feta cheese, crumbled
1 tablespoon pomegranate molasses
1 teaspoon sea salt flakes
plain flour, for dusting
pitta, flatbreads or burger buns, to serve
little gem lettuce leaves, to serve
freshly ground black pepper
For the sauce
1 garlic clove, crushed
juice of ½ lemon, plus extra to taste if necessary
90g tahini
180g full-fat plain yoghurt
½ teaspoon salt, plus extra to taste if necessary
Heat the grill to high. Line an oven tray with foil and lay the aubergines on top. Place them under the grill and cook for about 30–45 minutes, turning occasionally, until the skins are blackened and the flesh inside is completely soft to the point of a knife. Remove the aubergines from the grill, pierce the skins to let the steam out, and leave to cool.
While the aubergines are cooking, put the sour cherries in a small bowl and cover with hot (but not boiling) water. Set aside.
Pre-heat the oven to 200°C/180°C fan/gas mark 6.
Place the walnuts on a small baking tray and cook in the oven for 10 minutes, until toasted, then set aside to cool.
Once the aubergines are cool, scoop out the flesh (discard the skin) and place the flesh in a colander over the sink or a bowl to drain while you carry on preparing everything else.
Heat the 1 tablespoon of rapeseed or olive oil in a small frying pan over a medium heat. Add the onion and sauté, stirring occasionally, for about 5–10 minutes, until soft and translucent. Add the spices and breadcrumbs and cook for a final 1 minute, then set aside to cool.
While everything cools, make the sauce. Simply whisk all the sauce ingredients together. Season to taste – add more salt or lemon juice if you think it necessary.
Drain the cherries and pat them dry with kitchen paper.
Put the onion mixture, aubergine flesh, drained cherries, toasted walnuts, chickpeas, parsley, feta, pomegranate molasses and sea salt in a food processor with a good grinding of black pepper. Pulse a couple of times so the ingredients mingle, but do not over-mix – you don’t want to turn it into a purée, more of a chunky mixture with individual ingredients still visible.
Spoon the mixture into a large bowl and refrigerate for 1 hour to make the burgers easier to shape.
Dust a plate with a thin layer of plain flour. Using your hands, shape the aubergine mixture into 8 small patties (each about 7.5cm in diameter) and dust them with flour on each side.
Heat a large frying pan over a medium-high heat and add a couple of tablespoons of rapeseed or olive oil. Once the oil and pan are hot, fry the burgers for about 4–5 minutes on each side, until crispy and fragrant. You may need to do this in batches – if so, keep the cooked burgers warm in a low oven while you cook the rest.
Serve the burgers piled into flatbreads, pitta breads or burger buns, with a couple of crunchy little gem leaves and a good dollop of the garlic and tahini sauce. A tomato and red onion salad is also nice on the side.
Grilled harissa chicken
with griddled peach bulgur wheat & cucumber yoghurt
When I asked my friend Patrick to test this recipe, he reported back that grating a cucumber ‘is an activity not seemly to perform in sight of any observers’! I promise it’s the only unseemly thing you’ll be required to do in the preparation of this vibrant dish. I love the contrast in both texture and temperature between spicy, sizzling meat, warm grains and thick, cold yoghurt made extra refreshing with grated cucumber and fresh mint.
Peaches are a particular favourite of mine in summer salads, brightening up whatever you want to throw them in and providing a welcome burst of silky sweetness alongside the charred meat and cooling cucumber. You could also try using apricots or plums. This recipe lends itself well to barbecue season, but just use the grill or a griddle pan if you want to make it all year round. If you have vegetarian or vegan guests, the peach bulgur wheat also works excellently with some slices of grilled halloumi, some crumbled feta or some sliced smoked tofu, and it is surprisingly good with grilled or smoked mackerel, too. If you can’t find harissa, you can substitute for a teaspoon of chilli powder or chipotle paste.
Serves 3–4
For the chicken
1 tablespoon harissa
½ teaspoon sea salt flakes
1 teaspoon sweet smoked paprika
finely grated zest of ½ lemon and 1 tablespoon juice
a generous pinch of chilli flakes
300ml full-fat plain or Greek yoghurt
3 garlic cloves, crushed
2 tablespoons rapeseed or olive oil
8 skin-on, boneless or bone-in chicken thighs
For the yoghurt
1 cucumber, roughly grated
1 teaspoon salt
300ml thick, full-fat plain or Greek yoghurt
2 tablespoons chopped mint leaves, plus extra to garnish
For the griddled peach bulgur wheat
200g bulgur wheat
juice and finely grated zest of 1 lemon
½ teaspoon salt
½ teaspoon freshly ground black pepper
4 spring onions, finely chopped
2 tablespoons chopped mint leaves
2 tablespoons chopped coriander leaves
1 tablespoon chopped parsley leaves
3 tablespoons good-quality olive oil, plus extra for griddling the peaches
3 peaches, stoned and cut into roughly 1cm slices
First, marinate the chicken. Mix together all the ingredients except the chicken in a non-reactive mixing bowl. Stab the chicken thighs all over with a metal skewer or cocktail stick, then add them to the marinade and coat thoroughly. Cover with cling film and refrigerate, preferably overnight but for a few hours is fine.
When you’re ready to cook, prepare your barbecue (wait for the flames to die down, until you have glowing coals) or heat your grill to medium. Remove the chicken pieces from the marinade and place them on the barbecue or under the grill. Cook for about 15 minutes, until the skin is starting to become golden, then turn them over. Brush them with any remaining marinade and cook for another 15 minutes or so, until the skin is crispy and the juices run clear. (Bear in mind that if you’re using thighs on their bone, they will take a bit longer than boneless versions.)
Meanwhile, start the yoghurt. Put the grated cucumber in a colander and toss it with the salt. Suspend the colander in a bowl and leave the cucumber to drip through for about 15 minutes, stirring occasionally, then squeeze out as much remaining water from the cucumber flesh as you can. Set aside.
Put the bulgur wheat in a large bowl and pour over enough boiling water to cover by about 2.5cm. Put a plate over the bowl and leave the wheat for 15 minutes, then transfer the grains to a sieve and drain off any remaining water. Fluff up the bulgur wheat with a fork. Add the lemon juice and zest, along with the salt and pepper, and the spring onions, herbs and olive oil. Toss well.
Get a griddle pan hot, then brush it lightly with a little olive oil. Griddle the peach slices for about 2–3 minutes on each side, until tender and slightly charred, then stir them through the bulgur. You could also do this on the barbecue, but use a clean grill (or wash the one you used for the chicken).
To finish the yoghurt, mix the drained cucumber with the Greek yoghurt, mint and some seasoning.
Serve the chicken with the bulgur and a generous dollop of cucumber yoghurt alongside. A green or avocado salad is also a nice addition.

Grilled harissa chicken
Basil & goat’s cheese stuffed chicken
with pickled cherry & spelt salad
There are a few different components here, but everything is very easy to prepare and the finished dish would make an impressive dinner party main course. I always think cherries are better suited to savoury than sweet dishes: here, they pair beautifully with tart vinegar and lemon juice, the addition of star anise complementing the basil in the chicken stuffing. Spelt is an underused ingredient, so here I’ve tried to showcase its ability to soak up flavoursome dressings while retaining a delightfully nutty bite. It is the perfect foil to the rich, tender chicken and molten goat’s cheese, accentuated by the sharp bite of juicy, tangy cherry.
Serves 4
For the pickled cherries
200g cherries, halved and stoned
1 teaspoon light brown soft sugar
¼ teaspoon sea salt flakes
1 tablespoon balsamic vinegar
1 tablespoon red wine vinegar
1 star anise, broken into pieces
a squeeze of lemon juice
For the chicken & stuffing
1 tablespoon rapeseed or olive oil
50g butter, softened, plus a knob of butter
1 small onion, very finely chopped
2 garlic cloves, finely chopped
30g fresh breadcrumbs
125g soft goat’s cheese
25g basil leaves, finely shredded
4 skin-on, boneless chicken breasts
salt and freshly ground black pepper
For the spelt salad
1.4 litres vegetable stock
300g pearled spelt
140g kale, shredded
1 tablespoon cider vinegar
½ teaspoon Dijon mustard
1 teaspoon wholegrain mustard
1½ tablespoons maple syrup
3 tablespoons good-quality olive oil
2 tablespoons rapeseed oil
2 tablespoons lemon juice
40g pumpkin seeds
First, make the pickled cherries. Put the cherries in a bowl and mix with the sugar, salt, vinegars, star anise and lemon juice. Set aside to macerate, stirring regularly.
For the chicken stuffing, in a small frying pan, heat the rapeseed oil and the knob of butter over a medium heat. Add the onion and sauté for about 10 minutes, until golden and soft. Add the garlic and cook for another 2 minutes, then add the breadcrumbs and cook for 2–3 minutes, until everything is golden and toasted. Tip the lot into a small bowl and leave to cool. When cool, mash together with the goat’s cheese and basil leaves. Season well with salt and pepper.
Pre-heat the oven to 200°C/180°C fan/gas mark 6. Line a baking tray or roasting tin with baking parchment.
Put the 50g butter in a bowl, season it well with salt and pepper and mash it.
Using a sharp knife, slice a deep cut into the side of each chicken breast, lengthways, so you create a small pocket for stuffing – be careful not to cut all the way through. Arrange the chicken breasts on the baking tray and season well, inside and out. Stuff each breast with a quarter of the goat’s cheese stuffing, packing it as tightly as possible and closing the meat around it (as much as you can). Place the breasts in the tray, skin-side up.
Smear the seasoned butter over the skin of each chicken breast. Place the roasting tin in the oven and cook for 30–40 minutes, basting the breasts occasionally with the buttery juices that accumulate in the base. The breasts are cooked when the juices run clear when the thickest part is pierced with a knife, and there are no pink bits (or when a meat thermometer shows 74°C).
While the chicken is in the oven, cook the spelt. Place the vegetable stock in a large saucepan and bring it to the boil over a high heat. Add the spelt and cook for 17 minutes at a robust simmer, then add the shredded kale and cook for a further 3 minutes until the kale is tender. Drain everything in a colander and return the mixture to the pan (off the heat).
Whisk together the remaining salad ingredients, except for the pumpkin seeds, to make a dressing and add it to the pan with the spelt while the grains are still warm. Toss well to coat.
Heat a small frying pan over a medium heat. Add the pumpkin seeds and toast, shaking the pan, until they start to pop. Tip the toasted seeds into the spelt salad and toss to mix. Keep the salad warm until the chicken is ready.
Serve the chicken breasts, hot from the oven, with the spelt salad and a spoonful or two of the pickled cherries and their juices.

Basil & goat’s cheese stuffed chicken
Blue cheese crusted pork escalopes
with a fennel & apple slaw
This is a lighter riff on the classic roast pork with apple sauce. I have been making variations of this for many years, and the combination of the buttery, crunchy crust with the tender meat and tangy salad makes for the perfect dinner – light yet decadent. It is a great dish for when apple season is in full swing and you need a bit of a break from pies and crumbles.
Inspiration for the slaw comes from Heidi Swanson’s wonderful blog 101 Cookbooks. Try experimenting with different herbs, vinegars and vegetables to keep things interesting. Very thinly shaved celeriac works wonderfully instead of fennel, for example, and a gooseberry, raspberry or elderflower vinegar can take the dressing in interesting new directions. I also encourage you to hunt down some interesting apple varieties in season – they all bring a slightly different characteristic to this timeless pairing. My favourites are Discovery, Egremont Russet and Cox’s Orange Pippin. A crisp pear would also be rather lovely. Goat’s cheese works well instead of blue cheese, if you’re not a fan of the latter, and you could also use chicken breast fillets – bashed with a rolling pin to flatten them – instead of pork escalopes.
Serves 2
For the slaw
1 teaspoon lemon zest
¼ teaspoon sea salt flakes
1 garlic clove, roughly chopped
1 tsp finely chopped rosemary needles
1 teaspoon caster sugar
1 tablespoon cider vinegar
½ teaspoon wholegrain mustard
2 tablespoons plain yoghurt
½ fennel bulb, very finely sliced
1 large eating apple (Granny Smith, Discovery, Cox or Russet works well), quartered, cored and very finely sliced
a couple of leaves of kale or cavolo nero, de-stalked and very finely shredded
50g blanched hazelnuts
freshly ground black pepper
For the pork
2 boneless pork escalopes
30g butter
65g fresh breadcrumbs
30g Gruyère or Parmesan, coarsely grated
1 teaspoon thyme or lemon thyme leaves
60g blue cheese, at room temperature
salt and freshly ground black pepper
First, prepare the slaw. Put the lemon zest, sea salt, garlic, rosemary and sugar into a mortar and pound with the pestle to a paste. Add the vinegar and mustard and briefly pound until you have a fairly homogeneous liquid. Stir in the yoghurt, season well with black pepper and set aside.
Put the fennel and apple slices, and the kale or cavolo nero in a medium bowl. Pour the yoghurt dressing into the bowl and toss well to combine. Set aside.
Use the oven-assisted grill function on your oven, and pre-heat it to 200°C/180°C fan/gas mark 6 (or pre-heat a grill to high).
Put the hazelnuts on a small baking dish on the middle shelf of the oven and toast for about 5 minutes, until lightly golden and fragrant. Set aside to cool. Once cool, roughly chop and add the chopped pieces to the slaw. Toss gently to mix. Keep the oven/grill on.
Make the pork. If your pork escalopes are quite thick, place them between two sheets of baking parchment or cling film and bash with a rolling pin until they are about 1–1.5cm thick. Place them on an oven tray lined with baking parchment.
Melt the butter in a small saucepan over a medium heat. Take the butter off the heat once it is melted, and stir in the breadcrumbs, grated Gruyère or Parmesan, and the thyme. Season well with a little salt and a generous amount of pepper (don’t add too much salt, as the cheese will be salty).
Pat dry the surface of each piece of pork with kitchen paper. Divide the blue cheese between the pieces of pork and, using your fingers or a knife, roughly spread the cheese over the surface of each piece. Divide the breadcrumb mixture between the two pieces, and spread it out over the blue cheese, pressing it firmly on top.
Place the pork under the grill (on the highest oven shelf) for 10–15 minutes, until the cheese crust is golden and bubbling, and the pork is cooked all the way through (the exact time will depend on the thickness of your pork pieces, so start checking after 10 minutes). A meat thermometer should show 63°C, and the juices should run clear. Leave the pork to rest for 3 minutes before serving with the apple and fennel slaw.

Blue cheese crusted pork escalopes
Chestnut, maple, pear & vanilla cinnamon buns
These are the only thing I want to wake up to on Christmas morning – better than a stocking from Santa (although you can, and should, make them at any time of the year). A festive take on the Scandinavian kanelsnurre, these feature all of my favourite winter flavours and are the product of my quest to incorporate the underrated chestnut into as many recipes as possible. The maple pears add a delicious burst of buttery sweetness, but you could use apples instead.
Makes 15
For the dough
180ml whole milk
75g butter
2 eggs
500g strong white flour
60g light brown soft sugar
1 teaspoon ground cinnamon
1 teaspoon salt
7g fast-action dried yeast
For the filling
70g butter, softened at room temperature, plus extra for greasing
50g light brown soft sugar
200g chestnut purée
1 teaspoon vanilla paste or extract
a pinch of salt
2 ripe but firm pears (Conference or Comice works well)
5 tablespoons maple syrup
For the glaze
50g unsalted butter
20g demerara sugar
Put the milk and butter for the dough in a small saucepan over a medium heat and allow the butter to melt (about 5 minutes). Turn off the heat and set aside to cool to body temperature, then beat in the eggs.
In the bowl of an electric stand mixer fitted with a dough hook, or in a large mixing bowl if using your hands, combine the flour, sugar and cinnamon. Add the salt on one side of the flour mixture in the bowl and the yeast on the other. Make a well in the centre and pour in the egg and milk mixture. Using the dough hook or your hands, bring the mixture together to form a sticky dough, then knead for about 10 minutes, until the dough is soft and silky, and no longer sticky. Cover the bowl with a clean tea towel and leave the dough to rise in a warm place for 1–2 hours, until doubled in size.
Lightly grease a large roasting tin or baking dish (one with high sides) and line it with baking parchment.
While the dough rises, prepare the filling. In a medium mixing bowl, combine the butter, sugar, chestnut purée, vanilla and salt, mashing them together with the back of a spoon to form a homogeneous paste. Core the pears (you can peel them too if you like, but I don’t think it is necessary) and chop them into small dice (roughly 1cm). Put them in a separate bowl and toss them with the maple syrup. Set aside.
When the dough has doubled in size, roll it out on a floured work surface to a rectangle about 45 x 35cm, with the long side facing you. Spread the chestnut filling evenly over the dough, leaving a border of about 2.5cm at the long edges. Scatter the maple pears evenly over the chestnut filling.
Starting with the long side furthest away from you and rolling towards your body, tightly roll up the dough and filling so that you end up with a long log. Using a sharp, serrated knife, slice the log along its length into 15 even rounds. Place each round, swirl-side up, on the prepared roasting tin or baking dish with about a 2.5cm gap between each. Cover the tin with a clean tea towel and leave the buns to prove until nearly doubled in size (about 30–60 minutes) – the edges will start to touch one another and the edges of the tin.
While the buns are proving, pre-heat the oven to 200°C/180°C fan/gas mark 6. When they have proved, put the tin in the oven and bake the buns for 23 minutes.
While the buns are baking, make the glaze. Place the butter in a saucepan and melt over a medium heat. After 23 minutes, remove the buns from the oven and, using a pastry brush, glaze them with the melted butter. Sprinkle over the demerara sugar and return the buns to the oven to bake for a final 7 minutes, until golden.
Remove them from the oven and leave the buns to cool in the tin (if you can wait that long) before devouring. They freeze well and are easily reheated in an oven at 180°C/160°C fan/gas mark 4.

Chestnut, maple, pear & vanilla cinnamon buns
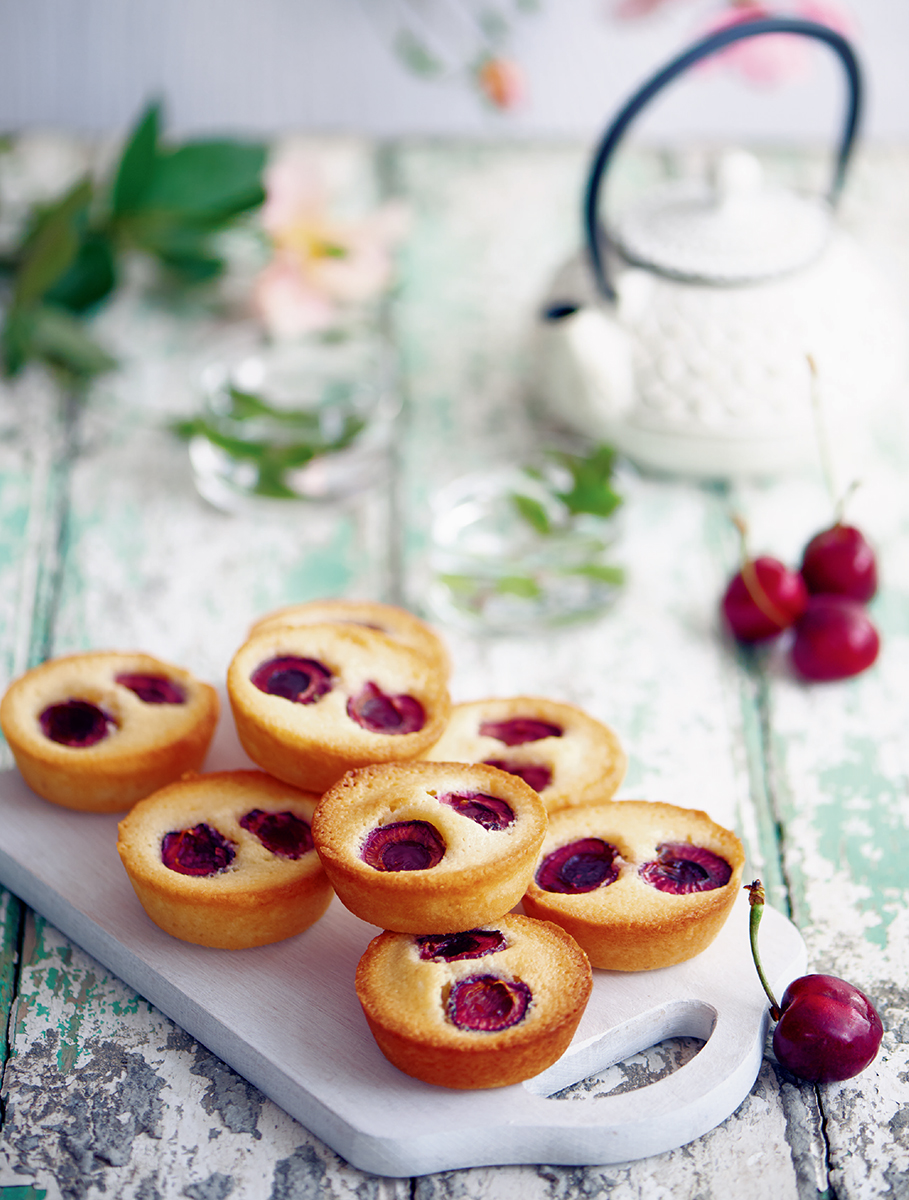
Little cherry & almond cakes
The main reason I love these dainty little cakes is that they are the perfect solution for the cook’s perennial ‘What to do with leftover egg whites?’ problem (particularly if, like me, you are not a fan of meringue). They are also an incredibly quick, one-bowl bake that you can whip up in minutes, and are extremely versatile. I’ve used figs, apricots, peaches, pears and various berries in these with great success, so they are also an excellent way to use up any fruit lingering in your kitchen – simply drop small pieces into the batter in the tin.
Makes 12
90g egg whites (from 2–3 large eggs)
100g caster sugar
70g ground almonds
a pinch of salt
½ teaspoon almond extract
35g plain flour
90g butter, melted and cooled slightly, plus extra for greasing
18 fresh or canned cherries, halved and stoned
Pre-heat the oven to 220°C/200°C fan/gas mark 7. Grease a 12-hole cupcake or bun tin well with butter.
In a large bowl, whisk the egg whites lightly with a hand whisk until a little frothy (but definitely not to soft peaks). Whisk in the caster sugar. Add the almonds, salt, almond extract and flour, then whisk again until just combined. Slowly pour in the melted butter, whisking continuously, until you have a thick batter.
Divide the batter between the holes of the muffin tin, then top each cake with 3 cherry halves. Bake for 7 minutes, then lower the oven temperature to 180°C/160°C fan/gas mark 4 and bake for another 3–6 minutes, until the cakes are golden and a skewer inserted in the centres comes out clean. Leave to cool a little before transferring to a wire rack to cool fully before eating.
Little cherry & almond cakes
Spiced apple & date jam
I used to have an apple tree in my garden, so this jam was really born out of necessity. When thousands of cooking apples suddenly descended on my lawn within a two-month period, it forced me to start finding creative ways in which to use them. I am still perplexed as to why we don’t see more apple jam in the shops. Apples are high in pectin, which means an almost guaranteed set. They are frequently used in compotes for pies and crumbles, so why do we – a nation so enamoured of apples – not take the logical next step of cooking them that little bit longer, so that we can enjoy their sweet-tart flavour on our morning toast throughout the winter? This is my attempt to do just that. It captures the flavours of autumn in a jar: brown sugar, toffeed dates, soothing cinnamon, and the unmistakeable aroma of warm apples.
Makes about 5 x 450g jars
1.5kg peeled and cored cooking apples (prepared weight), cut into 1.5cm dice
2 cinnamon sticks (about 8cm each)
6 cloves
1kg granulated sugar
400g light muscovado sugar
juice of 2 lemons
250g stoned dates, roughly chopped
Put the apples in a large, heavy-based saucepan or preserving pan. Add the cinnamon sticks, cloves, both sugars and the lemon juice. Heat gently, stirring regularly with a wooden spoon, until the apples start to release their liquid and the sugar starts to dissolve. Increase the heat and leave to cook until everything is watery. (Stir regularly to prevent the mixture catching on the bottom of the pan and burning.) Put a small plate in the freezer (to test for when the jam is set).
When the mixture is boiling, lower the heat slightly and simmer until the apples have softened and the liquid has started to turn golden and reduce (you will still have some chunks of apple left, though – it shouldn’t be totally mushy) – about 15 minutes. Add the dates, then continue to simmer vigorously for about 30 minutes, until the jam begins to thicken. (Again, stir regularly to prevent the mixture catching – be careful and wear oven gloves as the jam will bubble volcanically.)
After 30 minutes, start testing for a set. A sugar thermometer should reach 105°C, or you can test using the plate that you have chilled in the freezer: spoon a small dollop of jam onto it, leave to cool for 1 minute, then run your finger through it – if it wrinkles and parts cleanly, the jam is ready. If not, continue to cook for a few minutes more and test again. As soon as the jam sets, remove it from the heat (don’t overcook as the jam can quickly ‘turn’).
While the jam is cooking, sterilise your jars and lids. I do this by washing them well in soapy water, then putting the jars upside down in an oven at 140°C/120°C fan/gas mark 1 for 25 minutes, adding the lids (also upside down) for the last 10 minutes. Turn off the oven and leave the jars inside until you are ready to bottle the jam. You can alternatively run the jars through a hot dishwasher cycle, then pot the jam while they are still warm.
Decant the jam into the sterilised jars. Cover with wax discs, and seal with the lids. I have kept this jam for five or six years, unopened, in a cool larder with no problems, but once opened, keep it refrigerated and consume within a month.
The ultimate crumble
plum, brown sugar, ginger & marzipan
Sometimes, during an idle moment, I mentally rank my all-time top five dessert genres. (Crumble, cheesecake, lemon tart, sticky toffee pudding, tarte tatin, since you ask.) I’ve probably made more crumbles in my life than any other dessert (and the number of them in this book is testament to that fact), but I really wanted to come up with a definitive version that exemplifies the very best of what crumble is all about. This is that version. The plums are just sour enough to contrast with the buttery topping, while ginger, anise and orange bring out the plums’ robust flavour and create a deep purple syrup that bubbles up and caramelises invitingly around the edges. Oats, spices and tiny cubes of marzipan add crunch to the topping, and the whole thing is a perfect marriage of layered flavours and textures. This crumble is excellent made with blood oranges, when in season.
Serves 4–6
12 ripe plums, quartered and stoned
3 globes of stem ginger in syrup, finely chopped
2 tablespoons stem-ginger syrup (from the jar)
1 star anise, halved
finely grated zest of 1 orange and juice of ½
60g dark brown soft sugar
1 heaped tablespoon cornflour
150g plain flour
90g cold butter, cubed
40g jumbo oats
90g marzipan, cut into 5mm cubes
90g golden caster sugar
½ teaspoon ground cinnamon
½ teaspoon ground ginger
¼ teaspoon freshly grated nutmeg
1 tablespoon cold water or milk
Pre-heat the oven to 190°C/170°C fan/gas mark 5.
Put the plum quarters in a medium baking dish. Add the stem ginger and syrup, the star anise halves, the orange zest and juice, the brown sugar and the cornflour. Mix well.
Put the flour and butter in a medium bowl and rub the butter into the flour with your fingertips until the mixture resembles fine breadcrumbs. Stir in the oats, marzipan, caster sugar, cinnamon, ginger and nutmeg and mix well. Add the water or milk and mix gently so the mixture turns ‘pebbly’.
Tip the crumble over the plums in the baking dish and spread it out to cover the fruit. Flatten it slightly but don’t press down too much.
Bake for 45 minutes, until the fruit is bubbling up around the topping and the crumble is golden brown. Leave the crumble to cool for 10 minutes before serving with vanilla ice cream or custard.