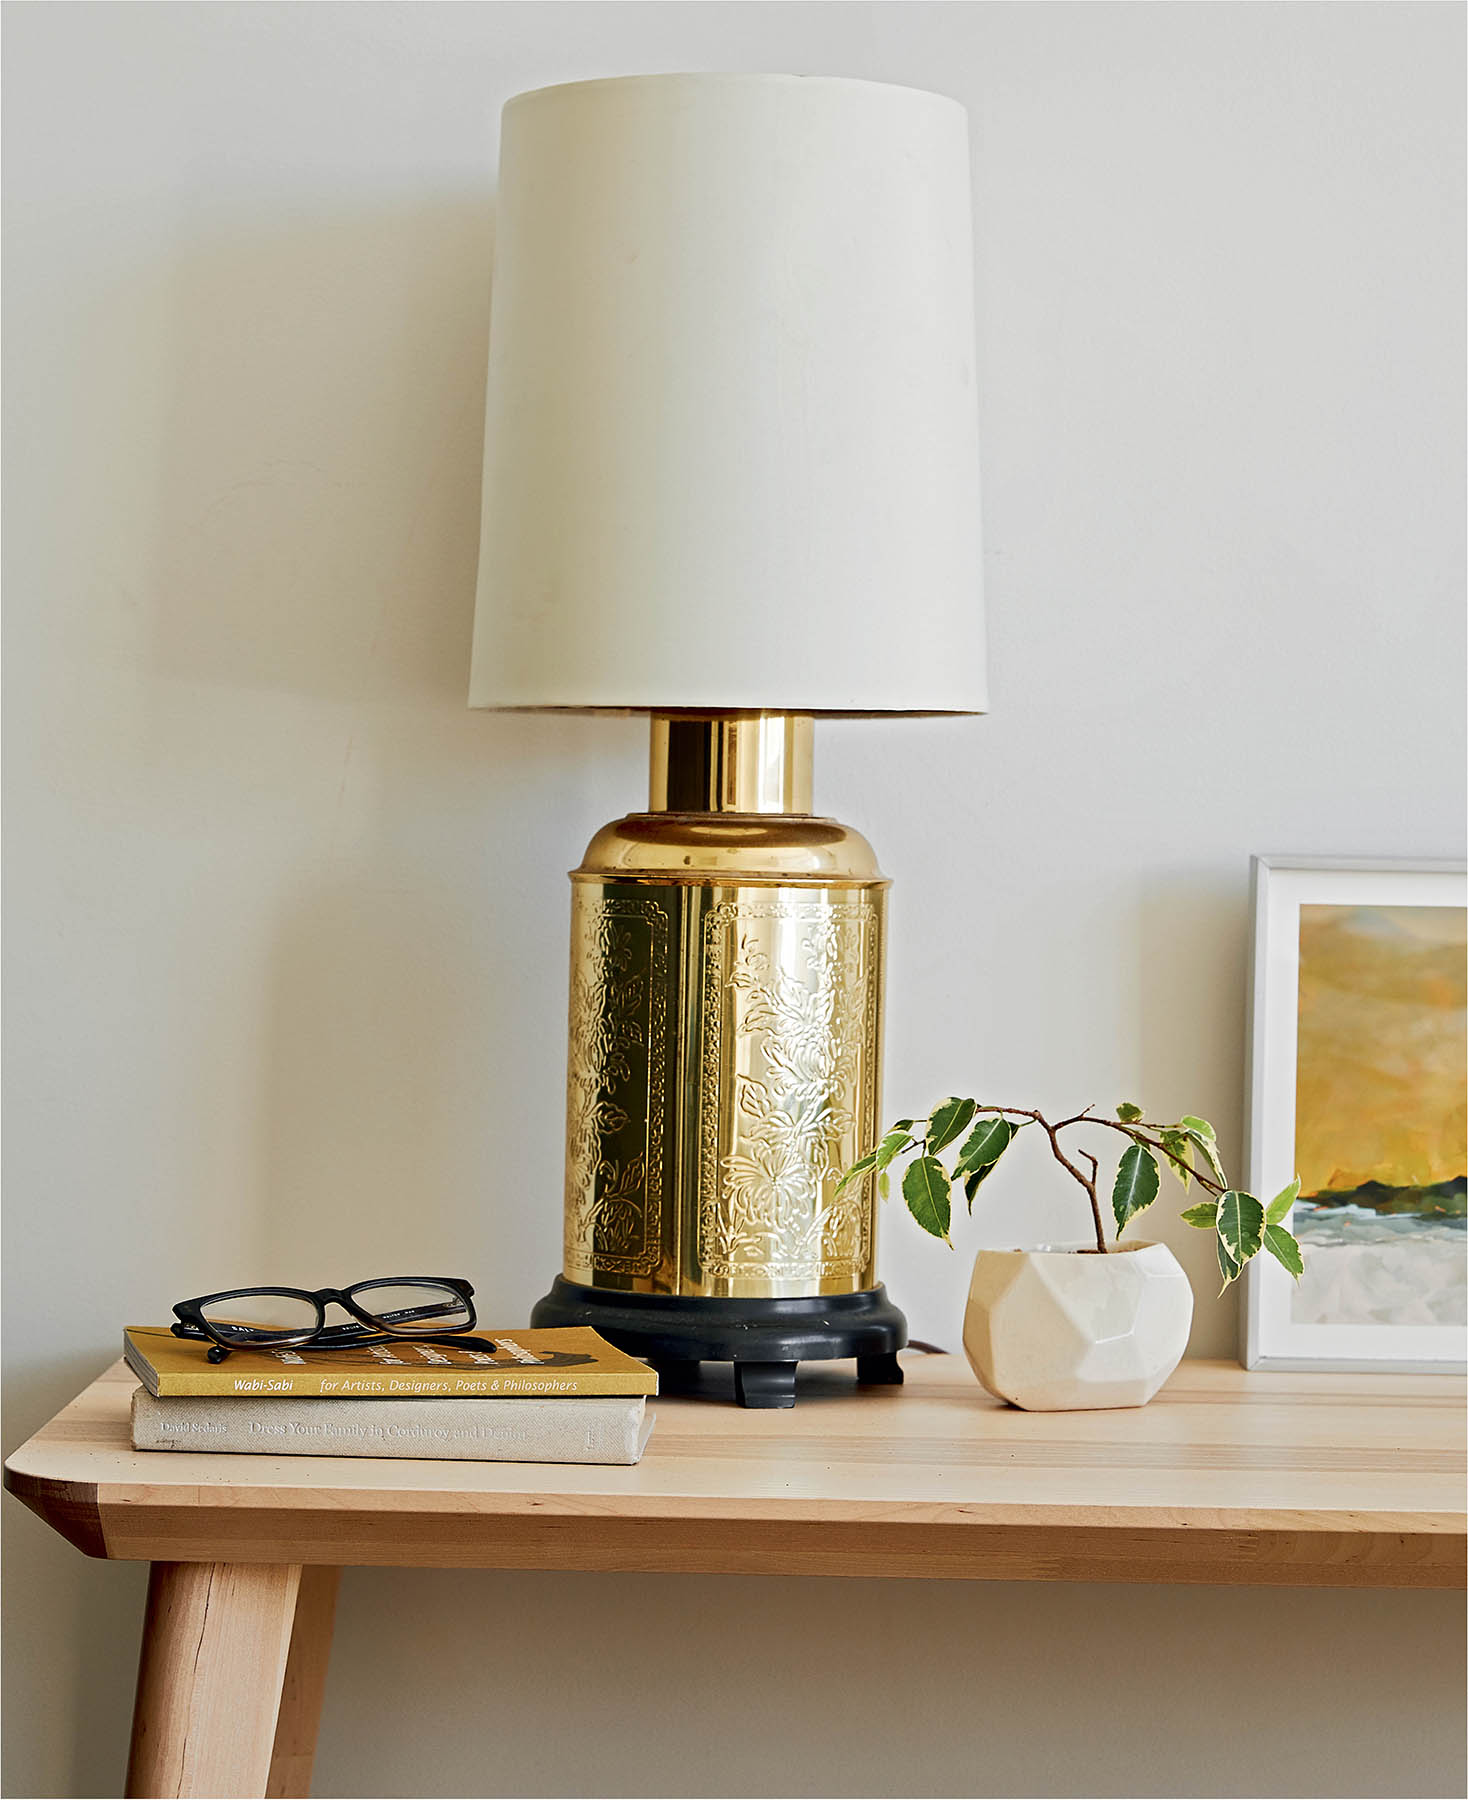

The entryway provides a buffer between the outside world and your living space. You step in and take a deep breath, and a switch is flipped—you know you’re home. With a little time and effort, you can use plants to create a smooth and pleasant transition from outdoors to in. You’ll find solutions here for any kind of space, from a crowded hallway that needs to accommodate a bustling family to a grand foyer aimed at impressing guests. Strategically placed greenery can direct visitors’ views or pique their curiosity by partially screening what’s around the corner. Well-chosen fragrant and colorful plants in particular can also be used to set a tone. Whatever sort of space you have and whichever plants you choose, the most important thing is to let your personality shine—all the better to signal “I’m home.”
Entryway Must-Haves
Fragrant Plants
Establish your home’s signature scent by placing an aromatic plant in the entry. Scent can cause many changes in the body and have an effect on mood; choose a plant to soothe (lavender) or energize (calamondin orange). If you’re searching for fragrant plants, look at their botanical names—if they contain the word fragrans or odoratissimum (or any derivative of these), give ’em a sniff! Here are a few aromatic options worth bringing home.

Paperwhite
These bulbs (Narcissus papyraceus) make a delicate, if fleeting, addition to an entry in late fall or early winter. The strong, decidedly floral (even perfume-like) scent of their blooms may calm nerves and help relieve stress. Kept in bright light, they can bloom in either soil or water (be sure to set the top 1 inch/2.5 cm or so of each bulb above the liquid). To keep the stems short and perky when growing in water, use a mixture of one part vodka to seven parts water.
Miniature Rose
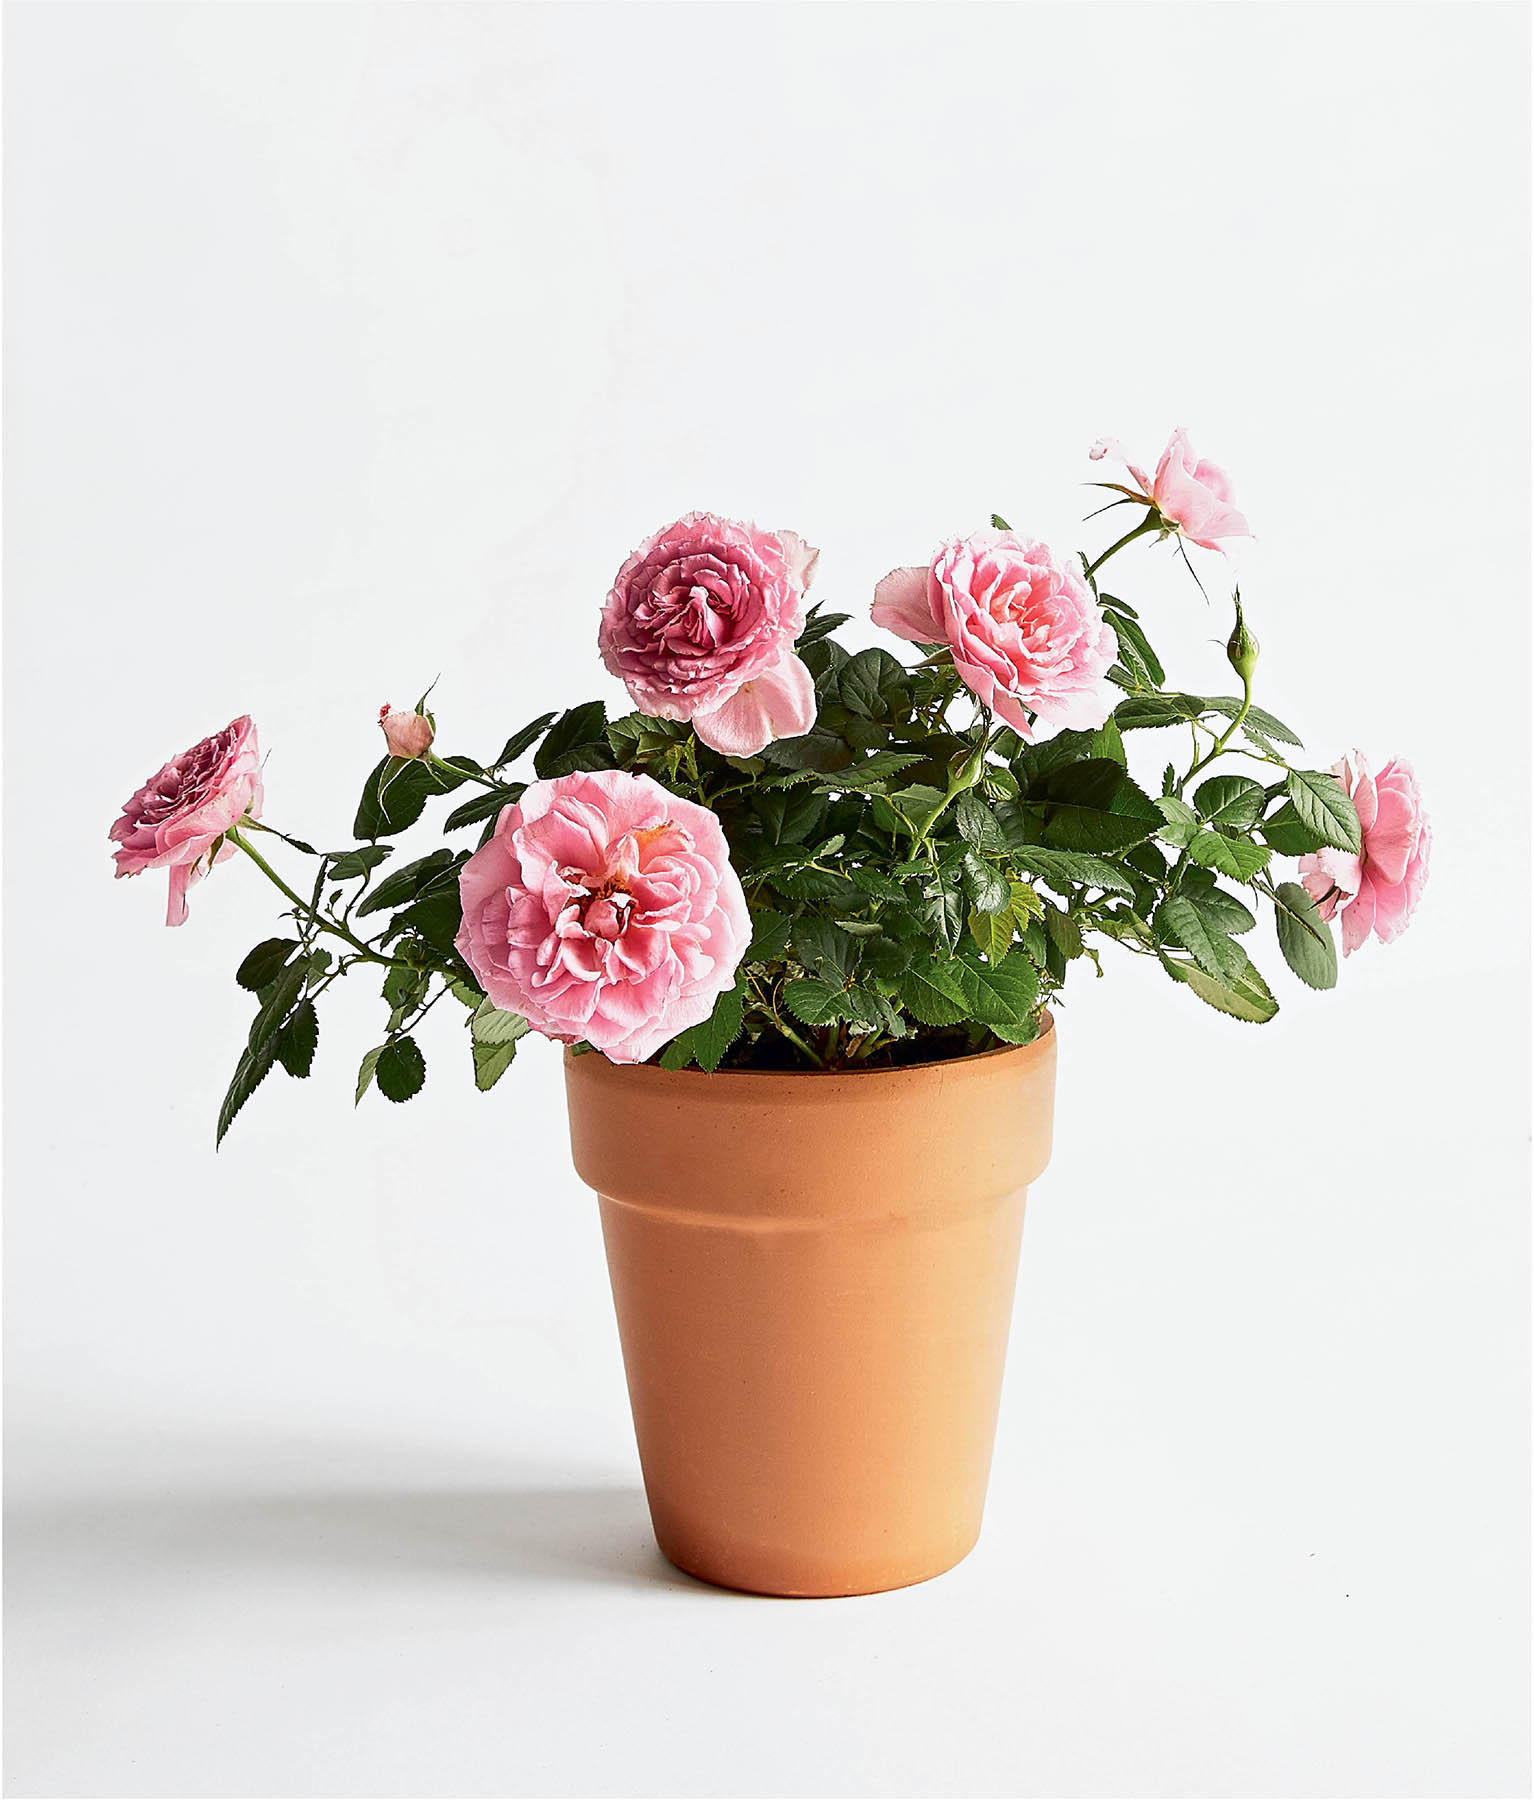
This miniature rose (a Rosa hybrid) is grown for the houseplant industry and adds a temporary ruffle of color to the winter home. Red blooms symbolize love; pink ones represent happiness. Place it in an area with very bright light and water regularly (but avoid getting water on the leaves). Prolong blooming by deadheading flowers as soon as they begin to fade. Rose plants will last only so long indoors, so transplant to a sunny outdoor space in spring.
Three Ways to Soak in the Aroma
1. Warm the room. Plant oils evaporate more easily and scent a space better in warm temperatures.
2. Rub the leaves. This works well with scented pelargoniums, eucalyptus, and herbs like lavender—give a leaf or blossom a squeeze to release the oil, and the scent will linger like perfume on your hand.
3. Enjoy the night. Plants emit fragrance to deter herbivores or attract pollinators. If your specimen’s pollinator is active at night (like a moth), the plant will pump up its fragrance cocktail in the evening to shout, “Come and get me!” Brugmansia and some wax plants (like a cinnamon-scented hoya) are two night owls to check out.

Jasmine
Bring this sprawling vine (Jasminum polyanthum) inside to add its richly sweet aroma—commonly used in teas and perfumes—to your space. Its strong scent is said to improve one’s mood with a single whiff. Studies have shown that its fragrance can even calm your pet. Jasmine is best kept moist and in bright light, but it is a fairly forgiving plant and can handle some direct sun as well as some shade. Tuck it in next to a broad-leaved plant for added texture.

Gardenia
Easy-to-find gardenias (Gardenia jasminoides) can be purchased from florists, grocery outlets, or plant nurseries and are available planted or cut. If choosing a planted specimen, get one with ripe buds to enjoy the fragrance for as long as possible. Place it in an area with bright light, and keep humidity levels high by setting the potted plant in a gravel tray (see humidity). Avoid touching any flowers, as this can bruise and discolor them.
A Hardworking Entry
The entryway is a hub of activity—boots get kicked off, coats dropped, groceries set down, and homework forgotten. But there’s always room for plants! The key for bustling entries is to keep plants out of the way, whether in a basket hung securely on the wall, on a shelf, or in a custom wall unit. This will make it less likely that people will topple the plants in the whirlwind of getting out the door. Plus, hanging plants at eye level turns them into a full-on display.
The system shown opposite, created with a combination of wall-mounted pieces found at Pottery Barn, has a cohesive overall look thanks to a unifying color palette of blues, browns, and pinks that runs through the plants, vases, and accessories. Though the overall effect is one of tidiness and order, the oversize philodendron and the moth orchid (whose stem extends beyond the backdrop of the brown shelf) bring a natural softness to the look. The China doll plant (to the right of the moth orchid) is rather plain, but it pops off the shelf thanks to its white vessel with a jewel-toned green pattern. The leather wall pocket piece was sold as a garden-shed organization tool, but it works nicely as a mail sorter and air plant holder. Bonus: the Tillandsia caliginosa air plant (bottom right pocket) is wonderfully fragrant when in bloom.
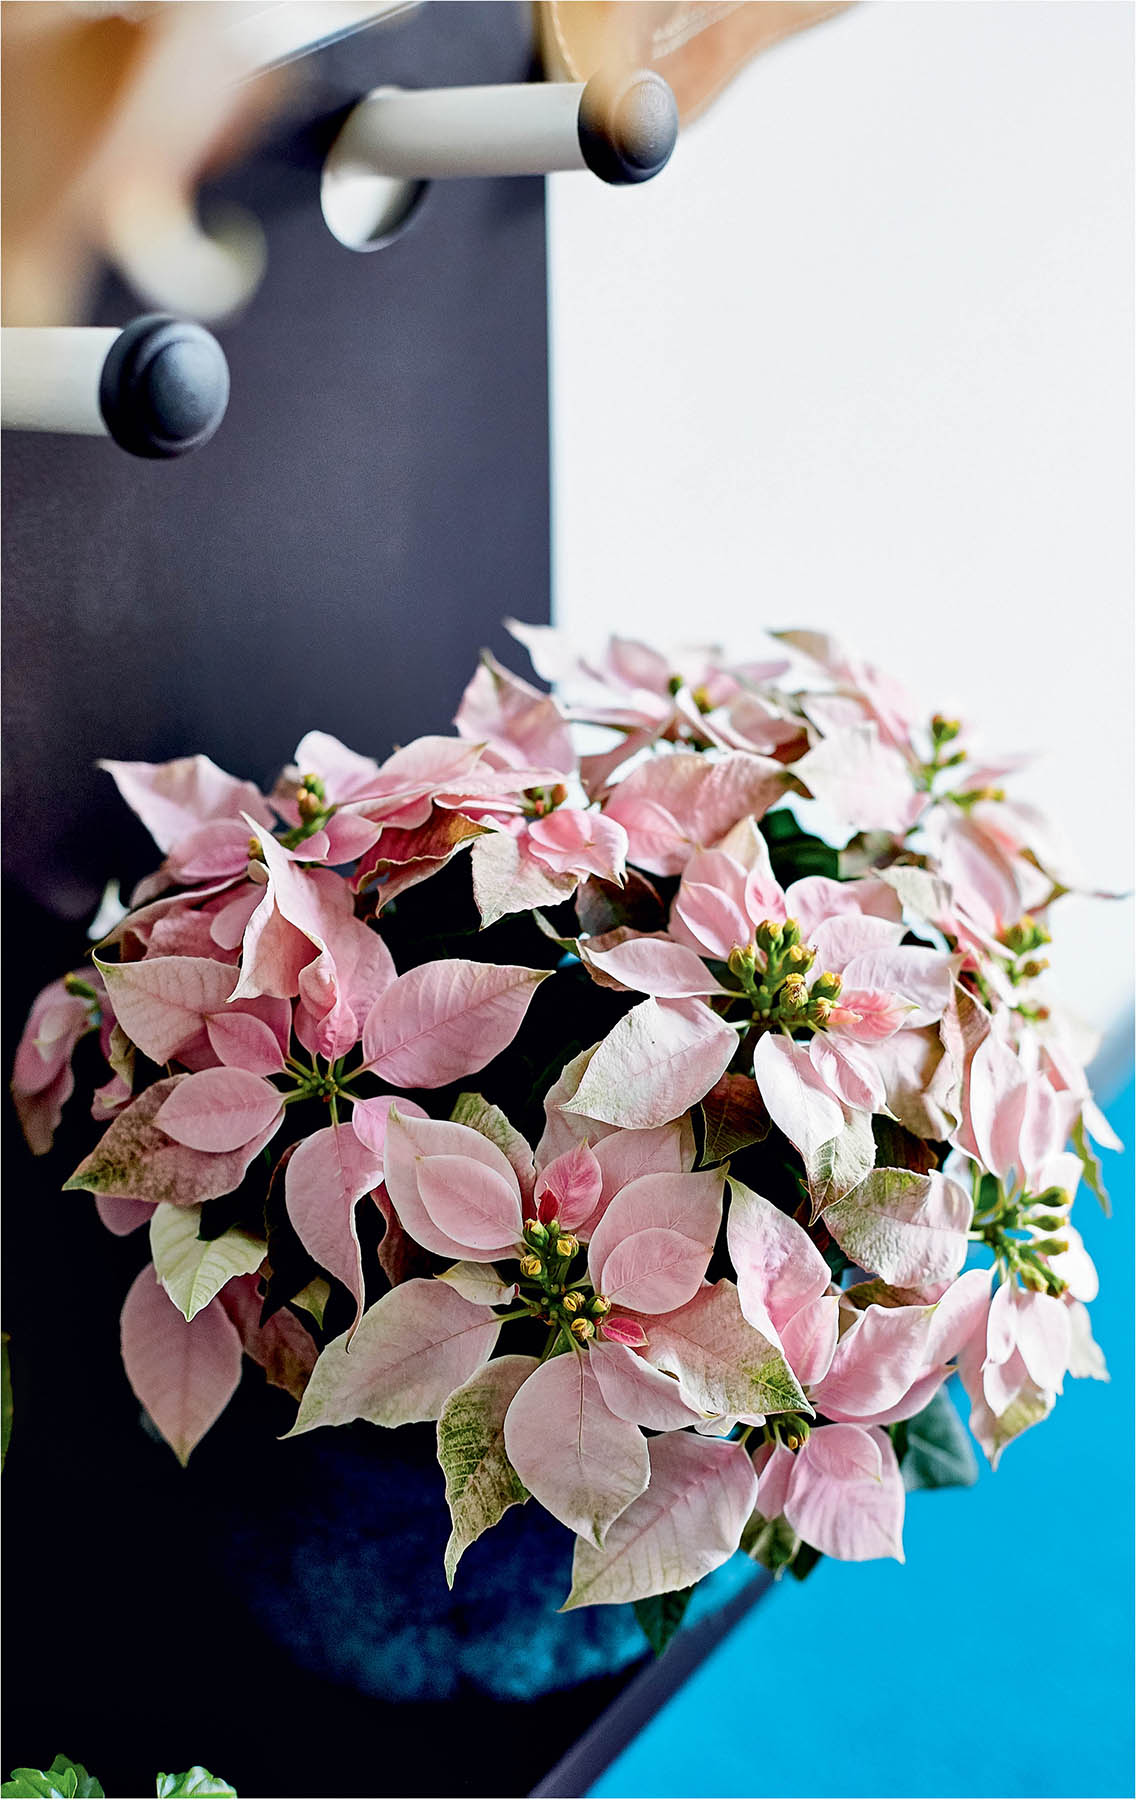
Pretty in Pink: Did you guess that this petite pink plant is a poinsettia? Poinsettias are euphorbias and come in many shapes, colors, and sizes—see Crown of Thorns for another type. This one was placed in a felt basket (by Swedish company Aveva) lined with a coating to create a waterproof, nonbreakable vase.
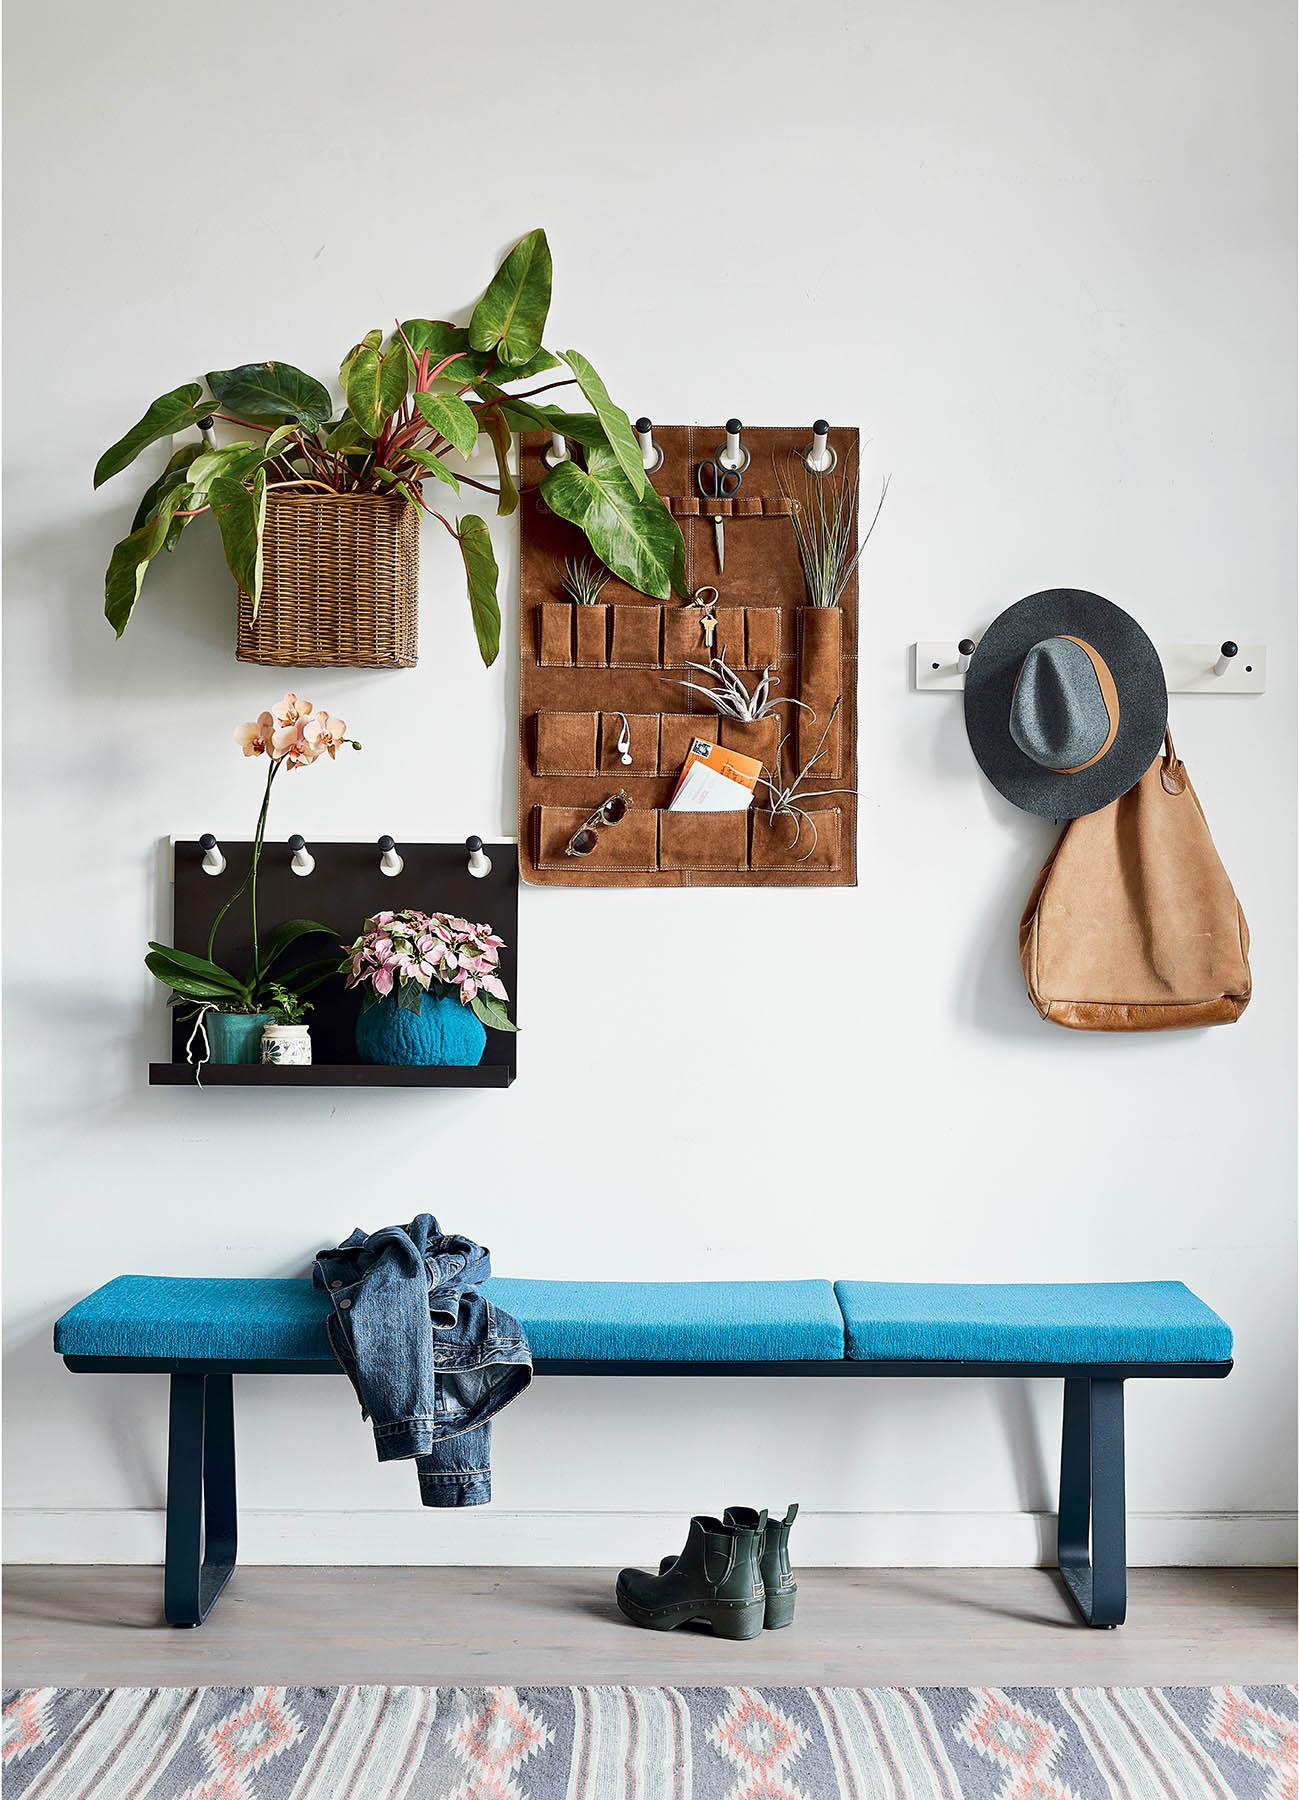
Many philodendrons, like this large-leafed ‘Painted Lady’, are great climbers. If you’re open to letting your plants grow up the wall (and potentially stick to the paint job), let them go wild!
A Tabletop Garden
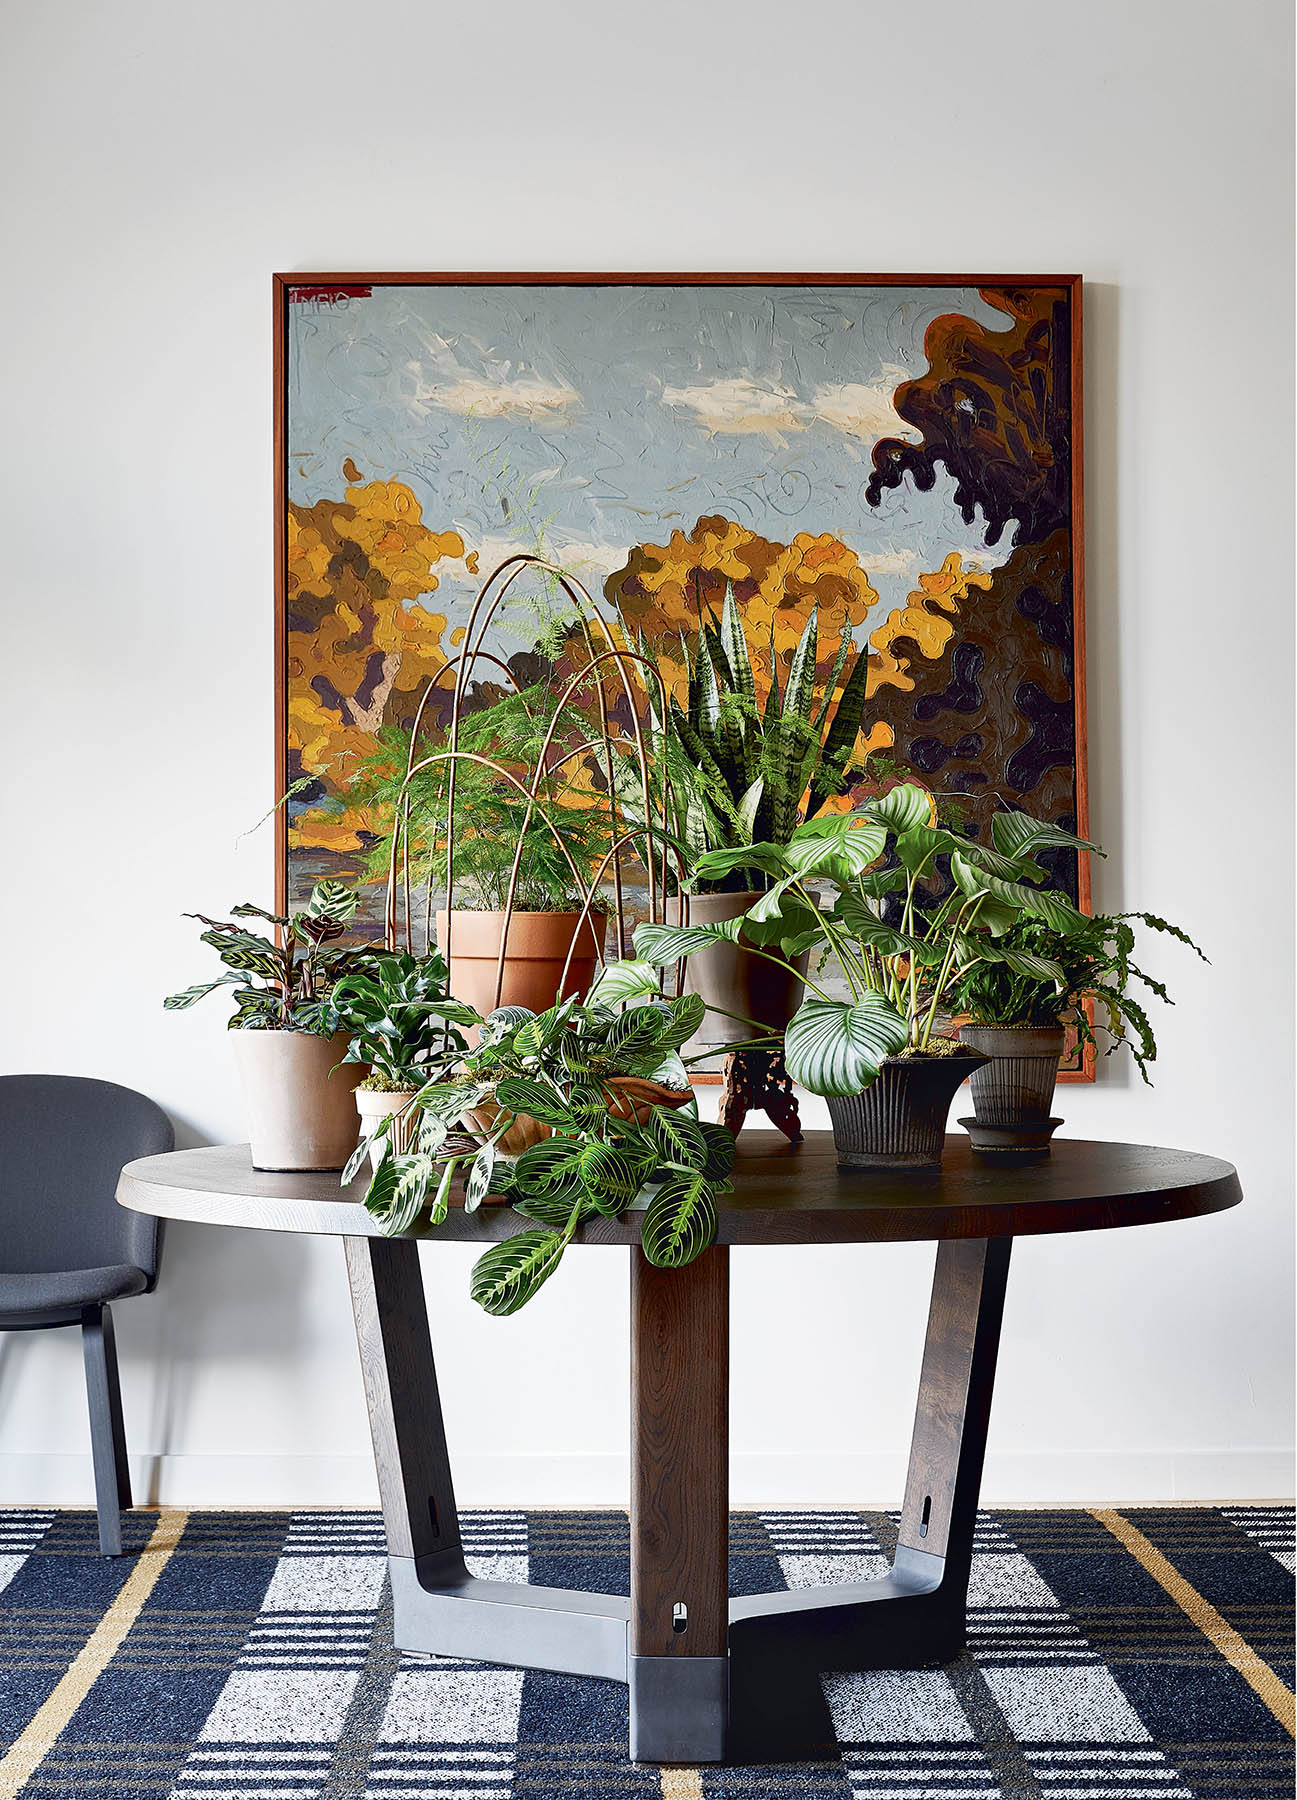
Bring the outdoors in with a bountiful collection of plants, unified by classic terra-cotta pots in a range of finishes. The addition of a willow trellis takes the garden theme to another level. If you need to make room for mail, keys, or other entryway ephemera, simply reduce the number of plants until you have the required space. To create your own green oasis, follow these guidelines.
Unify the grouping with matching vessels. What makes this look like an intentional design rather than a mishmash of plants is the repetition of both color and material in the vessels. Though some of the pots have a reddish hue while others are grayish, they all read as “terra-cotta” and can be effectively mixed and matched. Terra-cotta containers range from easy-to-find inexpensive versions from home and hardware stores to handcrafted, more ornate pieces found at gift shops and boutique plant nurseries.
Play with pattern and form. Though all the plants on this table are green, their varied patterns and forms make for interesting combinations. The repetition of the patterned leaves of the prayer and peacock plants (front center and far left) draws you in—making you want to get closer as their details come into view. The undulating leaf of the curly bird’s nest fern (far right) is a perfect counterpoint to the upright dracaena (left)—which in turn echoes the upright, wide leaf of the snake plant (back center). The shape of the willow trellis also mimics the sweeping stems of the round-leaf calathea (front right) and the vertical stripes of its pot.
Consider scale. This huge table calls for hefty plants to balance its size, dark color, and heavy material. A grouping of small plants on this surface would look dwarfed. The tall trellis adds needed height (the asparagus fern will attach and grow on it), as does the plant stand used to raise the snake plant. Similarly, the saucer under the curly bird’s nest fern (far right) is not only helpful for waterproofing but also adds a bit of bulk to balance the narrow vase.
Layer the landscape. Create an appealing, rounded silhouette by placing your tallest plants at the center, then filling in the collection with progressively shorter specimens as you near the edges of the table. An added benefit: grouped together, plants create a more humid microclimate than when standing alone, which helps them thrive.
Protect your surfaces. Waterproofing on a pristine wood table like this is a must. Either set each pot on a barrier (stand, tray, saucer, or cork coaster) and/or leave the plants in their original plastic grow pots and stage them inside decorative vessels with a plastic liner (see Staging for more on this technique).

Against an otherwise bare wall, a blooming ‘Sharry Baby’ oncidium orchid adds height, while the curved vine of a Madagascar jasmine to its right creates a sense of movement.
A Functional and Fragrant Front Door
Transform a narrow hall into an entry that’s practical enough for the family and pretty enough for your guests with a hardworking bench-cum–plant stand. Look for a piece that’s low enough to sit on, roomy enough to store things under, and wide enough for both drop-and-go items and a few pots. Be careful to consider who uses this space when choosing containers: low, wide, nonbreakable pots (such as the brass vase holding a gardenia plant, opposite, on the right side of the bench) will better serve a bustling family because they won’t tip or break.
To re-create this look, choose a long-lasting floor plant, like this ‘Alii’ ficus (opposite, far left), as a visual anchor for the design. It’s a strong focal point that provides a backdrop for the more delicate plants and nicely frames the bench. Then fill the back of the bench with ephemeral, fragrant plants (such as orchids, jasmine, and gardenias). Their wonderful smell will fortify you as you leave and welcome you home upon your return. (After they’ve finished blooming, put them somewhere less conspicuous where you may care for them until they rebloom—some varieties can even handle being outside.)
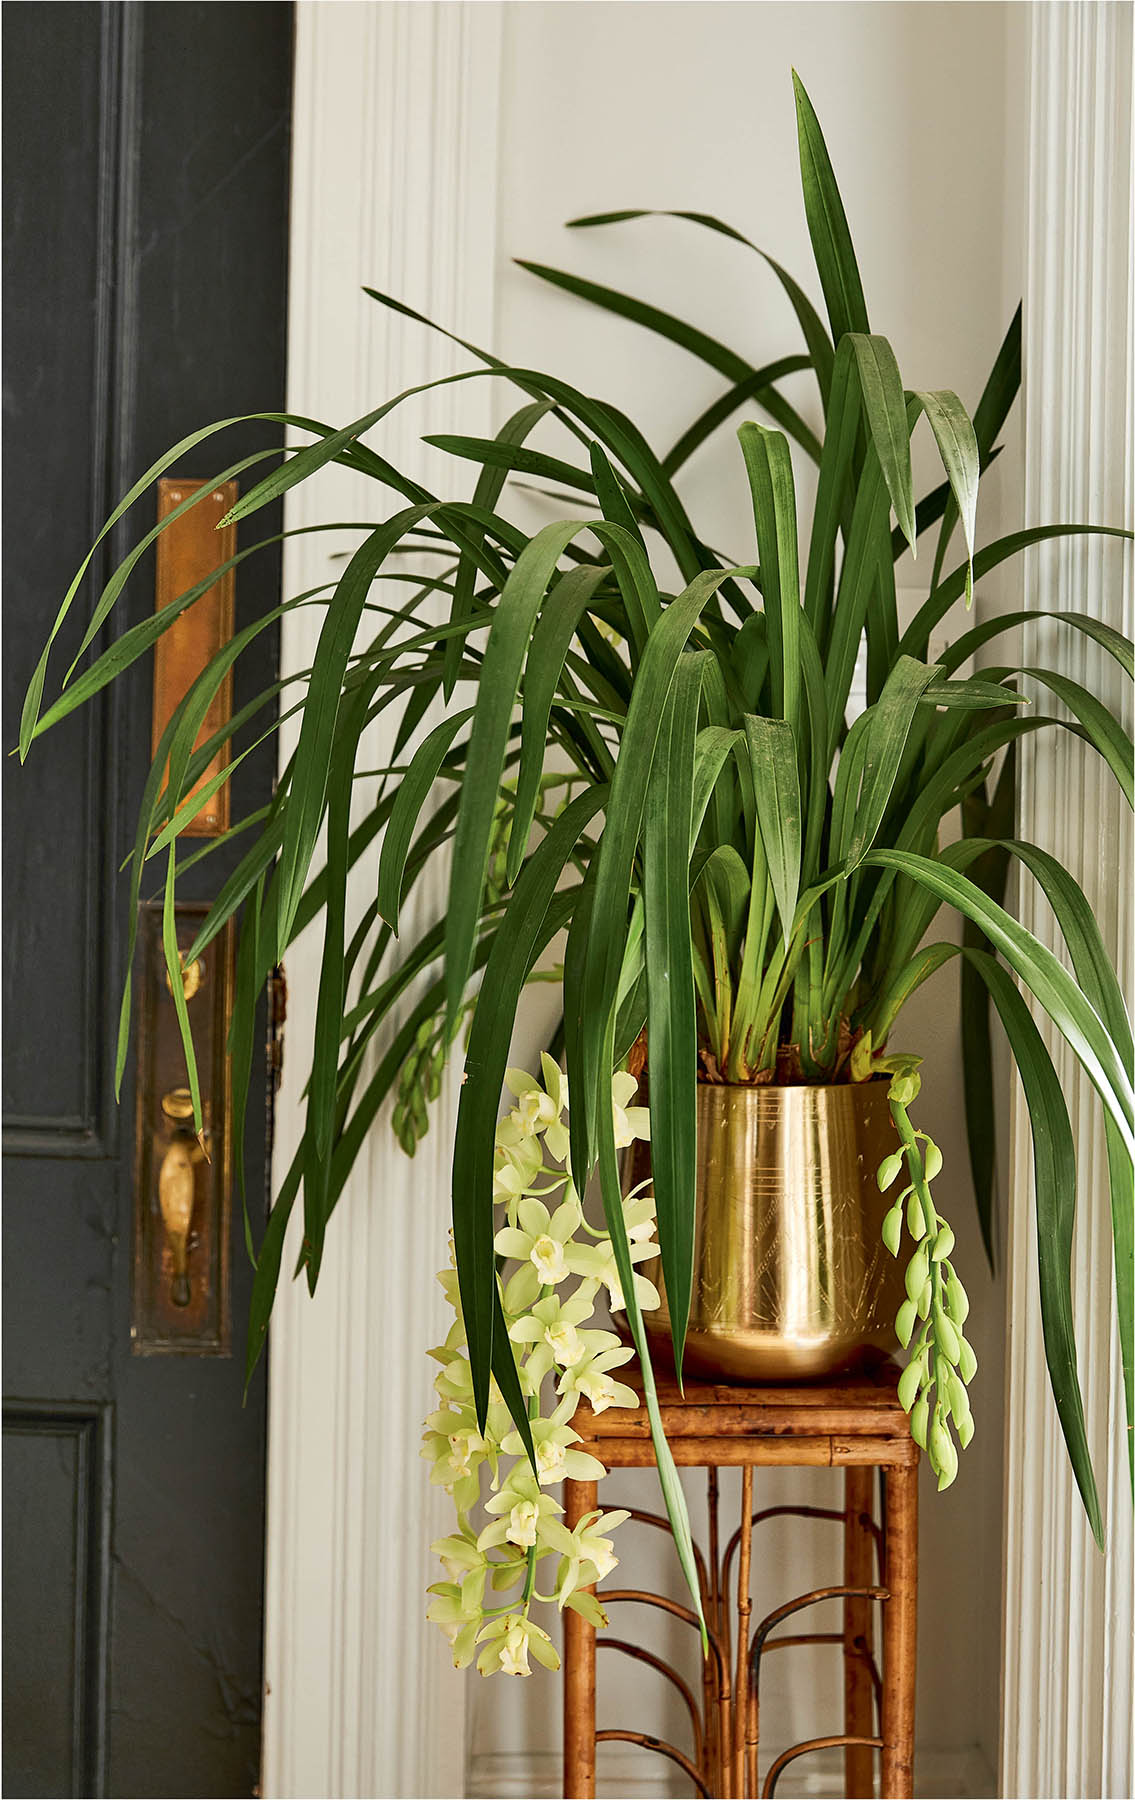
Rise and Shine: Another solution for adding greenery in a small, busy space is a narrow plant stand like this one, which raises the plant to eye level and keeps draping flowers and leaves from touching the ground. Here a blooming cymbidium orchid adds a pop of color to lead the eye to the front door and softens the edge of the doorframe.
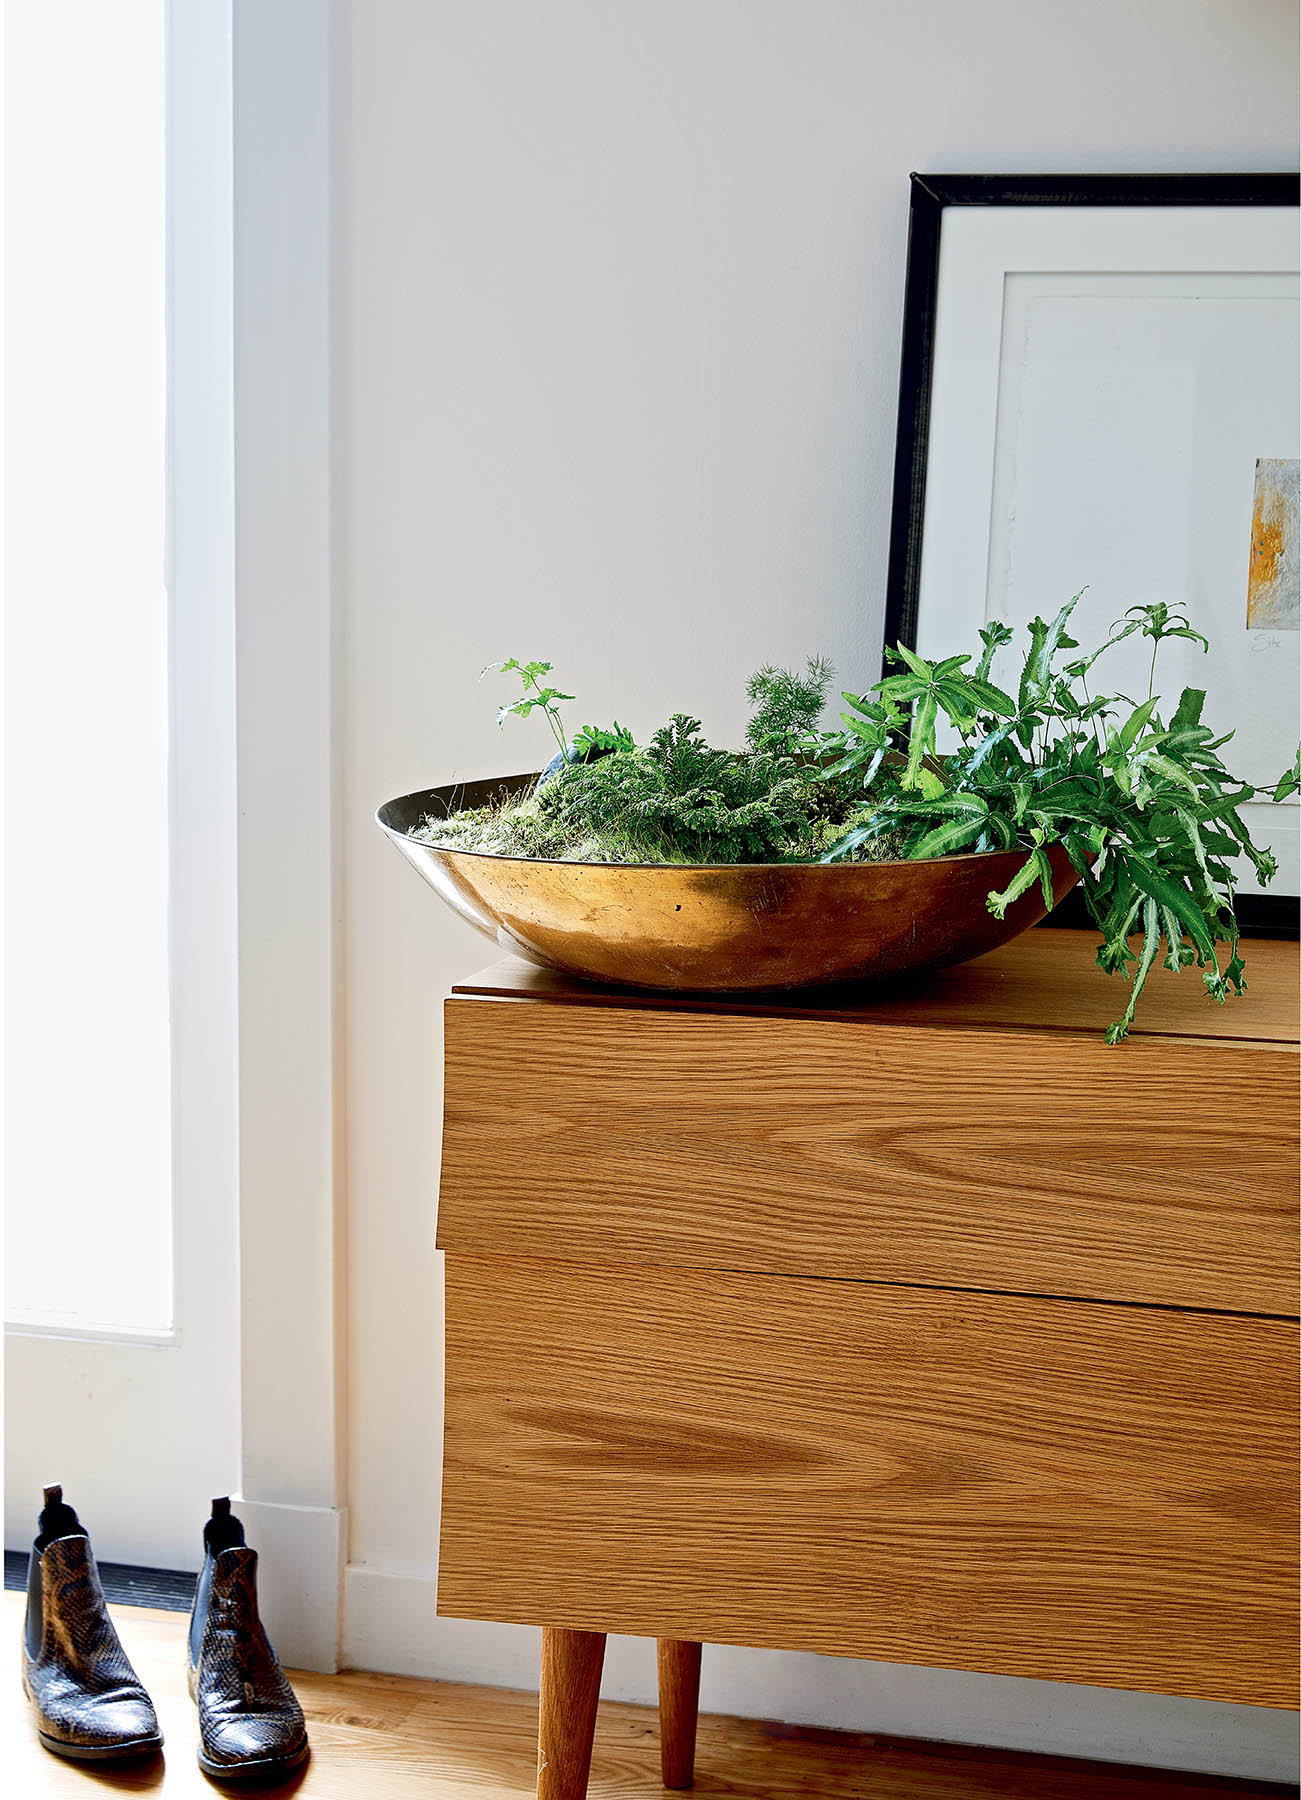
This large brass bowl could be considered much too large for a small table, and it would be overpowering if it were filled with big, colorful flowers. But despite the bowl’s size, the low mound of greenery inside means it fits the bill here quite nicely.
A Zen Entry
To turn your entry into a quiet retreat from a busy world, keep your planting simple. Choose soft shapes, a harmonious and subdued color palette, and an unobtrusive container, and be sure to maintain an open path that allows for passing by with ease. This design takes its inspiration from the Saihoji Kokedera (moss temple) garden in Kyoto, which is mostly swaths of green mosses and where visitors instantly feel relaxed upon entering through the garden gates. To mimic that calming experience at home, display a prepotted bonsai tree, or re-create this mini Japanese landscape with a handful of easy-to-find plants.
What You’ll Need:
Ferns and mosses (pictured here: cretan brake fern, Sprengeri fern, spike moss, sheet moss, and mood moss)
Wide, shallow bowl
Potting mix
Smooth, protruding rock
1. Set the plants inside the bowl to plan the layout of the arrangement. Although it is the combination of all the plants that makes the design beautiful, the space that holds the subtle moss ripples is the most impactful feature. Let the tranquil power of the negative space radiate; be thoughtful and add other plants sparingly.
2. Soak the moss in water.
3. Fill the bowl about three-quarters of the way with potting mix—leave enough room so the plants and moss will rest below the rim when they’re added.
4. Add a few more scoops of soil and, with cupped hands, mold the soil piles to form tiny mounds.
5. Place the rock off-center in the bowl. Unpot and plant a small fern, tucking it in at the base of the rock as if it grew there naturally.
6. Plant the biggest fern at an angle, letting it drape over the edge of the bowl.
7. Grab clumps of the soaking moss and give each a squeeze to release the water. Gently rest the moss on the soil—mood moss naturally mounds and creates an undulating layer of green, but the mounds give any type of moss a lift. Tuck in a piece of sheet moss or any other kind of moss in the fall of the ripples to create a wave-like moss meadow.
8. To care for the arrangement, keep a spray bottle handy and mist daily with water. Bright or moderate light works well for this planting, but keep it out of direct sun.

A Low-Maintenance, High-Style Console
If a simple-yet-strong style statement with easy-peasy plants is what you’re after, ‘Janet Craig’ compacta dracaena, starfish sansevieria, and ‘Fernwood’ sansevieria (pictured opposite, on the bottom shelf) are calling your name. These plants tolerate low-light conditions and won’t require as frequent watering as many indoor plants. To introduce a rugged touch, stage them in an unconventional vessel like this vintage blacksmith bag (see more on staging). To add fragrance and a pop of color to your tabletop, pick up an impressive jewel-tone zygopetalum orchid (top left). These prefer a bit of light (though no direct sun) and weekly watering while in bloom. See below for two more winning options for your entry console.
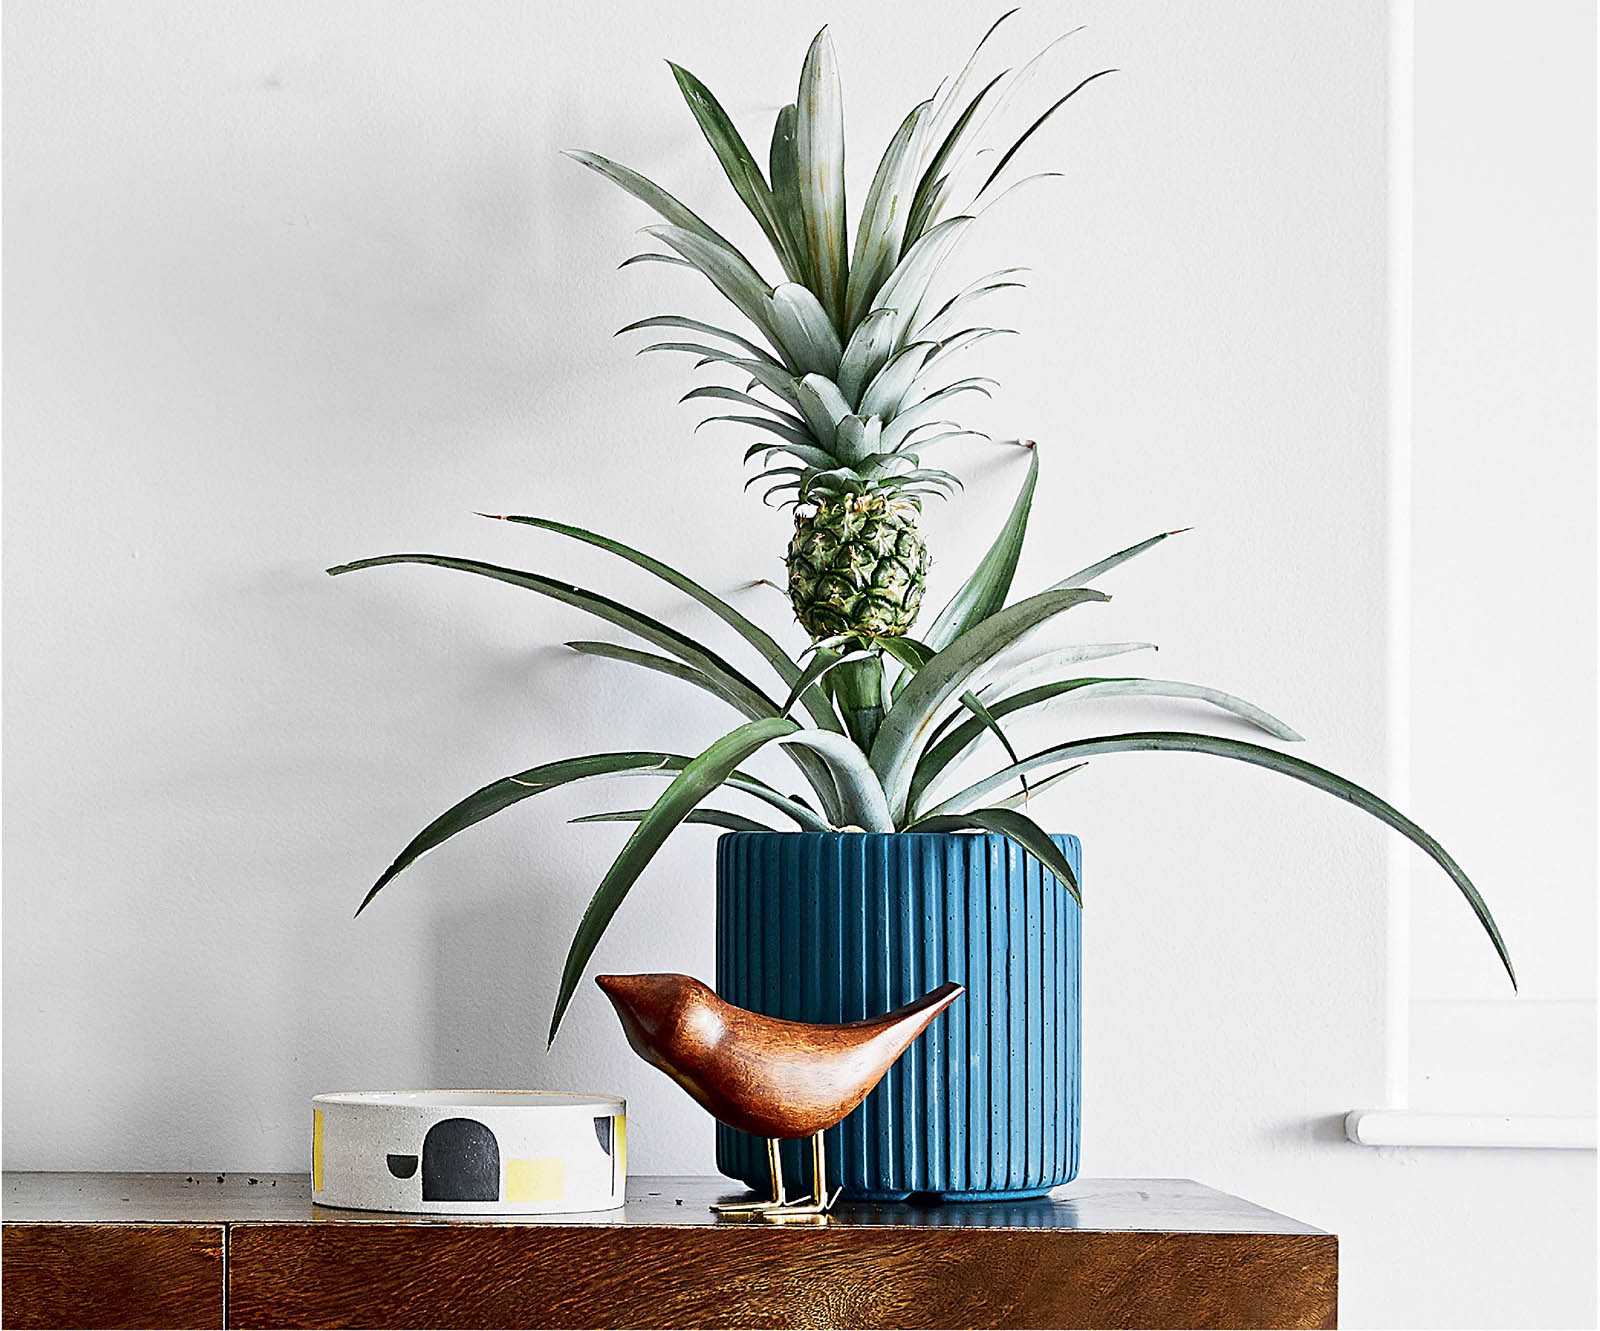
A Warm Welcome: There’s a reason pineapples are often represented on door knockers and welcome mats. They were once a luxurious rarity grown, displayed, and eaten only by the wealthy, who shared them with their most special guests. With such a storied history of hospitality, a potted pineapple plant makes for a fitting addition to your entry. Opt for a sturdy pot that will not only balance the weight of the growing fruit but also complement its color as it evolves from green to yellow. Pineapples need light and moist soil, but the reward goes beyond the symbolic welcome—after the fruit ripens to a golden yellow, cut it off and slice it open for a sweet treat!
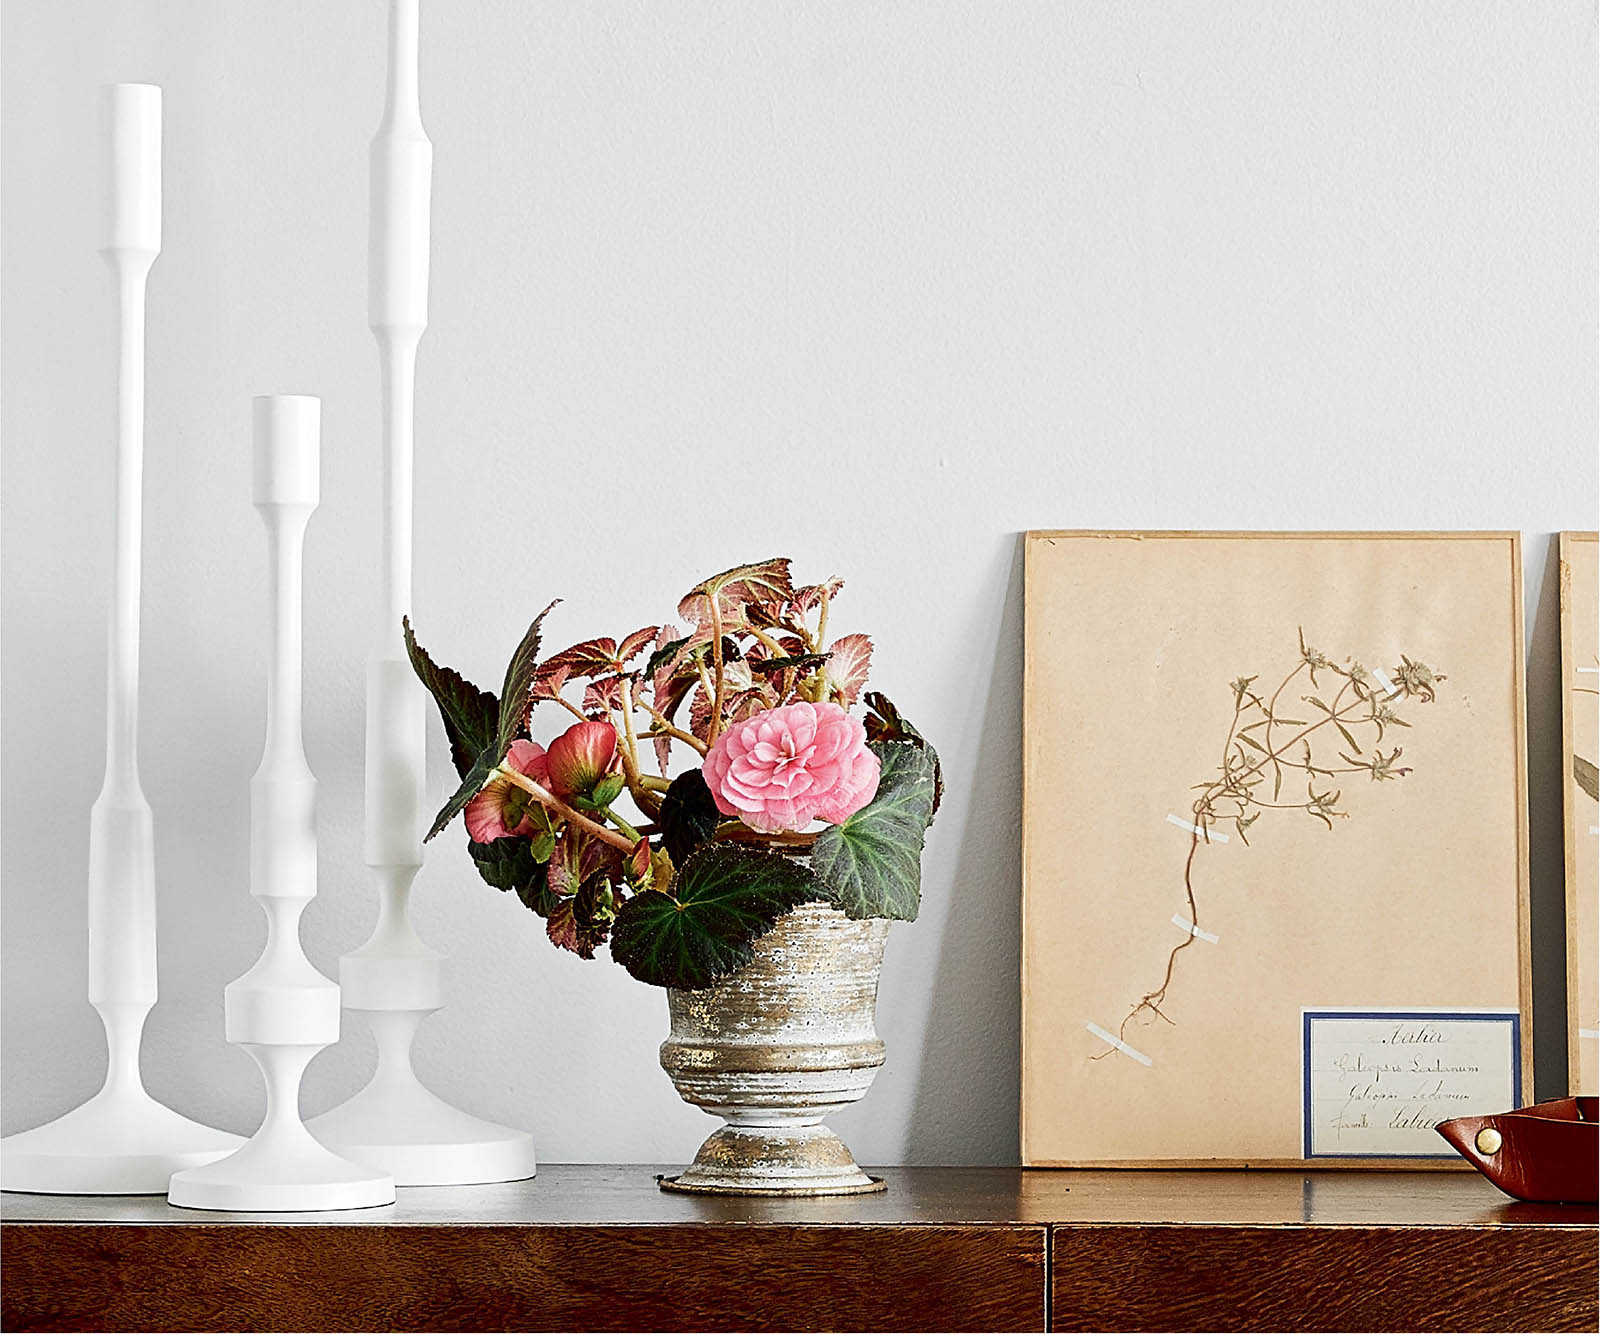
Feminine Florals: If you’re craving the beauty of a cut floral arrangement but want the ease and enduring quality of a living plant, opt for a blossoming specimen. Greenhouse plant nurseries use patterns of artificial light to trick plants into flowering at “off ” times of the year. Their techniques make it easy to pick up something in bloom year-round. Here the contrast of the fluffy rosettes of the tuberous begonia and the dark veiny backs of its leaves are oh-so gorgeous. Embrace the fancy, feminine nature of these flowers by choosing an antique-looking pot. Another option: begonia flowers are stunning when snipped and left to float in a bowl of water. Check out more blooming beauties.

This centerpiece includes (clockwise from the tall, arching orange-red blooms): Catatante orchid, Tillandsia superinsignis air plant, calla lily, aquamarine pilea, arrowhead plant, another aquamarine pilea, and hydrangea.
A Living Centerpiece
If your front door is used only for guests or otherwise isn’t called upon to handle shoes and keys and mail, you can create a space that’s all about being pretty and welcoming. Think of it as your personal grand hotel lobby and make a splash with it.
The “living centerpiece” shown here is like a flower arrangement, but with live plants. Instead of sharing a pot with other specimens, each plant is kept in its own pot and strategically placed inside the larger main vase, then the pots are covered with moss—a technique called staging. One benefit of staging is that plants with different water requirements can live longer together in the same vase because they can be watered individually. Another benefit is that when an individual plant no longer looks good, you can easily pull it out and pop in another. Though staging arrangements takes time, the outcome is a colorful, eye-catching centerpiece, perfect for a special occasion. Here are the fundamentals for creating your own.
1. Choose a vessel. Pedestal vases allow plants to dangle over their edges for added drama. Lay out the plants, each within its original grow pot, to ensure that the planter is large enough (grow pots are usually made of flexible plastic, so you can squish them a bit to fit them all in).
2. For added height and to prevent leaks, add waterproof stuffing (like Bubble Wrap) to the bottom of extra-deep vases. For another layer of water-leakage protection, set each grow pot inside an individual plastic liner before placing it inside the vase.
3. Think about where the arrangement will live. If it will sit in the open and all its sides will be seen, arrange the plants accordingly. If, however, it will be seen from only one angle, beef up that side and let the unseen area be plain.
4. Add the plants. For a dynamic, vibrant design, keep the viewer’s eye moving by arranging your plants in layers. Let one plant rise above the rest (here, the orange-red orchid bloom leads the eye upward). Tuck in other plants at various levels to add movement and liveliness. Create tension by crafting an asymmetrical yet balanced relationship with the plants (the left side of this arrangement is denser on the top, while the right is heavier on the bottom half).
5. Position some plants at an angle to interrupt the edge of the planter and create a natural look that will appear as if it has been growing there for years.
6. Once you’re happy with your composition, fill in any spaces with waterproof stuffing to secure the plants. Add a layer of moss over the top to cover the plastic pots. Water each plant carefully and separately. (A turkey baster works well for this.)

If plants have to be lined up, as they do in this terrarium, vary their height to add dimension and interest. Here a tiny rattan plant stand gave a lemon cypress (left) a boost; the paperwhite blooms (right) will begin to escape out of the opening as they grow taller. Also pictured: parallel peperomia (center).
Shed Some Light
If you’re an apartment dweller with a front door that leads to an interior hallway, or you otherwise have a very low- or no-light entry, consider hanging grow lights. The cheery contraption shown here is a hanging terrarium with programmable LED to mimic the sun, purchased from Modern Sprout’s online shop. It gives the impression of a bright window in a windowless room, subliminally connecting viewers to the outdoors, even though it’s all a mirage.
To create a similar setup yourself, pick up some full-spectrum LED grow strip lighting (narrow rolls of LED that can be rolled out and adjusted for easy adhesive-strip mounting) and attach the strip (light side downward) to the inside top of a shadow box, upcycled vintage fruit boxes, or any shelving unit. If you purchase a programmable LED unit, set a timer for the electric sunshine: most plants are happy with about twelve hours of light a day, though some sun-loving specimens like succulents need more and others will do well with less. See tips on how to know if your plant is getting the right amount of sunlight.
It’s All about Wavelength
Why can’t you use a regular incandescent lightbulb to give plants a boost? Light comes in various colors (wavelengths), and over the course of a day, sunlight goes through the entire color spectrum. The best way to replicate natural conditions for plants in the home is by exposing them to both the cool and warm lights that parallel the natural solar spectrum. Incandescent bulbs emit only the yellow and orange portions of the spectrum, while LEDs produce the full spectrum of light plants need to survive. As a bonus, LEDs’ low heat output means you can increase the light intensity by closing the distance between plants and light without burning the leaves.

Small Space, Big Impact
A Vertical Garden
If your entryway is a true pass-through, hang a living wall to keep plants in sight but out of the way and save all surface areas—including the floor—for other uses. Re-create the design pictured here using simple shelving brackets and long metal planters with these seven steps.
1. Choose the vessels. These low, long metal troughs can be found at flower shops or home-goods stores, but any lightweight vessels with flat backs will do. These were already lined with plastic, but if yours aren’t, waterproof them by lining them with cellophane and/or individual plastic liners.
2. Select the plants. Mix textures, add pops of bright yet related colors, and include a welcoming burst of fragrance. Avoid plants with suckers, such as creeping ficus, ivy, philodendrons, and similar plants if you don’t want them climbing up the wall and potentially causing the paint to chip. Here ‘Sharry Baby’ oncidium orchids, guzmania bromeliads, and jasmine grab the attention, with a combination of fine- and wide-leaved ferns as the backdrop.
3. Design the plantings. Keep the majority of the plants the same from container to container for visual continuity. Let a couple of the containers act as supporting players and keep them simple so that the others can shine for a more compelling design. Make sure the plants’ grow pots aren’t taller or wider than the vessel (cut off any offending plastic if one is slightly too tall).
4. To visualize where the planters will hang, measure each planter and create actual-size cutouts with scrap paper. Attach the cutouts to the wall with painter’s tape, then use the tape to vertically “draw” in a few plants’ heights. Step back and take a look. Stand at the front door and take another look. Move the cutouts around until your design is pleasing. For a lush look, hang the vases close to one another and fill the wall with green. Or go for a sparer design with just one or two vessels.
5. Hang each vase with a bracket (ideally, French cleat and a bottom spacer that allows for a plumb hang and ample air flow between the wall and the planter to prevent dampness and mold). It’s best if your living wall is easily detachable so you can clean away dust and bugs that linger and hide behind the installation.
6. Set each plant inside the vessel in its original plastic grow pot. If the grow pot is too short, prop it up with something waterproof like Bubble Wrap or an upside-down plastic cup.
7. Follow the care directions for each plant. If ease of care is important to you, be sure to choose plants with similar water and light requirements.