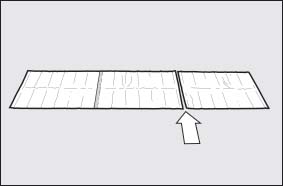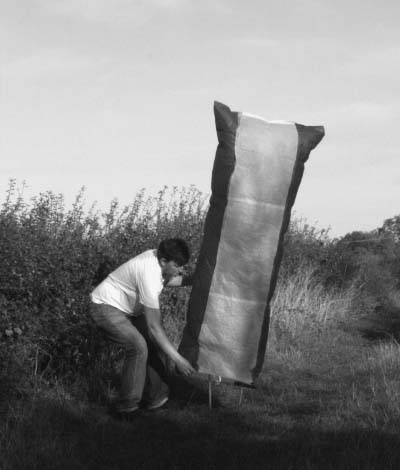
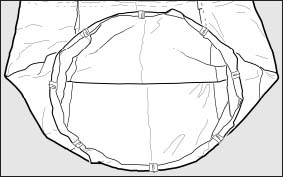
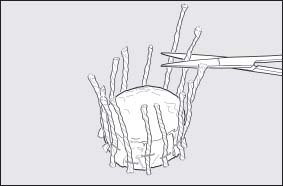
The UFO Balloon is a large, cylindrical balloon about 70 inches (178 cm) tall and about 25 inches (64 cm)in diameter. The top of the balloon is closed with a straight seam, like the bottom of a tube of toothpaste. This type of seam makes two points stick out like horns on either side of the balloon. The envelope is made from four flat rectangular panels, each made from three sheets of tissue paper glued together.
The bottom of the balloon is weighed down with a thick wire ring, bent around in a circle and simply held together with tape.
The envelope is very simple and quick to make and, as the large size and cylindrical shape means the envelope contains a lot of air, the UFO Balloon generates a lot of lift. The more lift the balloon can generate, the more fuel it can carry and the longer it can fly.
In the center of the ring is a special wax burner with 14 wicks and a wax reservoir that allows the balloon to fly for 20 minutes or more.
The cotton-ball burner commonly used on model balloons usually burns for around five minutes. If you make a cotton-ball burner larger it usually doesn’t burn for a longer time, just with a larger flame.
Modern, full-sized, hot air balloons store pressurized gas in cylinders away from the burner and have valves to control the feed to the burners. Model balloons cannot use anything as heavy or complicated as that.
But you can use an idea taken from an old-fashioned oil lamp. The oil lamp stores the fuel in a separate tin and uses a simple wick to control the amount of oil that gets into the flame through capillary action. The thickness of the wick and length of the wick exposed to the flame determine how fast the fuel is burnt.
The multiwick burner works the same way. The burner has an upturned cup in the center that stops wax vapor from burning right off the surface, so that the wax is fed into the flame only by the wicks. Because the flame is only fed by the wicks, you can adjust the amount of lift and the flight time by changing the number and size of the wicks.
If you need to increase the lift, you can increase the number of wicks, choose a thicker string for the wicks, make the wicks a bit longer, or reduce the amount of wax in the burner (to reduce weight). If you want to increase the flight time, you need to reduce the number of wicks, make the wicks from a thinner string, cut the wicks a bit shorter, or fill the burner with more wax.
If you make the flame too small, or fill the burner with too much wax, then the balloon will not fly. A typical UFO Balloon should be able to lift about 2 ounces (60 g) of wax, and to get the air in the balloon hot enough, a typical multiwick burner uses up 1 ounce (30 g) of wax every 17 minutes.
Since the very first balloon flights, pilots have competed to see how far they can travel in a balloon. The first manned balloon flight was in a hot air balloon and covered about 5½ miles (8.8 km). The first flight in a hydrogen gas balloon took place only weeks later and covered 22 miles (35 km). Hot air balloons were much easier to control than the early gas balloons. To make a hot air balloon rise, you simply stoked up the fire to make it burn hotter. To make the balloon sink, you let the fire burn lower, or raked out the hot coals and allowed them to fall away.
Despite the fact that a hot air balloon was easier to control, it suffered from two major problems when it came to setting distance records. First, you have to be able to carry enough fuel to keep the balloon flying. The farther you want to go, the more fuel you need to carry. Second, early hot air balloons regularly set fire to themselves. Sparks and embers carried up into the envelope would settle on the fabric of the envelope and start small fires. In fact, Pilatre de Rozier, the pilot on the first manned balloon flight, had to bring the balloon down early; the envelope had almost divided in two as there were so many holes scorched through it. Without parachutes or any means of escape, this made early hot air balloons incredibly dangerous.
Early gas balloons were also dangerous. In addition to the hazard from a large volume of explosive gas in the envelope above the pilot’s head, there were mechanical problems. Before reliable gas valves were designed, several balloons simply burst when they climbed too high. As a gas balloon flies higher into the atmosphere, the gas inside expands due to the reduced air pressure. The balloon pilot needs to release small amounts of gas to relieve the strain on the envelope. If the pilot does not do this or the gas valve jams, the envelope will rip apart.
Yet even if the valve is working, the pilot could release too much gas. The balloon would fall too fast, and the pilot would have to throw out sand ballast to slow the balloon down. If too much ballast is thrown out, then the balloon will start to rise again! Inexperienced balloon pilots could swing up and down releasing gas and ballast until either the envelope ripped or the balloon smashed into the ground.
De Rozier thought he had a solution. He combined the benefits of the gas balloon and the hot air balloon. He planned to cross the English Channel in a balloon that had two envelopes. On top there was a spherical gas balloon filled with hydrogen. The gas balloon was a bit smaller than normal, so that without any lift from the second envelope the balloon would descend slowly. The second envelope was a cylinder-shaped hot air balloon directly underneath the gas balloon. The idea was that the height of the balloon could be controlled by the hot air balloon in the usual way, but the amount of fuel needed would be greatly reduced, as most of the lift would be provided by the gas balloon.
Unfortunately, the design was a disaster. The attempt to cross the English Channel failed after only a few miles when the envelope caught fire. The hydrogen burst into flames and the whole balloon fell into the sea. De Rozier and all of the passengers died. After such a dramatic failure on its first flight, no one wanted to pursue de Rozier’s ideas and no more Rozier-type balloons were made for nearly 200 years.
Gas valve designs improved, pilots became more experienced, and ballooning became safer. But one big problem still remained: you can’t get a balloon to go where you want. It’s blown by the wind.
When you want to travel really long distances, you run into a big problem with the wind. Most weather systems are circular—wind spirals into low pressure areas and spirals out of high pressure areas. Any balloon released into the wind will follow a complex path, changing direction as it passes from one weather system to the next. In theory a balloon could even travel around in a giant circle and arrive back where it started. This makes long-distance travel at low altitude pretty random.
The answer came with the discovery of the jet streams. Jet streams are very strong, high-altitude winds that blow from west to east all of the way around the world. For example, the northern polar jet stream flows across the top half of the United States at a height of between 23,000 and 39,000 feet (7.0 to 11.9 km). The actual position of the jet stream weaves and wanders about—it is farther north in the summer and shifts to the south in the winter.
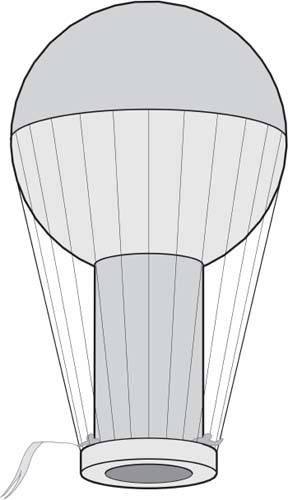
De Rozier’s long-distance balloon
Jet streams are caused by a combination of the heating effect of the sun and the rotation of the earth. The wind speeds are typically well above 100 mph (160 kph), and speeds of up to 247 mph (397 kph) have been measured. The jet streams are usually a couple of hundred miles wide but occupy a narrow band of altitude often less than 15,000 feet (4.6 km) from top to bottom.
But to travel in the jet stream you need a very special type of balloon. To keep the passengers alive, they need to be inside a pressurized cabin rather than an open basket. The balloon also needs to have precise control of altitude, even during the night.
Normally, gas balloons fly higher during the day as the sun warms the gas inside the envelope. When the sun sets, the gas cools and the balloon settles to a lower altitude. This would be a problem for a balloon riding in the jet stream. The balloon might drop too low and leave the bottom jet stream during the night and rise out of the top of the jet stream in the middle of the day.
To cope with the daily change in lift, long-distance balloon designers did two things. First, they improved the insulation of the balloon. They coated the envelope material with a layer of reflective aluminum. This reflected the heat of the sun during the day and meant that the gas warmed up more slowly. During the night the reflective layer also slowed down any heat loss from the gas, leading to much more even lift. They also made the balloons with a double skin, sometimes even blowing the air out from between the two skins during the day to keep the gas even cooler.
Second, they revived the Rozier balloon. Modern gas balloons use helium rather than hydrogen, and helium does not burn. Also, in a modern hot air balloon the hot air is generated using a propane burner. Propane burns very cleanly, producing just carbon dioxide and water vapor along with the hot air. This means that there are no embers or sparks to burn the fabric. Although the Rozier balloon still had to carry fuel for the burners, they needed much less than for a conventional hot air balloon. The hot air balloon part of the envelope gave pilots the control they needed to keep the balloon in the fast-moving air currents.
On March 1, 1999, Bertrand Piccard and Brian Jones took off from Chäteau-d’Oex in Switzerland in a giant Rozier balloon called Breitling Orbiter 3. Almost 20 days later it landed in the Egyptian desert. They had travelled 25,361 miles (40,815 km) and completed the first nonstop trip around the world in a balloon.
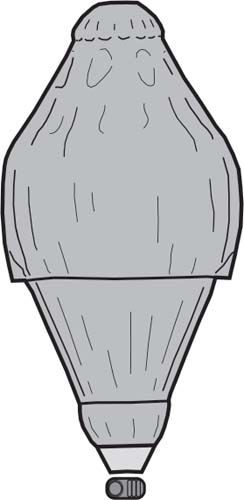
Breitling Orbiter 3
Adult supervision required
Materials
12 sheets of tissue paper, 20 inches by 26 inches (50 cm by 66 cm) or larger
1 cup (240 mL) diluted white craft glue (1 part PVA glue to 5 parts water)
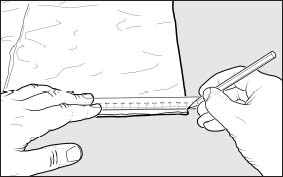
5 feet (1.5 m) iron wire, 16 gauge (1.6 mm diameter)
Thin clear tape, lightweight masking tape, or similar
Aluminum foil
7 feet (2.1 m) thin iron garden wire
Rubbing alcohol (a little may be needed to clean the wire)
Soft jute or cotton string
Tea light or nightlight
1 ounce (30 g) paraffin wax or beeswax
Tools
Narrow sponge or brush (to apply glue)
Ruler
Pen
Heavy books or food cans to keep the tissue paper from moving
Scissors
Clean sponge and dry cloth
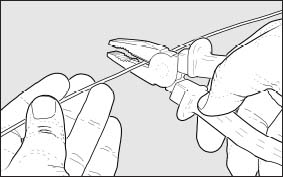
Pliers (with wire cutters)
8 small pieces of cardboard, 3/4 inches by 2 inches (2 cm by 5 cm), to hold ring in place
8 paper clips to hold ring in place
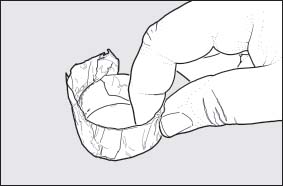
Strong plastic cup or glass with a 1½-inch (38 mm) diameter base to use as former for foil cup
Straight (dressmaker’s) pin
Large jar, about 4 inches (10 cm) in diameter, to melt wax
Heatproof gloves
Safety glasses
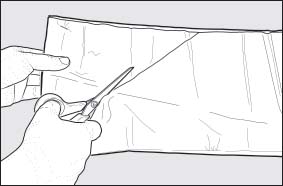
You will need a large, flat surface to build your balloon. You can use a table or the floor, but whatever you use you is going to get glue on it, so make sure the glue won’t damage it. You can help to protect the table or floor by cutting trash bags into large plastic sheets to cover the work area.
If you do cover your table with plastic sheets, you can leave the balloon on the table to dry, as white craft glue will not stick to the plastic used to make trash bags. The balloon will dry more slowly if you leave it on the table rather than hang it up, but it is a lot easier.
As with any tissue paper balloon, it is a good idea to have the bottom 12 inches (30 cm) of the balloon coated with a fire retardant. You need to coat the tissue paper before you create the balloon—see chapter 11 (page 221) for instructions.
When you make a tissue paper balloon, most of your time is spent waiting for the glue to dry. If you have a blow-dryer, you can make a balloon much more quickly by using the blow-dryer to blow warm air at the glued seams. Don’t use a fan heater or other room heater as they can set the tissue paper on fire.
What to Do If Things Go Wrong
Holes in the tissue paper are easy to fix, and the UFO balloon will still fly well. You can find repair instructions in chapter 11.
In fact, check chapter 11 if you have accidentally glued parts of the panels that shouldn’t be glued together, if you need a recipe for a different glue, if you cannot find the right materials, or if you have any other problems.
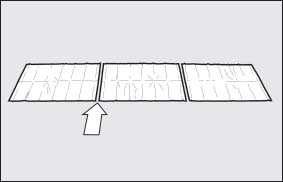

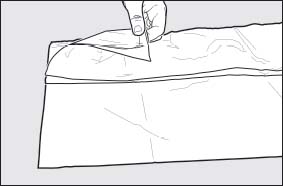
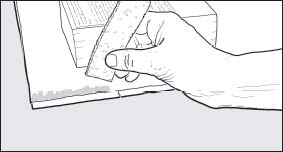
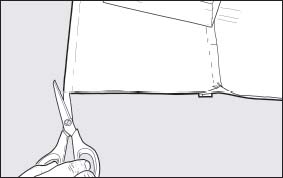
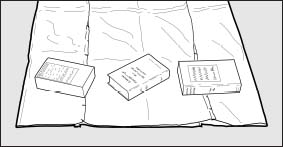
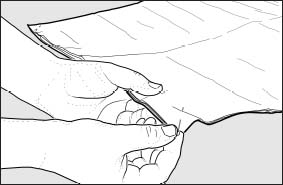
Repeat steps 1 through 9 until you have four panels each made from three tissue paper sheets.
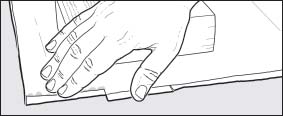

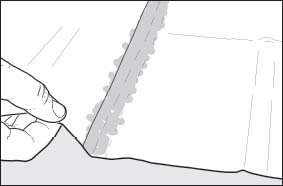
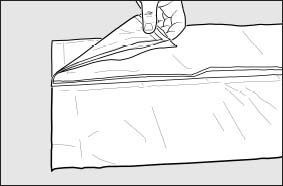
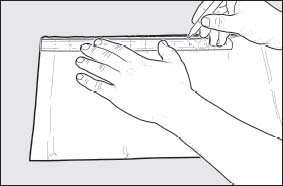
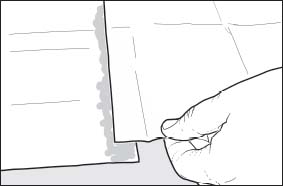
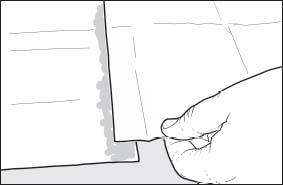
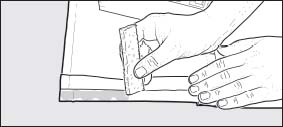
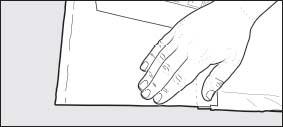
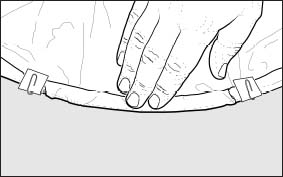
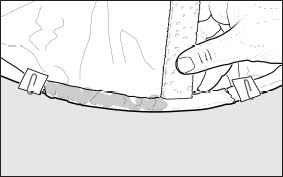
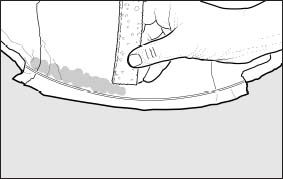
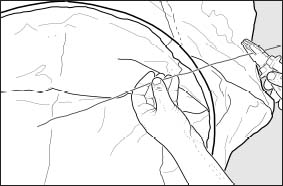
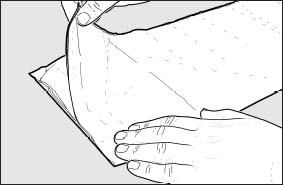
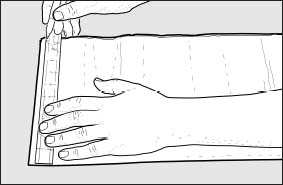
This will be more difficult than before, as the back edge of the top panel is already joined to the envelope and will not slide easily. Use the heavy books to hold the top panel in place to expose an even strip of the lower panel, even if this means that the back edge of the top panel lifts and moves about. You may have to put a book close to the edge to hold it down so that you can glue it.
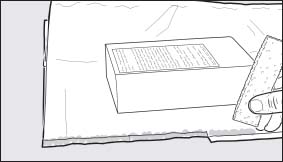
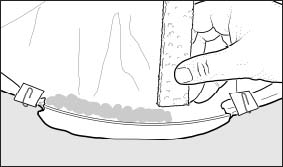
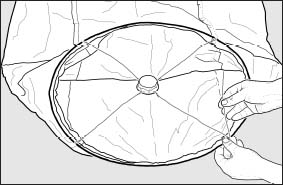
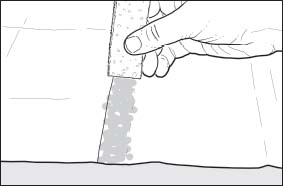
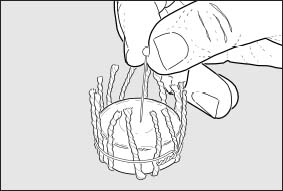
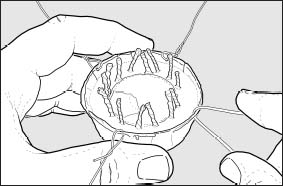
How to Fit a Thick Wire Base Ring
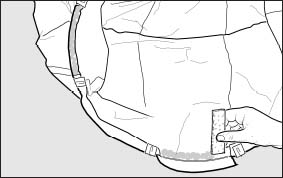
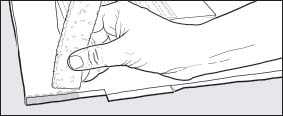
Hold the balloon up, turn it so that the next gap is toward you, and lay the balloon down onto the table or floor.
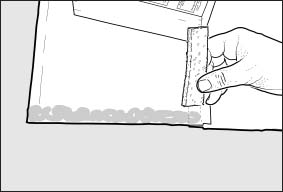
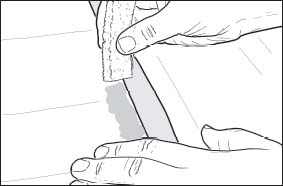
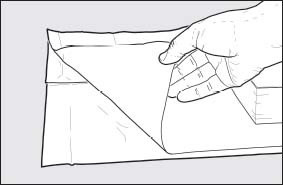
Repeat these steps until you have glued half of the gaps. Put the balloon to one side and prop the base ring up until the glued flaps are dry. Remove all of the cardboard fixings and paper clips.
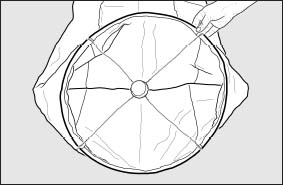
How to Make a Multiwick Burner
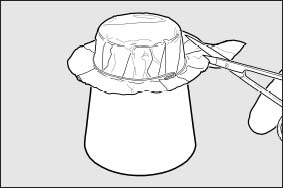
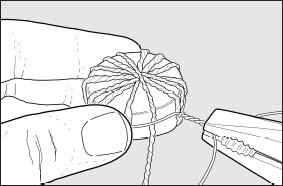
Put some blocks of wax into a jam jar and ask an adult to help you melt it. You can find out how to melt wax safely in chapter 11 (page 219).
What Next?
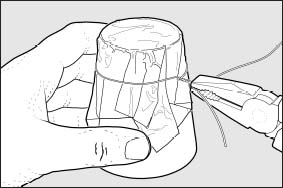
Check the envelope for any leaks by inflating it over an electric toaster or blow-dryer. Look for gaps in the seams or holes in the tissue paper and repair them (see instructions in chapter 11, page 211). Take care that the hot air from the toaster does not melt the wax or it could spill from the foil cup and may set the toaster on fire. Once you have fixed any leaks, the balloon is complete and ready to fly. See chapter 2 (page 33) for instructions on flying a balloon with a burner.
Applying a fire retardant to the tissue paper will almost completely eliminate burn-ups on launching. If the wind catches the burner flame and pushes it onto the side of the envelope, all that will happen is the flame will scorch a hole through the tissue paper.
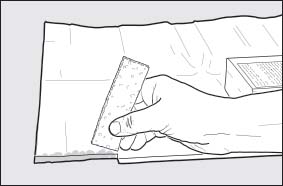
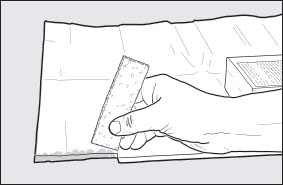
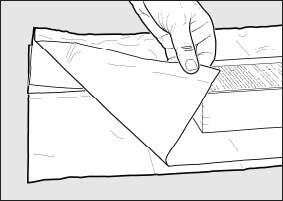
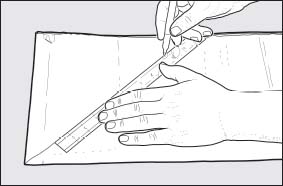
You can make a neater top to the UFO Balloon by cutting the panels to a point. Glue the tissue paper sheets together as described in steps 1 to 10 on pages 156–158.
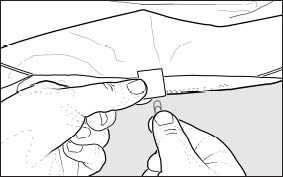
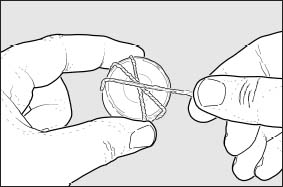
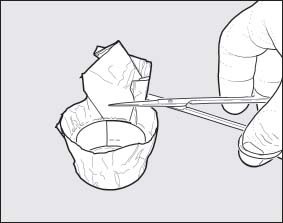
If you cannot find tea lights in your local store, you can make a great alternative multiwick burner out of cardboard and aluminum foil. You will need a mini stapler, foil, cardboard, scissors, string, and a straight pin.
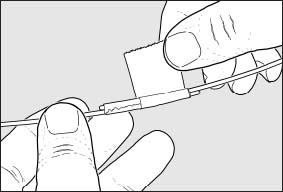
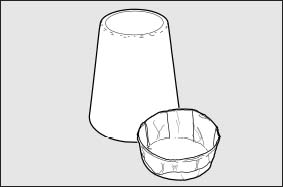
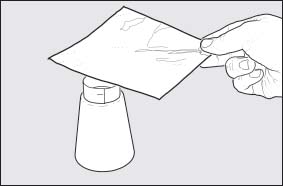
Make the foil cup as described in steps 41 to 44 on pages 167–168. Cut a strip of cardboard 3/4 inch (2 cm) wide from a cereal box.
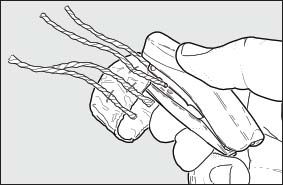
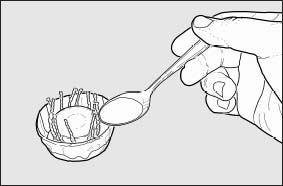
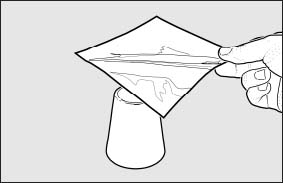
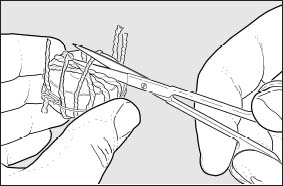
Filling the alternative multiwick burner with wax is easy. Grip the open edge of the burner carefully with a pair of pliers and dip the wicks into a jar full of molten wax to soak them. Set the burner aside to cool. Pour molten wax into the larger foil cup and lower the burner cup into place. Air should escape through the pricked holes and allow the burner cup to settle. Leave the burner assembly to cool and harden.