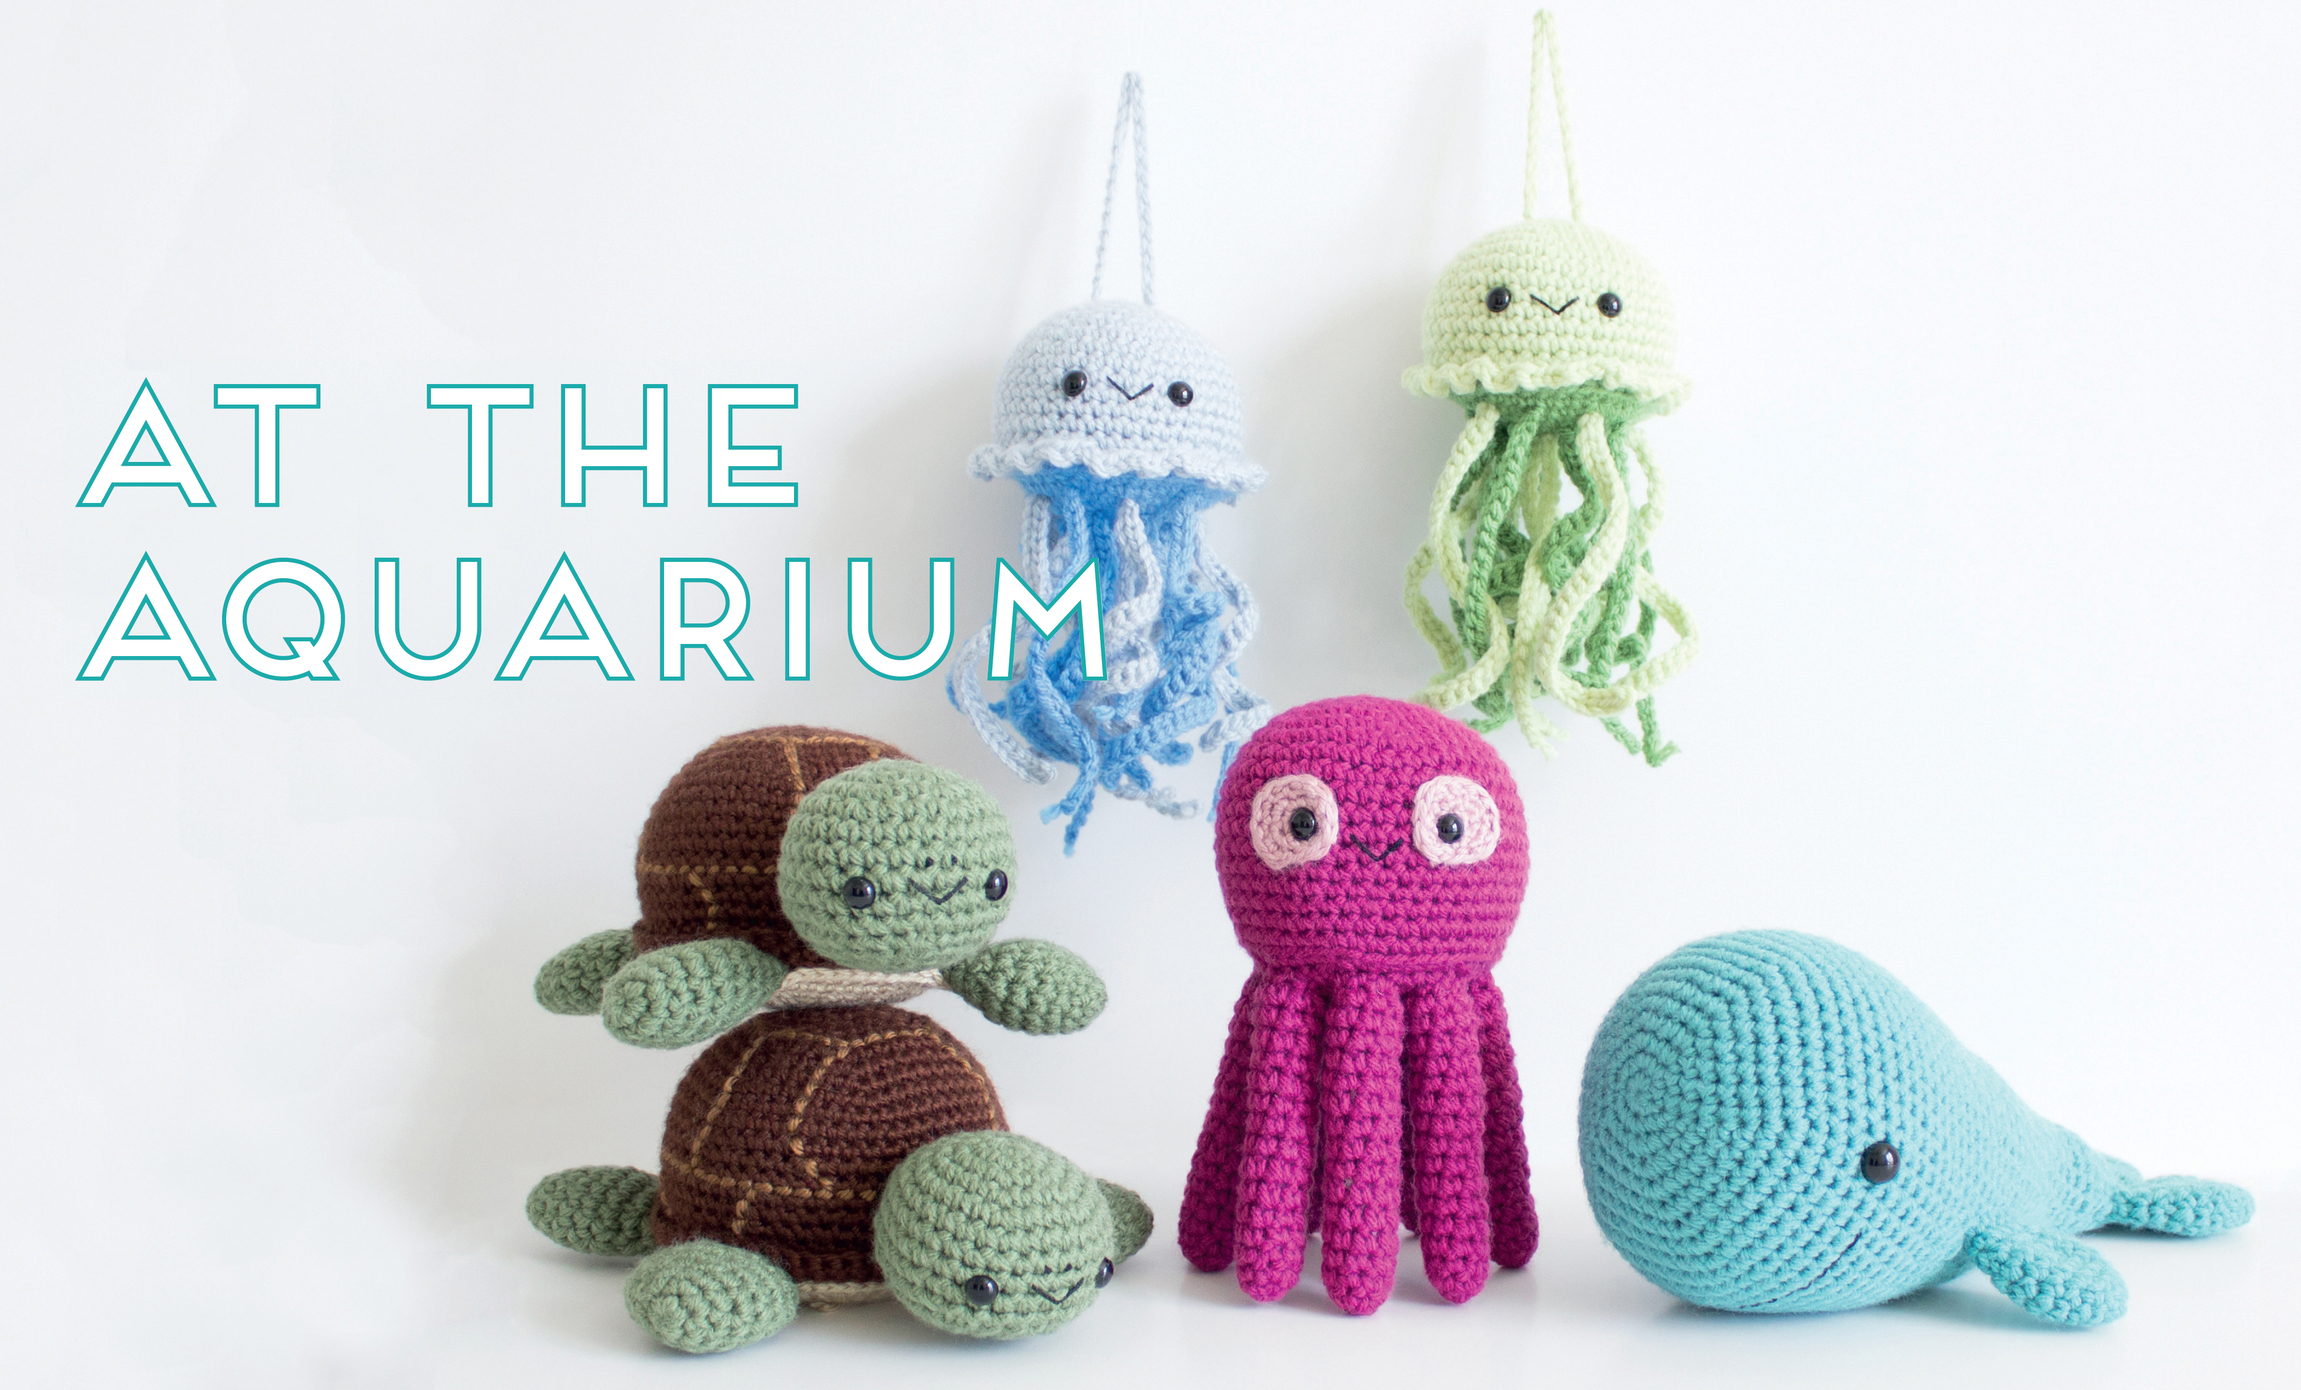


 FINISHED MEASUREMENTS
 Approx. 7 inches tall by 3.5 inches wide
 MATERIALS
 Worsted weight yarn: light green and dark green
 Size G/4.25mm crochet hook
 Pair of 9mm safety eyes
 Black embroidery floss and small embroidery needle
 Polyester fiberfill stuffing
 Yarn needle
 Scissors
 Stitch marker
 ABBREVIATIONS
 Mr - Magic ring
 R - Round
 Sc - Single crochet
 Sts - Stitches
 Inv Dec - Invisible decrease
 Hdc - Half double crochet
 Sl St - Slip stitch
 Ch - Chain
 PATTERN NOTES
 This pattern is crocheted in continuous rounds
Using light green yarn,
Round 1: 6 sc in magic ring (6 sts)
R2: 2 sc in each st around. (12 sts)
R3: *Sc 1, 2 sc in next st,* 6 times. (18 sts)
R4: *Sc 2, 2 sc in next st,* 6 times. (24 sts)
R5: *Sc 3, 2 sc in next st,* 6 times. (30 sts)
R6: *Sc 4, 2 sc in next st,* 6 times. (36 sts)
R7: *Sc 5, 2 sc in next st,* 6 times. (42 sts)
R8-14: Sc 42.
R15: Through FRONT loops only, *Sc 1, hdc 1, sc 1 in one st, sc 1 in next st,* 21 times. (84 sts)
Sl st and fasten off.
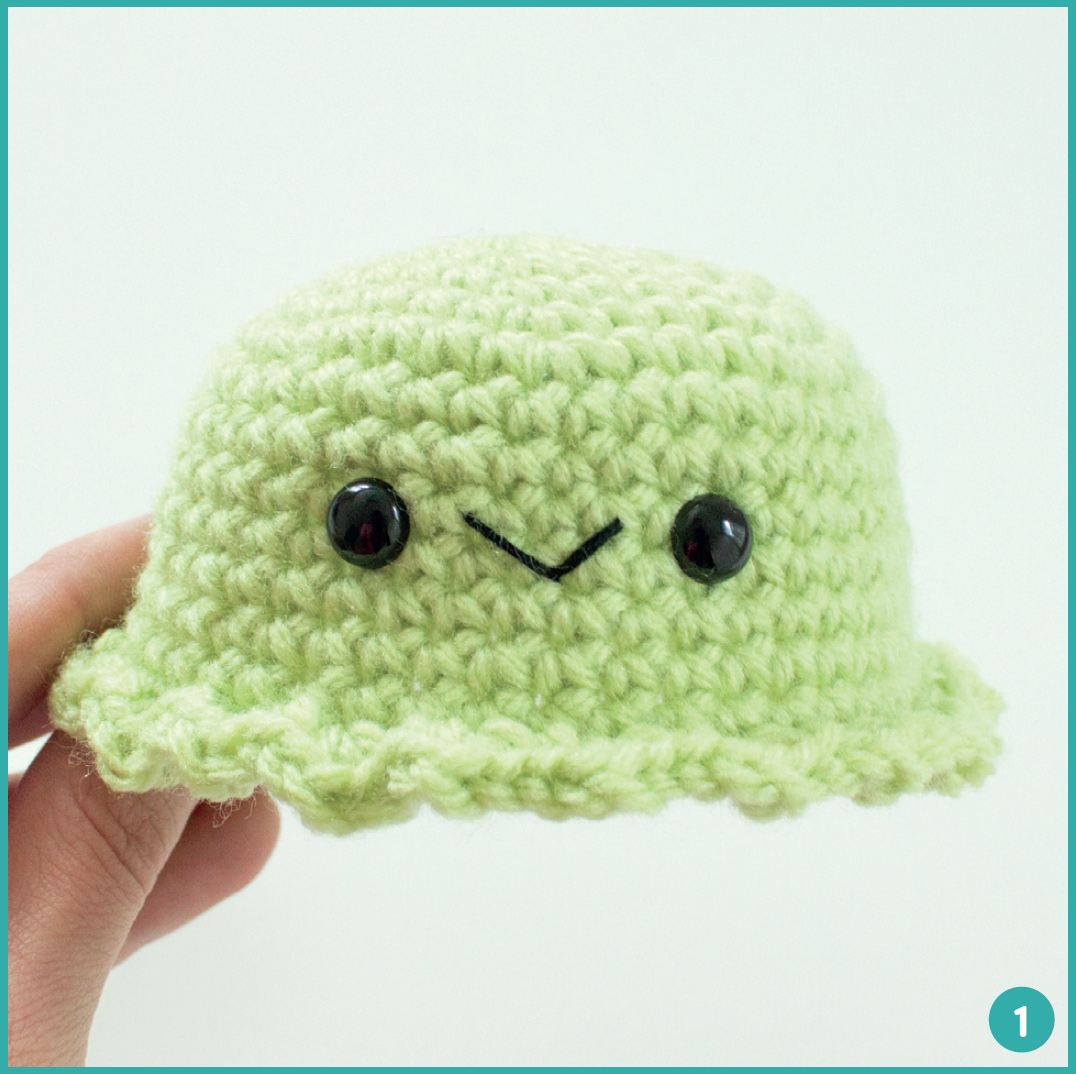
Add safety eyes and stitch mouth (photo 1).
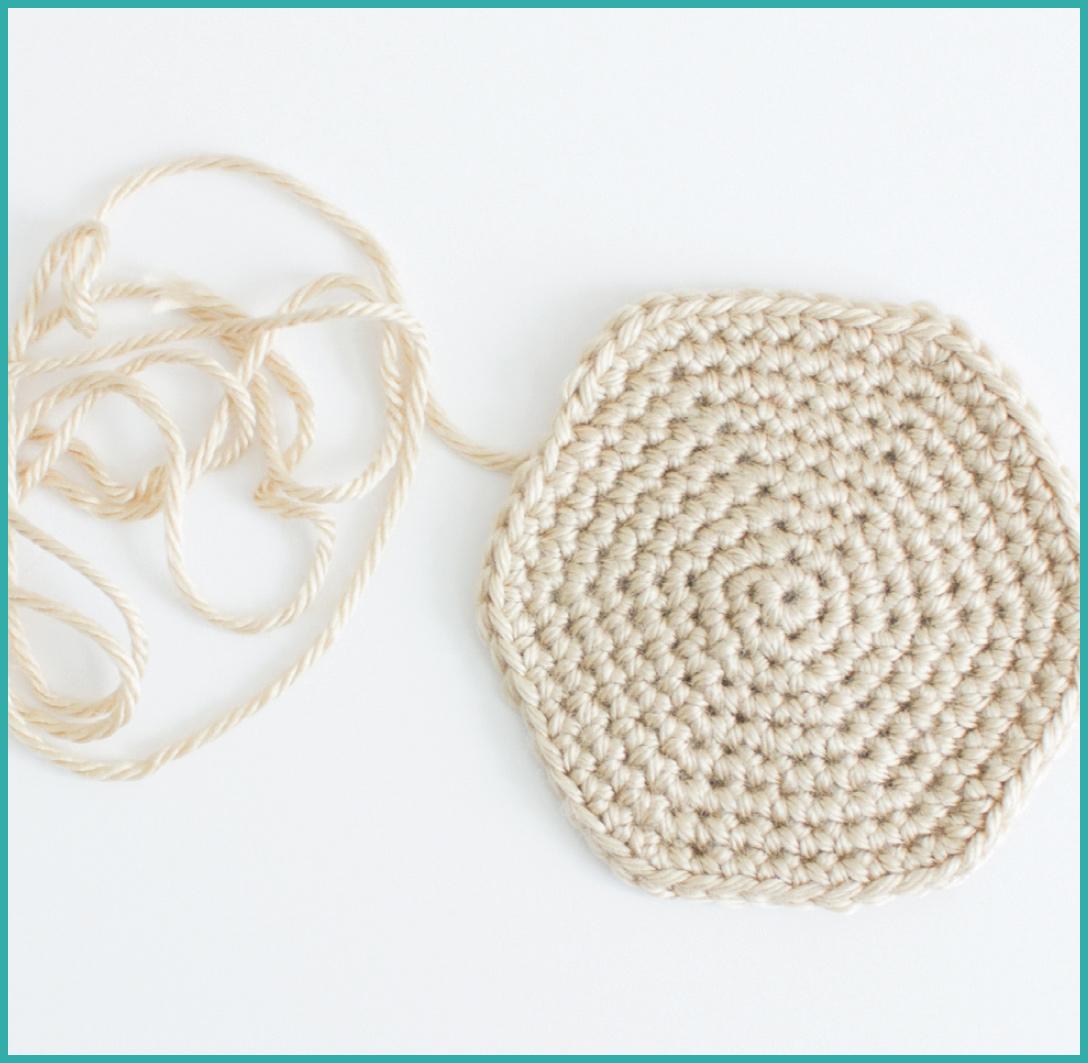
Using dark green yarn,
Round 1: 6 sc in magic ring (6 sts)
R2: 2 sc in each st around. (12 sts)
R3: *Sc 1, 2 sc in next st,* 6 times. (18 sts)
R4: *Sc 2, 2 sc in next st,* 6 times. (24 sts)
R5: *Sc 3, 2 sc in next st,* 6 times. (30 sts)
R6: *Sc 4, 2 sc in next st,* 6 times. (36 sts)
R7: *Sc 5, 2 sc in next st,* 6 times. (42 sts)
Fasten off and leave a tail for sewing (photo 2).

THICK TENTACLES: MAKE 10 (5 of each color) (photo 3)
Ch 30, then sl st in 2nd ch from hook and in each ch across (29 total).
Fasten off and leave a tail.

SKINNY TENTACLES: MAKE 8 (5 dark green, 3 light green) (photo 4)
Ch 24 and fasten off. Leave a tail.

ATTACHING TENTACLES (working from the center of the belly):
Attach the 3 skinny light green tentacles evenly around the magic ring of the belly (photo 1).

Next, attach 5 of the thick dark green tentacles, placing them evenly around the 3 skinny ones (photo 2).

Place the remaining 5 thick light green tentacles evenly around the belly (about 2 rows from the edge of the belly, photo 3).

Attach the 5 remaining skinny dark green tentacles, positioning them in the middle of the thick light green tentacles (photo 4).

Make sure to securely knot the loose strands on the inside of the belly. Trim strands (photo 5).

TO FINISH THE JELLYFISH:
To attach the belly to the body of the jellyfish, weave the yarn needle through the last row of stitches on the belly and the back loops from R15 on the body (photos 6-9).
Stuff with fiberfill before closing.

OPTIONAL:
If you would like to have a hanging jellyfish, simply make one more skinny tentacle. With a yarn needle, insert it into a stitch by the magic ring and bring out on the opposite side (photos 10 & 11). Tie a knot on the tail ends and trim ends (photo 12). Then gently pull chain through so that the knot is hidden inside the body (photos 13 & 14).


 FINISHED MEASUREMENTS
 Approx. 7 inches tall by 3.5 inches wide
 MATERIALS
 Worsted weight yarn: magenta and pink
 Size G/4.25mm crochet hook
 Pair of 9mm safety eyes
 Black embroidery floss and small embroidery needle
 Polyester fiberfill stuffing
 Yarn needle
 Scissors
 Stitch marker
 Straight pins (optional but very helpful when assembling the arms)
 ABBREVIATIONS
 Mr - Magic ring
 R - Round
 Sc - Single crochet
 Sts - Stitches
 Inv Dec - Invisible decrease
 Sl St - Slip stitch
 PATTERN NOTES
 This pattern is crocheted in continuous rounds
Using pink yarn,
Round 1: 4 sc in magic ring (4 sts)
R2: 2 sc in each st around. (8 sts)
R3: *Sc 1, 2 sc in next st,* 4 times. (12 sts)
Fasten off and leave a tail for sewing. Place a safety eye between round 1 and 2, leave backing off (photo 1).
Set aside.

Using magenta yarn,
Round 1: 6 sc in magic ring (6 sts)
R2: 2 sc in each st around. (12 sts)
R3: *Sc 1, 2 sc in next st,* 6 times. (18 sts)
R4: *Sc 2, 2 sc in next st,* 6 times. (24 sts)
R5: *Sc 3, 2 sc in next st,* 6 times. (30 sts)
R6: *Sc 4, 2 sc in next st,* 6 times. (36 sts)
R7: *Sc 5, 2 sc in next st,* 6 times. (42 sts)
R8-18: Sc 42.
Attach the eye sockets (photo 2). Weave in the tail from the start of the magic ring, then sew the socket on with the ending tail. Add safety backing. Leave a space in between for sewing on the mouth (photo 3).

R19: Through BACK loops only, *Sc 5, inv dec 1,* 6 times. (36 sts)
R20: *Sc 4, inv dec 1,* 6 times. (30 sts)
R21: *Sc 3, inv dec 1,* 6 times. (24 sts)
R22: *Sc 2, inv dec 1,* 6 times. (18 sts)
Stuff body.
R23: *Sc 1, inv dec 1,* 6 times. (12 sts)
R24: Inv dec around 6 times. (6 sts)
Fasten off and close piece.
Using magenta yarn,
Round 1: 4 sc in magic ring (4 sts)
R2: 2 sc in each st around. (8 sts)
R3-16: Sc 8. Add fiberfill as you go.
Fasten off and leave a tail for sewing.
Sew the arms around the edge of the body. Make sure to space them evenly so they all fit (photos 5-8).


 FINISHED MEASUREMENTS
 Approx. 6.5 inches long by 7 inches wide
 MATERIALS
 Worsted weight yarn: green, dark brown, light brown, and tan
 Size G/4.25mm crochet hook
 Pair of 9mm safety eyes
 Black embroidery floss and small embroidery needle
 Polyester fiberfill stuffing
 Yarn needle
 Scissors
 Stitch marker
 ABBREVIATIONS
 Mr - Magic ring
 R - Round
 Sc - Single crochet
 Sts - Stitches
 Inv Dec - Invisible decrease
 Sl St - Slip stitch
 PATTERN NOTES
 This pattern is crocheted in continuous rounds
Using tan yarn,
Round 1: 6 sc in magic ring (6 sts)
R2: 2 sc in each st around. (12 sts)
R3: *Sc 1, 2 sc in next st,* 6 times. (18 sts)
R4: *Sc 2, 2 sc in next st,* 6 times. (24 sts)
R5: *Sc 3, 2 sc in next st,* 6 times. (30 sts)
R6: *Sc 4, 2 sc in next st,* 6 times. (36 sts)
R7: *Sc 5, 2 sc in next st,* 6 times. (42 sts)
R8: *Sc 6, 2 sc in next st,* 6 times. (48 sts)
R9: *Sc 7, 2 sc in next st,* 6 times. (54 sts)
Fasten off and leave a long tail for sewing.
Using green yarn,
Round 1: 6 sc in magic ring (6 sts)
R2: 2 sc in each st around. (12 sts)
R3: *Sc 1, 2 sc in next st,* 6 times. (18 sts)
R4: *Sc 2, 2 sc in next st,* 6 times. (24 sts)
R5: *Sc 3, 2 sc in next st,* 6 times. (30 sts)
R6-10: Sc 30.
R11: *Sc 3, inv dec 1,* 6 times. (24 sts)
Add safety eyes and stitch mouth. For the nose, make two little knots above the mouth.
R12: *Sc 2, inv dec 1,* 6 times. (18 sts)
R13: *Sc 1, inv dec 1,* 6 times. (12 sts)
Stuff head.
R14: Inv dec around 6 times. (6 sts)
Fasten off and close piece.

Using green yarn,
Round 1: 6 sc in magic ring (6 sts)
R2: 2 sc in each st around. (12 sts)
R3: Sc 12.
R4: *Sc 1, 2 sc in next st,* 6 times. (18 sts)
R5-7: Sc 18.
R8: *Sc 1, inv dec 1,* 6 times. (12 sts)
R9: Sc 12.
R10: *Sc 1, inv dec 1,* 4 times. (8 sts)
Fasten off and trim tail. Add a little bit of stuffing.

Using green yarn,
Round 1: 5 sc in magic ring (5 sts)
R2: 2 sc in each st around. (10 sts)
R3: Sc 10.
R4: *Sc 1, 2 sc in next st,* 5 times. (15 sts)
R5-7: Sc 15.
R8: *Sc 1, inv dec 1,* 5 times. (10 sts)
R9: Sc 10.
R10: *Sc 1, inv dec 1,* 3 times, sl st in last stitch. (7 sts)
Fasten off and trim tail. Add a little bit of stuffing.

Using dark brown yarn,
Round 1: 6 sc in magic ring (6 sts)
R2: 2 sc in each st around. (12 sts)
R3: *Sc 1, 2 sc in next st,* 6 times. (18 sts)
R4: *Sc 2, 2 sc in next st,* 6 times. (24 sts)
R5: *Sc 3, 2 sc in next st,* 6 times. (30 sts)
R6: *Sc 4, 2 sc in next st,* 6 times. (36 sts)
R7: *Sc 5, 2 sc in next st,* 6 times. (42 sts)
R8: *Sc 6, 2 sc in next st,* 6 times. (48 sts)
R9: *Sc 7, 2 sc in next st,* 6 times. (54 sts)
R10-19: Sc 54.
R20: Sc 54 through FRONT loops only.
R21: Sc 54.
Fasten off and weave in end.
FOR SHELL DETAIL:
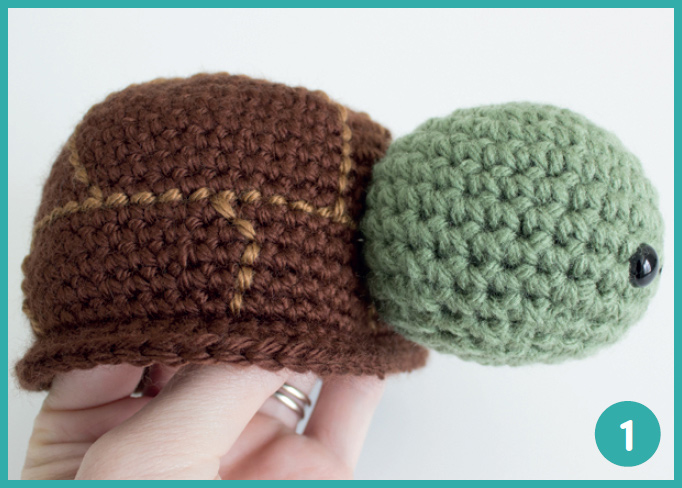
With light brown yarn and a yarn needle, back stitch a hexagon between rounds 5 and 6 (photo 1).

Next, count 8 rows down until you reach rounds 13 and 14. Back stitch a straight line around the whole shell and tie off (photo 2).

On each point of the hexagon, back stitch a line on a slight angle, about 4 stitches. Then turn and back stitch down until you reach the straight line (photo 3). We’re essentially making a wide V shape that is on its side. Make sure that every other line is the opposite, almost like making another hexagon in between the straight line and original hexagon (photos 4 & 5).

For the last row, repeat the steps for making another slight angle, this time going below the straight line. Make sure every other line is opposite like in step 3. Back stitch lines and make sure to stop where R20 from the shell begins (photos 6 & 7).

With green yarn and a yarn needle, sew the turtle head to the shell. Place the head about 2 rows above R20 from the shell (photo 1).
Place the front legs at the top of the belly on the corners, leaving one side open in between them (photo 2). With tan yarn, sew legs to the belly with a back stitch. Make sure to sew them on the inside of the body (the part that won’t be showing, photos 3 & 4).

Repeat for the back legs, this time working on the bottom half of the body. Leave one side open between the back legs, just like the front legs (photo 5).

To attach the belly to the shell, first make sure the head is centered between the front legs (photo 6). With tan yarn, begin to weave the yarn needle back and forth through the belly and shell. To create invisible stitching while sewing, weave the yarn needle through the last row of stitches on the belly and the back loops from R20 on the shell (photos 7 & 8). When you reach the legs, do the same technique but this time the leg will be included (photos 9-11).
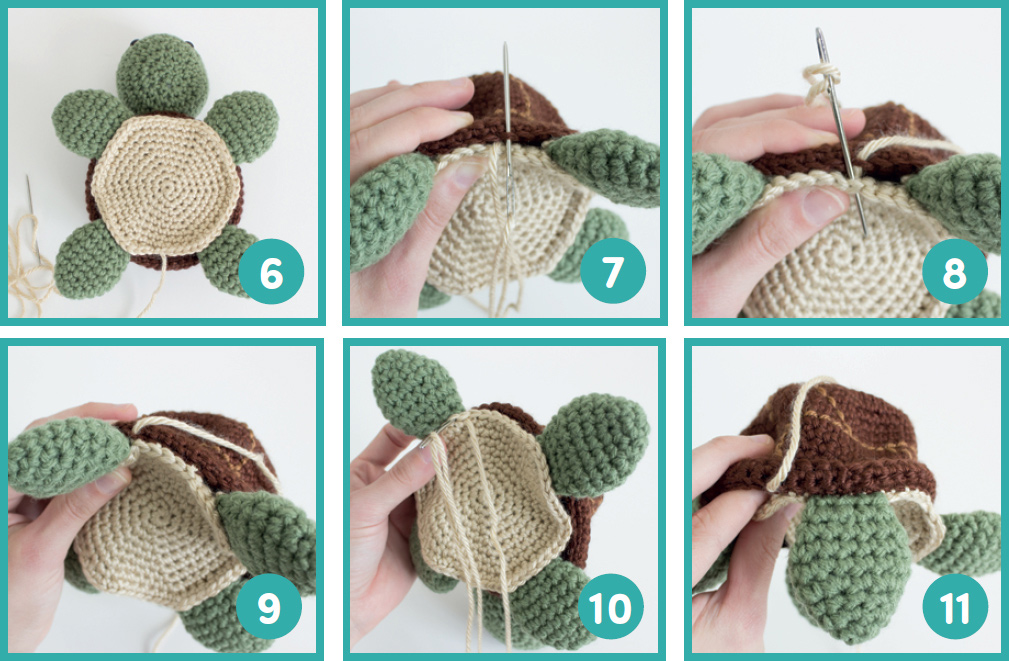
Make sure to stuff the shell with fiberfill before closing up the hole (photos 12 & 13).

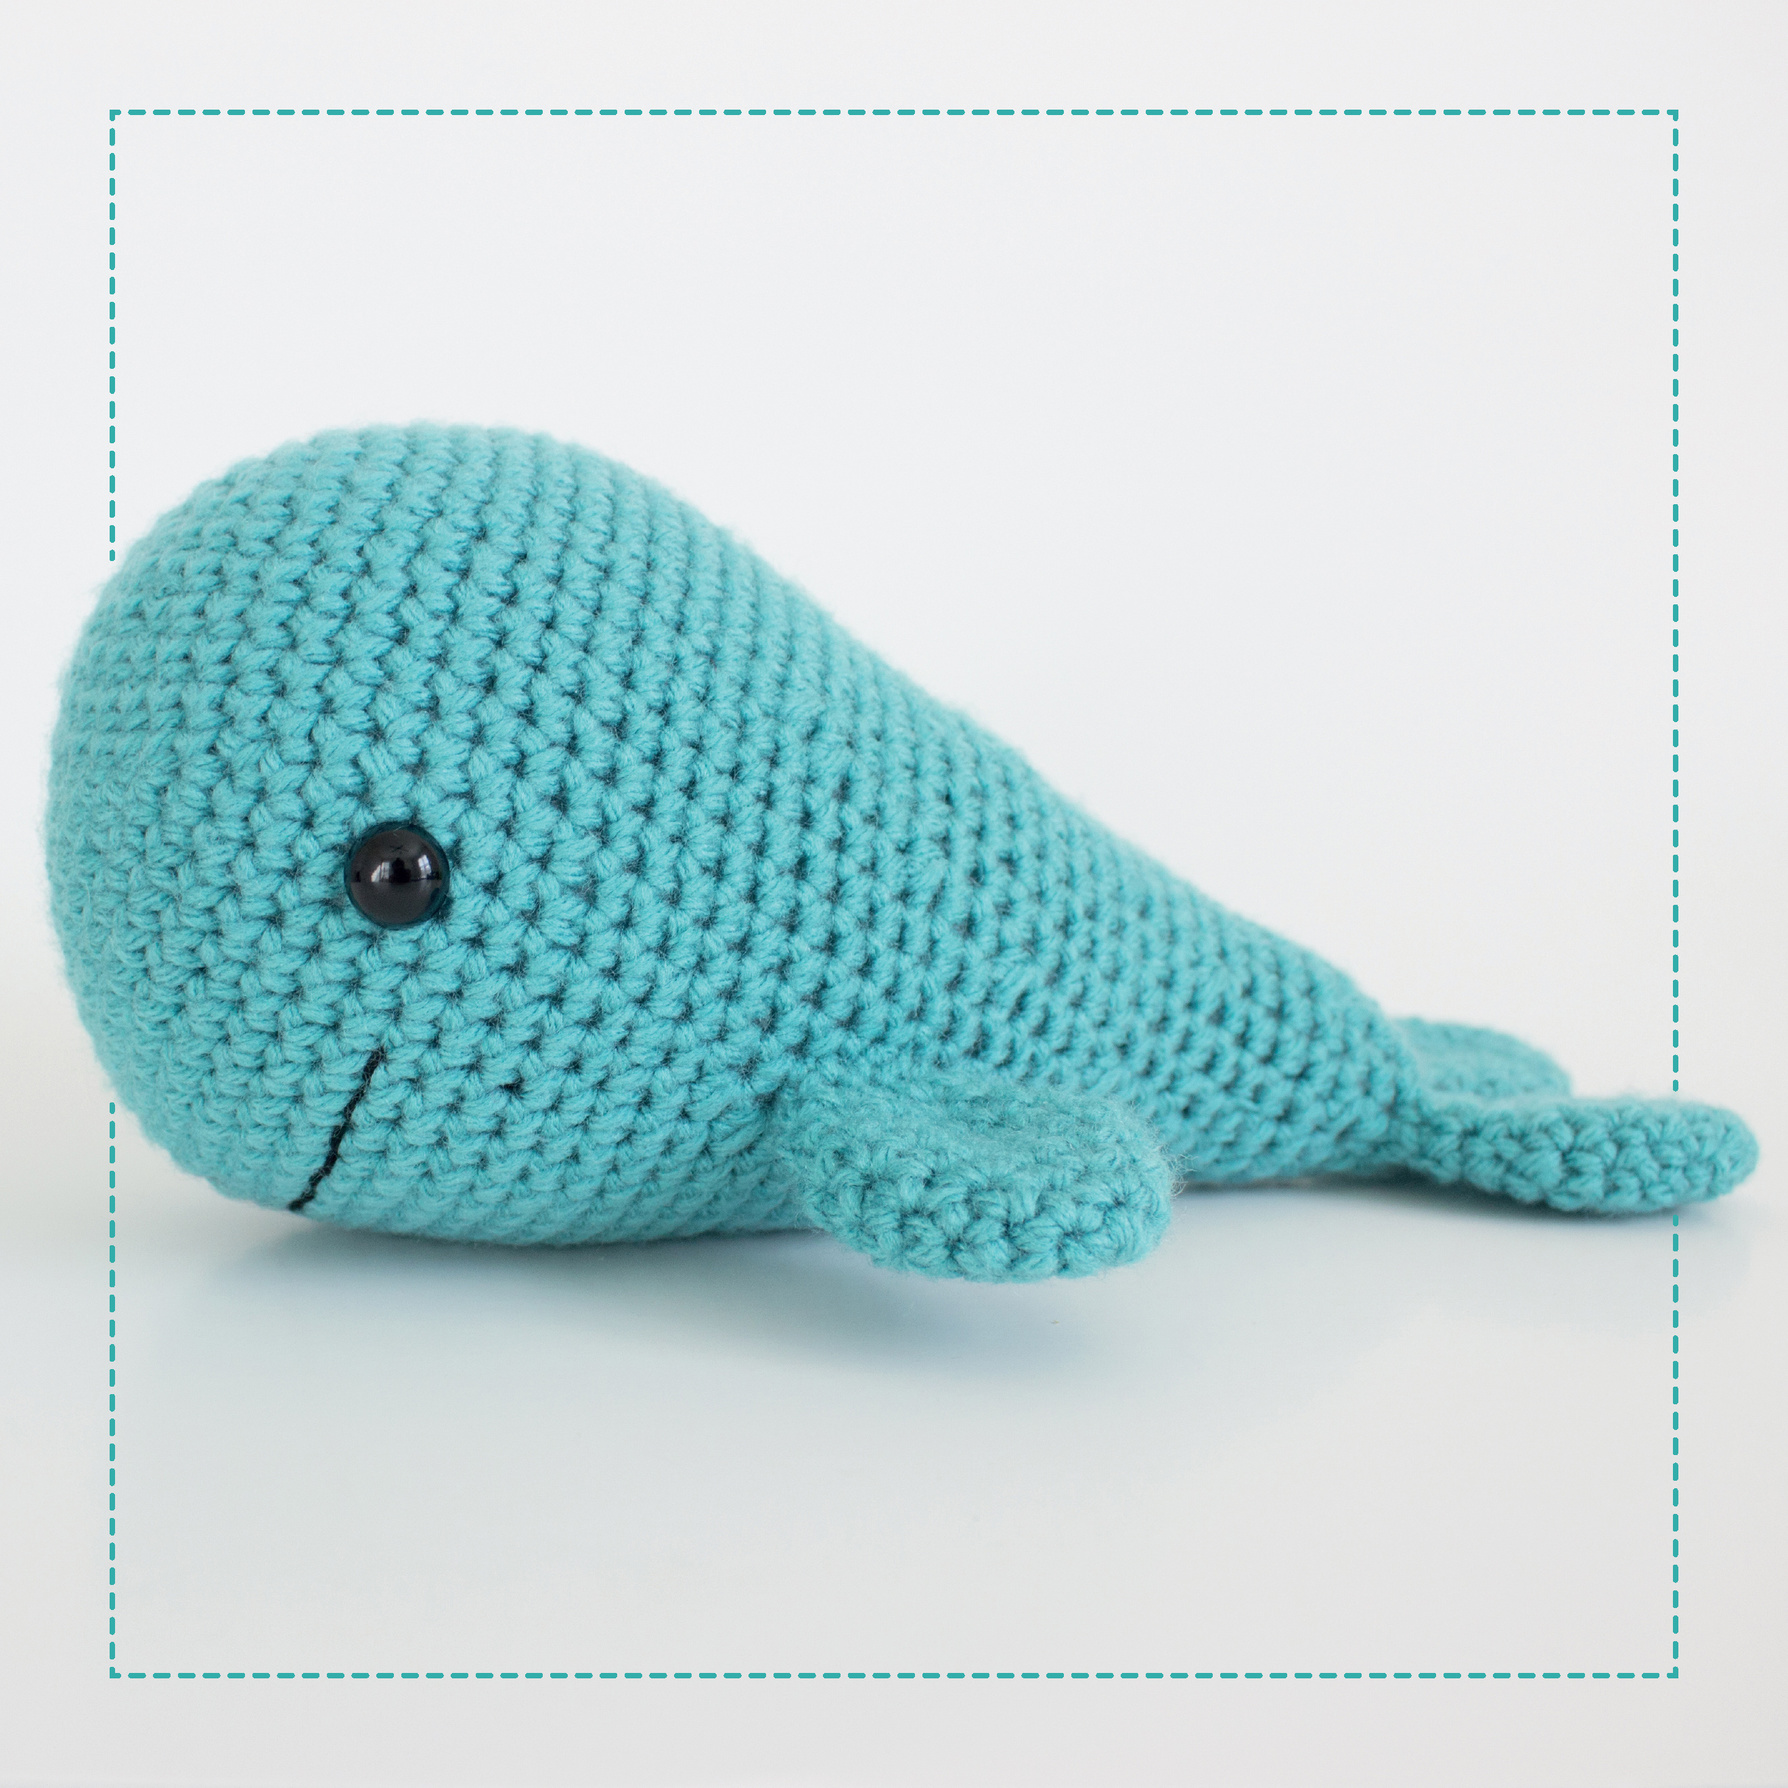
 FINISHED MEASUREMENTS
 Approx. 9 inches long by 4 inches wide (7 inches from fin to fin)
 MATERIALS
 Worsted weight yarn: aqua. If making a narwhal, you’ll need white for the tusk.
 Size G/4.25mm crochet hook
 Pair of 12mm safety eyes
 Black embroidery floss and small embroidery needle
 Polyester fiberfill stuffing
 Yarn needle
 Scissors
 Stitch marker
 Straight pins (optional, but very helpful when assembling the fins)
 ABBREVIATIONS
 Mr - Magic ring
 R - Round
 Sc - Single crochet
 Sts - Stitches
 Inv Dec - Invisible decrease
 Sl St - Slip stitch
 PATTERN NOTES
 This pattern is crocheted in continuous rounds
Using aqua yarn,
Round 1: 6 sc in magic ring (6 sts)
R2: 2 sc in each st around. (12 sts)
R3: *Sc 1, 2 sc in next st,* 6 times. (18 sts)
R4: *Sc 2, 2 sc in next st,* 6 times. (24 sts)
R5: *Sc 3, 2 sc in next st,* 6 times. (30 sts)
R6: *Sc 4, 2 sc in next st,* 6 times. (36 sts)
R7: *Sc 5, 2 sc in next st,* 6 times. (42 sts)
R8: *Sc 6, 2 sc in next st,* 6 times. (48 sts)
R9: *Sc 7, 2 sc in next st,* 6 times. (54 sts)
R10-21: Sc 54.
For the eyes: first place the right eye (your left) between rounds 12 and 13 from magic ring (photo 1). For the left eye (your right) count 25 stitches around the bottom of the whale, over to the right (photos 2 & 3).

For the mouth: with black embroidery floss, back stitch from 2 sts below one eye across to the other eye, leaving two sts (photos 4-6).

R22: *Sc 7, inv dec 1,* 6 times. (48 sts)
R23: *Sc 6, inv dec 1,* 6 times. (42 sts)
R24-25: Sc 42.
R26: *Sc 5, inv dec 1,* 6 times. (36 sts)
R27-28: Sc 36.
R29: *Sc 4, inv dec 1,* 6 times. (30 sts)
Start stuffing and continue as you go.
R30-32: Sc 30.
R33: *Sc 3, inv dec 1,* 6 times. (24 sts)
R34-35: Sc 24.
R36: *Sc 2, inv dec 1,* 6 times. (18 sts)
R37-40: Sc 18.
R41: *Sc 1, inv dec 1,* 6 times. (12 sts)
R42-44: Sc 12.
Fasten off and leave a tail for sewing. Flatten tail and sew closed (photos 7 & 8).

Using aqua yarn,
Round 1: 5 sc in magic ring (5 sts)
R2: 2 sc in each st around. (10 sts)
R3: Sc 10.
R4: *Sc 1, 2 sc in next st,* 5 times. (15 sts)
R5-7: Sc 15.
R8: *Sc 1, inv dec 1,* 5 times. (10 sts)
R9: Sc 10.
Fasten off and leave a tail for sewing.
For the tail: Place the the fins evenly on the tail, part of the fin will hang off and need to be sewn to the side of the tail (photos 9 & 10).
Sew the remaining two fins on the sides of the body (photos 11-13).

Using white yarn,
Round 1: 5 sc in magic ring (5 sts)
R2: Sc 5.
R3: 2 sc in each st around. (10 sts)
R4-14: Sc 10.
Add fiberfill to tusk.
Fasten off and leave a tail for sewing. Position and sew tusk between the eyes (photos 14 & 15).
