This is one of the easiest places for someone to start learning about how to dry foods. It might not be the most common place to start (people tend to start with fruit), but it really is the simplest.
Herbs are fine in texture and have little water in them to start with compared to a slice of a juicy strawberry, and they will dry up quickly. Dried herbs are so common around the kitchen that you will not have to go out of your way to think about ways to use them. They are a good example of how flavors are intensified with drying, and fresh herbs that you dry yourself are even more flavorful than store-bought dried herbs.
Preparing Herbs to Be Dried
Many people grow their own herbs, but you definitely can take advantage of drying your own even if you are getting fresh herbs from the store.
Harvesting herbs
This step is for the folks with their own herb gardens. The specifics on how and when to harvest will vary from herb to herb, although most can be harvested as soon as they are large enough to lose a few leaves or sprigs without killing the plant. Also, depending on the herb, you will want to collect leaves, stems, and/or seeds as well. You can just pluck leaves off, but it will do less damage to the plant if you use a small pair of scissors or shears instead.
To speed up your drying process, try to harvest herbs after a day or two of dry weather rather than after a recent rain. If your herb garden is inside, hold off watering for a day before harvesting for dehydrating. Do not be tempted to let your plant dry out, even if you plan on harvesting the entire plant. When starved of water, the plant will draw moisture (along with the aromatic oils) from the leaves into the stems and roots of the plant. You can end up with bland-tasting leaves if you dry herbs from a desiccated plant.
When you are harvesting, remember how much an herb will shrink when dried: far more than what you see with other foods. A few handfuls of an herb might mean a tablespoon of final dried herb. On average, you can expect 8 ounces of fresh herb material to become just about 1 ounce of dried product.
Cleaning and preparing
Once you have picked your herbs, remove any dead leaves or excess stem pieces you do not need in your final dried herbs. If you are drying an herb in seed form (such as dill seed), remove the seeds from the rest of the plant and take off any extra husks or seedpods. Herbs with small leaves are best left on the stems and will come off much easier after drying than before.
Dry any excess moisture off the herbs by gently pressing them between a layer or two of paper towels.
Methods for Drying Herbs
Due to their light nature, they are ideal for nearly any type of drying. You can really choose whatever works best for you. For nearly any kind of herb, you need to dry them completely until they are crisp and crumble apart easily.
Sun drying herbs
Sun drying might actually be too harsh for some herbs, but that will depend on the climate and weather where you are. Hot summer sun can dry herbs extremely quickly, and the heat can destroy the finer oils that give the herbs their unique taste and smell. If you are going to dry outdoors, keep your trays of herbs out of the direct sun. Even set them out in the shade if you can. In a sense, you are aiming for more of an air drying but with some of the sun’s heat added in.
When laying your herbs out, take care to place them so the leaves or pieces cannot blow away once they start to dry out. Dried herbs are light and will take off easily in even a slight breeze. Keeping them under a layer of mesh or screen can make things much easier.
Air drying herbs
Herbs are the best suited for air drying, even indoors. The traditional way to dry herbs would be to bundle them up (leaving the leaves on the stems for easy handling) and hang them from the rafters until they were dry through. By doing this in a brown paper bag, you will keep your drying herbs safe from dust and insects though it will take a little longer if you keep them under wraps like this. A bag will also catch any dried leaves or pieces that break off as they dehydrate. Just poke a few holes in it to help the air move around.
On average, your herbs will be done in a week or two using this method. The slower and cooler process is best to preserve the flavors of your herbs. Specific times for this method are not provided because it is imprecise.
Dehydrating herbs
A dehydrator can work well with herbs providing it does not get too hot, or you can end up with the same damaging situation as you would with sun drying. Your dehydrator should be no hotter than 110 F for the best results.
One thing to remember when using a dehydrator with herbs is that they have intense aromas, and the inside of your dehydrator is fairly confining even with the fan running. So, unless you want your basil to taste more like rosemary, you probably should keep your herbs separate. Of course, if you are drying herbs to be mixed together in a blend later anyway, you do not need worry about this.
You also will find that drying herbs this way will have a strong smell through your kitchen, which might not be suitable if you are doing other cooking at the same time. A kitchen that smells heavily of garlic or basil can have a negative effect on your cookies or cake.
Depending on your herbs, you likely will have finished drying your herbs in less than eight hours. You just need to lay out a single layer of herb pieces on each tray of the dehydrator and let it run.
When drying any herbs that are in seed form (dill, coriander, fennel), the small seeds may fall through the holes in your dehydrator trays. Stainless-steel window screening can be used to line your trays, and it is food safe, or you can use a layer or two of fine cheesecloth.
Oven and microwave drying herbs
The oven is too warm to do herbs decently, and it should be avoided as a drying method unless you can set it down to 110 F. The microwave, on the other hand, can work well with herbs. You want to place a single layer between two sheets of paper towel on a plate. Run the microwave on about half (or medium) power for two minutes, and check on your herbs. If they are not dry, continue to microwave them for 30 seconds at a time until they are dried through.
Storing Dry Herbs
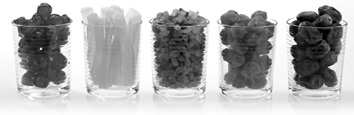
Dried herbs are usually stored in glass jars to protect them from air exposure, though any kind of opaque container will also keep the sunlight out as well. It just needs to be sealed tightly.
You do not want to store any dried herbs in paper containers or bags because the added exposure to air quickly will make the herbs go stale, not to mention what the aroma in your storage room would be like if all your herbs were packaged this way.
Regardless of the container, label them clearly because it can be hard to tell one from another once they are dry.
Specific Drying Instructions for Herbs
For the most part, the process and details of drying individual herbs are going to be the same regardless of what you are drying. Even so, there can be some variation in temperature and timing when drying a large-leafed herb versus one with smaller, finer leaves. Here are some of the common herbs you might be drying to get the precise details. You will know when they are done because they are completely dry and will crumble apart easily.
Because herbs are used in their dry form, either as flavorings in cooking or to be brewed in a tea, there are no instructions included for rehydrating.
The instructions include a little information on how to harvest, but you can just as easily purchase fresh herbs from the store or market if you are not growing them. The drying process will be the same either way. For the most part, all herbs will be dried at a temperature of 110 F, whether in the oven or in a dehydrator.
Chives
If you are able to use fresh chives, it is recommended that you do so because the fine oils in chive leaves will dissipate quite a bit during drying. You can use a dehydrator or microwave for chives, but the sun is likely going to be too warm for these delicate herbs. Because they grow much like blades of grass, you will not be picking leaves from a stem like most herbs. Snip a couple of inches off the tops of your plants, and then chop further into ¼ inch pieces for drying.
Dehydrator: Set at 110 F, four to six hours.
Sun drying: Eight to ten hours, but keep them out of direct sunlight
Oven: Set at 110 F, four to six hours.
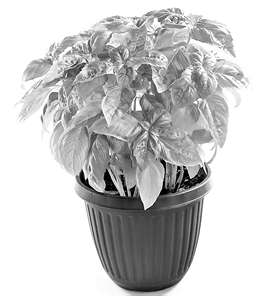
Basil
Because of the heavier leaves, basil takes longer to dry than most other herbs. You can pluck the leaves from the stems before drying if you wish, or wait until the leaves have thoroughly dried to pick out the stem pieces.
Dehydrator: Set at 110 F, eight to 12 hours.
Sun drying: One to two days, depending on the temperature
Oven: Set at 110 F, eight to 12 hours.
Oregano
When doing your own harvesting, you must pick the leaves just before the flowers open up in order to have the best-flavored herb. Dry them as quickly as you can to preserve that fresh flavor.
Dehydrator: Set at 110 F, four to eight hours.
Sun drying: Eight to 12 hours, kept in light shade
Oven: Set at 110 F, six to eight hours.
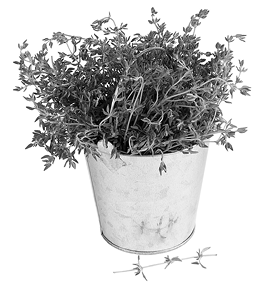
Thyme
Make sure to blot your thyme leaves dry before dehydrating. This is one of those herbs that should be dried before trying to strip the leaves off the stem.
Dehydrator: Set at 110 F, six to eight hours.
Sun drying: Eight to 12 hours in light shade
Oven: Set at 110 F, seven to ten hours.
Mint
If you are picking your own mint, choose the large leaves before the plant goes to flower. Any variety of mint can be dried, and they all have their own unique twist on the mint flavor. You can even grow chocolate mint or pineapple mint.
Dehydrator: Set at 110 F, six to eight hours.
Sun drying: Eight to 12 hours, kept in indirect sunlight or slight shade
Oven: Set at 110 F, six to eight hours.
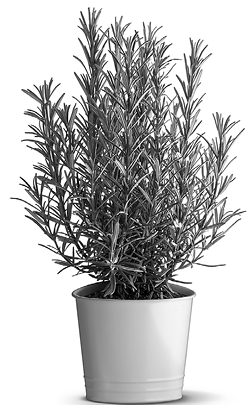
Rosemary
You should not wash rosemary leaves unless they are noticeably dirty, and you can pick the leaves once you notice they have developed their strong smell.
Dehydrator: Set at 110 F, six to eight hours.
Sun drying: Eight to ten hours in the full sunlight
Oven: Set at 110 F, eight to 12 hours.
Dill
With dill, you can harvest and dry the flowers, leaves, and/or the seedpods. They all have the same flavor, although the seeds are the strongest part of the plant. If you are going to use the flowers, you have to clip them from the plant just before the blooms actually open up. You can trim off the leaves anytime and even use the smaller stem pieces as well. For the seeds, you have to wait until after the plants blossom for the seeds to form. They can partially dry right on the plant before you cut the seed heads off (be careful not to lose any loose seeds). You will need to dry the leaves/flowers differently than you do the seeds.
For the leaves, stems, or flowers:
Dehydrator: Set at 110 F, six to eight hours.
Sun drying: Dry whole sprigs for about two days; indirect sun is best.
Oven: Set at 110 F, six to eight hours.
For the seeds:
Dehydrator: Set at 120 F, four to six hours.
Sun drying: Four to eight hours in open sun
Oven: Set at 120 F, four to six hours.
Parsley
Besides being used fresh as a garnish, you can find many other uses for dried parsley. Trim the leaves off as soon as they open up.
Dehydrator: Set at 110 F, six to eight hours.
Sun drying: Eight to 12 hours out of direct sun
Oven: Set at 110 F, six to eight hours.
Ginger
Because ginger is a thick root rather than a leafy herb, it will be a little different than the others listed. The best way to dry ginger is to either slice it very thinly or grate it. Either way, peel it first. It will grate a little easier if you use a frozen piece of ginger root. Unlike the other herbs, your dried ginger will not crumble but will come out leathery and still able to bend (pliable). There should be no moisture present though.
Dehydrator: Set at 110 F, four to six hours.
Sun drying: Eight to ten hours, and full sun is fine.
Oven: Set at 110 F, four to six hours.
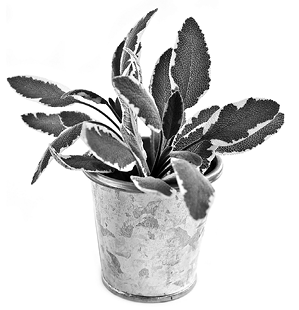
Sage
Green sage is usually used as an herb, but you can dry and cook with most other sage varieties too.
Dehydrator: Set at 110 F, eight to 12 hours.
Sun drying: Ten to 12 hours, under indirect sun
Oven: Set at 110 F, ten to 12 hours.
Tarragon
Snip off young leaves, and make sure to pat them dry before getting started. You will want to harvest before your plant starts to flower.
Dehydrator: Set at 110 F, six to eight hours.
Sun drying: Eight to 12 hours in light shade
Oven: Set at 110 F, eight to ten hours.
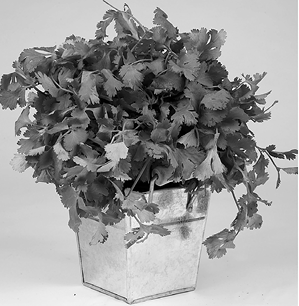
Coriander and Cilantro
These are listed together because they are actually the same plant. Technically, the plant is coriander, as are the seeds, but the commonly used name for the leaves is cilantro. So like dill, you will have two options when harvesting and drying. Harvest young leaves for drying, with only the finest stem pieces. You can wait until seeds start to dry on the plant to harvest them.
For leaves:
Dehydrator: Set at 110 F, six to eight hours.
Sun drying: 24 to 36 hours, in light shade
Oven: Set at 110 F, six to eight hours.
For seeds:
Dehydrator: Set at 120 F, four to six hours.
Sun drying: Four to eight hours in open sun
Oven: Set at 120 F, four to six hours.
Bay
Though bay leaves are quite large for an herb, they are traditionally used whole (most recipes will call for one or two leaves rather than a measure in teaspoons). So when drying bay leaves, you need to take care to leave the leaves intact. You may have to break one in order to test for dryness.
Dehydrator: Set at 110 F, six to eight hours.
Sun drying: Ten to 12 hours, turning leaves over once after halfway done in direct sun
Oven: Set at 110 F, eight to 12 hours.
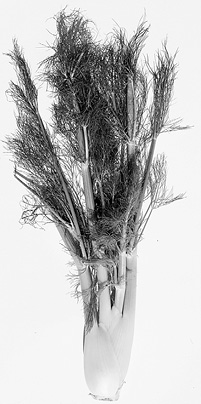
Fennel
Fennel is closely related to dill, and the plant is used in the same way (both the leafy pieces as well as the seeds). The flavor is more licorice than dill though. Trim off the leaves when they are still small, and later you can harvest the seeds just as the seedpod starts to dry on the plant. If you wait too long, the seeds will fall off the plant and be lost.
For leaves:
Dehydrator: Set at 110 F, six to eight hours.
Sun drying: Eight to ten hours in shaded sun
Oven: Set at 110 F, six to eight hours.
For seeds:
Dehydrator: Set at 120 F, four to six hours.
Sun drying: Four to eight hours in open sun
Oven: Set at 120 F, four to six hours.
Garlic
For drying, mince fresh garlic cloves as finely as you can (after removing husk or skin). When minced, it might fall through the grid on your dehydrator, so use a layer or two of cheesecloth. Once dry, you can use the granules as is or run them through a food processor to make a finer garlic powder.
Dehydrator: Set at 120 F, eight to ten hours.
Sun drying: Eight to ten hours in shade
Oven: Set at 120 F, six to eight hours.
Marjoram
Pick the older leaves once they have grown to full size (not the newly emerging ones).
Dehydrator: Set at 110 F, six to eight hours.
Sun drying: Eight to ten hours in light shade
Oven: Set at 110 F, six to eight hours.
Chamomile
So far, these all have been herbs used in cooking. But you also can dry herbs for use in teas. Chamomile is a good example. If you are growing chamomile, wait until the flowers have opened completely before you harvest. Let them dry slightly on the plant before harvesting to quicken your processing time.
Dehydrator: Set at 110 F, four to six hours.
Sun drying: Six to eight hours completely out of the sun
Oven: Set at 110 F, six to eight hours.
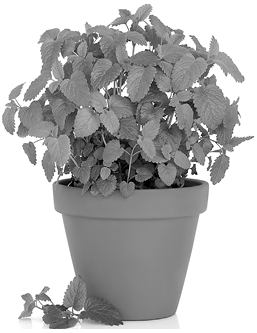
Lemon Balm
Lemon balm leaves should be picked just as the flower blossoms are beginning to form but before they bloom. You can use both the leaves and the smaller stems. Chop the stem pieces for quicker drying.
Dehydrator: Set at 110 F, six to eight hours.
Sun drying: Eight to ten hours in indirect sunlight
Oven: Set at 110 F, six to eight hours.
Catnip
Although your first thought might be that you do not even have a cat, dried catnip does have other uses. Many people enjoy it in an herbal tea blend for themselves.
Dehydrator: Set at 110 F, six to eight hours.
Sun drying: Eight to ten hours in shaded sun
Oven: Set at 110 F, six to eight hours.
Recipes for Dried Herb Blends
Individual herbs on their own are great in many dishes, but you can also add more variety to your cooking with some well-chosen blends of herbs you made yourself. Most of these will include herbs you can dry yourself, although some of the ingredients likely are not going to come out of your own home garden (such as cinnamon).
The instructions are the same for all the mixes. Just combine the right herbs, and store them in airtight jars or other containers.
Italian Herb Mix
This is a great all-around mix for seasoning Italian dishes
• 2 tsp. dried basil
• 2 tsp. dried oregano
• 1 tsp. dried sage
• 1 tsp. dried marjoram
Poultry Seasoning
Use in any chicken or turkey dishes, including homemade stuffing.
• ¼ tsp. dried thyme
• ¾ tsp. dried sage
• ¼ tsp. black pepper
• 1/8 tsp. marjoram
Chicken Breading Seasoning
This is the spice mix to use if you are making your own chicken coating or breading for fried chicken. It is just the spice blend; you will need your own coating recipe to go with this.
• 2 Tbsp. dried parsley
• 1 Tbsp. dried oregano
• 1 Tbsp. dried thyme
• 1 Tbsp. dried marjoram
• 2 tsp. dried rosemary
• 2 tsp. dried ginger
• 1 tsp. garlic salt
• 1 tsp. onion powder
• 1 tsp. celery salt
• 1 tsp. black pepper
• 1 tsp. dried sage
Herbes de Provence
A classic herbal blend used in the south of France. You can use this in nearly any kind of dish. The lavender is traditional, but the flavor may be unusual for anyone not used to it. Feel free to leave it out.
• 2 ½ Tbsp. dried oregano
• 2 ½ Tbsp. dried thyme
• 2 Tbsp. dried savory
• 2 Tbsp. dried lavender
• 1 tsp. dried basil
• 1 tsp. dried sage
• 1 tsp. dried rosemary
Pork Seasoning
This blend can be used for anything from pork chops to a tenderloin.
• 2 Tbsp. dried sage
• 2 Tbsp. dried parsley
• 2 tsp. dried thyme
• 2 tsp. dried rosemary
• 1 tsp. garlic
Fish Seasoning
You can use this herb mixture on just about any type of white fish for a quick dash of flavor.
• 1 Tbsp. dried tarragon
• 1 Tbsp. dried basil
• 1 Tbsp. dried dill
• 1 Tbsp. dried marjoram
• 1 Tbsp. dried parsley
Creole Seasoning
Some of these spices will have to be store-bought, but you can use some of your home-dried herbs as well.
• 3 Tbsp. paprika
• 2 Tbsp. salt
• 2 Tbsp. garlic powder
• 1 Tbsp. pepper
• 1 Tbsp. onion powder
• 1 Tbsp. cayenne
• 1 Tbsp. dried oregano
• 1 Tbsp. dried thyme
Herbal Salt Replacement
This is a good general-purpose blend to replace using extra salt when cooking or serving food. It is similar to a few of the commercial blends you can buy.
• 1 Tbsp. cayenne
• 1 Tbsp. garlic powder
• 1 Tbsp. onion powder
• 1 tsp. dried basil
• 1 tsp. dried oregano
• 1 tsp. dried thyme
• 1 tsp. dried parsley
• 1 tsp. dried savory
• 1 tsp. black pepper
• 1 tsp. dried sage
• 1 tsp. dried lemon peel, grated fine
• 1 tsp. dried marjoram
Growing Your Own Herbs
Full growing instructions for all these herbs are beyond the scope and purpose of this book, but if you are going to grow your own for drying purposes, keep a few things in mind.
Most herbs are annuals, which means you will have to plant new seeds each year for a new crop. You can either buy new seeds every spring or allow some of your plants to develop their flowers to produce seeds you can collect.
Unless you specifically are harvesting for seeds (such as dill or coriander), you will want to prevent your plants from making any flowers and seeds because they will change the taste of your herbs as soon as seeds are formed. So, pluck off any developing flower buds as soon as you see them. Either that, or wait until the plant is ready to flower, and harvest the entire thing for drying.
Herbs can be grown in any sunny or lightly shaded area, even indoors if you have a large enough window with a table or wide sill. Keep them well watered.
Because herbs tend to be aromatic, many are naturally “insect proof” to some degree, which can make for easy care on your part. But if you do need to repel any insect pests, several excellent all-natural insect sprays work well on any plants you intend to eat. Herbs do not need to produce large roots or fruits, so fertilizer is usually unnecessary.
Case Study: Practice Makes Perfect
Melissa Taylor
Hampton VA, 23663
Melissa is a bit of an old-school dehydrator who uses sun and air drying for her foods. She has a homemade hanging rack with several trays made with recycled screens and other materials. Of course, it took a few attempts to make the best use of this type of dehydrator. The first time she dried herbs, they stuck so badly to the screens that she lost most of her batch. Not to mention that the screens all smelled like herbs when she was done. So now, when she dries anything, she layers paper towel between her food and the screened trays.
Drying at home since 2002, Melissa usually uses homegrown herbs for dehydrating though she also dries fruit on occasion and sometimes garden seeds. She grows and dries herbs to save money. And of course, home-dried herbs have a great deal more flavor to them as well. Melissa just lays out her fresh herbs and checks on them periodically until they are dry enough to crumble. When the mood hits her, Melissa also dries flowers and fruit that she uses for crafts and seasonal decorations. She gets a lot of use out of her homemade dehydrator.
She has tried bananas using her warm-air method, but the fruit flies got to be a problem before the fruit dried out enough.
Before drying, everything gets a wash in cool water and a good patting dry with paper towels. When finished, her herbs are stored in either small glass spice jars or larger stainless steel canisters.