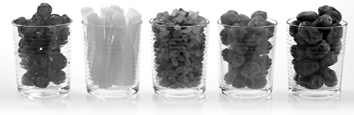
Because mushrooms are neither a fruit nor a vegetable, and because they are ingredients in so many delicious recipes, they really deserve their own section. They dry well and can be part of your overall dehydration plan.
Gathering Wild Mushrooms
Before this chapter can begin, it is only safe to present a clear warning when it comes to harvesting any wild mushrooms. Although it may be tempting to gather “free” food in the wild, you are taking a sizable risk unless you are already extremely familiar with wild mushrooms. The differences between many deadly varieties and those that are edible are minor, and it is easy to confuse them. And making a mistake can be lethal. Never assume you are risking only a stomachache with wild mushrooms.
The toxins present in some species of mushrooms will remain even after they have been thoroughly dehydrated. Having them dried will not make them any safer to eat.
A good field guide can be helpful, especially one designed to illustrate the differences between edible and dangerous species of mushrooms. But even the best field guide can be flawed; photos may not be enough to make the differences clear to you. If you intend to harvest wild mushrooms, it is a good idea to get some personal training from an expert.
Preparing Mushrooms to Be Dried
Mushrooms are not like your typical vegetables, so you will want to know more about them so they can be prepared properly before you begin dehydrating.
Harvesting or buying mushrooms to be dried
The majority of people who dry mushrooms do so with store-bought produce because of the difficulty in growing mushrooms. It is possible, and that will be covered briefly at the end of this chapter in case you do decide to grow your own.
When at the store, look for mushrooms that are firm and plump. If the area where the cap and stalk meet (called the veil) has opened up, it means the mushroom is old and should not be bought.
Unlike most other fruits and vegetables, you only will have success with dehydrating fresh mushrooms. Canned mushrooms should not be used for drying. If you buy them sliced and packaged, you can bypass one step.
Mushrooms will go bad quickly, so when you plan to do some dehydrating, buy your mushrooms only a couple of days beforehand, if not the day of.
Cleaning and preparing mushrooms
You usually can dry an entire mushroom, but some larger ones can have woody stalks you can cut away if you wish. Otherwise, just remove any browned spots with a knife.
Unless they are dirty, do not wash your mushrooms. Their spongy nature means they will absorb water easily, and that is not what you want when preparing to dehydrate them. Give them a good rubdown or a dry scrub with a vegetable brush. When you are waiting for your dehydrating session, store your mushrooms in a brown paper bag in the refrigerator. This will help release any additional moisture and help your dehydrating when you do get the mushrooms out for drying.
Mushrooms will give up their moisture easily, so you do not have to cut your pieces too thinly. Small mushrooms can be dried whole, otherwise slice into ½-inch pieces. When they dry, they will shrink by a factor of eight to ten (become up to ten times smaller) so do not cut your pieces too small. You will end up with a tray of slivers that are difficult to use.
Additional preparations
There really are not any other steps you need to take when drying mushrooms. They do not need any pretreatment or blanching like fruits or vegetables do. Mushrooms will darken slightly as they dry, but there is nothing you can do to prevent that.
If you are going to dry small pieces, you might want to line your dehydrator trays with cheesecloth to prevent the bits from falling through as they shrink.
Methods for Drying Mushrooms
Mushrooms will dehydrate well overall, and you can choose any method for drying them that suits you the best.
Sun drying mushrooms
Because they are not as sweet or juicy as so many fruits and vegetables, mushrooms dry better outdoors because they will not attract the attention of insects and pests. Lay them out on trays and either leave them exposed or cover with a light layer of cheesecloth. Because they are not sticky, debris is less of a problem.
Mushrooms will have a strong smell when they are dehydrating, so many people prefer outdoor sun drying just to keep the smell out of the house. This is just a matter of personal preference. Because you will want to change the temperature during drying, using the sun can be a little more difficult, although leaving your mushrooms to dry at one temperature is also fine. There will be more on the specific times and temperatures later in the chapter.
Air drying mushrooms
Though they do dry well, mushrooms will start to mold quickly, and regular air drying without heat will not dry them quickly enough to avoid mold or mildew contamination. This really is not a method you should choose for working with mushrooms. Stick to the other methods if you can.
Dehydrating mushrooms
Using a commercial dehydrator works well with mushrooms, except for the aroma problem that was mentioned in the section on sun drying.
To best dry mushrooms, you will need to turn up the heat after they have started drying, which makes a dehydrator that comes with temperature controls useful. If your machine does not allow for these types of control measures, you have to adjust the timing. Check the section below on specific drying instructions for more details.
Oven drying mushrooms
The oven works quite well for drying mushrooms, as long as you can lower the temperature enough. Best results require that you start drying at lower than 100 F, which most ovens cannot do. But just like with sun drying, you can probably make do if you adjust the times to suit your equipment. A little experimentation can help.
Mushrooms are 90 percent water, so yours will give off a lot of moisture during drying. Leave the oven door open, or it will get so humid inside that they will not finish drying regardless of the temperature.
Storing Dry Mushrooms
Dried mushrooms will not need any unique or special storage. Any container with a tight lid will work, and they should be stored out of direct sunlight. A cupboard or cabinet is better than being displayed on an open kitchen shelf, for example.
As long as they have been dried sufficiently, your mushrooms will last for many months if not years.
Specific Drying Instructions for Mushrooms
Unlike the other sections, there are not going to be specific times and temperatures set out for each type of mushroom. The differences from one type to another are so minor (from a dehydrating perspective) that it makes it unnecessary. You can take these instructions and apply them to Shiitake mushrooms, morels, chanterelles, Porcini mushrooms, or the common white mushrooms. They all will dry the same.
Dehydrator: First dry at 90 F for about three hours, then turn up the heat to 120 F for another eight to ten hours. If you cannot adjust the temperature, it will take about ten to 12 hours without making any adjustments.
Sun drying: One to two days in the full sun
Oven: Same as for the standard dehydrator, though few ovens will operate as low as 90 F.
Treatment: None needed for mushrooms
To rehydrate: They will soften up quickly and just need to soak in water (no simmering necessary) for about 30 to 40 minutes. Use a lot of water (at least three times the amount of mushrooms). If they absorb it all before they are soft, add more. Because they shrink so much when drying, they will grow just as much when the water is added back. So use a large enough bowl or pot to hold a volume about ten times what you start with.
Recipes for Dried Mushrooms
Mushrooms will regain their meaty texture when rehydrated, so they work well in a number of dishes. Because they rehydrate so quickly, you often just can add them to a pot of soup or a casserole, and they will soften up without any special treatment as the rest of the pot cooks.
These recipes are for mushrooms in general, and you can use whatever variety you prefer unless the recipe specifically states that a certain type of mushroom should be used.
Basic Mushroom Cream Sauce
An easy place to start is a classic mushroom and cream sauce.
• 1 cup dried mushroom pieces
• 3 Tbsp. butter
• 2 Tbsp. water
• 1 cup half and half cream
• 3 Tbsp. water
• 1 Tbsp. flour
• Salt and pepper to taste
In a cook pot, melt the butter along with the water until liquid, and stir in the mushrooms. Continue to heat until they start to soften up. Be prepared to add a little water if the bottom starts to go dry. Stir in the cream, and simmer for about five minutes. In another bowl, blend the second measure of water with flour until it is smooth, then slowly add the mixture to the sauce while stirring. Heat through for another five minutes at a low simmer until the mushrooms are fully rehydrated, and the sauce has thickened up.
Mushroom Risotto
This was initially a camping recipe; so, all the ingredients are dried and convenient to have on hand. You will get enough for two to four people.
• 1 cup dried mushrooms
• 2 cups long-grain rice
• 3 cups of water
• ¼ cup instant vegetable stock powder
• 1 Tbsp. dried parsley
• 2 tsp. dried thyme
• ½ tsp. black pepper
• ½ tsp. garlic powder
Combine all ingredients together in a saucepan and bring to a boil. Once boiling, reduce the heat down to a simmer, and let it cook for about half an hour or until the rice is cooked and the mushrooms are soft. If it begins to get dry in the pot, add additional water.
Mushroom Soup
This makes a creamy soup that would go well with some bread on a winter’s day. You will get about four bowls of soup with this recipe.
• 1 cup dried mushroom pieces
• 1 cup boiling water
• 1 beef bouillon cube
• 2 Tbsp. dried onion pieces
• 2 cups water
• 2 Tbsp. cornstarch
• 1/8 tsp. black pepper
• ½ tsp. dried thyme
• 1 can evaporated milk
• ½ cup grated cheese
First, you need to start your mushrooms softening by letting them soak in the first measure of water for about 15 minutes. Do not drain them, but put the mushrooms and remaining water in a saucepan over medium heat. Add the bouillon and onion, and then stir in the second measure of water. Keep heating until it reaches a boil, and then bring back down to a simmer. Cook while stirring often for about five more minutes.
Then add the cornstarch, pepper, and thyme while you continue to heat the soup. When it starts to thicken, pour in the evaporated milk. When you are ready to serve, top each bowl with a generous sprinkle of grated cheese.
Sautéed Mushrooms with Herbs
Not all mushroom recipes have to be creamy. This is a savorier mix of herbs for your dried mushrooms.
• 2 ½ cups dried mushrooms
• 2 cups water
• 2 Tbsp. butter
• 2 Tbsp. onion, diced
• 2 tsp. dried tarragon
• ½ tsp. nutmeg
• ¼ tsp. salt
• 1/8 tsp. black better
Simmer mushrooms in water for about 20 minutes or until they are mostly rehydrated. Drain off any excess water, and transfer mushrooms to a skillet. Add butter, and heat until the butter is melted and starting to sizzle a little. Stir in the rest of the ingredients, and cook mushrooms until they are fully soft and cooked. Makes side dish servings for about four.
Marinated Mushrooms
This appetizer will work best if you have larger pieces of dried mushrooms to work with, but anything can work. Serve before a meal or as an elegant side dish.
• 1 cup dried mushrooms
• 1 cup water
• 1 onion, diced
• ¾ cup olive oil
• ¼ cup vinegar
• 2 cloves minced garlic
• ½ tsp. salt
• ¼ tsp. dry mustard
• 1/8 tsp. black pepper
Combine water and mushrooms in a small saucepan, and simmer until the mushrooms have rehydrated. Drain them, and let them cool.
Toss the mushrooms with the rest of the ingredients, and let it all steep in the refrigerator overnight before serving cold the next day.
Penne Pasta and Mushrooms
The meaty texture of mushrooms is a great addition to a simple pasta dish.
• ½ cup dried mushrooms
• ½ cup water
• 1 cup penne pasta
• ¼ cup olive oil
• 1 clove minced garlic
• 1 Tbsp. butter
• 2 tsp. fresh parsley
• ¼ grated Parmesan cheese
Simmer mushrooms in water for about 15 to 20 minutes, and then drain and set aside. While that is cooking, you also can cook the pasta in another pot of water. Sauté the garlic in olive oil, then add the mushrooms, and cook for several more minutes until they are fully cooked. Add butter, and stir in until melted. Pour the mushroom mixture over the pasta, and top with parsley and cheese before serving.
Growing Your Own Mushrooms
Growing mushrooms is not a common pursuit, and you might be surprised to hear that it is something you can do at home. Although it would be a good idea to be somewhat familiar with gardening if you are going to try this, it is not necessary because conventional gardening knowledge is not going to help. Growing your own mushrooms is a whole other ball game.
If this is something you want to try, you can purchase kits from gourmet food shops or specialty gardening stores that will provide you with all the materials and instructions you need. Once you get the hang of it, you can buy your supplies without the added expense of the kit.
Mushrooms do not have seeds but rather grow from tiny spores. When buying material to start your own mushrooms, you can either use these or preprocessed little plugs that are made of spores and pressed sawdust. They are called “spawn” and are much easier to handle than the loose powdery spores.
The specific details on how to raise mushrooms is too detailed to explain completely here, but the general idea is that the spawn are inserted into a proper growing medium (such as a wooden log, or packed straw and sawdust). Once the log or other material is “inoculated,” you need to protect it and keep it in a dark location where you can turn up the temperature. Most mushrooms will start to form after about a month.
Your biggest risk with growing your own mushrooms is that your growing medium ends up catching natural wild mushroom spores in the area. These can grow into deadly mushrooms, so you need to have your growing area indoors where you can limit the exposure to outside air.
Case Study:Homegrown and Wild-Harvested
Naomi Lever
Little Carlton, Louth Lincolnshire LN11 8HP
www.facebook.com/groups/Backyardfarming
Not only does Naomi use her old seven-tray stackable dehydrating unit to dry fruits and herbs, she also takes advantage of the warm dry air around her wood stove to do even more dehydrating.
In the dehydrator, she dries all kinds of fruit including some that she harvests wild from around her home. Dried elderberries are an important ingredient for her wine making, for example. With the stove, she strings up apple rings and chili peppers. Overall, her favorite foods to dry are mushrooms, apples, pears, plums, and all the herbs. She finds the dried fruit to be a wonderful healthy snack for her children.
She has been doing dehydrating at home for nearly ten years (on and off), and she has gained a lot of valuable experience along the way. The only thing she has never tried to dehydrate is wild mushrooms mainly because she is not confident about harvesting only the safe varieties. She also does not dry meat because she seldom eats meat in the first place.
When doing fruits, she reminds people to slice everything as evenly as possible so the slices will dry consistently. Before drying, Naomi also dips much of her fruit in lemon juice to keep it from going brown. Potatoes also get a dipping before she dries. Naomi’s dried produce is kept in tightly sealed glass jars.