Automatic shooting modes are designed to produce average images. In order to take advantage of every available lighting scenario you encounter, you must be in full manual control of your camera and other tools. That may seem like a daunting task, but it’s not as tough as you might think. All it takes is an understanding of some simple concepts and a lot of exploration and practice.
Next to your imagination and experience, your tools are pretty important when creating your photograph. It’s best to know your equipment inside and out so, when problems arise (trust us—they will!), you will understand all of your options. If you don’t take the time to learn how to use your equipment, you’ll fall short of your goals.
As you’ll soon see, every piece of the mechanical puzzle provides you with creative options. The more experience you gain, the more you can see and the more light you can play with. Feel free to “liberate” a few visualization techniques from us. Go right ahead and use the ideas we show—and then take a creative leap of your own. That’s what this book is all about.
When you focus your camera’s lens, you are not simply focusing on a subject—rather, you are moving a contractible and expandable plane of focus (called depth of field) either closer to or farther from the camera. As a manual shooter, fully aware of this fact and of the physics surrounding it, you can create the most spectacular images in-camera, achieving a level of sharpness and focus unparalleled in the world of photography today. As a matter of fact, a manual shooter who knows what he’s doing can’t possibly get a blurry photo—unless he wants one.
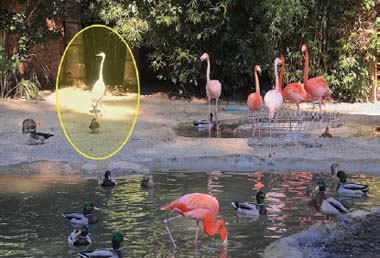
This is how the scene appeared. If you look closely, you’ll see an amazing opportunity to “play” with available light.
If you crop into the area of extreme contrast, you’ll notice something interesting: the bird is much brighter than its surroundings.
When we address focusing with our students, I stand in front of one student and ask him to autofocus on me. This is never a problem. Then I ask my wife to stand a few feet behind me and I ask the student to focus on both of us. I’m typically met with a quizzical look and silence.
From there, we teach our students how to take manual control over focusing and use depth of field (see page 19) to suit their artistic intent.

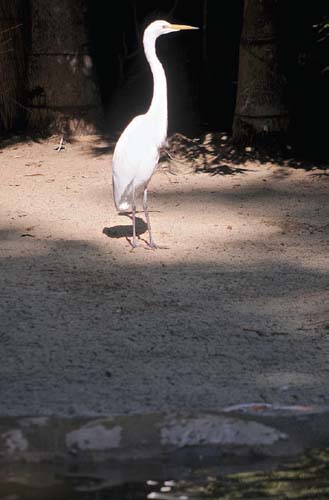
If you were to simply choose an aperture, shutter speed, and ISO setting that was not “normal” and illuminate the bird in a moody (darker) fashion, then the surrounding shadows would also have to get darker. Couple this with your ability to adjust your contrast setting in-camera (page 34) and voila—instant awesomeness! Keep in mind, of course, that this image in no way resembles how the scene actually appeared. The photographer is using the available light, not just trying to capture the natural light.