Chapter 8: Using a Wire Jig
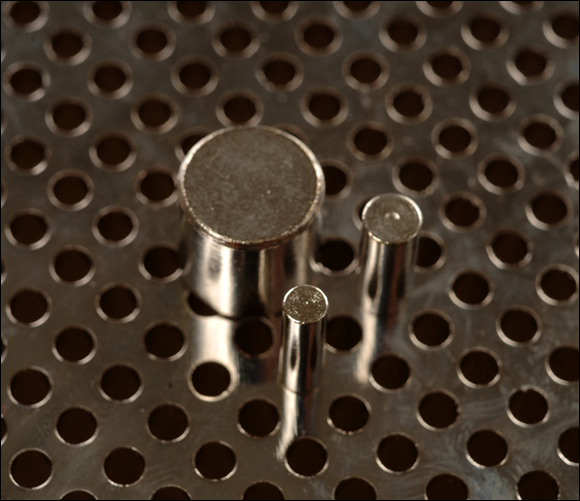
You can use a jig to create wire findings and components that are the same shape and size. Jigs are especially useful for making uniform connectors and ear wires. Most jigs have moveable pegs that you can rearrange to create your own unique designs. By creating jig patterns on paper, you can save your designs to use over again.
Basic Technique
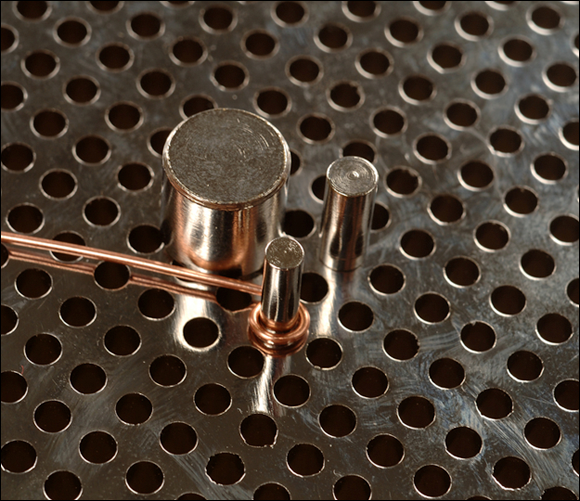
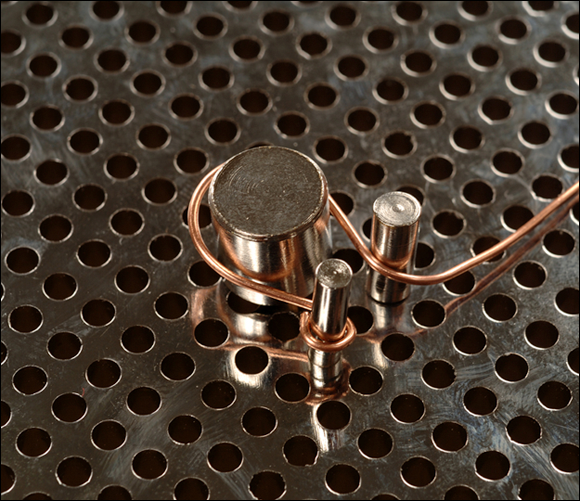
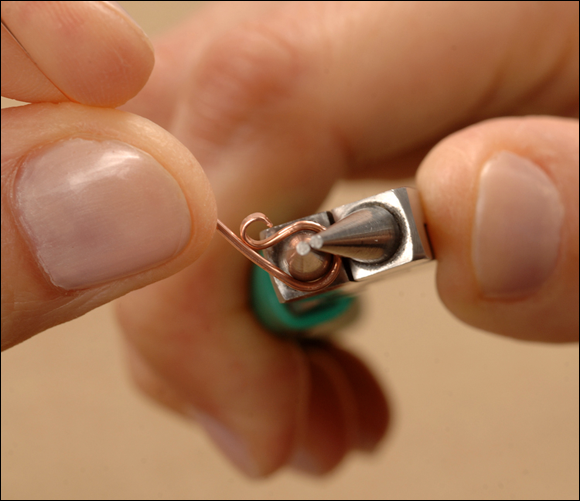
Wire jigs are easy to use once you get the hang of them. To begin, arrange some pegs on the jig by placing them into the holes. Next, anchor the end of your wire on the jig, and slowly wrap the wire around each peg in the direction called for by the design. Finally, remove the wire from the jig and trim off the extra wire ends.
Anchoring
You need to anchor your wire on the jig so that it doesn’t slip while you wrap it around the pegs. There are two common ways to do this. Experiment to see which method you like best.
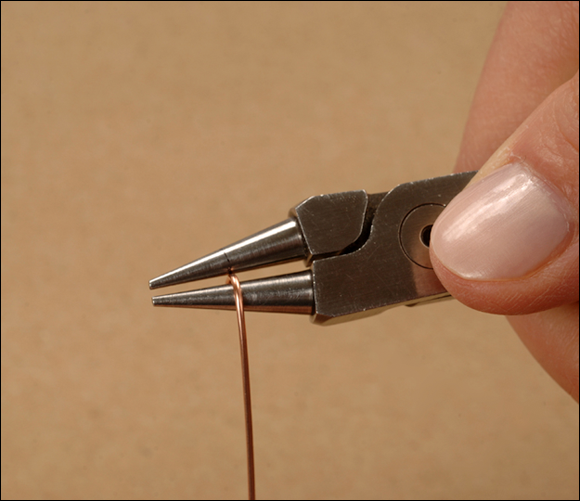
The simplest way to anchor wire is to hold the end down firmly against the surface of the jig with your fingers. You may need to hold the wire in this position while you wrap the entire design using your other hand.
The other way to anchor is to insert the end of the wire into an empty peg hole outside of the design. How well this works may depend on the style of your jig and the depths of its holes.
Wrapping
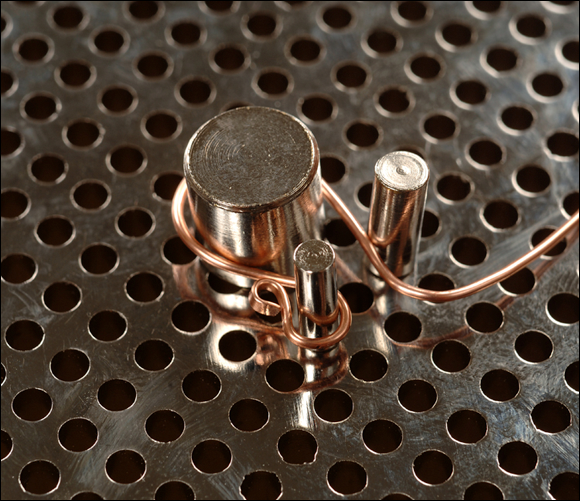
Once your wire is anchored, you can begin wrapping it around the jig pegs. For best results, go slowly and keep the wire as taut as possible as you move it from one peg to the next. Try to keep the wire as close to the jig surface as possible.
For small designs, or designs where the pegs are very close together, the wire may ride up to the tops of the pegs and try to pop off. If this starts to happen, try pushing the wire down using the eraser end of a pencil or the tips of flat nose pliers.
Removing
Always lift your design off the jig slowly. Use your fingers to support as much of the wire as possible, so that it doesn’t bend or stretch. You’ll find that pegs sometimes stick in the wire and get pulled out of the jig when you do this. Simply tap them down again with your fingers, or take them out and replace them after you’ve removed the design.
Make Wire Connectors
You can use connectors as decorative elements or to connect other components directly or with jump rings. Just like beaded links, connectors can be made with simple, open loops or with wrapped loops. For sturdy connectors, use 20-gauge wire for small pieces and 18-gauge wire for larger pieces.
Simple Two-Loop Connectors
A two-loop connector looks a lot like the figure-eight clasp eye that is made using round nose pliers in Chapter 6. Experiment to see which technique you like best.
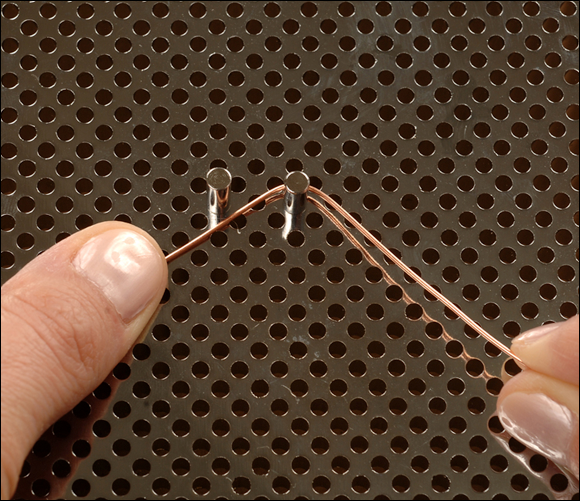
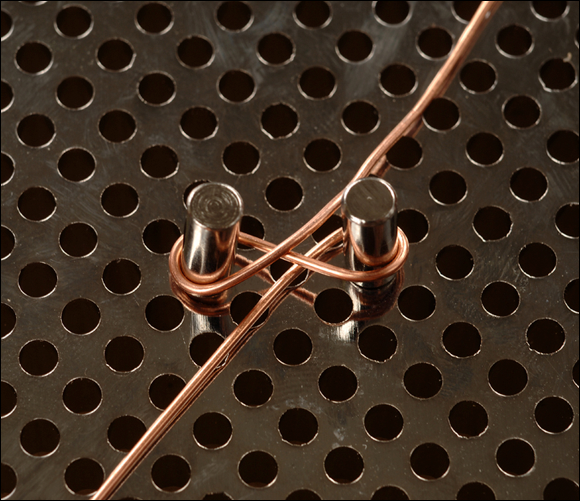
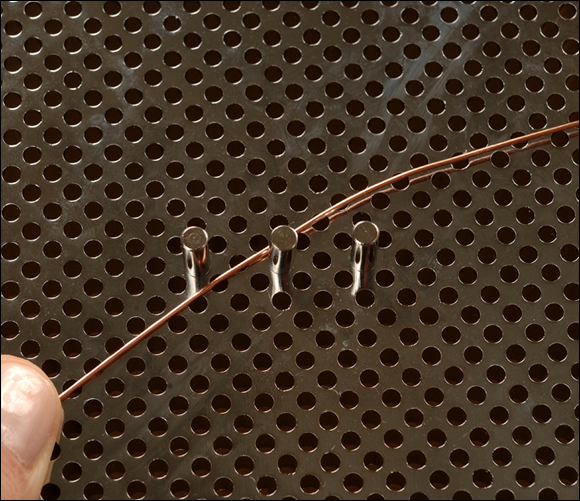
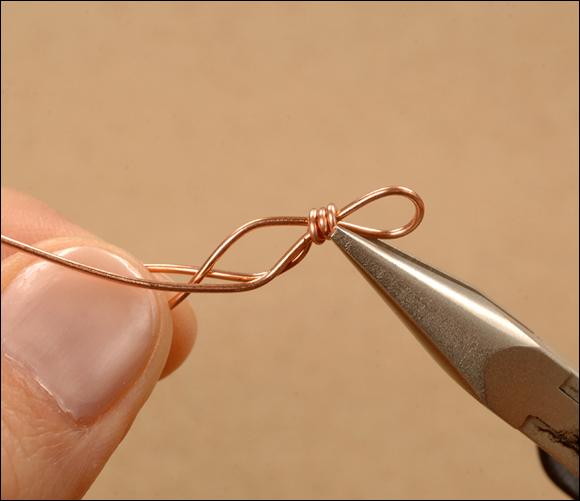
1 Arrange two pegs horizontally on the jig with one empty space between them.
2 Using wire directly from the spool or coil, place the wire diagonally between the two pegs, with the wire end reaching past the bottom peg by about 1 inch.
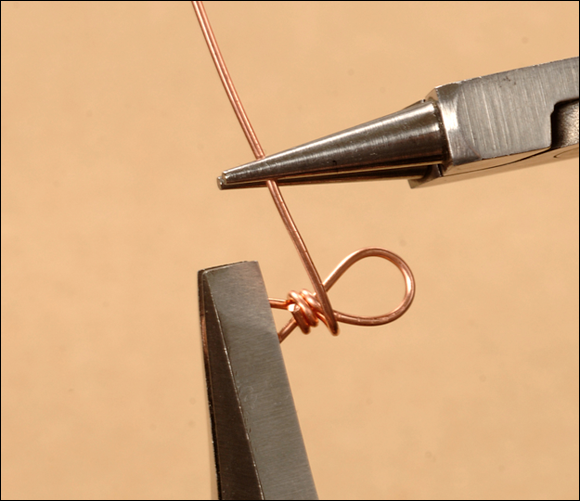
3 With the fingers of one hand, anchor the wire end against the jig.
Step 3
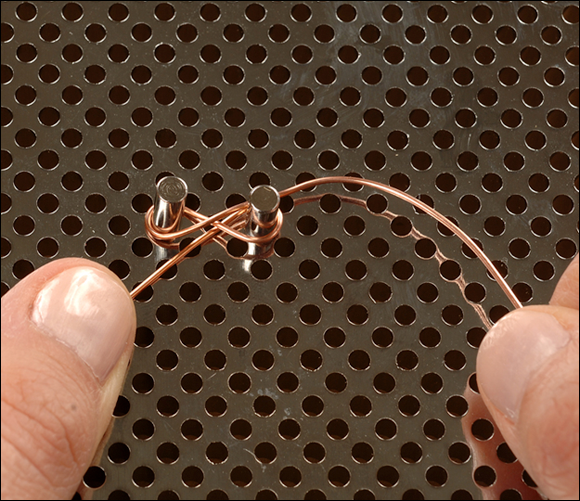
4 Using your other hand, wrap the wire over and around one of the pegs.
5 Bring the wire back up between the pegs and around the next peg, in a figure-eight pattern.

6 Position the wire diagonally between the pegs.
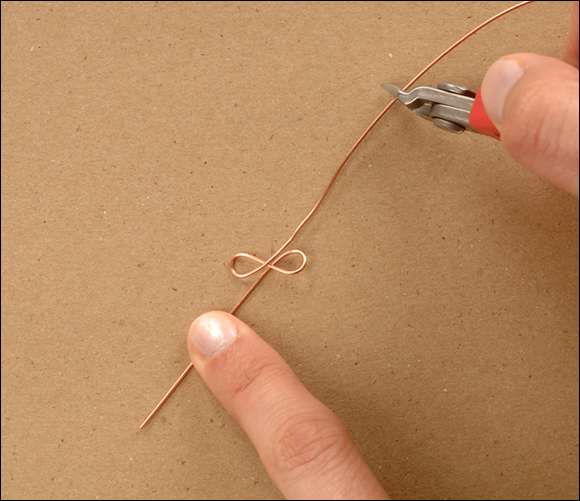
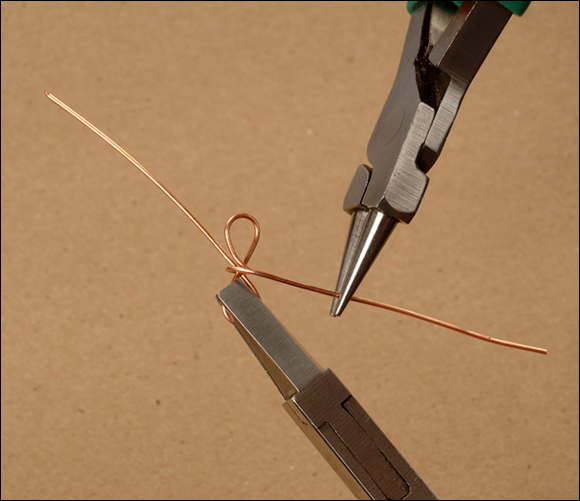
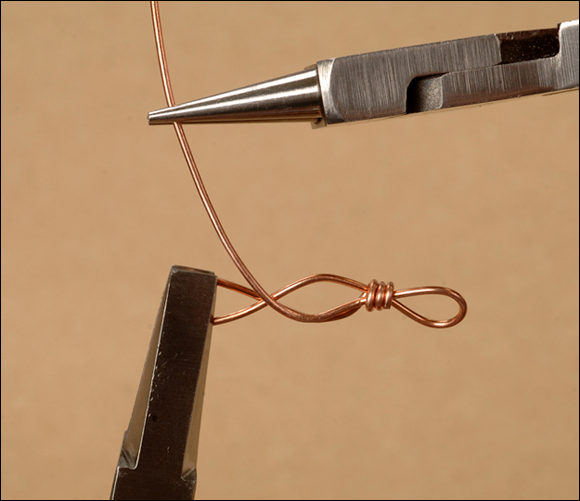
7 After removing the wire from the jig, use side cutters to trim off the ends of the wire at the base of each loop.
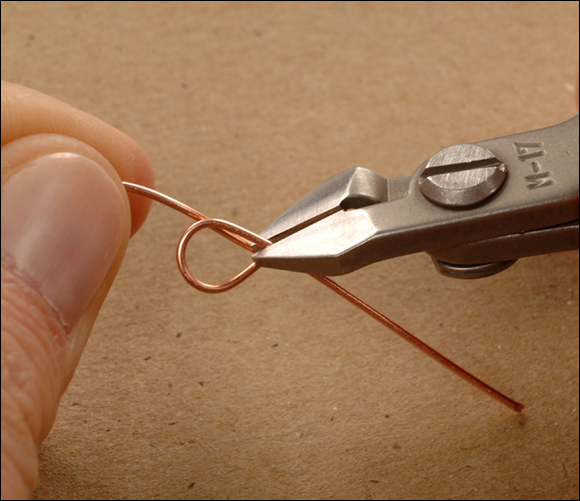
Step 7
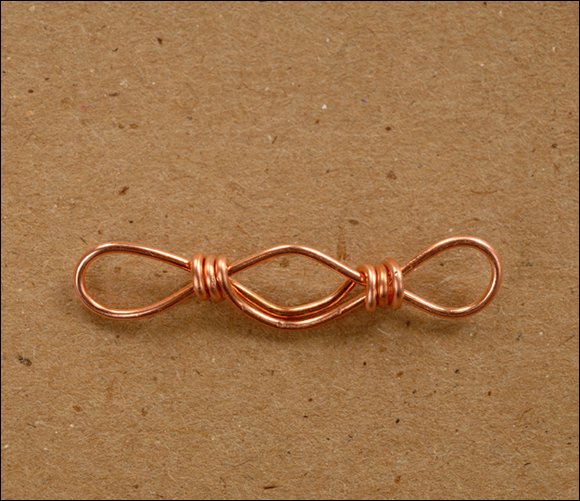
8 Use flat nose pliers to wiggle each loop closed.
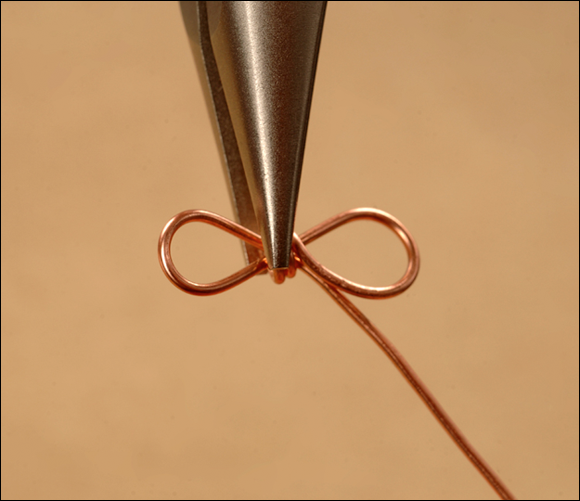
A completed two loop connector is shown here (a).
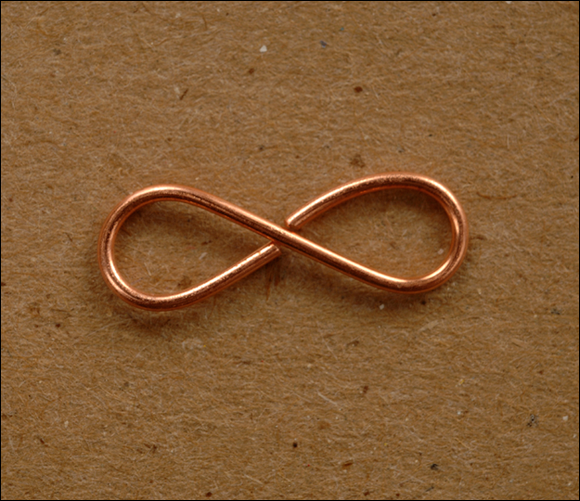
Step 8A
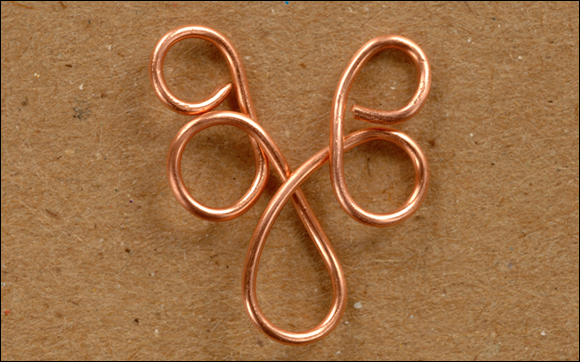
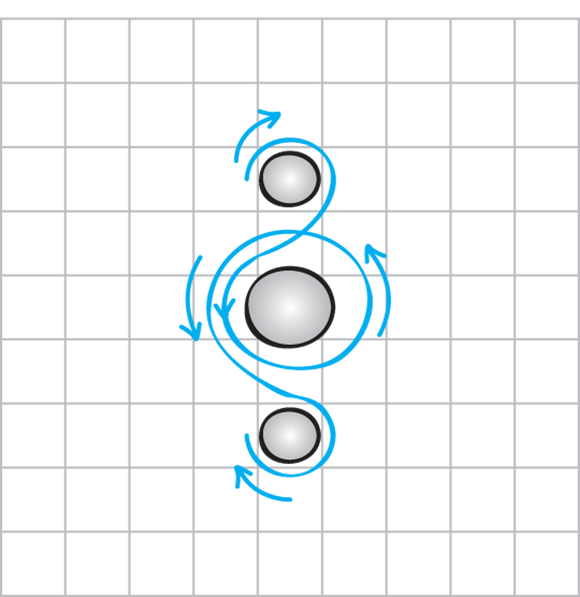
Simple Three-Loop Clover Connectors
You can use these connectors at the ends of double-strand bracelets and necklaces, or as necklace centerpieces to hold drops.
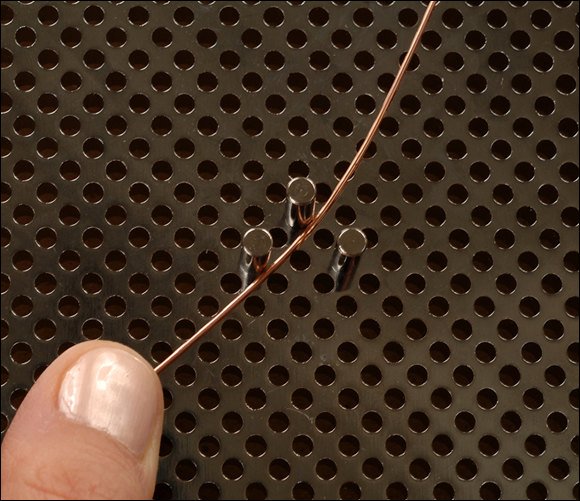
1 Arrange three pegs on the jig in a triangle pattern, leaving one empty space between every two pegs.
Step 1
2 Using wire directly from the spool or coil, place the wire diagonally between the pegs, with two pegs on one side and one peg on the other.
3 Allow the wire end to reach past the bottom pegs by about 1 inch.
4 With the fingers of one hand, anchor the wire end against the jig.
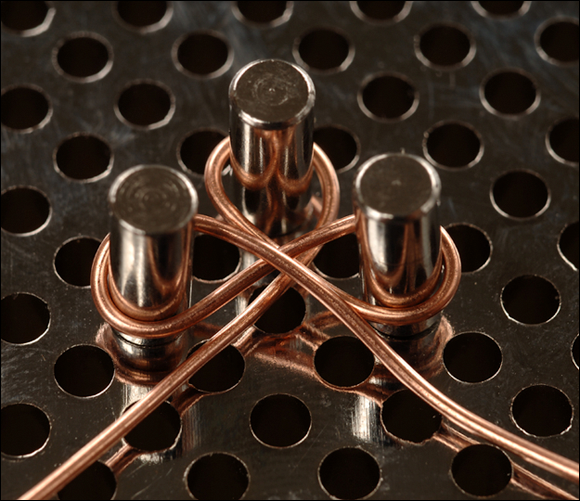
5 Use your other hand to wrap the wire over and around the top peg.
6 Bring the wire under, around, and over one of the bottom pegs.
7 Wrap the wire underneath, up and over the other bottom peg.

8 Complete the loop by bringing the wire down and out the bottom of the triangle.
9 After removing the wire from the jig, use side cutters to trim the wire at the base of the top and bottom loops.
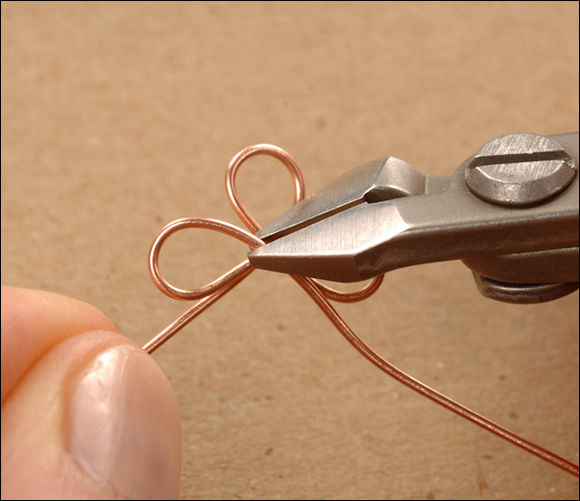
Step 9
10 Use flat nose pliers to wiggle each loop closed.
A completed three-loop clover connector is shown here (a).
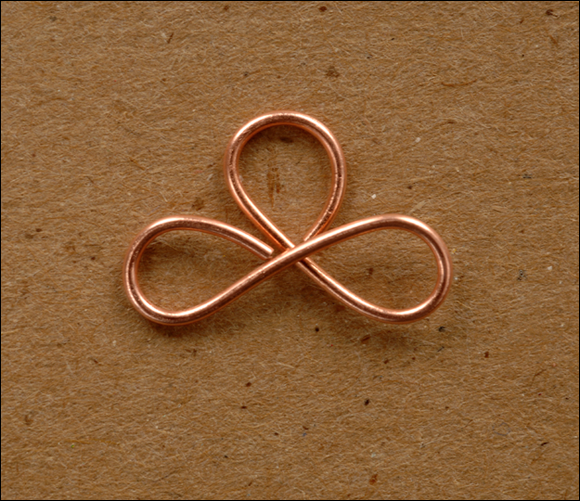
Step 10A
Four-Loop Clover Connectors
These connectors are similar to the three-loop version, but they’re more versatile because of their extra loop.
1 Arrange four small pegs on the jig in a cross formation, with one empty space in the center.
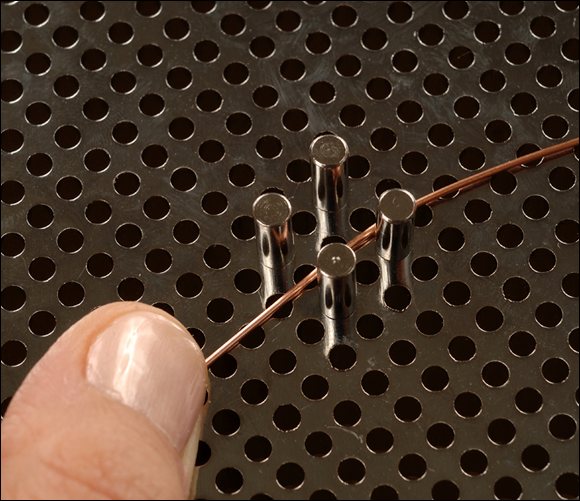
Step 1
2 Using wire directly from the spool or coil, place one end of wire diagonally between the pegs, with two pegs on either side.
3 Allow the wire end to reach past the bottom pegs by about 1 inch.
4 With the fingers of one hand, anchor the wire end against the jig.
5 Using your other hand, wrap the wire over the top peg.
6 Bring the wire down around the bottom peg in the opposite direction, creating a figure-eight.
7 Cross the wire through the center of the pegs, and wrap it around one of the side pegs.
8 Pull the wire across and around the other side peg in the opposite direction, creating a sideways figure-eight.

9 Position the wire diagonally through the pegs and out again at the top.
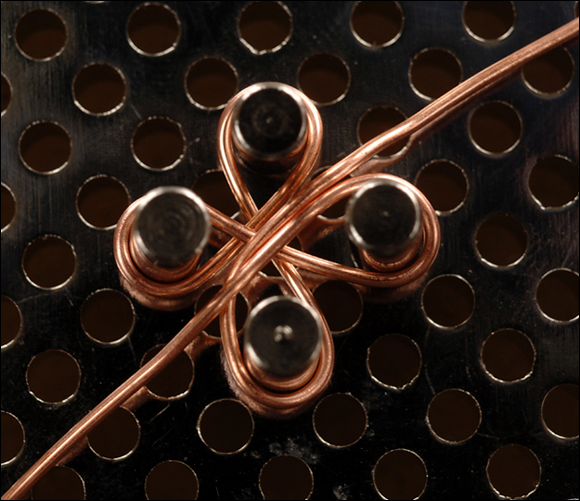
10 After removing the wire from the jig, use side cutters to trim both wire ends at the bases of the loops.
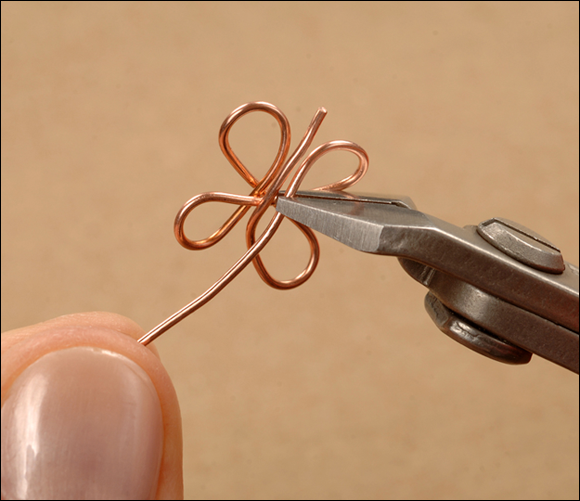
Step 10
11 Use flat nose pliers to wiggle the two open loops closed.
A completed four-loop clover connector is shown here (a).
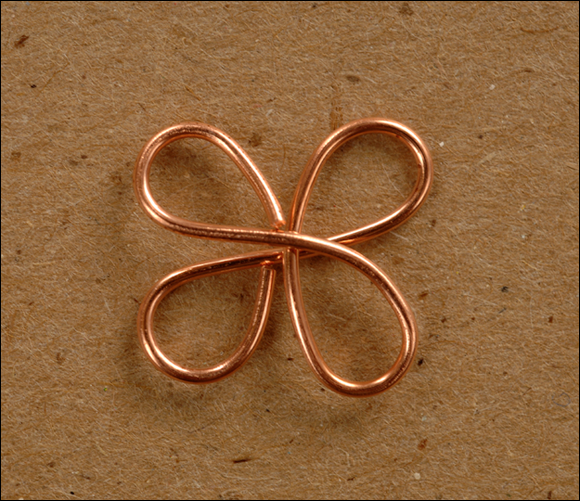
Step 11A
Wrapped Two-Loop Connectors
Wrapped wire connectors are more secure than simple connectors because their loops are wrapped closed.
1 Arrange two pegs next to each other on the jig, with one empty space between them.
2 Using wire directly from the spool or coil, place the wire diagonally between the pegs, leaving a tail about 2 inches long at the bottom.
3 Using the fingers of one hand, anchor the wire end against the jig.
4 With your other hand, wrap the wire over and around one of the pegs.
5 Bring the wire back up between the pegs and around the next peg, in a figure-eight pattern.
Step 5
6 Position the wire diagonally between the pegs.
7 After removing the wire from the jig, trim the wire so that it has about 2 inches of tail on its other end.
Step 7
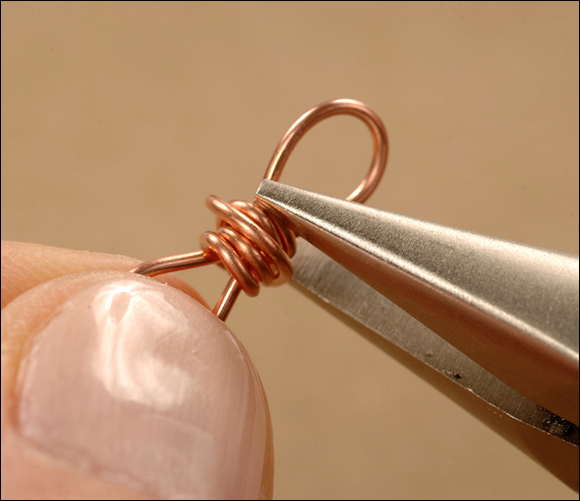
8 Using flat nose pliers, grasp one of the loops close to its base.
9 Wrap the wire tail from that loop, under and around the base of the loop twice, using round nose pliers to grip the wire, if necessary.
Step 9
10 After trimming off any excess wire tail, flatten the end of the wire against the coil using chain nose pliers.
Step 10
11 Turn the connector around and grasp the other loop with the flat nose pliers.
12 Wrap the second wire tail over and around the coil that you made with the first tail.
Step 12
13 After trimming any excess wire, flatten the wire end against the coil as you did in Step 10.
Step 13
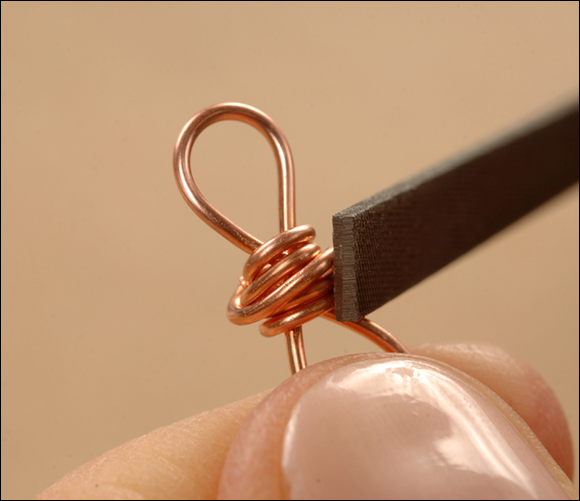
14 File the wire end with a needle file to remove any sharp edges.
Step 14
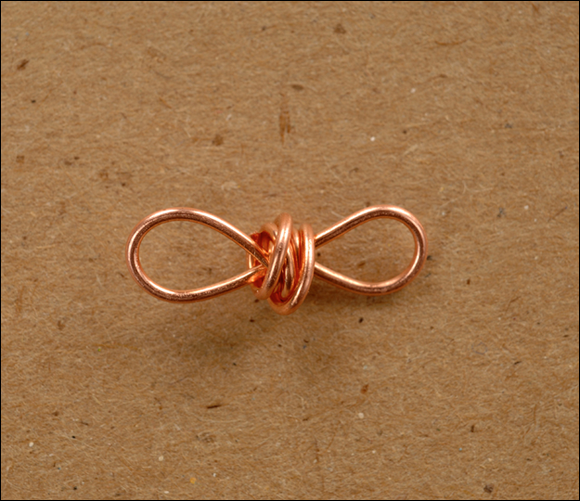
The completed wrapped wire connector is shown here (a).
Step 14A

Using Connectors as Spacer Bars
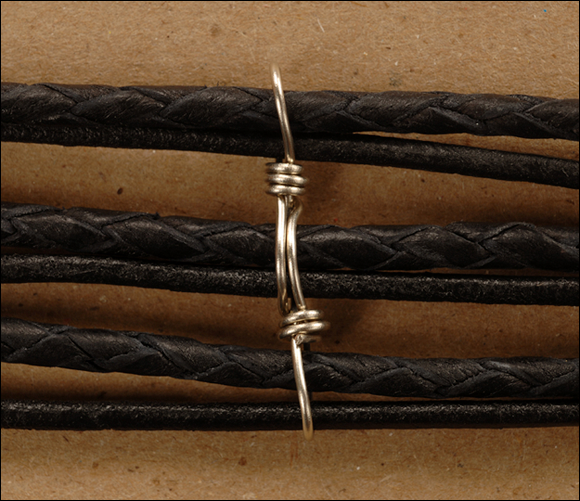
Wire connectors usually lie flat within a design to link components side-by-side. On large-diameter cord, like leather, they can also be used to hold multiple beaded strands next to each other lengthwise.
To do this, simply string on a connector by threading cord through its loops. String on beads or tie knots on either side of the connector to hold it in place.
Wrapped Three-Loop Connectors
1 Arrange three pegs horizontally on the jig, as shown.
2 Using wire directly from the spool or coil, place one end of wire diagonally between two of the pegs, leaving a tail about 2 inches long at the bottom.
3 Using one hand, anchor the wire tail against the jig.
Step 3
4 With the other hand, wrap the wire over the center peg, and then down again.
5 Bring the wire up, around, and over the next peg.
6 Position the wire diagonally and down between these two pegs.
7 Wrap the wire around the bottom of the center peg, bringing it up diagonally on the other side.
8 Wrap the wire over and around the last peg.

9 Position the wire diagonally up between these two pegs.
10 Wrap the wire over the center peg, leaving it pointing downward on the other side.
11 After removing the wire from the jig, trim the wire so that it has about 2 inches of tail on its other end.
12 Use flat nose pliers to grasp one of the end loops near its base.
13 Wrap the wire tail from this loop over and around the base of the loop two or three times.
Step 13
14 After trimming any excess wire tail, flatten the wire end against the new coil using chain nose pliers.
Step 14
15 Turn the connector around, and grasp the other end-loop with the flat nose pliers.
Step 15
16 Repeat Steps 12–13 to complete this wrap.
The completed three-loop wrapped connector is shown here (a).
Step 16A

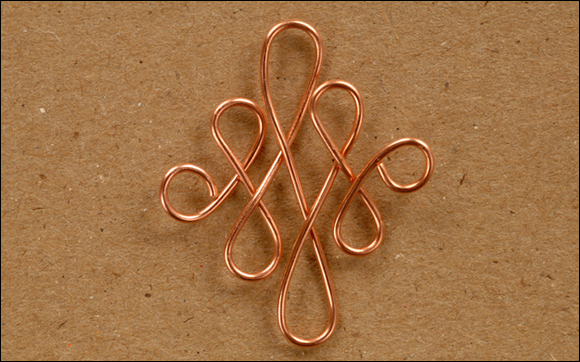
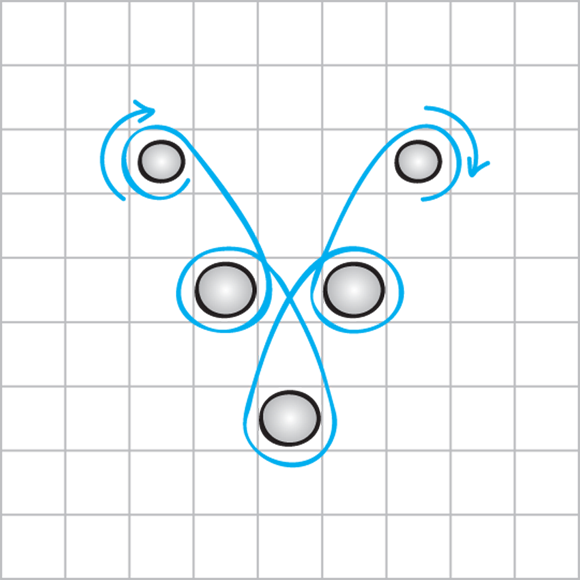
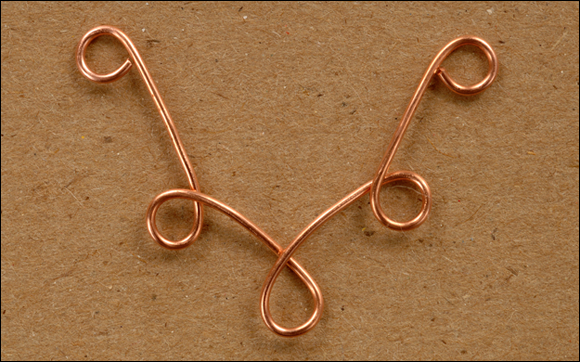
Celtic Knot Looped Connectors
These connectors make eye-catching focal pieces. Once you learn this basic approach, try creating them in other sizes and shapes using different diameters and arrangements of pegs.
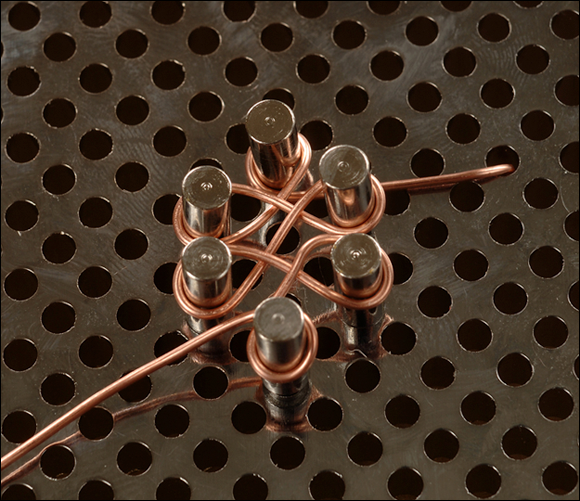
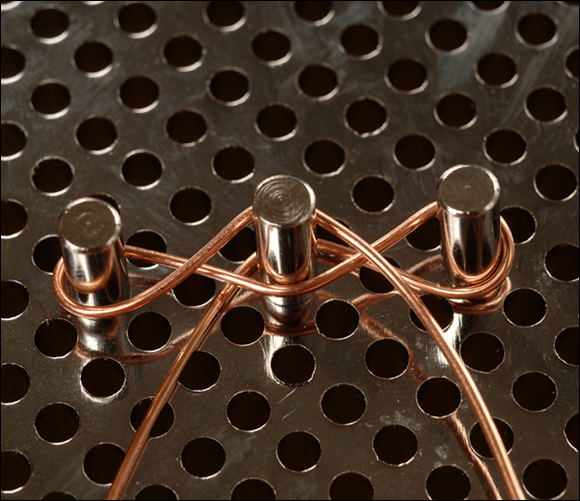
1 Arrange six small pegs on the jig as shown.
2 Using wire directly from the spool or coil, place the wire horizontally beneath the top peg, leaving a tail about 1 inch long at the side.
3 Using one hand, anchor the wire against the jig.
4 With the other hand, bring the wire up and around the top peg and back down again.
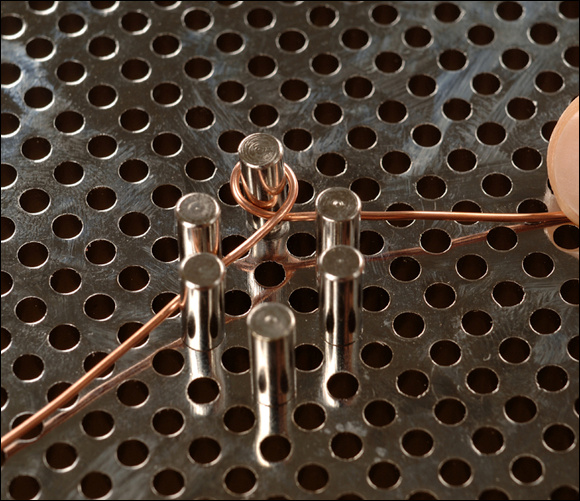
Step 4
5 Bring the wire up, over, and around one of the side pegs.
6 Cross over the center of the formation and wrap the wire around the opposite peg, creating a sideways figure-eight.
7 Cross the wire over again and bring it down below the next peg on the other side.
8 Wrap another sideways figure-eight around this peg and the peg opposite it.
9 Bring the wire down and wrap it all the way around the bottom peg.

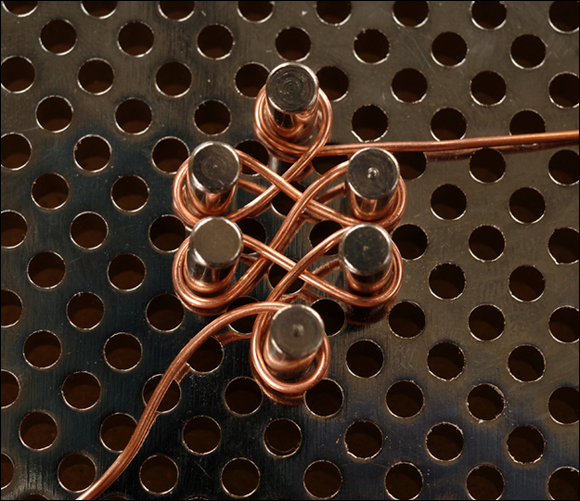
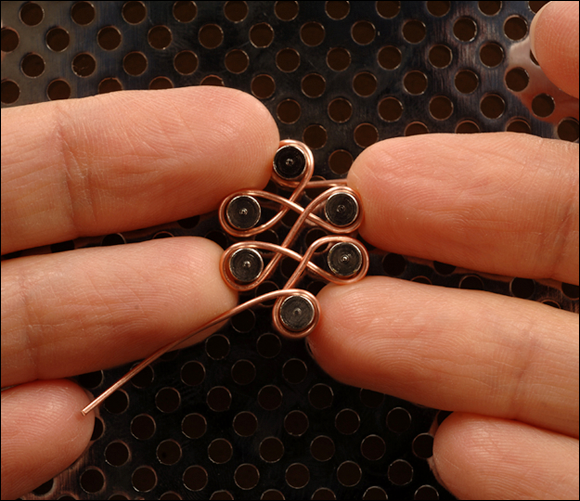
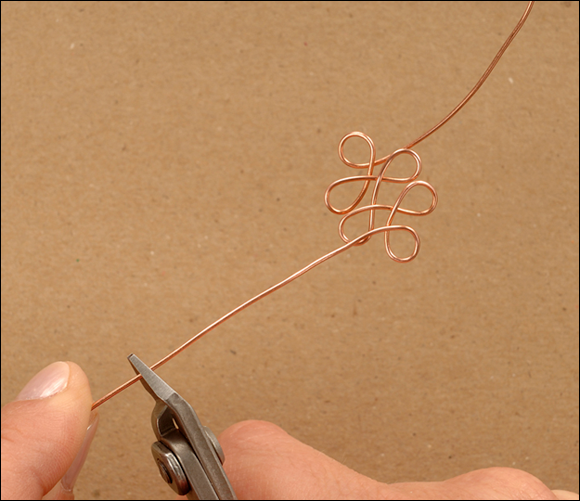
10 After removing the wire from the jig, use side cutters to trim the wire at the bases of the top and bottom loops.
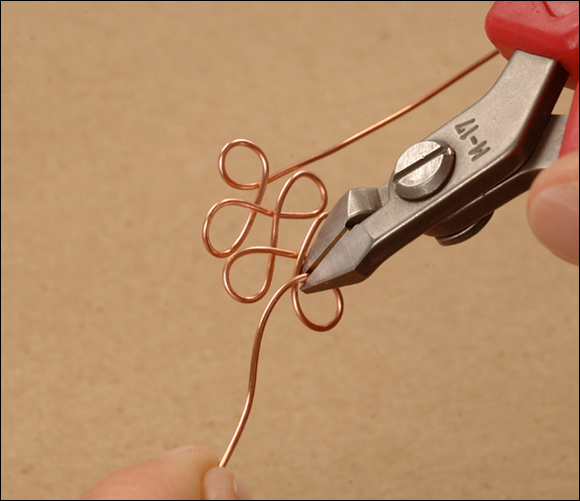
Step 10
11 Use flat nose pliers to wiggle each loop closed.
The completed Celtic knot looped connector is shown here (a).
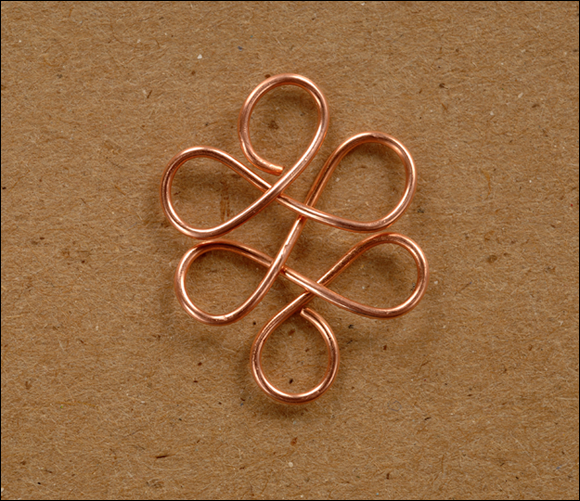
Step 11A
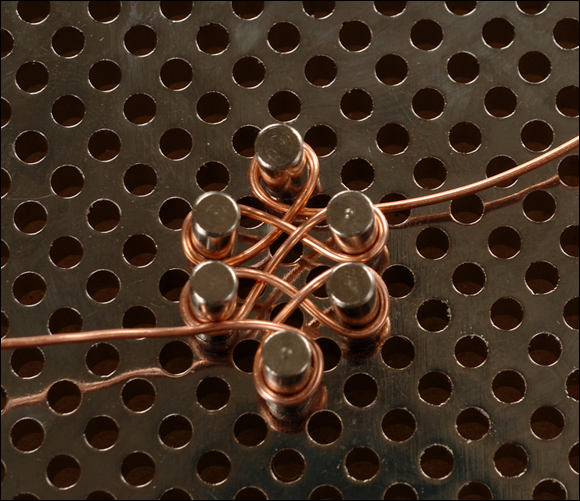
Spiral-End Looped Connectors
You can add flair to your connectors by replacing the end loops with flat spirals. Follow these steps to add coil ends to a Celtic knot looped connector.
1 Arrange six pegs on the jig in the same formation as the Celtic knot looped connector.
2 Using wire directly from the spool or coil, place the wire end horizontally below the top peg, leaving a tail about 2 inches long at the side.
3 Using one hand, anchor the wire against the jig.
4 Perform Steps 6–8 under “Celtic Knot Looped Connectors.”
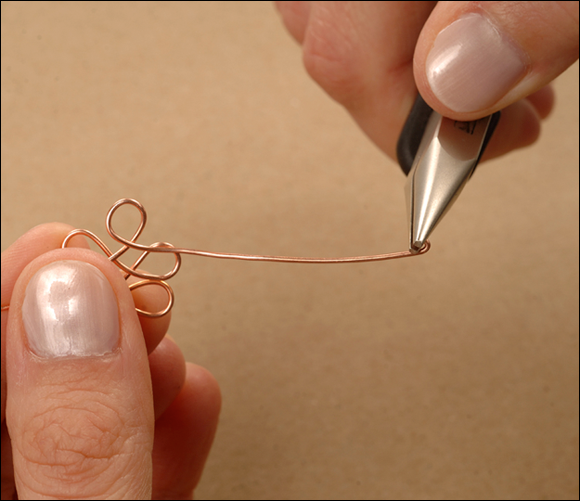
5 After removing the connector from the jig, trim it off of the coil or spool, leaving 2 inches of wire tail on the connector.
Step 5
6 Using chain nose pliers, fold-over the tip of one wire end in the direction shown.
Step 6
7 Begin spiraling the wire-end by performing Steps 4–7 for making spiral head pins in Chapter 6.
Step 7
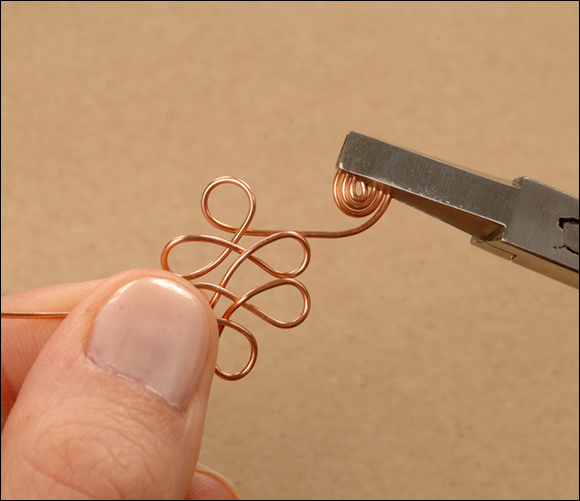
8 Continue forming the spiral until it reaches the connector.
9 Create a matching spiral on the other end of the connector, rolling the second spiral in the opposite direction to the first.
The completed spiral-end looped connector is shown here (a).
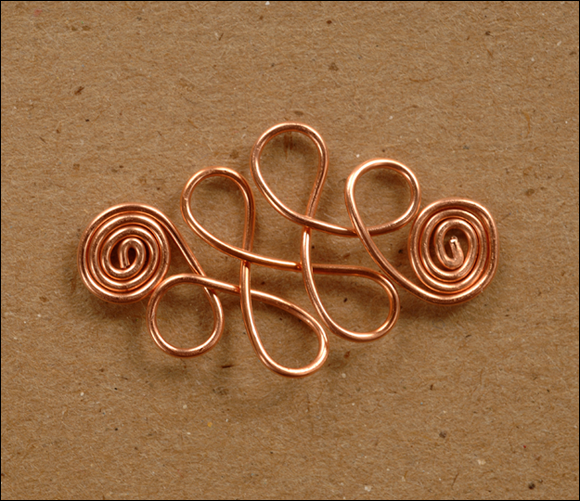
Step 9A
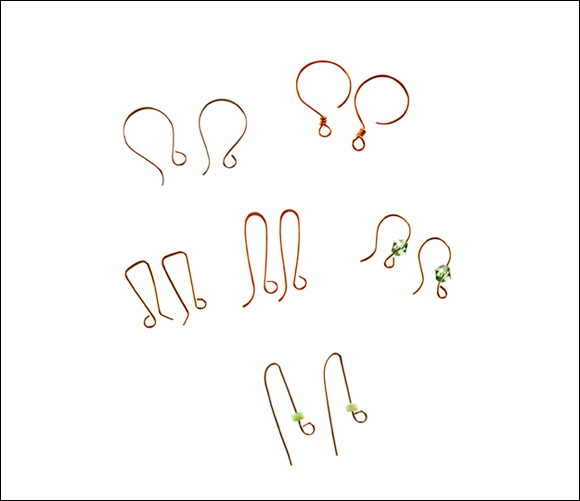
Form Ear Wires
Ear wires are easy to make and less expensive than their pre-made counterparts.
Simple French Hooks
1 Arrange one small, one large, and one medium peg on your jig, as shown.
2 Using 22- or 20-gauge wire directly from the spool or coil, use side cutters to make a flush-cut at the end of the wire.
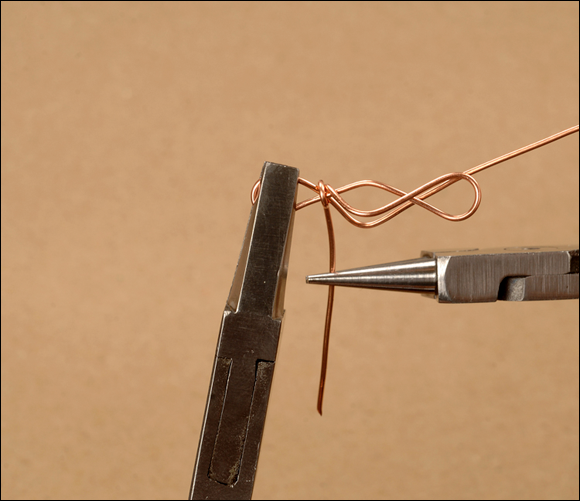
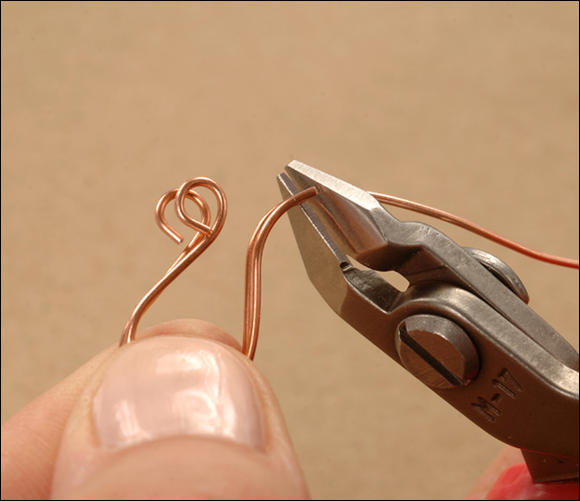
3 Grasp the wire end with round nose pliers, and roll them away from you to create a loop.
Step 3
4 Place the loop over the small peg on the jig, with the loop facing downward, as shown.
Step 4
5 Wrap the wire around and over the large peg, and down between the small and medium pegs.
6 Pull the wire up slightly behind the medium peg.

7 After removing the wire from the jig, use side cutters to trim the wire just past the final curve that you created in Step 6.
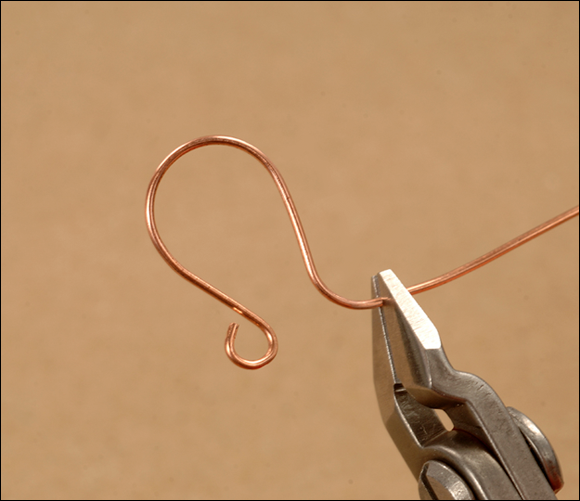
Step 7
8 Repeat Steps 1–7 to create a matching ear wire.
9 To trim the second ear wire, hold it up against the first one to make sure that you cut it in exactly the same place.
Step 9
10 Place each hook on a bench block.
11 Lightly hammer the tops of the hooks in a direction moving away from you, until they are slightly flattened.
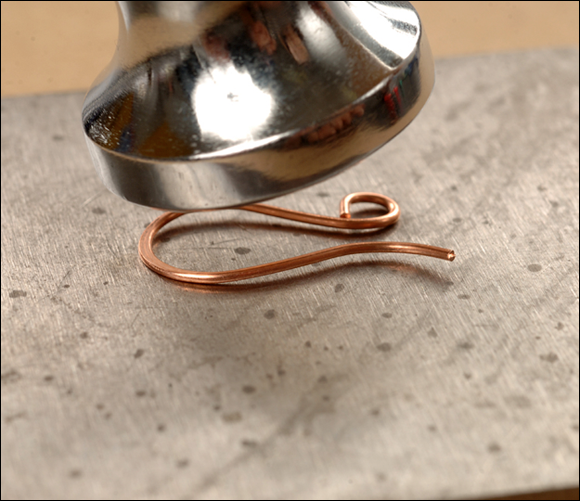
Step 11
12 Optionally, turn the hooks around and lightly hammer the loops to stiffen them.
The completed hooks are shown here (a).
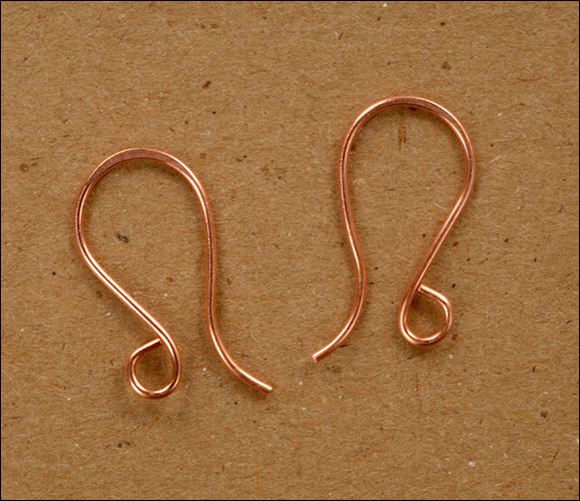
Step 12A
Deburring Ear Wires
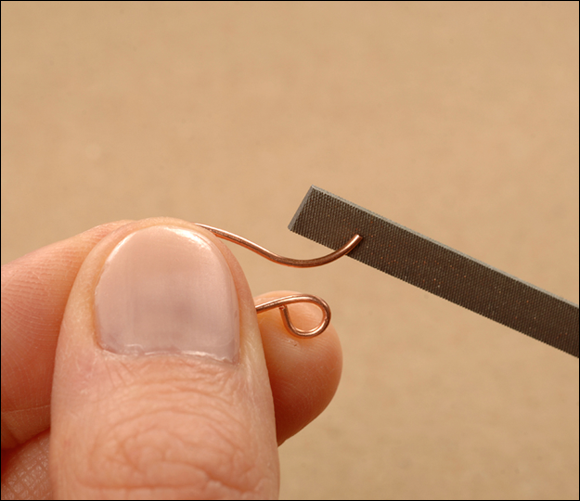
Always debur your ear wires so that they will be comfortable to wear. Deburring is the process of removing sharp edges from an end of wire.
After removing each ear wire from the jig and trimming its end, use a needle file to smooth down the edges. Holding the file at a 45-degree angle, gently file all the way around the wire end. Then, lightly rub your finger over the end of the ear wire to see if it’s smooth to the touch. If it’s still scratchy, continue filing gently at an angle until the wire tip is completely rounded and smooth.
Curled-Loop French Hooks
This style of French hook is a little more ornate than the simple version.
1 Perform Steps 1–2 under “Simple French Hooks”.
2 Place the end of the wire on a bench block.
3 Slightly flatten the tip of the wire by lightly hammering in a motion that is moving away from you.
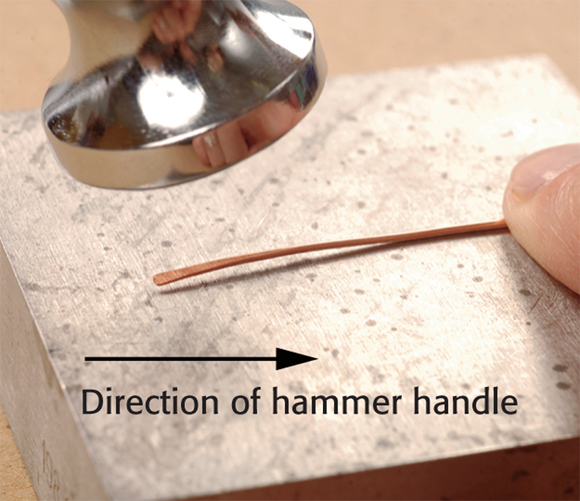
Step 3
4 If needed, use a needle file to file the end of the wire smooth.

Step 4
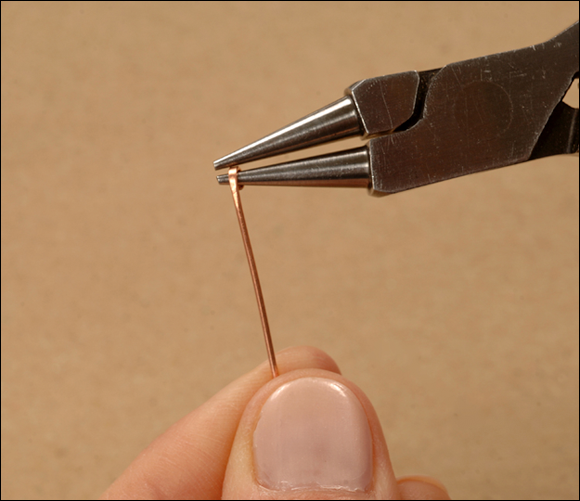
5 Grasp the wire end with the tips of round nose pliers, and roll them way from you to create a very small loop.
Step 5
6 Turn the wire around so that the loop is facing you.
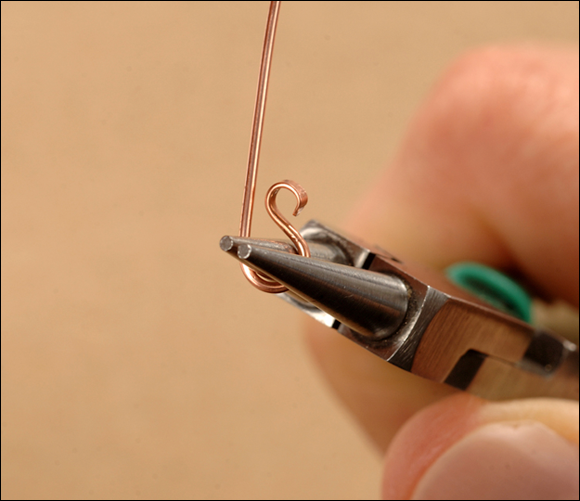
7 Grasp the wire with the round nose pliers just below the loop, and position the wire a little farther up on the nose of the pliers.
8 Roll the pliers away from you to create a second, complete loop.
Step 8
9 Before removing the pliers, gently pull the wire back and position it next to the first loop, as shown.
Step 9
10 Place the second loop over the small peg on the jig with the loop pointing downward, as shown.
Step 10
11 Complete the ear wire as you did in Steps 5–8 under “Simple French Hooks”.
12 Make a second ear wire to match.
The completed curled-loop French hooks are shown here.

Customizing Ear Wires
You can give earrings a unique look by altering the design of their hooks. Try experimenting with different shapes, sizes, and embellishments. Just make sure that your hooks are easy to insert and comfortable to wear, and that they hold earrings in place securely.
Here are some ideas to try:
• Large, circular hoops made by using your largest jig peg.
• Hooks with wrapped loops instead of open loops.
• Extra-long, straight hooks.
• Hooks with beads above their loops.
• Square or triangular hooks.
Wire Jig Patterns
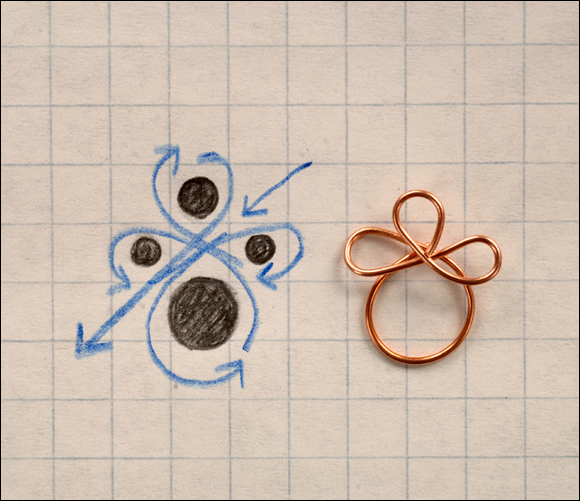
You can create your own unique components on a jig by experimenting with different peg sizes and configurations. When you discover a design that you really like, you may want to keep a record of it so that you can make it again. A good way to do this is to create a jig pattern.
Diagramming on Graph Paper
This is a very basic method for making a jig pattern. You simply draw in the locations of pegs in corresponding squares on graph paper.
Begin by arranging the jig pegs and wrapping wire around them to create your design. Place a piece of graph paper next to the jig, and copy the locations of each peg to matching squares on the graph paper. Allow each square to represent one space on the jig. Designate peg sizes by using varying sizes of circles or different letters, symbols, or colors on the paper. Use lines and arrows to show the path that the wire takes through the pegs. To use the pattern, simply arrange pegs in the jig to match your diagram.
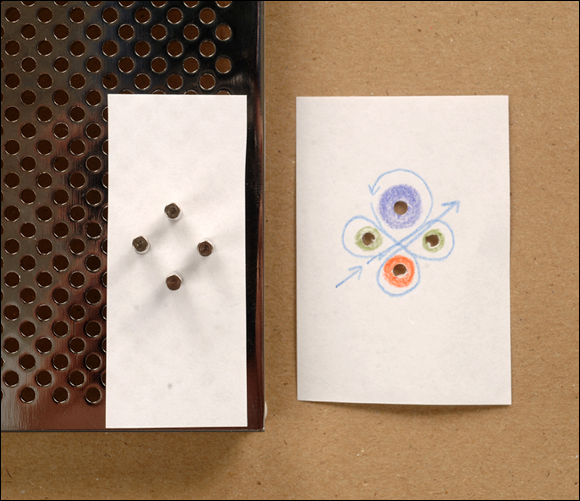
Peg-Hole Patterns
Another way to create a jig pattern is to use pegs to punch holes in a piece of paper. For best results, only use this method with a jig large enough to hold two separate arrangements of pegs at one time, or use two jigs.
Begin by arranging the pegs close to one side of the jig, and wrapping wire to create your design. Place a sheet of paper over the other side of the jig (or on a second jig). Using new pegs, re-create your design in the paper by pushing the pegs through it and into the jig holes. When you’re finished, you’ll have a template that you can place over your jig to re-create the design.
To designate peg sizes on a peg-hole pattern, try color-coding the outsides of the holes using colored pens. You can show the path of the wire using lines and arrows, as you would with a graph-paper pattern.
Some Wire-Jig Patterns to Try
Now that you know how to use a jig and jig patterns, try making these connectors by following the graph-paper patterns provided. When you get accustomed to them, try altering them to create your own designs.