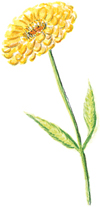
Calendula
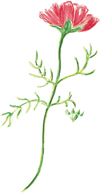
Cosmos
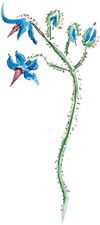
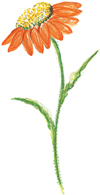
Borage
Tithonia
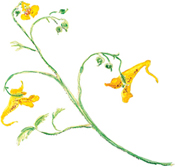
Jewelweed
Common Name |
Genus |
|---|---|
Aster |
Aster spp. |
Bee balm |
Monarda didyma |
Black-eyed Susan |
Rudbeckia hirta |
Blueberry |
Vaccinium spp. |
Borage |
Borago officinalis |
Buckwheat |
Eriogonum spp. |
Butterfly bush |
Buddleia davidii |
Calendula |
Calendula officinalis |
Catmint |
Nepeta spp. |
Chives |
Allium schoenoprasum |
Coneflower |
Echinacea spp. |
Coral bell |
Heuchera spp. |
Cosmos |
Cosmos bipinnatus |
Anethum graveolens |
|
Fennel |
Foeniculum vulgare |
Flowering currant |
Ribes sanguineum |
Flowering tobacco |
Nicotiana spp. |
Foxglove |
Digitalis spp. |
Goldenrod |
Solidago spp. |
Hollyhock |
Alcea rosea |
Jewelweed |
Impatiens capensis |
Joe-pye weed and boneset |
Eupatorium spp. |
Lantana |
Lantana spp. |
Lavender |
Lavandula spp. |
Lilac |
Syringa vulgaris |
Lupine |
Lupinus spp. |
Milkweed/Butterfly weed |
Asclepias spp. |
Phlox |
Phlox spp. |
Pincushion flower |
Scabiosa spp. |
Pineapple sage |
Salvia elegans |
Redbud |
Cercis canadensis |
Sedum |
Sedum spectabile |
Sunflower |
Helianthus spp. |
Verbena and vervain |
Verbena spp. |
Willow |
Salix spp. |
Zinnia |
Zinnia spp. |
|
|
|---|---|
Calendula |
Cosmos |
|
|
Borage |
Tithonia |
|
|
Jewelweed |
|
Common Name |
Genus |
|---|---|
Aster |
Aster spp. |
Borage |
Borago officinalis |
Dill |
Anethum graveolens |
Fennel |
Foeniculum vulgare |
Hollyhock (singles) |
Alcea rosea |
Hop vine |
Humulus lupulus |
Lupine |
Lupinus spp. |
Marigold |
Tagetes spp. |
Milkweed |
Asclepias spp. |
Parsley |
Petroselinum crispum |
Pipevine |
Aristolochia spp. |
Plumbago |
Plumbago spp. |
Queen Anne’s lace |
Daucus carota |
Violets |
Viola spp. |
|
|
|---|---|
Violets |
Borage |
Use 4-inch by 4-inch cedar posts (never use the chemically treated wood), and vary the heights from 3 feet to 5 feet.
Give your apartments the appearance of a hip roofed structure by cutting each side of the posts at a 60-degree angle to form a point.
Drill a row of 5/16-inch holes, ¾ of an inch on center and 3 inches deep. I’ve used four columns across and six rows of holes, but there are no rules as to number.
Use tin, aluminum, or copper cut to fit the roof, and glue it in place to protect the wood and bees from moisture. Sink posts 1 foot deep into the soil or concrete, with the entry holes facing east.
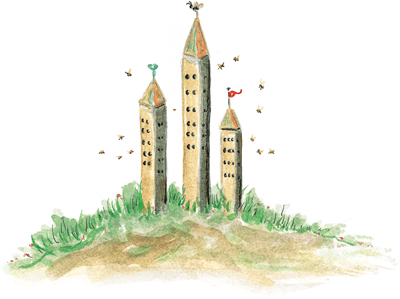
Cedar post bee havens add a sculptural element to the landscape.
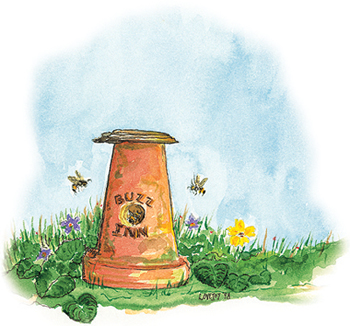
Find a sheltered, shady area, and set a flat rock on the ground. Lay a handful of cotton or fine, dry grasses on the rock. With a masonry bit, drill a ⅝-inch entry hole into the side of a 6-inch terra-cotta pot. This opening is large enough for bees, but too small for mice. Set the pot over the grasses and place a brick or flat stone on top of the pot to cover the drainage hole (bee nests must be kept dry) and to discourage marauding skunks.
For instructions in building or for a bat house kit, contact the Organization for Bat Conservation (OBC). (See here.)

Mount bat houses at least 15 feet above the garden.
Gather dry sunflower stalks, slender shoots of bamboo, or pithy berry canes and cut them into 6-inch lengths. Thoroughly clean and dry a large can (6-inch depth is best) and camouflage the exterior by painting it dull brown, green, or gray. Screw the back of the can to a piece of wood. Tightly stuff the can with the stalks or canes and mount it horizontally in a tree or other shady, protected location, such as against a fence or wall.
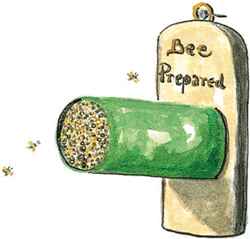
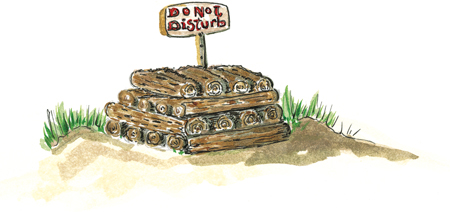
Materials you’ll need:
logs 2½ inches to 3 inches in diameter and 15 inches long
galvanized deck screws 3½ inches to 4½ inches long (at least 1 inch longer than the width of your logs)
an electric screwdriver or drill
Place four logs parallel on the ground about 1 inch apart, and then four more logs perpendicular to and on top of the first row about 1 inch apart. Install the deck screws through the top logs to secure them to the log below. Lay another row of four logs perpendicular to and on top of the second row about 1 inch apart. Repeat the installation of deck screws and alternating rows of logs until you’ve reached the desired height. Site the log high-rise in a sheltered, shady area.
Drop leaves and organic yard debris (not treated with pesticides or herbicide) down between the logs. Keep poisons and slug and snail baits away from this area.
Materials you’ll need:
a lidded plastic container at least 2 feet by 3 feet and 18-20 inches deep
screen (to line the bottom)
a tray (to catch the moisture)
4 bricks to elevate the container
Poke 1/4-drainage holes in the bottom and air holes in the sides and the lid. Cover the floor of the container with screen and a layer of moist, shredded newspaper. Add some kitchen leftovers and worms. Always top the worms with more wet newspaper, cardboard, or grass clippings after adding garbage. Fill one half of the container before moving to the other side. Empty the full half and repeat the process. Always keep the lid on the box.
Bin Menu: Spread a layer of bedding (shredded wet newspaper or cardboard, grass clippings, pine needles, leaves (nothing containing pesticides, herbicides, rodenticides, fungicides) before adding household garbage, including eggshells, coffee grounds (and filters), and tea bags.

You can build a 4-foot by 8-foot worm bin 30 inches tall with a plywood top for approximately $100. The cinder blocks will last a lifetime, and your bin can be disassembled and moved if desired.
Materials you’ll need:
64 cinder blocks 8 inches by 8 inches by 16 inches
a 4-foot by 8-foot sheet of ⅜-inch exterior plywood
a flat, shady spot at least 4 feet by 8 feet
Start with a row of cinder blocks to form the sides of a rectangle 4 feet by 8 feet. Lay the blocks end to end with the holes facing up. For the first row, use six blocks for the front and back sides. Use two blocks on each of the two ends and butting into the front and back.
For the second row, stagger the blocks to overlap the first row by using three blocks on each of the two ends and five along the front and back, butting into the sides. Repeat the first-row pattern for the third row, and the second-row pattern for the fourth. The height can be easily adjusted by using fewer or more rows of blocks.
Cut the plywood into two 4-foot by 4-foot pieces. Fit the plywood to cover the top of the bin. Don’t situate the bin against a wooden fence or siding.
If you live in an extremely cold area, lay 2-inch-thick pieces of Styrofoam against the sides of the bin and cut two pieces to “float” on top of the garbage in the bin. Worms slow down in cold weather and may overwinter in the cocoon stage.
To keep the contents smelling fresh and looking acceptable, always cover garbage with a layer of bedding. Foods not recommended for worm consumption are cheese, butter, meat, and oily products.
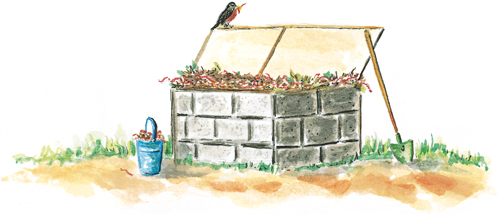
Moisten your worm bin once a week.

These resilient plants will thrive in the pale but constant light of a northern exposure: Aspidistras, Muehlenbeckia (the dainty but hardy maidenhair vine), an amazing array of ferns, asparagus smilax vine (one of the most popular bouquet and decorative plants of Victorian times), ivies, ficus, philodendrons, Chinese evergreens, marlberry, Norfolk Island pine (also a nice holiday decoration), variegated aucuba, palms, peperomia, mother-in-law’s tongue, umbrella tree, and spathiphyllum.
If you’re dreaming of an indoor jungle of flowers, your sunny southern window is the place to cultivate that desire. Experiment with elegant mandevilla vines, hibiscus, and cyclamen (both florist’s and miniatures). Lemon verbena, one of the most potently scented of all herbs, will happily grow indoors. But beware—come winter it will shed its leaves. Try your hand with dwarf fruit trees (which need night temperatures of 55 degrees) such as the tasty Meyer’s lemon, kumquats, limes, “Chinotto” orange, figs, and pomegranates. Abutilons, also known as flowering maples, with their drooping, hoop-skirted blossoms, will thrive and bloom prolifically alongside hibiscus, lantana (they need strong light three hours a day), climbing polyanthum jasmine (easy to train into a circular form), clerodendrums, geraniums, pentas, and scented pelargoniums.
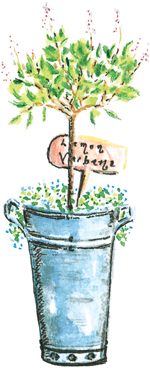
Lemon verbena
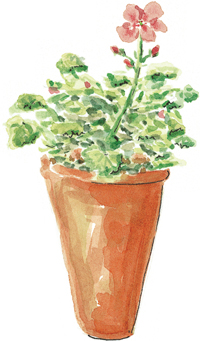
Geranium
These stalwart plants will flourish in the evanescent morning light of an east-facing window: rex begonias, angel-wing begonias, forcing bulbs (narcissus, daffodils, hyacinths, muscari, crocus, anemones, lily-of-the-valley), fuchsias (try the miniature thymifolia—it forms perfect topiaries), citrus, hoyas, whimsical windmill jasmine, impatiens, streptocarpus, orchids, violets, gesneriads (always water from below and don’t splash their hairy leaves with water), and clivia and amaryllis (two winter bloomers with brilliant flowers).
Near a western window, nestle some fuchsias, coddle a pittosporum and revel in its flowers scented like orange blossoms, and reserve an area for a stately, shiny-leaved camellia studded with perfect rosette blooms. Hoyas, alocasias (with their architectural leaf shapes and veining), anthuriums (so many varieties from which to choose), and calatheas (the zebra-striped Zebrina is striking) also enjoy this setting.
Many houseplants are content to grow and bloom beneath overhanging lamps outfitted with incandescent lightbulbs. Keep 40-watt bulbs at least 16 inches away from plants, 60-watt bulbs 24 inches away, and 100- to 150-watt bulbs about 30 inches above the plants.
These small bulbs are rated R-25, come in 50, 75, and 150 watts, and cost about $6 each. Use them for focused lighting on specimens such as ficus trees or over a collection of violets, pelargoniums, streptocarpus, or herbs.
New HID lights have two to three times the output of fluorescent light tubes. A typical 400-watt HID, which uses 6 kilowatts per hour, will furnish enough lumens for a grouping of light-loving bloomers (see the plants listed under Sunny Southern Dispositions).
Cluster your plants below fluorescent bulbs, or string them along the length of a fluorescent tube. Try blending fluorescents by using both a cool white and a warm white tube. Hang the fixture about 20 inches above your plants. The strongest light is in the center, so group your scented pelargoniums, violets, and orchids there, and place the plants with low-light requirements (see Shady Characters) at both ends of the tube.
