


Makes 4 servings | Hands-on time: 10 minutes | Total time: 20 minutes
I try to channel Chez Panisse’s Alice Waters whenever I throw together a simple salad like this one, which means I get all up in your face (as nicely as possible, of course) about using high-quality ingredients. If you attempt this recipe with mealy, out-of-season tomatoes, you’ll end up with a subpar salad. But if you start with juicy, ripe heirloom tomatoes, this little salad will explode with big flavor.
GET:
1 medium shallot, thinly sliced
2 tablespoons balsamic vinegar
5 ripe heirloom tomatoes, cut into wedges
Fleur de sel
Freshly ground black pepper
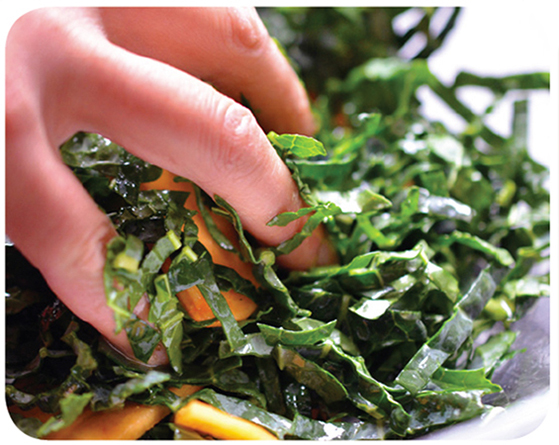
6 fresh basil leaves, cut into a chiffonade (see description below)
Extra-virgin olive oil
DO THIS:
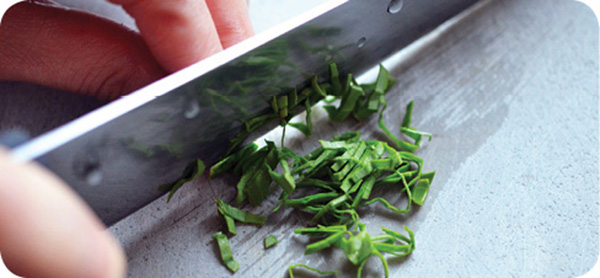
A CHIFFO-WHAT?
“Chiffon” is French for “rags,” and a “chiffonade” simply refers to the process of making a thin, ribbonlike cut of greens or leafy herbs. It’s an easy way to add an elegant garnish to your dishes.
The process is simple: Stack some leaves together, roll them lengthwise into a tight cylinder, and make thin, perpendicular slices with a sharp knife. You’ll end up with a bright green pile of edible confetti.
 Craving more heft? Try adding lump crab meat and diced Hass avocado to this salad.

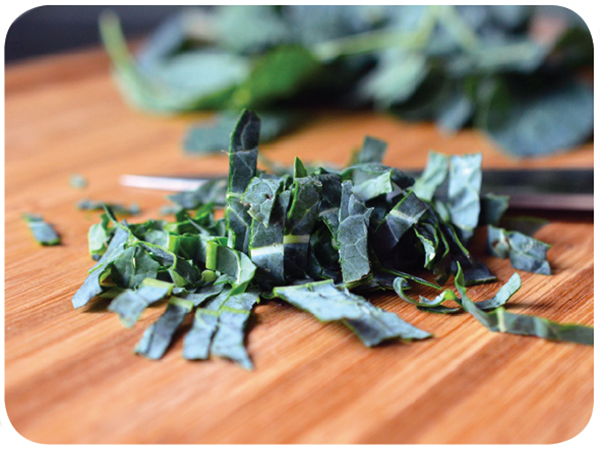
This fruity, tangy salad is mega-tasty and super-nutritious. Plus, you can hastily assemble one to pack for lunch in the office or to accompany a hearty dinner on a cold night. And unlike many other salad greens, kale holds up beautifully and tastes even better the next day. What’s not to love?
| Makes 2 servings | 3 cups baby lacinato kale | |
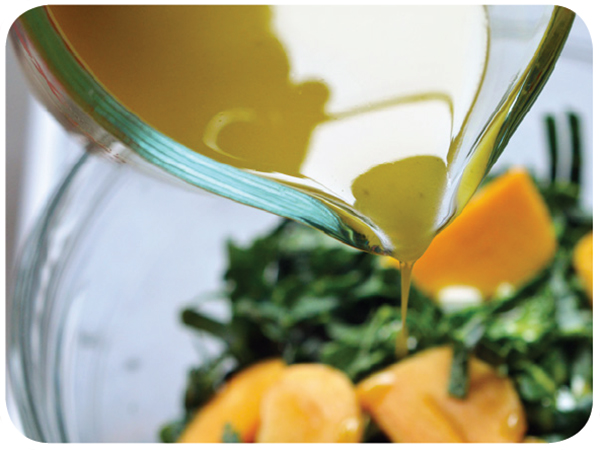
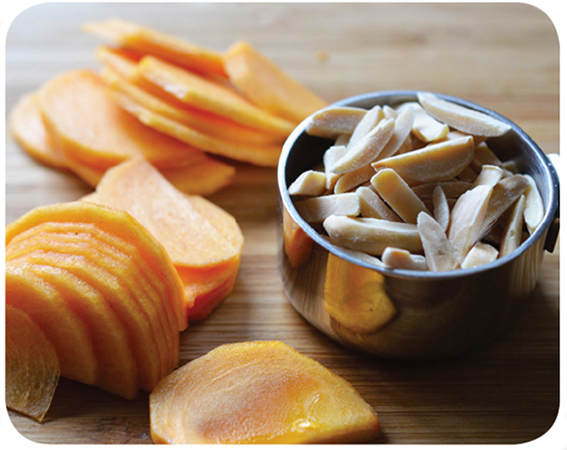
| Hands-on time: 5 minutes | 1 medium Fuyu persimmon, peeled and thinly sliced | |
| Total time: 5 minutes | ¼ cup Citrus Vinaigrette | |
| ¼ cup almond slivers, toasted |
DO THIS:
CHEW ON THIS:
Don’t you dare make a bland-tasting chicken salad tossed with plain old mayonnaise. Instead, punch it up with smoky, aromatic curry powder, crunchy apples, fresh herbs, and toasted almonds. With just a few pantry items, you can radically transform a ho-hum dish into an elegant and flavorful weeknight supper.
| Makes 4 servings | ½ cup Paleo Mayonnaise | |
| Hands-on time: 15 minutes | ¾ teaspoon Indian curry powder | |
| Total time: 15 minutes | 1 teaspoon kosher salt | |
| Freshly ground black pepper | ||
| 1 small Gala, Fuji, or Honeycrisp apple, peeled, cored, and cut into ½-inch dice | ||
| Juice from ½ medium lime | ||
| 1 pound cooked chicken breast or thighs | ||
| ½ cup packed fresh cilantro, roughly chopped | ||
| 2 scallions, trimmed and thinly sliced | ||
| ¼ cup almond slivers, toasted |
You can choose to use any Indian curry, but my personal favorite is Madras curry, an intoxicating blend of over a dozen fragrant spices!
DO THIS:

Make this Chicken Salad portable: wrap it in butter lettuce leaves!
For years, whenever we visited our favorite French bistro, I would always begin my meal with the same salad: wilted frisée with a soft-cooked egg and a generous sprinkle of smoky lardons. These days, I favor this homestyle variation, featuring peppery arugula and a drizzle of warm bacon dressing. Pop the yolk, and let all the components meld together for a rich, saucy salad.
| Makes 2 servings | 4 slices bacon, cross-cut into ¼-inch pieces | |
| Hands-on time: 30 minutes | 2 Poached Eggs | |
| Total time: 30 minutes | 2 tablespoons balsamic vinegar | |
| 4 cups baby arugula | ||
| Kosher salt | ||
| Freshly ground black pepper |
DO THIS:

Not a fan of bitter salad greens? Substitute fresh baby spinach for the arugula!


Close your eyes and picture a cup of coleslaw. You’re probably conjuring up a mental image of limp strands of cabbage drowning in bland, watery dressing, right? Sadly, modern coleslaw is often nothing more than a soggy mess, having lost much of the distinctiveness of its Dutch-American roots. (The name “coleslaw” is derived from the Dutch koolsalade or koolsla, meaning “cabbage salad”—though in its original eighteenth-century form, this tangy dish was dressed with hot melted butter and vinegar.)
Well, I’ve got a recipe that’ll rehabilitate the reputation of this picnic staple for you. Once you get a taste of this Paleo coleslaw, you’ll never look at this salad the same way again.
| Makes 6 servings | ¼ cup Paleo Mayonnaise | |
| Hands-on time: 20 minutes | 2 tablespoons full-fat coconut milk | |
| Total time: 1½ hours | 2 tablespoons fresh lemon juice | |
| 1 tablespoon honey | ||
| Kosher salt | ||
| ½ head small red cabbage, finely chopped or shredded | ||
| ½ head small Savoy cabbage, finely chopped or shredded | ||
| 1 large carrot, shredded with a julienne peeler | ||
| Freshly ground black pepper | ||
| 2 tablespoons sesame seeds, toasted |
DO THIS:
Classic coleslaw is terrific, but doesn't Italian coleslaw sound even better? Add thin strips of prosciutto and red bell peppers to make Insalata Capricciosa!

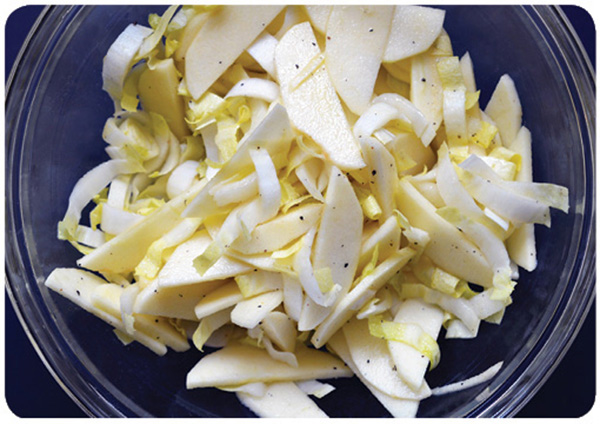
Can’t decide whether to plate up something salty or sweet, crunchy or juicy, bitter or tangy, or nutty or fruity? Make this salad. It marries all of these contrasting yet complementary elements in one bright dish.
| Makes 4 servings | 3 medium endive heads, thinly sliced crosswise (about | |
| Hands-on time: 15 minutes | 3 packed cups) | |
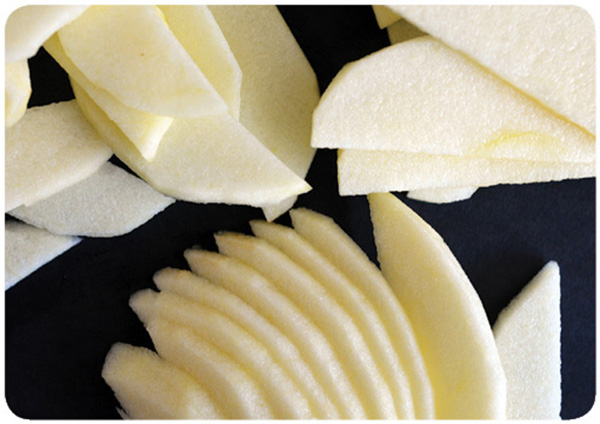
| Total time: 15 minutes | 2 medium Gala, Fuji, or Honeycrisp apples, peeled, quartered, cored, and thinly sliced | |
| ¼ cup Honey Mustard Dressing | ||
| Kosher salt | ||
| Freshly ground black pepper | ||
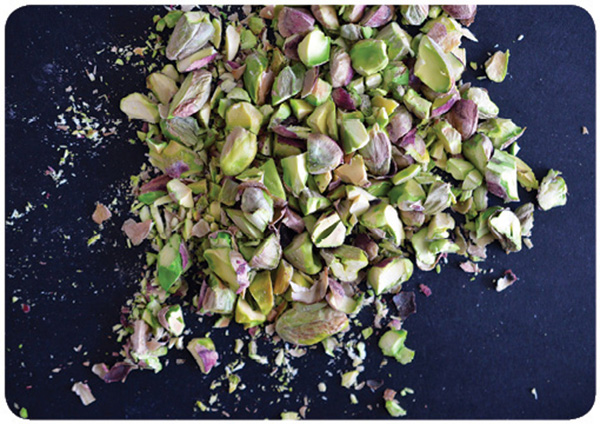
| ½ cup roasted and salted pistachio nuts, shelled and chopped |

DO THIS:
Combine the endive and apple slices in a large bowl. Add enough dressing to suit your tastes, and gently toss the salad together with your fingers. Season with salt and pepper to taste, and divide among plates or bowls. Top with the chopped pistachio nuts before serving.

This salad is the perfect accompaniment for sausages, grilled pork, or barbecued meats!

Makes 4 servings | Hands-on time: 10 minutes | Total time: 10 minutes
The classic Crab Louie originated in the early twentieth century somewhere on the West Coast, but the exact circumstances of its birth are lost to time. Some claim that this “King of Salads” was first served at Seattle’s Olympic Club, while others insist that it was the invention of Solari’s Restaurant in San Francisco’s Union Square. Even James Beard and Helen Evans Brown—two of America’s most esteemed food writers—could never quite see eye-to-eye on whether their beloved Crab Louie was a native son of Beard’s Washington or Brown’s California.
I’m a hometown gal, though, so my vote is for San Francisco. Besides, the centerpiece of this crisp, cool salad is fresh Dungeness crab—the very symbol of the city’s two-hundred-year-old fishing industry. Piled atop lettuce and adorned with ripe tomatoes, hard-boiled eggs, and bright green asparagus, the succulent crab meat is what makes this simple salad one that’s fit for a king.
GET:
1 pound asparagus, trimmed
6 cups lettuce leaves or salad greens
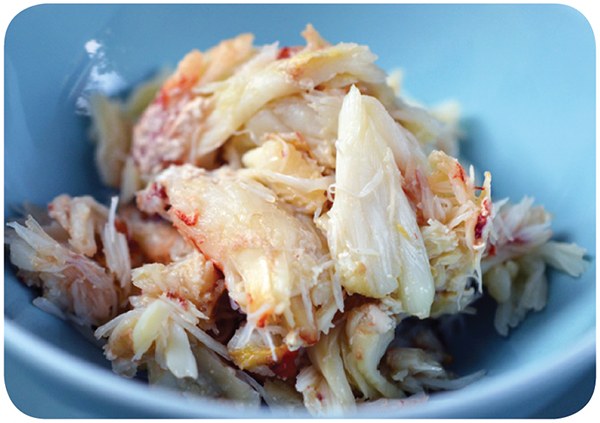
1 pound cooked lump crab meat (see below)
4 Perfect Hard-Boiled Eggs , sliced in half
1 cup cherry tomatoes
¼ cup minced chives
½ cup Louisiana Rémoulade
DO THIS:

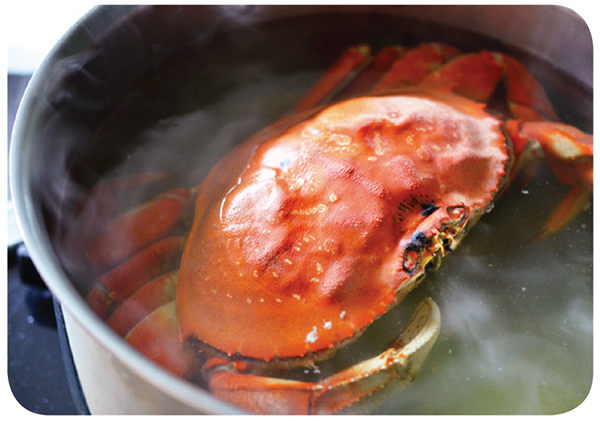
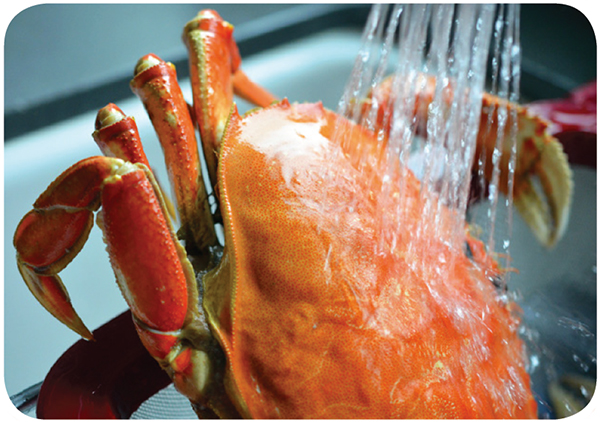
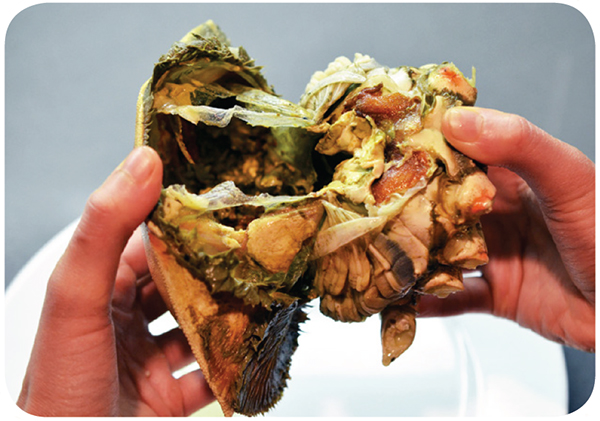
HOW TO BRINE-BOIL A
DUNGENESS CRAB
It’s a snap to crack open a container of lump crab meat. But if you’re in an ambitious mood, who am I to stop you from brine-boiling a live Dungeness crab? Fresh crustacean meat is a wonderfully delicate, sweet, and juicy reward that makes the effort more than worthwhile. Here’s how to do the deed:
Give yourself a round of applause. You’ve just brine-boiled a crab!
Hey, East Coast people: this method works with Atlantic blue crabs, too!

On a cold winter’s day, nothing hits the spot like a steaming bowl of bone broth—especially when I’m feeling under the weather. Not only does it warm me from the inside out, it’s also a terrifically nutritious superfood. Packed with health-promoting minerals like calcium and magnesium, bone broth is also loaded with collagen and gelatin, making it a magical elixir that boosts both intestinal and joint health.
And did I mention how wonderful it tastes? Done properly, bone broth reveals its divine depth and adds a robust, umami dimension to your soups and stews. Sure—broth made with bare bones can be less than appetizing, but that’s why I always use meaty bones like cross shanks, oxtails, and short ribs to punch up the flavor. And to produce a gelatin-rich broth, make sure to include knuckles or chicken feet.
There are plenty of ways to make bone broth at home. I’ve simmered it on the stove and in a slow cooker, but when I want it pronto, I turn to my pressure cooker—an invaluable tool for quickly transforming a pile of bones into a rich, flavorful broth. Whichever method you choose, you’ll love the rich, comforting flavors of this homemade stock.
| Makes 8 cups | ||
| Hands-on time: 10 minutes | ||
| Total time: 1 to 24 hours |
GET:
2½ pounds assorted beef, chicken, and/or pork bones (see note on opposite page)
2 medium leeks, trimmed, cleaned (see note here), and cut in half, or 1 small yellow onion, peeled, trimmed, and cut in half
1 medium carrot, peeled and cut into 3 pieces
8 cups water, plus more if needed
2 tablespoons Paleo-friendly fish sauce
1 teaspoon apple cider vinegar
¼ ounce dried shiitake mushrooms (optional)
4 garlic cloves, peeled and smashed (optional)
1 (1-inch) piece fresh ginger, peeled and cut into thick coins
Kosher salt or Celtic sea salt
BONE BROTH THREE WAYS!
If cooking the broth in a stock pot:
Cover and bring to a boil over high heat. Skim off the scum, and turn down the heat to maintain a low simmer. Cook, covered, for 12 to 24 hours, or until the bones are soft. Check occasionally and add water if needed to keep the bones and vegetables submerged. Cooking on the stovetop is the traditional way to make a pot of bone broth, but it takes a lot of babysitting. Patience is key!
If cooking the broth in a slow cooker:
Cover and set to cook on low for 8 to 24 hours. (You can actually simmer it for days; some say that the longer you cook your broth, the more nutrient-rich it becomes.) The advantage of using a slow cooker to make your broth is that you can leave the house without fear of burning it down to the ground. Still, you’ll have to wait a long time before you can sip on a mug of broth, so plan ahead.
If cooking the broth in a pressure cooker:
Lock the lid of the pressure cooker in place and cook over high heat. Once it reaches high pressure, immediately turn the burner down to the lowest possible setting (“simmer” usually works) that will still maintain high pressure. Set a timer for 45 minutes, and when it goes off, turn off the burner and remove the pot from the heat. Release the pressure naturally, about 10 to 15 minutes.
Maintain a low simmer when you're making bone broth, or you'll wind up with lots of unappetizing (albeit edible) gray scum on the surface. It may be packed with protein (albumin), but I prefer to skim it off 'cause it looks nasty.

Pro tip: you can almost always use bone broth whenever a recipe calls for chicken or beef stock.

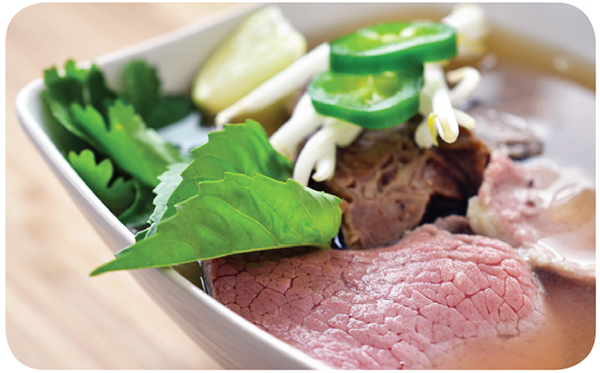
Pho bò—a classic Vietnamese rice noodle soup served with sliced rare beef and well-done brisket—occupies a special place in my heart. I cherish my childhood memories of slurping down steaming bowls of slow-cooked pho broth, savoring its aromatic spices and flavorings. My Paleo version omits the rice noodles, but leaves all the comforting beefiness intact. Plus, it takes just 2 hours to make!
| Makes 4 servings | ||
| Hands-on time: 30 minutes | ||
| Total time: 2 hours |
GET:
3 whole star anise
2 teaspoons whole coriander seeds
1 cinnamon stick
3 whole cloves
1 green cardamom pod
2 tablespoons ghee or fat of choice, divided
8 slices unpeeled ginger, each ½ inch thick
½ large yellow onion, peeled
2 (1-pound) beef cross shanks, 1½ inches thick
1½ pounds oxtails
1½ pounds beef brisket, cut in half along the grain
8 cups water
3½ tablespoons Paleo-friendly fish sauce
½ pound beef eye of round roast
8 cups Zoodles, (optional)
2 limes, cut into wedges
3 jalapeño peppers, sliced
1 bunch fresh cilantro
1 bunch fresh Thai basil
1 bunch fresh mint
2 cups bean sprouts
Paleo Sriracha

Pho is pronounced “fuh,” and was likely named after pot-au-feu, the classic French beef stew, during France’s colonization of Vietnam.
DO THIS:


If you’re a classicist (or don’t have a pressure cooker), you can prepare pho the traditional way: slooowly. After all, pho broth is traditionally slow-cooked for hours—or even days—to heighten the intensity of the beefy stock, and to infuse it with the steamy aroma of star anise, cinnamon, and cloves. Just follow the same steps as above, but use a slow cooker rather than a pressure cooker, and set it to cook on low for 12 hours. The only drawback to this method? It’ll fill your house with a tantalizing fragrance that’ll make your stomach growl for hours.

Makes 4 servings | Hands-on time: 30 minutes | Total time: 30 minutes
When I was a kid, a casual family meal at a Chinese restaurant could be a crapshoot. Some evenings, my grandfather would insist on ordering the most authentic dishes on the menu, many featuring odd bits that made my sister and me wrinkle our noses in disgust. Geoduck? Bitter melon? Bird spit? Like, actual bird saliva?
But if we were lucky, dinner would kick off with a beefy bowl of West Lake Soup. With bright green flecks of cilantro and cloudlike wisps of egg, this soup is both gorgeous and satisfying—which explains why we would gladly fill up on it before the slimy sea cucumber dish was served.
| ½ pound flank steak, finely minced | ||
| 1 teaspoon kosher salt | ||
| 2 teaspoons rice wine vinegar | ||
| 1 teaspoon Paleo-friendly fish sauce | ||
| 1 teaspoon sesame oil | ||
| Ground white pepper | ||
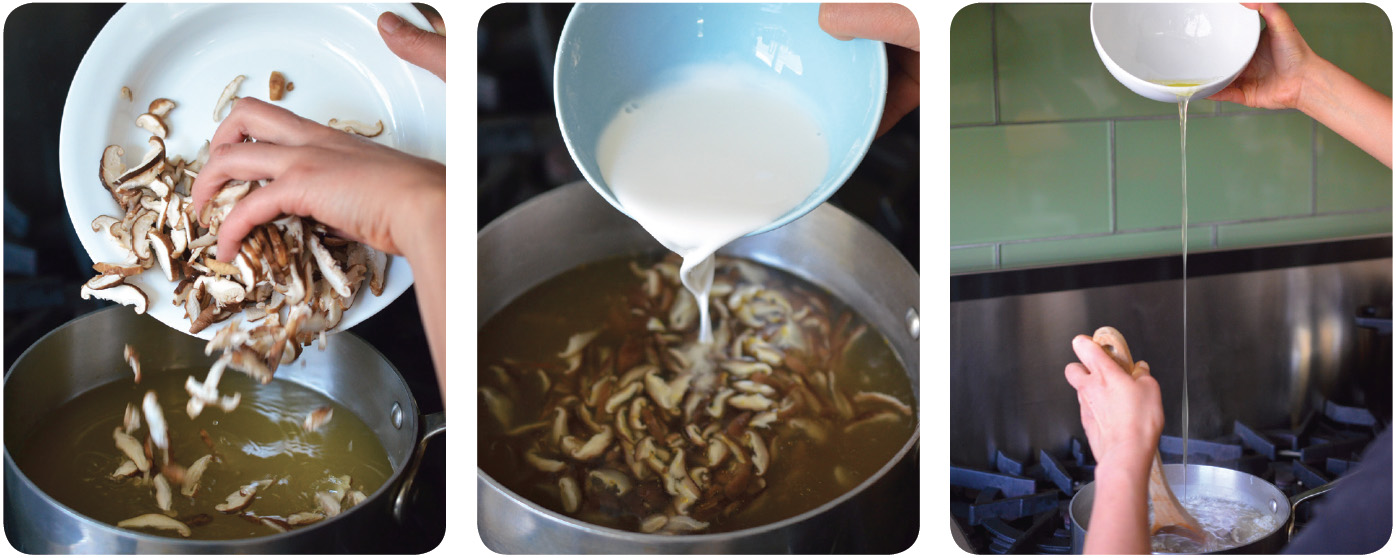
| 6 cups Bone Broth or chicken stock | ||
| ¼ pound fresh shiitake mushrooms, stemmed and thinly sliced | ||
| ¼ cup arrowroot powder, mixed with ¼ cup water to make a slurry | ||
| 3 large egg whites, lightly beaten | ||
| 1 cup packed fresh cilantro, finely minced | ||
| 3 scallions, thinly sliced |

This soup is named after a beautiful lake in Hangzhou, China. Sadly, the lake isn't actually made of soup.
DO THIS:
You can substitute other meats or seafood for the flank steak, but if you use ground meat, parboil it first or your soup will end up scummy.
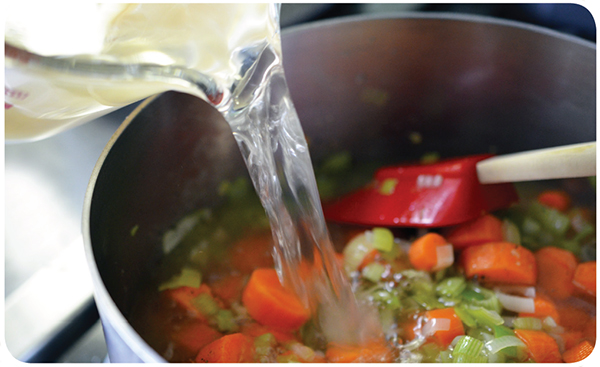
“Mulligatawny” is the Anglicized word for the Tamil term milagu thanni—the fragrant “pepper water” invented to appeal to foreign palates when the British took over the Indian subcontinent in the nineteenth century. Mulligatawny’s burgeoning popularity soon brought this rich curried soup across the seas to Westerners craving a taste of the exotic. These days, it’s become a mainstay of Indian restaurants across the world, though few pause to remember its very British origins.
But even if you’ve never pondered why a Southern Indian soup has such an Anglo-sounding name, you can love mulligatawny for what it is: an assertively spiced curry soup that can be easily made with common ingredients found in any Paleo eater’s pantry. It’s versatile, too; throw in some emergency protein in the form of cooked chicken, lamb, or mutton, and your mulligatawny instantly becomes a complete meal.
| Makes 4 servings | 2 tablespoons ghee or fat of choice | |
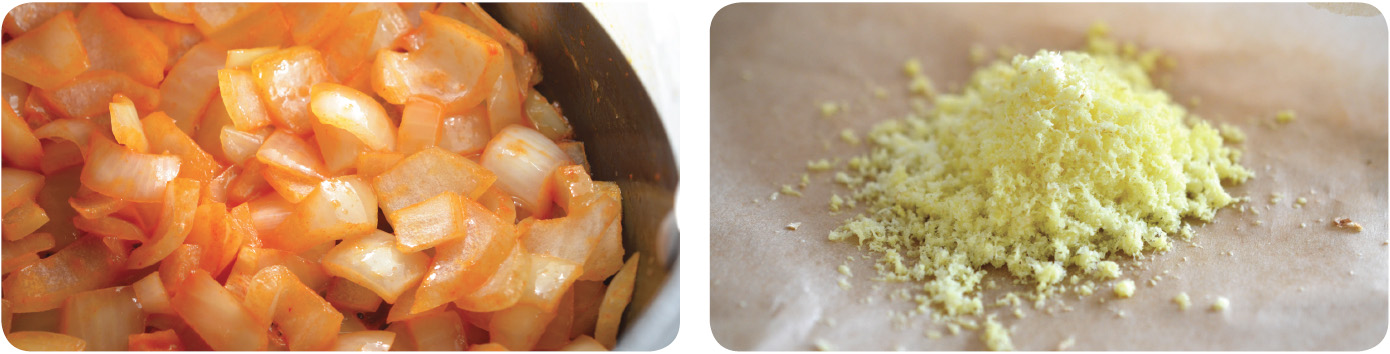
| Hands-on time: 15 minutes | 1 medium yellow onion, roughly chopped | |
| Total time: 45 minutes | 1 teaspoon tomato paste | |
| ¼ cup shredded unsweetened dried coconut | ||
| 2 garlic cloves, minced | ||
| 1 (1-inch) piece fresh ginger, peeled and finely grated (about 1 tablespoon) | ||
| 2 teaspoons Indian curry powder | ||
| 3 cups chicken stock or Bone Broth | ||
| 1 celery stalk with fibrous strings removed, roughly chopped | ||
| 1 carrot, peeled and roughly chopped | ||
| ½ ripe banana, peeled | ||
| ¼ cup diced Braeburn, Empire, McIntosh, or Cortland apple | ||
| 2 tablespoons minced fresh cilantro |
Don't worry, banana haters! You can't taste it in the soup!
DO THIS:
Secret ingredient alert! my super-chef sister taught me that diced apple can add sweetness and texture to puréed soups!


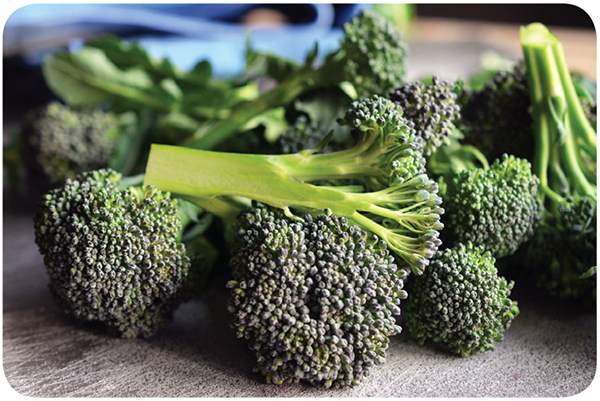
CURRIED CREAM OF BROCCOLI SOUP
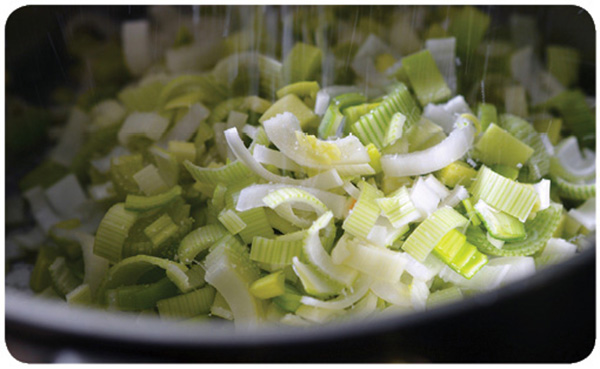
This is a perfect example of what I call “garbage soup.” On busy weeknights, I pull out whatever vegetables are languishing in my crisper and toss them in a pot with some pre-made broth. This formula works with just about any ingredients, but if you happen to have some broccoli florets and leeks in the fridge, give this recipe a go. The assertive curry spices and creamy texture of this soup make for a winning combination.
| Makes 6 servings | 2 tablespoons coconut oil or fat of choice | |
| Hands-on time: 20 minutes | 4 leeks, white and light green ends only, cleaned, trimmed, and thinly sliced (see here) | |
| Total time: 40 minutes | 1 large yellow onion, roughly chopped | |
| 3 medium shallots, roughly chopped | ||
| Kosher salt | ||
| 1½ pounds broccoli, trimmed and cut into uniform-sized pieces | ||
| ¼ cup diced Braeburn, Empire, McIntosh, or Cortland apple | ||
| 4 cups Bone Broth or stock of choice | ||
| 1 tablespoon Indian curry powder | ||
| Freshly ground black pepper | ||
| 1 cup full-fat coconut milk |
DIRECTIONS

Serve this soup with a side of Mushroom Chips!

Nothing signals springtime like a bowl of sunshine-orange soup.
Makes 6 servings | Hands-on time: 15 minutes | Total time: 45 minutes
GET:
1 tablespoon coconut oil
2 large leeks, white and light green ends only, cleaned, trimmed, and thinly sliced
Kosher salt
1½ pounds large carrots, peeled and cut into ½-inch coins
¼ cup diced Braeburn, Empire, McIntosh, or Cortland apple
1 teaspoon minced fresh ginger
½ teaspoon ground cardamom
4 cups chicken stock or Bone Broth
½ cup full-fat coconut milk
Freshly ground black pepper

DO THIS:


As a child, I despised gazpacho. Once I tasted the sharply acidic sludge my gastro-curious mom picked up at the neighborhood deli, I swore off chilled tomato soup for life. But years later, I sampled a bowl of Paul Bertolli’s gazpacho at Oakland’s Oliveto, and suddenly, my taste buds stood at attention. So that’s what gazpacho tastes like when it’s made with sun-ripened heirloom tomatoes and not watered-down vegetable juice mixed with metallic-tasting canned tomatoes! Who knew?
Nowadays, when the mercury rises, gazpacho’s one of my favorite simple, make-ahead recipes—especially when combined with the bright flavors of juicy watermelon, cool cucumbers, and crisp red peppers. For this recipe, use the best tomatoes and sweetest watermelon you can find. And no, removing the skins from the tomatoes and cucumber is not optional. Make this soup when you’re wilting under the sun, and you can thank me later. It’s summertime in a bowl, people.
| Makes 8 cups | 2 pounds ripe heirloom tomatoes | |
| Hands-on time: 30 minutes | 1 hothouse cucumber (approximately 1 pound), peeled | |
| Total time: 4½ hours | 2 small shallots, coarsely chopped | |
| 1 medium red bell pepper, seeded, cored, and diced | ||
| 4 fresh cilantro stalks with leaves | ||
| 3 cups cubed and seeded watermelon (about 1 pound) | ||
| 2 tablespoons sherry vinegar | ||
| ⅓ cup extra-virgin olive oil, plus extra for garnish | ||
| 1 teaspoon kosher salt | ||
| Freshly ground black pepper | ||
| Pinch of red pepper flakes (optional) |
DO THIS:
After a quick blanch and shock in ice water, the tomato skins will slide right off!
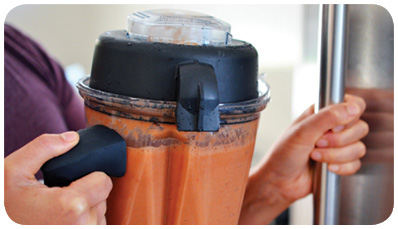
If your blender's on the small side (with a capacity of less than 8 cups), blitz the soup in batches.
