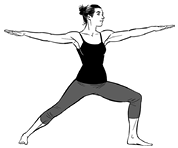
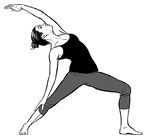
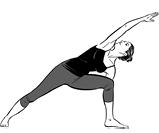
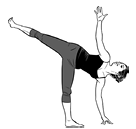
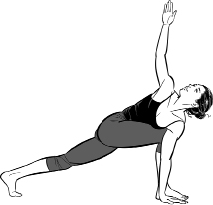
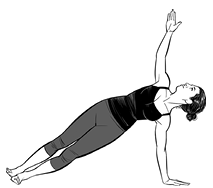
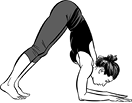
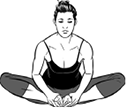
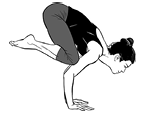
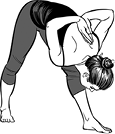
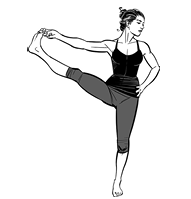
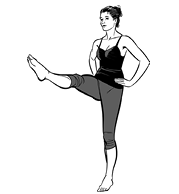
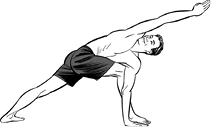
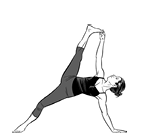
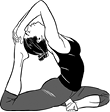
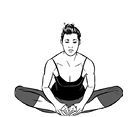
Physical Yoga
Yoga is the state of no activity in the mind, a state of bliss, where there is no more suffering, and our daily circumstances do not affect us anymore. Sometimes it is referred to as a state of liberation, of freedom from our thinking mind.
Since this is not an easy state to achieve simply by our own will, many practices were developed to help us achieve this state. In this section we will look at the practices of hatha yoga—physical practices that use our body and breath to get healthier and more focused—to help us gain better control of our body and mind, and eventually enter a state of bliss. The yogis of the past were concerned with all layers of the being, including food and diet. They ate healthy food that kept their bodies healthy and balanced; this in turn helped them keep a healthy mind. It is much harder to work on the mind when we have a backache or a cold. So the yoga practices are aimed at maintaining vitality and health, so we can further work on our minds with ease.
There are many debates as to how old yoga is or when it began, but it is known for sure that yoga in one form or another was practiced many centuries ago. Traditional yoga answers questions such as “Who am I? Where do I come from? Where do I go? What must I do?” in a way similar to many religions and philosophical practices.
The masters of ceremony in the old days had to practice focus and concentration while performing their duties and, at times, they had visions that transcended the ordinary mind. These masters were called rishis—the seers—and their practices are the roots of yogic practices today.
What Are the Benefits of Yoga?
Yoga is a practice intended to lead us to a more blissful life, with a healthy body and a calm and focused mind. The practice of yoga helps us understand who we really are, and how to transverse the perceptions of the mind.
Some Benefits of Yoga in Brief
Benefits many body systems. Improves digestion with twists and pranayama. Cleanses the body of waste by stimulating the lymphatic system. Improves circulation. Improves lung efficiency with pranayama practice, which allows us to use our lungs more efficiently. Cleanses through breath work such as kapalabhati. Strengthens the immune system by stimulating the parasympathetic nervous system.
Improves flexibility and strength. Keeps the spine supple, especially when bending backward and twisting. Relieves back pains and stiffness by stretching the back in all six directions. Improves posture by stretching and lengthening the spine, and opening the chest and shoulders. Improves flexibility by increasing range of motion throughout every single joint. Improves stamina and energy. Tones muscles by extending them as they work, resulting in a lean—rather than buff—look. Invites courage and empowers us when we manifest a new pose or learn to do an inversion or arm balance. Balancing practices create balance through better body awareness, from standing on one leg to holding a crescent pose steadily.
Has a balancing and calming effect. Relaxes the body and calms the mind, especially by the deepening of the breath. Improves sleep, not only thanks to the physical activity, but also the breath work and calming of the mind. Relieves stress, even if temporarily, with breath work and chanting. Balances energy channels throughout the body with pranayama practices; cultivates balance between the left and right sides of the brain.
The benefits of yoga can be felt in the body, the breath, and the mind. One of the greatest benefits is attaining a sense of bliss beyond your conscious mind. Keep practicing with no attachment to the results, and the fruit will appear on its own.
In this section, you will learn some physical practices that will help you become stronger, more flexible, and leaner; you will learn how to tone your muscles and develop your lungs. The practices will also help with your digestion and overall health, as these poses activate different hormones in the body (including the feel-good ones), and promote healthy circulation of blood, lymphatic fluid, and energy in the body.
The practice of yoga poses (specifically my method called Doron Yoga, which I’ll share with you here) is based on the foundation of traditional yoga—mostly ashtanga vinyasa as taught by Pattabhi Jois—but blends in contemporary knowledge of anatomy, alignment, and other modalities that can help promote an overall sense of physical well-being. It balances yin with yang—at times moving vigorously to get stronger, and at times holding poses longer to gain calm and flexibility. The Doron Yoga method is a balanced vinyasa system where movements flow from one to another in rhythm with the breath, emphasizing grace as the way to open to a meditative practice. The practice is practical, non-dogmatic, and sustainable; it protects the body from injuries and creates a place where the mind can surrender and soften while the body can strengthen and energize. The practice works with breath, flexibility, strength, and focus. Doron Yoga is a complete and efficient method for cultivating awareness, compassion, strength, and sensitivity, leading to a transformation to inner freedom. This blends smoothly with the other three elements of the flexitarian method. The breathing practices help the ease of movement, and the openness of the body prepares for the breathing practices. Some are incorporated with the yoga poses. This practice is a form of mind training, and helps with the deeper, more still, meditation practices.
The Practice of Doron Yoga
- • Move with ease. Balance your effort with calmness.
- • Breath as you move. Inhale as you open, lift up, or rise to standing, and exhale as you lower down or forward fold.
- • Keep awareness alive as you move. Follow the movements of your body with your gaze so you remain focused. Listen to the sound of your breath, and stay attentive to what is happening in your body.
- • Have fun! Yes, it may be hard at times, but remind yourself of your goal, so you can stay focused, and then surrender to the pleasure of the process.
Tristana—the Three Essentials
Tristana is the foundation—the supporting pillars—of the practice of ashtanga and vinyasa yoga, and as such, it is the tool to help cultivate the ultimate presence of mind, focus, and stability of the body and mind. The tools are breath (ujjayi), gaze (drsti) and control centers (bandhas). These tools work synergistically to enhance our experience as we practice. The breath and the gaze keep us focused and present. The gaze and the control centers help us stay balanced as well as deepen our postures; the control centers and the breath help maintain the energy level of the body. It is with these tools that we transform our asana practice from a simple body exercise into a complete mind-body transformation, from a huffing and puffing workout into a graceful flow. Tristana connects our physical yoga with our energetic breathing and our mind training. Now just eat well before you practice, and you have integrated all of the flexitarian practices into your day.
Ujjayi Breath—Ocean Breath (Victorious Breath)
One of the most important aspects of yoga is breathing. The fundamental technique of yogic breathing is ujjayi breath, or “victorious” breath. It is the foundation for many other pranayama techniques, works in synergy with yogic gaze (drsti) to help focus the mind, and the yoga control centers, or power centers (bandhas), to keep the energetic flow (prana) in the body. It is also an important practice on its own.
Ujjayi breathing has many benefits. It slows down and lengthens the breath. By filling up the lungs entirely, ujjayi increases lung capacity, and helps increase the supply of breath and oxygen in the muscles to help with the movements we do in yoga. It is a point of concentration or focus for the mind that aids us in the practice of pratyahara (withdrawal of the senses) and keeps the mind steady and calm, especially when poses get challenging.
Ujjayi practice is done by drawing the breath in and out through the nose, while slightly constricting the opening of the throat where air passes through the glottis. Though the air does enter and exit through the nose, most of the awareness and sensation is at the throat. That is why sometimes ujjayi is known as throat breathing, or ocean breath. It is the friction of air through the glottis that produces an ocean wave-like sound. This sound is known as ajapa mantra, the unspoken mantra.
Practice ujjayi breath first in a comfortable seated position. Try to equalize the inhalations and exhalations. Once you have mastered ujjayi breath while seated, you can start to use it in your asana practice by synchronizing your movement with the breath. During the transitions of asana practice, work on regulating the breath to match the movement, keeping the breath flowing calmly and with ease. Strenuous breathing may mean that you need to back off, either with the physical body or with the attitude of the mind.
Off your yoga mat, ujjayi breath can be practiced anywhere at any time. It is an excellent way to relax, calm the mind, focus, and alleviate insomnia.
Bandhas—Energy Locks or Control Centers
Bandha means to bind or to lock. We are physically and energetically activating parts of our body that help maintain and regulate all internal systems, as well as our internal energy. These locks are located at energy centers in our body. As we learn to use them, we learn deeper control and stability, improve focus and centeredness, regulate deeper breaths, and maintain a calmer mind. You can think of bandhas as control centers—as activation and regulation centers—so as we create these locks, we are controlling the energy and body systems, which help maintain control of body and mind.
The bandhas are key in asana practice. Beyond the energy in the body, which of course helps the energy of the pose, the bandhas also help create support for the spine and lower back during transitions, creating the “lightness” and graceful appearance of some of the more challenging poses, such as arm balances or the jump-through.
The two bandhas we will use are mulabandha (root control center) and uddiyanabandha (flying up control center).
Mulabandha (Root Energy Lock, Root Control Center)
The root bandha sits at the root of the spine. Lifting the pelvic floor helps activate it. At first you may lift more than what is needed, including the tightening of the anus, but as you refine your practice, you will learn to activate just the necessary muscles.
Try to slow down the flow of urine while using the toilet without using your abs, gluteus or leg muscles; you are probably using the correct muscles. If you are a woman, imagine that you are out and about, when you feel that your period has arrived a day early. The muscles you use to hold it in are the same muscles you use to activate mulabandha. For men, imagine it as lifting a diamond-shaped hammock between the anus and genitals and stretching it as well between the two sitting bones. Mulabandha is not easy to find and keep, but when we learn to activate it, it is powerful far beyond its physicality, as it is located at the root of the energy source. Mulabandha helps with the stability of the poses and serves as a strong foundation for all movement in the body. It evokes uddiyanabandha (see below) to action and stimulates energy to rise.
Uddiyanabandha (Flying Up Energy Lock)
Uddiyanabandha sits about two fingers’ width below the navel. It is activated by lifting the belly in and up. The lifting is done in a gentle way; you should still be able to breathe fully. The traverse abdominal muscles (inner abdominal muscles) will be activated. Uddiyanabandha is engaged during asana practice to help support the lower back and strengthen the core. It also helps lengthen the lower back, so that there is more space between the vertebrae, especially L4 and L5. This in turn helps support the whole torso so it can stay steady, thus protecting the lower back. This is important in all poses, but it is especially noticed in standing balancing poses, as well as arm balances and inversions. Uddiyanabandha maintains the energy rising up toward the heart energy center.
Drsti—Point of Focus
The practice of drsti, or yogic gaze, is used to help us practice both focus and stability; it leads us to the concentration needed to keep us balanced and helps control the tendency to wander around following our senses. Drsti is a perfect aid in the practice of pratyahara (withdrawal of the senses), and it initiates the practice of dharana (concentration).
There are nine drsti points, and each pose has its own prescribed drsti. Some of the drsti points not only help with focus, but actually help us go deeper into the pose, such as in twists, when we take our gaze far to the side we are twisting toward. Other times the gaze helps us stay grounded, or in the case of supine twists, when taking the gaze in the direction opposite of the legs, drsti helps to ground the opposite shoulder and thus aids in getting a fuller twist in the entire back. It is not as crucial that you keep your gaze at a specific prescribed point as it is to keep your gaze very steady and aware—aware of what you are looking at.
Tristana is the secret to a graceful yoga practice. When all three elements of tristana are working together, the yoga practice flows with greater ease, focus, stability, and concentration. When you see videos of yogis flowing through powerful practices with apparent ease, it is the power of ujjayi, drsti, and bandhas that make the difference.
Yoga Asana Practice
The benefits of yoga asana practice are many, on the physical plane, as well as on the mind and spiritual planes. The clearest benefit is physical—you will notice greater flexibility and balance, improved joint mobility, stronger and leaner muscles, and you will lose fat, increase stamina, improve posture and digestion, and detoxify the body.
Beyond the physical aspects of asana, yoga is a great tool for training your mind and your breath, and for improving overall health. This is where you begin practicing your meditation in movement as well as connecting the meditation on the cushion with the meditation of practical living. Yoga can help you open the body physically and emotionally, help you sleep better, and even improve your mood.
Effects of Asana
The practice of asana affects the following aspects or planes of the human being:
- • Physical (blood circulation, inner organs, glands, muscles, joints, and nervous system)
- • Psychological (developing emotional balance and stability, harmony)
- • Mental (improving ability to concentrate, memory)
- • Consciousness (purifying and clarifying consciousness/awareness)
Asana means to take a seat or a posture. In Patanjali’s sutras, the text that most yogis study and refer to, asana is referenced mainly in one place: Sthira sukham asanam, which means “steady comfortable posture,” or “steady and comfortable should be the posture.” Patanjali is probably referring to the asana in which one sits to meditate. Today, the word asana is generally used to describe physical postures of yoga exercise. This is not to say that the physical yoga exercise should not be practiced or valued, but is more of a reminder that the asana practice is not the ultimate goal.
Though yoga has existed for thousands of years, most of the asana practice we know today was developed more recently.
Vinyasa
This practice uses attention to breath to guide your flow in and out of poses. Vinyasa literally means “to place in a certain way.” The word is most commonly used to describe a flow practice, thus the class title “vinyasa flow.”
In vinyasa practice, the breath initiates the movement. Working on having the movement span the whole duration of the breath, we use ujjayi breath to help slow down and control the breath to match the length of the movement. This is especially useful in longer transitions, such as coming down from warrior to chaturanga.
Moving with Breath Helps to Remove Stagnation
- • While inhaling, you open up and expand (example: upward dog).
- • While exhaling, you fold down or in, contracting (example: downward dog).
Finding Your Limit
“You cannot step into the same river twice,” Heraclitus said. You cannot step into the same body twice, either. Every day is new. Some days I feel like I can jump into some crazy poses, and in others even the most basic poses seem like a huge task. This could be for many reasons, but what matters is that we respect our body, wherever it may be. This is the first rule for a sustainable practice, which leads to a sustainable life.
Find the edge when you practice. This is the play between putting in effort to go deeper, and respecting the signals that say you’ve done enough. If you are the type that always pushes hard, consider taking it a bit slower, and if you tend to have an edge that is 60 percent of what you can do, try going to 80 percent.
While in a pose, stay calm, breathe deeply, and practice acceptance of where you are and where your edge is; this will allow the process of moving deeper to be gradual, safe, and appropriate for what your body can do in the moment.
Tips for Knowing Your Limit and How Far to Go
- • Be alert. Observe the present moment.
- • Go to the place just before pain; back off if pain is there.
- • Some discomfort is fine and normal. Breathe into it.
- • Move in a fresh way, as if it is your first time practicing; don’t let the practice become mechanical.
- • Explore breath as an indicator; notice when it becomes rapid or shallow and back off to where you can breathe smoothly.
- • Move with steady, smooth, graceful movements, like in a dance.
Body Alignment
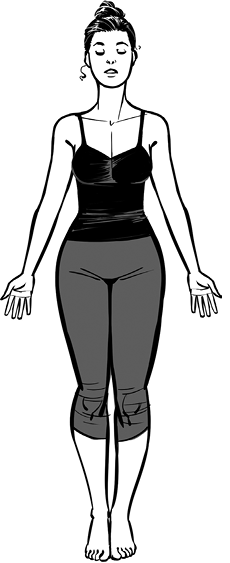
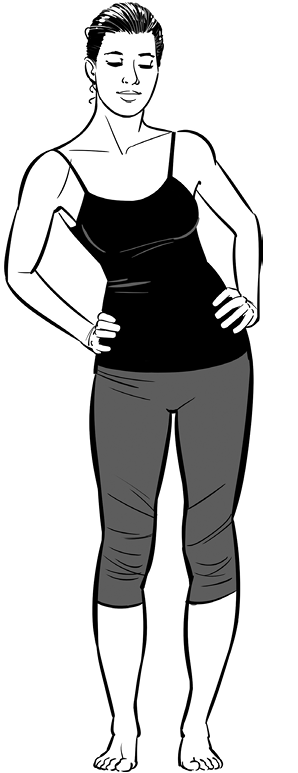
Before we do any yoga movements, we need to learn the most basic and fundamental yoga pose: tadasana (mountain pose). This is a simple standing pose that, when observed well, can reveal many lifelong conditions in the body. (figs. 1–2)
|
|
|
Figures 1–2, Mountain Pose side and front views (left to right)
The first time I had someone observe my body and mark the imbalances he saw in my posture, I was shocked. Some of the imbalances he found in my body were completely new to me. I had no idea that my right shoulder was a bit higher than my left. I thought I was doing so well with all the yoga I practiced.
So of course, I immediately tried adjusting myself to be balanced. It was not as easy as I thought it would be. I realized that some patterns, which I had had for many years, would take time and effort to change, until I managed to create new and healthy conditioning.
Once I got over resisting the fact that I am not perfect, I realized that accepting the imbalance would help me to fix it and get rid of it. I looked the imbalance in the eye and asked: Where is this from? As a kid, I used to carry my school bag with all its heavy books on my right shoulder.
To help carry the weight, I leaned a bit to the left, which lifted my right shoulder and compressed my left side. When I tried to imitate this movement, I noticed that my right hip lifted and the entire left side of the body became compressed. Okay, great. Now I had another thing to fix!
When we look at one imbalance, we may find another part of the body that is influenced or related to it. This is normal, as our body parts are not separate from each other.
We may even notice emotional imbalances associated with the physical imbalances. At times, an imbalance is caused by an emotional trigger—a tight chest for example.
Another imbalance I found was that my head was tilted forward. I am somewhat tall and used to be very self-conscious. I used to feel a need to hide, to beat myself up for all my imperfections.
One way I did this was to walk in what I call slumpasasna—or what my dad called the question mark look—which is why my head was tilted forward.
So not only was my spine twisted to one side, it was also rounded and curved in the wrong direction.
Beyond the fact that this does not look sexy, it is also unhealthy and can lead to serious back problems and pain.
Evaluating Your Posture
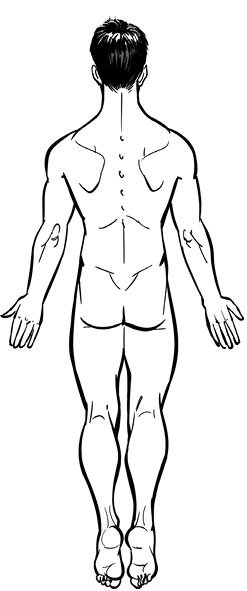
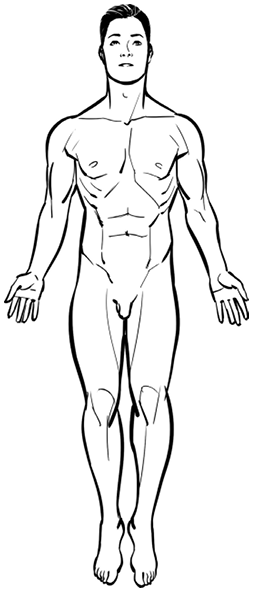
You can try to do this evaluation yourself in front of a mirror, but it’s better to have someone else take a look at you and write down what they see. I’ve provided a guide to posture evaluation with diagrams below.
Your partner can write his or her findings near the body areas. It is a good idea to scan the body from the front, the back, and the sides to get a comprehensive look. (fig. 3)
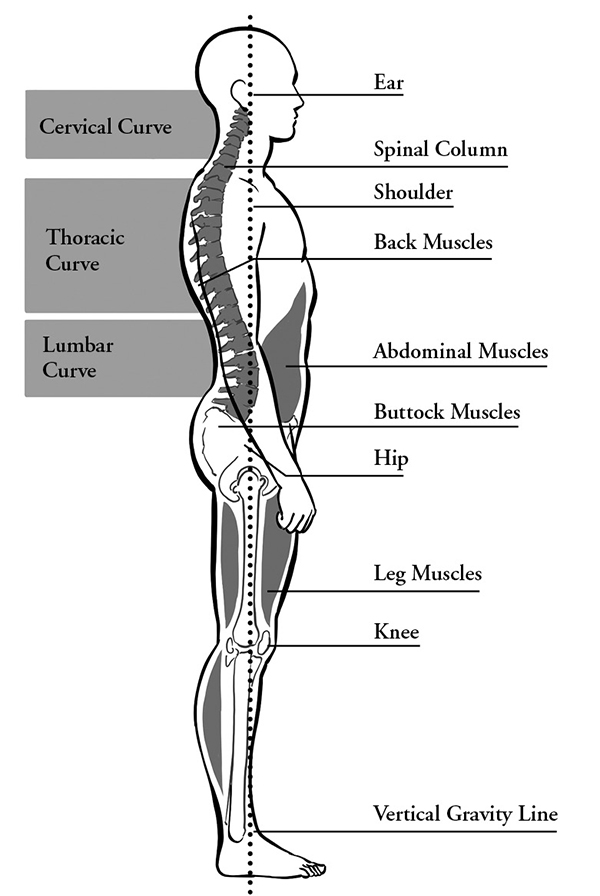
Figure 3, Posture Evaluation Diagram
Knees: Are they both facing forward?
Hips: Does one side appear higher than the other? (Your partner should place one hand on each of your hipbones to find out.)
Feet: Are they collapsed? Are the arches lifted? Is one foot turned sideways more than the other? Are they both facing more in or out rather than being parallel to each other?
Ankles: When looking from the back, are they straight and parallel to each other? Are they collapsed?
Spine: There should be three curves: one in the lower back (lumbar); one in the upper back (thoracic); and one in the neck (cervical). The curves should be visible but not overly exaggerated. For many, the lower back is either over-curved or under-curved. The mid back is sometimes flat and sometimes hunched. The neck area may have no curve, or it may be too curved in one direction. Also notice if the spine is straight or if there are any signs of scoliosis (a curvature to the left or right).
Shoulders: Are they rounded forward? Are they the same height? Are they in line with the ears and hips? Check the whole body from toes to ears. Ankles, hips, shoulders, and ears should be on the same vertical line.
Head: Is it tilted forward, back, or sideways?
General view: What else seems a bit off? There is no need to search for something that does not exist, but if you notice something, mention it. The idea is not to cure or diagnose anything; just record observations. Knowledge is the first step toward healing.
Posture Evaluation Assessment
Have a partner evaluate your posture from these positions. Write down the observations. (figs. 4–6)
|
|
|
|
Figures 4–6, Evaluate Your Own Posture, back, front, and side views (left to right)
The Yoga Poses (Asanas)
Next to each pose described below, there will either be one, two, or three stars depicting the practice level necessary for it, as follows:
*Basic poses recommended for everyone and considered foundational poses, warm-up poses, or preparatory poses for intermediate and advanced poses.
**Intermediate poses which most can practice and attempt, even if it is necessary to modify them. They may require a bit more strength, flexibility, or practice.
***Advanced poses which can be practiced by students of all levels but should initially be learned with an experienced teacher and may require more practice.
These poses may include inversions, arm balances, and others that require more technical skills.
Many poses will have variations or modifications described underneath the basic pose description.
The variations are meant for students who want to try the pose in a different way, or want to deepen the pose.
Some students may find poses hard to attain due to physical limitations, difficulty focusing, or lack of technical skill.
Modifications offer the opportunity to work toward the pose, step by step, and thus help students gradually make their way into the complete pose.
Basic Alignment Principles
Hip Neutrality
Stand tall, and place the fingers of one hand on your tailbone and the fingers of the other hand on your pubic bone. Move your hips forward and back a few times, and then find the center point where both your hands, still on your pubic bone and tailbone, are at about the same height. Lift your belly in and up to support the hips to stay in this position. We call this hip neutrality. You can practice this throughout your day while standing in line, taking a walk, and to a certain degree, while sitting down. Most of us can benefit from taking the pubic bone back while seated to take away the slump from the lower back.
Shoulder Basics
Raise your arms overhead, keeping them apart. Raise the fingers high up to the sky, and then drop your shoulders down and away from the ears. Keep the palms facing each other and rotate the pinky fingers in toward one another. This will help you begin to get the shoulders to rotate out and around toward your chest as well as create space between your shoulder blades.
Now adjust the palms so that they face each other while keeping the space between the shoulder blades. This is the way we want our shoulders to be when the hands are over the head, as well as when we are in downward facing dog, handstand, and most other poses that involve the shoulders. Even in such poses as upward facing dog, where the arms are not over the head, we still want to try to create the same feeling of the shoulders rotating back and down away from the ears, as well as keep the space between the shoulder blades.
Yin and Yang
Yin and yang represent the two sides of masculine and feminine, power and softness, active and relaxed, reaching and surrendering. We contain both yin and yang within us at the same time. We may have one more emphasized than the other at different times, but even the most macho types have some feminine in them, and the girliest girls will have strength or male energy as part of them.
In most yoga classes today, there is a separation between the two aspects of yin and yang. Power classes for example, contain mostly yang energy. They will be strong, fast, and move with vigor. On the other hand, yin or restorative classes emphasize soft, long-held poses that promote surrender and release.
I love to think that every pose contains both yin and yang on different levels. Take warrior 2, for example. In this pose, there is lots of power shooting from the arms, the gaze is focused, and the legs are strong—all yang. Then the face softens, the shoulders relax, and the feet become grounded—all yin. Try to find the balance of yin and yang in all poses, and really, throughout your life.
The Warm Up
Here you will find poses that can be done at the beginning of your practice or anytime you need some release. They do not need a specific warm up, and can be done anytime. I normally start my practice with these poses (I use the warm up 1 and warm up 2 sequences) to get the energy flowing, then move on to the sun salutes and then to the standing poses. The timing of your warm up will vary according to which of the poses you choose to do and how fast or slow you move.
Basic Tips for the Warm Up
- • Begin aligning ujjayi (victorious breath) with movement, and keep your awareness on the breath.
- • Activate your bandhas (control centers), and focus on activating and warming up your core.
- • Move steady and slowly, so you allow the body to wake up and warm up, but do not go too slow, as you do want your energy to move.
*Qi Gong Twists
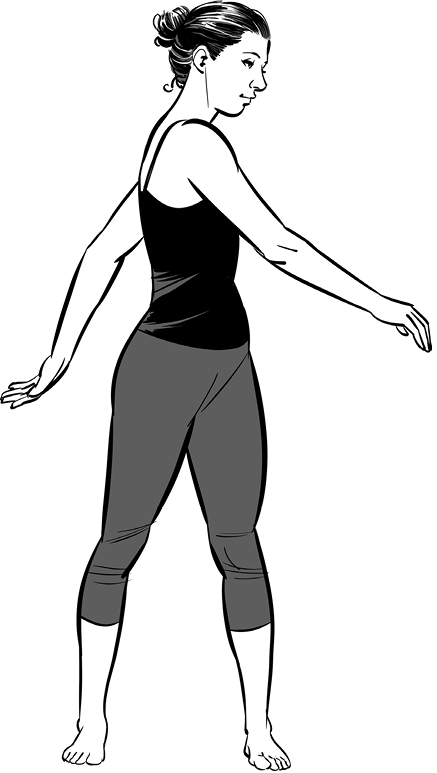
Qi Gong twists (Chi gong twists) is a great warm up. I do this someimes just to move after sitting for a while. Or in the morning, when sun salutes seem to much, this is my wake-up pose. Since we tap the kidney area as we swing the arms, we awaken the lymph system, and this helps the energy flow in the body. (fig. 7)
|
|
|
Figures 7–8, Qi Gong Twist and Qi Gong Twist Modification (hip rotations) (left to right)
Method of practice: Stand tall with your feet slightly wider than hip-width apart. Twist your shoulders and torso to the left while swinging your arms so that the left arm reaches behind you, tapping the lower back (the kidney area) and the right hand moves in front of the body toward the left lower back. Keep your shoulders relaxed.
Take the head with you so that you gaze over the left shoulder as you twist. While keeping the belly slightly lifted, keep your body movement fluid, so that you move with a sense of ease. Keep the feet steady on the floor and the knees slightly bent.
Variation: This variation is similar in the twisting action, but the hands go to different places. The left arm goes behind you; the back of the palm taps the lower back (the kidney area), and the right hand goes in front of the body, tapping the left shoulder. Take your head with you so that you gaze over the left shoulder as you twist.
Modification: A gentle variation of this is to just move the hips with the hands on the hips, as shown in the figure. (fig. 8) You can do this anytime, even just as a release from prolonged sitting.
*Bidalasana: Bitilasana (Cat-Cow)
The cat and cow poses are foundational warm-up poses in many yoga clases. In Doron Yoga we use delicious pose (hip rotations on all fours), as it covers more movement directions of the spine and does not take it to any extremes, but you can always choose these, if you like. (figs. 9–10)
Method of practice: Move onto your hands and knees, hips over the knees, shoulders over the wrists, with a neutral spine. As you exhale, round the back, tuck the tailbone under, and bring the chin towards the chest. Keep the belly moving in toward the back.
As you inhale, open the chest, lift the head, drop the belly, and allow the tailbone to move back and up. With each inhale, open up, and with each exhale, round in. Take full, deep breaths. Each breath is one full movement. This is a fantastic warm up for the spine.
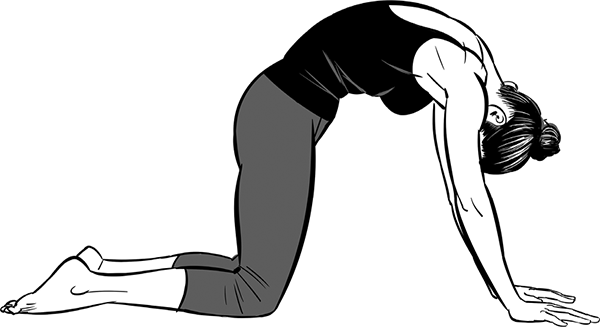
Figure 9, Cat Pose

Figure 10, Cow Pose
*Hip Rotations on All Fours (Delicious Pose)
I started doing this intuitivly, as it felt great to release the spine in the morning. Some days I do this as I get up. Do this any time you need to move some energy in the body, or bring some fluidity to your joints. (fig. 11)
Method of practice: Come to your hands and knees, hips over the knees, shoulders over the wrists. Rotate the hips to one side while allowing the lower spine to move up and down as you rotate, thus massaging the whole lower back as well as warming up the hips. You can make the circles small or big; play around and see what feels good in your body in this specific movement. You are welcome to move further into your shoulders and elbows. I like to think of this pose as being delicious, creating fluidity in the body, moving around to warm up and release stagnation.
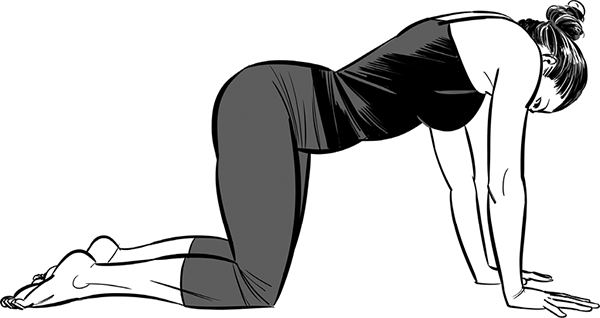
Figure 11, Delicious Pose

Figure 12, Downward Puppy Pose
*Uttana Shishosana (Downward Puppy)
A great warm up for downward facing dog, and a good shoulder opener. Feel free to stay here longer, as it really helps melt away tension in the shoulders, chest, and upper back. (fig. 12)
Method of practice: From all fours, begin stretching your arms forward while keeping your hips over the knees. Relax your head down, maybe resting your forehead on the floor. If that is easy, place your chin down. Let your chest be heavy to the earth. Breathe deeply.
*Head Rotations
You can do this pose anytime, preferably standing.
Method of practice: Rotate your head and neck in a full range of circular motion within your comfort zone. As the head comes forward, reach the chin toward your collarbone. Take it completely to the side, and as it goes back, try not to just drop it down but rather lengthen the neck, even if it does not go all the way back. Continue to the side and back down. For the full exercise, do five to each side, then four to each side, three to each side, two to each side, and one to each side. Respect your neck and go at a pace that feels good. It is better to start slowly.
*Shoulder Rotations
You can do this pose also anytime, preferably standing. Lift both shoulders high up towards the ears and drop them back all the way while maintaining hip neutrality. Do this ten times. It helps to lift in the belly to support your hips and spine while doing this so your torso stays steady as you move your shoulders up and back. After rotating both shoulders together ten times, rotate one shoulder followed by the other shoulder for a count of ten.
Most of us have a tendency to drop the shoulders forward while driving, working on the computer, or eating, or we normally just slouch. That is why I offer rotating the shoulders back but not forward. If you find yourself uneven in the shoulders and feel the need to balance them out with a forward motion, feel free to do so, but practice this with caution.
*Tri Pada Adho Mukha Svanasana (Three Legged Dog)
This is a preparation pose that helps warm up the legs and the hips. Though this pose is about lifting the leg behind you, it always feels good for me to open the hips as well, and even add some ankle rotations while the leg is in the air. (fig. 13)

Figure 13, Three Legged Dog Pose
Method of practice: From downward facing dog, lift your right leg up toward the sky. Try to keep your hips and shoulders somewhat squared. Keep pressing your left heel to the earth.
Variation: From here, you can bend the knee and open the hips for a few breaths, so the right foot is reaching toward the left hip. I also take a few ankle rotations here as additional warm up. Then straighten the leg back behind you in preparation for knee to nose sequence.
*Knee to Nose
Bringing the knee forward helps warm up the hips in preparation for bringing the foot forward between the hands. It is also a good core warm up, especially if you do your best to bring the foot as far forward as you can while lifting it up toward the chest. The back rounds up as in cat pose to maximize the core and even warm up the back and shoulder muscles. (fig. 14)
Method of practice: From tri pada adho mukha svanasana (three-legged dog), exhale as you bring your right knee forward toward the nose. Press your arm into the earth and lift in the upper back while keeping the belly lifted in (this is actually a core warm up). You will need to shift your body forward so that the shoulders come over the wrists. Inhale and take your leg back to tri pada adho mukha svanasana.
Modification: You can have the left knee on the ground while doing this movement.
*Knee to Elbow
Similar to knee to nose pose, this warms up the hips and core as well. (fig. 15, opposite page)
Method of practice: From tri pada adho mukha svanasana, exhale as you bring your right knee to the right side, toward your elbow or even onto the elbow if possible. You will need to shift your body forward for this. Inhale and press back to tri pada adho mukha svanasana.
Variation: Bend the elbows into chaturanga (low pushup) position with the knee still at the elbow. Inhale and press strong back to three-legged dog. This is much more challenging, but a great way to build further strength if you have an easy pushup.

Figure 14, Knee to Nose Pose

Figure 15, Knee to Elbow Pose

Figure 16, Knee to Elbow Across Pose
*Knee to Elbow Across
As knee to nose, and knee to elbow, this continues our warm up, with the addition of a twist in the hips as we reach the knee across. This helps activate different core muscles and further warms up the hips. (fig. 16)
Method of practice: From tri pada adho mukha svanasana, exhale as you bring your right knee across to the left elbow. You will need to rotate your hips and shift your body forward for this to happen. Inhale and take it back to three-legged dog.
Sun Salute Poses
The sun salutes serve to warm up the body. Traditional ashtanga classes begin with these. I add some additional warm up poses as I noticed that for most of us, not living in a tropical climate or sitting on the floor most of the day, a gentle warm up helps before we dive into these sun salutes. Practice them as a meditation. Use them to warm up the body, steady the breath and focus of the gaze (drsti), but also steady the mind, as you stay focused and present with your movements.
Basic Tips for the Sun Salutes
- • Practice awareness of movement aligned with breath and with drsti. Use your bandhas (control centers) as you move.
- • Be patient, especially if this is a morning practice. Allow your body to open in its own time.
- • Pay attention to your transitions, they are a great opportunity to deepen the breath and practice meditation in movement. Set your focus and presence now, so it stays with you during practice.
*Tadasana/Samasthiti (Mountain Pose/Equal Standing Pose)
These poses are the foundation for a healthy posture. Knowing to stand correctly in tadasana (mountain pose) will ensure that you have correct alignment in most other poses as the basic alignment of this pose keeps showing up throughout all the other poses, at times with different arm variations or a hinge at the hips. The description below explains how to do a correct tadasana. Once you understand and know this, there is no need to go through the entire process again. (figs. 17–18)
Tadasana and samasthiti (equal standing pose) are actually the same pose. Here I show tadasana classically standing, and samasthiti with hands together in front of the heart, though in a yoga class you may find that the names are used interchangeably.
|
|
|
Figures 17–18, Mountain Pose/Equal Standing Pose (left to right)
Method of practice: Stand tall with the big toes and ankles touching. Lift the toes, spread them wide and activate the arches in the feet. Lower the toes while maintaining some of the arch engagement.
Move your weight slightly forward and back so that you are evenly sharing the weight between the balls of the feet and the heels.
Roll the thighs in toward each other, which might feel like a hard thing to do since when lifting the arches of the feet, the shins will tend to rotate outward. Just do your best to rotate the thighs in and work these counter rotations, which will help you root and stabilize the lower part of the body.
Find your tailbone and pubic bone and place one hand on each. Move your hips forward and back until you can find a neutral place where both hands are at about the same height, thus creating pelvic neutrality.
Lift your belly, expand your chest while filling the breath up into the shoulder blades, and rotate the shoulders down and back.
Extend your neck tall and bring the chin parallel to the floor so that the spine at the neck maintains its natural curve. Allow your hands to hang beside your body. Some like to have the hands at the heart in namaste (prayer), which we call here samasthiti.
Try and maintain the body as active and alive, while staying calm and relaxed at the same time. It will happen over time.
Modification: If needed, separate the feet from one another to find a steady standing pose.
*Urdhva Hastasana (Raised Hands or Upward Salute)
Similar to tadasana, but with arms up over the head. This small movement reveals how open our shoulders are. Keep the arms straight here, so you can feel the energy rising all the way from your lower back (kidney area), through your shoulder blades and up to the arms. Let it feel powerful, with energy shooting out of your fingertips, while at the same time, let your shoulders relax down away from the ears. Though you maintain focus, remain calm and at ease. (figs. 19–20)
Method of practice: From tadasana, rotate your palms outward and raise the arms over the head. Rotate the shoulders externally in order to create space between the shoulder blades and the neck as if wrapping the upper back in toward the chest.
Take your gaze up toward the hands and bring your hands as close together as possible while keeping the arms straight. The hands will be slightly in front of you so that as you take the head up, you might be able to see your thumbs.
Try to keep a neutral pelvis by breathing into the front and back of the body, engaging uddiyanabandha (flying up control center) and tucking the tailbone under.
Modification: If the shoulders are tight, simply keep the arms parallel to each other or as close to each other as they will go while keeping the arms straight. You can look up toward the hands, or if uncomfortable, keep the gaze forward.
|
|
|
Figures 19–20, Raised Hands or Upward Salute Pose (left to right)
*Uttanasana (Standing Forward Fold)
Though a part of the sun salutes and warm up 2, this pose may feel stiff for some at first. Please make sure to bend the knees as much as needed so that there is no pain in the back. Hamstring (back of the leg) stretch is fine. The legs, as well as the muscles connecting the legs and back will open and release. (fig. 21)
Method of practice: From urdhva hastasana (raised hands), hinge at the hips and fold forward. Place the hands beside the feet or wherever they can reach. Feel the belly slightly lifting simply by breathing into the back of the body. Press evenly into all parts of your feet as you lengthen the spine down toward the earth and relax the head and neck.
Modifications: Take the feet slightly apart and bend the knees as deeply as needed to release the hamstrings and prevent any tension in the lower back. If the hands do not reach the floor, keep reaching them in that direction.
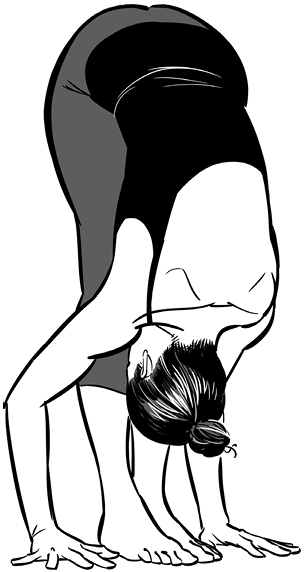
Figure 21, Standing Forward Fold Pose
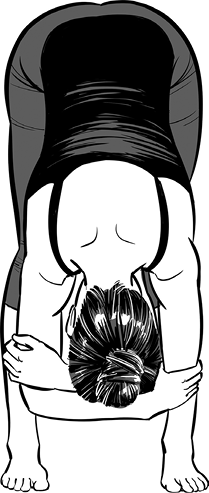
*Uttanasana (Standing Forward Fold Holding Elbows)
Similar to uttanasana, except we normally hold this forward fold longer with the feet wider apart. You can always do this with knees bent to release the back. Over time, straighten the legs. This is a great pose to hold for longer durations—from ten breaths to five minutes. Doing this pose daily will prove great results for those of us with tight hamstrings (back of the thighs). (fig. 22)
Method of practice: Same as uttanasana, but with feet shoulder width apart and the hands holding the elbows.
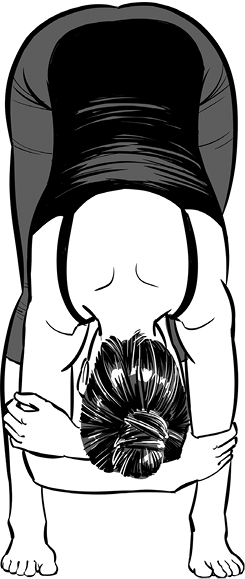
Figure 22, Standing Forward Fold Holding Elbows Pose
**Pada Hastasana (Standing Forward Fold with Hands Under Feet)
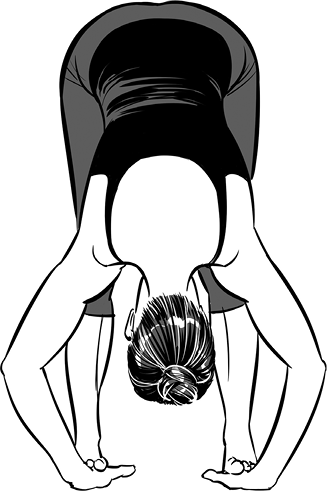
This is the ashtanga version of the forward fold. There are actually two versions of this pose in ashtanga—one with holding the big toes with your peace sign fingers, and one with hands under feet. I’ll explain the hands under feet here, but you can chose any variation that works for you including the holding elbows position. (fig. 23)
Method of practice: From tadasana (mountain pose), spread your feet shoulder width apart, inhale and lengthen the spine, and then exhale, fold forward, and bring the hands to the floor and place them under the feet. With another inhalation lengthen the spine forward, and with an exhalation surrender into the pose.
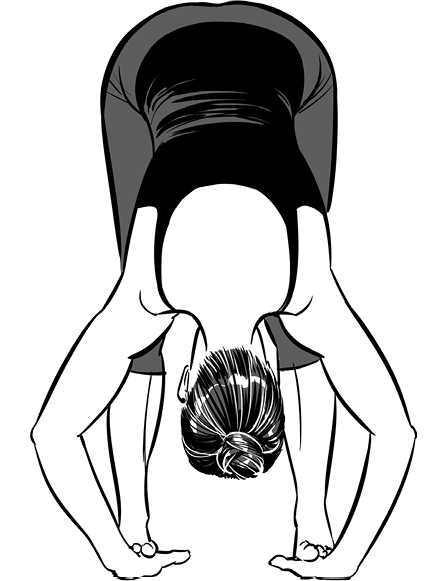
Figure 23, Standing Forward Fold with Hands Under Feet Pose
The important part of the practice in this pose is to stay a bit longer, relax the mind, and take deep exhales. You can activate the quads (front of the thighs) as this helps release the hamstrings (back of the thighs). Using your bandhas (control centers) helps create space in the spine for the forward fold and protect the back. Other that this, let gravity do the work for you. Take a deep breath and surrender into the pose.
*Ardha Uttanasana (Forward Fold, Half Way Up)
The lengthening of the spine forward and half way up from the ground, serves as an opportunity to reactivate the bandhas and recreates space in the spine. (fig. 24)
Method of practice: From uttanasana, lengthen your spine, coming up onto the fingertips so the back is straightening forward. Lengthen the neck forward so the entire spine is long, from the tailbone to the crown of the head. Activate your bandhas and lift the kneecaps, thus engaging the legs.
Modification: Bring the hands to the shins in order to have enough room to completely lengthen the spine.
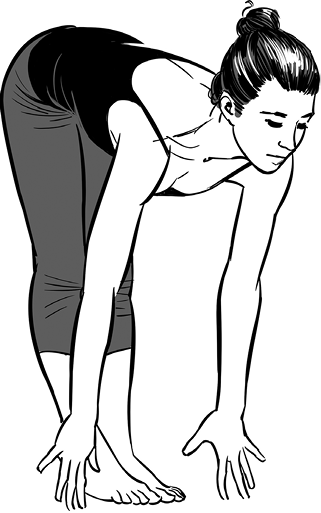
Figure 24, Forward Fold, Half Way Up Pose
*Utthita Chaturanga Dandasana (Plank Pose)
Plank pose is mostly used as a transition position before lowering down to chaturanga (low push up). It can also be held for longer periods in order to strengthen the core and shoulders. (fig. 25)
Method of practice: From ardha uttanasana (forward fold, half way up), step one leg back and then the other. Straighten both legs, knees off the ground, and bring the hips level with the entire body so that your body is in one even plane.
Keep the neck long by reaching the head forward. Spread your fingers, pressing all ten fingers firmly into the mat, heels pressing back and shoulders over the wrists. Lift in the belly, keeping the tailbone tucked under so that you maintain one long line from the heels to the head. Micro-bend the elbows.
Modification: You can lower the knees to the ground until you are strong enough to lift the knees off the ground.
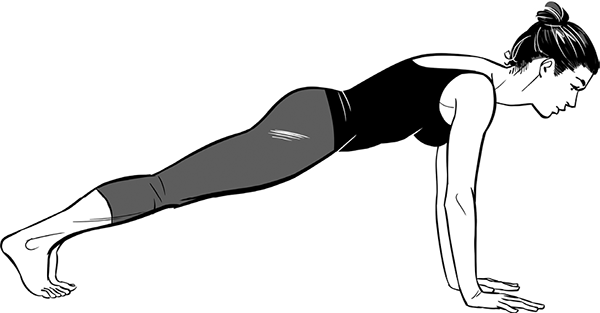
Figure 25, Plank Pose
*Chaturanga Dandasana (Four Limb Staff Pose, Low Push Up)
The low push up position is a transition pose before upward facing dog. It helps tone the body and keeps us strong. For some of us this is very easy, while for some it is a long-term goal. Be patient with it, and do it correctly, even if it means knees on the ground for many years. Too many people rush into doing it with knees up, and when lowering down they collapse into the shoulders. Since we do this pose often, this can lead to shoulder injury, so go slow, and practice often. (fig. 26)
Method of practice: From plank pose, keep the heels reaching back, and the legs and belly activated. Slowly bend the elbows back while keeping them close to the body. Lower the body until the shoulders and elbows are at the same height and hold until you finish your exhale. Keep the shoulders rotating up and back. Keep the chest slightly open so that the gaze is forward. Try to keep the hips in line with the legs and torso.
Modification: Drop the knees and bend the elbows only an inch or to a place where you feel you can hold steady for a full breath. While lowering down, make sure your shoulders do not move forward. While bending the elbows back, keep your shoulders over the wrists.
Variation: See Ashtanga Pranam on the next page.

Figure 26, Four Limb Staff Pose, Low Push Up Pose
*Ashtanga Pranam (Knees, Chest, Chin, or Eight Limbed Pose)
This is a classic pose in hatha yoga (physical yoga), and a great modification for chaturanga (low pushup). You may practice this as a substitute for low push up regularly or just use this at the beginning of practice until you warm up enough for the low push up position. (fig. 27)
Method of practice: Starting in plank pose, lower the knees down to the floor, shift the hips slightly back, and lower the chest in between the hands. Rest your chin on the floor. Your hips will be high up toward the sky. Keep the elbows close into the body, shoulders moving back and palms pressing into the earth. Over time, try to keep the shoulders closer to the wrists, rather than very far forward.

Figure 27, Knees, Chest, Chin, or Eight Limbed Pose
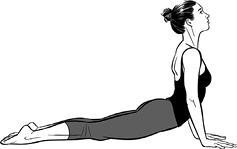
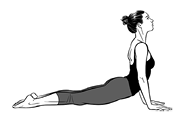
*Urdhva Mukha Svanasana (Upward Facing Dog)
This may be your first backbend of the practice, so go easy at first and slowly allow yourself to take the full expression of the pose. It is easy to forget to breathe here—try to take a deep inhale as you open the chest. (fig. 28)
Method of practice: From chaturanga (low push up), inhale as you slide forward and up, extending the back and chest. Press the tops of the feet into the earth, activate and lift the legs, and nearly straighten the arms. Keep a micro-bend in the elbows. The chest keeps moving forward to lengthen the lower back, as well as lifts toward the sky. The gaze is slightly up to help lengthen the neck, but do not overarch the neck as that will lead to compression. Reach the crown of the head up.
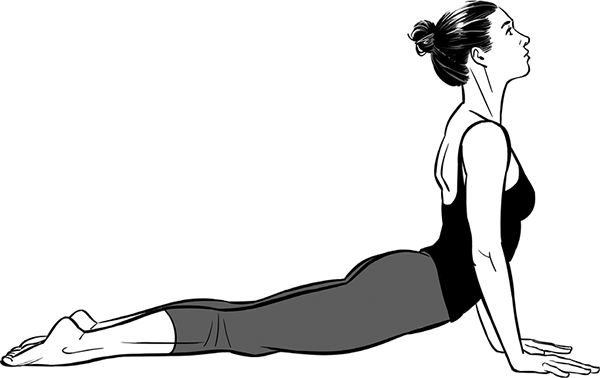
Figure 28, Upward Facing Dog Pose
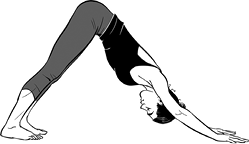
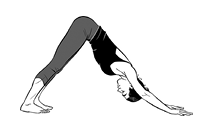
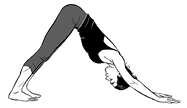
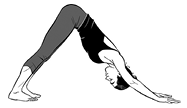
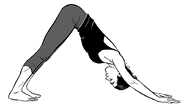
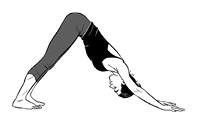
*Adho Mukha Svanasana (Downward Facing Dog)
Downward facing dog helps stretch the back of the legs, the shoulders, and over time lengthen the back. At first this pose may seem very difficult but eventually it becomes a resting pose. It is practiced every time we take a vinyasa, and as part of the warm ups as well as the sun salutes. (fig. 29)
Method of practice: From urdhva mukha svanasana (upward facing dog), exhale as you lift the hips and shift them back, rolling over the toes and pressing into your hands. The distance between your hands and feet should be the same distance they would be from each other in plank pose. Keep the feet hip-width apart and work toward straightening the legs back and reaching the heels toward the earth. Hips reach up and back creating more space for the back to lengthen. Hands root into the earth so that all your knuckles are pressing into the mat. Try to maintain the space between the shoulder blades by slightly rotating the shoulders towards the chest. After you rotate the shoulders, lift them to the same level as your torso. Lengthen the front and back of body, feeling your belly lift to help lengthen the lower back. Let your head hang between your hands, and of course breathe.
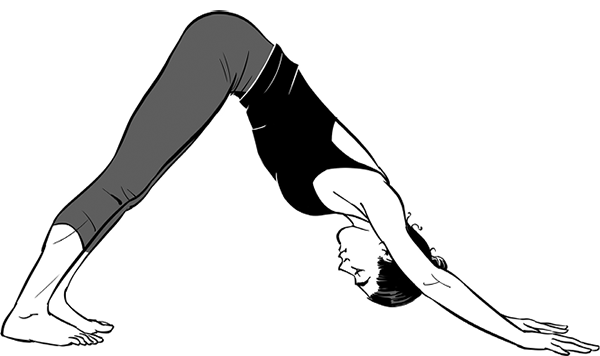
Figure 29, Downward Facing Dog Pose
Standing Poses
Standing poses are great for preparing for some of the more challenging poses. They offer the opportunity to stretch most of the body in a safe manner and continue to warm the body up.
Standing poses help steady and focus the mind, and if done with awareness, they encourage correct alignment and awaken the flow of energy. Some standing poses can be part of the sun salutes.
Basic Tips for Practicing Standing Poses
- • Be aware of the tendency to be sloppy in standing poses, as they feel more familiar compared to backbends or seated poses.
- • Stay grounded through the feet, and engage the legs. Keep knees micro-bent to protect the joints and activate the quads. Use inhales to create space and length and exhales to allow a deepening of the pose.
- • The pelvic floor—mulabandha (root control center)—should be activated to help create length in the spine and stability in the pose. Keep the bandhas (control centers) active, both in the transitions as well as in the poses. Begin with the bandhas (control centers), and then lengthen in the lower back to allow the pelvis to lift and move over the femur heads to create proper alignment.
- • Pay attention to transitions.
**Pada Hastasana (Standing Forward Fold)
Forward folding is a good way to stretch the back of the legs. For many of us, doing so standing is safer and less stressful than in a seated position. Allow yourself time to release into the pose. This a great pose to be in for longer holds, and is especailly helpful for runners, skiers, cyclists etc. (figs. 30–31)
Method of practice: From samasthiti, inhale and lengthen the spine, exhale and forward fold. Place the hands under the feet, lengthen once more and then forward fold. Like most poses stay for five breaths, but if you would like to achive quicker results in releasing your hamstrings, stay at least ten breaths, and up to five minutes.
Modification: If it is hard to reach or it is too much pressure on the hamstrings (back of the thighs), or the back, bend the knees as much as needed. You can also hold the toes instead as that is a bit easier to reach. If all this is too much, simply stay with the uttanasana modification of holding the elbows as you forward fold.
|
|
|
Figures 30–31, Standing Forward Fold Pose and
Standing Forward Fold Modification Pose (left to right)
*Utkatasana (Awkward Chair/Fierce Pose)
This pose is good for strengthening the quads (front of the thighs). It is practiced either as a transition for one breath in sun salute B, or at times practiced as a longer held pose. You can hold it for a few breaths longer anytime you take it for a breath. (fig. 32)
Method of practice: Bend the knees, and with an inhalation, raise the hands over the head. The hands can be apart or, if able, work toward bringing them together.
Try to keep your pelvis neutral (the tendency is to stick the buttocks out). Tuck the tailbone down slightly. Keep lifting the arms, reaching the fingers upward.
Open the chest and breathe into the front and back of the body. This pose can be challenging or awkward, so I like to practice smiling in this pose (thus I renamed it “happy pose”). The gaze can be forward or, eventually, up toward the hands.
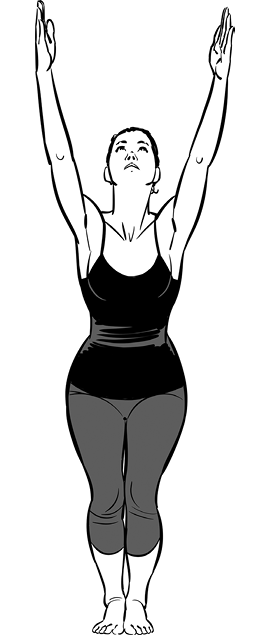
Figure 32, Awkward Chair/Fierce Pose
*Anjaneyasana (Low Lunge)
Low lunge is a safe way to stretch the hip flexors—or the upper part of the leg that connects with the hips. These muscles help us move our legs, such as when we walk or run. Low lunge also serves as a preparation for backbends, since most backbends require the hinging of the hips in the same way. You can practice this anytime, as part of the warm up, preparation for splits, or before backbends. Both of these low lunge variations can be held for longer to achieve greater benefit, and quicker release of the hips and quads, including the psoas muscle. (fig. 33)
Method of practice: From downward dog position, lift the left leg up into the sky, coming up onto the toes of the right foot, bend your left knee and start to bring it toward your chest while lifting in the belly and shifting your shoulders forward to the wrists. Land the foot between the hands. If the foot does not reach there, help yourself with the left hand and move the foot forward between the hands.
Lower the right knee to the floor or a blanket and lift your hands onto your left thigh. Lengthen the spine as you sink forward into the left knee. You will feel the stretch in the front right thigh.
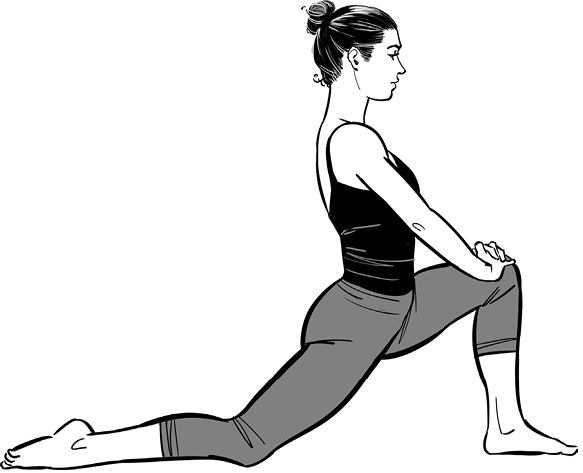
Figure 33, Low Lunge Pose
Variation: Quad stretch. Bend the right knee, and lift the leg up toward your hip. If possible, hold your foot with your hand and begin to move it forward, eventually turning the fingers in the same direction as the toes. This will deepen the stretch and move it from the hip flexors (thigh, closer to the hips), to more of a quad (center thigh) stretch. (fig. 34)
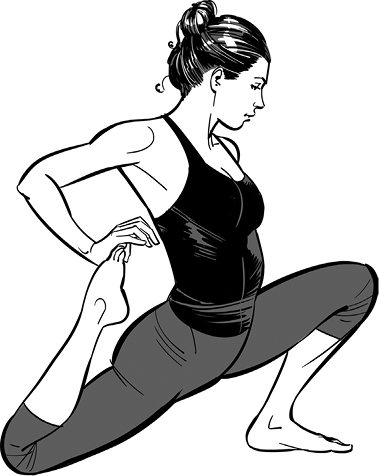
Figure 34, Low Lunge Variation (quad stretch)
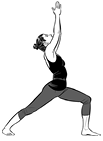
*Anjaneyasana (High Lunge/Crescent)
The high lunge is a great pose to strengthen the legs and stretch the hips. It is also a great preparation for the warrior 1, as here the back foot is up, and thus easier to have the hips square forward. (fig. 35)
Method of practice: Step the right foot forward while the back heel stays up. Reach up with a long spine supported by your bandhas (control centers) and then lift the arms up towards the sky. Keep the lift in the belly, and tuck the tailbone down creating a neutral spine. Keep reaching the fingers towards the sky while pressing the shoulders into the back and away from the ears. Sink into the hips, keeping the back leg very active, with the back heel reaching far back. The front knee should not go beyond the ankle. If you are bending deeply and you find your front knee moving past the ankle, scoot the front foot forward so the ankle is right below the knee. Repeat on the other side.
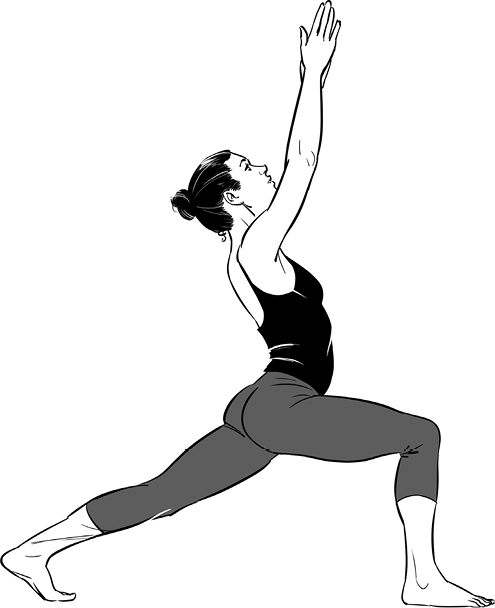
Figure 35, High Lunge/Crescent Pose
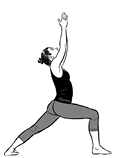
*Virabhadrasana Ka (Warrior 1)
Warrior 1 is a powerful pose practiced by many schools of yoga. Feel the energy of the arms reaching up, extending the spine with them, while keeping strong grounded legs. Though it appears early on in ashtanga and vinyasa classes, doing this pose correctly is not an easy task. Work on squaring your hips forward, but do not worry if you are not able to do so. If needed, you can always do high lunge instead. It is the process that counts. (fig. 36)
Method of practice: From downward dog, bring your left foot forward between the hands; spin your right heel down 45 degrees. Keeping the left knee bent at 90 degrees, lift the arms and strengthen the spine. Keep your hips squared towards the front of the mat. If this is too much, you can have less of a bend in the front knee; just make sure not to take the knee beyond the ankle.
Keep the fingers reaching high up towards the sky and gaze up towards the hands while the shoulders reach down away from the ears. Lift in the belly and keep the legs strong.

Figure 36, Warrior 1 Pose
*Twisted Warrior 1
I started doing this variation as I noticed I was needing a twist early on to release the mattress from my spine (when practicing in the morning). It should feel good, just make sure to breathe while twisting. (fig. 37)
Method of practice: From warrior 1 pose, bring your right hand onto the left thigh, and begin to twist to the left. Place your left hand behind you wherever it reaches. Take your drsti (gaze) with your twist, to help you go deeper.
With every inhalation, lengthen the spine, and with each exhalation, deepen the twist.
Modification: You can keep the back heel up, similar to lunge pose. This helps the hips align more forward and is especially important if you feel any pressure on the back knee.

Figure 37, Twisted Warrior 1 Pose
*Humble Warrior (Surya B2)
Humble warrior warms up the shoulders and hips while forward folding in the warrior, thus also building strength in the legs. (fig. 38)
Method of practice: From warrior 1 pose, take the hands behind your back and clasp the fingers. Inhale, lengthen the spine and exhale, fold forward with the arms going over the head towards the floor. Go toward your thigh, or if possible, take the head and shoulder to the inside of your thigh. Keep the back leg strong, and make sure your front knee does not go beyond the ankle. Stay for five breaths and then come back up to the warrior 1 pose, and with an exhalation, lower down and take your vinyasa.
Modification: Hold a strap or a towel between the hands if the shoulders are tight.

Figure 38, Humble Warrior (Surya B2) Pose
*Eagle Arms Warrior (Surya B3)
Surya B3 has two parts to it. The first part opens the shoulders and the second part (lizard) opens the hips. Similar to B2, but a deeper hip opener, and a shoulder strecth in the opposite direction that includes a backbend (vs. forward fold in Surya B2). This backbend can be intense, so go slow, and make sure you maintain a steady breath. It is a fantastic warm up for the deeper backbends that follow. (fig. 39)
Method of practice: From warrior 1, clasp your left arm under the right arm (eagle arms), engage your bandhas, keep the hips low, and begin lifting the arms up and back. This will stretch the shoulders and back. Deepen your backbend while lifting from the chest, to prevent collapsing into the lower back.
Stay for five breaths and then return to warrior 1.
Modification: When wrapping the arms, hold on to what you can reach. The hands may touch or not, maybe you reach a thumb. Whatever you can do is great.

Figure 39, Eagle Arms Warrior (Surya B3) Pose
*Utthana Pristhasana (Lizard Pose)
Lizard takes us deeper into the hips, really opening up and releasing tension, as well as preparing for more challenging poses. Lizard can be very intense for some of us, so be gentle. Go just as far as you can and hold for ten breaths. Staying longer really allows the hips to relax and open. Lizard is a different stretch than pigeon, and both of these poses are important, so make sure to practice each of them according to the instructions. (fig. 40)
Method of practice: From warrior 1, bring both hands down to the floor to the inside of the front leg. Lower to your forearms and allow your knee to open to the side. This is actually a hip opener, but we normally practice it as part of surya B3 (sun salute B3). If this is easy, keep moving your arms forward to deepen the stretch.
Modification: Place your forearms on a block, or even stay up on your hands. Allow your hips to open gradually and go further only when it feels fine for you.

Figure 40, Lizard Pose
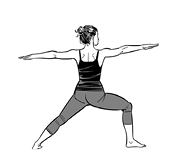
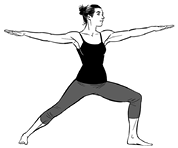
*Virabhadrasana Kha (Warrior 2)
Warrior 2 is a pose that embodies the power of the body with the clarity of mind. This is a great pose to balance power with softness—yang with yin. Feel the energy in the body and focus the mind. A great pose to hold for a bit longer, ten breaths or more if you can. (fig. 41)
Method of practice: Coming up to warrior 1 with the left foot forward, slowly open to warrior 2 by bringing your left arm forward and your right arm back, parallel to the floor. At the same time, open the chest and open the hips to the sides. Both thighs should rotate externally in this pose.
Keep the left knee over the ankle; it may have a tendency to drop inward. Reach the arms away from your center as if there is a fire hose shooting water through your fingertips. Keep the power and energy in the arms but relax the shoulders.
Keep the spine long and perpendicular to the floor. Use your bandhas (power centers) to help you stay tall, and keep the tailbone tucked under so that you do not overarch in the lower back. Keep the back leg strong and root into the outer edge of the back foot. Gaze forward over the front middle fingers with intention and softness at the same time. Stay focused and calm.

Figure 41, Warrior 2 Pose
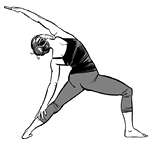
*Viparita Virabhadrasana Kha (Reverse Warrior 2)
The reverse warrior 2 is a side stretch. There are not many of these in ashtanga classes, so I added it here as a regular practice. (fig. 42)
Method of practice: From warrior 2, inhale and rotate your left palm up to the sky. Drop your right arm to the right leg and take the left arm up and back to create a stretch in the side of the body.
Lengthen both sides of the spine and try to keep your hips neutral. There is a tendency to let the buttocks stick out; use your bandhas (power centers) to prevent this from happening. Keep the front knee bending and let your gaze follow your hand. Enjoy for three to five breaths.

Figure 42, Reverse Warrior 2 Pose
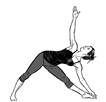
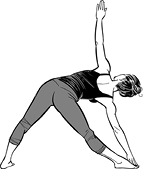
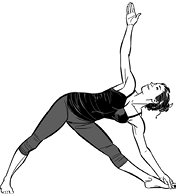
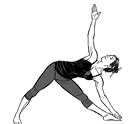
*Trikonasana (Triangle)
Triangle is a yoga classic and a good warm up for all levels. (fig. 43)
Method of practice: From warrior 2, straighten your front leg (without locking the knee joint), and reach forward with your left arm and torso as far as you can go. Now, lower your left arm to the left leg or even floor if possible. (The ashtanga tradition recommends holding the big toe with your peace sign fingers, if possible).
Take the right arm up to the sky and bring your gaze up towards the right hand. Keep your chin slightly tucked into the chest so that you turn the head with a long neck. Both legs remain straight and active.
Modifications: If there is discomfort in the neck, look to the side or down to the floor. Bend a bit with the front knee and activate the front of the leg to protect the knee.
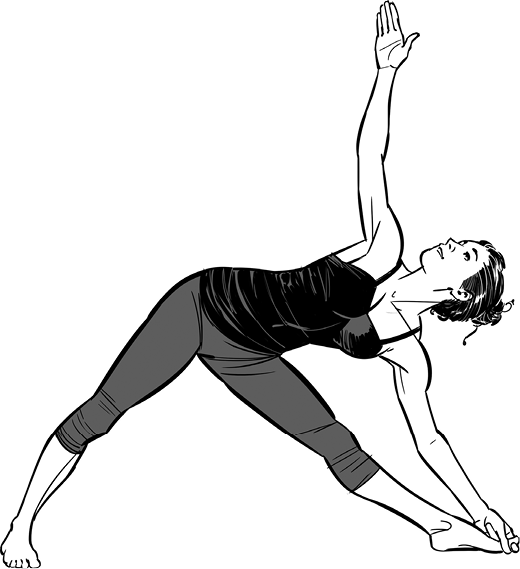
Figure 43, Triangle Pose
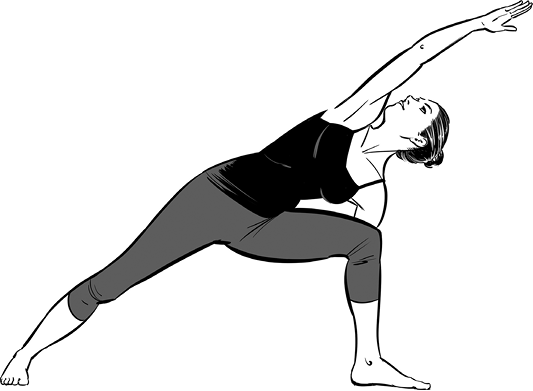
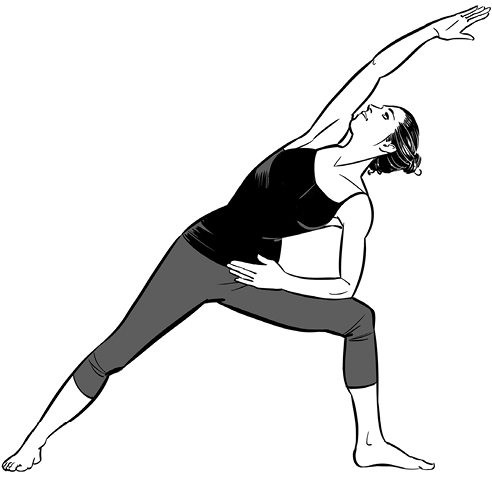
*Utthita Parsvakonasana (Extended Side Angle)
Similar to triangle, extended side angle is a classic warm up with the hips externally rotating. (figs. 44–45)
Method of practice: From reverse warrior 2, come forward and place your left hand on the floor outside the left leg. Place the back arm alongside the body facing up, and keeping the rotation of the shoulder, bring the arm over the head so that it creates one long line from your back heel through the back leg and side of the torso through the arm.
Press firmly into the outer edge of the back foot. Press your left arm against the left leg to help you open the chest towards the sky. Take the gaze up towards the sky.
Modification: If taking the hand to the floor causes the chest to collapse, come up and bring your front forearm onto the front thigh. Press the forearm down and lift the body so that you are not collapsing into the thigh.
|
|
|
Figures 44–45, Extended Side Angle Pose and Extended Side Angle Pose Modification (left to right)
*Prasarita Padottanasana A (Wide Legs Forward Fold A)
Wide legs forward fold offers a good stretch for the legs, a release for the spine, and a chance to surrender to gravity. (fig. 46)
Method of practice: Step the feet about four feet apart with both feet parallel to the outer edge of the mat. Place your hands on the hips. Inhale, lengthen the spine and with an exhalation, fold forward and bring your hands to the floor.
Place the hands shoulder-width apart and bend the elbows straight back, creating an arm position as you would in chaturanga (low push up). Press the heels of the hands into the floor to help the head reach towards the earth. Keep the legs straight and strong with the thighs active.
Modifications: If you feel very tight and have a hard time folding forward, take the feet farther apart. If your head reaches the floor and it is too easy, bring your feet closer together.
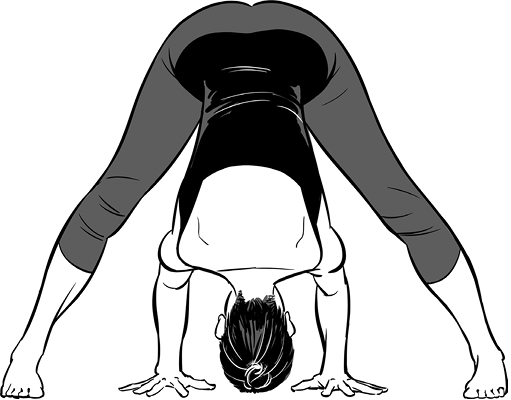
Figure 46, Wide Legs Forward Fold A Pose
*Prasarita Padottanasana C (Wide Legs Forward Fold C)
This variation of the wide legs forward folds adds a shoulder stretch and some extra weight as the arms reach over the head. Stay here a bit longer. Ten breaths are great. (fig. 47)
Method of practice: Set your legs as in prasarita A (wide legs forward fold) and clasp the hands behind your back. Inhale and lengthen the spine; exhale and fold forward. Take the hands over the head towards the floor. Keep the legs strong and active. Breathe and try to lengthen the spine while the head reaches the floor.
Modification: If you have a hard time clasping your hands behind the back or reaching them forward, you can use a strap or a towel, holding one end in each hand as wide as feels comfortable. This will create more space in your shoulders and the ability to take the hands forward so that gravity can help you stretch deeper.
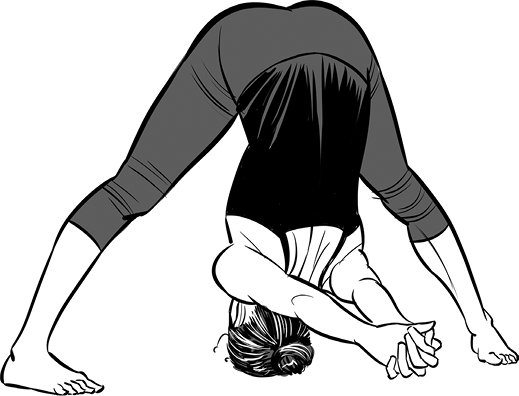
Figure 47, Wide Legs Forward Fold C Pose
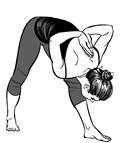
*Parsvottanasana (Pyramid Pose)
Pyramid pose is good for stretching your hamstrings (back of the legs) while standing. If you are struggling in this pose and need some mental help, consider repeating this mantra (chant): “I love you, hamstrings.” Just repeat it over and over. No need to fight the body where it is tight, but rather send the tight areas loving energy. (fig. 48)
Method of practice: Step your right foot back about one leg distance from your left foot with the back foot at a 45-degree angle. Keep the hips squared forward and take reverse prayer behind the back (palms facing each other, fingers towards the head). Inhale and lengthen your spine.
Keeping the front leg straight, exhale and fold over. Keep a micro-bend in the front leg to protect the knee. With every inhalation, lengthen the spine from the place you feel it rounding the most and with every exhalation, surrender into the pose. Eventually your gaze will be towards the toes of the front foot.
Modifications: If the arm position is not available, simply hold the elbows behind the back or keep the hands on the hips to help keep the hips squared. If there is any discomfort in the knee, or if you have a knee injury, bend the front knee a bit and keep the front thigh activated.
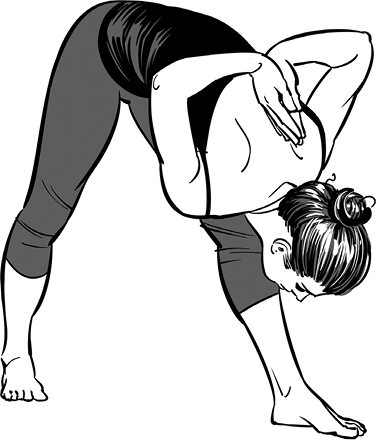
Figure 48, Pyramid Pose
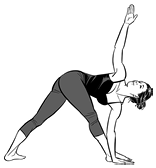
**Parivrtta Trikonasana (Revolved Triangle Pose)
The revolved triangle is much harder than the triangle pose, so use a block when needed, and be patient. I could not reach the floor when I started, and now I go across with the hand flat on the ground. Practice with a smile, and with time it will happen. (fig. 49)
Method of practice: Step your left foot back about one leg distance from your right foot with the back foot at a 45-degree angle. Keep the hips squared forward. Reach the left arm up and begin moving it forward and down towards the outside of the right foot.
Reengage your bandha, lengthen the spine, and begin to rotate the chest up as the right hand reaches up to the sky. Follow the right hand with your gaze.
Modifications: Lower the left hand to a block on the inside or eventually outside of the foot. When that is easy enough, lower the hand to the inside of the foot, then to the ankle, and eventually take the full pose with the hand outside the foot.
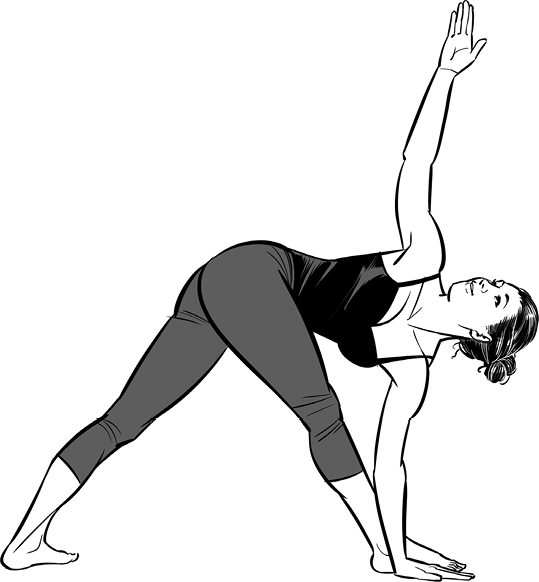
Figure 49, Revolved Triangle Pose
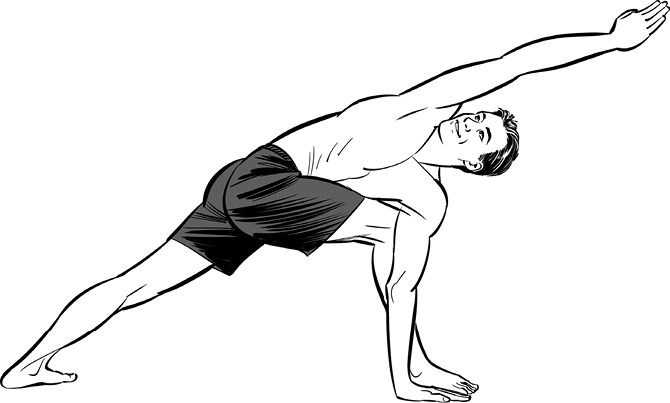
Figure 50, Revolved Side Angle Pose
**Parivrtta Parsvakonasana (Revolved Side Angle Pose)
The full pose is very challenging, but luckily there are many variations for the revolved side angle. Choose the appropriate one for you. Remember that each day may be different. (fig. 50)
Method of practice: Step the feet as wide apart as in warrior 1. Engage your bandhas and take your left arm across and over the right knee. Try to tuck your arm so that you are reaching your armpit towards the thigh. Take the left hand to the earth, lengthen your spine, and begin to rotate your chest to the sky. Take your right arm over the head and your gaze towards the right hand or up to the sky.
Modifications: Traditionally, the gaze is towards the right hand, but you can simply look up so as not to strain in the neck or even down to release the neck and help with balance.
Most of us will need to keep the back heel up as in lunge pose rather than down as in warrior 1. (figs. 51–52)
You can do this pose with the back knee on the ground. I certainly recommend at least setting up for the pose with the knee down and then, if possible, lifting it up.
You can keep the left hand to the inside of the right leg and twist from there. This makes the pose available to most people, and it is a great modification for beginners. Once you take the left hand over, you may want to place the hands in prayer position rather than opening them up if you cannot reach the left hand to the earth. The right arm can go straight to the sky rather than overhead, especially if there is any neck tension.


Figures 51–52, Revolved Side Angle Pose Modification (top to bottom)
*Vrksasana (Tree Pose)
Tree is the most well-known standing balancing pose, and serves as a good challenge for the mind to stay focused and clear. Practice often, even without a full yoga practice, just to regain centeredness. (fig. 53)
Method of practice: Standing in tadasana (mountain pose), focus your gaze on one spot that is not moving and keep your eyes soft. Let your breath deepen and soften and let your mind be calm. Shift your weight into the left foot. Grounding through the foot while continuing to spread the toes, lift your right foot up and place it on the inner thigh of the left leg. Take the right knee back so that it is in line with the standing leg. Bring your hands to your heart, find your stability, and then take the hands over the head. Slowly raise your gaze up to the sky. A steady gaze is a very crucial part of this pose. Moving your gaze will challenge your ability to stay steady.
Variation: If your hips feel open, you can bring the right foot into half lotus with the right ankle on the left thigh.
Modifications: Lift the non-standing foot to any height, from keeping the toes on the earth and leaning the heel on the ankle of the standing leg to anywhere else on the leg that feels comfortable, except for directly on the knee, especially if the knee is locked. Maintain a micro-bend in the standing leg.
Take this pose in stages. You can start with looking down and, over time, practice lifting the gaze.

Figure 53, Tree Pose
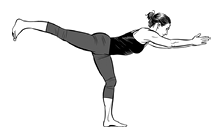
**Virabhadrasana 3 (Warrior 3)
Warrior 3 is a very challenging pose to do correctly, but you can always work towards it. Not only is it a balancing pose, but it also strengthens the glutes and standing leg. (fig. 54)
Method of practice: Standing on the left leg, raise your right leg back behind you as you reach the torso forward. Keep the hips over the standing leg, bandhas (control centers) engaged and back leg strong with the foot flexed. As you reach your torso forward, keep the chest open and reach the arms forward in front of you. Take your gaze towards the hands.
Modifications: Arms can be to the sides or in prayer position. There are also variations with hands clasped behind the back or alongside the body. You can keep the standing leg bent as much as you need to. Work on straightening the leg that is in the air.
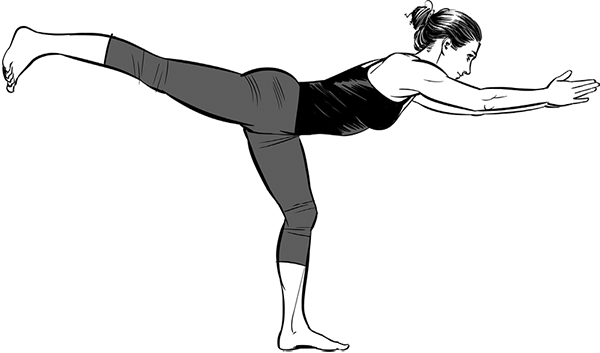
Figure 54, Warrior 3 Pose
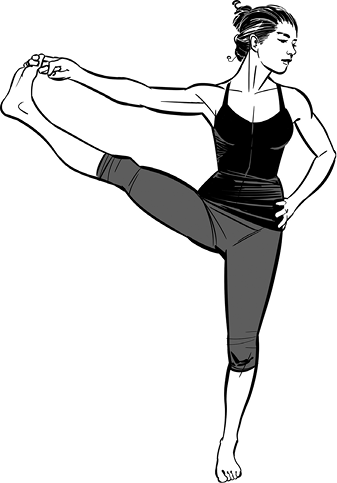
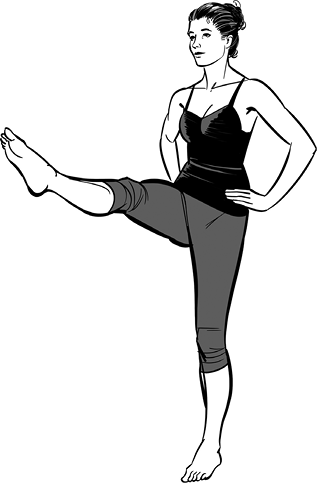
**Utthita Hasta Padangusthasana (Extended Hand to Big Toe Pose)
This is a classic ashtanga standing balancing pose. In both Doron Yoga and ashtnaga this pose comes after pyramid pose, as it requires open hamstrings, and the pyramid pose helps stretch them and prepare for this pose. This is a challenging pose, so don’t get discouraged. (figs. 55–57)
Method of practice: This pose has three parts.
Utthita Hasta Padangusthasana A: Root your left leg into the earth, activate your bandhas (energy control centers), and focus your drsti (gaze) at one point in front of you. Lift your right leg up and reach with your “peace sign fingers” (index and middle fingers) to hold the big toe of the left leg. Optional fold over the leg. Stay for five breaths.
Utthita Hasta Padangusthasana B: From A, lift your torso up if you folded, and open your right leg to the right side. If you feel steady, try and take your gaze to your left. Stay for five breaths.
|
|
|
|
Figures 55–57, Extended Hand to Big Toe Pose (left to right)
Utthita Hasta Padangusthasana C: From B, come back to center, optional fold over your right leg for one exhale, and inhale back up. Let go of your foot, and place your hands on your hips. Keep your right leg straight and your spine tall. Try not to lean backward, even if it means your foot is just a few inches off the ground. Hold for five breaths, and release down slowly. Lucky you! One more side to go!
Modification: Since this pose is a balancing pose, but requires the hamstrings (back of the leg) to be flexible, you can do this pose with the knee bent, and hold the knee instead of the foot. You will still get all the benefits of standing on one leg, from strengthening the standing leg, to becoming more focused and stable. (fig. 58)
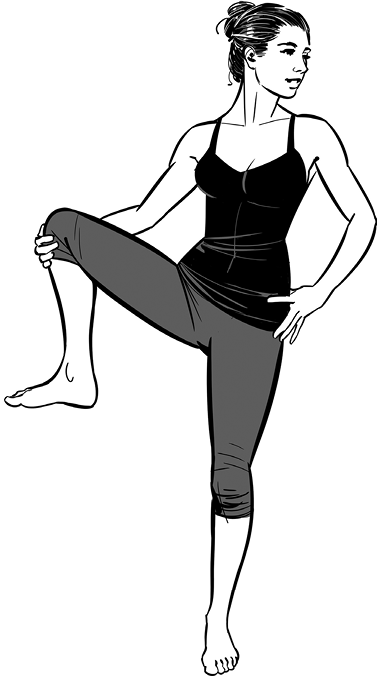
Figure 58, Extended Hand to Big Toe Pose Modification
*Natarajasana (Dancer Pose)
A fun standing balancing pose, great for all. (fig. 59)
Method of practice: Raise your right leg behind you and hold it with your right hand. Begin tilting forward with your torso as you extend the left arm forward and the right leg back. You can move forward with your torso, but rather than going down, try to maintain an open chest, as this is a backbend on one leg.

Figure 59, Dancer Pose
***Variation: The full pose is done by taking the hands overhead and holding the foot with both hands. This is extremely advanced, but if you want to play, you can try it with a strap. This pose requires a deep opening of the entire back, the shoulders, and the hip flexors, while adding the challenge of balancing at the same time. (fig. 60)

Figure 60, Dancer Pose Variation
*Preparation for the Galavasana Sage Pose/Cappuccino Pose
I like to call this pose “cappuccino” as it is easier to remember, and reminds me to sit back and down and enjoy the moment. I know I recommend not to drink cappuccinos, so you can think of it as mint tea if you rather. Whatever you do, it is a great pose as it opens the hips, strenghens the standing leg, and works on our mind to stay focused and balanced. (fig. 61)
Method of practice: Stand with the hands at your heart. Bring your right ankle onto your left thigh just above the knee. Keep the bandhas (power centers) activated as you begin to bend the standing knee and lower your hips down and back.
Try to keep your chest open as you bend deeper in the knee. Bend only as far as you can without letting the knee move forward beyond the ankle.
Modification: You can take the hands to the floor. You may feel a deeper stretch but will have less challenge with balancing.
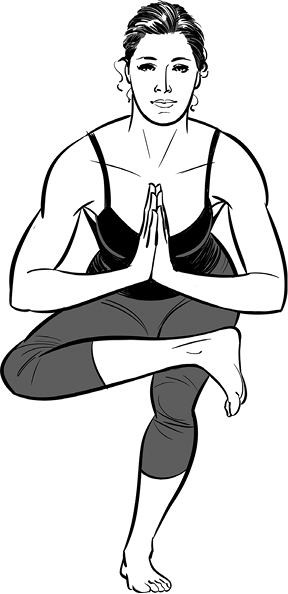
Figure 61, Preparation for the Galavasana Sage Pose/Cappuccino Pose
**Garudasana (Eagle Pose)
Eagle pose is a balancing pose that requires open hips, so take the variation that works for you, and enjoy the balancing. (fig. 62)
Method of practice: Shift your weight onto the left leg, lift the right leg and wrap it around the left leg. It is easier to do so, if you bend the left leg as you wrap the right. Wrap the right arm under the left arm, for eagle arms. Lower the hips back and down, so you do not shift weight onto your standing knee. Keep the arms lifted to create length in the spine and a bit of stretch in the shoulders.
Modifications: It is fine if you wrap the leg only part way. It may be that you wrap over the left thigh without tucking the foot around the calf. Your right foot may be on the ground just over the left leg. Either way is fine. It will get easier as your hips open up with the rest of the practice.

Figure 62, Eagle Pose
**Ardha Chandrasana (Half-Moon Pose)
Half-moon is a balancing pose that is done as part of the external hip rotation poses such as warrior 2, triangle, and extended side angle. (fig. 63)
Method of practice: From triangle pose, bend slightly in the front knee (let’s say the left one), and begin to shift your weight onto that leg. Lift the right leg off the ground, eventually to hip height.
Keep the hips over the standing leg, the bandhas active, and the chest opening towards the sky.
Your right hip should be stacked on top of the left or as close to stacked as your body will allow. (If the torso faces the earth, the pose becomes warrior 3.) The left hand can come to the ground; the right arm reaches up towards the sky.

Figure 63, Half-Moon Pose
Modifications: Bend in the standing leg as much as needed, but try to keep the leg that is in the air straight. If it is hard to reach the ground with the hand, use a block.
***Variations: Work on lifting the left hand off the ground, maybe towards the chest and balancing without its support. As an opening for the chest and shoulder, you may want to wrap the right arm behind the back towards the inner thigh. This is especially helpful when balancing without the support of the left hand. (fig. 64)

Figure 64, Half-Moon Pose Variation
**Urdhva Prasarita Eka Padasana (Standing Splits)
Standing splits is a balancing pose that requires open hamstrings (back of the legs). You can always do it with a bent standing leg. Do the stretching elsewhere, and focus here on the balancing aspect of the pose. (fig. 65)
Method of practice: From warrior 3, lower your hands to the floor, and take the leg that is in the air, as high up to the sky as possible. Try and keep the hips square as you lift the back leg up. It may not go very far. Just do your best. The other version is to allow your hips to open, and then you may find far more space to lift the back leg. In the Doron Yoga advanced sequence we practice hopping into handstand from here. Even just the practice of hopping is good. It does not matter if you manage the handstand.
**Variation: You can keep both hands on the ground, or take the left hand to the left ankle (standing leg) and balance here. If this still feels steady, you can try both hands to the ankle.
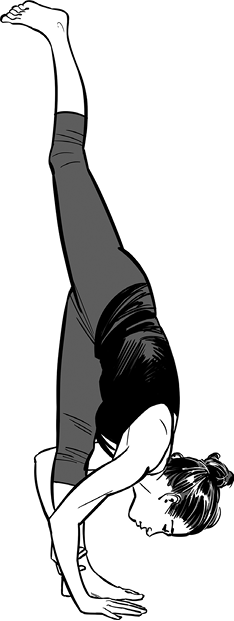
Figure 65, Standing Splits
Seated and Floor Poses
Seated and floor poses include forward bends, hip openers, and twists. Some are done seated and some reclined, lying down on the floor. In general, reclined poses are safer for beginning students, while seated poses, especially forward folds, may be challenging for those with tighter hamstrings, tight hips, and tight iliopsoas (muscles that connect the back with the upper leg) muscles. Try practicing these poses with a bit more of a yin attitude, allowing the opening to happen, rather than forcing it. I would also recommend staying in them a bit longer, at least ten breaths if you have the time. In all of these poses, focus on lengthening first, especially in the lower back, creating space for the lumbar spine, and only then deepen the pose.
Forward Folds
Forward folds open the spine, iliopsoas, hamstrings and, in some cases, the hips. All of these poses are calming and cooling and require less effort and more surrender. Since they are mostly passive, they can be held for longer durations. Breathing deeply and holding the poses a bit longer helps reduce mental and emotional fatigue. These poses are also great for balancing other more active poses such as backbends and sometimes inversions.
Basic Tips for Practicing Forward Folds
- • Engage bandhas (control centers) to protect the lower back.
- • Turn the pelvis slightly forward to allow for length in the fold. Do not go far forward until you can get the hips to tilt.
- • Inhale and lengthen; exhale and move forward. Gaze slightly forward to encourage lengthening.
- • Move the shoulders away from the ears and the shoulder blades away from each other.
- • Rotate the thighs internally. If one foot is forward, keep toes pointing up to the sky.
- • Consider keeping the quads (upper thigh muscles) engaged, as it protects the legs from injury.
- • Elevate the seat on a blanket or block if any tension is in the back or bend the knees if hamstrings are very tight.
Twists
Twists are similar to the rest of seated and floor poses, though they add a few extra benefits. They tone and cleanse the internal organs, giving an internal massage that also helps with digestion. They are great for releasing the spine after any intense pose, whether it is a backbend or forward fold, or even after sitting for many hours on a chair. Reclined twists are safer than seated ones.
Basic Tips for Practicing Twists
- • Sit tall with the natural curvature of the lower back. Sit on a blanket if needed.
- • Use the inhalations for lengthening and the exhalations for releasing deeper into the twist. Root the sitting bones down in seated twists.
- • Activate the pelvic floor and draw the belly in and up. This is both for stability and deepening. In deep twists, the coccyx should be curled in to further help with stability.
- • Try to initiate the twist from the core, and then follow with the chest and upper back. Open the chest, shoulders, and neck.
- • Keep the gaze moving in the direction of the twist without straining the neck and keep the head up as a continuation of the spine.
Hips
Hips are the foundation for the mobility of the body. They are a crucial part of the practice, especially in the West, where intense athletic activity and long periods of sitting on chairs and sofas cause the hips to tighten. Hip openers help with mobility of the upper and lower body. As the hips open, so do the energy centers of the lower body, centers that contain many emotional and sexual blockages. This helps us free up old patterns and releases emotional stagnation. Many back issues stem from the hips as well, so opening the hips can actually solve many back and other related problems.
Basic Tips for Practicing Hip Openers
- • When hip openers are practiced as yin poses, they are most efficient. Go slowly and with patience. Never rush into hip openers.
- • Inhale to lengthen the spine, and exhale deepen the pose.
- • Emphasize deep long exhales to help activate the parasympathetic nervous system, which will allow for more release and opening.
- • If you feel hip openers in the knees, back off. The knee is where the stretch goes when the hips are tight and we push too hard. A bit of sensation in the knee is fine, but there should not be any sharp pain.
*Sukhasana (Easy Pose/Cross-Legged Pose)
A great sitting pose for anytime, including meditation. This is a good substitute for padmasana (lotus pose). (fig. 66)
Method of practice: Sit on your mat with your legs crossed. You can sit with one leg in front of the other. Make sure you can sit comfortably with the spine straight, allowing the low back to maintain its natural arch.
If you find yourself in slumpasana, meaning you are collapsing your low back or your knees are higher than your hips, elevate your seat by sitting on the edge of blankets or a bolster. There is no limit to how high you can elevate your hips. Do your best to find a seat that allows your spine to stay long and maintain its natural curvature as well as have space for your knees drop below your hips.
*Vajrasana (Thunderbolt Pose)
A classic pose for pranayama (breath work), or as an optional position for meditation. (fig. 67)
Method of practice: Sit on your heels with your toes untucked and place the palms of your hands on your thighs, keeping the spine tall. Make sure there is no pressure on the knees.
Modification: If you find that the hips cannot come down to the heels or that it is uncomfortable to sit this way, place a block or a bolster lengthwise underneath your seat between the legs. Play around with the height that you need in order for your knees to be comfortable. Make sure there is no knee pain. A bit of a stretch sensation on the front of the thighs is fine.
|
|
|
Figures 66–67, Easy Pose/Cross-Legged Pose and Thunderbolt Pose (left to right)
***Padmasana (Lotus Pose)
The classic yoga position, some say the best position for meditation, as it is very steady, even without a cushion underneath your hips. Take your time with this pose and do not force it. (fig. 68)
Method of practice: Sit in cross-legged position, bringing your right ankle onto the left thigh and the left ankle onto the right thigh, eventually allowing your toes to hang over the outsides of your thighs. Please do not force yourself into this pose, as it could hurt your knees. Be patient and practice easier hip openers such as pigeon to prepare for this first.
You can work towards full lotus by sitting with one leg in half lotus—one ankle goes over the opposite thigh, while the other leg remains as in sukhasana (easy pose). Stay a few breaths, and then switch the legs around. When half lotus becomes comfortable, you can start working on full lotus pose. Be patient.
Modifcation: You can work towards full lotus by sitting with one leg in half lotus.
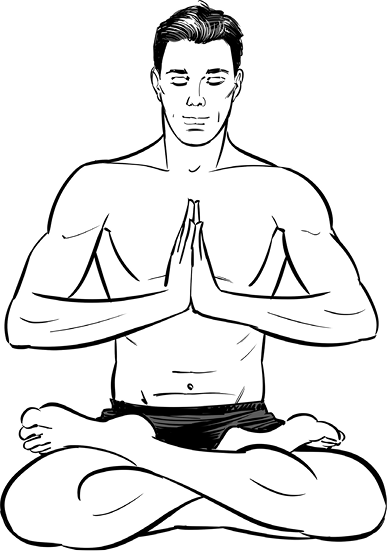
Figure 68, Lotus Pose
*Balasana (Child’s Pose)
Child’s pose is a great pose anytime you need a break, and a grounding pose after all inversions. (fig. 69)
Method of practice: Come onto your hands and knees with the knees hip-width apart or wider and slowly lower your hips down to your heels. Drop your chest towards the ground. Place your hands alongside the body close to the feet with palms facing up. Breathe deeply and slowly.
Variation: If you prefer, you can stretch the hands forward, palms facing down.
Modification: You can open the knees wider and let the belly drop in between the legs with the toes closer together.
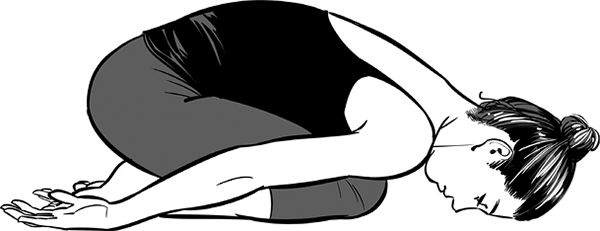
Figure 69, Child’s Pose
*Dandasana (Staff Pose)
This is the foundation pose for all seated forward folds. Practice this well, especially before you go into deeper seated forward folds. (fig. 70)
Method of practice: Sit on your mat with both legs extended in front of you. Place your hands beside your body and press into the floor to help lengthen the spine. Flex the feet, but keep the heels on the ground.
Breathe slowly into the front and back of the body to help create length in the torso. Feel your bandhas become active with your belly lifting in and up. Relax the shoulders and keep your gaze steady.
Modifications: Elevate your hips to allow for the forward rotation of the pelvis. Sit on the edge of a blanket or two. A yoga block works as well.
If you find yourself rounding a lot in your back, bend your knees. This is also a good option if you have lower back pain or knee issues.
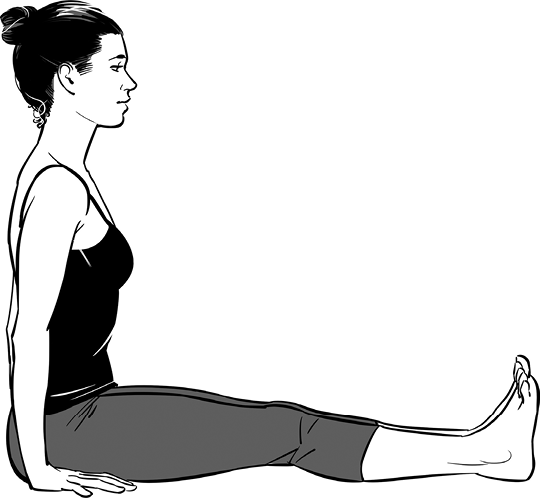
Figure 70, Staff Pose
**Paschimottanasana (Seated Forward Fold)
This is the classic seated forward fold pose, taught in most yoga styles. It is a nice cooling pose that is good for stretching your hamstrings, as well as the lower back. Be gentle, as it can pull on the lower back, especially if you have any lower back pain. (fig. 71)
Method of practice: Sitting on your mat with your legs extended forward, lift in the belly. Keep your spine as long as possible and fold forward. Take your hands to wherever they will reach. Use your inhales to lengthen the spine, and your exhales to release and relax—especially the shoulders. Practice dandasana (staff pose) as a preparation for this pose.
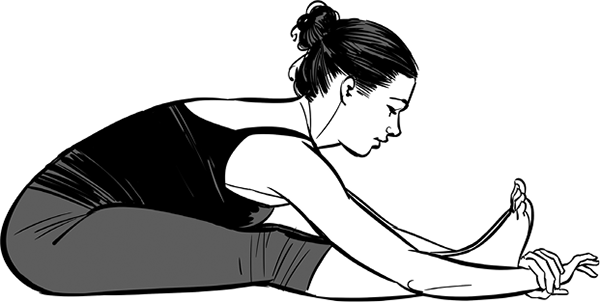
Figure 71, Seated Forward Fold Pose
Modification: If this feels tight in the hamstrings, you can bend the knees slightly as you fold forward. If you feel any tension in the lower back, elevate your seat by sitting on a block, a blanket, or bolster to create space in the lower back. Elevate your seat as much as needed, until there is no tension in the lower back. Stay for a minimum of five breaths, and up to five minutes. Do not fight the muscles but rather allow them to relax, so they feel safe to allow the stretch to happen. Try and keep your quads (upper thigh) active, to help release the hamstrings. (fig. 72)
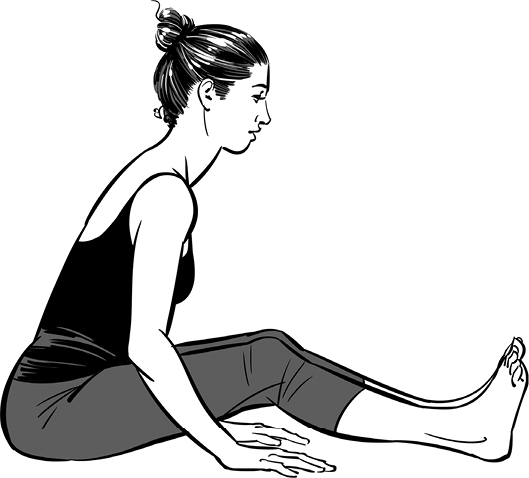
Figure 72, Seated Forward Fold Pose Modification
*Janu Sirsasana A (Seated Forward Fold Over One Leg)
A nice and classic forward fold that is nice to do before paschimottanasana (seated forward fold), as there is normally less pressure on the back in this pose. (fig. 73)
Method of practice: From dandasana (staff pose), bend the right knee and place the right foot against the inner left thigh. Inhale, lengthen the spine, and while keeping the hips as square as possible, fold forward.
Lengthen the spine with every inhalation, extending it wherever you feel it rounding. Use your exhalations as a tool to soften and relax deeper into the pose. Keep your bandhas active to protect your lower back. Eventually, gaze towards the toes.
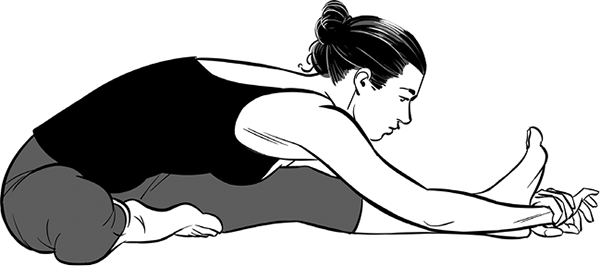
Figure 73, Seated Forward Fold Over One Leg Pose
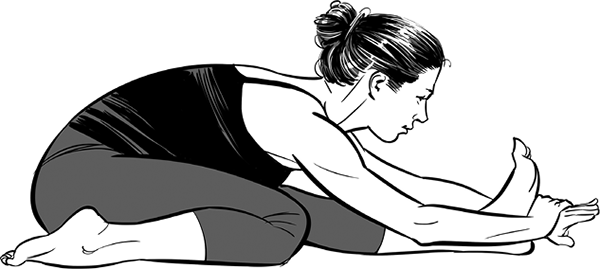
Figure 74, Three Limbs Facing One Foot Pose
**Trianga Mukha Eka Pada Paschimottanasana
(Three Limbs Facing One Foot Pose)
Similar to janu sirsasana A (seated forward fold over one leg), but with the leg folded backward. This pose may offer additional stretching in the quads (top of the thigh), or even in the ankle or foot. To have variety, you can choose between the trianga mukha (three limbs facing one foot pose), and janu sirsasana A (seated forward fold over one leg). They give different stretches but are both forward folds. If the trianga mukha does not feel good even modified (especially in the knee), stay with the janu sirsasana A (seated forward fold over one leg) for now. (fig. 74)
Method of practice: Sit in dandasana and bend the right leg at the knee so that your right inner ankle is by your right hip. Try to keep the knees together while you lengthen the spine and fold forward over the left leg.
Modification: Sit on a block or blanket to help create space for the right knee as well as for ease with the left hamstring.
*Marichyasana C (Seated Twist)
A classic twist, which is a good spine release, any time in the practice or even in the middle of the day. (fig. 75)
Method of practice: Sit in dandasana and bring your right knee up and your right foot to the floor about a fist distance from your left inner thigh. Keep the left leg active, left heel reaching forward, and toes turned up.
Rotate to the right side and place your right hand behind you on the floor as close to the body as feels comfortable. Bring your left upper arm to the outside of the right thigh. Use your inhale to lengthen the spine and your exhale to deepen the twist.
Modification: If the lower back is rounded, elevate your seat. If it is hard to reach the left arm to the outside of the thigh, you can hug the right knee with the left arm. (fig. 76)
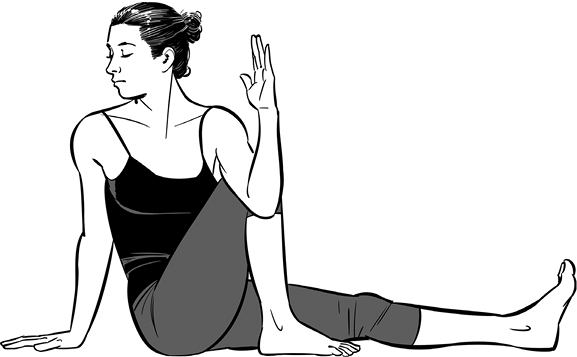
Figure 75, Seated Twist Pose

Figure 76, Seated Twist Pose Modification
**Ardha Matsyendrasana (Seated Twist with the Knees Bent)
Another classic twist (and one of my favorites) that can be practiced anytime. You can always choose and exchange between this and the marichyasana C (seated twist), or if uncomfortable, you can do a supine twist instead (see p. 154). (fig. 77)
Method of practice: Sitting on the mat, bring the right knee up and the right foot to the floor. Bend your left knee and bring your left heel towards your right hip. Move your right foot to the outside of the left thigh.
Inhale, lengthen the spine, and begin to rotate to the right side. Take your left upper arm to the outside of the right thigh, eventually reaching your left hand to the right foot. Don’t worry if it does not reach, just keep it anywhere over the right leg, even in the air. Place your right hand behind you on the floor and twist farther to the right.
Use your inhales to lengthen the spine and your exhales to deepen your twist to the right. Keep pressing the left arm against the right thigh, and if there is room, after a few breaths, move your right hand closer to the body to create more length and possibly more to the right to deepen the twist. Keep a slight bend in the right elbow to keep the right shoulder relaxed and down.
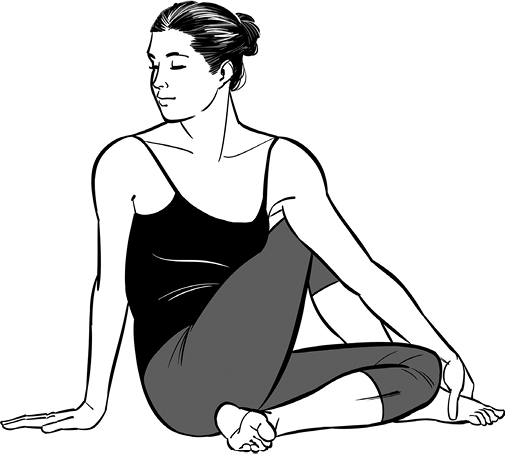
Figure 77, Seated Twist with the Knees Bent Pose
Modification: Instead of placing the left arm to the outside of the right thigh, consider wrapping the left arm around the right knee. If your lower back is rounded, sit on a block. (fig. 78)

Figure 78, Seated Twist with the Knees Bent Pose Modification
**Baddha Konasana (Bound Angle Pose)
A classic hip opener that can be practiced anytime, even beyond your asana (yoga poses) practice (such as reading a book, watching TV, observing a flower, etc.). (fig. 79)
Method of practice: Sitting on your mat with the legs extended forward, bend the knees and bring the soles of the feet together, bringing the heels close to the groin.
Place your hands on the feet and peel them open. With an inhalation, lengthen the spine, and with an exhalation, fold forward, keeping the belly lifted.
Modification: If, when sitting in this pose, you find it hard to straighten the back or the knees are high up off the floor, elevate your seat on a bolster, blanket, or block. I like to sit on the edge of the block and let my sit bones fall forward off the block. This allows my knees to drop more towards the sides so there is more weight pressing down to help my hips open.
Another option is simply to take the hands behind you and press the fingers against the floor. Try and use this action to help rotate your pelvis forward while keeping the spine long. (fig. 80)
|
|
|
Figures 79–80, Bound Angle Pose and Bound Angle Pose Modification (left to right)
**Upavishta Konasana (Seated Wide Leg Stretch)
Like bound angle pose, this is a great pose to practice for longer durations. Sometime I place my laptop on the floor in front of me, spread my legs into the seated wide leg stretch and reach forward to work on it. Of course you can place the laptop a bit higher, depending on your level of flexibility. (fig. 81)
Method of practice: Sitting on your mat, keep your legs straight and spread them wide open. Inhale and lengthen the spine; exhale and fold forward, reaching the chin or chest towards the floor.
Modifications: If you find your lower back rounded, elevate your seat on a blanket, bolster, or block. You can bend your knees slightly if that makes it easier. If you find that you have to lean back in this position, place your hands behind you and slowly walk them closer to the body.
Pressing the hands or fingertips into the floor will help you tilt the pelvis forward while keeping the spine long.
Once your torso manages to come forward a third of the way, you can move your hands forward in front of you and use the hands on the floor to help you lengthen the spine with an inhale and relax your body with an exhale. Over time, you may lower down to your forearms and do the same and eventually work your way all the way down to the floor.

Figure 81, Seated Wide Leg Stretch Pose
***Hanumanasana (Splits Pose)
You may know this pose from dancers or other gymnastic stretches. It is very similar indeed, with just an extra emphasis on keeping the hips square. Since yoga is not about gymnastics, don’t worry if you can do this or not. Simply practice, and over time your legs will release and open. Enjoy the process. (fig. 82)
Method of practice: From downward facing dog, bring your right foot forward between the hands, lower your left knee to the ground, and straighten the right leg. You can warm up here by folding over the right leg, or you can begin to move the leg forward for a deeper stretch if available. Eventually straighten both legs, while keeping the hips mostly facing forward. This is another great pose to hold for longer durations. From ten breaths to five minutes on each side. Do not go to the place of strong pain. Find the place where there is a nice stretching sensation, that still allows you to keep a calm and steady mind. This is a good yoga lifestyle practice.
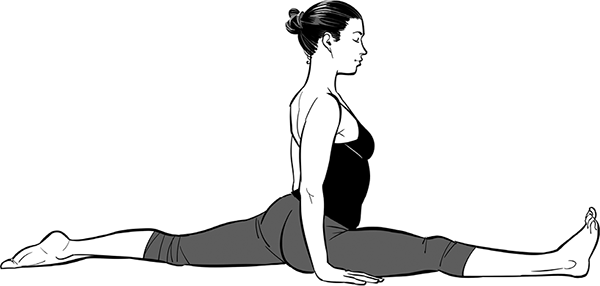
Figure 82, Splits Pose
*Supta Sucirandhrasana (Reclined Thread the Needle)
This is a great foundation pose for opening the hips. It can work for all levels of students and is safe as the back is supported by the earth. Thread the needle is a great pose for those with lower back pain and especially for those suffering from sciatica. (fig. 83)
I highly recommend staying here for longer durations of even five minutes on each side while breathing deeply and relaxing the mind.
Method of practice: Lie down on your back, bend your knees, and place both feet on the floor. Place your right ankle over the left knee. Lift the left foot and bring the left thigh up towards the chest. Thread the right arm between your thighs and place your right hand on the upper shin. Bring your left hand from the outside of the left thigh to meet the right and clasp the hands.
Bring the left thigh as close as you can to the chest. Try to keep your lower back down on the mat. You will feel a stretch in the back of the right hip (this will stretch your IT band, the outside of the thigh). As the pose starts to become easier, work on keeping the tailbone on the ground and gently pushing your right knee away from you with the right elbow.
Modification: If you can’t reach the shins, you can hold the back of the thigh. If you find your head is off the floor, you can place a block underneath the head to support it. If you have a hard time reaching your leg, you can either use a strap or place your foot on the wall (see picture). (fig. 84)
|
|
|
Figures 83–84, Reclined Thread the Needle Pose and Reclined Thread the Needle Pose Modification (left to right)
*Eka Pada Raj Kapotasana Prep (Pigeon Prep)
Another beautiful hip opener, that may just be the most popular one. It is similar to thread the needle, but for some this may be more intense. If so, practice thread the needle until you are ready for this. Support yourself in this pose so you are comfortable enough to stay here for longer periods. When staying five minutes, make sure to release slowly. The exit may be more intense than the pose itself. (fig. 85)
Method of practice: From downward dog, bring your right foot forward and place your right knee behind your right wrist. You can adjust the placement of the knee to find a spot where you feel the stretch in the hips. There should be no pain in the right knee.
Lower your left knee down and untuck the toes. Lengthen the spine and slowly lower your torso down to the floor, stretching your arms forward in front of you.
Keep the hips squared to the floor. (Try not to drop into the right hip so that both hips remain at the same height.) Keep your left leg straight behind you.
Moving the right foot up towards the head will intensify the pose, while moving it towards the hips will release some of the stretch. Another way to intensify the pose is to move the right knee more towards the right side, while moving it towards the left will make it less intense. Pigeon is best held for long periods of time. Hold for a minimum of one minute, gradually building up to five minutes.

Figure 85, Pigeon Prep
Modification: Go down just as low as feels comfortable for you; you can lower to the forearms as a midpoint. Make sure there is no knee pain. If you feel a sharp pain in the bent knee, back off. (fig. 86)
If your right hip is off the ground, you may want to place a blanket or block underneath it for support. If you feel any pressure in the knee, please back off from the intensity. To support the knee, you may consider rolling up a small towel and placing it in the crease between the thigh and the calf behind the knee.

Figure 86, Pigeon Prep Modification
*Shoulder Stretch
The shoulder stretch is one of the most important stretches for the modern yogi. Most of us live life with the arms moving forward, reaching computers or other devices. This stretch really opens the shoulders and the chest in the opposite direction we normally move. Be patient with this pose. It takes time to open, and the shoulders are delicate, so stay longer, but do not push. (fig. 87)
Method of practice: Lie down on your belly and stretch your right arm to the side. The arm should be at the level of your nose, or just a bit higher than your shoulder level. Slowly begin to roll onto the right side over the right shoulder. Go slowly, and stop when you feel the stretch in the shoulder becoming intense.
For some it may be just a bit of a twist, keeping the left hand on the floor, pressing lightly to help deepen the stretch. If this feels fine, begin twisting further while lifting your left knee and placing your left foot on the ground or eventually both knees up.
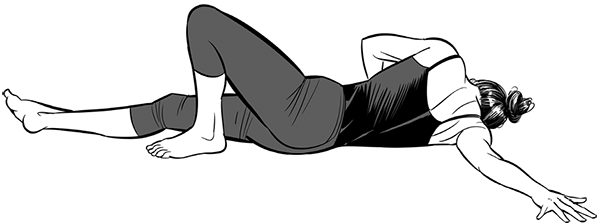
Figure 87, Shoulder Stretch Pose
Variation: For the full pose, if you are still feeling no stretch in the shoulder, take the left arm over towards the right hand and clasp hands. Do not change the placement of your right arm for the sake of connecting the hands. The goal is not to touch the hands but rather to feel the stretch in the shoulder. (fig. 88)
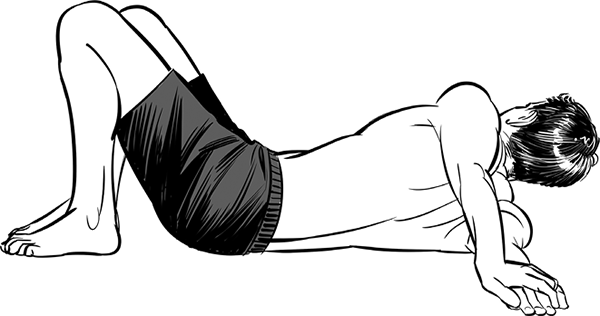
Figure 88, Shoulder Stretch Pose Variation
*Jathara Parivartanasana (Supine Twist)
Supine twists are safe, help release the spine, and can be held for longer periods of time so they become restorative. They are especially good as a substitute for sitting twists when lower back pain is present. There are many variations, and you can always choose and switch them around according to what feels good for you. (fig. 89)
Method of practice: Lie down on your back with your feet on the ground and knees pointing up. Lift your hips and move them slightly to the left. Lower the hips and lift the knees into the chest. Take your knees over to the right. Open your left arm out to the side and place your right hand on your legs to help the legs stay down.
Take your gaze to the left. Try to keep your left shoulder close to the floor. Take deep relaxing breaths, with long exhales. Hold from thirty seconds to five minutes and switch sides.
Variations:
*Jathara Parivartanasana B (Supine Twist with Eagle Legs)
If the basic supine twist is easy, try this variation. It is my all time favorite. (fig. 90)
Method of practice: Place the feet on the floor with the knees bent. Wrap the left leg over the right thigh, possibly even bringing the left foot to the outside of the right ankle (“eagle legs”).
Keep the right foot on the floor, lift the hips and move them about a foot to the left and lower the legs to right. Open your left arm out to the side and place your right hand on your legs to help the legs stay down. Take your gaze to the left, keeping the left shoulder close to the earth.
|
|
|
Figures 89–90, Supine Twist and Supine Twist with Eagle Legs Pose
*Jathara Parivartanasana C (Supine Twist C)
Here are two more variations you can play with. All are good, see what feels best for you and change them around to get slightly different stretches. With the knees bent it is easier and will stretch more of the spine, while with straight legs you may feel more the back of the leg or even the hips. (figs. 91–92)
Method of practice: Keep the right leg straight, while you take the left leg over to the right. You can do this either with a straight leg or bent knee. This is sometimes known as supta matsyendrasana (reclined half lord of the fish pose). I offer the straight leg variation here as well as in the supine leg stretches, as it stretches more of the leg and hip than it gives a back twist, but it is useful either way.


Figures 91–92, Supine Twist C Pose (top to bottom)
***Jathara Parivartanasana D (Supine Twist D)
This one requires more flexibility to get into, and may again feel more in the legs rather than the spine. Just another option to play with. Have fun! (fig. 93)
Method of practice: With both legs straight, twist to the right. Hold the outer edge of your left foot with your right hand. Bend the right knee and with your left hand, reach for the right foot. Take your gaze over to the left. This is a twist as well as a leg stretch.

Figure 93, Supine Twist D Pose
*Supta Padangusthasana (Reclined Big Toe Pose/Extended Leg Supine Stretch)
These poses are fantastic for opening up the hamstrings and stretching the legs in a safe manner. I normally add jathara parivartanasana C (supine twist C) as part of the sequence, after doing supta padangusthasana A and B (extended leg supine stretch A and B). This adds a nice gentle twist for the back while protecting the lower back as it is on the ground and slumping is not really an option. These poses are also beneficial for someone suffering from sciatica. (fig. 94)
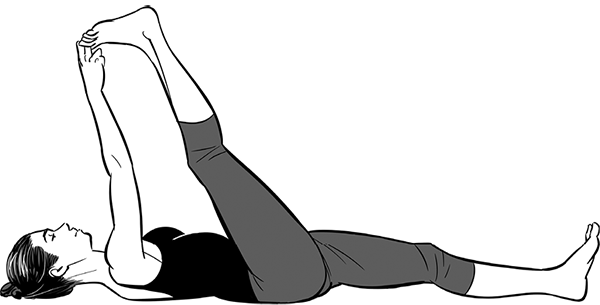
Figure 94, Reclining Big Toe Pose/Extended Leg Supine Stretch
*Supta Padangusthasana A (Extended Leg Supine Stretch)
A perfect way to stretch the legs without compromising the back.
Method of practice: Lie down on your back with your legs extended in front of you and your toes facing up. Bring your right leg up and take hold of your big toe with your peace fingers. You can also simply hold the foot in any way that is comfortable for you.
Stay here and breathe deeply, watching your breath. Hold for ten deep breaths to begin with. Over time, increase the length of your hold to up to five minutes.
*Supta Padangusthasana B (Extended Leg Supine Stretch to the Side)
Method of practice: From the previous pose, simply begin opening the leg to the right side, going only as far as you can, keeping the left hip mostly on the floor. Hold for five to ten breaths, eventually increasing the hold up to five minutes. Then raise the leg up to center. (fig. 95)
Modification: Use a strap if you cannot reach your foot. If your leg does not come up to 90 degrees, bend the knee that is on the floor, and place your foot on the ground. (figs. 96–97)
This will help you bring the leg you are pulling a bit closer, so it is more efficient. Once this gets easier, you can straighten the other leg back down. When going for the opening or the twisted variations, straighten the leg with the bent knee back to the floor.

Figure 95, Extended Leg Supine Stretch to the Side Pose
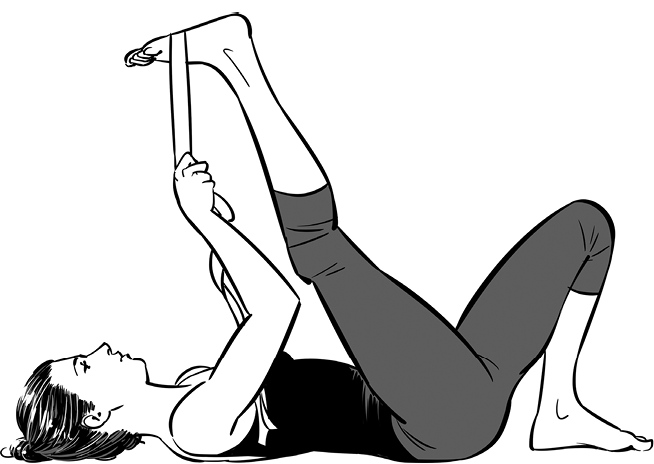
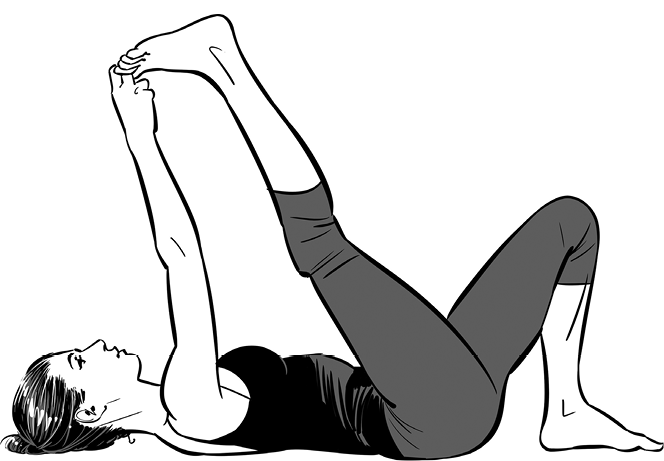
Figures 96–97, Extended Leg Supine Stretch to the Side Pose Modification (top to bottom)
*Ananda Balasana (Happy Baby)
This may be my signature pose, the one that exemplifies Doron Yoga the best. I teach this in almost all my classes, not only for the stretching and releasing of spine and hips, but because we do this pose with a rolling laughter. I normally teach this pose after we do some intense backbends or core work—anytime we may begin to take ourselves too seriously, really. This reminds us of the joyful attitude we want to embody, a big reason of our practice—not just to get more flexible, but really enjoy life, and practice with ease. (fig. 98)
Method of practice: Lie down on your back, bend the knees, and bring the feet up, reaching for the feet with your hands, allowing the knees to drop towards the floor on either side of the body. Roll gently from side to side, massaging the spine and opening the hips. Feel free to allow a smile to come onto your face or even let your laughter roll out loud. This is great anytime, and especially when you want to release the back and hips, such as after a strong backbend.
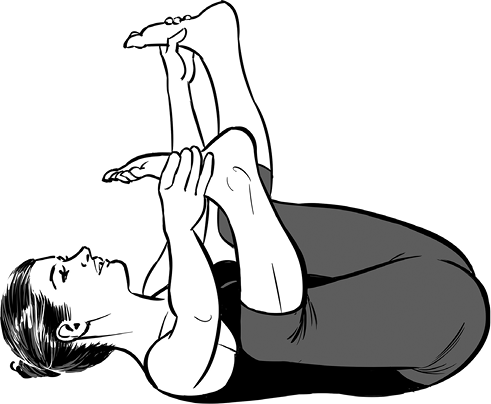
Figure 98, Happy Baby Pose
Malasana (Garland Pose/Squat)
A simple squatting pose that is practiced in India on a regular basis for washing clothes, waiting for the bus or going to the restroom. Apart from yoga practice, consider squatting every now and then, maybe as you enjoy some tea? (fig. 99)
Method of practice: From standing, begin to bend the knees and lower your hips back and down. Keep lowering down as far as you can. You may need to lift the heels up—that’s fine. You may also need to externally rotate your feet. Over time you will be able to lower the heels down and keep the feet parallel.
Place the elbows to the inside of your knees and use the pressure of the elbows pressing against the knees to lengthen in the spine and open the heart.
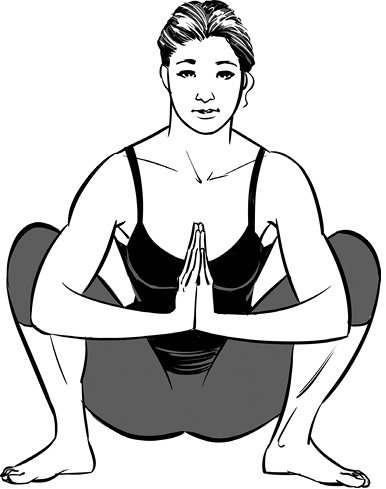
Figure 99, Garland Pose/Squat
Core Work
For all core work, make sure your belly is held in and does not puff out. While you are on your back, keep the lower back close to the ground so there is no arch. Arching the upper back is fine. Though I offer some dedicated core practices here, if you are using your bandhas, the core gets to work throughout the practice, especially when you jump through to sit, and jump back as well as in inversions and arm balances.
Basic Tips for Practicing Core Work
- • Practice core work slowly and with awareness. Let it be just like any other yoga practice. Move with your breath. Exhale as you come up and inhale as you release.
- • Stay calm throughout the core practice. Keep the mind and face relaxed.
- • Practice to create stability and strength in the body, not for ego lifting. Set the intention to stay relaxed and enjoy the process.
**Navasana (Boat Pose)
Navasana (boat pose) is the classic core work of ashtanga vinyasa. It is a great pose, however it can create pressure on the lower back. All levels can practice this if modifying. Remember to breathe and keep a calm face. This is a great pose to practice stretching your lips to your ears. (Smile!) (fig. 100)
|
|
|
Figures 100–101, Boat Pose and Boat Pose Modification (left to right)
Method of practice: From a seated position, lift your legs up, straight if possible, to about face height. Lift your arms up, and have them straight toward the feet. Stay for five breaths and then release down. You can hug your legs in and straighten your spine, or you can practice crossing the legs and lifting your body up, hands on the floor, for a breath.
Traditionally this is repeated five times for five breaths each. I like doing three rounds, with the first round longer, about eight to ten breaths, and the second and third rounds for five breaths.
Modification: Keep the knees bent. This reduces the pressure from the back. If this is still too challenging, hold the back of the thighs with your hands. You can also start with hands in the air, and bring them to hold the thighs after you begin to fatigue. (fig. 101, opposite page)
**Bicycle Yoga
Bicycle yoga is the ultimate core work that works all parts of the core—low abs, six-pack, and the side muscles of the core. Practice this as a meditation, slowly and with deep breaths. This can be practiced anytime. (fig. 102)
Method of practice: Lie down on your back. Bring your knees up to a 90-degree angle with the shins parallel to the floor. Clasp the hands behind the head and as you exhale, straighten the left leg forward keeping it about a foot off the floor.
At the same time, lift your torso, straighten the left arm and bring it to the outside of the right thigh. Then bring the right elbow towards the inner left elbow. Finish your exhale completely and as you inhale, lower the torso down, bend the left knee back beside the right knee, and adjust the arms into the original position.

Figure 102, Bicycle Yoga Pose
Repeat on the right side and then continue on both sides, taking deep slow breaths. Make sure that you lift the torso up without compressing in the neck. You might not come as high up, but you will surely use your core. Repeat until you really feel the belly burning and then rest for a few breaths. You can repeat this once or twice more. This pose is wonderful as it works the upper, lower, and sides of the abs.
*Jatharasana (Leg Lifts)
The leg lifts are good core work practice, especially for the lower belly. Pay attention to lower back pain, and release if it hurts, or use your hands under the hips. (fig. 103)
Method of practice: Lie down on your back placing the hands underneath your hips and lift your legs up to 90 degrees with your feet up towards the sky. With your exhale, slowly lower the legs down to a foot off the floor. Hold there while crisscrossing the legs for a count of five and then slowly lift the legs back up to 90 degrees while crisscrossing them. Repeat ten times or until you really feel the core working. This is most beneficial if you do it at least twice.
Modification: Skip the crisscrossing and if needed, lower one leg at a time and simply lift back up one leg at a time.
**Variation: Lift the head and the upper shoulders off the ground and keep them lifted while doing the leg lifts. You may also want to try and place the hands at the heart or even overhead for maximum intensity. This will help to cultivate upper and lower belly strength.
*Core Leg Twists
Doing the core leg twists helps strengthen the side muscles of the core, which are many times overlooked. Practice slowly with deep breaths. (fig. 104)
Method of practice: Lie down on your back and raise your legs up 90 degrees, feet towards the sky. Take your arms out to the sides in a “T” position with the palms facing down. As you exhale, lower the legs to the left until they are a foot off the floor. As you inhale, bring them back up, exhale, and lower them to a foot off the floor on the right side. As you inhale, bring them back up. Keep this going for as long as you can.
Modifications: Bend the knees as much as you need to so you can lower down close to the floor. Over time you can work on straightening the legs. You can start with fewer repetitions on each side and over time, increase the number of repetitions.
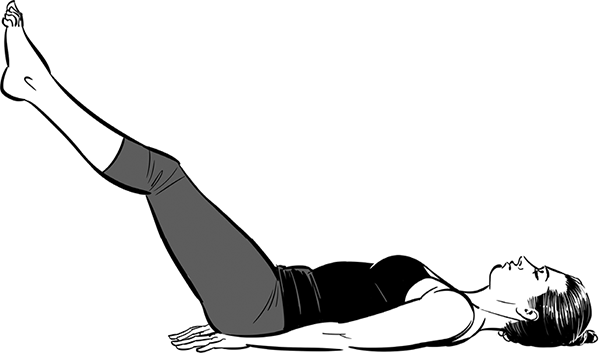
Figure 103, Leg Lift Pose
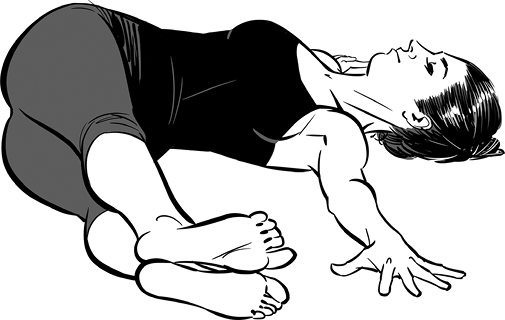
Figure 104, Core Leg Twist Pose
Arm Balances
Arm balances are great for toning the body, strengthening the core, arms, and shoulders, and improving our focus and balance. They are challenging for most and often involve some fear. They can be like a treat or playtime—an opportunity to practice with a smile and nonattachment. They can be humbling or ego inflators. Hopefully, you simply try to do them calmly and enjoy the process.
At times arm balances are called party poses, because some people get excited to see them while others enjoy showing them off. There have been some great teachers of the past that have used these poses to lure others into yoga—which is different than showing off for personal ego satisfaction. Work toward eventually practicing arm balances with grace and calm. They should become stiram sukkah—steady and with ease.
Basic Tips for Practicing Arm Balances
- • Practice awareness of what happens in the body and mind before, during, and after the pose. Engage the bandhas.
- • Shift the weight. Do not try to lift one side of the balancing body. Keep feeling a lift up rather than falling into gravity.
- • Keep the arms engaged and push into the floor to engage the back and chest. The more stacked you are over the foundation (hands), especially in the hips, the easier it will be to balance.
- • Keep the heart open as you practice and the gaze steadily down or slightly forward, not back.
- • Play with pressing into the fingertips or the ball of the hands to move the body back into balance while you keep your weight distributed evenly on either side of your foundation (arms).
- • Keep the legs active even when in the air.
- • For the exit, lift the hips by taking the pubic bone further towards the tailbone. Once the pelvis tilts, the legs can follow. Keep bandhas engaged for landing.
- • Keep breathing steadily. There is a tendency to hold the breath in arm balances. Practice staying steady and calm.
***Bakasana (Crow Pose)
Crow pose may be the most common arm balance in yoga. It strengthens the arms, the back, the core, and the chest, while demanding us to stay focused. (fig. 105)
Method of practice: Come to a squat position, lift your hips up, and place your knees onto your upper arms, as close to the armpits as possible. Bend the elbows and take your gaze forward so that you open the chest and relax the shoulders away from the ears. Begin shifting your weight forward so that the elbows come right over the wrists.
Keep the chest open and extending forward as you shift your weight of the hips to come over the arms. Your head will move forward, and the legs will come up slightly on their own.
Once you find balance, work on lifting your heels up higher towards your hips and straightening your arms. Keep your palms on the floor but allow your knuckles to come up slightly so, like a bird, you can move forward and back on the hands to help you with your balance.
Modification: It is best to learn this pose with a teacher present, but you may also want to place a blanket, or a sponge block, in front of you so that if you do fall forward, you have some padding.
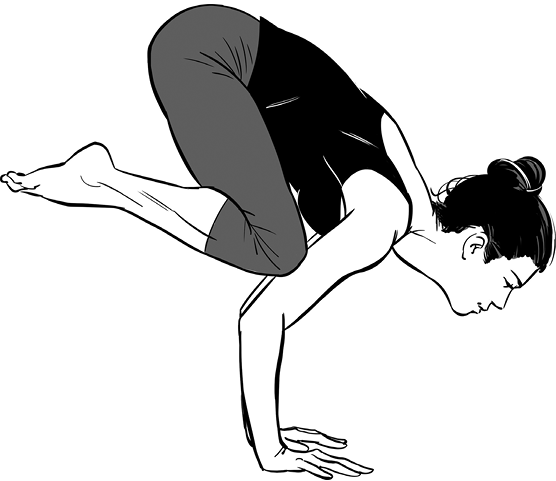
Figure 105, Crow Pose
**Vasisthasana (Side Plank)
Side plank helps strengthen the core and shoulders. Great after you do other core work, or as a quick way to get some core work in when doing a shorter practice. (fig. 106)
Method of practice: Come into plank, turn your body sideways so that you’re on your left hand and the left outer edge of your left foot. Stack the right foot on top of the left so that you are completely sideways. Take the right arm up the sky and lift the hips high. It can be a challenge to balance here, so activating your bandhas is key.
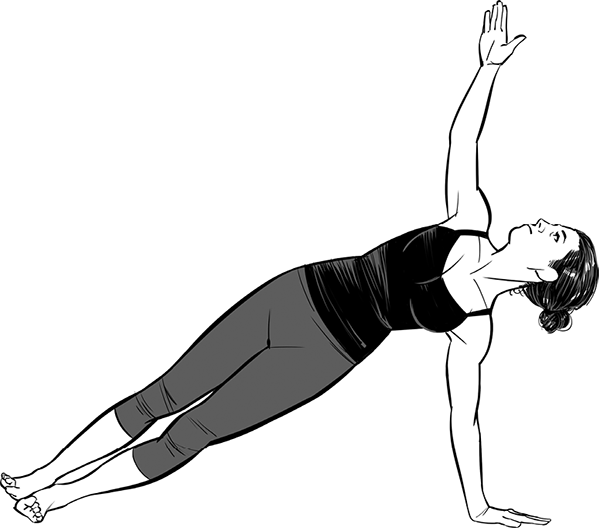
Figure 106, Side Plank Pose
Modification: Do the same pose with the bottom knee on the ground. Keep lifting the hips up while in the pose. (fig. 107)
For another modification that is just a bit more challenging: bend the top leg and place the foot flat on the ground either in front of or behind the other leg while continuing to lift the hips up. If you have any wrist discomfort, you can practice the same pose on your forearm.

Figure 107, Side Plank Pose Modification
***Variations: Lift the top leg while in side plank. You can hold it here in the air for a few breaths. If available, place the leg that is in the air in a tree pose, or you can try to hold your toe with the peace sign fingers, which will stretch your hamstrings as well and challenge your balance. Take your gaze to the sky, and keep your tailbone tucked under. (fig. 108)

Figure 108, Side Plank Pose Variation
Backbends/Back Extensions
Backbends, as they are commonly known, do bend the back but also help extend the back and create more space between the vertebrae and overall length in the spine.
Backbends also stretch the entire front of the body, thus they are sometimes called heart openers. They are great for balancing the modern lifestyle habits that require us to lean or bend forward. As heart openers, they also help expand the chest area and the emotional heart center, which allows for more openness and ability to truly feel and experience life in general and relationships in particular.
Backbends are stimulating, energizing, and warming.
Basic Tips for Practicing Backbends
- • Take a moment to relax your mind before moving into a backbend.
- • Begin with activation of mulabandha (root control center). Lengthen the belly and mid back and keep lengthening up to the thoracic spine (upper back) so that the curve spreads throughout the spine.
- • Lift and expand your heart center for physical and emotional opening.
- • Move the sacrum in and up towards the navel and roll the thighs inward.
- • Keep the shoulders relaxed to protect the neck. Shoulders should rotate externally, keeping space between the shoulder blades.
- • Maintain your ujjayi breath (victorious breath). There is a tendency to hold the breath in intense backbends. Use your inhales for lifting in the chest area and exhales to keep calm.
- • Take the knees from side to side to release between sets of backbends, and do a twist followed by forward folds at the end. Listen to your body, and do not go beyond what feels safe. Patience is a virtue.
*Shalabhasana (Locust)
Locust strengthens the back of the body. Great for preventing back pain, though if you already have back pain, do not push into it, but rather practice gently. (fig. 109)
Method of practice: Lie down on your belly and place the hands alongside the body, palms facing up. Keeping the feet close together, lift the chest and the legs. Keep the spine long and tuck the tailbone under. Keep the head reaching forward so the neck stays long. Breathe deeply for five to eight breaths.
*Variation: As you lift up, clasp the hands behind the back and use that leverage to lift a little higher by reaching the arms away from the body. (fig. 110)
Modification: If you feel too much pressure on the hipbones or the groin, you may place a blanket underneath your hips.

Figure 109, Locust Pose
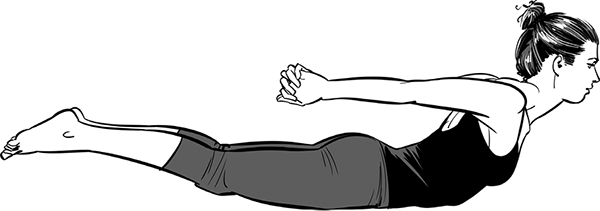
Figure 110, Locust Pose Variation
*Setu Bandha Sarvangasana (Bridge)
Bridge is the classic preparation for upward bow. It is safe for all, and can be repeated a few times. As in all backbends, if there is back pain, do not push through it, but rather focus on lengthening more than deepening. (fig. 111)
Method of practice: Lie down on your back. Bring the knees up, placing the feet on the floor, parallel to each other. Now tuck the tailbone towards the feet (creating space for L4–L5), then lift the hips, clasp the hands underneath the back, and roll your shoulders in so that you create space for the neck. Keep lifting the hips, moving the chest towards the chin and the chin slightly back away from the chest.
Hold for five deep breaths and release. Allow your knees to drop from one side to the other a couple of times and repeat two more times.
Modification: Take your feet further away from your hips. The closer your feet are to your hips, the more intense your pose will be, so adjust as necessary. You can also place a block underneath your lower back for a more relaxed variation.

Figure 111, Bridge Pose
**Ardha Bhekasana (Half Frog/Quad Stretch)
Half frog is a great quad stretch and a gentle backbend. It can become a deeper backbend when you lift higher, so move slowly. Do not push through knee pain. If it hurts in the knee, stop and check with a professional on how to do it right. You can also visit the Doronyoga channel on YouTube for many pose explanations. (fig. 112)
Method of practice: Lie down on your belly. Place the left forearm parallel to the front of the mat, bend the right knee, and with your right hand, slowly bring the knee forward towards the floor.
Consider rotating in the shoulder and taking the right elbow up to sky while rotating the wrist in order to bring the fingers forward in the same direction as the toes, just like chaturanga (low push up) arms.
Keep the right foot parallel to the body while bringing it alongside the body. Don’t let the foot twist sideways. Press your body up to get a slight backbend as well.

Figure 112, Half Frog/Quad Stretch Pose
*Salamba Bhujangasana (Sphinx/Supported Cobra)
Sphinx is the best foundation pose for understanding backbends. It is safe and a good place to work on the basics. I use the feeling I have in my chest doing sphinx, while practicing many other poses such as arm balances and some inversions. (fig. 113)
Method of practice: Lie down on your belly and then come up to your forearms. Keep the shoulders over the elbows and the elbows in. Root your hands into the earth and lightly pull forward so that you can feel more space in the lower back. Feel how you are moving forward first and then up, creating a back extension. Keep the feet parallel and rooting into the ground.
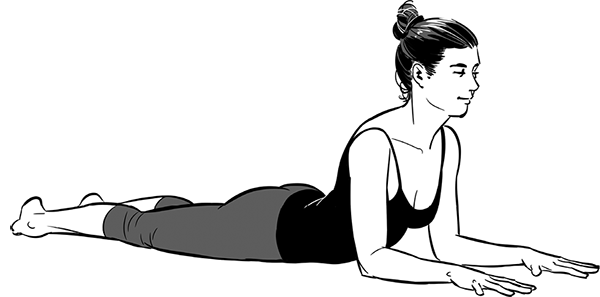
Figure 113, Sphinx/Supported Cobra Pose
*Bhujangasana (Cobra)
Cobra is a yoga classic, and a great way to open the chest and stretch the spine, and can substitute upward facing dog anytime. Don’t forget to breathe! (fig. 114)
Method of practice: Lie down on your belly. Place your hands under your shoulders and lift the chest forward and up. Keep the elbows slightly bent no matter how much you have opened your chest.
Make sure to keep lengthening the lower back as you open your chest by moving both the chest forward and the tailbone down and back.
Keep the knees and feet on the ground. Lengthen the neck without over-extending backward. Keep pressing all ten fingers into the ground.

Figure 114, Cobra Pose
Modification: If your back is sensitive, lift just to the point where you can lift the hands off the floor and stay up. (fig. 115)
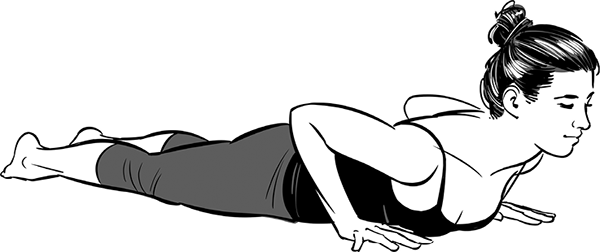
Figure 115, Cobra Pose Modification
**Dhanurasana (Bow Pose)
Bow pose is a backbend that helps prepare for upward bow. You can practice this once or up to three times with a few breaths break between each round. Remember to breath in the pose. (fig. 116, opposite page)
Method of practice: Lie down on the belly, bend the knees, and reach your hands back to hold the ankles. Press the legs back and up and lift the chest off the ground. Lift the chest forward and up to create extension as you open up. Bring the feet to touch and the knees hip-width apart.
Modification: If it is hard to reach the ankles, you can hold the feet. If this hurts the groin, you can place a blanket underneath the hips.
***Variation: As this pose gets easier, hold the legs farther down the ankles or shins.
**Ustrasana (Camel Pose)
Camel pose is a backbend that works with gravity. This means that your work is simply to slow down the bending and make sure it does not happen too deep too fast. (fig. 117)
Method of practice: The classic pose is done by placing your knees on your mat. I like to use a blanket or fold my mat for extra knee padding. Begin by placing your hands on your hips. With an inhalation, lengthen your spine up, and as you exhale begin arching back towards the feet. Move your hands back onto your ankles. Keep lifting your chest up with every inhalation, as well as move your hips forward. Try and keep the hips over the knees as much as you can.
To exit the pose, press the hips forward, and vertabrae by vertabrae, lift up. Let the head be the last to lift up. This may seem counter intuitive, but when you lift the head first, you actually create a collapse in the chest that blocks you from lifting up, and can be dangerous for the back. So remember, for safety: head last. Also, when coming up, try and come up evenly with the spine, so that you are not lifting one side first—again, for the safety of your back. Take child’s pose or a vinyasa, and repeat.
Modification: If reaching back to the heels is too far, you can begin by keeping the hands on the hips and simply bend back as far as it feels okay on your back. When this is comfortable, tuck your toes under and reach for the heels. This way, the heels are a bit higher—thus closer to your hands.
Most important is to remember to breathe while in the pose, as well as in your transition in and out of it.
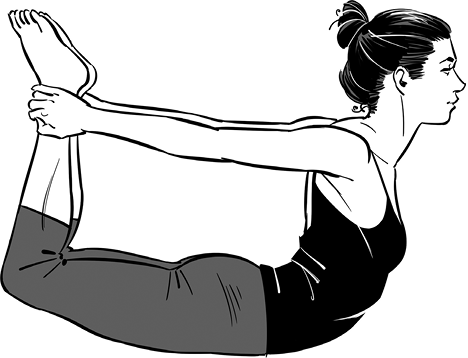
Figure 116, Bow Pose
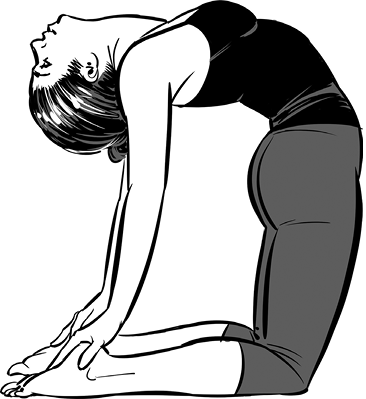
Figure 117, Camel Pose
***Urdhva Dhanurasana (Upward Facing Bow)
Welcome to the ultimate backbend. This pose requires open shoulders, back, and hip flexors. Try to notice where you feel most limited and stretch that area separately before doing this pose. Most Doron Yoga sequences make sure you warm up all these body parts before you practice the upward facing bow. You can always stay with bridge pose as a substitute. (figs. 118–119)


Figures 118–119, Upward Facing Bow Pose (top to bottom)
Method of practice: Lie down on your back. Bring the knees up, placing the feet on the floor parallel to each other. Place your hands next to the ears, lift the hips up, and press up to your head. Adjust the elbows so that they are parallel to one another, and move them over the wrists; then press up to straighten the arms. Make sure not to press straight up, but rather feel the lower back extend towards the knees as the chest moves towards the hands. Keep the feet parallel to each other and the knees moving toward each other. This will help protect the back. Over time, walk the hands towards the feet, while maintaining an arch in the spine.
Note: It is better not to do this pose until you can do it with almost straight arms.
Modification: Lift only to your head. Stay for a few breaths and release. When doing so, try keeping the elbows parallel to each other. If your shoulders are tight it will require some work squeezing the elbows in towards each other. You can rotate your hands slightly outward to help with the elbow movement. This helps keep space between the shoulder blades and protects your neck and shoulders from stress.
*Variation: This variation can be either a preparation for the upward facing bow, or actually take you deeper and prepare you for the full drop back (lowering to the backbend from standing position). (fig. 120)
Method of practice: As a preparation for the upward facing bow, stand with your back facing a wall and take the arms over the head towards the wall. Walk the hands down the wall as far as you can without bending the knees or going into your backbend yet.
Keep the elbows parallel and try to lift the chest to the sky while pressing the hips forward (away from the wall). Breathe deeply. This will help open the shoulders and the back.
If upward facing bow is very comfortable, you can try and work on going deeper, preferably with the guidance of a qualified teacher. To prepare for the drop backs, you will continue to walk the hands down the wall, just to the place you feel comfortable. (Remember you still need to come back up!) Stay for five calm breaths, and walk back up.
The exit is the same as in ustrasana (camel pose)—vertebrae by vertebrae with the head lifting last. Always practice three upward facing bow poses, before you go to the wall, to ensure you are sufficiently warmed up. I like to simply forward fold standing for a few breaths before I continue with the twists and seated forward folds. Do what feels good in your body.

Figure 120, Upward Facing Bow Pose Variation
***Eka Pada Raj Kapotasana (One Legged King Pigeon Pose)
One legged king pigeon pose is a deep backbend that stretches the entire front of the body as well as the back. It requires open shoulders, hips, hip flexors, and of course back. Be patient with this pose. It took me over a decade to do it fully. Every step of the process is an opening, on the physical level, emotional level, and even spiritual. As you open your heart and back here, you may feel some release of emotional blockages and a clearer flow of energy through the body. (fig. 121)
Method of practice: From adho mukha svanasana (downward facing dog), bring your left foot forward, so that the left knee goes behind and a bit to the outside of the left wrist. The left foot will go out as far as is comfortable for your hips and knee. Lower your hips down, reach back and take your right foot with your hands over the head. This is a deep backbend that stretches the front of the thigh, back, and shoulders. Be very careful with this pose and go slowly.
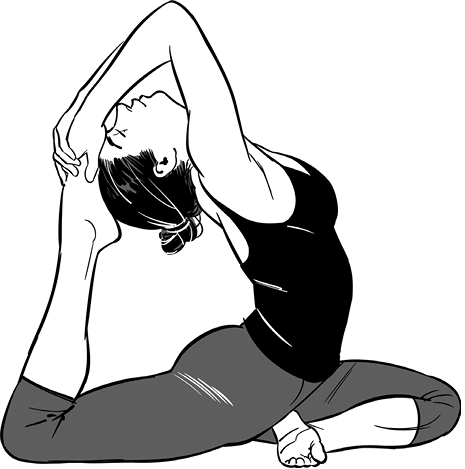
Figure 121, One Legged King Pigeon Pose
Modification: See eka pada raj kapotasana prep (pigeon pose), for some great ways to open the hips and prepare for this pose. I practice the prep regularly as it really helps open the hips.
**Variation: If you are comfortable with the prep version, you may want to reach one hand behind and work on bringing the back foot forward. (figs. 122–123)
If this is comfortable, try lifting your left arm up in the air so that you start to stretch your shoulder and learn to balance without hand support.
Then, if you are comfortable, shift the hand holding the leg so that the foot is in the elbow crease. Then try to take the other hand over the head and clasp the hands behind you.
You can also do this with a strap between the hands. Make sure you keep lifting the upper chest to protect your lower back. Work on squaring the chest forward.
|
|
|
Figures 122–123, One Legged King Pigeon Pose Variation (left to right)
Inversions
Inversions are fun and rewarding. They help us overcome fear, create strength and stability, and become okay with being upside down. Inversions help focus and steady the mind.
Inversions can be slightly intimidating at first and are best learned with a teacher present. You can use the wall when you first learn these poses. Practice against the wall until you feel steady and ready to move towards the center of the room.
Lying down with the legs up the wall is the most basic form of inversions, and for some this will be enough. Once inversions are mastered, they can be grounding, calming, and healing.
Basic Tips for Practicing Inversions
- • Activate the bandhas, and keep them active during transitions as well as while in the pose. Keep the shoulders away from the ears and maintain space between the shoulder blades.
- • Shift the weight of the hips over the shoulders, to help transition into the inversion. Keep the legs active even when they are in the air.
- • Keep the gaze steady and the mind focused, and keep your breath alive and smooth.
- • Press your support (head, hands, elbows) into the ground to help you lift.
- • Stay calm and try to relax into the pose. Be attentive to your body. Head-stands (sirsasana) and shoulder stands (salamba sarvangasana) can pose risks to the neck and should always be practiced with care.
*Viparita Karani (Inverted Action, Legs up the Wall)
Legs up the wall can be practiced by anyone, anytime. No need for warm up, and it is safe even for women on their cycle. It can substitute any other inversion offered in the Doron Yoga sequences, and can also be practiced anytime you need to restore. When teaching a few classes a day, I would sometimes take this pose for five minutes between classes to restore my energy and stay grounded. It is safe to stay here even longer, and practice leg variations (reclined wide legs and reclined bound angle) as well. (fig. 124)
Method of practice: Sitting sideways next to a wall, bring your left hip as close to the wall as possible, then lift the legs up towards the wall as you twist to bring both hips to face the wall.
The legs should be straight up the wall while the arms rest alongside the body, or place your left hand on the belly and your right hand on the chest and focus on your breath flowing through your belly and chest. To come out of the pose, bend the knees and roll onto one side. You may want to use a blanket underneath your hips for comfort.
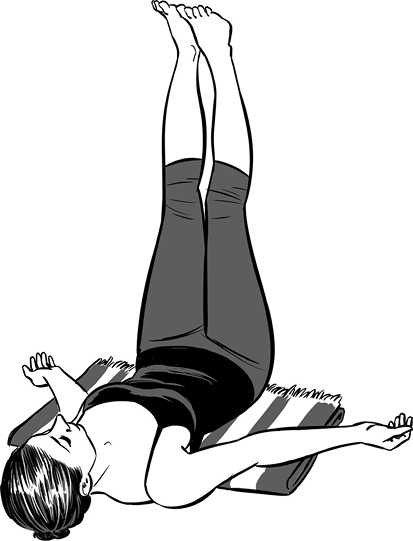
Figure 124, Inverted Action, Legs up the Wall Pose
*Supta Upavishta Konasana (Reclined Wide Legs)
I used the reclined wide legs pose in order to open quicker into upavishta konasana (seated wide leg stretch). The beauty of this pose is that you can be in it for fifteen minutes and simply relax. I like taking deep breaths here and allowing my body and mind to simply surrender. You will notice how much you actually did when you exit the pose, so release slowly and with care. (fig. 125)
Method of practice: From legs straight up the wall, begin to open them slowly as wide as feels comfortable for you while still resting on the wall. Stay in the pose for three to fifteen minutes. Make sure to come out very slowly and with the support of the hands.
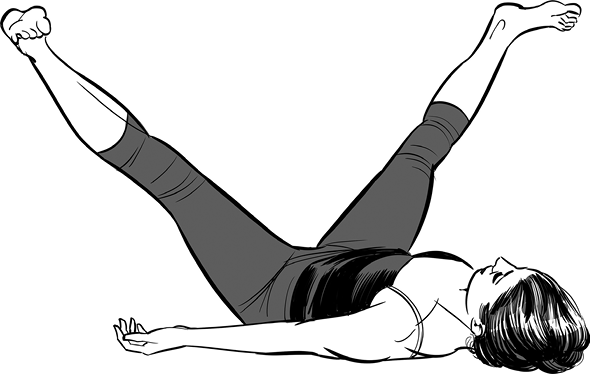
Figure 125, Reclined Wide Legs Pose
*Supta Baddha Konasana (Reclined Bound Angle)
Reclined bound angle is very relaxing and can be held for long durations. You can even begin your savasana (corpse—final relaxation) this way. For some people, this may feel better on the back than having the legs straight. It will help open the hips in a gentle way. (fig. 126)
Method of practice: Lie down on your back. Bring the feet together and open your knees to the side. Let your knees fall towards the floor. Allow your body to relax as much as possible. Stay here for as long as it feels good.
Modification: For a more restorative variation, place support such as blocks or blankets under the knees.

Figure 126, Reclined Bound Angle Pose
Variation: From viparita karani (legs up the wall), bring the soles of your feet together and your knees apart. Lower the knees down towards your hips, and let your body relax into the pose. Stay for as long as it feels good. (fig. 127)
In all of the legs up the wall poses, really allow your body to relax. You can place a blanket or a bolster underneath your hips to support your back.
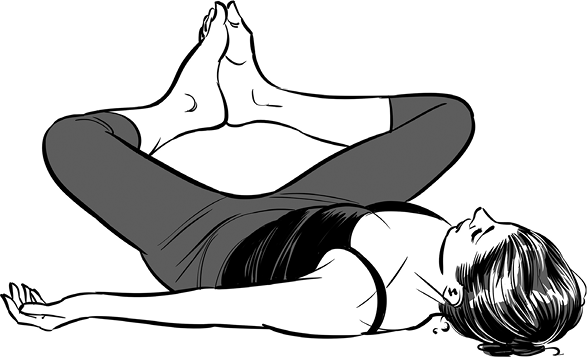
Figure 127, Reclined Bound Angle Pose Variation
**Salamba Sarvangasana (Shoulder Stand)
Some call the shoulder stand the queen of poses, as it is said to be very healing on many levels, including balancing hormones and a variety of illnesses. Whether true or not, this pose is practiced by almost all yoga styles and as long as it feels okay on your neck, it is a safe way to invert, reverse the flow of blood, move energy, calm, and stabilize. Try to practice it as a meditation, staying in stillness for some time (from ten breaths to five minutes). (fig. 128)
|
|
|
Figures 128–129, Shoulder Stand Pose and Shoulder Stand Pose Modification (left to right)
Method of practice: Lie down on your back. Lift your legs and take them over the head. Place your hands on your back and roll your shoulders underneath to create more space for your neck. Try to keep your elbows parallel to each other.
Extend the legs up towards the sky and take your gaze to your feet or watch your breath rise and fall at your belly. Keep lifting from your feet up, and if possible, walk the hands up the back (closer to the floor).
If there is pressure on the neck, you may need to place a blanket underneath the shoulders and have your head on the mat or floor. This elevates the shoulders and creates space for the neck. You can also try moving the chin away from the chest to create some more space for the neck. It is best to get advice from a teacher. Once up, stay calm and focused, and try to breathe deeply.
Modification: Place a block underneath the lower back and raise the legs straight up. This way you can be in a more relaxed state but still get the benefits of inverting. This is very useful for days when energy is low or for women who are menstruating. (fig. 129)
Halasana (Plow Pose)
Plow pose is a deep forward fold (upside down), so move gently especially if you have back pain. You can always bend the knees, either just a bit, or go directly into ear pressure pose. (fig. 130)
Method of practice: From salamba sarvangasana (shoulder stand), lower the legs straight over the head. If they reach the ground, untuck your toes. Stay for five to ten breaths.
Modification: This may not be possible, or may be too intense on the back. If so, bend the knees just enough to allow you to lower the legs. Try and keep them somewhat straight even if you are not lowering very far down.
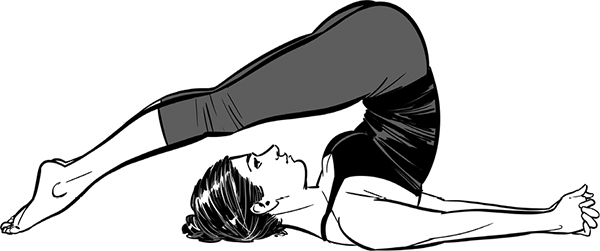
Figure 130, Plow Pose
Karnapidasana (Ear Pressure Pose)
Ear pressure pose is a bit safer for the spine than plow pose as the knees are bent. However still pay attention to your spine. (fig. 131)
Method of practice: From halasana (plow pose), bend the knees towards the ears. Stay here for five to ten breathes. To come out of karnapidasana (ear pressure pose), place your hands on the mat and use them to slow down your descent. Use your core muscles while lowering down.
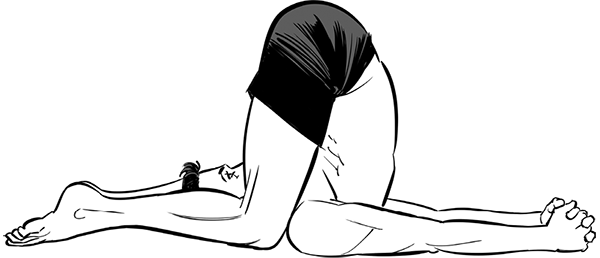
Figure 131, Ear Pressure Pose
Matsyasana (Fish Pose)
Matsyasana (fish pose) is a counter pose for the shoulder stand. It stretches the neck and throat in the opposite direction of the shoulder stand. (fig. 132, )
Method of practice: Prop up onto your elbows, lift the chest, and allow the head to drop back towards the floor. If your head does not reach the floor, move your elbows towards the feet, until you can reach your head to the ground. Stay for ten breaths while lifting the chest up.
Modification: If this is uncomfortable on your lower back, place your hands under your hips. This will ease the backbend.
*Vayu Muktyasana (Knees to the Chest Pose)
Knees to the chest is a nice gentle forward fold (on the back). Though this pose can be done anytime, it is a great counter pose to the fish pose. (fig. 133)
Method of practice: When you are done with fish, simply bring your knees to the chest for a few breaths. You can even roll gently from side to side on your back while doing this. It is a feel-good pose.
**Shoulder Stand Sequence
Shoulder stand is always done as sequence of poses. (fig. 134)
Method of practice: First come up to shoulder stand, and stay there for ten breaths. Then lower the legs down over the head into halasana (plow pose) for eight breaths followed by bending the knees toward the ears into karnapidasana (ear pressure pose) for eight breaths. Place your hands on the mat, and lower your legs slowly down. Prop onto your elbows to take matsyasana (fish pose) for eight breaths and finish with knees to the chest for five breaths.

Figure 132, Fish Pose

Figure 133, Knees to the Chest Pose

Figure 134, Shoulder Stand Sequence Pose (left to right: salamba sarvangasana, halasana, karnapidasana, matsyasana, vayu muktyasana)
***Sirsasana (Headstand)
Headstand is practiced for grounding, inverting, gaining balance, and focus, and some yogis in India claim that this pose has many other health benefits. At times it is called king of poses. Avoid it if you have neck pain, and be careful if you have back pain (especially in the transitions), though it may actually be helpful to have the spine hanging upside down (consider an inversion therapy that does not have pressure on the head for releasing the back). (figs. 135–138)
Method of practice: Come to all fours and then lower down to your elbows. Hold opposite elbows with the hands. Keeping your elbows where they are, open up your hands and clasp them together, placing the outer edges of your hands on the mat.
Place the crown of the head onto the floor so that the back of the head is pressing against the hands. Press the elbows down and lift the shoulders up and away from your ears. Tuck the toes under and lift the knees, coming into downward dog with headstand variation. Walk the feet towards the head as far as you can. You will need to lift in the belly and extend the hips tall to keep from rolling over.
|
|
|
Figures 135–136, Headstand Pose (left to right) (cont. next page)
|
|
|
(cont.) Figures 137–138, Headstand Pose (left to right)
Lift your right leg up keeping the knee bent and press strongly into the elbows. Lift in the belly and if available, raise the left leg with the knee bent so that now your hips are over the shoulders and your legs are in the air with the knees bent. When you feel steady, press the legs up, reaching the balls of the feet towards the sky and squeeze the ankles together while maintaining the lift in the belly. The more you are stacked in one vertical line, the easier it will be.
To come down, slowly begin lowering the legs with knees bent or straight, balancing the weight of the legs by slightly moving the hips back. Not much movement is needed in the hips, just enough to counter the weight of the legs as you come down. Most of the work will be done in the core. Once down, take balasana (child’s pose) to rest for a few breaths.
If you roll over while straightening up to the sky, simply release the clasp of the hands and allow yourself to roll. Smile and try again. Make sure to take child’s pose when you are finished with your headstand.
Modification: While in the downward dog headstand, lift one leg up and hold it for ten breaths. Lower down, and then do the other side.
***Variation: While in headstand, lower the legs halfway down and then bring them back up. Move slowly and repeat three to five times. If you still have energy, come down halfway once more and hold. Save a bit of energy to come back up and then lower all the way to the floor.
Sirsasana can be practiced with many variations, including padmasana (lotus), upavishta konasana (bound angle), and more. Once you are steady and know how to balance your weight, you are welcome to play around.
***Pincha Mayurasana (Dolphin Pose to Forearm Balance/Feathered Peacock)
Forearm balance is a good pose for strengthening the back and shoulders. Like other inversions, it helps build confidence, stability, focus, and a sense of power. Start practicing against the wall until you feel safe and steady to do this in the middle of the room—preferably with a teacher. (figs. 139–140 )
Method of practice: Come to all fours and then lower down to the forearms so that the elbows are underneath the shoulders and the hands are in line with the shoulders. Press your thumbs and index fingers firmly into the mat. Press your elbows down, and lift your shoulders up and away from the ears while tucking your toes under and lifting your hips to the sky.
Bring your gaze forward to the hands and walk your feet forward towards the head as far as you can, making sure your shoulders stay over the elbows and you are maintaining the lift in the belly and the upward lengthen in the torso to keep from rolling over. This is the dolphin pose—the preparation pose for the full forearm balance.
Take your right leg up to the sky, keeping it as straight as possible. Bend the left knee and kick the left foot up to meet the right, making sure you straighten and activate the left leg as you are coming up so you are consciously using effort to lift the left leg to meet the right. Use the lift in the belly to help you come up and to keep you steady.
|
|
|
Figures 139–140, Dolphin Pose to Forearm Balance/Feathered Peacock Pose (left to right)
Keep pressing your elbows down and lifting the shoulders up, as that will activate the muscles of your upper back, especially your latissimus dorsi. The lattisimus dorsi are sometimes called lats. They are broad muscles on the back that help support your balance—somewhat like wings—so keep them active!
Modification: Stay in dolphin (forearm downward dog), and practice pressing the elbows firmly into the ground so that you activate the chest, shoulders, and back muscles. When this gets easy, you can do the same thing with one leg lifted straight up to the sky and hold for ten deep breaths. If this is all too much, do your dolphin with the knees on the ground. This will help build the strength in the shoulders and upper body. Try to hold it until you really feel the shoulders burn.
***Adho Mukha Vrksasana (Handstand)
Although handstands are practiced in gymnastics, recently they have carved their space in the yoga world. Remember that practicing handstands is fun, but not a requirement for yoga. Practice with a smile, use the wall, and above all enjoy and be happy with where you are. (fig. 141)
Method of practice: Place your hands about shoulder-width apart on the ground. Move your weight forward over the wrists and lengthen the spine. With one leg at a time or both legs together, lift up to a handstand.
When coming up, focus on getting the hips over the shoulders first, and then follow with your legs. If you are kicking one leg at a time, take one leg straight up into the air. Bend the other one for the kick up, and straighten it as soon as it is in the air, while actively reaching it towards the sky. Once your legs are both up, squeeze the feet together; keep your belly lifted, your tailbone tucked under, and your gaze steady between the thumbs. Remember to breathe.
**Variations: Handstand is a challenging pose and there are a few ways to prepare for it. The first one is to practice the L shape (see below), and once you get strong enough doing the L shape, you can begin practicing the full handstand with the wall. Eventually—probably with the help of a teacher—you will start to practice with no wall, but even if you never do, it is absolutely fine. Practicing with the wall will give you all the strengthening you need.
**L Shape
Sit on the ground facing the wall with your legs extended forward. Place your hand along the hips or even a few inches behind the hips. This is where you want the hands to be. Now turn around, placing the hands at the spot you “measured” and start climbing your legs up the wall behind you. The beginning position looks like a downward dog pose with the feet near the wall.
From there simply take one leg up to the wall, and then the other. You can stay in the L shape or work on lifting one leg up towards the sky while the other still presses against the wall. It is actually easier to hold with one leg up toward the sky. Switch legs. If you need to, come down between sides. Over time, try to increase the amount of time you hold each side. This will help build the strength and stamina you will need for the full handstand.

Figure 141, Handstand Pose
**Handstand Against the Wall
Come to downward dog position with your hands about a foot away from the wall. Walk the feet forward so that the shoulders are over the wrists and your gaze is between your thumbs. Bend your knees, lift in the belly, and hop, taking the hips over the shoulders and the legs up to the sky or the heels against the wall. At first, practice hopping with one leg at a time, and once that becomes easy, try hopping with both legs together.
Remember that the work is to get the hips over the shoulders and then the legs follow. Once up, try to adjust your lower back so that you are lifting in the belly and tucking the tailbone towards your feet. Stay here or practice moving away from the wall one leg at a time.
***Sirsasana B (Tripod Headstand)
There are many headstand variations, but the two I offer in this book are the most common. For some this pose is more accessible than sirsasana A (headstand A). You can always switch between the two. (fig. 142)
Method of practice: Come to all fours, then lower the head to the floor and walk the hands back so that you create a 90-degree angle with bent elbows, which means that your upper arms will be parallel to the mat. Keep your shoulders in and over the wrists. Lifting in the belly, press strongly into the hands, activating the shoulders and moving them up and away from the ears.
Tuck the toes under, lift the knees, and take the hips up towards the sky. Walk the feet forward towards the arms while lifting in the belly and lengthening the spine towards the sky. Lift both legs up to the sky, or lift one at a time if necessary, stacking ankles over hips and hips over shoulders.
To come down, slowly begin lowering the legs with knees bent or straight, balancing the weight of the legs by slightly moving the hips back. Not much movement is needed in the hips, just enough to counter the weight of the legs as you come down. Most of the work will be done in the core. You can take child’s pose to rest after this pose.
Modification: From the downward facing dog in tripod position, take your right knee onto your right upper arm as close to the armpit as possible. Either stay and breathe here, or bring the left knee onto the left upper arm. Once you have both legs up, stay for a few breaths or possibly work your way towards lifting into the full tripod headstand.

Figure 142, Tripod Headstand Pose
Even if you just have one leg up on the upper arm while the head is down, you are still practicing an inversion and getting its benefits. Take your time and slowly go through the options until you manage to make your way all the way upside down. Remember to practice no judgment.
***Variation: When coming back down, slowly bend the knees, keeping the hips over the shoulders and lowering the knees towards the upper arms, keeping the hips over the shoulders for as long as you can. Eventually the hips will drop some, but by then you will be almost at arm level, and it will be easier to lower down. Stay for three to five breaths and either lift back up, drop back into chaturanga, or simply lower the feet down and come out of the pose. Take child’s pose.
Finishing Poses
When you are done with the active part of your practice, it is important to integrate all you have done. The classic pose that should not be skipped is savasana (corpse pose). To that you may add a seated meditation before or after savasana. You can also practice some pranayama, thus integrating the other two parts of the Yoga Lifestyle into the yoga asana.
Tips for Practicing Finishing Poses
- • Surrender. The active practice is over. Allow yourself to be whole. No need to work any specific part of the body.
- • Enjoy! This is the treat at the end of your practice.
*Savasana (Corpse/Final Relaxation)
Savasana (the final relaxation) is maybe the most important pose of them all. It is where we integrate all that we practiced so far, and allow the body to relax completely, with no control of our mind over it. It is called corpse pose because our practice is to let all control go, and be like a corpse—doing absolutely nothing. Not to be missed! (fig. 143)
Method of practice: Lie down on your back and allow your feet to splay out to the sides. Let your arms rest to the sides of your body with the palms facing up.
Lift your chin slightly to the chest and rest your head down so your neck is long. Take a couple of big inhales, and with your exhales, feel your body surrender heavily into the floor while finding lightness in your mind. In this pose, we focus on nothing, allowing the body to just rest on its own and allowing the mind to stay calm and still. It is a complete relaxation pose.
Since it is not easy for many of us to find complete stillness or even total relaxation in the body, it may be helpful to scan the entire body. Start with the feet, allowing them to relax while keeping your awareness on them as they soften. Keep going up the body—to your calves, knees, thighs, hips, chest, shoulders, arms, hands, and finally, head. Take your time and really notice how every part that you focus on finds a bit more ease and surrender. We have a tendency to hold on to even little muscles without noticing. When you reach the head, scan all parts of your face from the forehead to the eyes, nose, jaw, and chin. Then finish with a calming of the mind by allowing your awareness to drop back into your breath.
Modification: If you feel any tension in the lower back, consider placing a bolster or rolled blanket under the backs of your knees.

Figure 143, Corpse/Final Relaxation Pose
Yoga Sequences
Now that you have seen many yoga poses and even learned how to do them, it is time to put them together. Creating a sequence for a practice is an art. No worries; you will be given complete practices with images, but some things repeat themselves and it would be good to define them first. In all sequences, you will be prompted at times to “take a vinyasa,” and many sequences start with the warm-up 1 and 2 and then follow with surya A, B (sun salutes A, B) and their variations, so first, here is a description of what these mean.
|
|
|
|
Figure 144, Vinyasa Sequence (left to right)
*Vinyasa
When we speak of vinyasa traditionally, we speak of a sequence that includes movement and breath placed in a certain way. For example, raising the arms overhead with an inhalation is the first vinyasa of the sun salutation. For our purposes of creating practice sequences, we will use the term vinyasa to describe a specific sequence of a few poses that we repeat often. There are different starting points from which you will arrive at chaturanga (low push up): maybe plank, maybe jumping back from ardha uttanasana (forward fold half way), or maybe lowering from warrior 1. (fig. 144)
The Vinyasa Sequence
Use the vinyasa to keep the body warm and balance forward folds with backbends. Your first vinyasa may already be in the warm up 1 sequence. Maybe you will skip it here, or modify with knees down in chaturanga and a gentler backbend than upward dog, such as baby cobra. Keep doing vinyasas between your sun salutes to really warm up. During your practice you can use these to balance your dosha (body type). If you feel vata (air, distracted), do them slowly, if you feel vet pitta (fire, aggressive), skip some, and if you feel kapha (earth, lethargic), please add them between all seated poses.
- • Exhale; lower to low plank (chaturanga dandasana).
- • Inhale; move forward and up to upward facing dog (urdhva mukha svanasana).
- • Exhale; roll over your toes, moving your hips back and up into downward facing dog (adho mukha svanasana).
Modification 1: From plank pose, lower the knees, the chest, and the chin, and then slide forward into a baby cobra or sphinx pose. Plant the hands on the floor, and starting with the knees down, lift your hips up and back, returning to downward facing dog.
Modification 2: If you are comfortable with lowering the knees, chest, and chin to the ground, try to lower the knees down keeping the hips right over the knees with the arms close to the body. Bend the elbows and lower the shoulders to elbow height. If that is too much, bend the elbows just to the place where you can stay for the rest of a long deep exhale, even if you have only lowered an inch. Continue to upward facing dog and then downward facing dog.
Surya Namaskara—Sun Salutations
Surya in Sanskrit means sun—or the source of light—seen as the physical and spiritual essence of the world. Namaskara—from namas—means to bow or adore.
Though in classic ashtanga yoga, the practice begins with sun salute A and B, I have found that adding an extra warm up before, and a few extra variations to the sun salute B sequence, makes the practice more user friendly for all levels of practitioners.
Most of our practices begin with warm up 1 followed by warm up 2 and then sun salute A, followed by sun salute B, with a few variations. Then we do some standing poses, some floor poses and finish. Let’s look at some of the benefits and then define some of the groups of poses we use often.
Some of the Benefits of Practicing Warm Ups and Surya Namaskara
- • Warms up the body with both cardio exercise and stretching, and warms up joints and muscles.
- • Promotes the flow of energy, lymphatic fluid, and circulation.
- • Promotes deepening of the breath and the connection of breath with move-
ments that helps in establishing concentration of mind on the flow of body and breath. - • Warms up and prepares for deeper forward folds and backbends.
- • Allows for a sense of connection to the heart as we begin with hands at the heart, and move in a prayer-like sequence. Arms over the head, then bowing down. Try to make this a practice of gratitude and heart opening.
Warm Ups and Sun Salute Sequences
All of the sequences which follow, including the warm ups and the surya namaskara (sun salutes) with their variations, have an image sequence in the yoga practices section below. If you do practice your own sequence, start with warm up 1 and 2, surya A, B1, B3, B4, or B5. This is a pretty solid warm up, and even a full practice on days with very little time. Later we will look at options you can add to this, but this is pretty much my standard beginning.
*Warm Up 1 Sequence
This is the Doron Yoga classic warm up 1 sequence. However, you can modify it some according to how you feel. Maybe you do the knee to nose with the back knee on the ground, or maybe you do this with no vinyasa in between. The important part is that you move slowly and allow the body to wake up in a fluid way. (fig. 145, page 209)
- • Cat/cow for five deep breaths (bidalasana—bitilasana)
- • Hip rotations on all fours, a few to each side (delicious pose)
- • Downward facing puppy (uttana shishosana)
- • Downward facing dog (adho mukha svanasana)
- • Take your right leg up to the sky. Bend the right knee and take it up towards the sky, bringing your right heel to the left side. Stack your hips over each other and thus open the hips. Stay for three deep breaths.
- • Inhale, straighten the right leg behind you, and exhale, shift forward, bringing the shoulders over the wrists and the knee to the nose, curling in the belly. Repeat two more times or bring the right knee to the left elbow and back to the sky, then the right knee to the outside of the right elbow and back to the sky.
- • Exhale and bring your right foot forward between the hands. If it doesn’t reach there, help yourself by using the right hand to bring the foot forward. Come into low lunge (anjaneyasana) for five breaths.
- • Step back to plank and take a vinyasa.
- • Inhale and take your left leg up to the sky. Bend the left knee and take it up towards the sky and your left heel to the right side. Stack your hips over each other, thus opening the hips. Stay for three deep breaths.
- • Inhale and straighten the leg behind you. Exhale and shift forward, bringing the shoulders over the wrists and bringing the knee to the nose, curling in the belly. Repeat two more times or bring the left kneeto the right elbow and back to the sky, and then bring the left knee to the outside of the left elbow and back to the sky.
|
cat |
cow |
hip rotation |
downward facing puppy |
downward facing dog |
|
three legged dog (right leg) |
knee to nose (right leg) |
knee to elbow (right leg) |
knee to elbow across (right leg) |
low lunge (right leg) |
|
four limb staff |
upward facing dog |
downward facing dog |
three-legged dog (left leg) |
knee to nose (left leg) |
|
knee to elbow (left leg) |
knee to elbow across (left leg) |
low lunge (left leg) |
four limb staff |
upward facing dog |
|
downward facing dog |
forward fold halfway up |
standing forward fold |
upward salute |
samasthiti |
Figure 145, Warm Up Sequence 1 (left to right, top to bottom)
- • Exhale and bring the left foot forward between the hands. If it doesn’t reach there, help yourself by using the left hand to bring the foot forward. Come into low lunge (anjaneyasana) for five breaths.
- • Step back and take a vinyasa.
- • Walk the feet to the front of the mat and fold forward (uttanasana).
- • Slowly bend the knees and inhale; come all the way up to standing with the arms over the head (urdhva hastasana).
- • Exhale and close the hands back to the heart (tadasana or samasthiti).
*Warm-Up 2 Sequence
The main addition here is the high lunge pose—an important preparation for the warrior 1 that follows in most sequences. You can do the entire warm up 2 sequence, or you can simply go to the high lunge after the last downward dog of the warm up 1, and do it on both sides before coming up to mountain pose. (fig. 146, page 211)
- • Come to mountain pose (tadasana or samasthiti).
- • Inhale; take the hands up over the head (urdhva hastasana).
- • Exhale; fold forward (uttanasana).
- • Inhale; lengthen halfway up (ardha uttanasana).
- • Exhale; take the right foot back. Step the left foot back and go through your vinyasa.
- • Inhale; bring the right foot forward between the hands, slowly coming up to crescent high lunge. Hold for five breaths (anjaneyasana). Exhale; bring the hands to the heart (tadasana or samasthiti). Inhale; take the hands up over the head (urdhva hastasana).
- • Take your hands to the earth. Step the left foot forward and lengthen the spine halfway up (ardha uttanasana).
- • Exhale; fold forward (uttanasana).
- • Inhale; come all the way up with hands over the head (urdhva hastasana).
- • Exhale; bring the hands to the heart (tadasana or samasthiti).
|
samasthiti |
upward salute |
standing forward fold |
forward fold halfway up |
runners lunge (right leg back) |
|
four limb staff |
upward facing dog |
downward facing dog |
high lunge (right foot forward) |
forward fold halfway up |
|
standing forward fold |
upward salute |
samasthiti |
upward salute |
standing forward fold |
|
forward fold halfway up |
runners lunge (left leg back) |
four limb staff |
upward facing dog |
downward facing dog |
|
high lunge (left foot forward) |
forward fold halfway up |
standing forward fold |
upward salute |
samasthiti |
Figure 146, Warm Up Sequence 2 (left to right, top to bottom)
- • Inhale; take the hands up over the head (urdhva hastasana).
- • Exhale; fold forward (uttanasana).
- • Inhale; lengthen halfway up (ardha uttanasana).
- • Exhale; take the left foot back. Step the right foot back and go through your vinyasa.
- • Exhale; bring the left foot forward between the hands, slowly coming up to crescent high lunge. Hold for five breaths (anjaneyasana).
- • Take your hands to the earth. Step the right foot forward and lengthen the spine halfway up (ardha uttanasana).
- • Exhale; fold forward (uttanasana).
- • Inhale; come all the way up with hands over the head (urdhva hastasana).
- • Exhale; bring the hands to the heart (tadasana or samasthiti).
*Surya Namaskara A (Sun Salute A) Sequence
This is the classic surya A sequence of the ashtanga vinyasa system. (fig. 147, page 213)
- • Come to mountain pose (tadasana or samasthiti).
- • Inhale; take the arms up over the head (urdhva hastasana).
- • Exhale; fold forward (uttanasana).
- • Inhale; lengthen halfway up (ardha uttanasana).
- • Exhale; step or jump back into low plank and take your vinyasa. Breathe for five deep breaths in downward facing dog (adho mukha svanasana).
- • Look between your hands; inhale and step or jump forward,
lengthening halfway up as you land (ardha uttanasana). - • Exhale; fold forward over the legs (uttanasana).
- • Inhale; come all the way up with the hands over head (urdhva hastasana).
- • Exhale and bring the hands to the heart (tadasana or samasthiti).
|
samasthiti |
upward salute |
standing forward fold |
||
|
forward fold halfway up |
four limb staff |
upward facing dog |
||
|
downward facing |
forward fold halfway up |
standing forward fold |
||
|
||||
Figure 147, Surya Namaskara A (Sun Salute A)
Sequence (left to right, top to bottom)
*Surya Namaskara B (Sun Salute B) Sequence
This is the classic surya B sequence of the ashtanga vinyasa system. (fig. 148, page 215)
- • Bend the knees deeply, lower your hips, and inhale; open your heart and raise your arms up to fierce pose (utkatasana).
- • Exhale; fold forward (uttanasana).
- • Inhale; lengthen halfway up (ardha uttanasana).
- • Exhale; step or jump back, and take your vinyasa.
- • From downward dog, bring your right foot forward and rotate the left heel down. Come up into warrior 1 (virabhadrasana I).
- • Exhale; lower the hands to the earth. Step the right foot back and go through your vinyasa.
- • Bring your left foot forward and rotate the right heel down. Come up into warrior 1 (virabhadrasana I).
- • Exhale; lower the hands to the earth. Step the left foot back and go through your vinyasa.
- • Take five deep breaths in downward facing dog (adho mukha svanasana).
- • Look between your hands, inhale, step or jump forward, and lengthen halfway up (ardha uttanasana).
- • Exhale; fold forward (uttanasana).
- • Bend the knees deeply, lower your hips, and inhale; open your heart and raise your arms up (utkatasana).
- • Exhale; return to mountain pose (tadasana or samasthiti).
|
fierce pose |
standing |
forward fold |
four limb staff |
|||
|
upward |
downward |
warrior 1 |
four limb staff |
|||
|
upward |
downward |
warrior one |
four limb staff |
|||
|
||||||
|
||||||
Figure 148, Surya Namaskara B (Sun Salute B)
Sequence (left to right, top to bottom)
Surya Nasmaskara Variations
All the variations that follow begin with coming into warrior 1 on the right side, then taking the variation. After taking the variation, lower down to take a vinyasa and repeat on the left side.
You can take five breaths in downward dog once you finish the second side, and either continue to another variation, or make your way back to standing. When I have time and feel strong, I return to standing between the variations, but many times, I just go from one variation to the next with a few breaths in downward dog between them.
The flexitarian method would be to return to standing after surya B1 for example, but skip coming back to standing on the next variation. Always finding the middle way.
*Surya Namaskara B, Variation 1, Twisted Warrior 1 (Surya B1)
This sequence is almost the same as the classical surya B, but with an added twist—great for releasing the spine and moving energy. There are no twists in the ashtanga sun salutes, and since my body was craving one to wake up the spine early on, this has now become a new classic. (fig. 149, page 217)
- • From warrior 1, take the twisted warrior variation. Take your left hand forward to the right thigh and your right arm down to the right side on the back leg.
- • Twist to the right side, keeping the torso tall and perpendicular to the floor and the right knee bending deeply. Keep rotating your right shoulder to the right, and let your head follow. Hold for five deep breaths.
- • Return to warrior 1.
- • Lower the arms down to the mat and take your vinyasa.
- • Repeat on the left side.
|
fierce pose |
standing forward fold |
forward fold halfway up |
four limb staff |
|
upward facing dog |
downward facing dog |
warrior 1 (right leg) |
twisted warrior (right leg) |
|
four limb staff |
upward facing dog |
downward facing dog |
warrior 1 (left leg) |
|
twisted warrior (left leg) |
four limb staff |
upward facing dog |
downward facing dog (5 breaths) |
|
|
standing forward fold |
fierce pose |
samasthiti |
Figure 149, Surya Namaskara B, Variation 1,
Twisted Warrior 1 (Surya B1) (left to right, top to bottom)
*Surya Namaskara B, Variation 2, Shoulder and Hip Opener (Surya B2)
A sequence that opens the shoulders and hips—a great way to warm up quickly and prepare for what is next. On days with less time, I do this on the same round of warriors as surya B1. So it is a B1—B2 combo. (fig. 150, page 219)
- • From warrior 1, release your hands down and clasp your fingers behind your back. Lengthen in the spine and move your torso up and back while you take your arms away from the body so that you are creating a gentle backbend.
- • Exhale, take your head to the inside of the right knee towards the floor with the arms following, reaching overhead. You are now in humble warrior pose. Hold for five deep breaths.
- • With super strong legs and your core engaged, lift all the way back up into warrior 1.
- • Exhale and take the hands back down to the floor. Go through a vinyasa.
- • Repeat on the left side.
|
fierce pose |
standing forward fold |
forward fold halfway up |
four limb staff |
|
upward facing dog |
downward facing dog |
warrior 1 (right leg) |
humble warrior (right leg) |
|
four limb staff |
upward facing dog |
downward facing dog |
warrior 1 (left leg) |
|
humble warrior (left leg) |
four limb staff |
upward facing dog |
downward facing dog (5 breaths) |
|
forward fold halfway up |
standing forward fold |
fierce pose |
samasthiti |
Figure 150, Surya Namaskara B, Variation 2,
Shoulder and Hip Opener (Surya B2) (left to right, top to bottom)
*Surya Namaskara B, Variation 3, Eagle Arms and Hips (Surya B3)
I know I’m not supposed to have favorites, but if I did, this would be one of them. Opening the shoulders, a bit of backbending, and then a very delicious hip opener—a fantastic way to prepare for the challenging poses that will come ahead. (fig. 151, page 221)
- • From warrior 1, take your right arm underneath the left and wrap it around so that the right palm faces the left palm. If it does not quite happen, you might be able to hook your thumbs, and that is fine.
- • Lift in the belly, lengthen the spine, and begin going into a backbend while lifting the elbows. Let your gaze go up towards the hands. Keep the right knee bent and hold for five breaths. Inhale and come back up into warrior 1.
- • Exhale and bring the hands to the inside of the right foot. Lower the back knee to the ground, untuck the back toes, and either stay here or lower the forearms to a block or to the floor. This is utthana pristhasana (lizard pose).
- • Stay and breathe for eight deep breaths.
- • Come back to your hands, step the right foot back and take your vinyasa.
- • Repeat on the left side.
|
fierce pose |
standing forward fold |
forward fold halfway up |
four limb staff |
upward facing dog |
||||
|
downward facing dog |
warrior 1 |
eagle arms warrior (right leg) |
lizard (right leg) |
four limb staff |
||||
|
upward facing dog |
downward facing dog |
warrior 1 (left leg) |
eagle arms warrior (left leg) |
lizard (left leg) |
||||
|
||||||||
|
||||||||
Figure 151, Surya Namaskara B, Variation 3,
Eagle Arms and Hips (Surya B3) (left to right, top to bottom)
*Surya Namaskara B, Variation 4, Triangle (Surya B4)
This sequence incorporates some classics into one flow. From warrior 1 we move slowly as in meditation with great focus to warrior 2, opening our hips, and continuing with external rotation hip poses to the reverse warrior and triangle. A foundation for most vinyasa classes. (fig. 152, page 223)
- • From warrior 1, open slowly into warrior 2 and hold for two to five deep breaths.
- • Turn the right palm up and reverse the warrior. Hold for three deep breaths.
- • Come back up through warrior 2, straighten the front leg and come into triangle pose. (You can do extended side angle instead.) Hold for five deep breaths.
- • With super strong legs and a lift in the belly, inhale back up to warrior 2.
- • Exhale, cartwheel the hands down and take your vinyasa.
- • Repeat on the left side.
|
fierce pose |
standing forward fold |
forward fold halfway up |
four limb staff |
upward facing dog |
||||
|
downward facing dog |
warrior 1 (right leg) |
warrior 2 (right leg) |
reverse warrior 2 (right leg) |
triangle (right leg) |
||||
|
warrior 2 (right leg) |
four limb staff |
upward facing dog |
downward facing dog |
warrior 1 (left leg) |
||||
|
||||||||
|
||||||||
|
||||||||
Figure 152, Surya Namaskara B, Variation 4, Triangle (Surya B4) (left to right, top to bottom)
*Surya Namaskara B, Variation 5, Extended Side Angle, Triangle, and Half-Moon (Surya B5)
This is a sequence similar to surya B4 with a few extra poses. You can always do the surya B4 on days with less time or energy. (fig. 153, pages 225–226)
- • From warrior 1, open slowly into warrior 2 and hold for two to five deep breaths.
- • Turn the right palm up and reverse the warrior. Hold for three deep breaths.
- • Come back up through warrior 2 and into extended side angle. Hold for five deep breaths.
- • With super strong legs and a lift in the belly, inhale back up to warrior 2.
- • Straighten your front leg and reach forward for triangle. Hold triangle for three to five breaths.
- • Shift the weight forward onto the front leg, keeping the heart open. Raise your back leg into half-moon and hold for five breaths. The bottom hand can be at the floor, on a block or even at your heart.
- • Return to warrior 2.
- • Exhale, cartwheel the hands down to the floor, and take your vinyasa.
- • Repeat on left side.
|
fierce pose |
standing forward fold |
forward fold halfway up |
four limb staff |
|||
|
upward facing dog |
downward facing dog |
warrior 1 (right leg) |
warrior 2 (right leg) |
|||
|
||||||
|
||||||
|
||||||
Figure 153, Surya Namaskara B, Variation 5, Extended Side Angle, Triangle, and Half-Moon (Surya B5) (left to right, top to bottom) (cont. next page)
|
downward facing dog |
warrior 1(left leg) |
warrior 2 (left leg) |
reverse warrior 2 (left leg) |
|||
|
||||||
|
||||||
|
||||||
|
||||||
(cont.) Figure 153, Surya Namaskara B, Variation 5, Extended Side Angle, Triangle, and Half-Moon
(Surya B5) (left to right, top to bottom)
Yoga Practices
Time to get to work! There are a variety of sequences offered here for different levels and durations. In reality, you can choose any of these sequences and modify them to your level or needs for the specific day and time you are practicing.
For example, you can walk forward and back (instead of jumping) when doing your warm up, and even skip the vinyasas if necessary. You can also add more vinyasas or take a second chaturanga after upward facing dog, if you need more power and aerobic work.
I did not mention all the vinyasa options, but you can take a vinyasa after each pose if you like. Remember that kapha dominant people may be tempted to skip the vinyasa, though they shouldn’t, and pitta dominant people may want to do more of them, even when they have actually had enough. Find your balance.
Most poses offered here have modification options in the asana descriptions, so at first learn what is right for you, and when the practice gets easier, begin doing the full poses. For example, I may have a figure of a supine twist with legs crossed. You may need to take the more basic variation of legs uncrossed. The modifications are shown in the pose description section.
All vinyasa flow sequence poses are to be held for five to eight deep breathes unless otherwise noted or when part of the vinyasa or sun salutes, where you move at a pace of one breath per movement.
Begin each practice with a sit for two minutes to breathe and set an intention. Consider chanting Ohm or another chant. Close each practice with legs up the wall or savasana. Enjoy savasana for at least three minutes, and if you have the time, stay for five to ten minutes. Do not skip it!
For your full practice, either follow one of the set sequences offered in the Doron Yoga practice sequences, or build your own practice according to the Doron Yoga building blocks.
The Doron Yoga Building Blocks
There are eighteen building blocks in the Doron Yoga system. Each block may vary in the number of poses it contains and the amount of flexibility to change the poses in it. The warm ups are pretty set, but you can change how you get in and out of them, as well as add warm up poses or eliminate vinyasas.
The surya namaskara B block may have any combination of the variety of surya B options.
Below you will find the main blocks with optional poses and what to choose according to a basic class (level 1–2) or an intermediate class (level 2–3). All level classes are more or less level 1–2 with more options from the level 2–3. You will have to determine according to your body and the specific day of practice; some days you may feel more of a yoga ninja, and others more like a beginner. Respect your body.
Details of the Doron Yoga Building Blocks
- 1. Opening: intention, meditation, chant
- 2. Warm up 1 and 2
- 3. Surya namaskara A
- 4. Surya namaskara B and/or B1
- 5. Surya namaskara B2 or B3
- 6. Surya namaskara B4 or B5
- • Level 1–2—surya B1, surya B2, surya B4
- • Level 2–3—surya B, surya B1, surya B3, surya B5
- 7. Standing forward fold
- • All levels—uttanasana (standing forward fold), hold elbows or any other arm variation that feels good for you
- 8. Prasarita (wide leg forward fold)
- • Level 1–2—prasarita A or C
- • Level 2–3—prasarita C then A, with optional sirsasana B (tripod headstand)
- 9. Parsvottanasana (pyramid)
- • Level 1–2—parsvottanasana or parivrtta parsvakonasana modified (revolved extended side angle)
- • Level 2–3—parsvottanasana, parivrtta trikonasana (revolved extended side angle), parivrtta parsvakonasana (revolved extended side angle)
- 10. Standing balancing poses
- • All levels—tree pose, galavasana prep, natarajasana (dancer)
- 11. Play time (core, arm balances, and inversions)
- • All levels core—navasana, bicycle yoga, jatharasana (leg lifts), or core leg twists, side plank
- • Playtime—give yourself some time to play, allow for repeated tries—maybe 2–3 times.
- • Level 1–2—bakasana (crow), dolphin, headstand, handstand prep (L shape)
- • Level 2–3—bakasana (crow), handstand, pincha mayurasana (peacock), sirsasana B (tripod headstand)
- 12. On the belly
- • All levels—salabhasana (locust), baby cobra, sphinx, shoulder stretch, ardha bhekasana (half frog), dhanurasana (bow)
- 13. Deep stretch
- • These can go anywhere you need a break.
- • All levels—thread the needle, pigeon, extended leg supine stretch, or splits
- 14. Backbends
- • Level 1–2—bridge with optional urdhva dhanurasana (upward facing bow)
- • Level 2–3—urdhva dhanurasana (upward bow), eka pada raj kapotasana (king pigeon), natarajasana (full dancer)
- 15. Twists, hips, and forward folds
- • All levels—start with any twist to release the back (on the back or seated)
- • Optional happy baby—can feel great too
- • All levels—baddha konasana (bound angle), upavishta konasana (seated wide leg stretch), janu sirsasana A (seated forward fold over one leg), marichyasana C (seated twist), trianga mukha eka pada paschimottanasana (three limbs facing one foot), paschimottanasana (seated forward fold over both legs), and any other basic calming seated poses
- 16. Inversions
- • All levels—baddha konasana (bound angle), upavishta konasana (seated wide leg stretch), janu sirsasana A (seated forward fold over one leg), marichyasana C (seated twist), trianga mukha eka pada paschimottanasana (three limbs facing one foot), paschimottanasana (seated forward fold over both legs), and any other basic calming seated poses
- • Optional sirsasana (headstand) with balasana (child’s pose) as release
- • For easy days or when on your cycle, practice viparita karani (legs up the wall)
- 17. Meditation, savasana, and closing
- • All levels—optional supine (on the back) twists, savasana (final relaxation), optional pranayama (breath work)
- • Meditation, set intention, chant, feel gratitude
More practices and pose descriptions in text and video formats can be found on my website: www.doronyoga.com.
Doron Yoga Practice Sequences
The sequences offered here are sample practices of different lengths and different levels of difficulty. You can add and change these sequences as needed. For example, you can use the forty-five minutes, all-levels practice as a base, and then add to it extra hip openers, forward folds, or standing balancing poses. You can also modify levels. If there is an advanced practice you like, such as the seventy-five minutes advanced, you can skip some of the challenging poses, or practice the preparation for them.
These sequences can be practiced over and over, as they are balanced practices. Try to work on doing some of the longer ones as well. After you get comfortable with them, use the guidelines in the Doron Yoga building blocks to create your own variations. Most importantly—breathe and enjoy!
30 Minutes Doron Yoga Vinyasa—Beginners
This is a great quick practice for beginners or those that want a short practice with extra stretching and less movement. This is also a great supplement if you already did other cardio or as an afternoon second practice. (fig. 154, page 232)
30 Minutes Doron Yoga Vinyasa—All Levels
A quick practice that is good for all. Great for days with less time, but do try and also practice the longer versions of 75 and 90 minutes. (fig. 155, page 233)
45 Minutes Doron Yoga Vinyasa—All Levels
Here is another great short/medium practice. It is great for all, as well as for days with less time, or as supplement for cardio. (fig. 156, page 234)
45 Minutes Doron Yoga Vinyasa—Advanced
Get to work! This is a no-nonsense, intense 45–minutes practice. If you know your poses, and are ready to dive in, this is for you. Of course you can modify and do the preparation for many of these poses, but if you are new, this may be too much for now. (fig. 157, page 235)
60 Minutes Doron Yoga Vinyasa—Beginners
An hour-long yoga practice that is great not only for beginners, but for days when you would rather stretch more and take it easy. If you feel stressed or out of balance with your pitta (fire body type), consider this as a good choice. (fig. 158, page 236)
|
standing forward fold |
triangle |
||
|
wide leg forward fold (10 breaths) |
pyramid |
tree |
locust (x2) |
|
reclined thread the needle (one minute each side) |
bridge pose |
supine twist |
extended leg supine stretch |
|
extended leg supine stretch to the side |
legs up the wall |
final relaxation |
Figure 154, 30 Minutes Doron Yoga Vinyasa—Beginners (left to right, top to bottom)
|
standing forward fold |
|||||||
|
|
pyramid |
preparation for |
locust |
||||
|
shoulder stretch pigeon bridge (pictured) or upward facing bow |
|||||||
|
|||||||
|
|||||||
Figure 155, 30 Minutes Doron Yoga Vinyasa—All Levels (left to right, top to bottom)
|
wide leg forward fold (ten breaths) |
pyramid |
tree |
||||
|
bicycle yoga |
locust |
shoulder stretch |
dolphin (pictured) or pincha mayurasana |
|||
|
||||||
|
||||||
Figure 156, 45 Minutes Doron Yoga Vinyasa—All Levels (left to right, top to bottom)
|
wide leg forward fold A |
tripod headstand (optional) |
pyramid |
revolved triangle |
|||
|
garudasana |
anjaneyasana—quad stretch |
splits |
boat |
|||
|
pincha mayurasana (pictured) or handstand |
upward facing bow (x3) |
twist with knees bent |
seated forward fold |
|||
|
||||||
Figure 157, 45 Minutes Doron Yoga Vinyasa—Advanced (left to right, top to bottom)
|
standing forward fold |
hip rotations |
|||||
|
triangle |
extended side angle |
wide leg forward fold (ten breaths) |
pyramid |
|||
|
tree |
squat |
locust |
shoulder stretch |
|||
|
reclined thread the needle |
bridge |
supine twist |
extended leg supine stretch |
|||
|
||||||
|
||||||
Figure 158, 60 Minutes Doron Yoga Vinyasa—Beginners (left to right, top to bottom)
60 Minutes Doron Yoga Vinyasa—All Levels
One hour of all the important poses. Though this is a complete practice, try to also do the 75– and 90–minutes all levels sometimes. They offer more depth and additional poses such as core work. (fig. 159, page 238)
75 Minutes Doron Yoga Vinyasa—All Levels
This practice may be the most useful. You can switch the camel with upward facing bow for variety, and switch the boat pose with bicycle yoga. Or simply alternate this practice with the 90–minutes all levels. (fig. 160, page 239)
75 Minutes Doron Yoga Vinyasa—Advanced
A fun flowing practice, with changing poses such as handstands and standing splits. Not for beginners. A great practice for days when you have energy and ready to play. (fig. 161, pages 240–241)
90 Minutes Vinyasa Yoga—All Levels
This may be one of the most useful practices. It is complete, long, and offers a great variety of poses. You can substitute the bridge/upward facing bow with camel pose some days. Or alternate this practice with the 75–minutes all levels. (fig. 162, pages 242–243)
90 Minutes Doron Yoga Vinyasa—Advanced
This is a master class—challenging and long—that works the entire body with some advanced poses. You can modify these to work with intermediate students as well. Skip some advanced poses, or modify them to work with your level. (fig. 163, pages 244–245)
|
standing forward fold (or holding elbows) |
wide leg |
pyramid |
tree (pictured) or dancer |
|||||
|
||||||||
|
||||||||
|
shoulder stand sequence (left to right: salamba sarvangasana, halasana, karnapidasana, matsyasana, vayu muktyasana) |
||||||||
|
final relaxation |
||||||||
Figure 159, 60 Minutes Doron Yoga Vinyasa—All Levels (left to right, top to bottom)
|
standing forward fold (or holding elbows) |
wide leg forward fold (ten breaths) |
pyramid |
dancer |
revolved side angle |
boat pose |
|||||
|
||||||||||
|
||||||||||
|
shoulder stand sequence (left to right: salamba sarvangasana, halasana, karnapidasana, matsyasana, vayu muktyasana) |
||||||||||
|
final relaxation |
||||||||||
Figure 160, 75 Minutes Doron Yoga Vinyasa—All Levels (left to right, top to bottom)
|
standing forward fold |
wide leg forward fold A |
|||||
|
tripod headstand (optional) |
pyramid |
warrior 3 |
standing splits |
|||
|
hand stand |
four limb staff |
upward facing dog |
downward facing dog |
|||
|
||||||
Figure 161, 75 Minutes Doron Yoga Vinyasa—Advanced (left to right, top to bottom) (cont. next page)
|
samasthiti |
revolved side angle |
bicycle yoga |
||||
|
locust |
half frog/quad stretch |
bow |
upward facing bow |
|||
|
upward facing |
supine twist advanced |
bound angle pose |
seated wide leg stretch |
|||
|
||||||
|
||||||
(cont.) Figure 161, 75 Minutes Doron Yoga Vinyasa—Advanced (left to right, top to bottom)
|
standing forward fold |
||||||
|
||||||
|
||||||
|
dolphin (pictured) or pincha mayurasana |
locust |
half frog/quad stretch |
bow |
|||
Figure 162, 90 Minutes Vinyasa Yoga—All Levels (left to right, top to bottom) (cont. next page)
|
|||
|
|||
|
|||
|
shoulder stand sequence (left to right: salamba sarvangasana, halasana, karnapidasana, matsyasana, vayu muktyasana) |
|||
|
final relaxation |
(cont.) Figure 162, 90 Minutes Vinyasa Yoga—All Levels (left to right, top to bottom)
|
crow |
||||||
|
standing forward fold |
wide leg forward fold |
wide leg |
tripod headstand (optional) |
|||
|
||||||
|
||||||
Figure 163, 90 Minutes Doron Yoga Vinyasa—Advanced (left to right, top to bottom) (cont. next page)
|
splits |
side plank variation |
locust |
shoulder stretch |
|||
|
bow |
pincha mayurasana (optional) |
camel |
king pigeon |
|||
|
twist with knees bent |
bound angle pose |
seated wide leg stretch |
three limbs facing one foot pose |
|||
|
||||||
|
||||||
(cont.) Figure 163, 90 Minutes Doron Yoga Vinyasa—Advanced (left to right, top to bottom)
Balancing Your Doshas with Asana
All sequences offered here can be used to balance your doshas. To balance vata, practice much more slowly, hold poses longer, and keep the gaze very steady; most deep stretch practices are suitable for this. To balance kapha, take extra sun salutes and vinyasas, practice what is challenging for you, and don’t hold poses very long. To balance pitta, soften your practice, breath, and attitude. See the Ayurveda section for further details.
Complementing Yoga
The asana practice of yoga as outlined in this book will give you most of what you need, as far as physical practices. The poses will stretch your body in every direction, and work most of your muscles. You are bearing you own weight over and over in yoga, as well as often having to work against gravity, which helps to maintain healthy bones and tone the muscles.
Most gym machines isolate your muscles and get you strong in very specific areas. Our bodies work in synergy; we use whole groups of muscles together. Yoga poses use many muscles all at once so you may not feel it the way you would when doing squat reps or some other gym training that is more focused on one area, but you will see your body getting toned all around.
If you would like to, you can mix in additional body weight exercise such as pushups, pull-ups, side planks, and other exercises that use your own body and gravity for work. You can do this with your yoga practice or at another time.
As for cardio, the sun salute will give your heart a bit of a workout, and most other challenging poses, such as deep backbends and some inversions, will get your heart rate moving up as well.
With this being said, I would advise you to do some extra cardio and other movement beyond your yoga practice. You do not need to train for a marathon or be a serious bike rider, but you want to be moving often, either as an additional training or through your daily tasks. It will keep you in better shape and have your energy flowing regularly.
There are many ways to get your heart rate up. I’m all about keeping it natural. I love hiking, long walks with short sprints, a bike ride, or a summer swim. Playing Frisbee or volleyball, dancing, and any sport done as a recreational activity are good choices, as well. Whatever you do, make sure you break a sweat. Do something you love, and you will notice you will also be happier.
Another great way to keep moving is simply to do more of life’s tasks on your own. Cleaning your home or car, walking to the store instead of driving, carrying your groceries instead of rolling them in a cart, and weeding your garden instead of hiring someone else are all examples. Think of living your life a bit more old school. Be happy when you actually have to do some physical tasks. Think of Karate Kid waxing the cars.
No matter what form of exercise you do, it is important to keep the core slightly in and lifted to support the lower back. Keeping the knees slightly bent is also very important to protect your joints. Practice with delight and to the level where you can still afford a smile.
The Benefits of Exercise
Humans are meant to move. In prehistoric times, and even after, humans were hunters and gatherers who would squat to start a fire, sprint away from danger, or walk long hours as they moved their residences to find a place with more food availability. This movement kept them in shape and supple. Since most of us drive, sit on chairs, and do not need to fetch water from the well, it is good to have some additional exercise practices.
Exercising will make you stronger—muscles will develop to protect your bones and tone your body. Your bones will also get stronger, as they need to resist the pressure put onto them. Moving the joints in a healthy manner helps sustain joint mobility and flexibility. Regular exercise will strengthen your heart and help keep your blood pressure under control, improving your cardio ability. No doubt that the more you use the lungs, and maybe even use them better as you learn pranayama, the better your control of the lungs and respiratory system becomes. This will help keep you young for the long term.
Your digestion will improve as well. Moving helps improve your digestion and your bowel function.
Exercising stimulates the release of endorphins, which improves mood, decreases stress, anxiety, and depression, and gives you an overall good feeling. This may even get addictive, but some “addictions” are good ones. Keep exercising regularly to maintain the natural high it offers. Since exercise increases the feeling of being energetic, light, and powerful, when feeling this high, I do not want to go eat junk food afterward, so it even encourages eating healthier. When you move, your blood flow increases to bring nutrients and oxygen to the entire body, including your brain, so yes, it also helps your mind!
Sleep is also improved, as when you exercise, hormones are released that will later help improve sleep and calmness. Okay, I think we can agree it is good to move!
Some Exercise Options to Complement Yoga
Walking: This is one of my favorites. Walk for a minimum of thirty minutes at a fast pace. Keep your hands moving with your body. Do a two-minute sprint every ten minutes. Try to walk when possible. Do you need to drive? Don’t worry about parking far away; the extra walking is good for you.
Swimming: This is fantastic as it both works your heart muscle and tones the whole body. For me it is also a sort of meditation and an opportunity to be absorbed by the water, like being in the womb, but with lots of space to move.
Dancing: I love any form of dancing, especially dances that encourage you to move your whole body in all directions. Some of the greatest dances are done barefoot, have no prescribed form, and allow you to move to your ability. Take a dance class or just go wild in your living room!
Biking: Get your cardio and strengthen your legs. Make sure you keep your spine long and not hunched. If you are going for long rides, try going at your full speed capacity once in a while to exercise your heart and lungs.
Running: A good cardio workout, running also strengthens the legs and glutes. My only hesitation with running is the possible damage to knees and the lower back. If you do decide to make running part of your cardio practice, take the extra time to learn how to do it properly. Keep the knees slightly bent, your body slightly tipping forward, and move each leg forward as if to keep from falling. Keep you lower back long, and try to keep a slight lift in your belly to support your back.
Traditional ways of living: Washing your car, cleaning your home, cleaning your bathtub, and any other work that could be automated or delegated to others can be a source of cardio exercise. You will gain strength, save energy, save money, and enjoy seeing the fruits of your own work.
Women and Yoga
For most of India’s history, primarily men practiced yoga. A big shift happened when Indra Devi, an Eastern European woman, asked Krishnamacharya—the grandfather of most yoga practiced today—to teach her yoga. Though he refused at first, her persistence and dedication convinced him to take her under his wing. Indra Devi later took this practice to California, where she taught many celebrities, and eventually to South America, as well.
Now that yoga is at least as popular with women as it is with men (probably even more so), it is important to understand a few specifics related to women practicing yoga.
Yoga and Menstruation
In Mysore, India, at Pattabhi Jois’s institute, women are asked to stay home and rest during their menstrual cycle. This is because of the idea that women have less energy during this time of the month and should rest. However, there are many women who actually feel more energized during this time, or at least still have enough energy to practice, either the same way or in a modified, gentler way. Today in the West, most women will still practice during menstruation, though they may stay away from inversions. They may practice poses such as downward facing dog and uttanasana (forward fold), but not poses such as salamba sarvangasana (shoulder stand) or sirsasana (headstand).
There has been much discussion about menstruation and inversion in the yoga world, but there has not been one clear conclusion made. Many teachers caution not to do inversions while menstruating. One fear that has now been disproven was that practicing inversions during menstruation would cause endometriosis. All agree now that inversions are not good for someone that already has endometriosis, but inversions do not cause it. If a woman already has endometriosis, then she should avoid inversions while menstruating.
Another problem that may occur if inversions are practiced while a woman is on her cycle is vascular congestion. This is not very common but may happen, especially during the first few days when bleeding is heavier or when inversions are held for more than a minute or two; however, there have not been any studies that confirm this.
In yoga there is an energy called apana, which is in charge of elimination and is said to move the energy downward. Some teachers claim that doing inversions during your period interferes with the natural downward flow that is supposed to occur. This interference may cause a temporary stop in the bleeding and heavier bleeding later on.
I have met many women for whom this is not true; they can practice inversions while menstruating and feel fine. If you want to be on the safe side during your heavy bleeding days, either skip full inversions and take legs up the wall, or explore them for a few breaths to see how you feel. Note how you feel a few hours later, as well. In general, it is not such a bad idea to back off sometimes and just take it easy.
Premenstrual Yoga
Before the menstrual cycle, many women have a variety of PMS symptoms, including irritability, bloating, headaches, and heaviness in the pelvic region. Some get more emotional than usual, and some even experience depression. The body and the mind are connected and affect each other. Yoga can help with these symptoms, but it is important to always listen to the body; you may need to go a bit easier than you normally would.
If you have strong PMS symptoms, instead of a full practice, you may decide to do some reclined poses, such as:
- • Supta padangusthasana (reclined hamstring stretch)
- • Supta baddha konasana (reclined bound angle pose)
- • Gentle reclined twists
Other poses that may feel good are:
- • Baddha konasana (bound angle pose)
- • Upavishta konasana (seated wide leg stretch)
- • Viparita karani (legs up the wall)
- • Prasarita padottanasana (wide leg forward fold)
- • Adho mukha svanasana (downward dog)
- • Bridge pose or supported bridge
- • Savasana (corpse pose) reclining on a bolster
Remember that we are all different. An advanced student is someone that knows to listen to his or her body, and feels what is right for them at that specific moment. Practice with awareness, and learn to be sensitive to your body’s needs. You are the ultimate judge of what is right for you.
As prehistoric humans, we were moving around, fast and slow, bending, squatting, running, crouching, sprinting, reaching, climbing, and yes, also resting. Today’s lifestyle is not natural for our human bodies. Yoga is a great tool to help us move the body in ways that balance out the modern way of living. Yoga and possibly some other physical activities keep you active, stretched, and healthy. This is true for your body, but not less important for your mind, and breath. When we practice yoga, we learn to focus on the breath, deepen it, stretch the lung areas, as well as focus the mind, release tension and stress, and find more peace. The stretching and twisting also helps our digestion, so not only is it important what we eat, but also how we digest. In India there is a folk saying, “You are what you digest”; so yoga and food are good partners.
Being active and practicing yoga is an important part of the flexitarian method, and of course a major part of the yoga lifestyle. Remember to show up. Make it a good habit to show up every day, even if you do just a little bit. Before you know it, you will not be able to live without it.
Next, let us see the sister practice of the yoga poses. Pranayama (breath work) and yoga asana (yoga poses) work synergistically, and support each other in helping you achieve long lasting, sustainable health and joy.

