Chapter 4
  Chapter 4
 “So fragile—the human body. Just one prick and it will draw blood. Just one bullet and the bleeding never stops.”
—TIANA DALICHOV
Some of the most common outdoor injuries are cuts, scrapes, and puncture wounds. Often these are minor injuries but sometimes they are not. Even if a cut seems minor it can become infected if left untreated and lead to sepsis, a life-threatening illness.
The main goal in treating any bleeding injury is to stop the bleeding. To do this, apply direct pressure. Don’t place your bare hands directly on a cut or wound. Use gloves or another impermeable barrier to protect yourself. See Figure 4.1.
If your patient has injured her arm or leg, raise the limb so it’s above the heart. This will help slow the bleeding and make your job easier. Press down on the area and maintain that pressure for five to ten minutes. After ten minutes, if the patient is still bleeding, spread the pressure over a wider area and maintain it for another ten minutes.
If the patient has lost a lot of blood, she may go into shock, indicated by rapid breathing and pulse and possibly loss of consciousness. In these circumstances, you should keep her warm and, if she’s awake, talk calmly to her to try to relieve her stress.
After you’ve stopped the bleeding, you will need to clean and protect the injured area. If the wound is very large or very deep, stop the bleeding but don’t try to clean it. Seek medical attention immediately. When possible, allow the injured person to do the cleaning himself, as he will be able to adjust what he’s doing to the amount of pain he’s in.
Remove any obvious debris by brushing it away with a clean cloth or by using a pair of sterilized tweezers or a blunt-ended needle to pluck it out (in a pinch, heat tweezers/needle with a lighter to clean it; allow it to cool before using). If the material is deeply embedded, do not try to remove it but instead seek immediate medical help.
Once you have brushed away or otherwise removed obvious debris, flood the area with a large amount of clean water to flush away any remaining dirt or debris (see “Cleaning the Wound” later in this chapter for more information). Cool water will probably feel more comfortable than warm or hot water. Use soap to wash around the wounded area but don’t try to dig into the wound itself (be careful when cleaning a wound near an eye so that soap does not get into the eye). The cleaning process may cause the wound to start bleeding again. If this happens, apply direct pressure to stop the bleeding.
Once the wound has been cleaned, protect it with a bandage and be sure to change the bandage at least once a day, or until professional medical help is obtained (then follow the medical professional’s advice). When possible, use nonstick bandages and dressings so that removing them does not cause the wound to start bleeding again.
The best way to clean a wound is by irrigation—that is, running a forceful stream of water over it. A syringe is helpful for doing this, and if you have room in your pack, take along a 20 cc syringe. If you don’t have one, cut a hole in a plastic bag and use that. If the wound is deep, disinfect some water and hold it 6–8" above the patient, then pour it onto the injury. Be careful not to let any of the blood spatter on you.
Cleaning a wound with soap and water is the best way to prevent infection. People often think using disinfectants such as rubbing alcohol, peroxide, or iodine can help clean the wound and speed up healing, but these chemicals are too harsh to use on damaged tissues and can actually slow down the healing process. You can use disinfectants on the skin around a wound to help keep it clean but don’t use them on the wound itself.
If you don’t have any commercial antibiotics for treating shallow cuts, use pine sap. You can easily gather it, and it will protect the wound from infection.
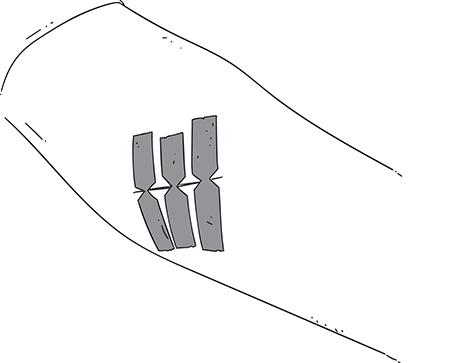
Make some butterfly bandages from a roll of Gorilla Tape. You can use them to hold the edges of the wound together. See Figure 4.2.
If you can’t get a wound to close with tape or butterfly bandages, place sterile dressings in the wound to keep it clean and protected and then cover it with a bandage. Change the dressings and the bandage itself at least once a day, until you can obtain help from a medical professional. Closing a wound is a way to help the tissue repair itself and to reduce the likelihood of infection but a wound doesn’t have to be sutured right away—sutures can still be placed by a medical professional several days after an injury has occurred.
Sometimes a wound can injure tendons, ligaments, or even bones. For example, if someone in your party cuts his hand and can’t move his fingers, it’s probable that he severed a tendon. To determine how serious an injury is, you’ll need to evaluate limb function. If an injury to the arm or hand has occurred, first check for the ability to move the hand and/or fingers. If the injured person can move them, check them for grip strength, which should be firm but not tight. If your patient has injured his leg or foot, place a hand on the bottom of his foot and ask him to press down. Then make the opposite test: put your hand over his foot and have him try to pull it up. This will tell you whether the blood is flowing as it should, how much strength there is in the limb, and whether the patient is experiencing pain in any kind of movement of his foot.
If a wound has injured a tendon, ligament, or bone, splint the affected limb to keep it immobile and protect the area. Although immediate professional medical care is desirable, tendon and other damage may be repaired even days after an injury.
There’s a difference between a dressing and a bandage. A dressing is placed directly on the wound, while a bandage holds it in place. You can make an effective dressing out of a piece of clean cloth. Double it over and hold it with a piece of Gorilla Tape. See Figure 4.3.
The main thing in applying a dressing is to be as clean as possible so as to avoid infection. To that end, wash your hands. If the cloth is sterile, that’s great, but if it’s not, you’re going to have to use it anyway. Find the clean part of it and use it. If time permits, boil it and let it dry before applying. Place the dressing material on the wound. If it’s a large wound, you may need to wrap the dressing around the wound. Maintain even tension to ensure that circulation is not cut off. Then secure the dressing by tying it, using tape, or with whatever improvised item you can find. For the wilderness first-aider, do what works!
As a wound scabs over and begins to heal, it will probably cause the dressing to stick a bit. Not only can this be painful when it’s time to change the dressing, but you need to be careful not to reopen the wound. You can get the dressing off by wiping around the stuck area with a damp cloth. As in all things in this book, be gentle and mindful of your patient’s discomfort.
You may need to dress and bandage a wound that has an open fracture (the bone is sticking out) or with embedded debris that cannot be immediately removed (such as glass or gravel that is not on the surface). In these cases, you will need to apply a no-pressure bandage so as not to cause the injured person additional pain. Use your bandaging material for this. Twist the bandaging material to create a rope-like effect. Shape this into a circle and place the center of the circle over the area you’re trying to protect. Then gently secure the material in place.
If you have applied a bandage correctly, the bleeding should be stopped (or slowed) and the wound protected. If you’ve applied the bandage too tightly, it can restrict circulation and cause tissue damage. If there is a blue tinge in the nail beds, a feeling of coldness, or an inability to move the hand or foot below the bandaged wound, it is a sign of a too-tight bandage. So is pale skin around the bandage, a tingling feeling or loss of sensation near the bandaged area, or pain around the bandaged area that isn’t because of the wound. If any of these things occur, it’s best to rebandage the wound.
A tourniquet is a bandage or other device that compresses a limb and its blood vessels in order to reduce blood flow. See Figure 4.4.
The use of a tourniquet is a last resort and in fact is rarely needed. Improper application of a tourniquet may cause permanent damage to the tissues of the affected limb, leading to dire consequences such as amputation. As we talked about earlier, you can use direct pressure, elevation of the limb, and pressure points to control external bleeding without the need of a tourniquet. However, sometimes you don’t have a choice: if the patient is continuing to lose blood, you should use a tourniquet.
Fashioning and applying a tourniquet isn’t difficult as long as you keep a clear head and follow these steps.
1. Placement of the tourniquet is important. You want to place it 2" above the injury. In case that puts you on a joint, go 2" above the joint. Wrap the area with the tourniquet material. If you aren’t using a professionally manufactured tourniquet, be careful with the one you’ve fashioned. The tourniquet should be approximately 2" wide and a few layers thick. Under no circumstances use rope or wire; they can further injure your patient. Belts aren’t generally flexible enough to tie tightly. It’s better to use a strip of cloth, a pack strap, a plastic drum liner, or something else that can be rolled up and tied.
2. Start tightening the tourniquet. When you see the bleeding stop, stop tightening. Leave it on until it’s taken off by a medical professional, since you don’t want to loosen clots. These can get into the bloodstream and cause considerable damage.
3. If the patient is being evacuated and you’re not going with him, pin a note to his clothing that will tell the doctor you’ve applied a tourniquet. It is best practice to place a TK (TK means “tourniquet”) on the patient’s forehead. Be sure to say when you put on the tourniquet.
Because of the way your body’s infection-fighting white blood cells work, redness, heat, and tenderness in the area around an injury are the first signs that an infection is occurring. In the event of an infection, the lymphatic system kicks into high gear, carrying away unwanted stuff in your body. For this reason, red streaks may appear on the skin, pointing toward the heart. The patient’s body temperature will increase—in other words, a fever—since some bacteria are negatively affected by heat.
An infection that starts to spread (indicated by the signs we just discussed) presents a serious danger to the patient. To treat it, you will want to draw bacteria from the wound in the form of pus. Soak a cloth in hot water and place it over the injury. If you don’t have antibacterial medicine in your first-aid kit look for natural means to halt the infection. Find some tulip poplar leaves and put them in a bandanna, which you then put over the wound.
Any infection that lasts more than twelve hours is going to do sufficient damage to the patient that he’ll require a hospital stay to fully recover. That being the case, your priority should be making and executing plans for an evacuation. This is especially important because it’s unlikely that a person with a fever and spreading infection can walk out on his own. At the same time, you want to keep everyone else in the group safe. If the patient’s skin is covered with boils or other symptoms, keep the rest of the party away from him.
Hot soaks can cause the wound to reopen. That’s not a cause for alarm, since it means the wound is draining pus and other harmful substances. Don’t make the hot soaks too hot, but make them as hot as is tolerable.
Once the wound has drained, prepare a new dressing. Twice a day, reopen the wound, drain it, and re-dress it.
Certain types of bleeding injuries require care beyond merely stopping the bleeding and cleaning and bandaging the wound. These special wounds require special care.
Sucking chest wounds are a special category of injury in which something has penetrated the chest wall. If the hole is a small one, the body itself will seal it (although this is still a serious injury). If the hole is too big for the body to self-repair, though, this is a sucking chest wound. A small wound such as one from a thorn can self-seal when the object is removed, essentially allowing the surrounding material to return to its proper position. In the event of a large penetrating object—such as impalement by an arrow or a broken-off tree limb—the hole is so large that when the victim breathes and her chest expands, she also sucks in air through the hole. If the injury isn’t properly treated, this can collapse the lung.
It’s not sufficient to put a dressing and a bandage over the injury. This is a wound you have to treat in a special manner: you have to make a valve.
From some nonstick material—for example, a piece of plastic—cut a piece three to four times bigger than the hole. Using Gorilla Tape, seal three of the four sides of the bandage and leave one side open. This creates what’s called a flutter valve. An inhale will pull the bandage down against the hole and prevent air from entering it. An exhale will push the patch away from the hole temporarily.
Flail chest is a serious condition that results from multiple fractures of the rib cage caused by blunt force trauma; this is common in the wilderness due to falls from tree stands, ATV accidents, and stumbles while hiking. What’s happened here is that some of the ribs have been separated from the chest wall. When the victim breathes out, these ribs will push against the skin, creating a bulge, which will disappear when he breathes in. The patient will have trouble breathing and, because broken ribs are extremely painful, probably express great distress.
Place a folded blanket or some other soft padding over the area. Be very gentle while doing this; after all, you’re dealing with broken bones. This is a case where you should try to evacuate the patient swiftly so trained medical professionals can deal with the situation.
Since outdoorsmen are often hunters, accidental gunshot wounds sometimes occur. A single bullet can cause multiple internal and external injuries. Treatments are very limited in remote locations, but the following options will be useful for four types of GSWs (gunshot wounds).
Treat superficial wounds as you would any other puncture wound. Apply pressure, dress the wound, and apply a pressure bandage. Keep in mind that a GSW may have caused damage in the tissue surrounding the actual entry point. Bullets rarely follow a straight line when they enter the body and the bullet may have ricocheted or bounced off a bone, creating fragments, so do a careful assessment of the injured person to be certain you understand the full extent of the injury.
Apply direct pressure and elevate the wound immediately followed by a pressure bandage. If it’s still bleeding, apply pressure to a pressure point then after thirty minutes if nothing has slowed, apply a tourniquet. The upper thigh is the site of the femoral artery. If the GSW is in that part of the body, apply a tourniquet immediately. Think about shattered bone fragments and internal injuries: if the area swells rapidly, that’s a sign of internal bleeding. If bones appear broken, you’ll need to immobilize the limb once bleeding is controlled.
Think about protecting the internal organs. Bullet damage to the hollow organs of the abdomen can lead to a number of harmful conditions including severe internal bleeding. If you discover protruding intestines, place a moist, sterile dressing on top of the wound (to protect the organs). If the intestines are damaged or torn open, immediate medical care is required. If the injured person does not bleed out first, he may likely die due to severe bacterial infection that will ensue. Make certain the injured person does not eat or drink anything until the pain lets up, then he should only sip clear fluids for a day or two after. Rehydration via IV fluids will likely be required once the injured person is in a hospital setting.
Spinal injuries and sucking air into the chest are two major concerns with a GSW to the chest. If the wound is open, creating a sucking chest wound, treat it as such by applying an occlusive dressing so that a lung doesn’t collapse. If you suspect spinal injury, do not move the injured person as fragmented bone or bullet particles could make the spinal condition and internal bleeding worsen. If the heart, lungs, or a major blood vessel is damaged, there’s nothing you can do in a remote area without proper expert medical care.
Most knife and axe injuries in the wilderness are superficial and can easily be controlled with direct pressure, elevation, and proper dressing and bandaging without the need for sutures or ointments.
For more serious wounds such as stabbings and deep lacerations, stopping the blood loss is of immediate importance. You can best accomplish this by using clotting agents, tampons, scarves, shirts, or other sterile absorbents.
Many plants contain tannins. These are a drying as well as constricting agent, and they work well in masticated or powdered form to help stop bleeding. Depending on the type of wound you may use different types of plants as aid if you have nothing else. Yarrow flower tops and leaves work well for deep gashes, and common goldenrod works well on superficial bleeding. Many plants are absorbent to some extent and can be used directly for bandages or as a medium between layers to absorb blood. Mullein has large, broad, soft leaves that will work as standalone gauze, while you can use things such as cattail fluff as a batting material to help soak up blood in between dressings. See Chapter 16 for more information on using plants to help heal injuries and illnesses sustained in the wild.
As a general rule, wounds that remain closed on their own do not require sutures; you can clean them and keep them closed with butterfly bandages or duct tape. Deeper wounds that remain open on their own, however, should not be sutured in the field due to the likelihood of bacterial infection and the possibility of them constantly opening back up. So keep those types of wounds clean and covered with dressings and bandages.
When medical help is less than an hour away, you can get away with a lot more in wound care. Wash it out with whatever clean water you have and slap a bandage on it, and you’re pretty much good to go.
TIPS AND TRICKS
• Use a credit card or driver’s license as a “dressing” to help stop bleeding and protect a wound.
• Sterilize cloth in the wilderness by boiling it and laying it out in direct sunlight to dry.
• You can create simple bandages using 1"-wide duct tape and a small square of cotton T-shirt.
• You can make a fomentation to treat local swelling from abrasions by soaking a piece of cotton material in an infusion of anti-inflammatory herbs such as plantain or jewelweed. See Chapter 16 for more on fomentations and infusions.
• Large mullein leaves make a fine emergency replacement for feminine pads if the need arises.