VEGETATIVE GROWTH
As soon as the roots have adjusted to the new environment, it is time to increase the light and nutrients. Firm, turgid leaves and new growth are indications that the plant is ready for rapid growth. The plants should be kept on a high N fertilizer regimen until they are put into flowering. “Grow” formulas that include micronutrients support rapid vegetative growth. (See Nutrients & Fertilizers.)
Indoors
Vegetative growth can be started indoors any time it’s convenient because the grower determines the plant’s environment and simulates seasonal variations by adjusting the periods of light and darkness.
Outdoors & Greenhouses
To prevent burning, slowly acclimate plants rooted indoors to higher light. Plants rooted indoors to be planted outdoors should be shaded as they acclimate before being placed in the full sun. Seedlings can be started in full sun as long as care is taken that they do not dry out during germination. Gardeners using natural light as either a primary or a secondary source must take the seasons into account. Planting time and strategies vary depending on the environment.
The earliest that seedlings or clones should be planted outdoors is when the soil temperature three inches (7.5 cm) below the surface reaches 60°F (15.5°C) in the afternoon and slips no lower than 45°F (7°C) at night. They can be planted when ground temperatures are lower, but growth will be slow until the ground heats up. In areas where there are four distinct seasons, clones or rooted cuttings should be planted outdoors at the same time as tomatoes. Almanacs can be checked for optimal planting times based on local microclimate zones. Light deprivation may be needed to prevent flowering.
No matter what time plants are transplanted outdoors, they will flower in the fall, although ripening times differ by cultivar, except for autoflowering plants. No artificial light is needed as long as there is plenty of sunshine.
At higher latitudes, the intensity of light that plants receive from the sun in early fall is a fraction of the light in early summer. The available amount of UV light also decreases the farther away from the equator one cultivates. As discussed in more detail in the Lights chapter, artificial light can be used to supplement the plants’ lighting needs in the fall.
The sun’s angle changes over the growing season, so plants that were in direct light in spring and summer may be shaded in autumn. Strategic planting will anticipate where the sunny areas will be during flowering, growth, and ripening.
Plants in containers can be moved, following the sun either daily or seasonally to provide them with more direct sunlight. Plants in the ground that are shaded require supplemental light to grow and ripen properly.
On overcast days, clouds absorb most of the light, so they delay ripening. Even sunny gardens receiving direct but weak sunlight may require more light for the buds to develop well.
Providing plants with supplemental light during the brightest part of the day may be all that is needed to help the buds mature in early fall. (See Light.)
Gardeners in lower latitudes, such as Mediterranean and subtropical regions, can grow outdoors virtually the entire year. These areas include the southern tier of Europe, the southern tier of the United States, and all of Mexico and Central America. Therefore, in these zones day length and light intensity do not vary as much between summer and winter as in higher latitudes.
Most indica and indica-dominant hybrids are early ripening, because they require the least amount of uninterrupted darkness to flower. Depending on latitude, some varieties trigger almost immediately when placed outdoors; for them, the night length is long enough in summer to promote flowering.
One strategy for taking advantage of this is to grow plants indoors until they reach the desired size, then set them outside to flower. Indica-dominant varieties slow their rate of vegetative growth quickly once they start to flower. They may grow only 25 to 100% of their size in this period. Sativa-dominant varieties may continue to grow vegetatively for the first several weeks of the flowering cycle. They can triple or even quadruple in size. Other strategies include keeping small plants in vegetative growth by interrupting the dark period. However, to grow larger plants without effort, growers choose more dark-tolerant cultivars.
Sativas and sativa-dominant hybrids are usually late-season varieties that require a longer dark period to flower. Some equatorial sativa varieties do not start to flower until early fall and don’t ripen for two to three months. In winter, flowering is induced quickly, but the plants may continue to grow vegetatively for a month or more before they concentrate their energy on flowering. The result is that they can be planted anytime of the year. Sativas set out between late summer and midwinter will ripen within 120 days. Plants transplanted outdoors in the spring and summer flower in late fall in warmer microclimates.
Dedicated flowering greenhouses can be used to grow up to six crops a year using supplemental light, with a separate vegetative area. The determining factor is root and air temperature. Plant growth is slow when air temperature is below 60°F (15°C). It quadruples with adequate light as the temperature increases from 60 to 80°F (15 to 26°C). At the same time, ground temperature below 65°F (18°C) hinders root function, which affects the supply of water and nutrients to the canopy. Supplemental heating of containers will ameliorate the problem. With this in mind, the garden plan should be based on average temperature for the zone, which can be found in almanacs or on the internet. If the plant roots are kept warm, the plant canopy does better in cool weather.
Outdoor subtropical zoned gardens can be planted all year. In other warm areas, where spring comes early, gardens can be planted in mid to late winter, as the sun’s intensity starts to increase. In areas that are in zones that are cooler, row covers can be used to keep the plants warmer.
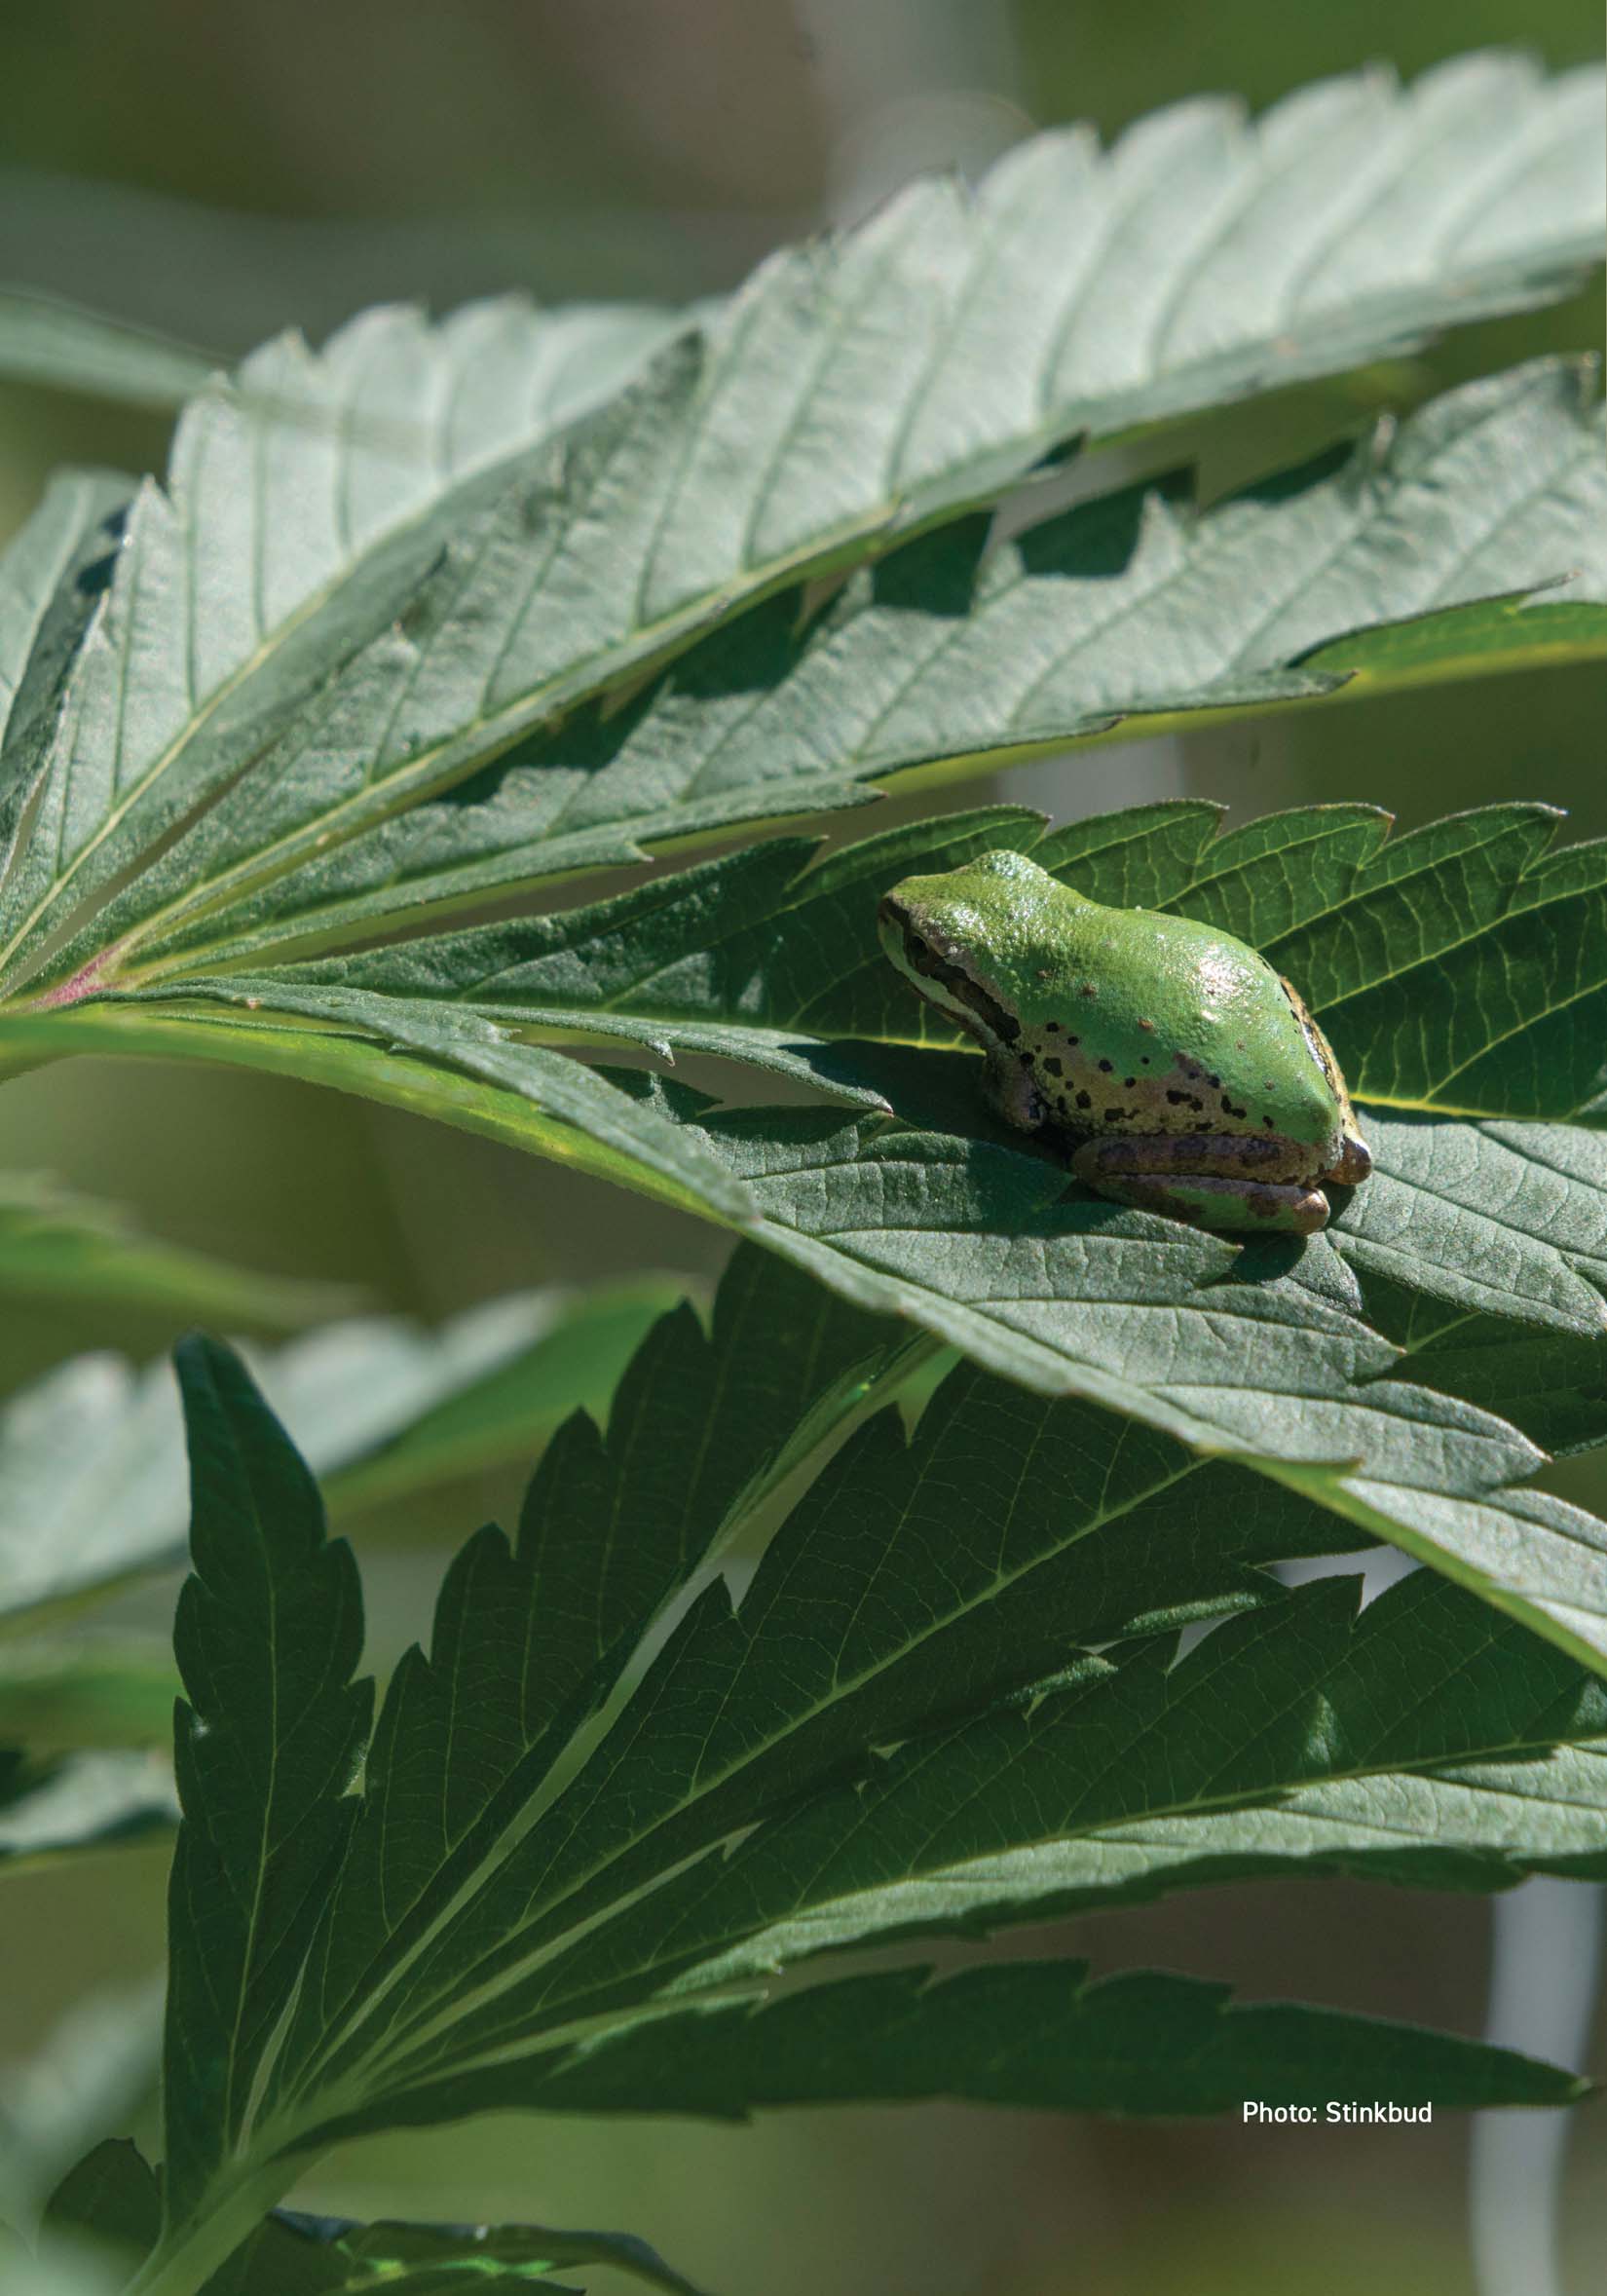
Row covers keep the garden warm and sheltered from the cold, wind, and rain. Photo by Brian Walker Courtesy of Central Coast Agriculture
Young plants placed outdoors immediately start to flower, because the night period is still longer than 12 hours. Indicas and indica-dominant hybrids continue to flower as the days get longer. However, sativas and sativa-dominant hybrids revert to vegetative growth unless light-deprivation techniques such as blackout covers are being used.
In some areas, it’s just too cold to plant in late winter or even in early spring, but passively heated greenhouses move the planting period forward three weeks or more. A heated greenhouse can overcome inclement and cold conditions, but cloudy spring skies may not provide quite enough light to the plants. LEDs or HID lamps can be used to supplement the light for five or six hours during the brightest part of the day and to increase the number of hours of light during the winter. Systems that measure sunlight and adjust lamps keep the light levels constant and the greenhouse running at top efficiency.
Removable tunnels, often called row covers, are another way to get a jump on the season. They keep the outdoor garden warm and sheltered from the cold, wind, and rain.
Row covers are easily constructed using rebar or metal pipe covered with (6 or 8 ml) clear polyethylene. The plastic is removable, so it is placed over the plants only when there is cold or inclement weather. In early spring, it might be used nightly. The tunnels should be constructed about 6 feet (1.75 m) high so they can be used for forcing flowering with blackout covers later in the season. This process is known as light deprivation and is covered further in the Flowering chapter. They are often 10 feet (3 m) wide, but can be designed for any width.
One design has two sheets of polyethylene, one on either side of the frame. The first sheet is clear plastic and is used to cover plants in cold or inclement weather. The other is panda plastic, which is white on one side and black on the other. Panda plastic is used as a blackout curtain for light deprivation. It is placed white side out to reflect sunlight so the air inside the tunnel doesn’t heat up.
Using a tunnel or a greenhouse, it’s possible to manipulate the light cycle to either prolong vegetative growth or to force the plants to flower. Using these techniques, a crop can be produced in 90 days or less.
One greenhouse strategy is to plant in early spring. The plants will ripen in the late spring or earlier. Immediately after harvesting, the next crop is planted and will ripen by late summer or early fall. A third crop is then started. It will flower immediately and is ready by midfall. The second and third crops could be started in a smaller area while the current crop is still growing. They could be in the “flower field” for a shorter time, increasing the number of harvests annually.
There are several advantages to forcing an early harvest other than trying to produce multiple crops:
- The crop is less vulnerable to thieves, who look for gardens primarily during the fall harvest season.
- Plants harvested in summer are less susceptible to mold or the vagaries of weather that plague farmers in the fall.
- Total light intensity is lower in the fall than in summer, so the buds are not as large or potent.
- The bud quality is higher when plants flower and are harvested under the strong UV rays of summer rather than in autumn, when UV light is declining. High UV light increases potency.
During early spring, plants usually require an interruption of the night cycle (or extension of the light period), so they do not go into the flowering stage prematurely. Lights on a timer are used to interrupt the dark period briefly during the night.
A 400-watt HPS covers an area of about 600 square feet (55 m2) with enough light to stop flowering. HPS reflectors are available that oscillate a 1,000-watt lamp, which covers 1,500 square feet (130 m2). HPS lamps and warm white fluorescents emit a high percentage of red light, the spectrum used by plants to prevent flowering.
String or strip red LED lights that produce this spectrum are used but need to be rated for outdoor use (IP65 and above).
Compact fluorescent lights (CFLs) can be set out at a rate of one 24-watt bulb per square yard (0.8 m2). Flash the lights on for a minute using a timer at least once during the middle of the dark period. Several light interruptions may be more effective. Gardeners with large spaces sometimes stagger the timing of the night lights.
Indoor Greenhouse Manipulation
Growers can use a combination of indoor and greenhouse or outdoor gardening. Plants are started and initially grown indoors to get a head start, then moved outdoors. By starting early with large plants, the grower can get a jump on the season. This is how growers on the West Coast of the United States grow giant outdoor plants; the plants are started indoors as early as midwinter and may be six feet (1.8 m) tall by the time they are transplanted outdoors into raised bed or soil.
Another strategy is to start plants early indoors using autoflowering varieties. When the weather becomes favorable, they are moved outdoors. Meanwhile, another crop is started outdoors and is transplanted after the first crop is harvested. Use a standard variety if the season is short, or an autoflower if the season is longer. Long-season growers can plant a third crop that will mature in the fall.
Plants grown indoors that are placed outdoors during late spring and summer usually need to adjust to the harsh UV rays by being kept in the shade at first, using an antitranspirant, or covering the canopy with shade cloth. New growth will adjust to new conditions.
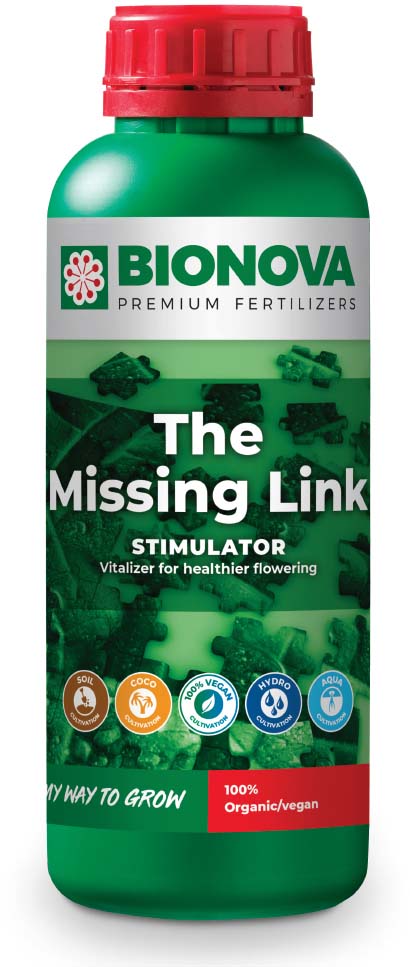
The Missing Link by Bionova stimulates the natural immune defense system of any plant, prevents most deficiencies, and leads to both higher-quality and higher-yielding crops. Growers apply it on the roots or as a foliar feed during vegetative growth and early flowering, on mother plants when clones are cut, and on seedlings and cuttings to prevent infection and disease.
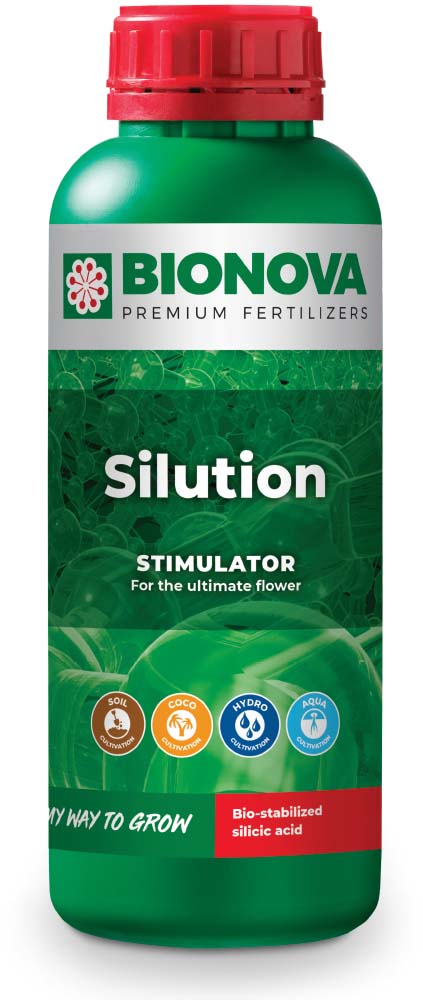
Bionova Silution is a plant-strengthening liquid stimulator based on mono-stabilized silicic acid and fulvic acid that stimulates nutrient uptake and defense against viruses and infections, resulting in more dry weight. Silution helps crops develop a higher resistance to the negative impact of stress and temperature extremes, as well as stronger cell walls, stronger defense against plant infections and pests, and a higher weight at yield.
Nutrients for Growth
Cannabis grows very quickly when supplied with ample amounts of all its requirements, including nutrients, during the vegetative stage. If the soil or planting mix cannot meet the plants’ nutrient needs, the plants require fertilizers.
If the plants are suffering from a particular nutrient deficiency for a short period of time, supplying that individual nutrient puts them back on track. There are many brands of organic and mineral nutrients available. Most of them have been on the market for many years and have a long successful history of providing quality products.
Always use a control when testing a new product. Friendly garden “mavens” and garden shop employees are always suggesting mixing recommendations or odd combinations of products. The grower may also wish to compare two fertilizers and see how their performance in the garden differs. A wise gardener tests the suggestion on just a small group of plants first to see if the recommendation is beneficial or perhaps harmful.
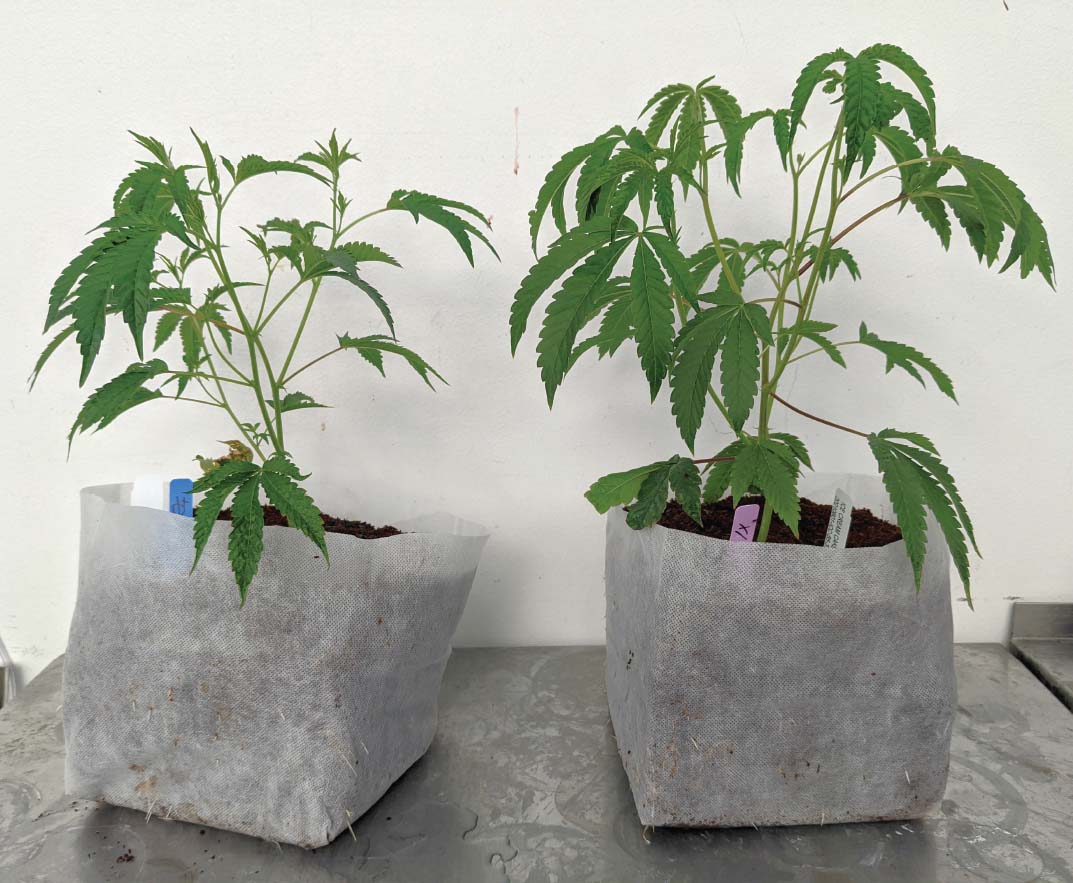
These clones were planted at the same time and received identical inputs, except the plant on the right was treated foliarly with PowerGrown’s Triacontanol and Brassinolide Cannabis Kit. When used correctly, triacontanol can significantly increase the amount of chlorophyll in leaves, improving the rate of photosynthesis as a result. It can also destress plants. Triacontanol can also be used to help fight disease in plants, ward off potential disease, and act as an anti-aging agent. As a nutrient uptake enhancer, it can also aid plants suffering from poor nutrient intake or other growth deficiencies. For R&D use only.
Watering & Irrigation
Cannabis is a water-loving plant. It thrives in moist soil and responds to dry conditions first by slowing and then halting photosynthesis. As dry conditions continue, the leaves lose turgidity and wilt. Then they dry up. Even a short period without water can result in a dead plant unless the plant is “dry farmed” or other measures are taken for it to thrive in a low-water climate. (See Dry Farming with Sunboldt Grown.)
Cannabis that has easy access to water can grow to its full potential. This translates to maintaining a moist, but not waterlogged, growing medium. As the growing medium dries, the plant’s ability to move water into the roots becomes more difficult. The water tension increases as a result. Water moves from the growing medium into the roots, up the stem, and finally out the stomatal pores in the leaves. If the growing medium dries too much, the increased water tension disrupts water movement into the plant and up to the leaves. When there is a continued water deficit, the first thing the plant does is close the stomata on the leaves. With the stomata closed, the plant cannot absorb CO2, resulting in the cessation of photosynthesis. At the same time, it transpires water to keep cool. This results in loss of water and turgidity, causing the leaves to wilt.

Outdoors
Under natural growing conditions, cannabis planted outdoors uses between 20 and 30 inches (50-75 cm) of water over the season. Most of it is used in the summer, when the plants are in the vegetative stage and growing rapidly. This is also the period of peak temperature, so the plants’ use of water increases dramatically because it is used for both photosynthesis and transpiration. Photosynthesis increases in relation to higher light intensity and rising temperature. At its peak, this process uses large amounts of water. Transpiration increases with more light and heat, as it helps cool plants through water evaporation and draws more water from the roots.
Many factors affect how much water is available to an outdoor garden. In areas where there is regular rainfall or a high water table, plants may need no irrigation. However, areas with a Mediterranean or desert climate, where there is very little rainfall in the summer, cannot support plant growth without irrigation. Water availability also varies by soil type. Clays, mucks, and loams with high content of organic matter hold more water than sandy soil.
Water loss to soil evaporation can be eliminated or slowed using mulch, pebbles, or plastic sheeting to keep soil cooler by protecting it from the sun. Container systems that catch and recycle the excess water that would otherwise drain past the roots also conserve water.
Plants growing in soil or soilless mixes should be watered before the medium dries out, but only after the top inch or two (2.5-5 cm) has lost a bit of its moisture. If the soil or mixture drains well, overwatering does not create anaerobic conditions because the excess water drains. However, soluble nutrients are leached out by overwatering, and unnecessary water use can be costly and environmentally unfriendly.
Roots require oxygen to function and thrive. They have problems with some soils not because they are too wet but because they have too fine a texture and do not hold air between the particles. When roots have no access to air, they become stressed and susceptible to attacks by pathogens. Interestingly enough, sometimes too much water will look like too little water because too much water can cause an oxygen stress that results in leaves wilting. Wilting leaves as a result of prolonged root oxygen stress can usually be relieved by letting the growing medium dry out, which seems counterintuitive when the leaves are wilting. (For more on this, see Soil.)
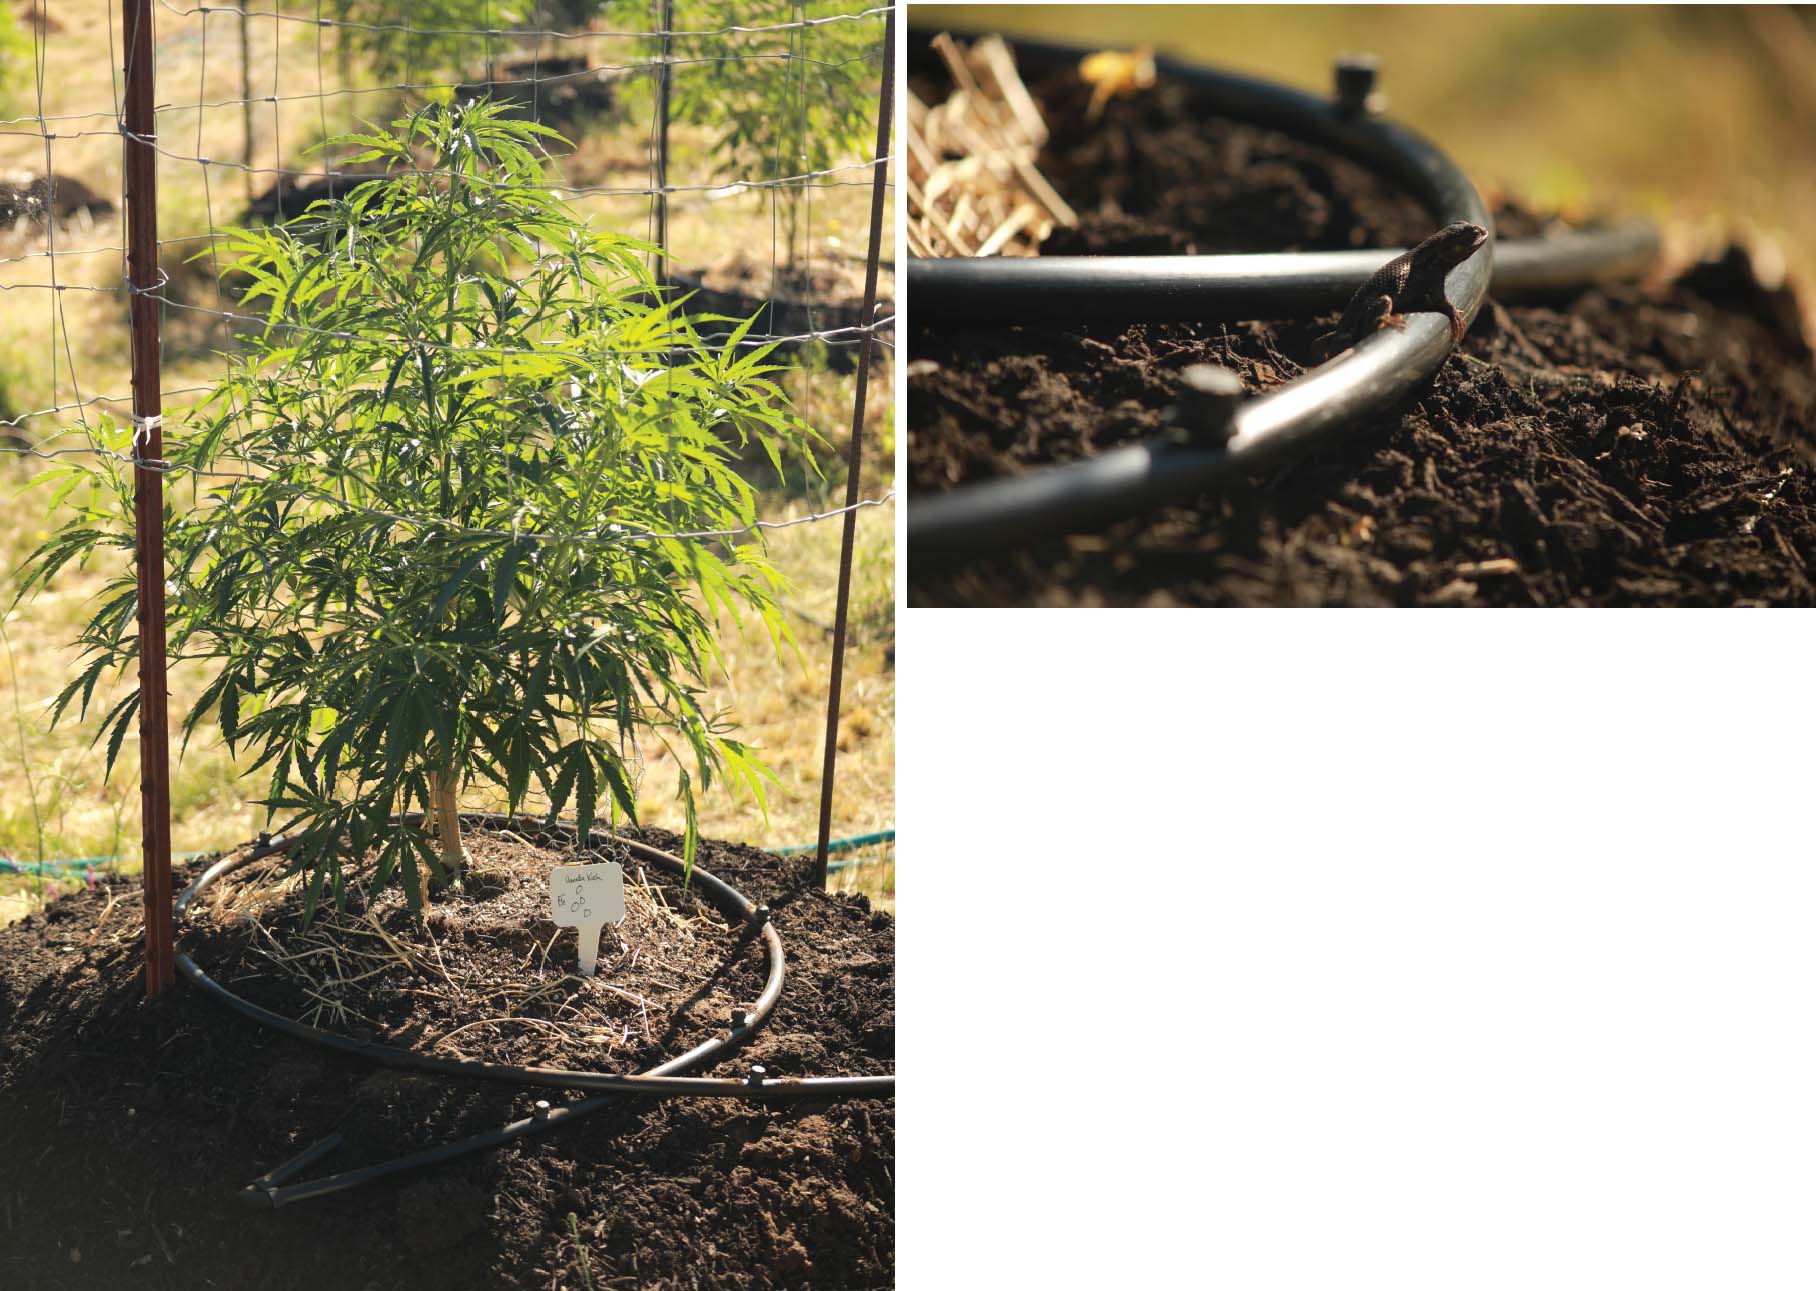
Drip irrigation is an effective way to conserve water outdoors. Photos: Mendo Dope
Hydroponic Water Use
Hydroponic gardens typically use one half to two thirds the amount of water that plants grown in the ground require because almost all the water in a hydroponic system is used directly by the plant.
Gardeners using hydroponic systems just add water to the reservoirs, replenishing water that is either lost to evaporation or used for transpiration, photosynthesis, and general metabolism. Before adding water, it is necessary to check the nutrient levels of the water-nutrient solution remaining in the reservoir. The nutrients in the water to be added are adjusted so that when they are combined with what remains in the reservoir, the pH and nutrient levels are within an acceptable range.
Growers using active hydroponic systems, such as drip emitters or ebb and flow, should adjust the watering cycle so that the medium never loses its moisture. Each type of medium retains a different volume of water, but media for active systems should drain well so that the roots are always in contact with air. The plant’s size and growth stage, as well as the ambient temperature and humidity, all affect the amount of water used, so adjust the cycling schedule accordingly.
Indoor Watering
As with plants growing in the ground outdoors, plants growing in soil or soilless mixes indoors in containers need water once the top layer is no longer moist but before the soil in the root zone dries out. Overwatering is not a problem so long as the soil or planting mix is porous and drains well. Additionally, overwatering in well-draining hydroponic growing media is nearly impossible as long as the nutrient solution is thoroughly oxygenated.
Roots remain healthy as long as a medium allows both air and water to penetrate. If the roots do not have access to air, they grow weak and are prone to attack by bacteria. Planting mixes vary greatly in both their water- and air-holding capacity, so the watering regimen must be developed based on the medium and plant size and growth stage.
When plants are small, they use less water. As they grow, their water needs increase, so the watering schedule should change. In general, plants require more water during vegetative growth than during flowering; however, even during flowering, plants are most productive when they have easy access to water. During the last two weeks of flowering, plants grow more slowly, use less water, and need fewer nutrients.
Some growers withhold water for several days before harvesting. This results in a slightly smaller yield but may slightly increase potency. A better practice is to limit fertilizing to improve bud flavor.

Spray-N-Grow Micronutrients® is formulated with the full spectrum of 16 naturally occurring micronutrients in a single foliar spray. Used in conjunction with a macronutrient solution it optimizes plant growth and bud production, and increases yields, flower size, and root mass. In studies conducted on lettuce, tomatoes, snow peas, and strawberries, it increased fruiting, yields, and weight of the finished harvested crop.
Maximize absorption and improve the efficiency of any nutrient by using Coco-Wet Wetting Agent. Coco-Wet is a natural wetting agent with a nonionic formula that makes it compatible with any nutrient product. Whether in a foliar spray or in the reservoir, improve the absorption of nutrients and achieve optimal results with Coco-Wet.
Foliar Feeding
Plants can absorb both water and nutrients through their leaves, so the nutrient-water solution supplied to the roots can be misted on the foliage as well. Leaves have stomata that serve the same purpose as pores: They open and close as needed to regulate the absorption of CO2, water, and nutrients. Foliar-fed plants grow faster. Foliar feeding also saves fertilizer compared with soil; a higher percentage of the fertilizer is more quickly absorbed than with conventional methods.
Foliar spraying should be done at least an hour prior to lights on or after lights out. Be sure to spray generously, in particular the underside of the leaves. To help the foliar spray stick to the leaves, use a few drops of a wetting agent or liquid soap such as Dr. Bronner’s Hemp or Castile soaps.
Foliar feeding is especially helpful when plants are suffering from a deficiency, because the needed nutrients are delivered directly to the leaves.
Foliar feeding can be started as soon as the seeds germinate. Once they have roots, clones grow faster when they are misted with a water-nutrient solution. Since the ability of young plants to absorb water is limited, a dilute nutrient solution spurs growth. Continue foliar feeding during vegetative growth and early flowering. Stop spraying once the flowers are three to four weeks old and are beginning to develop water-trapping crevices. Buds at this stage are susceptible to mold and infections promoted by excess humidity.
Sea of Green (SOG)
In traditional planting a high proportion of the plant’s life cycle is spent by growing infrastructure to fill space in the canopy. For instance, a plant that is to occupy a four by four foot (1.2 by 1.2 m) space may take 45-60 days to fill the canopy. A three by three foot (90 by 90 cm) space can take 60-90 days. During that time it is occupying space and growing vegetation that will never be harvested.
In a sea of green garden, each plant only has to grow a small fraction of space to fill the canopy. Photo: Angela Bacca
Instead, using the sea of green (SOG) method, each plant in the canopy is assigned a space of six by six inches (15 by 15 cm) to one by one foot (90 by 90 cm). Each plant has to grow only a small fraction of the space to fill the canopy. The time the plant spends in vegetative growth producing infrastructure is reduced to a fraction of the time it takes to fill a larger space, and only a fraction of the energy required to build a larger infrastructure. As a result, less time and space is spent in growth that is not producing harvestable material. That is the essence and efficiency of the SOG.
In a SOG garden, plants are placed together very closely so that each plant needs to grow a little bit to fill the canopy. Plants are forced to flower by switching the photoperiod to bloom. The timing of the lighting regimen change ranges from zero time in vegetative to about two weeks depending on the cultivar and the size of the assigned space.
SOG has a lot of advantages and a few disadvantages over traditional cultivation:
- The number of crops per year is increased because little time is spent in the vegetative cycle. Almost all the plant growth is used to produce flowers.
- Because the plants are close together, the number of top buds is increased. This short-cropping method produces approximately the same yield per crop as with larger plants. Same yield, shorter time.
- The plants remain short, usually no higher than 3.5 feet (1 m), so a grow area can be stacked with two, three, or more layers, taking advantage of the vertical space.
- This method can be used with either seeds or clones, but for best results the plants should be uniform so that no single plant dominates an area.
- Very little time is spent tending plants because the plants don’t have time to develop extraneous growth. They need little support, but sometimes netting is used to keep the plant tops in place. Usually the plants need little pruning, which goes faster, since the plants all have single stems.
- Although the plants are very close together, there is less opportunity for pest damage because the plants are in place for a much shorter time, giving the pests less time to build up harmful numbers. It’s easier to contain the infection, because they are in plain sight rather than hidden in dense foliage.
- This method is well suited mostly for commercial growers because home growers often run up against plant number restrictions.
Eliminating the vegetative growth stage decreases turnaround time. SOG gardens hold one to four plants per square foot (0.09 m2). Spacing depends on several factors:
- Number of clones available: A shortage of clones can be a key limiting factor in determining spacing. Divide the space by the number of clones to find the best available spacing.
- Cultivars differ in their growing pattern: Plants with less side branching can be placed closer together than plants that side branch. Trim off the side branches to place side-branching plants closer together.
- If growing in containers, choose the maximum cubic space possible: For instance, plants being spaced at 12 inches (30 cm) should be planted in 12 or 10 inch (25 cm) containers. Plants spaced at 6 inches (15 cm) should be planted in 6 inch square containers if possible. Square containers hold more medium than cylindrical.
- Space: A raised bed or soil-filled tray, rather than individual containers, is used to provide the most planting mix in the space. Rockwool 6 inch (15 cm) blocks are often used because they are easy to set up and provide adequate space for the roots.
- Plants mostly forgo side branching when placed close together.
SOG Tips
- Lower leaves can be trimmed off. However, if there is good air circulation in the garden, there is no reason to spend labor trimming them. They won’t interfere with the top buds, so most of the lower leaves can be left on.
- Although breeders recommend certain varieties, most varieties can be used because when plants are placed close together, they tend to grow vertically rather than spread out with side branching.
Clones versus Seeds: Which Is Better for SOG?
As the name of the growing method suggests, the goal of SOG truly is to achieve a sea of uniform, as close to identical as possible plants. SOG production has many advantages as previously stated; however, the choice of sourcing plant material strongly leans toward using clones as opposed to seeds.
Seeds result in more heterogeneity than clones simply because seeds are the result of sexual reproduction. Large-scale seed production requires two separate parents to hybridize. The resulting seeds will have genetic variability, which manifests as slightly different phenotypes with differences in cannabinoids, potency, flower development, height, or flowering time.
Having plants develop at different rates is detrimental to any large-scale production, but especially SOG. Since there are so many more individual plants to harvest, the chances of differing ripening times are greater. Additionally, if a few plants here and there are taller than the rest of the canopy, they will shade the plants immediately surrounding them. Uniformity is very important in horticulture in general, but its need is amplified in SOG style of production.
On the other hand, clones are genetically identical, so there is more uniformity. Growing with clones removes a pretty significant obstacle to achieving a uniform canopy: different genetic makeup of the individual plants in the canopy. Since SOG does better when the canopy is uniform, clones are the preferred method of obtaining genetic material for production. Although it is not impossible to grow in SOG fashion with seeds, it is better for a more uniform canopy to use clones.
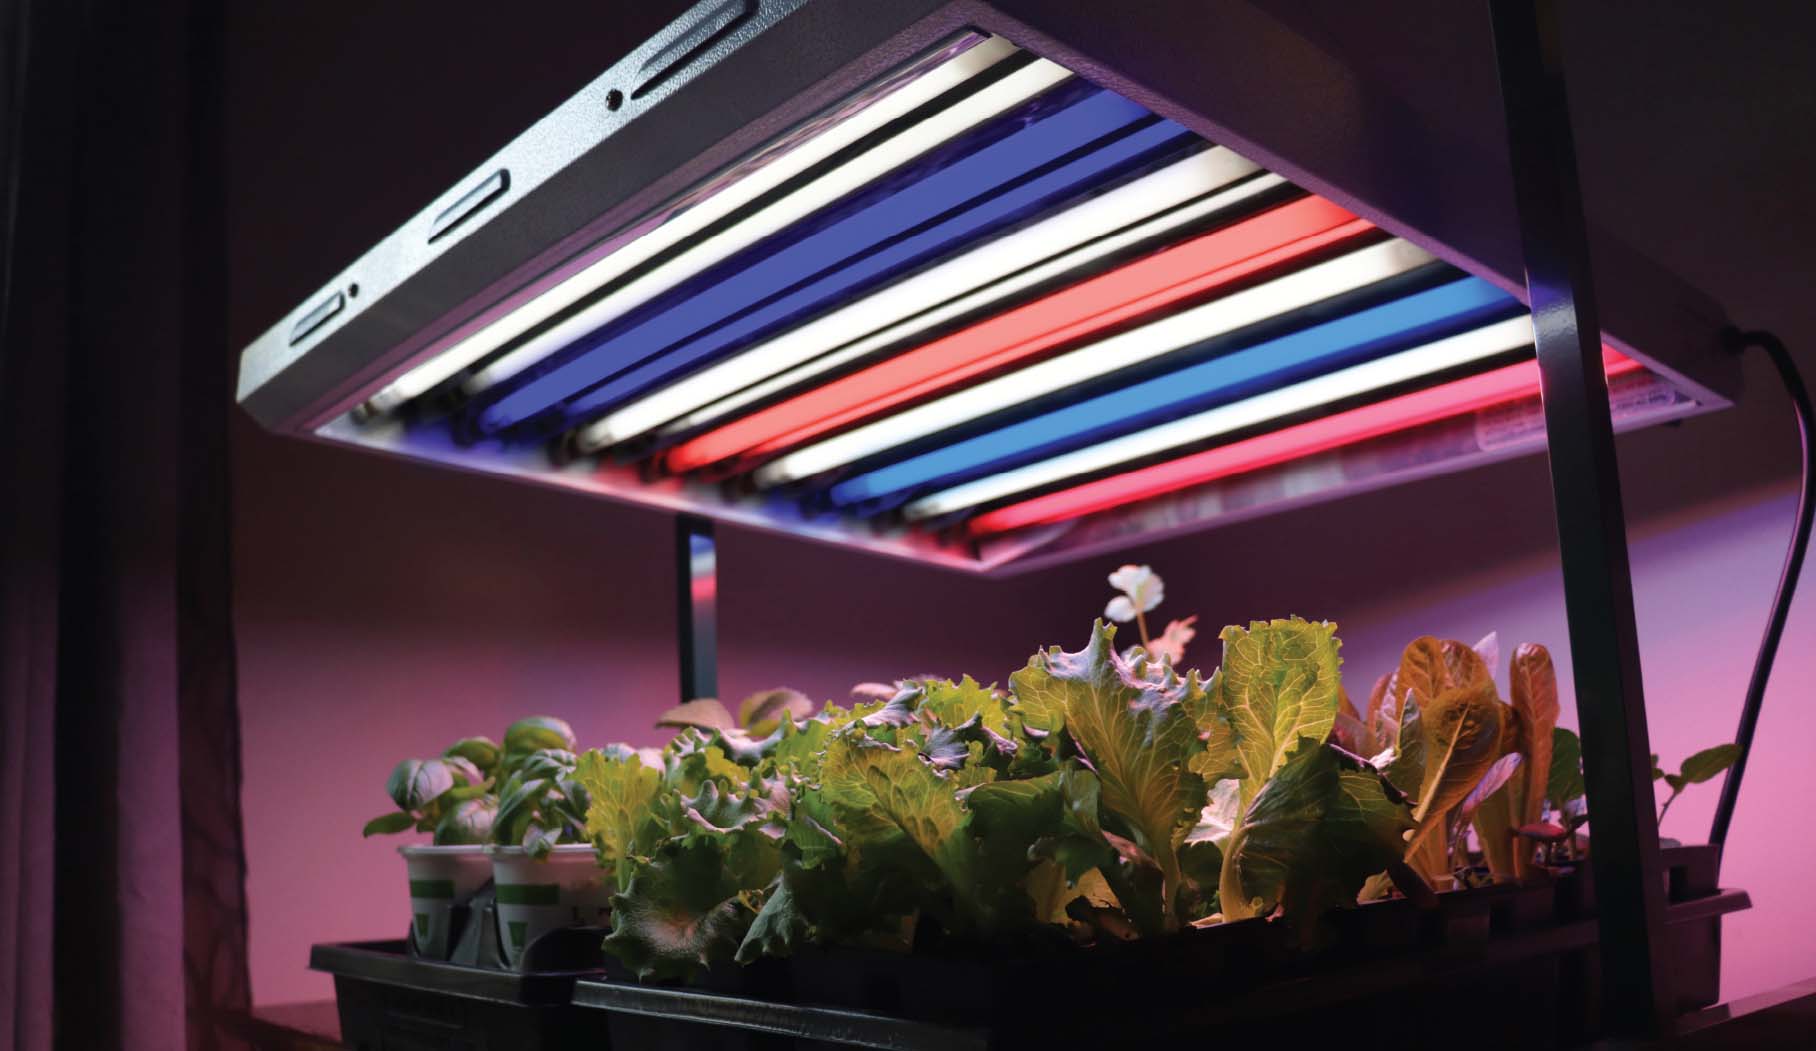
The EYE Hortilux PowerVEG FS+UV (full spectrum plus ultraviolet) is a fluorescent T5 lamp that provides plants with a well-balanced spectrum and UV light. The spectrum closely mimics natural sunlight and promotes extreme photosynthesis for faster growth, creates a stronger root system, enables easy transition from indoor veg to outdoor flowering, helps to develop stronger, healthier vegetative plants that will produce higher yields and higher-quality crops, vivid colors, more flowering, and better-tasting crops.
by Royal Queen Seeds
Screen of Green (ScrOG) is a training technique that forms an even and horizontal canopy. There are myriad benefits to creating this botanical structure.
Left to their own devices, cannabis plants grow taller than they do wide. The ScrOG technique aims to bring the lower branches up and the upper branches down, stretching them across an evenly distributed plane. By placing a screen above the growing medium, cultivators weave branches through the mesh as plants grow and mature. By redirecting individual branches and running them lengthwise across the screen, growers achieve a flat horizontal canopy.
But why ScrOG in the first place? Well, the technique offers plenty of advantages, including:
- Light exposure: A ScrOG canopy receives even light exposure. Untrained cannabis plants feature one main cola that rises above the rest of the plant, resulting in uneven light distribution. In contrast, there is no shading because no plants are taller than others.
- Yield: Because all bud sites receive adequate light, they maximize their photosynthetic potential, leading to an increase in size and resin production. This level of training also transforms the main stem and central cola into a multitude of both.
- Aeration: The horizontal screen of green receives adequate airflow above and below the canopy. The addition of a fan further enhances this benefit, reducing the risk of fungal pathogens.
A Screen of Green system utilizes light and space to increase yield-per-plant.
Courtesy of Dutch Passion Seeds
When to ScrOG
Guide plants through the screen as soon as they start making contact with it. Position the screen about eight inches (20 cm) above the base of the plants so that their growth rate will determine when it is time to ScrOG.
Start the “tucking” process as the apex of each plant begins to grow through the screen. Wait for each tip to grow about two inches (5 cm) above the screen. Proceed to tuck each individual shoot under the screen and direct them through the next square away. Tucking will lay the foundation of the ScrOG process, so be mindful of the direction each branch will grow.
Continue this process throughout the vegetative phase. Induce flowering when the screen becomes mostly filled. Continue to tuck and weave each branch over the next two to three weeks as plants begin to stretch.
Avoid tucking and weaving plants too early. It might be tempting to rush ahead, but they’ll only grow well beyond the screen. Training plants into the mesh too early—during the early vegetative phase—will lead to extra work.
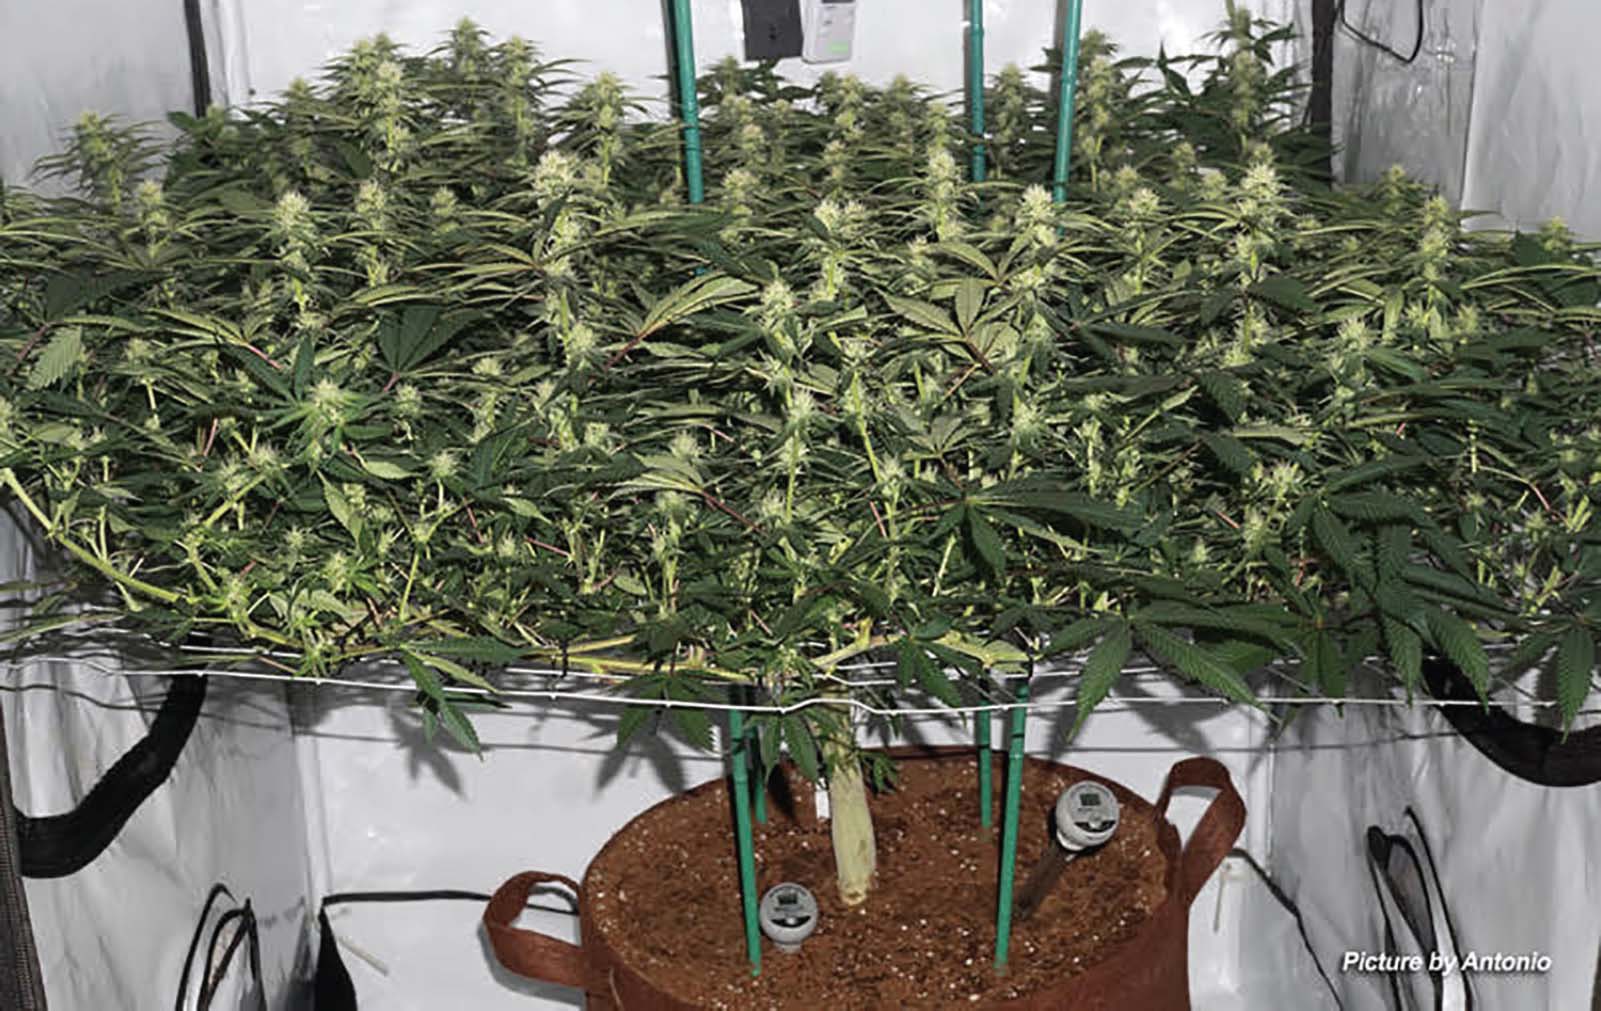
Select the Correct Pot Size
Select the correct pot size to optimize the garden space. This variable will shift depending on how many plants are to be incorporated. Consider the following factors:
- Multiple plants: Consider spacing when growing several plants in a smaller space. Each plant requires a smaller pot. Three gallon (11 l) pots make the most of the space while optimizing plant growth.
- Single plants: Increase the pot size when using a single plant in the ScrOG setup. A 6.5 gallon (25 liter) pot gives the plant enough room to establish a substantial root system and large canopy.
- Fabric pots: The ScrOG technique greatly improves aeration of the canopy. Using a fabric pot increases aeration of the growing medium.
Correct spacing will minimize mold formation while encouraging the best yield possible. The goal is to fit as many plants as possible into the space while keeping them far enough apart to increase light exposure and aeration.
Pruning & Training
There are probably as many theories about pruning and training and their effect on crop yield as there are cultivators. Pruning and training theories are complicated by the many varieties of cannabis, which have different branching patterns and growing habits. The intent of pruning and training plants is almost always to increase yield.
Traditionally, gardeners have been more interested in the total yield of their garden space, rather than each plant. Growers have become concerned with the yield per plant primarily because of regulations regarding the number of plants. Most home growers are limited to only a few plants, so each plant is nurtured to produce the highest possible yield. Only when the regulations limit canopy space rather than plant count does it make sense to be concerned about total yield of the space rather than the yield per plant.
Pruning Techniques
Some pruning techniques increase yield in a given area. In addition, pruned plants usually occupy more space than plants left unpruned, so yield per plant may increase substantially with pruning.
Cannabis adjusts well to many kinds of pruning techniques. It can be pruned to become bushy rather than tall, trimmed to only a few branches, cut to fit a space, or stretched out to promote branching. Flowering plants can also be pruned to increase flower production. (See Flowering.)
To make a plant bushy, clip the tip of the growing shoot after the third set of leaves has developed. The branches surrounding the top branch are no longer inhibited from growing and create a rosette of three or four branches. Meanwhile, the two top shoots that have been hanging out at the pair of top nodes begin to grow. Other lower branches grow a bit as well. After the plants have grown another three or four sets of leaves, clip the tops again to make the plant grow even bushier. Sometimes the plants are topped once or twice more during the vegetative stage. Cutting the tips encourages plants to spread out rather than to grow vertically.
Indoors, the canopy absorbs virtually all the light, leaving little in the shadows below. For this reason, the understory below the canopy contributes little energy to the plant. Instead, it costs the plant nutrients, increases humidity, and stops airflow.
Pruning the lower limbs creates more airflow under the plants and cuttings for cloning. It also forces the plant’s growth to the top limbs that get the most light, maximizing yield. These lower leaves and branches should be removed to create an open airspace.
Flat Plants
Selective pruning creates “flat,” two-dimensional plants that can be placed against walls, positioned close to each other, or used in unusual configurations.
Cannabis typically grows leaves in an alternating pattern along the stem, with each set of leaves perpendicular to the next. Each leaf is attached to the stem at about a 90° angle, parallel to the ground, positioned to catch light. Opposing branches develop at the nodes in the axils between the leaf and stem, hence the name axillary buds. This growing pattern results in a plant that basically has four corners.
Removing the branches from every other set of leaves creates plants with branches that are opposite each other in two dimensions. This technique can be modified to remove only one branch from every other set of leaves, so one set of branches juts out at a 90° angle from the opposing pairs, creating a more triangular shape. This way, the flat side can be placed against a wall, while the others project into the space.
Floribunding (Fimming)
Trim the top 80% of the apical growing tip, leaving about 20% intact. The tip develops multiple tops, creating a bushy plant laden with heavy branches. Topped branches usually develop two to four new tops for each one cut. Using this technique, a single branch produces six to eight tops.
Sunleaf (Fanleaf Removal for Light)
Contrary to myth, most sun or fan leaves should not be removed from the plant during the vegetative stage. These leaves are costly for the plant to produce, and they are sugar factories that turn light into chemical energy. These sugars are used to power metabolism and for tissue building by combining with nitrogen and phosphorus to make amino acids and proteins. When a leaf is removed, the plant loses a source of energy and its rate of growth slows. Gardeners who routinely remove the fan leaves from their plants outdoors slow growth and lower yields.
To test this, try an experiment. Use a plant that has two sun leaves opposite each other with a small branch growing from either side. Remove one of the leaves and see which side branch develops faster.
Sometimes a few fan leaves block light from a large section of a plant. These leaves can be removed if, on the whole, the plant receives better distribution of light.
Similarly, leaves that are constantly in shadow, such as leaves below the canopy indoors, are not contributing to plant growth, so they should be removed. Similar to “lollipop” pruning, this eliminates the risk of infection, improves air circulation, lowers humidity, and reduces the demand for nutrients.
Leaves that are directly blocking light from getting to buds or the cola should also be removed. This becomes more apparent as the buds grow and become more prominent. However, leaves near the buds but not blocking light should be left in place.
Remove yellow leaves, as well as any infected or infested material.
Single-Bud Plants
Plants can be put into the flowering cycle when they are only a foot or two (30-60 cm) tall, before they have developed branches. They grow into plants with only one bud. The main stem becomes swollen with flowers, but there is little to no branching. These plants are useful for compact gardens because they require only one quarter to one square foot (7-30 square cm) of floor space.
Another advantage is that the plants spend little time growing vegetatively, instead spending most of their time growing flowers. The canopy fills quickly when plants are placed close together and then the garden can be flipped into flowering.
Bending & Crimping
Proceed carefully when bending to avoid breaking the stem or branches. The plant will repair damaged stems if there is some snapping or pinching, so long as the stem is not severed or split. Young branches that are still green are more flexible than older ones that are woody and have turned tan or brown, which cannot be bent much before they snap.
One method of bending the branch is called crimping. The goal of this technique is to stress the branch by twisting top stems so the plant will reinforce the damaged area. The plant repairs the damage quickly. The stem remains bent, and the repaired area is stronger than it was before it was treated.
To crimp a stem or branch, use one hand to hold the stem in place. With the other hand, gently twist the stem back and forth by rolling it between the thumb and forefinger until tissue crunching or snapping is felt. On larger branches, an audible break indicates that the twisting has damaged the stem. Smaller branches can be pinched rather than twisted.
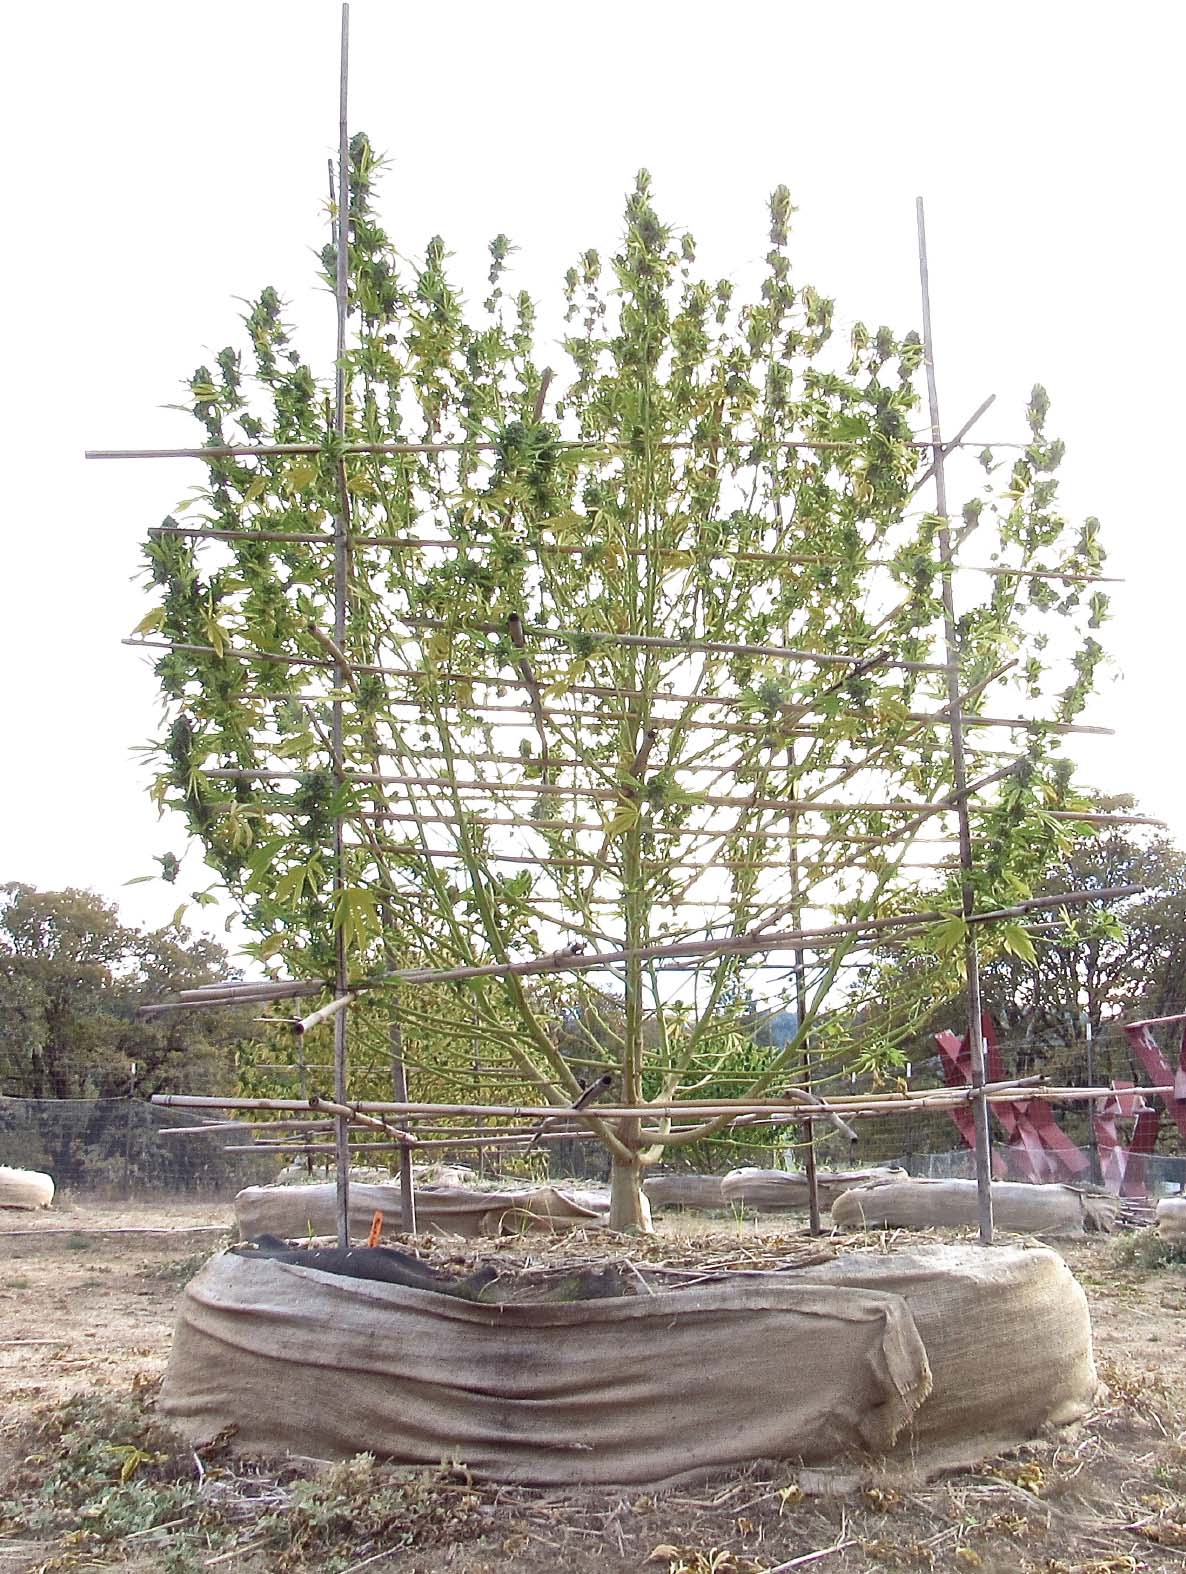
Tomato Rings
Plants can be “opened up” to allow more light to reach lower branches in the interior. This usually entails positioning branches so they don’t shade the interior or so that they get more light themselves. String, rope, cloth, gardener’s tape, twist ties, stakes, and braces are all useful for bending branches to the grower’s will. Also, plants can be controlled by keeping all branches inside the cone. This way they are kept within a designated canopy area.
Tomato trellises (the metal cones) can be used to open up the plants when they are still young. The branches all get more light from the opening and respond by growing bigger buds. Position branches around the outside of the cone, and tie them to it using twist ties or plastic gardening tape. Indoors, these conical trellises can be used to contain unruly plants. A canopy of sativas and other large plants can be confined so they don’t infringe on their neighbors using the four or five foot (1.2-1.5 m) cones.
Plants can also be trained with a trellising technique commonly used by grape growers. Stretch ropes at one foot (30 cm) spacing between posts. Tie the plant branches to the ropes. Stretch each branch horizontally so the plant has virtually no depth.
Alternatively, use chicken wire attached to a frame as a trellis. As the plants grow, use twist ties, gardener’s tape, or soft string or cloth to attach them to the wire.
Inverted Tops, Supercropping, Bending
Removing the top bud stops auxin production in the shoot apex (high auxin concentrations will keep the lower axillary buds dormant), so the lower branches begin to grow. A way to achieve this result without the loss of the top bud is to bend the top bud down. When it is positioned at a height below the side buds, auxin movement down the stem is inhibited. The side branches are no longer inhibited, so they start growing. At this point the main bud can be released and will start to grow again. This results in more very large buds.
Supercropping is a similar technique of training top branches to grow horizontally so that the primary bud is exposed to more light. With more areas exposed, the bud grows larger than normal. This technique can also be used when one bud is growing taller than the rest of the canopy. Position the branch by bending, tying down, or gently snapping it. Supercropping is also used to control vertical growth, especially if the garden has height limitations.
These supports guide the branches in the desired pattern. Photo: David Downs

A single large plant can produce 15 pounds (6.8 kg) of flowers. The perimeter fence helps keep plants upright. Photo: David Downs
There are several ways to tie the top bud. The top of the stem near the growing tip is composed of flexible soft green tissue, so it can be gently bent down or sideways. To secure the stem and branches, use soft string or cloth, gardener’s tape, twist ties, or stakes. Keep any knots loose to minimize damage. The branch may have to be supported by splinting with a skewer or bamboo support.
The top branch is then bent so that it is positioned at the height of or lower than some of the side branches; the side shoots grow as if the top branch were cut. After the side branches have started growing, release the top branch so it can grow upward again. Branches produce more growth than they would with the top branch dominating. The plant with a group of branches produces more bud weight than top-dominant plants.