fruiting
vegetables
—
No group of vegetables repays the gardener more handsomely for their efforts than those with edible fruits. People who have never tasted a home-grown tomato, cucumber or pepper can hardly believe the richness of flavour in freshly picked produce, grown from carefully selected varieties. The pods of peas and beans, technically their fruits, as well as some of the leafy parts of peas, are sources of unsuspected delights for salad-lovers.
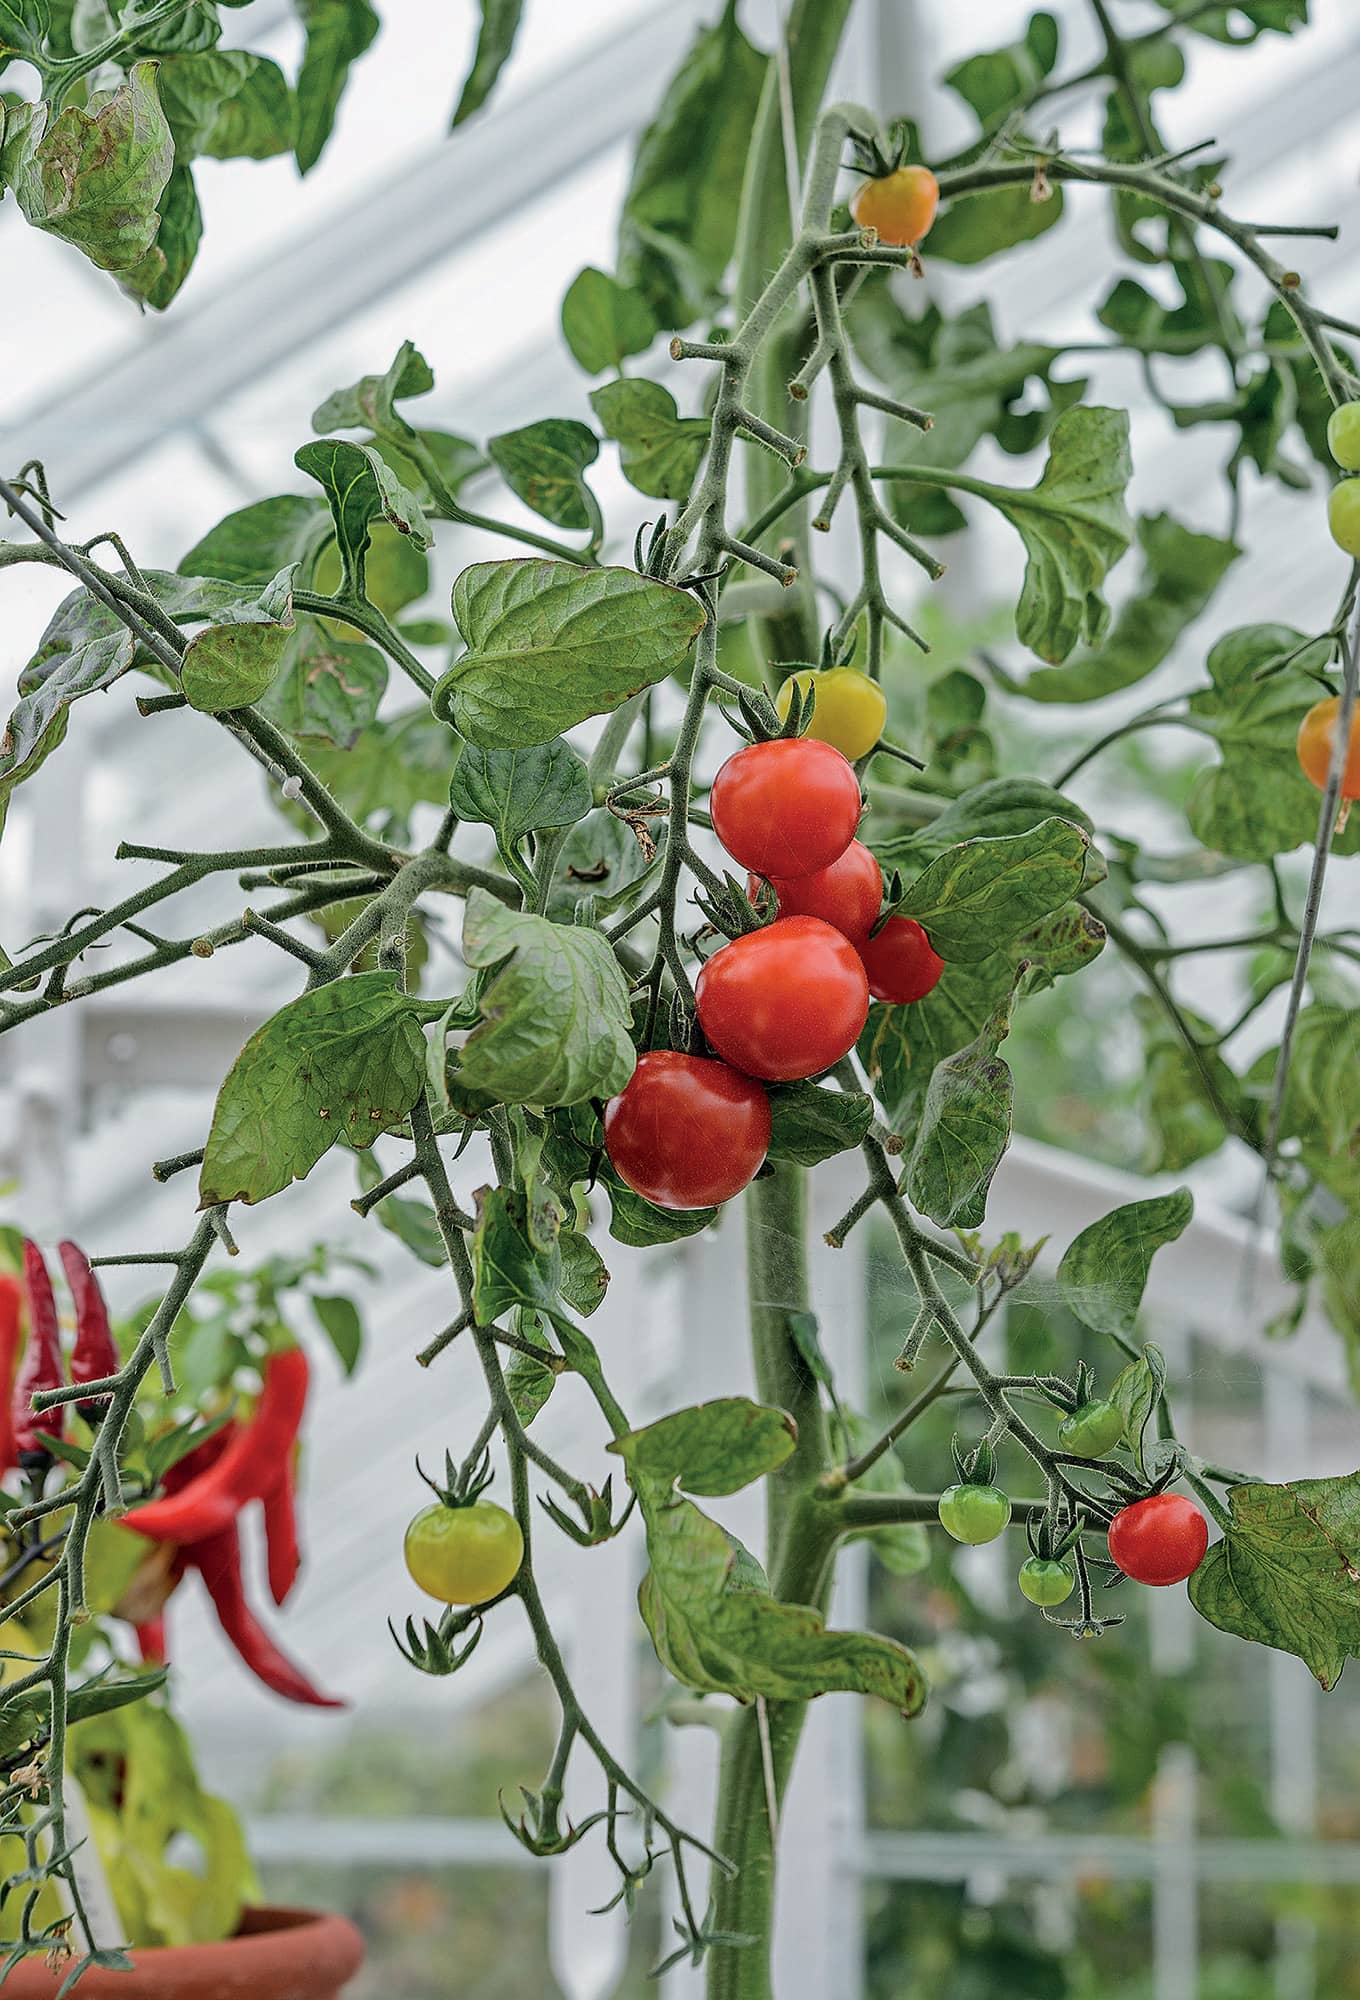
Tomato
Lycopersicon esculentum
The tomato is a tender South American plant, which was introduced into Europe in the sixteenth century as an ornamental greenhouse climber. It has deservedly become one of the most universally grown vegetables. Tomatoes are beautiful, rich in vitamins and versatile in use, both cooked and raw.
–––––
Types of tomato
Tomato fruits are wonderfully diverse in colour, shape and size. They can be red, pink, orange, yellow, red- and orange-striped, black, purple, green and even white. Size ranges from huge beefsteaks to the aptly named ‘currant’ tomatoes. They can be roughly classified on the basis of fruit shape and size, red and yellow forms being found in most types.
Standard Smooth, round, medium-sized fruits of variable flavour.
Beefsteak Very large, smooth, fleshy, multilocular fruits (that is, several ‘compartments’ evident when sliced horizontally); mostly well flavoured.
Marmande Large, flattish, irregular, often ribbed shape, multilocular, fleshy, usually well flavoured, but some so-called ‘improved’ varieties though more evenly shaped are not necessarily as well flavoured as the old.
Oxheart Medium-sized to large, conical, fleshy; some are exceptionally well flavoured.
Plum-shaped Generally small to medium sized, though ‘San Marzano’ can be very large. More or less rectangular in shape, firm, generally late maturing; variable flavour, mostly used cooked. (On account of their shape and firmness the ‘Roma’ varieties in this group were originally selected for the Italian canning industry.) Cherry plum tomatoes are a small, firm, distinctly flavoured form of plum tomato for eating raw, typified by ‘Santa’.
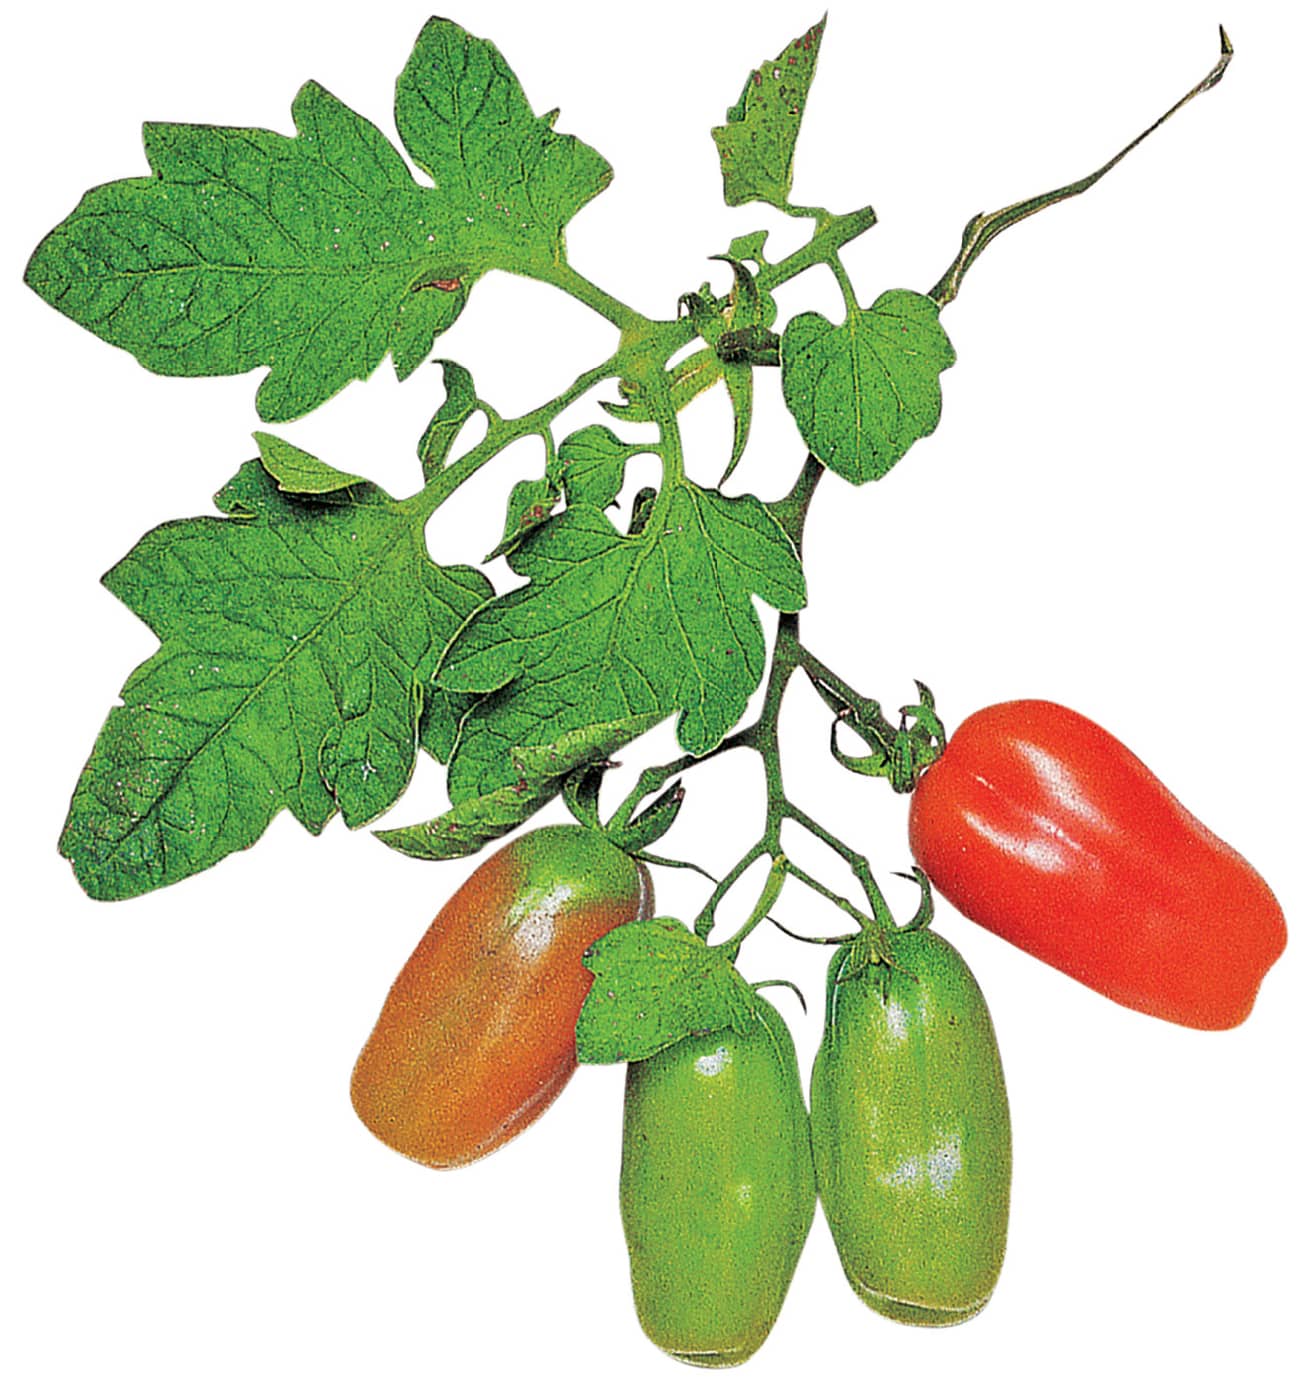
Italian plum type
Pear-shaped Smooth, small to medium-sized, ‘waisted’, mostly unremarkable flavour and texture.
Cherry Small, round fruits under 21/2cm/1in diameter, mostly sweet or distinctly flavoured. Some have a tendency to split on ripening, so must be picked as soon as ready.
Currant Tiny fruits about 1cm/1/2in diameter; exceptionally rambling plants; hitherto not notably flavoured.
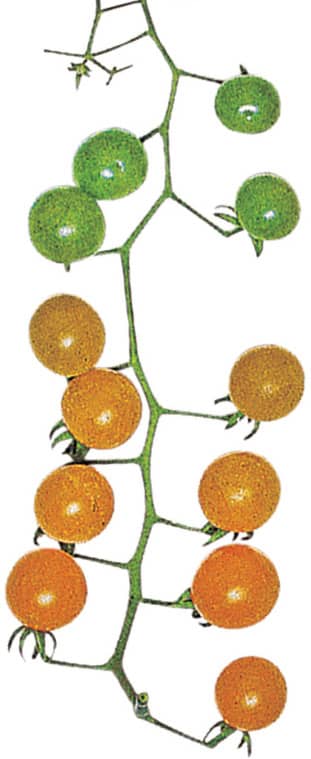
‘Yellow Currant’ type
Growth habit
The growth habit of tomatoes affects how they are cultivated.
Tall or ‘indeterminate’ types The main shoot naturally grows up to 4m/13ft long in warm climates, with sideshoots developing into branches. These are grown as vertical ‘cordons’, which are trained up strings or tied to supports. Growth is kept within bounds by nipping out or ‘stopping’ the growing point and removing sideshoots. It is also possible to allow sideshoots to develop and train plants into U-shaped double cordons, or even triple cordons, which at the same time reduces the vigour of the main stem. I have done this recently to keep tall-growing cherry tomatoes within reach. Appropriate varieties, for example tiny currant tomatoes, can even be trained as ‘fans’.
In a ‘semi-determinate’ sub-group, the main shoot naturally stops growing when about 1m/3ft high. Most Marmande types are in this latter group.
Bush or ‘determinate’ types In these types the sideshoots develop instead of the main shoot, forming a naturally self-stopping bushy plant of 60–125cm/2–4ft diameter that sprawls on the ground. They do not require stopping, sideshooting or supports. They are often early maturing, quite decorative when growing, and can be grown under cloches and films (see here). Some varieties are suitable for containers, but usually need some kind of support to keep them within bounds. Where blight is a limitation on growing tomatoes outdoors, early bush varieties are the best option, as they should fruit before being seriously affected.
Dwarf types These are exceptionally small and compact, often no more than 20cm/8in high. They require no pruning, and are ideal for containers and edgings.
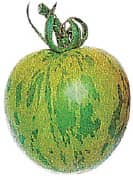
‘Green Zebra’
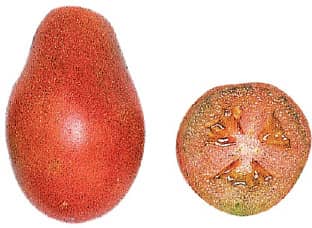
‘Pink Pear’ pear-shaped type
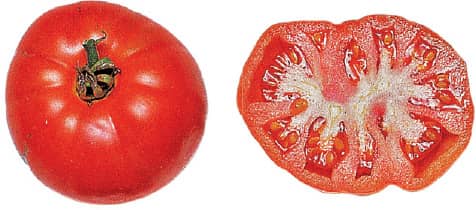
‘Supermarmande’ F1 ‘Marmande’ type

‘Yellow Perfection’ yellow-skinned
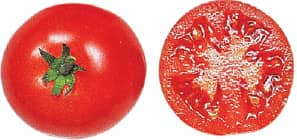
Typical round standard tomato
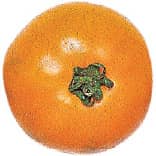
‘Jubilee’ orange-skinned
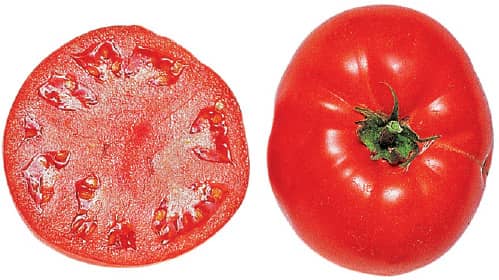
Typical beefsteak tomato
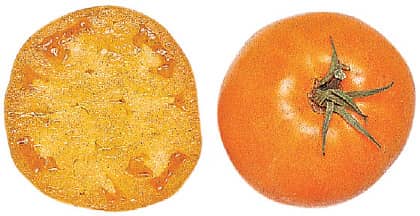
‘Golden Boy’ F1 beefsteak type
–––––
Flavour
The quest for excellent flavour, which is rarely found in bought tomatoes, is a major incentive for growing your own. Nothing can compare with thick slices of a freshly picked ‘Golden Boy’ beefsteak on home-made bread, sprinkled with basil and black pepper. Flavour, essentially a balance between acidity and sweetness, is in practice determined by a number of factors, of which the hours and intensity of sunshine are probably paramount. Sunshine apart, flavour can vary from plant to plant, and fruit to fruit, depending on the season, maturity and even the time of day. My personal view is that overwatering and overfeeding commonly destroy flavour. Start with a potentially well-flavoured variety, and err on the side of ‘starving’ and ‘underwatering’. You may not have the highest yields, but they will be the best tasting. Currently heirloom varieties are being reintroduced on the basis of their flavour. Some, undoubtedly, are exceptionally flavoured, but not all. In comparison with modern varieties, they tend to suffer from poor disease resistance and late maturity. Incidentally, green tomatoes are among the most highly rated for flavour. Most must be picked while still green, though ‘Green Grape’ should be picked when the skin is ‘green chartreuse’. The whole question of flavour is extraodinarily subjective: two people, tasting the same variety at the same time, can have totally opposing views. Experiment… and grow what you like!
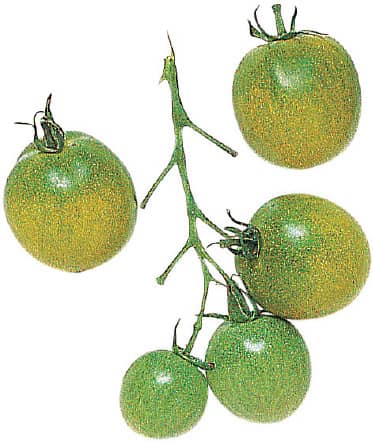
‘Green Grape’
–––––
General cultivation
The optimum temperature for tomatoes is 21–24°C/70–75°F. They grow poorly at temperatures below 10°C/50°F and above 32°C/90°F. They need high light intensity and most varieties require at least eight frost-free weeks from planting to maturity. Beefsteaks require somewhat higher temperatures in the early stages, pear-shaped tomatoes may not develop a true pear shape at low temperatures, and the slow-maturing ‘Roma’ varieties need a fairly long season. The method of cultivation depends on climate. If you are new to tomato growing, be guided by current practice in the locality. The main options, graduated from warm to cool climates, are:
• Outdoors, directly in the ground or in containers.
• Outdoors, initially protected by cloches or in frames which are removed when outgrown, using tall or bush types.
• Outdoors, under cloches or in frames, using bush types. Bush types can also be planted under perforated film or fleece which is removed later (see here).
• Indoors, in unheated greenhouses or polytunnels. They can be grown in the ground unless soil sickness has developed in which case they must be grown in containers or growing bags, or by systems such as ring culture (see here), or using plants grafted on disease-resistant rootstocks. Polytunnels are invaluable for tomato growing, as they can be moved every three or four years, so avoiding the development of soil sickness.
• Indoors, in heated greenhouses. For culture in heated greenhouses see Further reading.
Some tomato varieties are bred solely for cultivation in greenhouses, but in practice, in my experience, most ‘indoor’ varieties can be grown outside and vice versa. It really depends on your locality.
–––––
Soil and site
In temperate climates, tomatoes can be grown outdoors, but the main problem is infection from potato blight, which has become increasingly serious in recent years and can lead to failure. A key factor in success, which may help offset blight, is planting in a warm sheltered position, for example against a wall (ideally south-facing) which will reflect warmth on to the plants. (See also Cultivation of outdoor crops).
Tomatoes are in the potato family and vulnerable to the same soil pests and diseases so should be rotated accordingly. Grow them as far away from potatoes as possible. Growing in polytunnels and unheated greenhouses is a practical option, and gives considerable protection against infection from the airborne blight spores. In polytunnels and greenhouses it is inadvisable to grow tomatoes in the same soil for more than three or four consecutive years.
Tomatoes need fertile, well-drained soil, at a pH of 5.5–7. Ideally prepare the ground beforehand by making a trench 30cm/12in deep and 45cm/18in wide, working in generous quantities of well-rotted manure, compost and/or wilted comfrey leaves (whose high potash content benefits tomatoes).
–––––
Plant raising
Sow in early to mid-spring, six to eight weeks before the last frost is expected. For a follow-on crop of container-grown bush tomatoes for patios or under cover, a second sowing can be made in late spring. Seed germinates fastest at 20°C/68°F, though outdoor bush varieties germinate at slightly lower temperatures. Sow in a propagator, either in seed trays, pricking out into 5–71/2cm/2–3in pots at the three-leaf stage, or in modules. These can later be potted on into small pots. Seedlings can withstand lower temperatures, of about 16°C/60°F once germinated, but must be kept above 10°C/50°F. Keep them well ventilated, well spaced out and in good light. They are normally ready for planting in the ground or into containers six to eight weeks after sowing, when 15–20cm/6–8in high, with the first flower truss visible. When buying plants, choose sturdy plants in individual pots, with healthy, dark green foliage.
–––––
Cultivation of outdoor crops
For outdoor growing it is advisable to choose varieties with a degree of resistance to blight. Modern plant breeding is continually improving the options, though the quality of flavour is variable. None is totally resistant. On the whole cherry tomatoes are less prone to blight than larger-fruited varieties, and early bush tomatoes will often mature before the onset of blight.
Raise seeds as above, and harden off well before planting outside. If the soil temperature is below 10°C/50°F or there is any risk of frost, delay planting. Plant firmly with the lowest leaves just above soil level. Planting through white reflective mulch keeps plants clean and reflects heat up on the fruit – an asset in cool climates. Unless planted through polythene film, keeping plants mulched with straw is beneficial, and prevents blight spores being washed up on to the plants.
Tall types (grown as cordons) Plant 38–45cm/15–18in apart, in single rows or staggered in double rows. For supports, use strong individual canes, elegant metal spiral supports or posts at least 11/2m/5ft high; or erect 11/2/5ft posts at either end of the rows, running two or three parallel wires between them. Tie plants to the supports as they grow. In cool climates, protect plants in the early stages, for example with polythene film side panels. These can be left in place, where feasible, and will give some protection against blight infection. Remove sideshoots as they develop, and in mid- to late summer remove the growing point, so that remaining fruits mature. Depending on the locality, this will be after three to five trusses have set fruit.
Except in very dry conditions, plants do not normally require watering until they are flowering and setting fruit. At this stage apply about 11 litres per sq. m/2 gallons per sq. yd weekly. If growth seems poor when the second truss is setting, feed weekly with a seaweed-based or specially formulated organic tomato feed, or liquid comfrey. In cool climates, towards the end of the season cut plants with unripened fruit free of the canes (without uprooting them), lie them horizontally on straw and cover with cloches to encourage further ripening. You can also uproot plants and hang them indoors for several weeks to continue ripening. Individual fruits ripen slowly wrapped in paper and kept in the dark indoors.
Bush and dwarf varieties Plant bush types 45–60cm/18–24in apart and dwarf types 25–30cm/10–12in apart. Closer spacing produces earlier crops, but wider spacing produces heavier yields and is advisable where there is a risk of blight. Water and feed as tall varieties above. Protect bush and dwarf varieties with cloches or grow in frames. (Low polytunnels are unsuitable, unless the film is perforated, as humidity and temperatures rise too high.) Keeping plants reasonably dry is a key factor in preventing and limiting blight.
As a measure against blight, if there has been wet weather for about three days when the plants are starting to fruit, Belgian nurseryman Peter Bauwens covers outdoor plants with polythene film anchored over hoops. The hoops (1m/3ft high) cover two rows of bush tomatoes.
For an earlier crop, plant under perforated polythene film or fleece, anchored in the soil and laid directly on the plants or over low hoops (see here). Once the flowers press against the covering, make intermittent slits (about 60cm/2 ft long) down the centre, to allow insect pollination and to start ‘weaning’ the tomatoes, ie acclimatizing them to colder conditions. About a week later cut the remaining gaps so that the film falls aside. Leave it there as a low windbreak. Water and feed as for tall outdoor plants. These will normally be ready two weeks before other outdoor tomatoes.
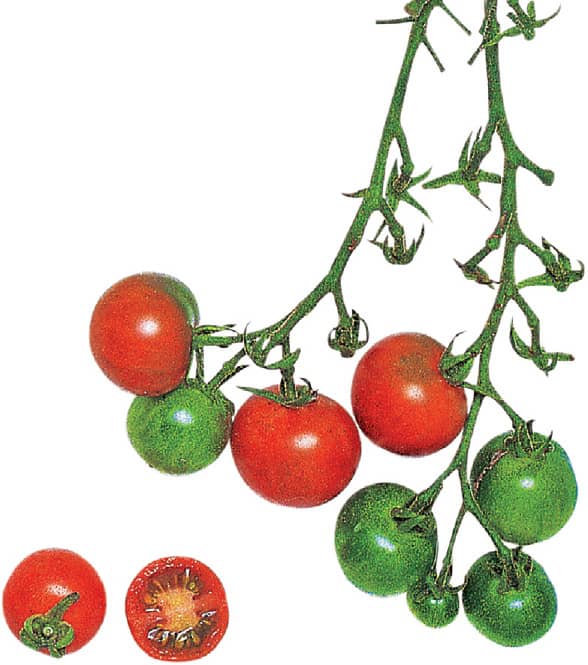
‘Gardener’s Delight’ cherry type
–––––
Cultivation of indoor crops
To grow crops in unheated greenhouses and polytunnels, prepare the ground and raise plants as above. Tall varieties make optimum use of this valuable space. Plant in single rows 45cm/18in apart, or at the same spacing in double rows with 90cm/36in between each pair of rows. I interplant with French marigolds (Tagetes spp.) as a deterrent against whitefly. To conserve moisture, tomatoes can be planted through polythene film, ideally opaque white film which reflects light up on to the crop, or double-sided black and white film. (For growing in containers see overleaf.)
Plants need to be supported, with strong individual canes or stakes, or some other system. One of the simplest is to suspend heavy-duty strings (man-made fibres tend to be stronger than natural fibres) from a horizontal overhead wire or horizontal bars beneath the greenhouse roof, looping the lower end around the lowest leaves of the tomato plant, or for greater stability, around the root ball before planting. Twist the plant carefully around the string as it grows, or tie it to the cane or stake, preferably with a figure-of-eight tie, so the stem doesn’t rub directly on the support.
Whatever system is used, make sure it is robust enough to support the weight of a mature plant with a heavy crop of fruit. It is hard to envisage this when planting out a relatively small plant, and sometimes plants do snap off. If a leader snaps, it is often possible to encourage a lateral shoot into replacing it. First aid is another option. I have several times repaired what looked like severe breaks by ‘bandaging’ them with non-porous, transparent waterproof surgical tape. Provided the damaged stem is adequately supported, the wound will heal and it will continue growing normally. Tomato plants have great resilience.
Unless planted through polythene film, keep plants well mulched with up to 12cm/5in of organic material. (Wilted comfrey can be used.) Water well after planting, then lightly until the fruits start to set, when heavier watering is necessary. Plants need at least 9 litres/2 gallons per plant per week. One school of thought maintains that flavour is best if they are watered, at most, once a week, allowing the soil almost to dry out between waterings. To limit the risk of fungal disease, water carefully without splashing the leaves, and water either in the morning or early afternoon, rather than in the evening, to keep greenhouse humidity low at night.
If fruit is slow to set in late spring/early summer, tap the canes or wires around midday to spread the pollen and encourage setting. Keep plants well ventilated, removing some of the lower leaves, especially any that are yellowing, to improve air circulation around plants. In hot weather, ‘damp down’ at midday – that is, sprinkle the greenhouse and plants with water. Humidity during the day helps fruit to set and deters pests.
Remove sideshoots as for outdoor tomatoes and stop plants, ie remove the growing point, in late summer, either when they reach the roof or when it seems that further fruit is unlikely to mature during the season. Vigorous plants may produce seven or eight trusses, continuing to ripen into early winter. Continue removing withered and yellowing leaves and dig up and burn any seriously diseased plants. For high yields, indoor tomatoes normally need weekly feeding, once the first truss has set, with a high potash tomato feed.
–––––
Growing tomatoes in containers
(For container growing in general see here.) Tomatoes are one of the most popular vegetables for growing in containers. They are widely used in greenhouses and polytunnels, especially where the soil is unsuitable for tomato growing or has developed ‘soil sickness’, and also on patios, courtyards, balconies and in similar situations. Containers used range from plastic growing bags filled with potting compost, to hanging baskets. The size of the container has to be suited to the type of tomato being grown and the variety.
Types best suited to container growing, especially outdoors on patios, are the very compact dwarf varieties, bush varieties, with their natural branching habit, and self-stopping determinate varieties. There are some varieties with a cascading habit, which can look stunning in hanging baskets or containers raised off the ground. For suitable varieties see below; consult seed catalogues for detailed information on their growth habit. Probably few of these have the flavour of the tall-growing, determinate varieties, but new varieties are continually being introduced.
Where tall-growing, determinate varieties are grown in containers it is crucial to ensure a high level of fertility and an adequate support system.
The general container rule – the larger the container the better – holds for tomatoes. The minimum size would be about 25–30cm/10–12in width and depth. Sarah Wain, supervisor of the famous Dean Gardens in Sussex, grows cherry tomatoes in 35–40cm/14–16in diameter pots, getting six to eight trusses in a season. Three plants can be fitted into a standard growing bag, but two plants per bag is preferable. To minimize evaporation, cut small square holes in the bag for planting, rather than removing the top plastic completely.
Very compact and cascading varieties don’t need supports, but larger varieties generally need supports such as canes, strong wire mesh, or a purpose-made plastic frame.
Use good quality potting compost – working in well-rotted garden compost is always beneficial – water very carefully so they are never too wet nor too dry, and start feeding weekly as soon as the fruits start to set, as for indoor tomatoes.
–––––
Pests and diseases
With outdoor tomatoes the main problems are poor weather and potato blight, which manifests as brown patches on leaves and fruits. There is no organic remedy. (See Soil and site).
Indoor tomatoes, which are being forced in unnatural conditions, are prone to various pests, diseases and disorders. You can avoid many of these by growing disease-resistant varieties, by growing plants well with good ventilation and avoiding overcrowding. Use biological control against whitefly (see here). Interplanting with French marigolds may help deter whitefly.
–––––
Varieties
The choice today is vast and constantly changing. The following are my personal favourites and a few highly recommended, chosen for flavour, texture or some specific use or quality.
Standard round Tall: ‘Alicante’, ‘Cristal’ F1, ‘Ferline’ F1, ‘Green Zebra’, ‘Nimbus’ F1, ‘Orkado’ F1 (good outdoors) Bush: ‘Maskotka’, ‘Red Alert’, ‘Sleaford Abundance’
Beefsteak and marmande ‘Costoluto Fiorentino’, ‘Brandywine’, ‘Golden Boy’ F1 (gold), ‘Marglobe’, ‘Supermarmande’ F1, ‘Marmande’
Plum-shaped ‘Britain’s Breakfast’, ‘San Marzano’ (both excellent for freezing)
Cherry and small plum ‘Apero’ F1, ‘Cherry Belle’ F1, ‘Gardener’s Delight’ (large cherry), ‘Golden Crown’, ‘Rosella’ (dark skinned), ‘Sakura’ F1 (large cherry), ‘Sun Belle’ (yellow)
Misc. heirloom ‘Black Cherry’, ‘Green Grape’, ‘Green Zebra’ (striped), ‘Nepal’, all ‘Oxheart’ varieties
Bush and dwarf vars for containers/hanging baskets ‘Balconi Red’, ‘Balconi Yellow’, ‘Cherry Falls’, ‘Garden Pearl’/‘Garten Perle’, ‘Lemon Sherbert’ (yellow), ‘Losetto’ F1, ‘Maskotka’, ‘Red Alert’, ‘Terenzo’ F1, ‘Tumbler’ F1, ‘Tumbling Tiger’, ‘Totem’, ‘Tumbling Tom Red’, ‘Tumbling Tom Yellow’, ‘Vilma’
Varieties currently available with varying degrees of blight resistance Bush a semi-determinate: ‘Losetto’ F1, ‘Lizzano’ F1
Cordon: ‘Clou’ (yellow) ‘Crimson Crush’, ‘Dorado’ (yellow) F1, ‘Ferlline’ F1, ‘Mountain Magic’ F1, ‘Resi’, ‘Primabella’, ‘Primavera’ (orange fruit)
Cucumber
Cucumis sativus
With their crisp texture and refreshing flavours, cucumbers are quintessential salad vegetables. In origin climbing and trailing tropical plants, for practical purposes they can be divided into several main groups: the European greenhouse type, the outdoor ridge type, and heirloom cucumbers.
–––––
Types of cucumber
European greenhouse
These have smooth, dark green skin and fine-quality flesh, and are often over 30cm/12in long. The more recently developed ‘mini cucumbers’, however, are mature when 10–15cm/4–6in long. The traditional greenhouse cucumbers are vigorous plants, requiring high temperatures (roughly 18–30°C/64–86°F), and are normally grown in heated or unheated greenhouses. The fruit was mainly borne on side shoots/laterals, which had to be trained in. In older varieties (now mainly grown for showing), male flowers had to be removed as pollination made the fruits misshapen and bitter.
Modern ‘all female’ varieties Most modern varieties are ‘all female’ F1 hybrids. They are ‘parthenocarpic’, so set fruit without insect pollination. This virtually eliminates the problem of bitterness and the need to remove male flowers, though occasional male flowers appear, especially if the plants are stressed: these should be removed. (The female flowers are distinguished by the visible bump of the embryonic fruit which develops behind the petals.) Fruit develops on the main stem, so plants are easily trained up a single string or tied to a support. Many of these varieties have good disease resistance. The downside is they are less robust than the ridge varieties, require higher temperatures for growth and germination, and the seed tends to be expensive. In practice it is often as economic for gardeners to buy young plants. Many of the ‘mini cucs’ are all female varieties.

Mini cucumber

Greenhouse cucumber

Burpless cucumber

White cucumber
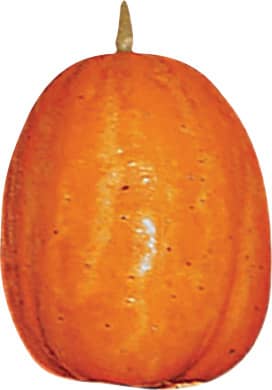
‘Sunsweet’ F1 ‘lemon’ cucumber
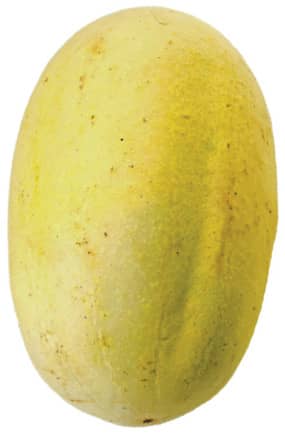
‘Crystal Apple’ cucumber
Outdoor ridge
The original ridge types – so called as they were grown in Europe on ridges to improve drainage – were short and stubby, with rough, prickly skin, normally dark or light green, but occasionally white, yellow or cream. There are some compact bush forms which are suitable for growing in containers. The plants have male and female flowers and need pollination. They are notably hardier and healthier than greenhouse cucumbers, tolerate much lower temperatures but are considered ‘rough’ in comparison with the greenhouse types, though often are well flavoured. All ridge cucumbers can be grown outside or under cover.
Japanese and ‘burpless’ hybrids Asian in origin, plant breeding has given us a range of excellent improved varieties, often approaching greenhouse cucumbers in length, smoothness and flavour. They tend to be healthy plants with good disease resistance. They climb up to about 13/4m/6ft, with fruits up to 30cm/12in long. They are suited to cultivation outdoors (except in cold or exposed sites) or in unheated greenhouses or polytunnels. They produce male flowers but there is no bitterness if pollinated, and fruit primarily on the main stems.
Gherkins are a distinct group of ridge cucumber with thin or stubby fruits, notably prickly skinned, averaging 5cm/2in in length. They tend to be sprawling plants. Although grown for pickling, they can be used fresh in salads.
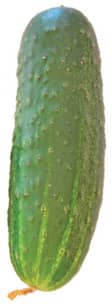
Gherkin
Heirloom types
In this group are several more or less round-fruited varieties which are juicy, moderately well flavoured and decorative. They include the pale-skinned ‘Crystal Apple’, yellow-skinned, lemon-shaped ‘lemon’ cucumbers and the Italian ‘melon cucumber’ or ‘carosello’, which is credited with exceptional drought resistance.
When it comes to deciding what type to grow, I would suggest you play safe with Japanese hybrids and Burpless varieties or, if you are prepared to do a bit of ‘coddling’ in creating a warm environment, go for all female hybrids and try the mini cucs.
Ridge and all-female types should not be grown in proximity, or cross-pollination will occur. Only grow one type within the confines of a polytunnel or unheated greenhouse.
–––––
Soil and site
Cucumbers will not tolerate any frost. Outdoor plants require a warm site sheltered from wind, sunny but not liable to be baked dry. They tolerate light shade in mid-summer. Cucumbers do best where the roots can romp freely through reasonably fertile, humus-rich, moisture-retentive soil. Good drainage is essential. Very acid soils should be limed. Prepare the ground by making individual holes (or a trench) about 30cm/12in deep and 45cm/18in wide, working in well-rotted manure or garden compost. Cover with about 15cm/6in of soil, made into a small mound to improve drainage.
–––––
Plant raising
In the north European climate cucumbers require 100–140 frost-free days from sowing to maturity, so do not plant outside until all risk of frost is past. Where summers are cool or short, start them indoors in mid- to late spring, about four weeks before planting out. (A second sowing can be made about four weekls later for a follow on crop.) For germination, they need a minimum temperature of 18°C/64°F to at least 21°C/70°F for the all female varieties. As cucumbers transplant badly, sow in modules or in 5–71/2cm/2–3in pots. Sow seeds singly or two to three per module or pot, removing all but the strongest one after germination. (Old gardening books advocated sowing seed on its side, but the Michaud organic growers demonstrated this is unnecessary: seed germinates equally well when sown flat.) Try to avoid further watering until after germination, to prevent damping-off diseases. Maintain a temperature of at least 16°C/60°F – preferably higher, for all female hybrids, with minimum night temperatures of 16–24°C/60–75°F.
Seedlings grow fast. If you are growing cucumbers outdoors, plant them out at the three-to-four-leaf stage in early summer after hardening them off carefully. Take care not to bury the stem when planting, which invites neck rot. Protect plants if necessary in the early stages. Once the soil feels warm to the touch, seeds can be sown in situ outdoors, under jars or cloches if necessary. Space climbing plants 45cm/18in apart, and bush plants 90cm/36in apart.
–––––
Supports
Climbing cucumbers can be trained against any reasonably strong support suitable for climbing beans, against trellises, metal or cane tepees, pig or sheep wire net, or nylon netting of about 23cm/9in mesh. Few varieties grow much over 13/4m/6ft high. They are largely self-clinging, but may need tying in the early stages. Less vigorous varieties can sprawl on the ground – gherkins are usually grown this way – but plants are healthier, and less prone to slug damage, if trained off the ground even on low supports.
Nip out the growing point when plants reach the top of the supports. Modern hybrids bear fruit on the main stem, whereas older varieties tend to bear on lateral sideshoots. (In this case nip out the growing point above the first six or seven leaves, to encourage fruit-bearing sideshoots. Tie these sideshoots in if necessary. To control growth, nip them off later, two leaves beyond a fruit.)
Once the plants are established, give them an organic mulch. Keep them well watered, but not waterlogged. If growth is not reasonably vigorous, apply an organic feed weekly from mid-summer onwards. Pick regularly to encourage further growth, picking the fruits young before the skins harden. If the cucumbers are too long for household use, cut the lower half and leave the top attached. The exposed end will callus over and can be cut later.
–––––
Growing in greenhouses
To grow ridge cucumbers in a greenhouse or polytunnel, cultivate as above. They generally grow taller than outdoors, so may need higher supports. You can train them up strings (see Tomatoes), but a strong structure such as rigid pig or sheep net or reinforced concrete mesh is more satisfactory. To build up really strong plants, rub off the early flowers that form on the first five or six leaves. If plants produce masses of laterals at a later stage, trim them back – a few at as time rather than all at once – to a few leaves, to allow good air circulation.
The warmer, protected conditions in unheated greenhouses and polytunnels increase the risk of pests and disease, so you need to strike a fine balance between creating humidity and ventilation. In hot weather, shading may be necessary. We sometimes simply peg light shading net over the plants during the day. Damp down plants and soil regularly (see here) to prevent the build-up of pests such as red spider mite. Mulch the whole floor area, paths included, with straw; this helps maintain humidity and keeps the roots cool. Water regularly, and once fruits are developing, combine watering with a liquid feed. If roots develop above ground, cover them with garden compost as an extra source of nutrients.
–––––
Growing in containers
Cucumbers are not ‘naturals’ for containers, as containers restrict their roots and the soil temperature tends to rise too high. With care they can be grown in growing bags or in pots of at least 30cm/12in diameter. Choose compact varieties: bush ridge varieties are among the most suitable. Put them in a sheltered position. (See here for container growing in general.)
–––––
Pests and diseases
Cucumbers flourish in suitable climates, but are prone to various disorders and diseases in less favourable conditions. Good husbandry is the key to success. Never, for example, take a chance on planting in cold soil. Destroy diseased foliage, and uproot and burn diseased plants.
The most common problems are:
Slugs Young and trailing plants are the most vulnerable.
Aphids Colonies on the underside of leaves cause stunted and puckered growth.
Red spider mite Cucumbers grown under cover are very susceptible. Use biological control as soon as any signs of attack are noticed.
Cucumber mosaic virus This aphid-borne disease causes mottled, yellowed and distorted leaves; plants may become stunted and die. Remove and destroy infected plants and where possible control aphids. Varieties with a degree of resistance are becoming available.
Powdery mildew White powdery patches occur on leaves in hot weather, often spreading rapidly, weakening and killing the plant. Good ventilation helps prevention. Currently some varieties have impressive resistance.
–––––
Varieties
Just a selection from the wide choice available.
Greenhouse, all-female with mildew resistance ‘Carmen’ F1, ‘Euphya’ F1, ‘Tiffany’ F1
Mini All female: ‘Cucino’ F1, ‘Hana’ F1, ‘La Diva’ F1 (indoors and outdoors), ‘Passandra’ F1, ‘Primatop’ F1, ‘Socrates’ F1; Male & female flowers: ‘Greenfingers’ F1 (compact)
Japanese and ‘Burpless’ ridge type ‘Burpless Tasty Green’ F1, ‘Jogger’ F1, ‘Tokyo Slicer’ F1
Ridge types for outdoor cropping ‘Bush Champion’ F1 (compact), ‘Marketmore’ (good mildew resistance) ‘White Wonder’ (long white)
Gherkins ‘Agnes’ F1, ‘Alhambra’ F1, ‘Partner’ F1, ‘Patio Snacker’ F1 (compact), Vert Petit de Paris
–––––
Cucamelon Melothria scabra
This plant has burst upon the scene in recent years, grown for its tiny, grape-sized fruits, variously described as having a cucumber or watermelon flavour with a hint of lime. It is a rampant, climbing or trailing plant, capable of growing up to 21/2m/8ft high. It will grow outdoors in a sheltered spot or in a cool greenhouse. It is self-pollinating, very resistant to pests and has good drought tolerance. Fruits are used raw in salads or pickled.
Not having grown it myself, I’ve been sounding out gardening friends for their views. I have to say ‘other people like it’ was a common comment. Some thought it pretty; others not. Some found the skins tough and hard, and fruits bitter and full of seed. Some said children love it, others got tired of picking! Virtues include being very easily grown, prolific and fruiting all summer long! It should probably be classed as an edible novelty.
If you want to make up your mind, sow as for cucumbers, plant out about 45cm/18in apart against some kind of trellis support. For maximum production stop the main stems at 21/2m/8ft, and trim back sideshoots to 45cm/18in. The first season they may fruit from July to September, but in a sheltered situation will overwinter and start fruiting earlier in their second season.
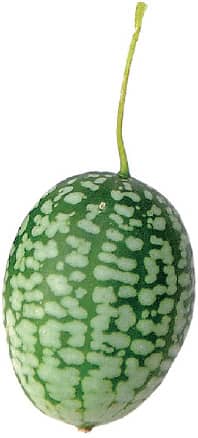
Cucamelon
Sweet pepper
(capsicum) Capsicum annuum Grossum Group
Sweet peppers, also known as capsicums, are tender tropical annuals that produce very varied, beautiful fruits. Most of these are green when immature, becoming red, yellow, orange or even a deep purple-black when fully ripe. Fruit shape is also very variable. They can be square, box-shaped (almost rectangular), bell-shaped, squat (for example, the ‘bonnet-’ or ‘tomato-shaped’ pepper) and long. The long-fruited types can be broad-shouldered or narrow, some tapered varieties having twisted ends like goat (or bull) horns. Fruits can be thin- or thick-walled, upright or pendulous. The plants are bushy in habit, with popular cultivars usually 30–45cm/12–18in high, though some are taller. (For chili peppers, see here.)
Sweet peppers are superb salad vegetables, contributing colour, flavour and crisp texture when raw. As they mature, their flavour undergoes subtle changes. Coloured ripe peppers are sweeter and richer-flavoured – and richer in vitamins. Flavours can also modulate to wonderful effect when peppers are cooked or blanched then cooled to use as salads.
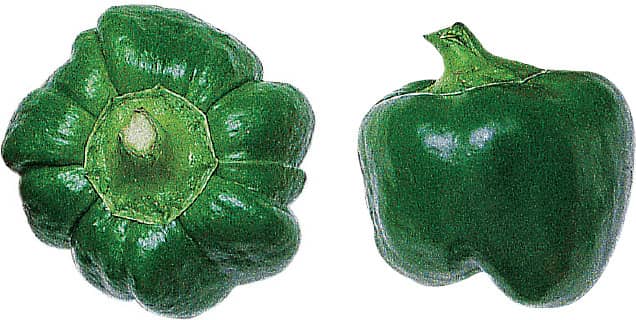
Bonnet-shaped types
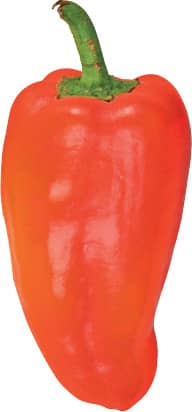
‘Gypsy’ pepper
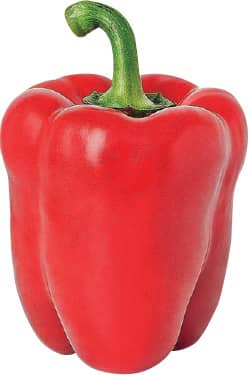
Red bell pepper
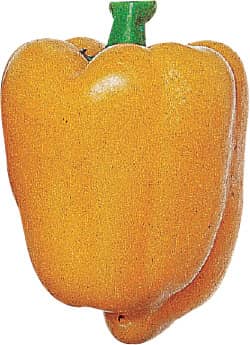
Yellow bell pepper
–––––
Cultivation
Broadly speaking, sweet peppers require much the same conditions as tomatoes (see here), though they prefer marginally higher temperatures. They grow best at temperatures of 18–21°C/64–70°F. Depending on variety, most peppers reach a usable size slightly faster than tomatoes, but you should allow anything from three to six weeks for them to turn from the immature green stage to fully ripe. Like tomatoes, they need high light intensity to flourish. For the cultivation options in temperate climates, see Tomatoes. Being dwarfer in habit than tomatoes, sweet peppers can be easier accommodated under cloches and in frames or, in the early stages, under fleece.
Peppers are in the potato and tomato family and susceptible to the same soil pests and diseases, so should be rotated accordingly. Fortunately, they seem to be less susceptible to potato blight and generally healthier than tomatoes. They also have lower fertility requirements. Digging in plenty of well-rotted manure before planting is normally sufficient: indeed, too much nitrogen can encourage leafiness at the expense of fruit production.
Peppers perform well in containers such as growing bags, pots and even hanging baskets, but choose suitable, compact varieties. Three medium-sized peppers can be fitted into a standard growing bag; single peppers can be grown in pots of about 25cm/10in (equivalent to a 7–71/2 litre pot) diameter.
–––––
Plant raising
For plant raising, see Tomatoes. It is advisable to sow fresh seed, as viability drops off after a year or two. The aim with peppers is to produce sturdy, short-jointed plants. You can achieve this by potting on several times before planting out, initially into 71/2cm/3in pots, and subsequently into 10cm/4in pots. Seedlings are normally ready for planting about eight weeks after sowing, when they are about 10cm/4in high with the first flower truss showing. Harden them off well before planting outside, protecting them if necessary. Space standard varieties 38–45cm/15–18in apart and dwarf types 30cm/12in apart. You can interplant indoor plants with dwarf French marigolds to deter whitefly.
Peppers need to develop a strong branching framework. If growth seems weak, nip out the growing point when the plant is about 25–30cm/10–12in high to encourage sideshoots to develop. A small ‘king’ fruit may develop early, low on the main stem, inhibiting further development. Remove it at either the flower bud or young fruit stage. Once plants are setting fruits, nip back sideshoot tips to 20cm/8in or so to concentrate the plant’s energy.
Branches can be brittle, and plants may need support if they are becoming top heavy. Tie them to upright bamboo canes, or support individual branches with small split canes. Earth up around the base of the stem for further support. Water sufficiently to keep the soil from drying out, but do not overwater. Heavier watering is required once fruits start to set. Mulching is beneficial. Keep plants under cover well ventilated, and maintain humidity by damping down regularly in hot weather (see here). This also helps fruit to set. If fruits are developing well, supplementary feed is unnecessary. If not, apply a liquid feed as fruits start to set. At this point plants in containers should be fed every ten days or so with a seaweed-based fertilizer or high-potash tomato feed.
Start picking fruits young to encourage further cropping. Pick green fruits when the matt surface has become smooth and glossy. Where the season is long enough, you can leave fruits from mid-summer onwards to develop their full colour. Plants will not stand any frost. Towards the end of the season, uproot remaining plants and hang them in a sunny porch or greenhouse. They continue to colour up and may remain in reasonable condition for many weeks.
–––––
Pests and diseases
Poor weather is the main enemy of outdoor peppers. Under cover, red spider mite, whitefly and aphids are the most likely pests. For control measures, see here.
–––––
Varieties
In warm climates, the choice is infinite. The following are reliable croppers in cooler climates: ‘Ariane’ F1, ‘Bell Boy’ F1, ‘Bendigo’ F1, ‘Californian Wonder’, F1, ‘Corno di Toro/di Toro Rosso’/‘Bull’s Horn’, ‘Diablo’ F1, ‘Gourmet’ F1, ‘Gypsy’ F1, ‘Long Red Marconi’, ‘Tequila’ F1
Compact varieties suitable for containers, patios
* = suitable for hanging baskets
‘Hamik’ (yellow), ‘Mira’, ‘Mohawk’ F1*, ‘Oda’ (purple fruit), ‘Paragon’ F1, ‘Redskin’ F1, ‘Roberta’ F1, ‘Snackbite’ F1 series, ‘Sweet Sunshine’ F1, ‘Marconi Rossa’
Chili peppers Capsicum annuum, C. frutescens and other spp.
Chili peppers are universally grown for their fiery flavours. Some are annuals, being the same species as sweet peppers, others are perennials from several species such as C. frutescens.
They are a very diverse group, both in the form of their fruits and in the degree of ‘heat’. Many are beautiful plants and compact enough to be grown in patio containers and even hanging baskets.
Because of their hot flavours, very few are suitable for use raw in salads, the exceptions being the milder, fleshier ‘Hungarian Hot Wax’ type. The chili experts at Sea Spring Seeds suggest that others, such as some of the ‘Anaheim’ and ‘Jalapeno’ chilies, are better grilled, peeled, then used cold. They have wonderful, subtle flavours. Just make sure to remove the placenta, to which the seeds are attached, and every seed: both can be overwhelmingly pungent. There is a huge choice available today.
Cultivate as sweet peppers. Rather surprisingly, they seem to be more robust and easier to grow than sweet peppers.
Milder, fleshy varieties
Hungarian Wax type: ‘Hungarian Hot Wax’, ‘Inferno’ F1
Anaheim group: ‘Anaheim’, ‘Antler Joe E. Parker’, ‘Beaver Dam’, ‘Hot Mexico’
Jalapeno type: ‘Early Jalapeno’, ‘Jalapaeno M’, ‘Telica’
Compact decorative varieties for containers ‘Apache’ F1, ‘Basket of Fire’, F1, ‘Cheyenne’ F1, ‘Firecracker’, ‘Gusto’ F1, ‘Hot Thai’, ‘Loco’ F1, ‘Nu Mex’, ‘Twilight’, ‘Pikito’ F1, ‘Prairie Fire’, ‘Stumpy’, ‘Super Chili’ F1

Jalapeno type chili

‘Corno di Toro’ (Bull’s horn chili)

Hungarian Wax type, semi-mature chili

Hungarian Wax type chili
Peas
(Garden peas) Pisum sativum
Peas are deservedly among the most popular vegetables for gardeners, not least because fresh peas are so rarely on sale. (The money lies in the vast frozen pea market.) While any pea can be used raw in salads, there is no doubt in my mind that the most tempting raw are the ‘mangetout’ or sugar peas, grown for their edible, parchment-free pods. The classic mangetout peas are flat-podded and sickle-shaped, eaten when the peas are miniscule. They tended to be large, some well over 10cm/4 in long, but there are also varieties with very much smaller pods. There are a few purple- and yellow-podded varieties which are very attractive in salads. Very distinct is the Sugar Snap type. Uniquely, these are round in cross-section, with the round young peas virtually ‘welded’ to the outer skin. Peas and pods are eaten as one, and for flavour and texture they are hard to beat raw, though they can of course be cooked. All the mangetout peas are sweet and refreshingly crisp, and can, if left to maturity, be shelled and used as normal peas. Plants vary in size from the very tall ‘Carouby de Maussane’ to compact dwarf varieties. Peas have tendrils which enable them to cling to supports. Compact varieties can be grown in large containers.
Of the ‘shelling peas’, the best flavoured, and sweetest for use raw, are wrinkled-seeded varieties. These are preferable to the rather starchy, round-seeded hardy peas used for early sowings.
Apart from the pods, tender young pea leaves and tendrils are also edible, in salads or cooked. Pea tendrils and ‘pea shoots’ – the top pairs of leaves at the tip of the stem – are a delicacy in many parts of the world, notably China. They are traditionally grown by sowing peas closely together and harvesting the shoots as they develop. For Westerners, a more economical, and very acceptable, alternative are the tendrils of ‘semi-leafless’ peas, ordinary varieties with leaves modified into wire-like tendrils. A bonus for gardeners is that these enable neighbouring plants to twine together, so virtually becoming self-supporting. Clumps look beautiful in a potager. Nip off the tendrils while they are still soft and pliable, and enjoy the most delicate pea flavour. The plants will still produce a crop of normal peas.
Peas can also be sprouted, for young shoots harvested about 5cm/2in high. (See Seed sprouting.)
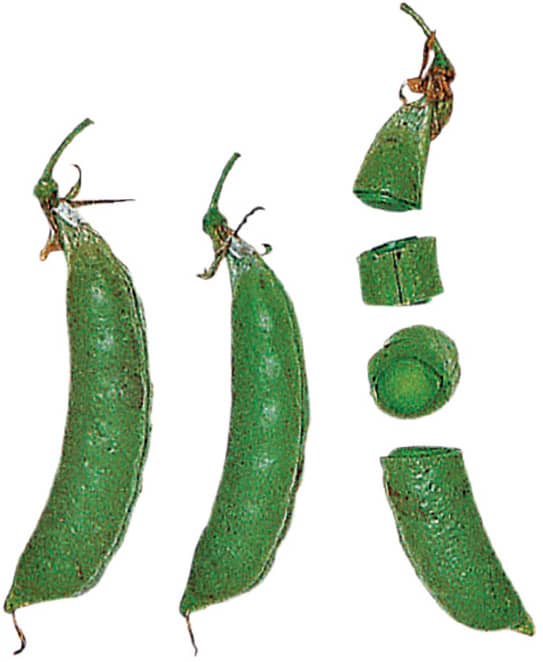
Sugar Snap type of sugar pea
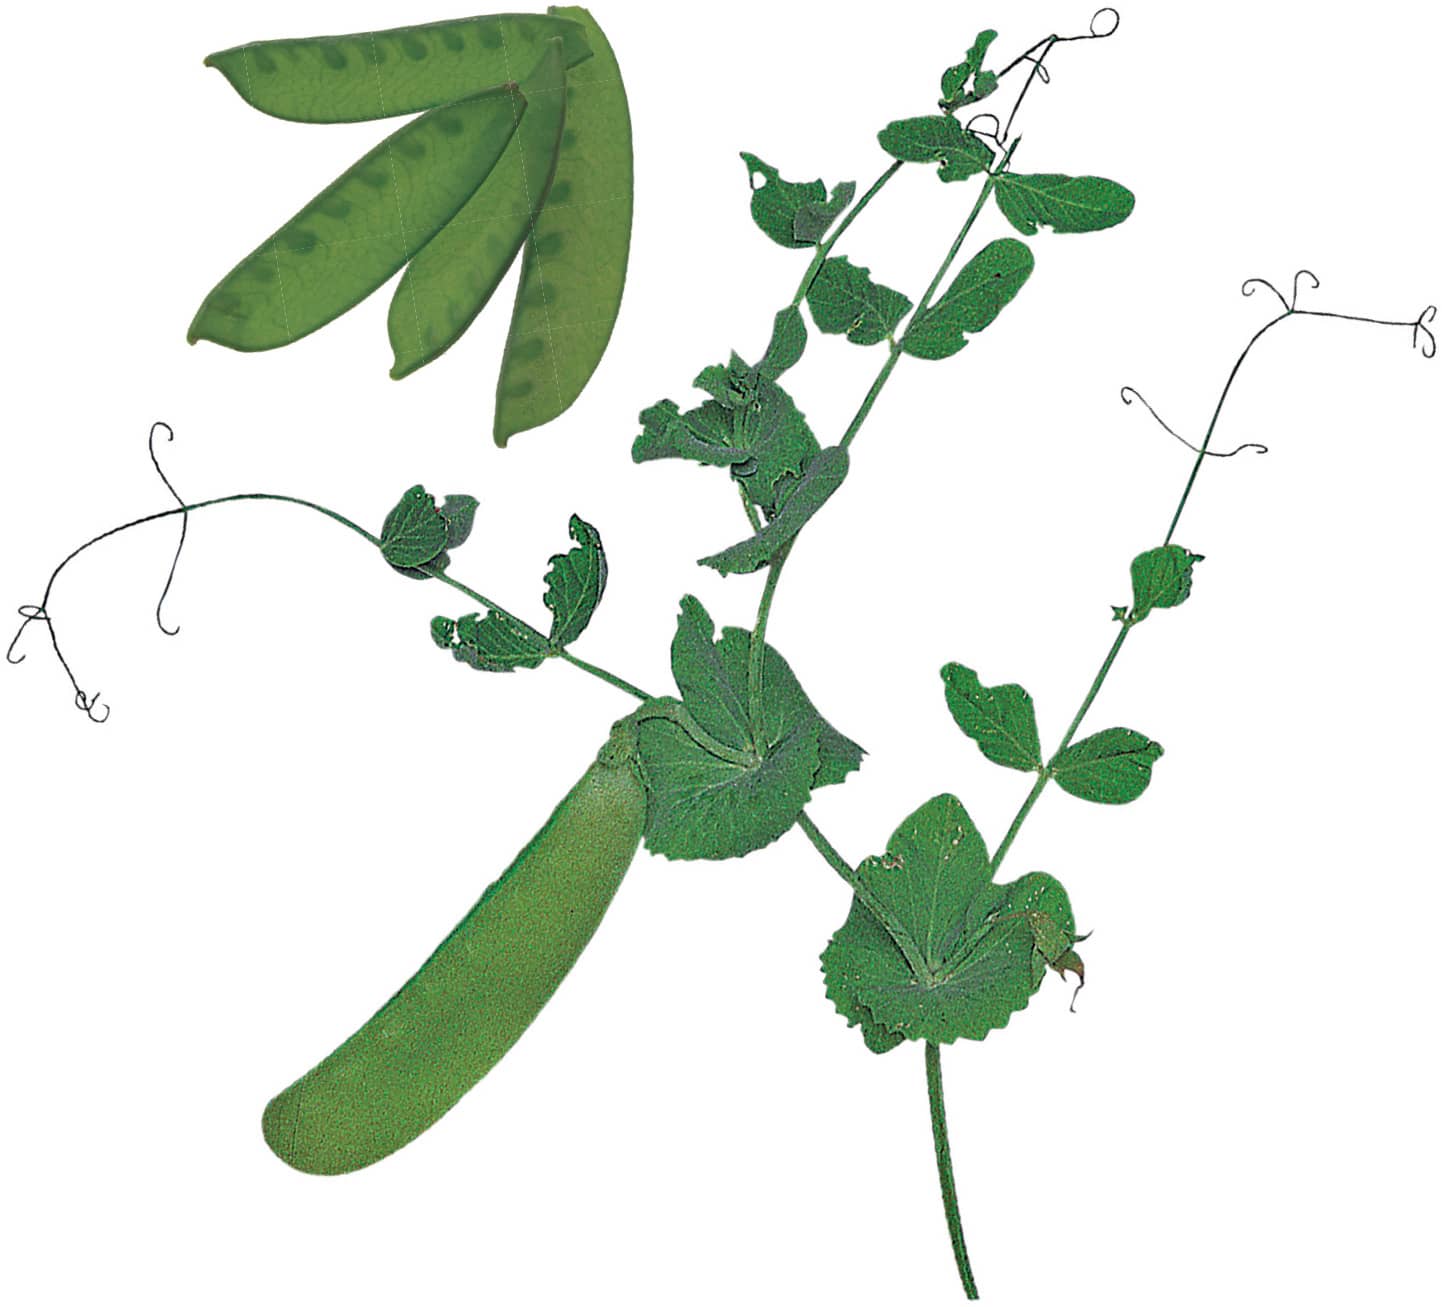
Flat-podded sugar pea
–––––
Some currently available varieties
Mangetout type Large podded: ‘Carouby de Maussane’, ‘Oregon Sugar Pod’
Small podded: ‘Delicata’, ‘Norli’, ‘Sweet Horizon’, ‘Shiraz’ (purple podded), ‘Golden Sweet’ (yellow podded)
Snap peas ‘Delikett’, ‘Jessy’, ‘Sugar Snap’, ‘Sugar Snap Zucolla’, ‘Sugar Ann’
Semi-leafless ‘Ambassador’, ‘Charlie’, ‘Quartz’ (snap pea), ‘Style’
Beans
Gardeners use the term ‘beans’ to embrace several distinct crops: runner beans (Phaseolus coccineus), French beans (Phaseolus vulgaris), and broad beans (Vicia faba). What they all have in common, and is not always appreciated, is that they must be cooked before eating, to destroy the toxins in raw beans. So their primary salad use is as cooked, cold ingredients, whether using immature pods or the bean seeds inside the pods.
–––––
Runner beans Phaseolus coccineus
Originally introduced to Europe from America as climbing ornamentals, these robustly flavoured beans made the British Isles their home. The flattish pods can be well over 23cm/9in long, but are most tender picked at roughly half that length. They are excellent cooked and eaten cold, but the beans inside are normally too coarse for salads, unless used very small. The beautiful flowers can be red, white, pink or bicoloured. In some varieties, particularly the older varieties, the edges of the pods were tough and needed to be removed or ‘stringed’ before use. This has been eliminated in some newer varieties. Most runner beans grow over 3m/10ft tall, but there are some very decorative dwarf varieties, less productive than climbers, but pretty enough to grow in flower beds. They can also be grown in large containers.

Runner bean pods
–––––
French beans (Kidney beans) Phaseolus vulgaris
French beans are used at several stages: the immature pods as ‘green beans’ (though they can be other colours); the semi-mature bean seeds as ‘flageolets’; and the mature, ripened beans dried as ‘haricot’ beans, usually stored for winter. All can be used in salads after being cooked, though some varieties are more suited to one use than another. Be guided by catalogue descriptions. Varieties grown for pods are green, purple, yellow or red and cream flecked; in my view the yellow ‘waxpods’ (the pods are waxy) and the purple-podded varieties have the best flavour. Pod shape varies from flat (in some climbing varieties) to the very fine, ‘filet’ or Kenya beans, which have a melting quality. When dried, French beans display a huge range of colour and patterning, which can be used to great effect in salads. Among my favourites are ‘Borlotto Fire Tongue’/‘Lingua di Fuoca’, a red-flecked white bean (available in both climbing and bush forms), and the bicoloured ‘pea bean’ so called because of its rounded, pea-like shape. As with runner beans, there are climbing and bushy dwarf forms of French beans. The latter can be grown in large containers.
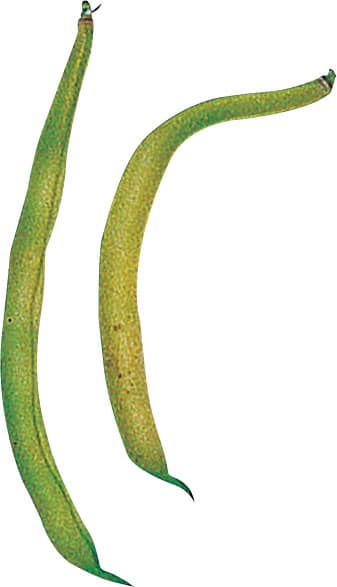
Yellow waxpod French bean
–––––
Broad beans Vicia faba
The seeds of these large, very hardy beans have a unique flavour which seems to be enhanced when used cooked and cold. For salads, either pick ordinary varieties young, before the seeds develop their own tough skin, or use the smaller-seeded, more delicate varieties grown primarily for freezing, such as ‘Stereo’. The shorter-podded green- or white-seeded ‘Windsor’ broad beans, sown in spring, are more refined and generally better-flavoured than the hardier, autumn-sown, mainly ‘longpod’ types. There are a few pink-seeded varieties, which add a colourful dimension to salads. It is advisable to steam, rather than boil them, to retain their colour.
Most broad bean varieties tend to be too top heavy for containers, but the compact, early, cropping variety, ‘The Sutton’, can be grown in large containers. It can be sown in autumn or spring,
Another treat lies in the leafy tips of broad bean plants. Picked young and tender, once the pods are developing they can be steamed as greens or used raw in salads, though sparingly, as they are strongly flavoured. The tops of fodder bean plants, which I grow for green manure, are equally tender.
Broad bean flowers are ornamental and flavoursome in salads; particularly beautiful are those of the heirloom ‘Crimson Flowered’ bean.
Pink seeded varieties ‘Grando Violetto’, ‘Karmazyn’, ‘Red Epicure’
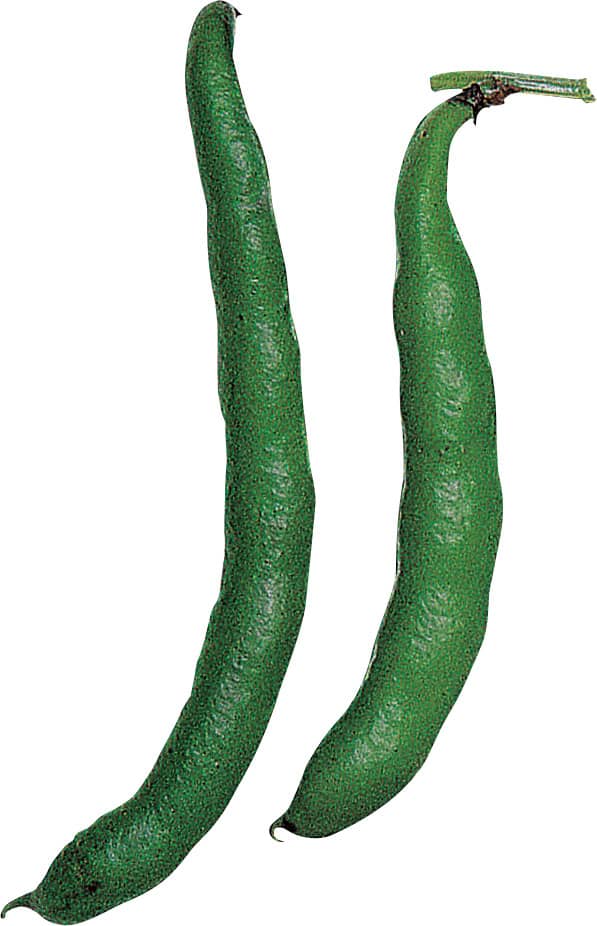
Broad bean pods
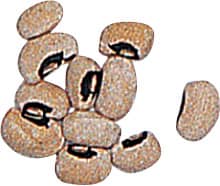
‘Black-eyed’ dried beans
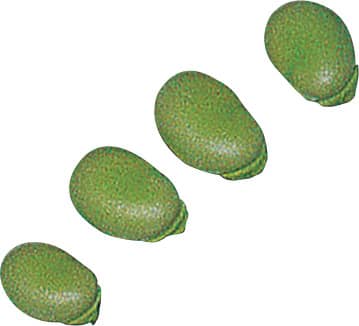
Green broad bean seeds
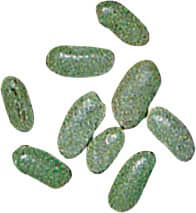
Semi-mature green flageolet beans
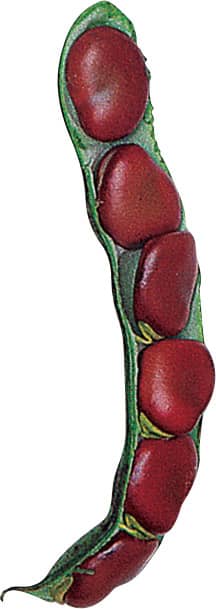
‘Red Epicure’ broad bean