the
onion
family
—
It’s impossible to imagine a good salad that doesn’t make use of a member of the onion (Allium) family. There is such a choice: from the varying pungency of sliced bulb onions to the freshness of salad and green onions, to a sprinkling of chives or their colourful flowers, to the uniqueness of garlic, whether worked into a dressing or simply rubbed into a wooden salad bowl.
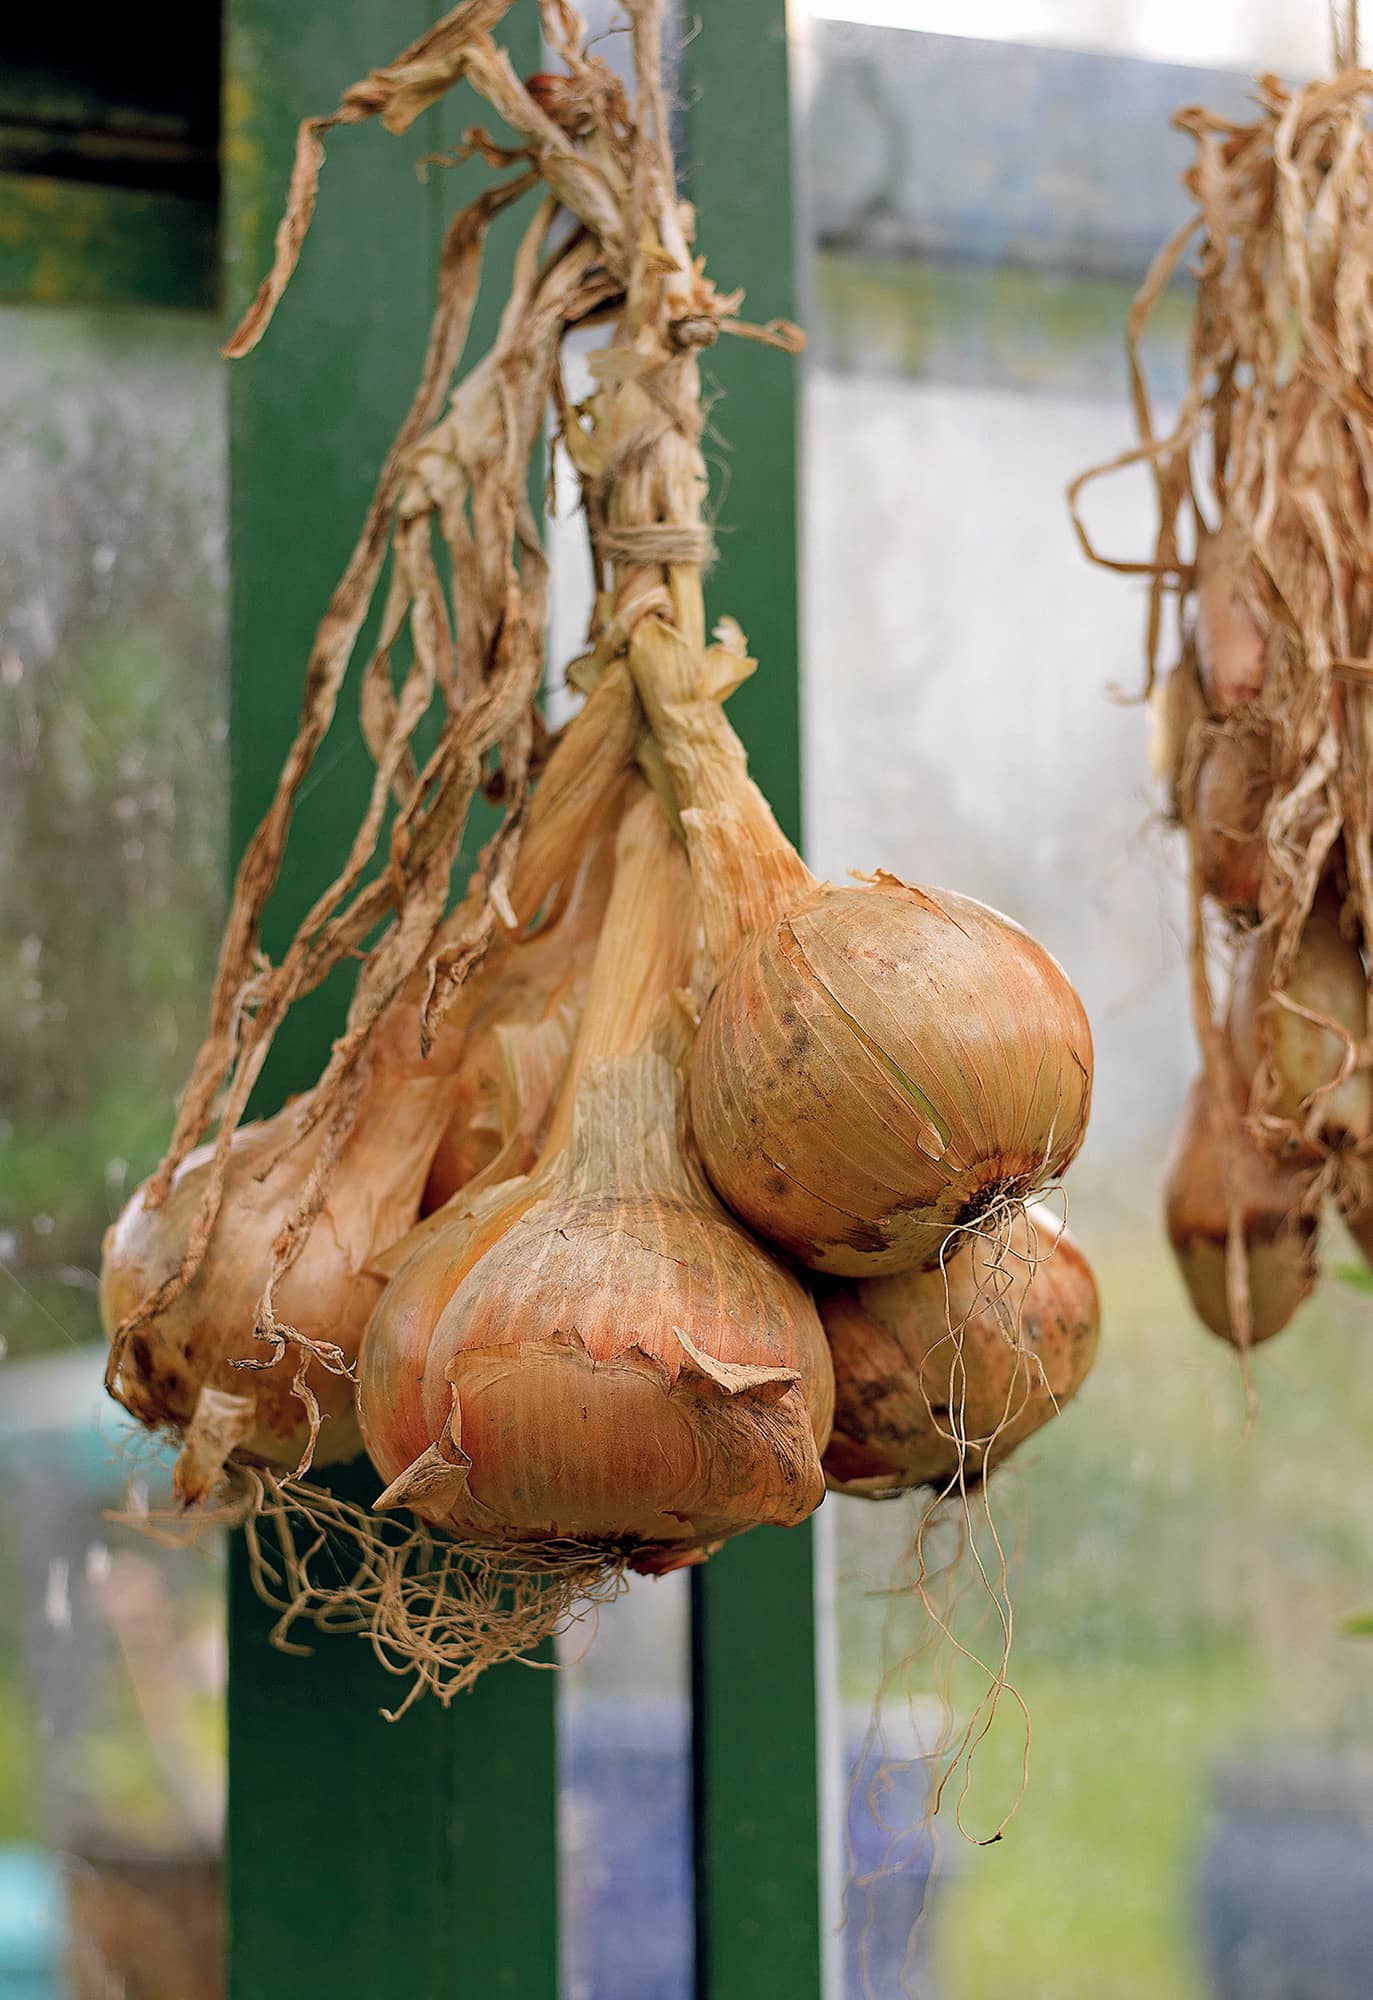
Bulb onions
Allium cepa
The onions are a large family of biennials and perennials, with a characteristic flavour. Using appropriate types, it is feasible to have a year-round supply: all can be used in salads. They divide into bulb and ‘green’ types. Bulb onions (Allium cepa) are adapted to temperate climates, and are used fresh or stored, sliced, chopped or grated raw into salads. Most are creamy or white-fleshed, but some are pink-skinned, and a few brown-skinned varieties have pretty, pink-hued flesh. Flavour varies from mild to piquant depending on variety, climate and growing conditions. Very small bulb onions are grown for pickling.
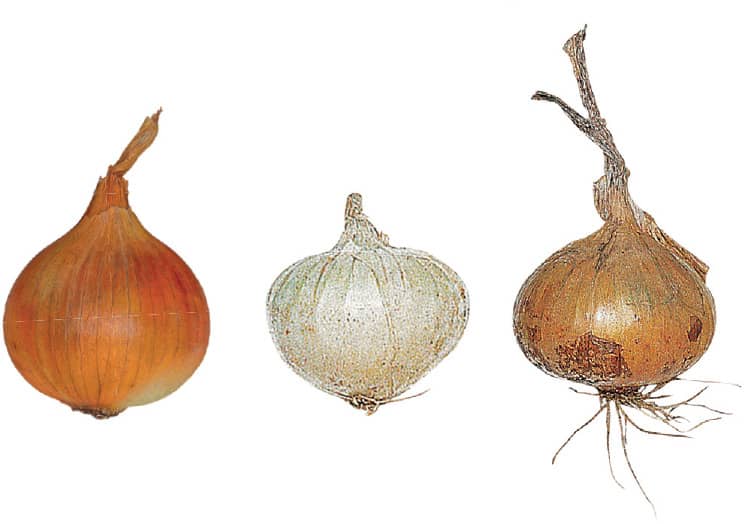
Various bulb onions
–––––
Soil and site
Bulb onions need an open site and fertile, thoroughly dug soil. Prepare it several months before sowing or planting, as growth will be too lush in freshly manured ground. Good drainage is essential. Lime acid soils to a pH of at least 6.5. In spite of the ‘onion patch’ tradition, try to rotate on a four- or at least three-year cycle to prevent the build-up of eelworm and soil-borne diseases.
–––––
Cultivation
Bulbs are the compact, swollen bases of the leaves. Bulb onions are very responsive to day length, and once a certain point is reached (about mid-June in the British Isles) no further leaves are initiated. In effect the bulb has reached its maximum potential: there is no ‘catching up’ if they were sown late. Success hinges on contriving the longest-possible growing season. It is essential to grow varieties suited to your climatic zone. ‘Foreign’ onions rarely succeed.
Sets or seed? Onions are grown from ‘sets’ – tiny, specially produced bulbs – or from seed. Each has its merits. Sets, being a more advanced stage of development, mature earlier, are easy to plant, can be planted in soil conditions unsuitable for sowing and escape onion fly attacks. Drawbacks are that planting dates are more critical, they are more prone to premature bolting and they are only available for certain varieties. Seeds are cheaper, available for all varieties, are more flexible over sowing times, and premature bolting is less likely. They require more attention, and are more liable to onion fly attack. Where good-quality sets are available (as in the British Isles) their use simplifies onion growing!
Sowing programme To ensure a continuous supply in temperate climates, make two sowings or plantings. Sow in late winter/early spring, for (a) main summer supplies of fresh onions, ready from mid-summer onwards and (b) storage onions, ready to lift in late summer/early autumn. These normally keep until mid- to late spring the following year. Make a second sowing in late summer/early autumn, for the first fresh onions, which will mature in early to mid-summer the following year. Only hardy varieties capable of overwintering outdoors are suitable: most of these are in the category known as ‘Japanese onions’. An increasing range is becoming available, both as seeds and sets for autumn planting. Most only keep for a few months after lifting. The sowing date is critical and depends on your area. The onions need to be about 15–20cm/6–8in high by mid-autumn to survive winter conditions, but if too large, they are more likely to bolt prematurely or be affected by adverse weather. Be guided by catalogue information and local practice. It is a gamble worth taking for an early crop.
Growing from sets Use appropriate sets for the planting season (for varieties). Plant firm, small to medium-sized sets, as large sets are more likely to bolt prematurely. Some varieties are ‘heat treated’ to destroy the flower embryo and prevent premature bolting: these must be planted later. Follow the supplier’s instructions.
For the main summer and storage crops, plant standard sets in situ from late winter to mid-spring as soon as the soil is workable. Plant heat-treated sets later. If soil conditions are poor, start sets singly in 5cm/2in modules and plant out when conditions improve. Plant overwintering sets in early to mid-autumn.
Plant sets by pushing them gently into the soil, until only the tip is visible. For the highest yield of medium-sized onions, space them 15cm/6in apart; closer spacing gives smaller onions, wider spacing larger ones. If birds tweak the sets aside, uproot and replant carefully: pushing them back in damages developing roots.
Growing from seed For that invaluable early start, sow indoors from late winter to early spring in seed trays or modules, at 10–16°C/50–61°F. If sowing in seed trays, prick out seedlings at the ‘crook neck’ stage, when they are still bent over, spacing them 5cm/2in apart. Onions can be multi-sown with up to six seeds per module. Once the seeds have germinated, maintain a temperature no higher than about 13°C/55°F before planting out, after hardening off. For maximum yields of medium-sized onions, space them 15cm/6in apart, or 4cm/11/2in apart in rows 30cm/12in apart. As with sets, wider spacing produces larger onions and vice versa. Space groups of multi-sown onions 25–30cm/10–12in apart each way.
Follow with in situ sowing outdoors as soon as the soil is warm. Prepare the ground ten days before sowing, effectively making a ‘stale seedbed’. This allows the soil to settle, deterring onion fly, which is attracted by freshly disturbed soil. Onion seed is small, so rake the seedbed to a fine tilth. Sow thinly in rows 20–30cm/8–12in apart, thinning to the spacings above. Use thinnings as green salad onions. Sow hardy overwintering varieties in late summer to early autumn, according to the date recommended for the variety. (See Sowing programme).
–––––
Weeding and watering
Keep onions weed-free, especially in the early stages, as the narrow, upright leaves never form a weed-suppressing ‘canopy’. An onion hoe is the ideal weeding tool. In dry weather, water carefully until plants are well established. Further watering is normally unnecessary.
–––––
Harvesting and storage
For long-term storage, allow the foliage to die back and bend over naturally. Never forcefully bend it, as the resulting wounds lead to storage rots. Ease bulbs gently out of the ground. Dry them for about ten days, either outside off the ground on upturned boxes or racks, or, in wet weather, under cover, until the outer skins are papery. Store them hung in bunches or plaits, or loose in shallow boxes, in cool, well-ventilated, frost-free conditions.
For fresh and short-term storage, lift onions as required, once they are large enough to use. After the foliage has died back in late summer, the remaining onions must be lifted, or they deteriorate. Treat them as storage onions, using them up first.
–––––
Pests and diseases
Onion fly Groups of seedlings will turn yellow and die as a result of attacks from tiny maggots. Onion fly is most prolific in hot, dry conditions. Sow into a stale seedbed as described on the opposite page, or grow under fine nets. Remove and burn damaged plants.
Mildews and rots There are no organic remedies for the diseases which attack in poor seasons, but look out for varieties with mildew resistance, which are becoming available. Handle storage onions gently, as rots start with cuts and bruises.
–––––
Recommended varieties
Spring-planted bulb onions from sets
Brown: ‘Autumn Gold’, ‘Centurion’, ‘Jaro’, ‘Rumba’, ‘Santero’ (mildew resistant), ‘Setton’, ‘Sturon’
Red: ‘Garnet’, ‘Red Baron’, ‘Red Ray’, ‘Redspark’, ‘Marshalls Fen Red’ (all of these need heat treatment).
Spring-sown bulb onions from seed
Brown: ‘Arthur’, ‘Golden Bear’, ‘Hybound’, ‘Hytech’, ‘Marco’, ‘Santero’ (mildew resistant), ‘Supersweet’/’Dulcinea’
Red: ’Kamal’, ‘Red Baron’, ‘Red Ray’, ‘Redspark’
Autumn-planted bulb onions from sets (Japanese onions) ‘Radar’, ‘Senshyu Semi-Globe Yellow’, ‘Shakespeare’
Autumn-sown bulb onions from seed (Japanese onions) ‘Element’, ’Hikeeper’, ‘Imai Early Yellow’, ‘Senshyu Semi-Globe Yellow’, ‘Toughball’
Misc. ‘Long Red Florence’ (long, mild, red, sweet salad onion)
–––––
Pickling onions Alliium cepa
Varieties suitable for pickling never develop a papery outer skin, and are lifted when they are small and immature. There are white- and purple-skinned varieties. They grow best in fertile soil, but tolerate poorer conditions than bulb onions.
Sow in spring in a sunny situation in wide drills or bands, spacing seeds about 1cm/1/2in apart, or in rows 30cm/12in apart, spacing seeds 8mm/1/2in apart. The high density keeps the bulbs small; thinning is normally unnecessary. Seeds are usually sown about 1cm/1/2in deep, but in Holland they are sometimes sown 4–5cm/11/2–2in deep, to make the bulbs whiter. Allow the foliage to die down, then harvest as bulb onions. If left in the ground longer they will resprout. They can be stored a while before pickling, and can at any stage be used fresh in salads.
Popular varieties
White: ‘Barletta’, ‘Paris Silver Skin’, ‘Pompeii’ Red: ‘Purplette’
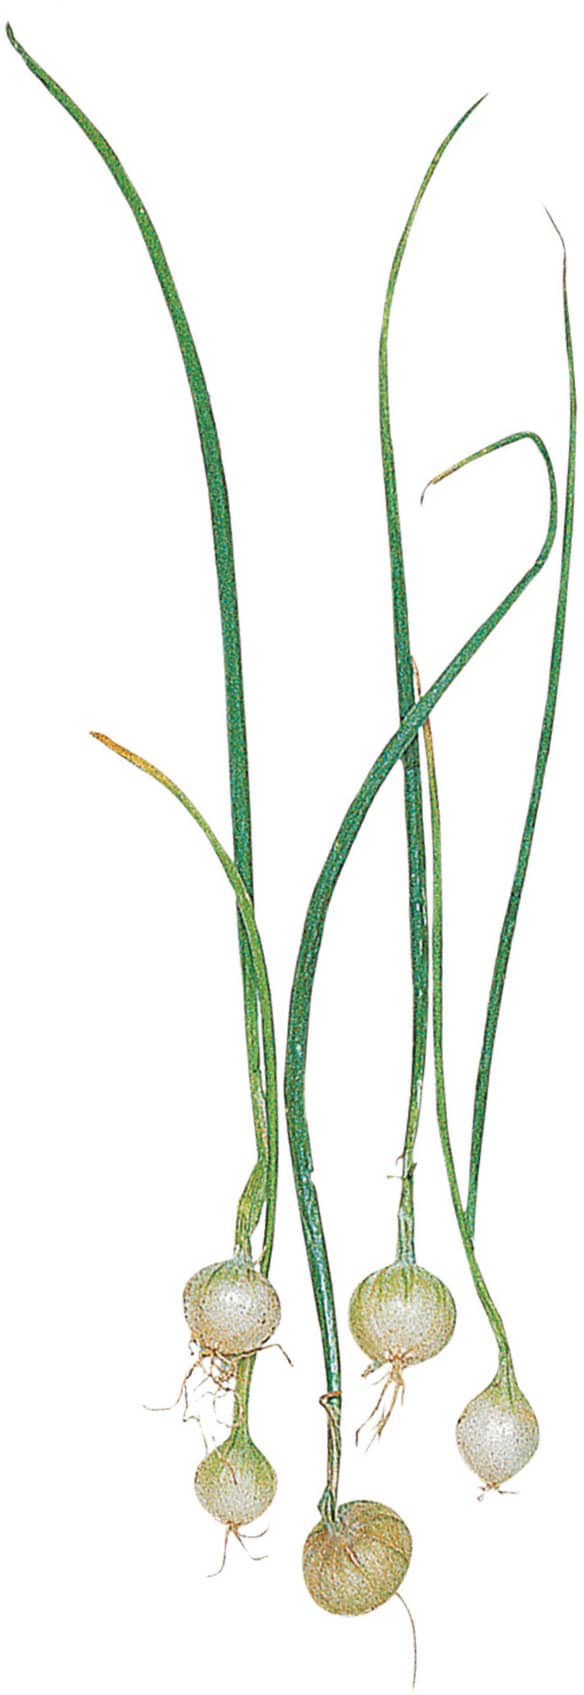
Immature pickling onions
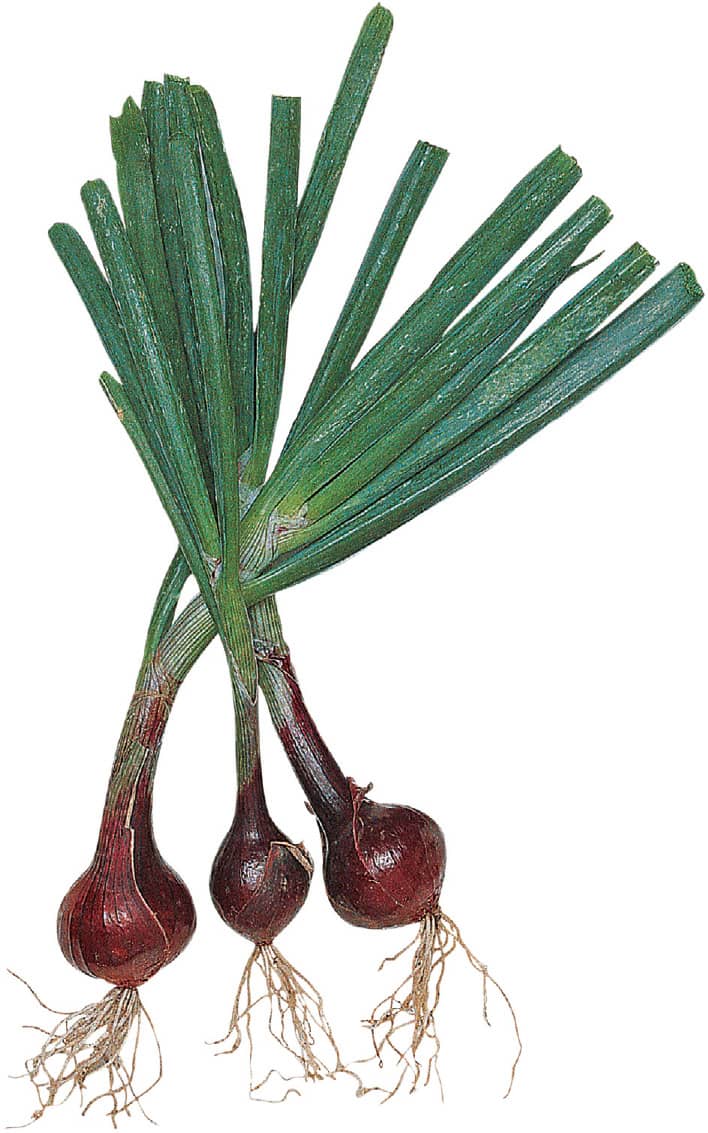
Red-skinned onions
–––––
Egyptian onion (Tree onion) Allium cepa Proliferum Group
These curious onions produce clusters of tiny aerial bulbils, not unlike hazelnuts, which in turn sprout and develop further clusters, so the plant becomes two- or sometimes three-tiered. In due course the stems bend to the ground, where the bulbils root, the plant thus perpetuating itself. Egyptian onions are low yielding but extremely hardy: ‘mid-air’ bulbils can be picked in mid-winter.
Egyptian onions grow in most soils in a sunny spot, but prefer fertile, well-drained soil. Plant single bulbils or a cluster about 25cm/10in apart, in spring or autumn. The plants will keep going for several years, but may need thinning periodically.
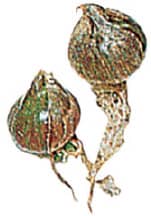
Tree onion bulbils

Egyptian or tree onion
–––––
Shallots Allium cepa Aggregatum Group
Typical shallots are globe to flask-shaped bulbs, multiplying into a cluster at ground level. There are three main groups.
Yellow Round to flask shaped, with the outer skin a straw or bronze colour, and white flesh. They tend to be large.
Red Round to flask shaped, bronzy outer skins, but pink-tinged flesh; generally smaller than the yellow type. Some are very strongly flavoured.
French Jersey type Elongated shape; often pinkish flesh. Beloved of chefs, as they are easily sliced and are considered to have an excellent flavour. Some are only suitable for short-term storage.
Shallots have a distinct, clean onion flavour, with varying degrees of pungency. With the exception of the French Jersey types, a major asset is their ability to keep sound, often for nine months, ie until early or mid-summer the year after harvesting. This bridges the gap in late spring/early summer between stored and fresh onions. European varieties are moderately hardy and withstand higher temperatures much better than bulb onions.. Besides being grown for their bulbs, shallots can be planted close for use as ‘green onions’ or scallions.
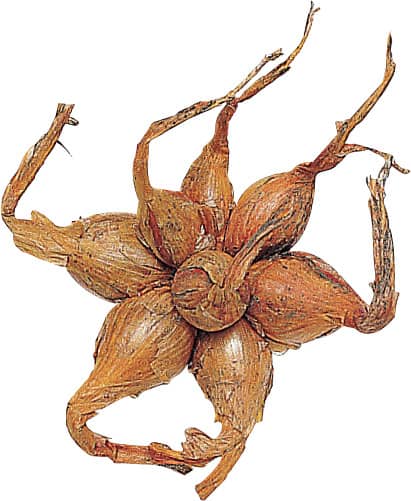
Clump of mature shallots
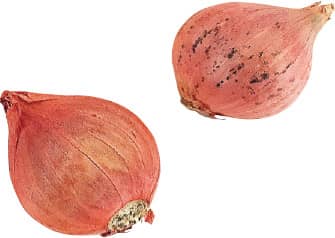
Individual shallots
Cultivation
For soil and site, see Bulb onions. Shallots are easily grown, traditionally from individual sets or small bulbs, but more recently also from seed.
Growing from sets is very simple (each will develop into a cluster of eight to ten bulbs), but there is a tendency to bolt prematurely, and stocks can become virused and low yielding. Always buy certified stock from a reputable supplier: beware of cheap offers! Some sets are suitable for autumn planting; others only for spring planting. Be guided by supplier or catalogue information.
Plant single sets in late autumn in mild areas, otherwise in late winter/early spring, depending also on the variety. The optimum size for planting is about 1cm/1/2in circumference; larger sets may bolt prematurely. Remove the loose, dry outer skin and plant as onion sets (see here), spaced 18cm/7in apart each way for the highest yield. Harvest and store as for bulb onions. There is no need to break up the clusters until required for use.
Raising from seed is more labour intensive, and requires a longer season. However there is less risk of bolting, and plants are more disease resistant. Each seed normally produces one bulb – occasionally split into two or three. Sow indoors in early spring as bulb onions, planting 5cm/2in apart each way. Cultivate, harvest and store shallots as bulb onions (shown here).
Provided the shallots look healthy, keep some for replanting the following season. They eventually become infected with virus, so buy fresh, clean stock every few years.
Recommended varieties
Globe shaped from sets: Brown/yellow: ‘Bistro’, ‘Golden Gourmet’, ‘Yellow Moon’ Red/pink: ‘Sante’
Jersey Long type from sets: Brown/yellow: ‘Griselle’, ‘Jermor’, ‘Longor’, ‘Pesandor’ Red/pink: ‘Mikor’, ‘Picasso’, ‘Zébrune’
Globe shaped from seed: (all red/pink) ‘Ambition’, ‘L’Orient’, ‘Matador’, ‘Conservor’ (longish flask shaped)
Green onions
Allium cepa
The main types of green onion are the European ‘salad’ or ‘spring’ onion (Allium cepa), grown for the young green leaves and tiny bulbs, and the larger more robust oriental bunching onion (Allium fistulosum), a form of the hardy, perennial Welsh onion. These are adapted to both hotter and colder climates than ordinary bulb onions.
Spring onion (Salad or bunching onion, Scallion) Allium cepa
In these varieties of bulb onions the green leaves and stems, which are white in most varieties, but red in some, can be harvested within two months of sowing. Some are straight-shanked, others form tiny bulbs. Their refreshing flavour and colour are invaluable in salads. Recent hybridizing with A. fistulosum (the ‘Welsh’ and Japanese bunching onion group) is producing varieties with stronger, healthier leaves that remain green and erect far longer.
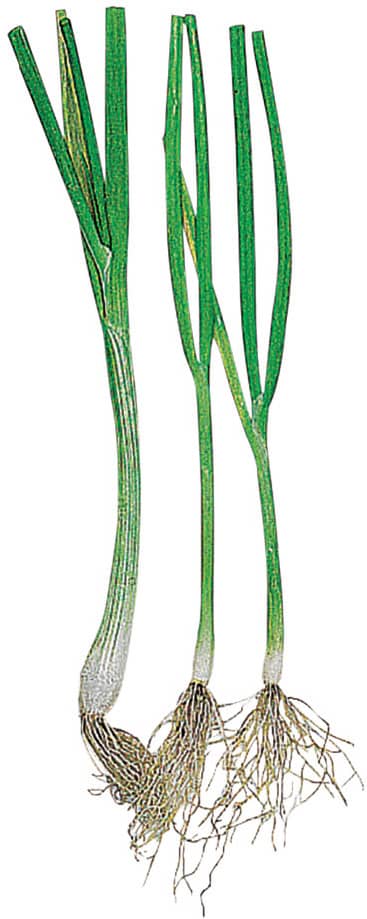
Spring onions
Cultivation For soil, cultivation, pests and diseases see bulb onions. For the main summer-to-autumn supply, sow from early spring to early summer outdoors, making the first sowings under cloches or protection if necessary. Sow in succession every two or three weeks.
For very early spring supplies, sow hardier overwintering varieties in mid- and late summer. Where winters are mild and not too wet, sow in the open; otherwise sow under cover.
Sow either in single rows about 15cm/6in apart, or in roughly 10cm/4in wide drills, in both cases spacing seeds about 21/2cm/1in apart. When the young onions reach a usable size, pull as required. Some of the bulb-forming varieties can be left to grow into larger bulbs.
Recommended varieties
(* = suitable for overwintering)
White: ‘Eiffel’ ‘Elody’, ‘Feast’ F1, ‘Guardsman’*, ‘Ramrod’*, ‘White Lisbon’;
Red: ‘Apache’, ‘Red Beard’, ‘Reddy’
Welsh and Oriental bunching onion (Japanese bunching onion) Allium fistulosum
The Welsh onion Welsh onion is a hardy, perennial, evergreen onion, long cultivated in northern Europe (it has nothing to do with Wales!). It can grow 50cm/20in tall, with fairly strong-flavoured, rather coarse, hollow green leaves, thickened at the base. Its value lies in the fact that it is useable all year round. It makes a good permanent edge to vegetable beds.
Propagate it by dividing established clumps every two or three years, replanting younger outer sections in a new site, 20cm/8in apart. Or sow seed in situ in spring or autumn, thinning to 20cm/8in apart.
Oriental bunching onion In Asia, over many centuries, a diverse group of milder onions has been developed from the Welsh onion. There are different varieties for harvesting at every stage: seedlings, young leaves, leafy stems and the imposing, leek-like, white shafts of the single-stem types, 21/2cm/1in thick and 45cm/18in long. Some varieties have red-tinted stems. (For detailed cultivation, see Further Reading, Oriental Vegetables.)
Bunching onions grow best in light, fertile soil. Naturally healthy and vigorous, they tolerate a wide range of temperatures. Although perennial, they are best grown as annuals or biennials. For tender young salad leaves, sow in situ outdoors throughout the growing season, as for spring onions (see here), making early and late sowings under cover. They can also be multi-sown in modules, planted 71/2cm/3in apart. Pull for use at any stage from 5–15cm/2–6in tall, normally within five weeks of sowing.
For larger plants with slightly thickened stems, thin to 4cm/11/2in apart; pull these, or cut single leaves, when 30cm/12in high, usually within three months of sowing.
In temperate climates, hardier single-stem varieties, which survive moderate frost, can be grown for winter and early spring. The leaves may be coarse but can be sliced finely into salads. Sow from spring to early summer in situ, in rows 30cm/12in apart, thinning to 71/2cm/3in apart. Cut leaves as required. They often stand in good condition into spring and early summer, and are usable even after flower heads have formed.
Recommended varieties
Mainly for summer use: ‘Laser’, ‘Parade’, ‘Savel’, ‘Summer Isle’, ‘Ishikura’ (also for overwintering)

Welsh onion
Chives
Allium schoenoprasum
Chives grow 23–30cm/9–12in high and both the slender leaves and tiny pink to purple flowers in the flower heads add a delicate onion flavour – and colour – to salads. ‘Giant Chives’ is a taller, handsome form. Chives tolerate light shade, but, as natives of damp meadows, do best in fertile, reasonably moist soil. They make excellent edges to vgetable beds, and can be grown in containers, provided there is plenty of organic matter in the pots and the roots do not dry out.
Cultivation Sow in spring in seed trays, or multi-sow about four seeds per module. Plant in clumps of about four seedlings, the clumps 23cm/9in apart. Lift and divide old clumps every three or four years in spring, replanting the younger, outer parts in clumps in a fresh site. Once they are established, cut foliage just above soil level.
Cut plants in sequence to allow them time to regenerate. Remove flower heads unless required for salads. In temperate climates, chives die back in mid-winter, but you can cloche or pot up a few and bring them indoors for early pickings.
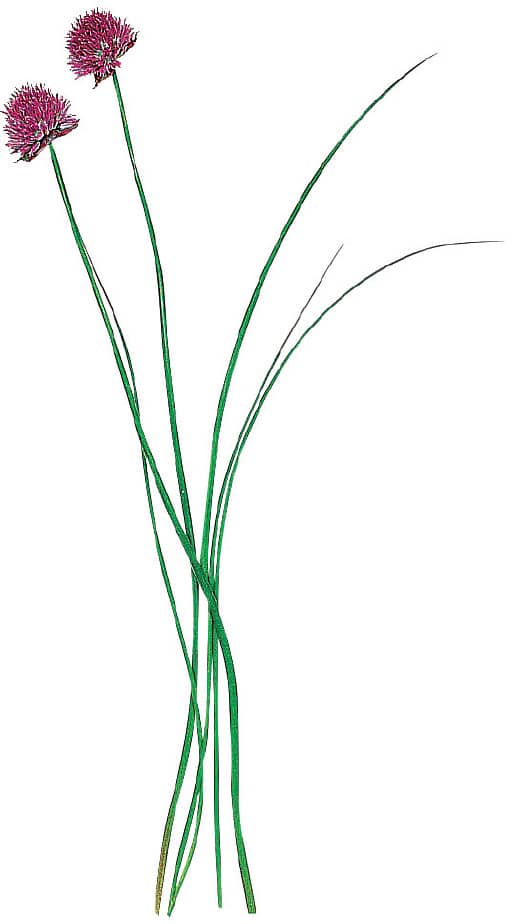
Giant chives

Standard chives
Chinese chives (Garlic chives)
Allium tuberosum
Chinese chives have light green, flat leaves which emerge early in spring. They have a unique, part mild garlic, part chives flavour. From summer onwards the clumps produce a mass of starry, white flowers on 60cm/24in stems, fading into beautiful seed heads. Leaves, flowers buds and flowering stems are all edible. In China plants are covered after being cut with clay pots to produce a blanched crop of long, pale yellow, mild-flavoured leaves. (See Further reading, Oriental Vegetables.) Chinese chives are undemanding perennials, tolerating extremes of high and low temperatures.
Cultivation Chinese chives tolerate any well-drained, moderately fertile soil. Sow fresh seed in seed trays or modules from spring to early summer, planting seedlings in their permanent position in late summer/early autumn when about 10cm/4in high. Plant in clumps of about six seedlings, the clumps 20cm/8in apart. They grow slowly.
In the first season after planting, cut sparingly when the leaves are 15cm/6in high and remove any flowering stems. Feed in spring with manure or a liquid feed. Keep the young plants well weeded, as it is hard to remove weeds once the clumps are established.
In spring in the second season rake over the plants to remove debris, then cut moderately, so they can build up their reserves. From the third year onwards they can be cut hard.
Chinese chives grow well in containers with at least 20cm/8in of soil, provided their roots don’t dry out. Feed them regularly throughout the growing season with a dilute organic feed, or top-dress the container with garden compost.
Chinese chives can also be propagated by lifting and dividing clumps, as for chives. They are long-lived, and there is no need to divide them unless they are losing vigour. The leaves normally die back in mid-winter; bring plants into growth earlier by covering them with cloches in late winter.
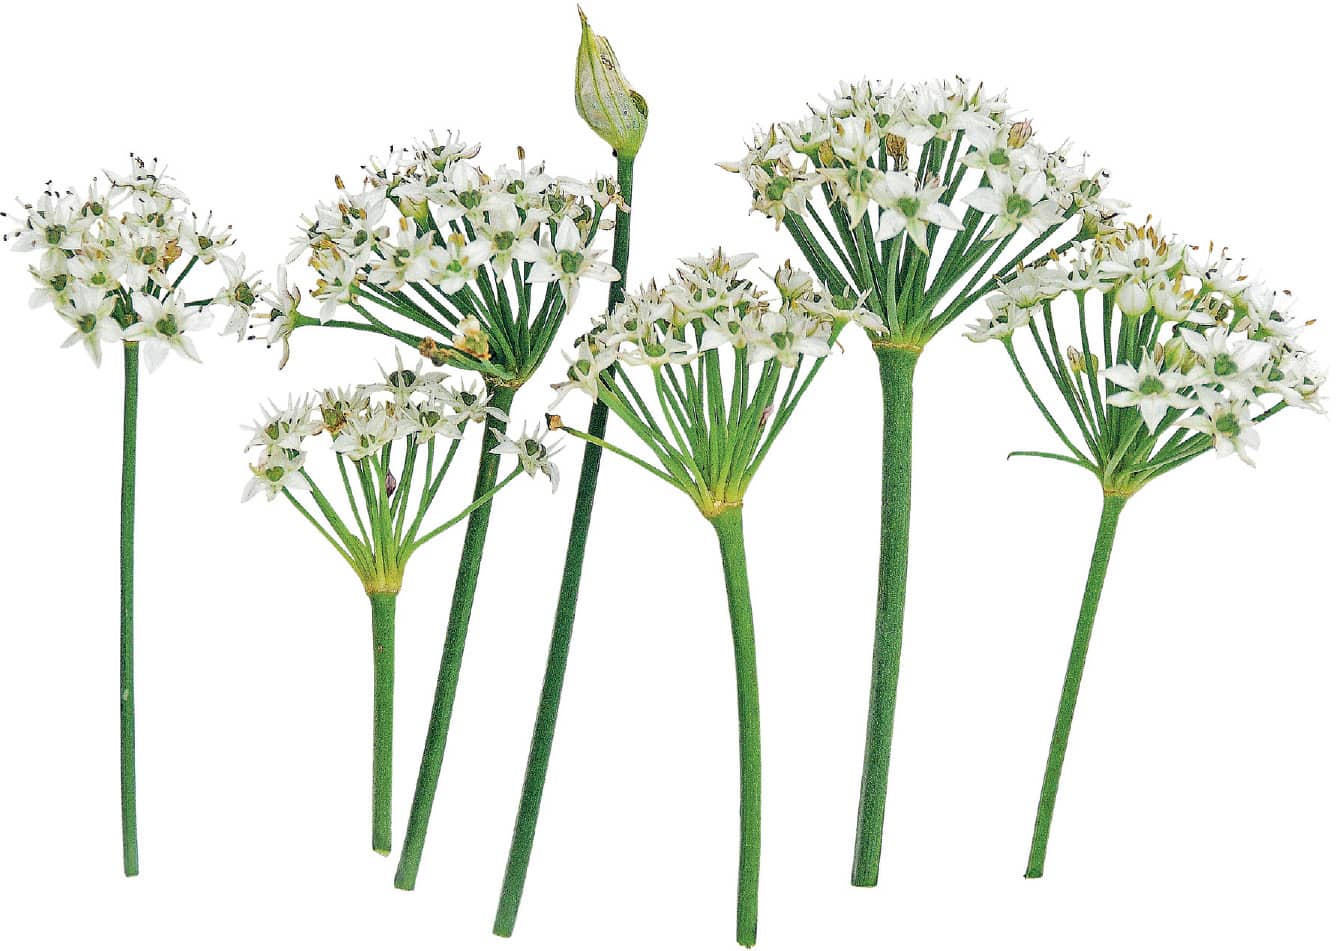
Chinese chives in flower

Chinese chives in bud
Garlic
Allium sativum
The unique flavour of garlic is indispensable in many salad dishes and dressings. Mature bulbs are used fresh or stored; immature bulbs sold as ‘green’ or ‘wet’ garlic are superbly flavoured. In China, garlic is also cultivated for the young green leaves and flowering stem. (For this and more on garlic, see Further reading, Oriental Vegetables.)
Garlic is biennial, but if left in the ground, will perpetual itself and behave like a perennial. There are two distinct types, ‘softneck’ (Allium sativum), and ‘hardneck’, (A. sativum var. ophioscorodon), The ‘softneck’ type has soft leaves, and is most commonly grown in the West. It is also the most easily grown, the most productive, and stores well. The ‘hardnecks’ are characterized by developing a flower stalk, sometimes amazingly twisted, with a picturesque seed head of sterile seed. They produce fewer but larger cloves, which are only suitable for short-term storage. Their hard leaves make them impossible to braid. Connoisseurs, however, believe they are among the best flavoured.
There are numerous garlic strains, the sickle-shaped cloves being white, pink or purplish and varying in pungency. Garlic stores from six to twelve months, depending on variety. It is crucial to plant healthy, disease-free stock suited to your climate. Provided the cloves are healthy, you can save your own and replant for future crops.
Cultivation Garlic needs an open, sunny position, and grows best on moderately rich, light soil that is not freshly manured. Good drainage is essential. Bonfire ash can be incorporated when planting, as potash is beneficial. Lime acid soils. Garlic is hardy, surviving at least -10°C/14°F, and needs a long growing season. Although varieties differ in their requirements, most should be planted in late autumn. Otherwise plant in spring as soon as the soil is workable. Where winters are wet or the risk of slug damage is high, start off cloves singly in modules, planting out in spring when conditions improve.
Plant plump, healthy cloves split from mature bulbs, ideally 1cm/1/2in in diameter. The bulbs develop below ground. On light soils, plant up to 10cm/4in deep; on heavy soils plant more shallowly, but cover the cloves with at least 21/2cm/1in of soil. Make sure the flat end is downwards: it is not always easy to tell. For optimum yield, space bulbs 18cm/7in apart each way. On wet ground, either plant on 10cm/4in-high ridges, or put coarse sand or potting compost beneath the cloves. Keep them weed-free and water in very dry weather early in the season. Cutting back the flower stalks of hardneck varieties two to three weeks before harvesting is said to increase the clove size considerably.
Harvesting Unlike onions, garlic must be lifted when the foliage starts turning yellow, or the cloves resprout. Dig them up carefully (they bruise easily) and dry them hung, or laid on trays, in a breezy situation – under cover in wet weather. Baking in full sun is not necessary. Store for winter like onions (shown here), ideally at 5–10°C/41–50°F.
Cloves accidentally left in the ground over winter may produce delicious shoots in spring, which can be used like chives.
Garlic rust (Puccinia allii) This disease, easily identified by the rust-coloured spores which occur on the leaves, can be serious but is very random in its attacks. The spores can be spread from overwintering alliums such as leeks and chives. It seems to be worst in humid climates and where winters are mild. If it is proving serious, try growing early varieties (such as ‘Extra Early Wight’ and ‘Early Wight’). Harvest affected bulbs as soon as you can, and hang them in the kitchen for consumption. The rust won’t affect their storage, but they won’t be as large as healthy bulbs. Dispose of the rusted leaves in a waste system. Don’t put them on the compost heap. Elephant garlic is less susceptible.
Recommended varieties:
Softneck: ‘Early Purple Wight’, ‘Germidour’, ‘Solent Wight’, ‘Thermidrome’, ‘Vallelado’ ‘White Cristo’, ‘Extra Early Wight’
Hardneck: ‘Carcassonne Wight’, ‘Lautrec Wight’, ‘Sprint’, ‘Sultop’
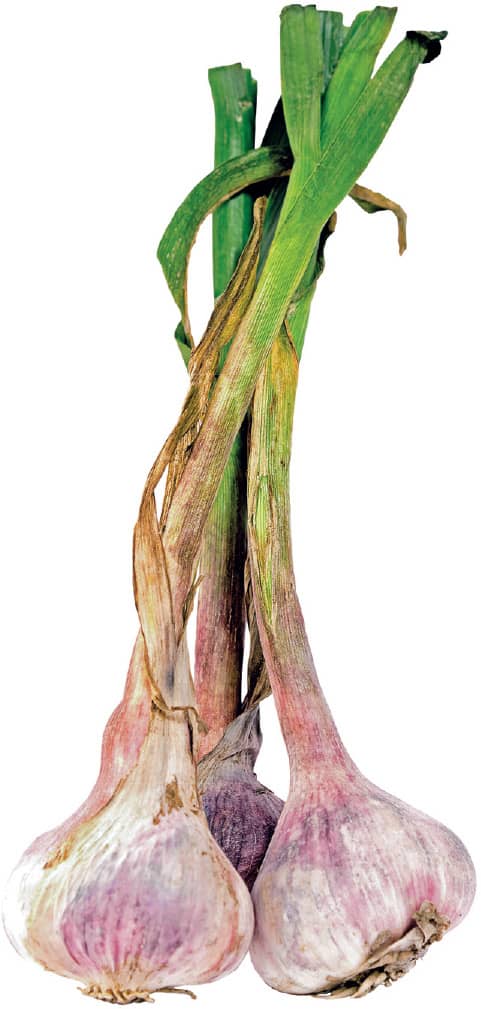
Pink garlic
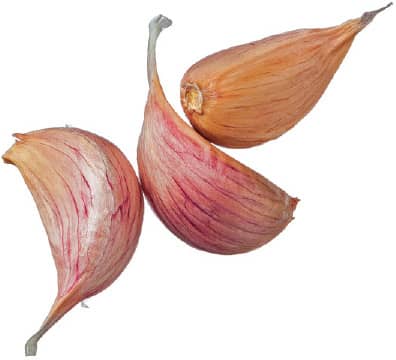
Single garlic cloves
Elephant garlic
Allium ampeloprasum
Elephant garlic is a type of leek, which forms huge white, garlic-flavoured cloves. The flavour ranges from mild to fairly strong. Plant in autumn a month before frost is likely or in early spring, or start cloves in modules. Plant at least 21/2/1in deep and 30cm/12in apart. Harvest as garlic above.
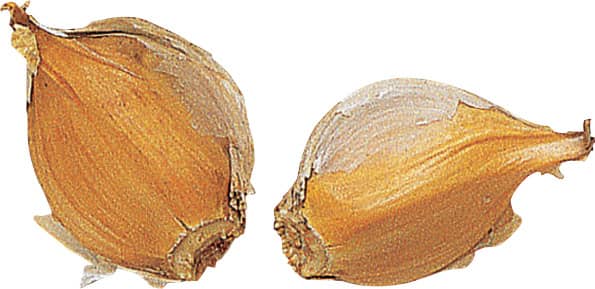
Elephant garlic cloves