1916
‘The news about 8a.m. was not altogether good.’
Sir Douglas Haig, 1 July
The Battle Plan – in Brief
The 1916 Battle of the Somme lasted from 1 July to 17 November. It was opened by a mainly volunteer British Army, over half of which was new to battle and had, barely 18 months earlier, answered Kitchener’s call to arms.
The Commander of the British Expeditionary Force (BEF) was also new. General French had been replaced by his critic, General Haig, and now the latter had to prove his worth.
At the end of 1915, the French and British planned for a 1916 joint offensive on the Somme, with the French playing the major role. Masterminded by Joffre, the plan was (as far as Joffre was concerned) to kill more Germans than their pool of manpower could afford. But when the German assault at Verdun drew French forces away from the Somme, the British found themselves with the major role, providing sixteen divisions on the first day to the French five.
The British plan was based upon a steady 14-mile wide infantry assault from Serre in the north to Maricourt in the south. On the first day 100,000 soldiers were to go over the top at the end of a savage artillery bombardment. Behind the infantry – men of the Fourth Army, commanded by General Rawlinson – waited two

General Sir Douglas Haig.
When the early assaults failed to penetrate the German lines, the British Staff set about denying that they had ever intended to do such a thing. To many, their protestations appeared to be attempts to cover up the failure of Haig’s plan, and, as the C-in-C continued with his costly and unimaginative attacks, other voices demanded his removal. But he kept his job. He was, after all, a confidant of the King and a pillar of the Establishment.
By the time that the battle ended, British casualties exceeded 400,000. The British secret weapon, the tank, had been used against expert advice in a ‘penny packet’ operation in September at Flers-Courcelette. Could it have been a desperate attempt by Haig to gain some sort of victory that would offset his earlier failures?
In October and November, piecemeal attacks continued when the heavy rains allowed, and, in a break in the weather on 13 November, the British took Beaumont Hamel. What had been achieved since July? On the ground very little: a maximum advance of 8 miles. Haig said that the battle had been a success and had achieved the aim that he had placed first on his list of aims – ‘To relieve the pressure on Verdun’. Certainly the German offensive at Verdun had been stopped, but how could the C-in-C maintain that it had been the prime objective of the Somme offensive when the decision to attack the Somme was made by him and Joffre a week before the Verdun battle began? There is the smell of a smokescreen in the air. There can be no denying, however, that the administrative preparations for the coming battle were very thorough.
Administrative Preparations for the 1916 Somme Battle
In 1915 at Loos, the orders for the attack were contained on some two pages. In February 1916, GHQ issued a fifty-seven-page memorandum setting out the preparations that should be undertaken before large-scale operations. Things had changed.
To prepare for the battle, a mini-city had to be built and supplied. The planning requirement looked for ‘7 weeks’ lodging for 400,000 men and 100,000 horses’. Extra accommodation was set up for 15,000 men per division in wooden framed tarpaulin-walled huts – but only with lying down space of 6ft x 2ft per man. New trenches, roads and railways were constructed. It was estimated that the Fourth Army alone would need thirty-one trains per day to sustain it. Not only was it necessary to prepare roads and railways prior to a battle, but they had to be extended forward to maintain supplies of immediate needs, such as infantry stores, guns and ammunition essential to sustain an advance. Specialist RE units, together with labour and/or pioneer battalions did the work.
Following the successful September 1916 attack on ‘the Woods’, 7th Field Company RE was tasked to build ‘tramways’ forward, and used 60m Decauville prefabricated track. By the end of October, 8 miles of track had been laid in two lines. One was from Contalmaison to beyond Martinpuich and the other from Mametz Wood to High Wood. The second in command of the company was a Lt Glubb, later to be known as Lt Gen Sir John Glubb KCB, CMG, DSO, OBE, MC – ‘Glubb Pasha’, Commander of the Arab Legion, with whom the authors communicated.
Water supply was a particular problem and more than a hundred pumping plants were set up and over 120 miles of piping laid. The range of facilities to be provided for was legion – food, ammunition, medical reinforcements, workshops and postal facilities – all involving movement. A telling measure of the scale of the challenge is given in the Official History (1916, p 283). One of the critical tasks on a battlefield is traffic control and a 24-hour traffic census taken at Fricourt three weeks after the battle began lists the following, almost unbelievable, administrative activities:
‘Troops 26,536, Light Motor Cars 568, Motor cycles 617, Motor lorries 813, 6-horse wagons 1,458, 4-horse wagons 568, 2-horse wagons 1,215, 1-horse carts 515, Riding horses 5,404, Motor ambulances 333, Cycles 1,043’,
and this is not a complete list.
The Commander-in-Chief
As pointed out in the Introduction, those who study World War I tend to fall into two main camps: those who are anti-Haig and those who are pro-Haig. But there are those who veer from one opinion to the other, according to the quality of the debate. Was the C-in-C a dependable rock, whose calm confidence inspired all around him, whose far-seeing eye led us to final victory, and who deserved the honours later heaped upon him? John Masefield, asked by Haig to write an account of the Somme battle, visited him at GHQ in October 1916. Masefield was extremely impressed by this ‘wonderful’ man. ‘No enemy could stand against such a man’, he enthused. ‘He took away my breath.’ He described Haig’s ‘fine delicate gentleness and generosity … pervading power … and a height of resolve …. I don’t think anyone could have been nicer.’

Apprehensive faces two days before the battle. Picture dated 29 June 1916
Was this the real Haig, or was he an unimaginative, insensitive product of the social caste system that knew no better: a weak man pretending to be strong, who should have been sacked? Dennis Wheatley, in his war-time memoirs, Officer and Temporary Gentleman opines, ‘He was a pleasant, tactful, competent, peacetime soldier devoted to his duty, but he had a rooted dislike of the French and was not even a second-rate General. Many of the high-ups were well aware of that, but the question had always been, with whom could they replace him?’
Many more pages than are available here are needed to pursue those questions fairly and to examine the Battle of the Somme in any detail. But some pointers can be set by a skeleton examination of the battle that, with Passchendaele in 1917, led soldiers, rightly or wrongly, to describe their C-in-C as ‘Butcher’ Haig.
The Different Parts of the Battle
The Battle is divided into 5 parts:
Part 1. The First Day: 1 July
Part 2. The Next Few Days: 2 July +
Part 3. The Night Attack/ The Woods: 14 July +
Part 4. The Tank Attack: 15 September
Part 5. The last Attack: 13 November.
Part 1. The First Day: 1 July
At 0728, seventeen mines were blown under the German front line. Two minutes later, 60,000 British soldiers, laden down with packs, gas masks, rifle and bayonet, 200 rounds of ammunition, grenades, empty sandbags, spade, mess tin and water bottle, iron rations, mackintosh sheet, warmed by the issue of rum, ‘to each a double spoonful, fed baby-fashion by the sergeant’ [Williamson], clambered out of their trenches from Serre to Maricourt and formed into lines 14 miles long. As the lines moved forward in waves, so the artillery barrage lifted off the enemy front line and rolled forward.
Now it was a life or death race, but the Tommies did not know it. They had not been entered. Their instructions were to move forward, side by side, at a steady walk across No Man’s Land. ‘Strict silence will be maintained during the advance through the smoke’, they were instructed, ‘and no whistles will be blown’. It would be safe, they were told, because the artillery barrage would have destroyed all enemy opposition.
It started on 24 June. Over 3,000,000 shells had been stockpiled but these proved to be insufficient. There were still many duds, despite the outcry of the ‘Scandal’ about duds after the Battle of Loos. Most of them were due to shoddy and defective workmanship – substandard steel casings cracked and burst prematurely; copper driving bands were faulty; the hot summer weather caused the explosives to exude; unburnt fuses remained in the bore and many other lethal inadequacies caused some gun crews to christen themselves ‘the Suicide Club’. Despite borrowing guns from the French, the Artillery were short of heavy weapons.
The original date for the assault, (‘The Big Push’), was 29 June. On 28 June the offensive was postponed to 1 July because of bad weather and there was insufficient ammunition to maintain the same level of bombardment intensity for an extra two days. Because of these factors and the doubtful efficacy of artillery against wire, the Germans were not destroyed, as had glibly been promised. They and their machine guns had sheltered in deep dugouts, and when the barrage lifted, they climbed out, dragging their weapons with them.
The Germans easily won the race. They set up their guns before the Tommies could get to the trenches to stop them and cut down the ripe corn of British youth in their thousands (as is the somewhat cliched habitual description), many on the uncut wire that they had been assured would be totally destroyed. As the day grew into hot summer, another 40,000 men were sent in, in successive waves, stepping over the bodies of their wounded companions (‘All ranks are forbidden to divert attention from enemy in order to attend wounded officers or men’), adding only more names to the casualty lists. Battalions disappeared in the bloody chaos of battle, bodies lay in their hundreds around the muddy shell holes that pocked the battlefield.
And to what end this leeching of the nation’s best blood? North of the Albert-Bapaume road, on a front of almost 9 miles, there were no realistic gains at nightfall. VIII, X and III Corps had failed. Between la Boisselle and Fricourt there was a small penetration of about half a mile on one flank and the capture of Mametz village on the other by XV Corps.
But there was some success. XIII Corps attacking beside the French took all its main objectives, from Pommiers Redoubt east of Mametz, to just short of Dublin Redoubt north of Maricourt. Overall some thirteen fortified villages were targeted to be taken on the first day, but only two – Mametz and Montauban – were actually captured. The French, south of the Somme, did extremely well. Attacking at 0930, they easily took all their objectives. ‘They had more guns than we did’, cried the British Generals, or ‘The opposition wasn’t as tough’, or ‘The Germans didn’t expect to be attacked by the French’, or ‘They had easier terrain’.
But whatever the reasons for the poor British performance in the north, they had had some success – on the right flank beside the French.
Therefore, if the attack was to continue the next day, would it not make sense to follow-up quickly on the right where things were going well?
Part 2. The Next Few Days: 2 July +
Other than the negative one of not calling off the attack, no General Command decisions were made concerning the overall conduct of the second day’s battle. It was as if all the planning had been concerned with 1 July and that the staffs were surprised by the appearance of 2 July. Aggressive actions were mostly initiated at Corps level while Haig and Rawlinson figured out what policy they ought to follow. Eventually they decided to attack on the right flank, but by then the Germans had had two weeks to recover.
Part 3. The Night Attack/The Woods: 14 July +
On the XIII Corps front, like fat goalposts, lay the woods of Bazentin le Petit on the left and Delville on the right. Behind and between them, hunched on the skyline, was the dark goalkeeper of High Wood. Rawlinson planned to go straight for the goal. Perhaps the infantry general’s memory had been jogged by finding one of his old junior officer’s notebooks in which the word ‘surprise’ had been written as a principle of attack, because, uncharacteristically, he set out to surprise the Germans and not in one way, but in two.
First, despite Haig’s opposition, he moved his assault forces up to their start line in Caterpillar Valley at night. Second, after a mere minute’s dawn barrage, he launched his attack. At 0325 on 14 July, twenty thousand men moved forward. On the left were 7th and 21st Divisions of XV Corps and on the right 3rd and 9th Divisions of XIII Corps. The effect was dramatic. Five miles of the German second line were over-run. On the left Bazentin-le-Petit Wood was taken. On the right began the horrendous six day struggle for Delville Wood. Today the South African Memorial and Museum in the wood commemorate the bitter fighting. But in the centre, 7th Division punched through to High Wood and with it were two squadrons of cavalry. Perhaps here was an opportunity for a major break-through at last. Not since 1914 had mounted cavalry charged on the Westen Front, but, when they did, the Dragoons and the Deccan Horse were alone. The main force of the cavalry divisions, gathered south of Albert, knew nothing about the attack. The charge was a costly failure, the moment passed, the Germans recovered, counter-attacked and regained the wood. Then followed two months of local fighting under the prompting of Joffre, but, without significant success to offer, the C-in-C began to attract increasing criticism. Something had to be done to preserve his image, to win a victory – or both. It was done, and with a secret weapon.
Part 4. The Tank Attack: 15 September
Through the prompting of Col Ernest Swinton and Winston Churchill, the War Office sponsored the construction, by William Foster & Co in Lincoln, of a machine that could cross trenches and was both armed and armoured. By August 1916 the machine, codenamed the ‘tank’ because of its resemblance to a water tank (later christened variously by journalists as ‘Diplodocus Galumphang’, ‘Polychromatic Toad’ and ‘Flat-footed Monster’), was, following highly successful trials, beginning production. Both Swinton and Churchill considered it essential that no use should be made of the secret weapon until it was available in large numbers. But Haig insisted that he needed them and, late in August, forty-nine were shipped to France. Still very new and liable to break down, only thirty-two tanks assembled near Trônes Wood on the night of 14 September for dispersal along the front, and the following morning at 0620, following a three-day bombardment, eighteen took part in the battle with XV Corps. Their effect was sensational. The Germans, on seeing the monsters, were stunned and then terrified. Nine tanks moved forward with the leading infantry, nine ‘mopped up’ behind. Barely over 3 hours later, the left hand division of XV Corps followed a solitary tank up the main street of Flers and through the German third line. Then Courcelette, too, fell to an infantry/tank advance.
The day’s gains were the greatest since the battle began and much jubilation was felt on the Home Front, whipped up by the press. But there were too few tanks and, after the intitial shock success, the fighting once again degenerated into a bull-headed contest. The opportunity that had existed to use the tank to obtain a major strategic result had been lost. Many felt that it had been squandered. Yet the tank had allowed Fourth Army to advance and the dominating fortress of Thiépval finally fell on 26 September, helped, it was said, ‘by the appearance of 3 tanks’. At last the British were on the crest of the Thiépval-Pozières-High Wood ridge. But Beaumont Hamel in the north still held out.
Part 5. The Last Attack: 13 November
At the northern end of the battlefield, seven Divisions of the Reserve (Fifth) Army assaulted at 0545 on 13 November. Bad weather had caused seven postponements since the original date of 24 October. V Corps was north of the River Ancre and II Corps was south. The preparatory bombardment had been carefully monitored to see that the enemy wire had been cut, but this eminent practicality was offset by the stationing of cavalry behind the line to exploit success. Past battle experience should have made such an idea absurd, the weather’s effect on the ground alone should have rendered it unthinkable. The generals were as firmly stuck for ideas as any Tommy, up to his knees in Somme mud, was stuck for movement.
But this time the mines were fired at the right time. On 1 July the Hawthorn mine above Beaumont Hamel had been blown 10 minutes early. The Sappers now tunnelled back under the old crater, which had been turned into a fortification by the Germans and placed 30,000 lbs of explosives beneath it. It was blown at 0545 and covered the German trenches with debris. The attack went in with a shield of early morning dark and fog, the troops moving tactically from cover to cover. Beaumont Hamel and the infamous Y Ravine were taken by the 51st Highland Division and their kilted Highlander Memorial stands there today in memory of that achievement. Immediately to the south of the 51st, the Royal Naval Division took Beaucourt early on the morning of the 14th and their memorial stands in the village. Fighting continued for several more days and 7,000 prisoners were taken – though Serre did not fall. But, at last, enough was enough. The attack was halted. The 1916 Battle of the Somme was over.
Casualties (killed, wounded and missing)
‘Lies, damned lies and statistics’ (attributed to Mark Twain)
Casualty figures and statistics generally are weapons which can be, and often are, falsified to discourage the enemy, encourage one’s own forces or alter a view of events to particular advantage. The Somme figures are given here alongside those for Verdun, because only by comparison can the Somme casualties be seen in a meaningful light. We do not claim any absolute numeric accuracy for our figures, which have been deduced from a number of sources, including official histories, which often have a nationalistic bias.
The Battle of Verdun is often presented as the most horrific conflict on the Western Front in terms of human casualties. Yet even allowing for inaccuracies, the comparative figures below show:
a. that the British had at least equal, if not greater, losses on the Somme than the French at Verdun;
b. that the Germans had greater losses on the Somme than they did at Verdun.
Joffre, therefore, had succeeded in his aim of joining the British and Germans in a battle of attrition. By the letting of so much young blood the British were now firmly in the conflict, Joffre had dispelled the French idea that the British were ‘not pulling their weight’, and the process of wearing down the Germans had speeded up.

The Fourth Army ORBAT on 1 July (Rawlinson)
VIII CORPS (Hunter-Weston)
Hébuterne to Beaucourt
48th (SM) Div (Fanshawe)
31st Div (O’Gowan)
4th Div (Lambton)
29th Div (de Lisle)
III CORPS (Pulteney)
Ovillers to la Boisselle
8th Div (Hudson)
19th (W) Div (Bridges)
34th Div (Ingouville-Williams)
XIII CORPS (Congreve, VC)
Carney to Maricourt
18th (E) Div (Maxse)
30th Div (Shea)
9th (S) Div (Reserve)
X CORPS (Morland)
Hamel to Authuille
36th Div (Nugent)
49th (WR) Div (Perceval)
32nd Div (Rycroft)
XV CORPS (Horne)
Bécourt to Mametz
21st Div (Campbell)
17th (N) Div (Pilcher)
7th Div (Watts)
SM = South Midlands; WR = West Riding; N = Northern; E = Eastern; S = Scottish Formations are shown north to south, with inclusive responsibilities.
‘I have of course, as a Prussian officer, no doubt whatever. War means the destruction of the enemy without scruple and by any means. War is the harshest of all trades, and the masters of it can only entertain humane feelings so long as they do no harm…
Ernst Junger, 73rd Hanoverian Fus Regt, commenting on the moral justification of the utter destruction during the German’s withdrawal to the Hindenburg Line
Although the emphasis when studying the battles of the Somme is upon the preceding and following years, fighting did not, of course, cease in this general area in 1917! It was the year which saw the Germans’ strategic retreat to the newly formed defensive Hindenburg Line (known to them as the Siegfried Line), in which they undertook the systematic and brutal destruction of every town and village they passed through, poisoning wells and setting mines and booby traps (shades of General Sherman’s ‘March to the Sea’).
Notable also was the Battle of Arras, within which was the Canadian action at Vimy and the Australian assault at Bullecourt. As these sites of 1917 actions in the Somme proper are passed, they are described in the main Itineraries of this book. But, just as ‘The Big Push’ was concentrated in the Départment of the Somme in 1916, in 1917 actions in this part of France moved northwards to the Départment of the Pas de Calais and the Battle of Arras. Some aspects of this are covered in Eastern Approach (Vimy and the surrounding sectors, see page 41) and in Itinerary Four (Bullecourt, see page 284) but the battle of Cambrai is covered in Holts’ Western Front-South book and Passchendaele in both ‘Western Front – North’ and ‘Ypres’.
1918
THE KAISER’S OFFENSIVE.
MARCH-AUGUST
‘There is no other course open to us but to fight it out! … With our backs to the wall and believing in the justice of our cause, each one must fight onto the end’.
GOC Order of the Day 11 April 1918
The Battle is divided into 2 parts:
Part 1. The Main Thrust from St Quentin to Amiens (see Itinerary 6)
Part 2. The American, Canadian and French Sectors (see Itinerary 5)
Part 1. The Main Thrust from St Quentin to Amiens
After the failure at Cambrai in 1917 the BEF went into a defensive mode and began to construct positions in depth similar to the Germans. A forward, lightly-held zone was meant to delay the attacker, while behind it was a main battle zone held in strength and depth. In both zones small redoubts (defended positions) and machine-gun posts were to be scattered like cherries in a Dundee cake. The battle zone was generally to be separated from the forward zone by a gap of two to three miles and was to be 2,000 to 3,000 yards deep. Four miles further back still was a rear zone, effectively a second position to which the defence could retire if need be. All of these positions had to be prepared and, as it attracted the lowest priority, the rear zone in many places was hardly more than a belt of wire known as the Green Line.
The British C-in-C., Haig, reasoned that the most critical part of his line was in the north, shielding the Channel Ports, and he put forty-six divisions to cover what amounted to two-thirds of his front. The remaining third, on the right, was covered by Gough’s Fifth Army which mustered fourteen divisions. Already thinly spread compared to the north, the Fifth Army was given a further twenty-five miles to cover which were taken over from the French early in 1918. Foch also wanted Haig to contribute nine divisions to a central Allied reserve to be controlled by Foch. Haig refused. Instead he made a ‘gentleman’s agreement’ that each would come to the other’s aid with six divisions after five days’ notice if the need arose.
On 29 November 1917 hostilities ceased on the Russian Front. A week later Rumania stopped fighting. The Germans now had spare forces which they could move to the Western Front. In the period up to the opening of the Kaiser’s Offensive their strength rose by 30%. British strength, compared with the summer of 1917, fell by 25%.
Ludendorff held a conference, ironically in Mons on 11 November 1917, at which the plans for the Kaiserschlacht were discussed. He decided to strike first in the area of Arras and St Quentin where the ground would be firmer than in Flanders. He also chose to attack the British whose forces, he believed, had been weakened by Passchendaele and whose Generals, he felt, were more inept and less flexible than the French. In addition he introduced a wholly new tactical philosophy. Ludendorff adopted an attack concept, originated by Capt Geyer, of a light tactical assault unit, the infantry group, made up from a few riflemen, mortar teams, engineers and light machine guns. These groups of ‘storm troopers’ incorporated in a thin screen would move forward to probe and penetrate enemy defences, bypassing any centres of opposition according to circumstances and not limited by a rigid timetable. The main attack force, following behind and reinforced with its own under-command field artillery would overcome any resistance remaining. In addition, artillery tactics were also revised. Von Hutier had introduced the idea of silent registration on the Eastern Front and it had been used with great effect at Caporetto. His chief gunner was Oberst Georg Bruchmüller and he now became the great conductor for the battle and orchestrated a score for the March artillery programme that was to confirm his nickname, ‘Breakthrough Bruchmüller’.
Bruchmüller’s plan began with silent registration and consisted of seven phases, six of them between 0400 and 0940 hours, the jump-off time. The seventh was a creeping barrage. He defined the targets to be hit, the intensity to be achieved, the explosive/phosgene gas mixture to be used, and the duration of each phase. Training for the attack, ‘Operation Michael’, was intensive and thorough. Steadily Ludendorff built up his strength. By the night of 20 March the German superiority in infantry was four to one, and the more than 6,000 guns standing by for Bruchmüller’s overture were a larger assembled force of arms than those of the British on the Somme on 1 July 1916, the British at El Alamein in October 1942 and the Allies against Saddam Hussein in February 1991 all added together: Der Tag was about to dawn.
The Battle
At 0930 hours on 21 March 1918, after five hours of Bruchmüller’s itemised bombardment, 3,500 mortars opened rapid fire on the British front line defences. Five minutes later in thick mist the storm troopers advanced. 5th Army communications had been destroyed, battalion positions and redoubts were cut off and by passed. Not only did the defenders know little about what was happening, they could see little. By nightfall, the Germans had penetrated the forward zone on both 4th and 5th Army fronts and were consolidating in the battle zone. Gough withdrew his right wing seven miles to behind the Crozat Canal (shown on modern maps as the St Quentin Canal between Ham and Chauny) and asked the French for permission to blow the railway bridges. They refused.
The following morning the Germans continued their assault, the mist still protecting them. By the end of the day the Fifth Army’s centre had been broken and all of its meagre reserves committed. On the night of 22 March Gough decided that he must pull his remaining forces behind the line of the River Somme and make a stand there (see Map 305). The line held for three days but the German tide would not be denied. The Fifth’s retreat continued. On 23 March German long-range railway guns started to shell Paris. The French considered pulling back to defend their capital and Haig looked at the possibility of abandoning the Fifth Army and moving the Third Army north to protect the Channel Ports. But the German advance was slowing. Their roads forward were clogged with traffic and constantly harassed by the RFC. Their soldiers, who had been on short rations for many months and whose clothing and equipment was of poor quality, were overwhelmed by the richness of captured British food and supplies and engaged in wholesale looting. Rudolph Binding, the German writer who took part in the advance, recorded in his diary on 28 March, ‘There were men driving cows… others who carried a hen under one arm… men carrying a bottle of wine under their arm and another open in their hand… men staggering… men who could hardly walk… the advance was held up and there was no means of getting going again for hours.’
On 26 March, in emergency sessions, Clemenceau, Foch, Milner, Haig and others conferred under the chairmanship of President Poincaré at Doullens. The initial mood of impending defeat was shattered by Foch, who proclaimed, ‘I will never surrender.’ Haig promised Poincaré that he would hold Amiens and when Foch was appointed Supreme Commander of the Allied Forces on the Western Front, Haig willingly acquiesced to the position of Number Two. The headlong retreat of the Fifth Army, however, needed a scapegoat. Ignoring the fact that Gough had warned of his shortage of men both for fighting and for preparing defences, had warned of the too-extended frontage that he had to hold, had warned of the certainty of the location of the coming attack and had asked repeatedly for reinforcements, he was relieved of his command. Two days later Rawlinson took over from him in the field with the HQ staff of the Fourth Army. On that same day the German advance was virtually spent. The Third Army north of the Somme threw back the German efforts against Arras. Ten miles in front of Amiens, just to the east of the village of Villers Bretonneux, the tired Germans were fought to a standstill by the 1st Cavalry Division.
On 3 April Gough met Haig before returning to England. The meeting was brief. Haig said that the orders for Gough’s removal had not come from him, that there would be an enquiry into the actions of the Fifth Army and its Commander and that Gough would have ‘every chance’ to defend himself. Haig concluded by shaking hands. ‘I’m sorry to lose you Hubert,’ he said. ‘Goodbye’.
Already Australian troops, rushed down by Haig from the north, were arriving around Villers Bretonneux. When the Germans attacked again at dawn on 4 April it seemed momentarily as if the village must fall, but an Australian bayonet charge tipped the scales. The forty miles advance was over.
The Germans paused to gather their strength. At GHQ Haig realised that the situation was critical and asked Foch to take over some part of the front held by the British and Commonwealth forces. Foch agreed to move a large French force towards Amiens and on 11 April Haig, worried about the morale of his tired and overstretched troops, issued his ‘Special Order of the Day’ which was addressed to ‘All Ranks of the British Army in France and Flanders’.
In the dawn mist of 24 April the 4th (Ger) Guards Division and the 228th Division supported by thirteen tanks came down the hill from Villers Bretonneux towards Amiens. Again the Australians took them on, pinching out the village on the morning of Anzac Day, 25 April, just hours after the first ever tank-versus-tank battle. The advance was over. Amiens was safe and the Germans switched their attention to Flanders. But the signs were there that the end was nigh.
Three days earlier the Australians had buried Baron Manfred von Richthofen, the ‘Red Baron’, at Bertangles, with full military honours. An Australian anti-aircraft battery claimed the victory - so did the Canadian pilot, Capt Roy Brown, and the dispute continues to this day. Von Richthofen had had eighty kills and was a symbolic figure of German military prowess. His death was a great blow to military morale at a time when back home workers’ strikes were crippling the German economy.
An extraordinary insight into the desperate attempts to stem the German tide is portrayed in R.G. Sherriff’s play, Journeys End. It is set in an officers’ dugout near St Quentin between 18-20 March 1918. The attack is anticipated, and a suicidal raid is undertaken into enemy lines to secure a prisoner for intelligence purposes and, because it is written from personal experience - Sherriff served with the East Surreys and fought in the battles of St Quentin and the Somme Crossings throughout March and April 1918 - it is searingly realistic. First produced in December 1928 at the Apollo Theatre it starred the unknown actor Laurence Olivier in the pivotal role of the company commander, Capt Stanhope. A brilliant revival, produced by David Grindley, and with the most superb cast who seem to ‘be’ rather than to act their roles, was put on in the Playhouse Theatre, London in 2004/5. The raw feelings and authentic sets and sound effects transcended the outmoded language and attitudes of ‘14-18’ to project a genuine empathic experience.
The German offensive, codenamed ‘Operation Michael’, continued to beat elsewhere along the Allied line, but on 8 August came the ‘Black Day’ of the German Army. The Fourth Army of British, Australian, Canadian and a few attached Americans, achieved complete surprise by opening their counter-offensive at 0420, and co-ordinated artillery, infantry, tanks and air force to such effect that 16,000 prisoners were taken that day.
It was the beginning of the final ‘100 Days’ that led to the Armistice of 11 November 1918.
Part 2. The American, Canadian and French Sectors:
The Kaiser’s Offensive of 21 March 1918 had reached almost to Amiens. On the D1029 St Quentin-Amiens road their advance was stopped by the Australians at Villers Bretonneux and some three miles south the Canadian Cavalry held the Germans at Moreuil, while 8 miles still further south the Americans were to have their first large-scale assault, as an American formation, at Cantigny. Then on 8 August the Allied counter-offensive known as ‘The Hundred Days’ began.
This Itinerary looks at a part of the Somme battlefield that, compared to the area associated with the actions of 1916, is rarely visited. The Kaiser’s Offensive which began on 21 March 1918 made its greatest gains in this area and what we look at here are some of the Memorials and Cemeteries associated with the international efforts that finally brought the Germans to a standstill. We examine briefly each of the nations involved in bringing the German advance to a stop south of the D1029 Villers Bretonneux-Amiens road.
The United States entered the First World War on 6 April 1917. Relations between Germany and America had been strained by the sinking of the Lusitania on 7 May 1915, when over 120 Americans died, and by indiscriminate German use of submarines against unarmed merchant shipping. Things were brought to a head by the publication of the ‘Zimmerman Telegram’. Supposedly sent from the German Embassy in Washington to the German Embassy in Mexico, it proposed that, in the event of war between America and Germany, an alliance be formed with Mexico and that Mexico should be allowed to ‘reconquer her lost territory in Texas, New Mexico and Arizona’. Feelings in America ran high against Germany, despite theories that the telegram was a fake engineered by British Intelligence and, finally, President Wilson declared war.
On 26 May 1917 Major General John. J. Pershing was appointed to command the American Expeditionary Force and he landed at Boulogne on 13 June 1917 with a small advance party. Two weeks later elements of the First Division (later to be known as ‘The Big Red One’) began landing at St Nazaire. After the war a splendid Memorial was erected there to commemorate the Division’s arrival but it was destroyed by the Germans in the Second World War. A full size replica was erected in 1989.
America had no experience of the ‘new’ war that was being fought in Europe and units were distributed amongst Allied formations in order to gain experience (e.g. see the Carey’s Force entry on page 234). The first American deaths occurred at Bathlemont (south-east of Metz) on 3 November 1917 when three men serving with the French were killed. However it remained a key part of American policy that their forces should operate as a whole, as an ‘American’ force.
In March and April 1918 the ‘Kaiser’s Offensive’ (sometimes called by the French ‘The Second Battle of the Somme’) hammered against much of the Western Front with large gains along a line from Péronne to Montdidier (see map on page 305). Pershing put all his troops under General Foch in order to help to counter the German threat and the American First Division entered the front west of Montdidier, the first time that a complete American division had been so used. Given the task of taking the high ground around Cantigny the Division’s 28th Infantry attacked at 0645 on 28 May 1918, taking the town that day and never losing it, despite heavy German counter-attacks over the next two days. The American action was acclaimed as a great success and its significance is remembered by three Memorials at Cantigny – one commemorating the National significance of the event, another remembering the First Division and the most recent to the 28th Inf Regt - a fine statue of a Doughboy. In Chicago the 1st Division Museum is in Cantigny Park and has more than 100,000 visitors a year – see www.cantigny.org
The Canadians
When the war began in August 1914 Canada automatically joined on Britain’s side and within weeks its small regular army of barely 3,000 men had been swelled by over 32,000 volunteers. In October a convoy of some 30 ships carrying the Canadian Expeditionary Force set sail for the two weeks journey to England, being joined en-route by a ship carrying the Newfoundland contingent that insisted upon remaining independent.
Not until December 1914 did the Canadians get to the front line, their first troops being the Princess Patricia’s Canadian Light Infantry formed almost entirely from exregular British soldiers. Two months later the 1st Canadian Division arrived and in September 1915 the 2nd Division landed in France. Much as General Pershing would later demand for his Americans, the Canadians insisted that their troops should remain together as a Canadian force and thus the Canadian Corps was formed, being joined in December that year by the 3rd Division.
During 1915 the Canadians were in action around Ypres and in 1916 they were on the Somme. In 1917 they had their remarkable success at Vimy Ridge (qv) and at the beginning of 1918 the Canadian Cavalry Division faced the advancing Germans at Moreuil south of the D1029. It is that action that we look at here. On the ‘Images of a Forgotten War’ website, of the National Film Board of Canada, by following the ‘Wartime/Battles/August Offensive 2’, links, one is taken to a short film of Canadian cavalry gathering before the assault.
The French
The Kaiser’s Battle in the south was directed along a rough line from Péronne to Amiens against General Byng’s 3rd Army and General Gough’s 5th Army. Both British Armies fell back, the 5th in the south suffering particularly badly. As the German drive towards Montdidier developed during the day General Pétain gave orders that French troops should support the British right and forces under General Humbert, part of General Fayolle’s Army Group (he had commanded the French 6th Army that attacked south of the Somme on 1 July 1916), were rushed forward in lorries, joining the battle the following day.
The German advances continued, however, and on 26 March at Doullens all Allied forces were placed under the command of General Foch, superseding Pétain. Two days later General Pershing told Foch, ‘All we have is yours’. On 27 March Montdidier fell but the German progress had been stalling as French resistance south of the Somme gathered pace and now, almost forty miles from their supply bases and exhausted, the Germans stopped to gather breath. It was in this area from the end of March to the end of June that René Fonck, the French air ace, claimed some 18 of his 75 victories.
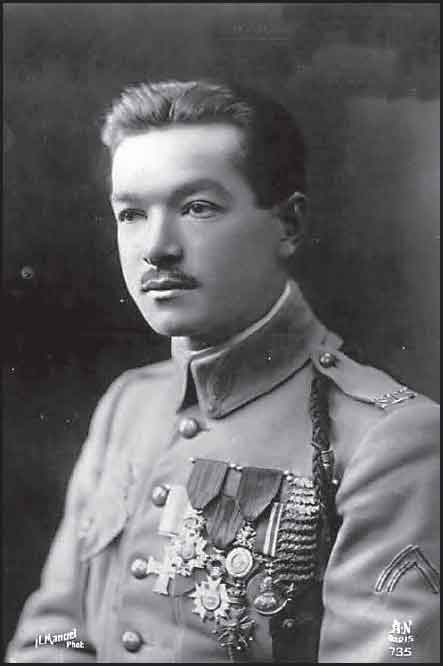
French air ace, René Fonck