CHAPTER 20
Basic Techniques
 Now that we have learned about the proven health benefits of bone broth, it’s time to get into the kitchen and cook. The wonderful thing about preparing bone broth or stock is that it leads to so many delicious dishes; indeed, stock is the basis of soups, stews, sauces, gravies, and many other comfort foods. “Without stock,” said the master chef Escoffier, “nothing else can be done.”
The happy exercise of making broth inevitably leads the neophyte chef to devising other dishes and gaining a reputation as a wonderful cook.
Stock Versus Broth
Is there a difference? Purists insist there is; unfortunately, the explanations for the difference between stock and broth vary considerably.
The word stock derives from an old Germanic root meaning “tree trunk.” The word has more than sixty related meanings tied to the idea of basic materials, sources, and supplies. The word broth derives from another Germanic root meaning “to prepare by boiling.” It is related to the words bouillon and brew.
Today the word stock has come to mean, for most people, the thin liquid produced by simmering raw ingredients (vegetables and bones), after which all the solid ingredients are removed—thus it serves as a basic material or source for sauces and soups. In contrast, broth is a basic soup in which the solid pieces of meat or fish, along with some vegetables, remain. It is often made more substantial by adding starches such as rice, barley, or pulses. According to this definition, then, chicken broth and chicken soup have the same meaning.
In the culinary world, both stock and broth start with the same basic foundation: water, onions, celery, carrots, black peppercorns, and herbs. Broth is then enriched with the meat of a chicken—usually a whole chicken. The mixture is simmered and strained; it is light, with a clean flavor. Stock, on the other hand, starts with the same foundational ingredients, but rather than simmering it with the meat of the chicken, stock is made with bones. In this definition, stock ends up with more gelatin than broth.
Compounding the confusion between the generally accepted notion of hearty stock and lighter broth, practitioners of the GAPS (Gut and Psychology Syndrome) diet, a therapeutic diet designed to heal the intestinal tract, refer to “meat stock” as stock cooked using plenty of meat and few bones and cooked for only a short period of time, in contrast to broth, which is made with plenty of bones and cooked much longer. Thus, this diet distinguishes between “light stock” and “rich broth.”
Among some chefs, stock is technically what is made when you simmer vegetables, meat scraps, bones, and aromatics in order to extract their flavor. Stock isn’t meant to be eaten on its own; rather, stock serves as the basis for soups, sauces, and stews, and therefore should not be salted or highly seasoned. Broth is defined as “seasoned stock,” which can be eaten on its own, as a soup.
Slight differences in definition—but all very confusing! Since the experts disagree, in this book we can be forgiven for using the terms interchangeably throughout this book. Both stock and broth are a clear or semiclear liquid; soup is made by adding ingredients to stock or broth.
When Stock Won’t Gel
The goal is gelatinous stock, stock that sets up as a solid gel if you put it in the fridge, so solid that you can turn the container over and the gel will stay in place. Second best is stock or broth that has visibly thickened but may not be solid. And if your broth hardly thickens at all, it is still worth consuming, as there will always be some gelatin in it, not to mention minerals and many other nutrients.
The gel in well-made stock or broth comes from the unique qualities of collagen fibers. Most proteins from animals and plants unfold from their normal compact shape when heated; the strands “become entangled and form strong bonds with each other so that they coagulate permanently and irreversibly into a firm solid. Thus, liquid eggs solidify, pliable muscle tissue becomes tough meat, and milk curdles,” according to Harold McGee. Collagen fibers behave in the opposite way. With heat, collagen molecules unwind from their ropelike structure and disperse in the cooking water like spaghetti strands—the unwound, separate chains are what we call gelatin. When the liquid is cooled, the strands rebond to each other, forming a gel structure; reheat and the strands disperse again.
“Won’t gel” is the most common complaint we get from neophyte broth makers. Here are the main reasons that your stock won’t gel:
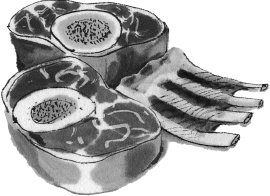
1. Not the right kind of bones. You want bones that have lots of cartilage. Meat contains only about 1 percent by weight of collagen; bones contain about 20 percent; skin, such as chicken skin and pig skin, contains up to 30 percent; and veal knuckles contain up to 40 percent. This means for chicken stock you’ll want to include the backs, wings, and necks; for beef and veal stock, use cartilaginous knuckles or tailbones (usually sold as oxtail) along with more cartilage-rich meaty bones like short ribs or shanks; fish stock usually gels easily from the copious amounts of cartilage in the fish carcass.
One way to ensure plenty of gelatin is to include feet—chicken feet (and heads also!) for chicken broth and beef or calves’ feet for beef and veal stock. Since these are difficult to obtain—especially from a conventional supermarket—pigs’ feet can be used in any stock to ensure an adequate gel. Most supermarkets carry split pigs’ feet (although you may need to ask your market to get them). One or two pieces of split pig’s foot (fresh, not smoked) in any kind of stock will guarantee a gel.
If you are cooking a whole chicken for broth (and to have meat left over), remember that the skin contains a lot of cartilage along with other good things; still, it’s wise to add chicken feet or a split pig’s foot to the pot if you can.
As a general rule, to get the right mix of bones that yield gelatin and other types of bones that add flavor and color, make sure you use one of the following ingredient combinations:
• 1 whole free-range chicken with neck and wings, preferably also with feet and head
• 3 to 4 pounds bony chicken parts such as necks, backs, and wings, with the skin on, plus feet and head or a split pig’s foot
• Picked carcasses of 2 meat chickens plus feet and heads or split pig’s foot
• 7 pounds total beef or veal bones (4 pounds cartilage-rich bones, such as tail and knuckles, and 3 pounds meaty bones, such as short ribs or shank)
Many cooks report that they get a better gel using pasture-raised chickens than conventional or simply organic chicken. Such poultry will also be more nutritious for your family and much less likely to contain toxins like lead or arsenic.
2. Not enough bones and too much water. When you make stock, the water should just cover the bones. For chicken, the correct proportion is 3 to 4 pounds bones per about 4 quarts filtered water, or just enough water to cover the bones. For beef stock, the correct proportion is 7 pounds bones per about 4 quarts of water or enough water to cover the bones.
3. The stock was heated to too high a temperature. If stock is brought to a rolling boil, the heat will break down the collagen fibers into shorter strands. These do not coagulate as well when the stock is cooled—and hence a less than satisfactory gel may result. (Nevertheless, the cartilage strands are still there, and if the stock is reduced by boiling to make a sauce, the strands will concentrate enough to thicken the sauce.)
This means you need to watch the pot as you get your stock going. It should be heated over medium heat until the liquid starts to “roll,” and then turned down to low heat so that the stock barely simmers. You will need to learn to know your stove and stockpot. You may need a burner separator to lift the pan higher from the flame or coils of your stove; if your stockpot cooks too hot, you can leave the top slightly askew to prevent boiling.
French culinary tradition always cooks stock with the lid off. This helps prevent boiling and also allows the gradual reduction of the stock and concentration of gelatin.
4. The stock did not cook long enough—or it cooked too long! You need to cook the stock long enough to extract the collagen, but not so long that the gelatin fibers break into short pieces. Optimum extraction times depend on the size of the bones and the age of the animal; “the more cross-linked collagen of a steer takes longer to free than the collagen from a veal calf.” As a general rule, cook chicken or veal stocks for 4 to 6 hours and beef stock for a full day or overnight.
The collagen in fish is less cross-linked than that of mammals and birds, so it melts and dissolves at much lower temperatures and in a relatively short time. Fish collagen will dissolve into the water at temperatures well below the boil and in as little as a half hour.
Raw Bones or Cooked?
Most recipes call for raw bones, but you can also use bones that have been cooked—most commonly bones from cooked or baked chicken, but any leftover bones from a roast or a bird can go into the stockpot or slow cooker for broth. There should be no difference in flavor or nutritional properties.
Mixing Species in the Stockpot
In many recipes we add a split pig’s foot to chicken stock, and some people save up all their bones and make stock of several species mixed together. While this practice might not appeal to culinary purists, there is no reason to stick to one species only. Adding a split or whole pig’s foot to any kind of broth increases gelatin content, and a stock made with several species of bones will not be less nutritious or less flavorful, especially if you are using the stock in a highly flavored soup or stew. However, for gourmet sauces, where you want to enhance the flavor of your meat, use a stock made with the same meat—chicken stock for chicken, beef stock for beef, and so on.

Preparing Chicken Feet for the Stockpot
In many cases, the chicken feet will arrive already prepared. However, if you get them directly from a farm, you may need to dress the chicken feet yourself; that is, if the feet are covered with a yellow membrane, this will have to be removed. Rub the feet with salt and scald them briefly in boiling water followed by an icy bath. When blanching the chicken feet, take great care not to blanch the feet too long or you will overcook the feet, which will cause the yellow membrane to fuse to the foot and activate the gelling process. Moreover, overcooking will also cause the tendons in the feet to contract, making peeling pretty much impossible. Blanching for just the right length of time—usually less than a minute—enables you to more easily peel the yellow membrane off the foot. After removing the yellow membrane, some cooks like to chop the talons off at the first knuckle, but this is not really necessary. To see photos of chicken feet in the three stages of preparation, visit http://nourishedkitchen.com/chicken-feet-stock/.
Where to Buy Bones
The sad truth is that it can be hard to find good bones for stock, especially the cartilaginous bones of feet and knuckles.
If your only choice is a supermarket, you can still find oxtail and probably pigs’ feet, but you may need to make a special request for them. Beef shank and beef short ribs are your best choices for meaty bones, as they contain a lot of cartilage.
Many of the best cuts, including chicken feet, veal knuckles and feet, and beef feet, can be found in kosher markets and Middle Eastern, Asian, Latin American, and other ethnic markets.
The ideal is to purchase your bones and meat directly from a farmer engaged in nontoxic pasture feeding. A growing number of farmers can supply you with naturally raised chicken, including heads and feet, and bones and meat from pigs, calves, and steers (but obtaining calves’ or beef feet from these farmers may be problematic because most small butchers do not possess the special equipment required for processing the feet). To find a farm near you, contact your nearest local chapter of the Weston A. Price Foundation (westonaprice.org). You will find that the bones of pastured animals release their cartilage more quickly than the bones of conventionally raised animals, and the smell of the stock they produce is absolutely delicious.
Finally, you can obtain good bones and even ready-made broth from a number of suppliers by mail (see Sources, here); and the Shopping Guide of the Weston A. Price Foundation provides a list of sources that is updated yearly. The Shopping Guide is now available as an iPhone app.
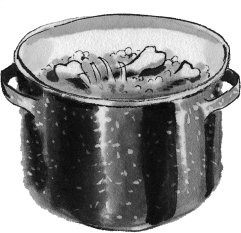
The Stockpot
The ideal stockpot is made of good-quality enamel on steel, cast iron, or aluminum. Uncoated stainless steel can give a metallic taste to the stock from leaching undesirable metals like nickel. Uncoated aluminum pots should never be used.
Three good sources of enameled stockpots are Le Creuset, Cuisinart, and Martha Stewart (check the Internet for best buys of these brands). Speckled enamelware, purchased in hardware stores, also works well and is easy on the budget. You should have a range of sizes, from eight to twenty quarts.
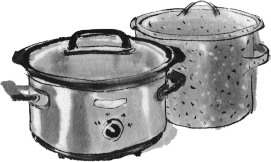
Stock can also be made in a slow cooker and even in a pressure cooker (see here).
Flavor
Flavor in basic stock comes from the meat, not the bones. If you are using your stock to make soup or aspic, you may not want much flavor in your stock. In that case, you can use stock made mostly with bones and very little meat. The Simple Slow Cooker Pig’s Foot Broth (here) has a neutral flavor, gels beautifully, and can be used wherever you are looking for gelatin without a strong taste.
Quality Counts
I have found that the quality of chicken determines how a broth performs. I have done tests with organic, free-range, pastured, and “in-between” (non-GMO soy-fed and corn-fed “outdoor” summer chickens in Minnesota) to see what gives the most medicinal stock for those who are ailing. I find that even an organic chicken produces a muddy taste. (Organic chickens may be labeled “free-range” or “cage free” but they are still mostly raised in barns and never see sunlight or green grass.) The best taste comes from pastured and “in-between” chicken. Broth made from these pastured birds does not get muddy, even with a long simmer at 200°F. I first bring the stock to a hint of a boil and then reduce to a simmer and skim as it cooks. In my research I have found that making a stock from a conventional chicken using the same technique results in a taste extremely different and sometimes downright nasty.
—Lydia Rose Sifferien, Oakland, California
For a stock with lots of flavor—flavor that will concentrate when you boil down the stock to make a reduction sauce—you’ll need to include lots of meaty bones, such as short ribs and shank. For best flavor, first brown the meaty bones in a hot oven (set at 400°F to 450°F) for about 30 minutes. This will create Maillard reactions with lots of complex flavor molecules—and also impart a beautiful brown color to the broth.
For a very flavorful (and also more nutritious) broth, you can make what is called a double stock by straining the bones and vegetables out of your stock and then cooking more bones and vegetables in the original stock. This highly prized double stock is especially delicious—great for consommé or French onion soup.
Clear or Cloudy?
Most stock ends up slightly cloudy, which is just fine for gravies, blended soups, and thickened stews. But for clear soups, clear reduction sauces, and aspics, you will want your stock to be clear.
Cloudiness can be reduced by careful cooking techniques. Start by washing the bones and meat thoroughly before adding to the pot (if you are browning the bones, wash and wipe them dry before browning in the oven). Set the bones in a pot and cover with cold filtered water plus a little vinegar, let soak for 30 to 60 minutes, and then slowly bring the water to a gentle simmer. McGee explains, “The cold start and slow heating allow the soluble proteins to escape the solids and coagulate slowly, forming large aggregates that either rise to the surface and are easily skimmed off or settle onto the sides and bottom. A hot start produces many separate and tiny protein particles that remain suspended and cloud the stock.”
An important technique for avoiding cloudiness in the stock is to skim the scum that rises to the top as the stock starts to cook. Skim as thoroughly as possible at the beginning of the process, and then occasionally throughout cooking. An interesting observation: Bones from pastured animals produce very little scum, while those from conventional sources can produce lots of it. The scum carries impurities and may give a bitter flavor to the stock, so take care to remove as much as you can—certainly at the beginning of the cooking process and occasionally throughout the long simmer. This is all the more important when you are using bones from conventionally raised animals, as that scum will be carrying a lot of the junk that cooking dislodges.
The key to producing a clear broth is to never let it come to a boil. Instead, simmer it with the lid off or slightly askew.
When stock is chilled, the particles that cause impurities settle to the bottom. An easy way to get a fairly clear stock is simply to let the stock come to room temperature then pour all but the bottom half inch or so into a pan, discarding the cloudy stock at the bottom of the container.
You may want to invest in a chinois, a cone-shaped straining tool. It can be lined with cheesecloth or a thin towel to produce the clearest of broths. Even better is a jelly strainer bag, available online. Another great tip is to pour your stock through a disposable coffee filter—this easy technique works beautifully for small amounts of stock. For about 1 cup of stock, use a coffee filter placed in a 4-inch strainer set above a bowl.

Finally, the traditional method for clarifying a cloudy stock is to add beaten egg whites to the strained stock. Bring to a slow boil, allow the egg whites to rise to the surface, and boil gently for 30 minutes or so. The whites will coagulate, carrying any impurities with them. After cooling, you can lift them off to discover the clearest of stocks underneath. Strain through a fine-mesh strainer to remove any remaining egg white.
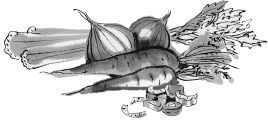
Vegetables and Herbs
Classic stock calls for the addition of vegetables and herbs, often referred to as aromatics. Ideally these are added after the initial skimming process, as vegetables rising to the surface make the broth hard to skim. Vegetables and herbs add not only flavor and color to the broth but also lots of important minerals.
The classic vegetable combination is onions, celery, and carrots, called a mirepoix in French cuisine. Many leave the skins on the onions to add flavor and color to the broth, but the carrots should be peeled, as the peelings can be bitter. Onions and carrots add sweetness to the broth and celery adds a distinctive flavor.
Of course other vegetables can be added as well. Use peeled parsnips in place of carrots if you want a lighter-colored broth. Garlic, tomatoes, peppers, greens, leeks, celery root and leaves, and parsley can all be added. In fact, making broth provides a good opportunity to clean out the vegetable drawer in your refrigerator. Vegetables that are limp and oldish can still go into the pot. (Cruciferous vegetables like cabbage, broccoli, and Brussels sprouts might give too strong a flavor to the broth, so use with caution.)
As for herbs, the classic addition is a bouquet garni, sprigs of parsley and thyme plus a bay leaf or two tied together with string; any number of other herbs can be tied with the bouquet garni as well. Peppercorns provide great flavor to broth. Ideally use the softer green or white peppercorns, which you can crush in your hands or in a mortar and pestle before adding, but the harder black peppercorns will soften up in the broth and also add flavor. It’s best to add the peppercorns after the initial skimming.

Salt
The one seasoning that should never be added to stock is salt. Meat releases some salt, but the main reason for leaving it out is that if you boil down or concentrate the stock, you may end up with liquid that is too salty. Add salt to your soup, stew, sauce, or gravy at the end of the cooking process, when the desired thickness is obtained.
The Water
You will want to use clean, filtered water for your stock—definitely not city tap water containing fluoride, chloramine, and other chemicals. Remember that your stock will likely be reduced and concentrated, thus concentrating whatever is in the water you use. (Unlike chlorine, used in years past, chloramine, widely used for water treatment today, does not evaporate or boil off.)
Home-filtered water, bottled spring water, and clean well water are all good choices for making stock.
Vinegar
Most of our recipes for stock call for the addition of small amounts of vinegar. This helps extract minerals from the bones and vegetables, even when diluted with the water. Small amounts of vinegar do not change the flavor of the broth. The vinegar need not be raw, as it will be heated during cooking anyway, and apple cider vinegar, wine vinegar, or another type of vinegar can be used in the recipes.
Finishing and Straining Your Stock
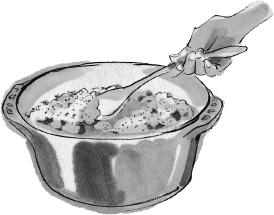
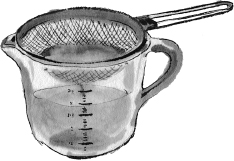
When the stock is finished cooking, use tongs and a slotted spoon to remove the bones and meat pieces, then pour the liquid through a fine-mesh strainer set over a bowl to remove the vegetables and herbs. Two-quart Pyrex measuring containers make the ideal receptacle for strained stock (you’ll need more than one of them for many of our stock recipes). Just set your strainer over the measuring containers and ladle or pour your stock through. Then your stock is in containers from which it can easily be poured. The stock is now ready to use.
If, however, you want a defatted stock for gourmet sauces or clear soups, set your Pyrex measuring containers of strained stock in the refrigerator until completely cooled. The fat will rise to the top and can be easily skimmed off the jellied stock (you may use this fat, especially beef and veal fat, for cooking if you wish). After removing the fat, transfer your stock to glass jars or plastic containers for storage. The stock can then be reheated and clarified if needed (see here). (You can also chill and freeze the stock without defatting.)
Storage
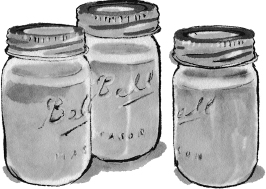
The ideal storage container for broth is freezer-safe, wide-mouth, quart-size mason jars. You can also use jars that close with a clamp and rubber gasket, such as those made by Weck or Libby. The possibility of breakage can be minimized by taking two important steps:
1. Fill the jars only three-quarters full.
2. Let cool, and then chill the jars in the refrigerator, allowing the temperature to drop gradually, before transferring to the freezer.
In fact, you can cool your finished stock in the pot, then ladle it directly from the pot through a cone-shaped strainer into your jars. Refrigerate and then remove the congealed fat if desired, then transfer the jars to the freezer.
The jars are easy to clean in the dishwasher and of course can be reused an infinite number of times. When the tops of mason jars become rusted or unsightly, they can be replaced, as can the rubber gaskets for jars that close with clamps. Plastic lids that avoid the rust problem are also available for mason jars.
For plastic, use plastic containers with a rating of 1, 2, 4, or 5. Plastic containing BPA is rated 3, 6, or 7. Make sure your stock is thoroughly cooled before transferring to plastic containers.
Those with limited freezer space can reduce the stock by boiling to make fumet, or concentrated stock. It can then be cooled somewhat and poured into ice cube trays or put into zip-top bags (but not zipper bags because they have a weaker grip). When you need stock for broth or soup, you simply remove a cube or two from the ice cube tray or remove the contents from one zip-top bag and melt it in a pan with water. Water is the magic ingredient that restores concentrated stock to thinner broth for soups and stews.
What to Do with Those Bones
What to do with those bones after making stock? Soft bones from chicken stock can be given to your dog or cat… or even to your backyard chickens. Larger bones from beef or veal can be simmered a second and even third time. They can then be discarded or even put in a compost pile (although they will take a long time to soften and decompose). See “A Farmer’s Tips for Making Broth” on here for an ingenious method of recycling the bones and vegetables from making stock.
By the way, the meat still on the meaty bones or chicken bones will be tender and delicious. Don’t throw it away; instead, pick it off and reserve it for soups, meat or chicken salads, or stews. It can be stored for a few days in the refrigerator or several months in the freezer.
Some cooks like to place softened bones in the blender and make a thick bone paste, which can then be thinned with a little stock. While not exactly a gourmet dish, “bone soup” is obviously nutritious and much higher in calcium than regular bone broth.
MSG Sensitivity
Some people are very sensitive to monosodium glutamate (MSG), even to its more natural form, free glutamic acid. Glutamine, or glutamic acid, is an essential amino acid abundant in meat and cartilage, and the process of making stock brings it out into the liquid. Indeed, it is glutamic acid that gives broth its savory, meatlike flavor.
Those with extreme sensitivities to MSG will also react to the free glutamic acid in broth. The solution is to make a meat stock with lots of meat and very few bones and simmer it for a short time, about an hour. One reader reports to us that she can’t tolerate bone broth cooked more than six hours. These individuals will need to use their broth in soups and not as reduced, concentrated sauces.
Recipes That Make Their Own Stock
You can make gelatin-rich soups and stews without making stock beforehand! For soups, simply add a split pig’s foot, a couple of chicken feet, or a cartilage-rich ham hock or two to the soup while it is cooking. Oxtail soup will be naturally rich in gelatin.
A Farmer’s Tips for Making Broth
Here are some tips and tricks I have developed for making broth, as well as something to do with the leftover bones once you’re done (that is, if you live on a farm or have chickens).
Save your veggie scraps in the freezer for use in making stock later. I save all my onion skins and tops, celery tops and ends, and any other scraps that would be good in a stock. I also save bones and fat any time we eat meat. This cuts down on our garbage and compost waste and also enables me to make large batches of stock at one time instead of a little at a time.
You can make several batches of stock from one pot of bones! Once you make the first batch, add more water to the pot and simmer for another day. The second and even third batch of stock is just as flavorful as the first and often gels just as well too.
After making stock at our farm, we use the spent bones and veggie scraps to create protein treats for our chickens. We have a wire basket lined with straw on their coop that we put all the waste in. We put a bit more straw on top, wait a few days, and watch as fat little maggots come dropping out of the basket to be joyfully gobbled up by our chickens! They love these protein-rich little grubs, and we love the fact that our stock waste isn’t waste at all, but is getting used yet another time to create two more nutritious foods (grub for the chickens and eggs and meat for us!). This also helps control the fly population over time, because every maggot that is eaten by a chicken is another maggot not turning into a fly later. Once the maggot numbers have dropped off, we take the straw and what’s left of the stock waste (not much!) and add it to our compost. This is best for a farm, but it can be done on a very small scale for a few backyard chickens. There is a little smell for a day or two, but that goes away pretty quickly. The straw also helps absorb the smell quite well.
—Rachel Armistead, Woodsboro, Maryland
For stews, use the cuts that have the most cartilage, such as short ribs or shanks, and add some cartilage-rich bones such as a pig’s foot, veal or beef knuckle, or beef or veal foot.
Portable Stock
Stock boiled down into a thick gel makes a great portable soup for camping trips. It can be poured into shallow trays and dehydrated in a dehydrator to the point where it becomes brittle. Place these pieces of stock in individual plastic bags along with dried vegetables, pieces of beef jerky, and a little salt. Rehydrate in water over a campfire for instant soup!
Purchased Broth
What to do if you really don’t have time to make stock? Fortunately, we have many sources of genuine stock made from bones, usually provided frozen. Many of these sources will provide stock by mail order—at a price, of course.
Some sources are listed in our Sources section (here); for updated information, you can purchase the Shopping Guide from the Weston A. Price Foundation or the Foundation’s Find Real Food App. Local chapters of the Weston A. Price Foundation may know of individuals making stock for the local market (find your nearest local chapter at www.westonaprice.org/local-chapters).
What about broth in cans and asceptic containers? Here’s a test that anyone can do. Put the contents of the can or container in a bowl and place in the refrigerator. Does it gel? Usually the answer is no, not at all. Most of these products are made with water and flavorings, with very little in the way of bones and virtually no gelatin or cartilage material.
An additional problem with the asceptic packaging is that the boxes are flash-heated to way above the boiling point, an unnatural process that almost certainly warps and distorts any amino acids that may be in the broth.
We also have the question of what the cans and packaging are lined with—plastics in the case of cans and aluminum in the case of aseptic containers. These products are not worth the money and may actually be harmful.
Let’s Get Cooking!
If you have never made broth, you are in for a surprise. It’s fun to do and sets you on the path to being a good cook. So let’s roll up our sleeves and get started!