
Elizabeth P. Lawlor
Illustrations by Pat Archer
Most people identify trees by their leaves. This makes tree identification a special challenge in winter. This may not be a disadvantage, because it forces you to observe the more subtle differences among trees.
Deciduous trees are those that shed their leaves in the fall. Without their leaves, you can see the trees’ various shapes. This is an ideal time to learn about branching patterns. The diagrams will help you determine which pattern each tree illustrates.
1. Whorled branches grow out of the trunk in threes. This occurs rarely, but you can find it easily in larches (pine family), a deciduous gymnosperm.

whorled (third branch on the other side)
2. The branches, twigs, and leaves are paired in some trees. Look for this pattern, called opposite, in maple, buckeye, ash, dogwood, and horse chestnut.

opposite, or paired
3. The third pattern of branch arrangement is called alternate. The branches and twigs grow in spiral steps.

alternate
Branching as seen in winter
If you would like to learn more about patterns in nature, read Fascinating Fibonaccis, by Trudi Garland.
Within the parameters of a tree’s genetic code, its shape is determined by its environment. A tree growing in an open space will develop a different shape than will a tree of the same type growing in more cramped quarters such as woods or an urban park. A tree that grows close to its neighbors will have normal-sized limbs only near its top, with perhaps a few underdeveloped limbs along the length of its trunk. Look for this kind of stunted development.
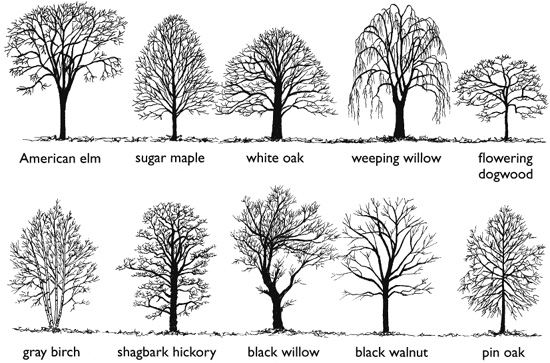
The shape of a tree aids in its identification. For example, a sugar maple is shaped like an egg standing on its broad end. An elm looks like an open umbrella or an upside-down bud vase. To see the distinct shape of a tree, you will need to observe the tree from a distance. You can easily do this in an open field or on a golf course.
Find a tree that interests you. Describe its shape in your notebook. Draw an outline of the tree or photograph it. Do the branches droop like those of a weeping willow? Do they spread out from the trunk like a white oak, or do they grow close to the trunk like a hickory? Are the branches growing in any particular direction? Besides the prevailing winds, what might cause the tree to grow in a particular direction?
It is difficult to determine the identity of many trees by examining only the bark. One reason for this is that as a tree ages, its bark changes. Nevertheless, there are some trees that have very distinctive bark and are easily recognizable throughout their lives.
The sycamore (Platanus occidentalis) is easily identified by its mottled and flaking bark. It is frequently planted as a shade tree, and you can find it in parks and along urban and suburban streets.
A clue to the nature of the bark of shagbark hickory (Carya ovata) lies in the tree’s name. Strips of bark scroll away from the trunk and give the tree a shaggy appearance.
The bark of the American beech (Fagus gran-difolia) is smooth and gray or blue-gray.
The bark of the American hornbeam (Carpinus caroliniana) is often described as resembling flexed arm muscles.
WINTER TREE SILHOUETTES
American beech bark (Fagus grandifolia)

Shagbark hickory bark (Carya ovata)

American hornbeam bark (Carpinus caroliniana)

Sycamore bark (Platanus occidentalis)
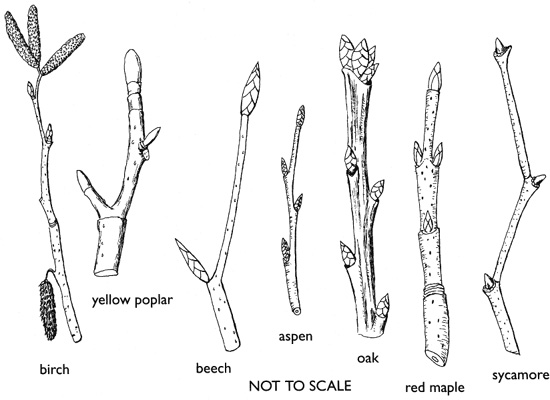
Twigs and buds are especially useful in identifying trees in winter.
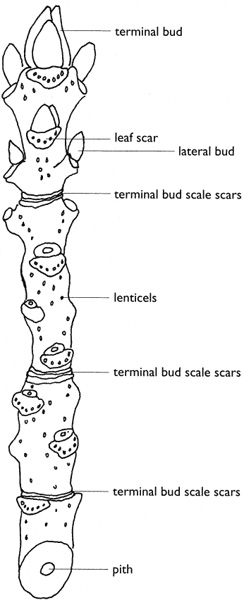
Green ash twig with terminal bud.
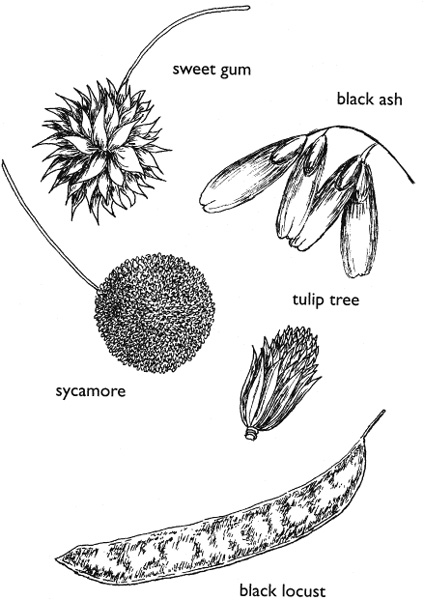
Many deciduous trees retain some seed containers throughout the winter.
Twigs come in a variety of colors, shapes, and sizes. Make a collection starting with beech, oak, shagbark hickory, and maple, if you can find them. How many colors are there among your twigs? Are they straight, zigzag, or curved? Study the additional twig traits described below. The illustrations will help you match twig with tree.
First look at the buds. The bud at the tip of the twig is called the terminal bud. As it develops, it adds length to the twig. The buds that grow along the side of the twig are called lateral buds. They produce flowers, leaves, or new branches. Each bud is covered by overlapping scales that protect the developing tissue.
The characteristics of the terminal bud can help you identify the tree. Is the bud single or in a cluster? Is it large or small? Pointed or rounded? Hairy? Sticky? What color is it? Oak twigs have clusters of three or four terminal buds protected by brown or reddish brown scales. Beech tree twigs have only one terminal bud. Like the lateral buds, it is shiny tan and cigar shaped. Red maple twigs have a single round, dark red terminal bud. The terminal bud of shagbark hickory is elongated with blunt tips, hairy, and usually dark brown.
Now look at the lateral buds along the sides of the twigs. How do they resemble the terminal buds?
The small dots you see on new or young twigs are lenticels. These are openings in the outer layers of the stem and root tissues that allow the exchange of oxygen into and carbon dioxide out of the plant. Is there a pattern to the arrangement of lenticels? How far back on the twig can you find them?
Twigs will also show leaf scars. During the summer, the tree produces a layer of cork between the leaf stem and the point where it attaches to the twig. When this layer is complete, the leaf falls, and the mark left on the twig is called the leaf scar. The shape of the leaf scar is unique for each type of tree. If you look closely at a bare twig, you will see tiny dots in the leaf scar. These dots mark where the transport tubes of the twig joined those of the leaf and are called the vascular bundle scar. The illustrations on page 100 show lateral buds and leaf scars on selected twigs. You will notice that they come in a variety of shapes and sizes. The color of the buds also will vary according to the type of tree.
The terminal bud scar is the point where the bud scales of the terminal bud were attached. The space between rings, which look like rubber bands around the twig, mark each year’s growth. In what year did your twig grow the most? Look at other twigs the same age on the same tree. Do they also show the most growth during that same year?
If you cut into a twig, you will find a sponge-like substance called pith. When placed in a growth medium, pieces of pith grow into new plants. Cut a cross section of twig and examine the pith. If it is star-shaped, it is probably an oak, poplar, or hickory twig. If the pith is circular, it is probably an elm twig.
Many deciduous trees retain some seed containers throughout the winter. You can easily see the button balls, or seed clusters, of the sycamore dangling from the zigzag twigs. If you live in an area where sweet gum (Liquidambar styraciflua) thrive, look for the spiked seed balls. Clusters of winged seeds that hang from branches announce the ash. The yellow poplar or tulip tree (Liriodendron tulipifera) produces seed clusters that resemble a tulip blossom. Ash trees (Fraxinus spp.) retain bunches of winged seeds. See if you can find these and other trees that retain some seed containers throughout the winter.
—From Discover Nature in Winter
Elizabeth P. Lawlor
Illustrations by Pat Archer
When you first walk into the forest on a hot summer day, you are relieved to feel the cool, moist shade. As you walk along the path, you notice the small trees and bushes that thrive in the sun-mottled shade, as well as dense patches of ferns. Ferns are especially abundant in the wet areas near streams.
These common woodland plants have an exotic, ancient aura to them, like prehistoric relics. Ferns and their close relatives actually did flourish in the steamy forests of the dinosaur ages in the Carboniferous period, about 350 million years ago. The stable climate of that time encouraged their growth. Flat, marshy land and vast inland seas contributed to the success of these early land-dwelling plants. The forests of ferns they created flourished over a large portion of the earth, including what are now the icy polar regions. The cooling climate that followed this period resulted in the evolution of the ferns we see today, which are adapted to changing sets of environmental conditions. Today there are some twelve thousand fern species, about four hundred of which live in the United States, and about one hundred of those in the Northeast. Ferns of various sizes and shapes live in a diversity of habitats, ranging from tropical rain forests to the arctic tundra. Robust, eighty-foot-tall fern trees thrive in the tropics, and dainty, two-inch leaves of curly grass fern (Schizaea pusilla) grow in the acid soils of southern New Jersey bogs. You also can find ferns in such unlikely places as the marshlands of northern Alaska and even Antarctica. However, few grow in arid deserts.
Ferns were the first plants with vascular systems. These systems carry minerals and water to the food factories in the leaves and the manufactured nutrients from the leaves to all parts of the plant. They also provide support so that these plants can stand upright.
Ancient mythology often attributed magical qualities to ferns. People noticed that ferns did not possess obvious structures related to reproduction, such as flowers, fruits, and seeds, but the plants continued to appear year after year. Compared with other plants, the ferns were a strange anomaly.
A rudimentary understanding of how ferns reproduce dates back only three hundred years, to 1669, when spores were discovered. But at that time, scientists were unable to make the connection between these tiny structures and fern reproduction. It was not until the mid-eighteenth century that this relationship became clear. However, the scientific explanation itself is quite an intricate tale filled with strange terminology.
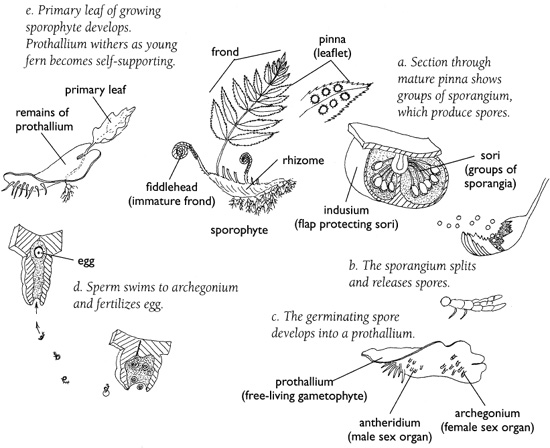
Spores are tiny cells that do not contain a baby plant or embryo. Therefore, spores do not become new ferns, but if they fall on suitable soil and have adequate water, they will divide and produce a tiny structure called a prothallium (plural, prothallia). These flat, often heart-shaped structures lack leaves, stems, roots, and vascular systems. Prothallia get their nutrients directly from the surrounding water, which doesn’t have to be more than a thin film over the ground. The prothallia are small, growing only to about one-fourth inch in diameter, and are only about one cell thick except near the center. In this slightly thicker region, on the underside, two small structures develop. One of these is the archegonium, which contains an egg, and the other is the antheridium, which contains antherozoids or sperm. Spores need moisture for fertilization to take place, as the antherozoids must swim to the archegonium. The fertilized egg that develops from this union eventually becomes the plant we recognize as the fern. During this development, the prothallium withers, and the young fern becomes self-supporting. Often referred to as the private life of the fern, this phase in the two-part life cycle of a fern is called the gametophyte generation.
The self-supporting fernlets have tightly coiled, bright green heads, called crosiers, or fiddleheads, which poke their way through the soil in the spring. As the fern matures, the coils straighten into leaves, or fronds. With the unfurling of its young fronds, the fern enters another stage of its life cycle. Now its job is to produce spores. Some ferns produce hundreds of thousands of spores, and other, more prodigious ferns produce millions.
LIFE CYCLE OF FERNS
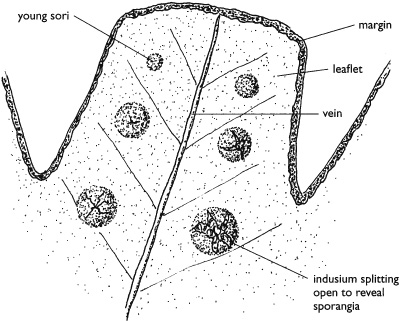
Individual fern species have their own unique patterns of spore production, but generalizations about this process can be made. In the spring, tiny green bumps appear on the undersides of the leaves. As the season progresses toward summer, these bumps turn brown, and the leaves may look as though they are growing fungi. These dark brown spots are called sori, and they contain spore cases, or sporangia. Sometimes the sporangia are covered with a thin protective membrane called an indusium.
When the sportes are mature, they are released from the sporangium. The method of release varies among species. In some ferns, the spores are shot into the air by a slingshot-like mechanism. In other species, the spore cases simply open, and the spores are caught in air currents and drift away from the parent fern. Whatever the discharge mechanism, the spores of all ferns become airborne with the slightest breeze, even by an imperceptible movement of air.
Relatively few spores come to rest on suitable soil. Those that land in warm, shady, moist places at the right time of year will begin to grow. If conditions are not appropriate at the time of their landing, the spores remain alive but inactive for as long as a year. This spore-producing phase in the life cycle of a fern is called the sporophyte generation.
The complete life cycle of a fern is even much more complicated than has been outlined here. If you keep in mind the following, however, you can easily remember the essential steps in the cycle: 1. Fronds produce spores. 2. Spores develop into prothallia. 3. Prothallia manufacture gametes. 4. Gametes fuse to produce a new fern (the sporophyte). In the [Observations] section, you will have an opportunity to explore this process in some specific ferns.
This pattern of shifting between asexual and sexual development is known as alternation of generations. Although it is the usual pattern of fern reproduction, not all ferns are restricted to it; some can reproduce vegetatively as well. One way they do this is by the branching and rebranching of their rhizomes (a special type of stem). Some ferns send out a “feeler” rhizome that roots some distance from the parent fern. When this happens, a new population of ferns appears where there were none before.
Ferns also can reproduce asexually by vegetative reproduction of fronds, roots, or rhizomes. This method does not use spores or require the union of gametes, and the offspring are identical copies, or clones, of the parent plant. As long as the habitat conditions meet the requirements of the parent plants, the clones and resulting population will survive.
The rare walking fern (Camptosorus rhizophyllus) demonstrates a form of vegetative reproduction. Its long, lance-shaped fronds arch away from the center of the plant. When the tips of the fronds touch the earth, they produce roots and new plants. Because the new plant was not produced through the union of gametes or sex cells, it is a clone of its parent.
The Boston fern (Nephrolepis exaltata bostoniensis), used frequently as an interior decoration, reproduces vegetatively through the use of runners, stringlike leafless stems that develop among the fronds. These runners will sprout roots wherever they touch soil.
Buds on the roots of the staghorn fern (Platycerium sp.) develop into fernlets. Some less familiar ferns develop clones on the upper surfaces of their fronds. Eventually the new ferns will leave the parent fern, develop roots and rhizomes, and become independent ferns.
Most ferns are perennials. When it turns cold at the end of the growing season, the fronds of these ferns turn brown and become brittle. Their life above the ground is over, but the rhizomes continue to live throughout the winter. When spring arrives, new shoots will sprout from the rhizomes. If you feel around a clump of ferns in the autumn, you may feel some hard, round forms. These are the beginnings of the fiddleheads that will appear next spring.
Some ferns are evergreen and, along with pines, cedars, and hollies, provide a splash of color to the winter landscape. The common Christmas fern (Polystichum acrostichoides), which gets its name from the eared, stocking-shaped lobes of its fronds, is an evergreen fern you might find along wooded sloping streambanks, near stone walls, and in rocky, wooded areas. The marginal wood fern (Dryopteris marginalis) and the rare hairy lipfern (Cheilanthes lanosa) are frequent members of the rocky slope community.
Wherever they grow, ferns lend a subtle feeling of wildness to their habitat. Compared with the cheery spring blooms of wildflowers, ferns are subdued and are easily ignored. However, there is great diversity and beauty to be found. Find some ferns. Make a commitment to spend a season with them, observe them, ask questions, and learn what they have to tell you. They might just develop into a lifelong passion. The activities that follow will help give you a new and rich perspective on these fascinating plants.
In the activities below, you will discover a world of plants very different from the flowering plants of fields and gardens. On ferns, you will not find the familiar flowers, fruits, and seeds. Instead, fronds, sporangia, and prothallia will be your new companions as you navigate through this complex yet beautiful world. The ferns you will examine in these activities are not restricted to wetland habitats, but are common and easily found. Use the diagram below to help familiarize yourself with some fern anatomy and the vocabulary that goes with it.
Frond, or Leaf Blade. The flat, green leaf blades, or fronds, the most conspicuous part of the fern, vary in size and shape. Fronds are usually compound, with leaflets, or pinnae, attached along a rachis, or midrib. The fronds manufacture food through photosynthesis. Some species have sterile and fertile leaves of different sizes and shapes. Fertile fronds contain reproductive spores. Fronds vary in size and shape in different species.
FERN ANATOMY
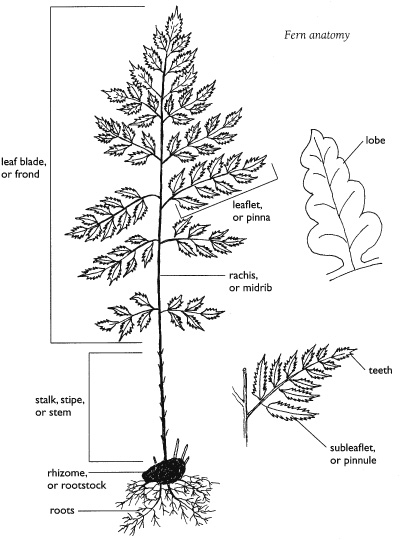
Stipe, or Stalk. The stipe, or stalk, is the leaf support below the rachis and above the root. It is covered with hairs or scales, rounded in back and concave or flat in front, and green, brown, tan, silver, or black in color.
Rachis. The rachis is the backbone of the frond and is the continuation of the stalk supporting the leaflets. It corresponds to the midrib of a simple leaf. Until the lobes in a fern are cut to the midrib, there is no rachis.
Leaflet, or Pinna (Plural, Pinnae). Leaflets are divisions of a compound leaf.
Subleaflet, or Pinnule. Subleaflets are subdivisions of leaflets.
Lobe, or Pinnulet. Lobes are the subdivision of a pinnule.
Teeth. Teeth are serrations along the edges of the pinnae, pinnules, or pinnulets.
Rhizome. Rhizomes are horizontal stems that lie on the surface of the soil or just below it.
Roots. Roots are thin, threadlike, sometimes wiry structures that anchor the plant and absorb water and minerals from the soil. They grow from the rootstock, or rhizomes.
The shape of a frond will help you identify an unfamiliar fern. Is the frond triangular and broadest at the base, does it become narrow at both ends, or is it tapered only at the base?
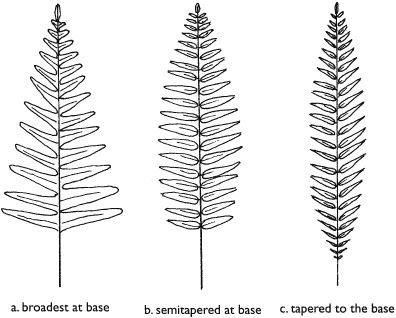
Frond shapes
Fronds come in many shapes and may be undivided, somewhat divided, or much divided into smaller parts.
Ferns vary in appearance. Some are extremely delicate; others are more substantial. There are differences in the lobes, leaflets, and subleaflets. Ferns are organized into groups having similar leaf patterns, which makes fern identification somewhat easier. Botanists who specialize in ferns use an even more detailed system than the one presented here to help them categorize these beauties.
Undivided Ferns. These ferns are very unlike the typical fern. The simple leaves are straplike and lack the feathery appearance of most ferns. These include the rare walking fern and the bird’s nest fern (Asplenium nidus), often grown as a houseplant.
Simple Ferns, or Lobed Ferns. Fronds of these ferns are divided by cuts on either side of the midrib but do not touch the midrib. The common polypody (Polypodium virginianum) has this design.
Compound Ferns. These ferns are cut into distinct leaflets to the midrib.
Once-cut ferns. Each leaflet, or pinna, is cut to the midrib. Ferns in this group are the sensitive fern (Onoclea sensibilis) and Christmas fern.
Twice-cut ferns. In these ferns, not only are the fronds cut into leaflets, but the leaflets are also cut into subleaflets, or pinnules. They include the marsh fern (Thelypteris palustris), cinnamon fern (Osmunda cinnemomea), ostrich fern (Matteuccia struthiopteris), and marginal wood fern.
Thrice-cut ferns. In these, the laciest of ferns, the fronds are cut into leaflets (pinnae), which are cut into subleaflets (pinnules), which are cut again into pinnuletes. The common bracken fern (Pteridium aquilinum) of open fields and woods and the lady fern (Athyrium filix-femina) of moist, shaded woods are thrice-cut ferns.
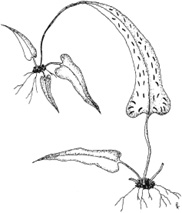
Walking fern (Camptosorus rhizophyllus).
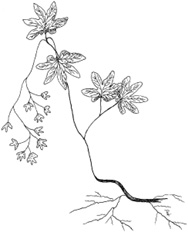
Hartford climbing fern (Lygodium palmatum).
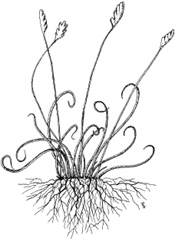
Curly grass fern (Schizaea pusilla).
Unfernlike Ferns. There are a few rare ferns that, in spite of their unfernlike appearance, are classified as ferns because they are vascular plants that reproduce by spores rather than seeds. The walking fern (Camptosorus rhizo-phyllus) prefers the northern face of moist limestone outcrops. The Hartford climbing fern (Lygodium palmatum) has vinelike fronds that climb and twist over shrubs and other obstacles in the partial or deep shade of low thickets and along streambanks in moist, wet, acid soil. It prefers sun, but the rhizomes must be wet. Curly grass fern (Schizaea pusilla) grows in wet, very acid soil, such as that found in cranberry bogs and cedar swamps. It is found in New Jersey, Nova Scotia, and Newfoundland.
Ferns are easier to find than you might think. You will find them to moist, shaded areas, along riverbanks, around ponds, and in the woods. Here are brief descriptions of three common ferns you are likely to find growing in swampy areas and in wet woodlands.
The cinnamon fern has twice-cut fronds and a separate cinnamon-colored fertile frond growing from the rhizome that bears club-shaped sporangia. The tall, pointed sterile fronds grow in a circular pattern.
The ostrich fern has tall, plumelike, twice-cut sterile fronds that are wider in the middle and taper toward the base and the top of the frond. The fertile frond is also plume shaped, and its tough pinnae clasp dark brown clusters of sori.
The marsh fern also has twice-cut fronds. You can distinguish between sterile and fertile fronds by the presence of sori on the fertile fronds, which are also taller and thinner than the sterile fronds.
You need not limit yourself to ponds to discover the fascinating world of ferns. Other ferns grow in habitats such as roadside ditches, meadows, and damp, cool forests, and some even grow out of brick walls.
The sensitive fern is a very common fern with once-cut fronds, found in open fields and swamps. The wavy, lobed fronds do not produce sori, which means that they are sterile. A separate fertile frond appears during the fall. It contains small, brown, bead-shaped clusters containing sori that persist throughout the winter.
The common polypody grows in rock crevices in woodlands. The sori develop on the undersides of the upper lobes. The fronds are once-cut.
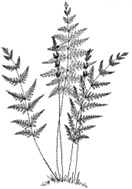
Cinnamon fern (Osmunda cinnamomea).
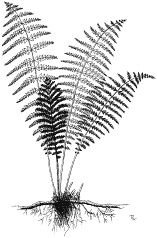
Ostrich fern (Matteuccia struthiopteris).

Marsh fern (Thelypteris palustris).
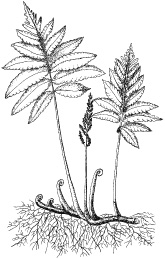
Sensitive fern (Onoclea sensibilis).
The Christmas fern has leathery, evergreen, once-cut fronds with a tough stipe and rachis. The fertile pinnae are limited to the top third of the frond, where there are reddish brown sori on the underside.
The marginal wood fern has large, leathery, evergreen, twice-cut fronds and scaly stipes. The sori are located on the margin of each pinnule. Look for this common fern on rocky woodland slopes.
The bracken fern is common in woodlands and fields. It has very large, leathery, thrice-cut, triangular fronds. Look for sori around the edges of the undersides of pinnules that are folded under.
The lady fern has pointed, thrice-cut fronds with floppy tips. Short, straight, or curved sori develop on the undersides of the fronds. This is a common fern of moist, semi-shaded woods and fields.
Although the fronds of most ferns look identical, some of them produce spores and are called fertile fronds; others do not and are known as sterile or vegetative fronds.
Some ferns produce fertile fronds that do not resemble the leafy sterile fronds. The sensitive fern produces fertile fronds that look like small, thin sticks, each with many branchlets. The spore cases look like brown beads decorating the tiny branches. These fertile fronds live long after the sterile fronds have withered and died. The fertile fronds of the cinnamon fern look like cinnamon-colored sticks standing erect in the middle of a clump of bright green sterile fronds.
As you observe your ferns throughout the growing season, look for signs of fertile fronds. When do the fronds first appear? Do they all appear at once? If not, how long is the delay between frond appearance? When do the sori first appear? Are all the look-alike fronds on your fern fertile or are some sterile? When do the fronds, sterile and fertile, die back? On average, what is the lifespan of a frond? How many fronds does one fern produce in a season? Record your findings in your field notebook.
In the spring, bright green young ferns begin to poke up through the soil. As each emerges, you will see a coil of green called a fiddlehead, or crosier. These names refers to the coil’s shape, the first for its resemblance to the head of a violin, and the second for a bishop’s ceremonial staff also called a crosier, which is a stylized shepherd’s staff with a crook at the top.
The fiddleheads are coiled because the upper and lower surfaces of the fronds grow at different rates. As the fern grows, the fiddlehead unrolls and expands, revealing tiny new fronds. Sometimes the fiddlehead has a cover of fuzzy, brown scales. Some ferns have a cover of silky hairs on the rachis when the young fiddlehead unrolls. Before the development of synthetic materials, these hairs from large tropical tree ferns were used for upholstery stuffing.
Locate a patch of ferns during the summer months, and return there the following spring to observe the fiddleheads poke through the soil, unfurl, and release their folded leaflets. Record your observations in your field notebook. On what date do you first notice the fiddlehead? Is it wearing a brown, tan, or white fuzzy protective hood? How long does it take to reach its full height? Look for different types of ferns. Do all the ferns you observe have fiddleheads? Which ferns have them and which do not?
In the fall, you can find fiddleheads by poking around the base of the fern. They are tightly coiled, hard, round structures that hug the rhizomes and may be covered by a thin sheet of soil.
Some people relish fiddleheads as tasty vegetables, reminiscent of asparagus. The fiddle-head of commerce is the ostrich fern, great quantities of which are collected in the spring and shipped to markets or canneries. If you would like to investigate this gourmet aspect of ferns, try the following. (Caution: Do not eat fiddleheads you pick in the wild. Use only those you buy from a grocer.)
Select fiddleheads that are newly arrived to the grocer’s shelves, choosing only those that are bright green and tightly coiled. Cut off the long tails. Between your palms, rub away the fuzzy or brown, papery covering, and wash the fiddle-heads well. Steam them until fork-tender, and rinse in cool water. Dry them thoroughly, then toss with a favorite salad dressing. Or if you prefer, stir-fry them in oil with ginger to taste for about two minutes. Add two cloves of garlic, salt, and one-quarter cup of chicken broth. Cover and simmer for about five minutes.
If eating fiddleheads does not appeal to you, you can still buy a few and unfurl them to examine how the leaves are packaged.
Summer is the best time to look for ripe spores. You can tell which spores are ripe by the color of the sori, which will be a shiny dark brown. If the sori are white or green, the spores contained within the sporangia are immature. Withered or torn sori indicate that the spores have been dispersed.
On some ferns, the sori are covered with a thin membrane called an indusium, which can be curved, round, or long and narrow. These characteristics of the indusium vary among species and are used to help identify them. The size, shape, color, and location of the sporangia are also important clues in fern identification. The cinnamon fern has clusters of sori on separate stalks. On the ostrich fern, the sori are enveloped by leaflets with curved margins. On the bracken fern, the sori form a continuous line at the frond’s edge. The wood fern has scattered rows of sori and a kidney-shaped indusium. The marsh fern has sori near the margins and a kidney-shaped indusium.
When did the spores on your fern mature? Are they on all the green leafy fronds or only on some of them? Where on the frond are they located? Are they confined to the margins of the frond, or are they along the midrib? Are they on a distinctly different fertile frond? Are the sori covered with an indusium? Describe the sporangia. Make a drawing or take a photograph of your fern, perhaps from several different angles. Keep a record of your findings in your field journal.
Remove a mature frond with shiny brown sori and place it between sheets of white paper. In a day or two, remove the top sheet carefully and pick up the frond. Spores should be present on the bottom sheet.
—From Discover Nature in Water and Wetlands
U.S. Army
In a survival situation you should always be on the lookout for familiar wild foods and live off the land whenever possible.
You must not count on being able to go for days without food as some sources would suggest. Even in the most static survival situation, maintaining health through a complete and nutritious diet is essential to maintaining strength and peace of mind.
Nature can provide you with food that will let you survive any ordeal, if you don’t eat the wrong plant. You must therefore learn as much as possible beforehand about the flora of the region where you will be operating. Plants can provide you with medicines in a survival situation. Plants can supply you with weapons and raw materials to construct shelters and build fires. Plants can even provide you with chemicals for poisoning fish, preserving animal hides, and for camouflaging yourself and your equipment.
Note: You will find illustrations of the plants described in this chapter in Appendixes B and C.
Plants are valuable sources of food because they are widely available, easily procured, and, in the proper combinations, can meet all your nutritional needs.
Absolutely identify plants before using them as food. Poison hemlock has killed people who mistook it for its relatives, wild carrots and wild parsnips.
At times you may find yourself in a situation for which you could not plan. In this instance you may not have had the chance to learn the plant life of the region in which you must survive. In this case you can use the Universal Edibility Test to determine which plants you can eat and those to avoid.
It is important to be able to recognize both cultivated and wild edible plants in a survival situation. Most of the information in this chapter is directed towards identifying wild plants because information relating to cultivated plants is more readily available.
Remember the following when collecting wild plants for food:
• Plants growing near homes and occupied buildings or along roadsides may have been sprayed with pesticides. Wash them thoroughly. In more highly developed countries with many automobiles, avoid roadside plants, if possible, due to contamination from exhaust emissions.
• Plants growing in contaminated water or in water containing Giardia lamblia and other parasites are contaminated themselves. Boil or disinfect them.
• Some plants develop extremely dangerous fungal toxins. To lessen the chance of accidental poisoning, do not eat any fruit that is starting to spoil or showing signs of mildew or fungus.
• Plants of the same species may differ in their toxic or subtoxic compounds content because of genetic or environmental factors. One example of this is the foliage of the common chokecherry. Some chokecherry plants have high concentrations of deadly cyanide compounds while others have low concentrations or none. Horses have died from eating wilted wild cherry leaves. Avoid any weed, leaves, or seeds with an almondlike scent, a characteristic of the cyanide compounds.
• Some people are more susceptible to gastric distress (from plants) than others. If you are sensitive in this way, avoid unknown wild plants. If you are extremely sensitive to poison ivy, avoid products from this family, including any parts from sumacs, mangoes, and cashews.
• Some edible wild plants, such as acorns and water lily rhizomes, are bitter. These bitter substances, usually tannin compounds, make them unpalatable. Boiling them in several changes of water will usually remove these bitter properties.
• Many valuable wild plants have high concentrations of oxalate compounds, also known as oxalic acid. Oxalates produce a sharp burning sensation in your mouth and throat and damage the kidneys. Baking, roasting, or drying usually destroys these oxalate crystals. The corm (bulb) of the jack-in-the-pulpit is known as the “Indian turnip,” but you can eat it only after removing these crystals by slow baking or by drying.
You identify plants, other than by memorizing particular varieties through familiarity, by using such factors as leaf shape and margin, leaf arrangements, and root structure.
The basic leaf margins are toothed, lobed, and toothless or smooth.
These leaves may be lance-shaped, elliptical, egg-shaped, oblong, wedge-shaped, triangluar, long-pointed, or top-shaped.
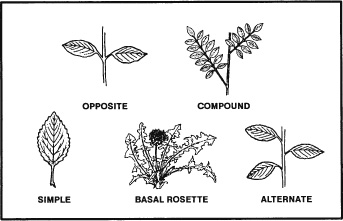
The basic types of leaf arrangements are opposite, alternate, compound, simple, and basal rosette.
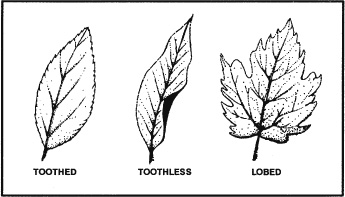
Leaf margins.
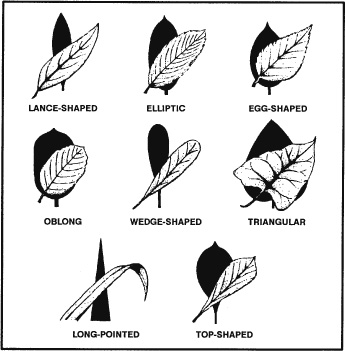
Leaf shapes.
Leaf arrangements.
Root structures.
The basic types of root structures are the bulb, clove, taproot, tuber, rhizome, corm, and crown. Bulbs are familiar to us as onions and, when sliced in half, will show concentric rings. Cloves are those bulblike structures that remind us of garlic and will separate into small pieces when broken apart. This characteristic separates wild onions from wild garlic. Taproots resemble carrots and may be single-rooted or branched, but usually only one plant stalk arises from each root. Tubers are like potatoes and daylilies and you will find these structures either on strings or in clusters underneath the parent plants. Rhizomes are large creeping rootstocks or underground stems and many plants arise from the “eyes” of these roots. Corms are similar to bulbs but are solid when cut rather than possessing rings. A crown is the type of root structure found on plants such as asparagus and looks much like a mophead under the soil’s surface.
Learn as much as possible about plants you intend to use for food and their unique characteristics. Some plants have both edible and poisonous parts. Many are edible only at certain times of the year. Others may have poisonous relatives that look very similar to the ones you can eat or use for medicine.
There are many plants throughout the world. Tasting or swallowing even a small portion of some can cause severe discomfort, extreme internal disorders, and even death. Therefore, if you have the slightest doubt about a plant’s edibility, apply the Universal Edibility Test before eating any portion of it.
Before testing a plant for edibility, make sure there are enough plants to make the testing worth your time and effort. Each part of a plant (roots, leaves, flowers, and so on) requires more than 24 hours to test. Do not waste time testing a plant that is not relatively abundant in the area.
Remember, eating large portions of plant food on an empty stomach may cause diarrhea, nausea, or cramps. Two good examples of this are such familiar foods as green apples and wild onions. Even after testing plant food and finding it safe, eat it in moderation.
You can see from the steps and time involved in testing for edibility just how important it is to be able to identify edible plants.
To avoid potentially poisonous plants, stay away from any wild or unknown plants that have—
• Milky or discolored sap.
• Beans, bulbs, or seeds inside pods.
• Bitter or soapy taste.
• Spines, fine hairs, or thorns.
• Dill, carrot, parsnip, or parsleylike foliage.
• “Almond” scent in woody parts and leaves.
• Grain heads with pink, purplish, or black spurs.
• Three-leaved growth pattern.
Using the above criteria as eliminators when choosing plants for the Universal Edibility Test will cause you to avoid some edible plants. More important, these criteria will often help you avoid plants that are potentially toxic to eat or touch.
An entire encyclopedia of edible wild plants could be written, but space limits the number of plants presented here. Learn as much as possible about the plant life of the areas where you train regularly and where you expect to be traveling or working. Listed below and on the following pages are some of the most common edible and medicinal plants.
TEMPERATE ZONE FOOD PLANTS
• Amaranth (Amaranthus retroflexus and other species)
• Arrowroot (Sagittaria species)
• Asparagus (Asparagus officinalis)
• Beechnut (Fagus species)
• Blackberries (Rubus species)
• Blueberries (Vaccinium species)
• Burdock (Arctium lappa)
• Cattail (Typha species)
• Chestnut (Castanea species)
• Chicory (Cichorium intybus)
• Chufa (Cyperus esculentus)
• Dandelion (Taraxacum officinale)
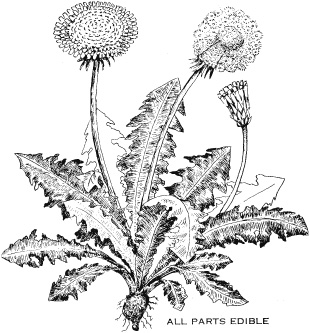
Dandelion
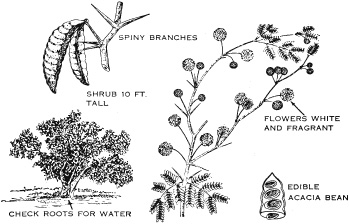
Acacia
• Daylily (Hemerocallis fulva)
• Nettle (Urtica species)
• Oaks (Quercus species)
• Persimmon (Diospyros virginiana)
• Plantain (Plantago species)
• Pokeweed (Phytolacca americana)
• Prickly pear cactus (Opuntia species)
• Purslane (Portulaca oleracea)
• Sassafras (Sassafras albidum)
• Sheep sorrel (Rumex acetosella)
• Strawberries (Fragaria species)
• Thistle (Cirsium species)
• Water lily and lotus (Nuphar, Nelumbo, and other species)
• Wild onion and garlic (Allium species)
• Wild rose (Rosa species)
• Wood sorrel (Oxalis species)
TROPICAL ZONE FOOD PLANTS
• Bamboo (Bambusa and other species)
• Bananas (Musa species)
• Breadfruit (Artocarpus incisa)
• Cashew nut (Anacardium occidentale)
• Coconut (Cocos nucifera)
• Mango (Mangifera indica)
• Palms (various species)
• Papaya (Carica species)
• Sugarcane (Saccharum officinarum)
• Taro (Colocasia species)
DESERT ZONE FOOD PLANTS
• Acacia (Acacia farnesiana)
• Agave (Agave species)
• Cactus (various species)
• Date palm (Phoenix dactylifera)
• Desert amaranth (Amaranthus palmeri)
One plant you should never overlook is seaweed. It is a form of marine algae found on or near ocean shores. There are also some edible fresh-water varieties. Seaweed is a valuable source of iodine, other minerals, and vitamin C. Large quantities of seaweed in an unaccustomed stomach can produce a severe laxative effect.
Dulse.
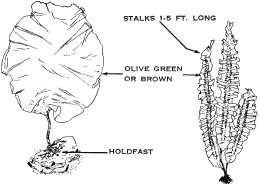
Sugar wrack.
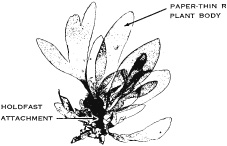
Laver.
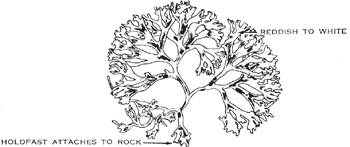
Irish moss.
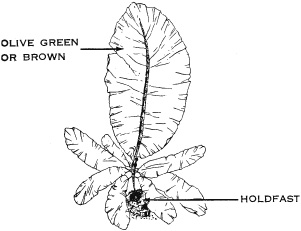
Kelp.
When gathering seaweeds for food, find living plants attached to rocks or floating free. Seaweed washed onshore any length of time may be spoiled or decayed. You can dry freshly harvested seaweeds for later use.
Its preparation for eating depends on the type of seaweed. You can dry thin and tender varieties in the sun or over a fire until crisp. Crush and add these to soups or broths. Boil thick, leathery seaweeds for a short time to soften them. Eat them as a vegetable or with other foods. You can eat some varieties raw after testing for edibility.
SEAWEEDS
• Dulse (Rhodymenia palmata)
• Green seaweed (Ulva lactuca)
• Irish moss (Chondrus crispus)
• Kelp (Alaria esculenta)
• Laver (Porphyra species)
• Mojaban (Sargassum fulvellum)
• Sugar wrack (Laminaria saccharina)
Although some plants or plant parts are edible raw, you must cook others to be edible or palatable. Edible means that a plant or food will provide you with necessary nutrients, while palatable means that it actually is pleasing to eat. Many wild plants are edible but barely palatable. It is a good idea to learn to identify, prepare, and eat wild foods.
Methods used to improve the taste of plant food include soaking, boiling, cooking, or leaching. Leaching is done by crushing the food (for example, acorns), placing it in a strainer, and pouring boiling water through it or immersing it in running water.
Boil leaves, stems, and buds until tender, changing the water, if necessary, to remove any bitterness.
Boil, bake, or roast tubers and roots. Drying helps to remove caustic oxalates from some roots like those in the Arum family.
Leach acorns in water, if necessary, to remove the bitterness. Some nuts, such as chestnuts, are good raw, but taste better roasted.
You can eat many grains and seeds raw until they mature. When hard or dry, you may have to boil or grind them into meal or flour.
The sap from many trees, such as maples, birches, walnuts, and sycamores, contains sugar. You may boil these saps down to a syrup for sweetening. It takes about 35 liters of maple sap to make one liter of maple syrup!
—From Survival (Field Manual 21–70)
Bradford Angier
(Quercus)
There is no need for anyone to starve where acorns abound, and from 200 to 500 oaks (botanists differ) grow in the world. Some eighty-five of these are native to the United States. Although some of the latter species are scrubby, the genus includes some of our biggest and most stately trees. Furthermore, except in our northern prairies, oaks are widely distributed throughout the contiguous states, thriving at various altitudes and in numerous types of soil.
Abundant and substantial, acorns are perhaps this country’s most important wildlife food. The relatively tiny acorns of the willow oak, pin oak, and water oak are often obtainable near streams and ponds, where they are relished by mallards, wood ducks, pintails, and other waterfowl. Quail devour such small acorns and peck the kernels out of the larger nuts.
Pheasants, grouse, pigeons, doves, and prairie chickens enjoy the nuts as well as the buds. Wild turkeys gulp down whole acorns regardless of their size. Squirrels and chipmunks are among the smaller animals storing acorns for off-season use. Black-tailed mule and white-tailed deer, elk, peccaries, and mountain sheep enjoy the acorns and also browse on twigs and foliage. Black bears grow fat on acorns.
Acorns probably rated the top position on the long list of wild foods depended on by the Indians. It has been stated, for example, that acorn soup, or mush, was the chief daily food of more than three-quarters of the native Californians. The eastern settlers were early introduced to acorns, too. In 1620 during their first hungry winter in Plymouth, the Pilgrims were fortunate enough to discover baskets of roasted acorns which the Indians had buried in the ground. In parts of Mexico and in Europe, the natives today still use acorns in the old ways.
All acorns are good to eat. Some are less sweet than others, that’s all. But the bitterness that is prevalent in different degrees is due to tannin, the same ingredient that causes tea to be bitter. Although it is not digestible in large amounts, it is soluble in water. Therefore, even the bitterest acorns can be made edible in an emergency.
Oaks comprise the most important group of hardwood timber trees on this continent. A major proportion of our eastern forests is oak. Its dense, durable wood has many commercial uses. Furthermore, oaks are among the most popular shade trees along our streets and about our dwellings.
The oaks may be separated into two great groups: the white oaks and the red oaks. The acorns of the former are the sweet ones. They mature in one growing season. The inner surfaces of the shells are smooth. The leaves typically have rounded lobes, but they are never bristle-tipped. The bark is ordinarily grayish and is generally scaly.
Among the red oaks, the usually bitter acorns do not mature until the end of the second growing season. The inner surfaces of the shells are customarily coated with woolly hair. The leaves have distinct bristles at their tips or at the tops of their lobes. The typically dark bark is ordinarily furrowed.
Indians used acorns both by themselves and in combination with other foods. For example, the Digger Indians roasted their acorns from the western white oak, Quercus lobata, hulled them, and ground them into a coarse meal which they formed into cakes and baked in crude ovens. In the East, the acorns of the white oak, Quercus alba, were also ground into meal but then were often mixed with the available cornmeal before being shaped into cakes and baked. Roasted and ground white oak acorns provide one of the wilderness coffees.
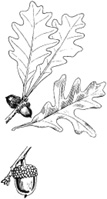
Eastern white oak.
Indians leached their bitter acorns in a number of ways. Sometimes the acorns would be buried in swamp mud for a year, after which they would be ready for roasting and eating whole. Other tribes let their shelled acorns mold in baskets, then buried them in clean freshwater sand. When they had turned black, they were sweet and ready for use.
Some tribes ground their acorns by pounding them in stone pestles, many of which are found today, and then ran water through the meal by one method or another for often the greater part of a day until it was sweet. The meal might be placed in a specially woven basket for this purpose, or it might just be buried in the sandy bed of a stream.
To make the familiar, somewhat sweetish soup or gruel of the results, all that is necessary is to heat the meal in water. The Indians generally used no seasoning. As a matter of fact, until the white man came they ordinarily had no utensils but closely woven baskets. These were flammable, of course, and the heating had to be done by putting in rocks heated in campfires. Still showing how little one can get along with, the tribe then ate from common baskets, using their fingers.
It’s an easy thing to leach acorns today. Just shell your nuts and boil them whole in a kettle of water, changing the liquid every time it becomes yellowish. You can shorten the time necessary for this to as little as a couple of hours, depending of course on the particular acorns, if you keep a teakettle of water always heating on the stove while this process is continuing. The acorns can then be dried in a slow oven, with the door left ajar, and either eaten as is or ground into coarse bits for use like any other nuts or into a fine meal.
To make acorn cakes, mix 2 cups of the meal with ½ teaspoon salt and ¾ cup of water to form a stiff batter. This will be improved if you let it stand at room temperature for about an hour before turning it into the skillet.
Heat 3 tablespoons cooking oil in a large frypan until a test drop of water will sizzle. Drop the batter from a tablespoon, using a greased spatula to shape cakes a bit over 3 inches in diameter. Reduce the heat and tan the cakes slowly on each side. They are good either hot or cold.
For acorn pancakes for two, combine a cup of acorn meal and a cup of regular flour with 2 tablespoons sugar, 3 teaspoons double-action baking powder, and ½ teaspoon salt. Beat 2 eggs, 1 ½ cups milk, and 2 tablespoons liquid shortening. Get your preferably heavy frypan or griddle hot, short of smoking temperature, and grease it sparingly with bacon.
When everything is ready to go, mix the whole business very briefly into a thin batter. Overmixing will make these tough. For this reason, a slightly lumpy batter is preferable to one that’s beaten smooth. Turn each hotcake only once, when the flapjack starts showing small bubbles. The second side will take only half as long to cook. Serve steaming hot with butter or margarine and sugar, maple syrup, or one of the wild jellies.
We think of antibiotics as modern developments, but some of the Indian tribes used to let their acorn meal accumulate a mold. This was scraped off, kept in a damp place, and used to treat sores and inflammations.
(Betula)
The nutritious bark of the black birch is said to have probably saved the lives of scores of Confederate soldiers during Garnett’s retreat over the mountains to Monterey, Virginia. For years afterward, the way the soldiers went could be followed by the peeled birch trees.
The black birch may be identified at all times of the year by its tight, reddish-brown, cherrylike bark, which has the aroma and flavor of wintergreen. Smooth in young trees, this darkens and separates into large, irregular sections as these birches age. The darkly dull green leaves, paler and yellower beneath, are two to four inches long, oval to oblong, short-stemmed, silky when young, smooth when mature, with double-toothed edges. They give off an odor of wintergreen when bruised. The trees have both erect and hanging catkins, on twigs that also taste and smell like wintergreen.
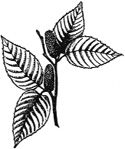
Black birch.
In fact, when the commercial oil of wintergreen is not made synthetically, it is distilled from the twigs and bark of the black birch. This oil is exactly the same as that from the little wintergreen plant, described earlier.
Black birches enhance the countryside from New England to Ontario, south to Ohio and Delaware, and along the Appalachian Mountains to Georgia and Alabama.
A piquant tea, brisk with wintergreen, is made from the young twigs, young leaves, the thick inner bark, and the bark from the larger roots. This latter reddish bark, easily stripped off in the spring and early summer, can be dried at room temperatures and stored in sealed jars in a cool place for later use. A teaspoon to a cup of boiling water, set off the heat and allowed to steep for 5 minutes, makes a tea that is delicately spicy. Milk and sugar make it even better. As a matter of fact, any of the birches make good tea.
You can make syrup and sugar from the sap, too, as from the sap of all birches. I’ll never forget my first introduction to this. It was our first spring in the paper birch country of the Far North, and Vena and I were bemoaning the fact that there were no maples from which to tap sap for our sourdough pancakes.
“Birch syrup you can get here in copious amounts,” Dudley Shaw, a trapper and our nearest neighbor, informed Vena. “Heavenly concoction. It’ll cheer Brad up vastly.”
“Oh, will you show me how?”
“I’ll stow a gimlet in my pack when I prowl up this way the first of the week to retrieve a couple of traps that got frozen in,” Dudley agreed. “Noble lap, birch syrup is. Glorious in flippers.”
Dudley told us to get some containers. Lard pails would do, he said, or we could attach some wire bails through nail holes in the tops of several tomato cans. He beamed approval when he arrived early Tuesday morning. The improvised sap buckets, suspended on nails driven above the small holes Dudley bored with his gimlet, caught a dripping flow of watery fluid.
“You’d better ramble out this way regularly to see these don’t overflow,” Dudley cautioned. “Keep the emptied sap simmering cheerfully on the back of the stove. Tons of steam have to come off.”
“Will it hurt the trees any?” Vena asked anxiously.
“No, no,” Dudley said reassuringly. “The plunder will begin to bog down when the day cools, anyway. Then we’ll whittle out pegs and drive them in to close the blinking holes. Everything will be noble.”
Everything was, especially the birch syrup. It wasn’t as thick as it might have been, even after all that boiling. There was a distressingly small amount of it, too. But what remained from the day’s work was sweet, spicy, and poignantly delicious. What we drank beforehand, too, was refreshing, sweet, and provocatively spicy.
All the birches furnish prime emergency food. Two general varieties of the trees grow across the continent, the black birch and those similar to it, and the familiar white birches whose cheerful foliage and softly gleaming bark lighten the northern forests. Layer after layer of this latter bark can be easily stripped off in great sheets, although because of the resulting disfigurement this shouldn’t be done except in an emergency, and used to start a campfire in any sort of weather.
The inner bark, dried and then ground into flour, has often been used by Indians and frontiersmen for bread. It is also cut into strips and boiled like noodles in stews. But you don’t need to go even to that much trouble. Just eat it raw.
(Arctium)
This member of the thistle family marched across Europe with the Roman legions, sailed to the New World with the early settlers, and the now thrives throughout much of the Unites States and southern Canada. A topnotch wild food, it has the added advantages of being familiar and of not being easily mistaken.
The somewhat unpleasant associations with its name are, at the same time, a disadvantage when it comes to bringing this aggressive but delicious immigrant to the table. Muskrats are sold in some markets as swamp rabbits, while crows find buyers as rooks. But unfortunately in this country burdock is usually just burdock, despite the fact that varieties of it are especially cultivated as prized domestic vegetables in Japan and elsewhere in the Eastern Hemisphere.
Burdock is found almost everywhere it can be close to people and domestic animals—along roads, fences, stone walls, and in yards, vacant lots, and especially around old barns and stables. Its sticky burrs, which attach themselves cosily to man and beast, are familiar nuisances.
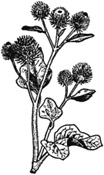
Burdock.
The burdock is a coarse biennial weed which, with its branches, rapidly grows to from two to six feet high. The large leaves, growing on long stems, are shaped something like oblong hearts and are rough and purplish with veins. Tiny, tubular, usually magenta flowers appear from June to November, depending on the locality, the second year. These form the prickly stickers, which actually, of course, are the seed pods.
No one need stay hungry very long where the burdock grows, for this versatile edible will furnish a number of different delicacies. It is for the roots, for instance, that they are grown by Japanese throughout the Orient. Only the first-year roots should be used, but these are easy to distinguish as the biennials stemming from them have no flower and burr stalks. We get all we can use from the sides of our horses’ corral, where they are easily disengaged. When found in hard ground, however, the deep, slender roots are harder to come by, although they are worth quite a bit of effort.
The tender pith of the root, exposed by peeling, will make an unusually good potherb if sliced like parsnips and simmered for 20 minutes in water to which about ¼ teaspoon baking soda has been added. Then drain, barely cover with fresh boiling water, add a teaspoon of salt, and cook until tender. Serve with butter or margarine spreading on top.
If caught early enough, the young leaves can be boiled in 2 waters and served as greens. If you’re hungry, the peeled young leaf stalks are good raw, especially with a little salt. These are also added to green salads and to vegetable soups and are cooked by themselves like asparagus.
It is the rapidly growing flower stalk that furnishes one of the tastier parts of the burdock. When these sprout up the second year, watch them so that you can cut them off just as the blossom heads are starting to appear in late spring or early summer. Every shred of the strong, bitter skin must be peeled off. Then cook the remaining thick, succulent interiors in 2 waters, as you would the roots, and serve hot with butter or margarine.
The pith of the flower stalks has long been used, too, for a candy. One way to make this is by cutting the whitish cores into bite-size sections. Boil these for 15 minutes in water to which ¼ teaspoon baking soda has been added. Drain. Heat what you judge to be an approximately equal weight of sugar in enough hot water to dissolve it, and then add the juice of an orange. Put in the burdock pieces, cook slowly until the syrup is nearly evaporated, drain, and roll in granulated sugar. This never lasts for very long.
The first-year roots, dug either in the fall or early spring, are also used back of beyond as a healing wash for burns, wounds, and skin irritations. One way to make this is by dropping 4 teaspoons of the root into a quart of boiling water and allowing this to stand until cool.
(Juglans)
Confederate soldiers and partisans were referred to as butternuts during the Civil War because of the brown homespun clothes of the military, often dyed with the green nut husks and the inner bark of these familiar trees. Some of the earliest American settlers made the same use of them. As far back as the Revolution, a common laxative was made of the inner bark, a spoonful of finely cut pieces to a cup of boiling water, drunk cold. Indians preceded the colonists in boiling down the sap of this tree, as well as that of the black walnut, to make syrup and sugar, sometimes mixing the former with maple syrup.
The butternut thrives in chillier climates than does the black walnut, ranging higher in the mountains and further north. Otherwise, this tree, also known as white walnut and oilnut, closely resembles its cousin except for being smaller and lighter colored. Its wood is comparatively soft, weak, and light, although still close-grained. The larger trees, furthermore, are nearly always unsound.
Butternuts grow from the Maritime Provinces to Ontario, south to the northern mountainous regions of Georgia and Alabama, and west to Arkansas, Kansas, and the Dakotas. They are medium-sized trees, ordinarily from about thirty to fifty feet high, with a trunk diameter of up to three feet. Some trees, though, tower up to ninety feet or more. The furrowed and broadly ridged bark is gray.
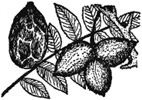
Butternut.
The alternate compound leaves are from fifteen to thirty inches long. Each one is made up of eleven to seventeen lance-shaped, nearly stemless leaflets, two to six inches long and about half as broad, with sharply pointed tips, sawtoothed edges, and unequally rounded bases. Yellowish green on top, these are paler and softly downy underneath. The catkins and the shorter flower spikes appear in the spring when the leaves are about half grown.
The nuts are oblong rather than round, blunt, about two to two and a half inches long, and a bit more than half as thick. Thin husks, notably sticky and coated with matted rusty hairs, enclose the nuts whose bony shells are roughly ridged, deeply furrowed, and hard. Frequently growing in small clusters of two to five, these ripen in October and soon drop from the branches.
The young nuts, when they have nearly reached their full size, can be picked green and used for pickles which bring out the flavor of meat like few other things and which really attract notice as hors d’oeuvres. If you can still easily shove a large needle through the nuts, it is not too late to pickle them, husks and all, after they have been scalded and the outer fuzz rubbed off.
Put them in a strong brine for a week, changing the water every other day and keeping them tightly covered. Then drain and wipe them. Pierce each nut all the way through several times with a large needle. Then put them in glass jars with a sprinkling of powdered ginger, nutmeg, mace, and cloves between each layer. Bring some good cider vinegar to a boil, immediately fill each jar, and seal. You can start enjoying this unusual delicacy in two weeks.
A noteworthy dessert can be made with butternuts by mixing ½ cup of the broken meats with 1 cup diced dates, 1 cup sugar, 1 teaspoon baking powder, and ⅛ teaspoon salt. Beat 4 egg whites until they are stiff and fold them into the above mixture. Bake in a greased pan in a slow oven for 20 minutes. Serve either hot or cold with whipped cream. This is also good, particularly when hot, with liberal scoops of vanilla ice cream.
Butternut and date pie is something special. Chop a cup apiece of dates and nuts. Roll a dozen ordinary white crackers into small bits, too. Mix with 1 cup sugar and ½ teaspoon baking powder. Then beat 3 egg whites until they are stiff. Sometimes, if the nuts are not as tasty as usual, we also add a teaspoon of almond extract. In either event, fold into the nut mixture and pour into a buttered 9-inch pie pan. Bake ½ hour, or until light brown, in a moderate oven. Cool before cutting. Ice or whipped cream is good with this, too, but it is also delicately tasty alone.
Butternut brownies, eaten by the nibble and washed down with draughts of steaming black tea, are one of the ways I like to top off my noonday lunches when hunting in the late fall. Just blend together 1 cup sugar, 1 teaspoon salt, ½ cup melted butter or margarine, 2 squares bitter chocolate, 1 teaspoon vanilla, and 3 eggs. When this is thoroughly mixed, stir into it 1 cup finely broken butternuts and ½ cup flour. Pour into a shallow greased pan and bake in a moderate oven 20 minutes.
(Typhaceae)
Who does not know these tall strap-leaved plants with their brown sausagelike heads which, growing in large groups from two to nine feet high, are exclamation points in wet places throughout the temperate and tropical countries of the world?
Although now relatively unused in the United States, where four species thrive, cattails are deliciously edible both raw and cooked from their starchy roots to their cornlike spikes, making them prime emergency foods. Furthermore, the long slender basal leaves, dried and then soaked to make them pliable, provide rush seating for chairs, as well as tough material for mats. As for the fluff of light-colored seeds, which enliven many a winter wind, these will softly fill pillows and provide warm stuffing for comforters.
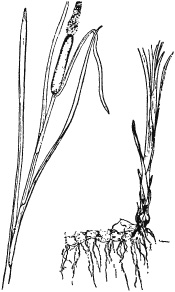
Cattail
Left: leaves, head, and flower spike.
Right: basal leaves and root.
Cattails are also known in some places as rushes, cossack asparagus, bulrushes, cat-o’nine-tails, and flags. Sure signs of fresh or brackish water, they are tall, stout-stemmed perennials with thin, stiff, swordlike, green leaves up to six feet long. These have well-developed, round rims at the sheathing bases.
The branched rootstocks creep in crossing tangles a few inches below the usually muddy surface. The flowers grow densely at the tops of the plants in spikes which, first plumply green and finally a shriveling yellow, resemble long bottle brushes and eventually produce millions of tiny, wind-wafted seeds.
These seeds, it so happens, are too small and hairy to be very attractive to birds except to a few like the teal. It is the starchy underground stems that attract such wildlife as muskrat and geese. Too, I’ve seen moose dipping their huge, ungainly heads where cattails grow.
Another name for this prolific wild edible should be wild corn. Put on boots and have the fun of collecting a few dozen of the greenish yellow flower spikes before they start to become tawny with pollen. Husk off the thin sheaths and, just as you would with the garden vegetable, put while still succulent into rapidly boiling water for a few minutes until tender. Have plenty of butter or margarine by each plate, as these will probably be somewhat roughly dry, and keep each hot stalk liberally swabbed as you feast on it. Eat like corn. You’ll end up with a stack of wiry cobs, feeling deliciously satisfied.
Some people object to eating corn on the cob, too, especially when there is company. This problem can be solved by scraping the boiled flower buds from the cobs, mixing 4 cups of these with 2 cups buttered bread crumbs, 2 well-beaten eggs, 1 teaspoon salt, ⅛ teaspoon pepper, and a cup of rich milk. Pour into a casserole, sprinkle generously with paprika, and heat in a moderate oven 15 minutes.
These flower spikes later become profusely golden with thick yellow pollen which, quickly rubbed or shaken into pails or onto a cloth, is also very much edible. A common way to take advantage of this gilded substance, which can be easily cleaned by passing it through a sieve, is by mixing it half and half with regular flour in breadstuffs.
For example, the way to make pleasingly golden cattail pancakes for 4 is by sifting together 1 cup pollen, 1 cup flour, 2 teaspoons baking powder, 2 tablespoons sugar, and ½ teaspoon salt. Beat 2 eggs and stir them into 1 ⅓ cups milk, adding 2 tablespoons melted butter or margarine. Then rapidly mix the batter. Pour at once in cakes the size of saucers onto a sparingly greased griddle, short of being smoking hot. Turn each flapjack only once, when the hot cake starts showing small bubbles. The second side takes only about half as long to cook. Serve steaming hot with butter and sugar, with syrup, or with what you will.
It is the tender white insides of about the first 1 or 1 ½ feet of the peeled young stems that, eaten either raw or cooked, lends this worldwide delicacy its name of cossack asparagus. These highly eatable aquatic herbs can thus be an important survival food in the spring.
Later on, in the fall and winter, quantities of the nutritiously starchy roots can be dug and washed, peeled white still wet, dried, and then ground into a meal which can be sifted to get out any fibers. Too, there is a pithy little tidbit where the new stems sprout out of the rootstocks that can be roasted or boiled like young potatoes. All in all, is it any wonder that the picturesque cattails, now too often neglected except by nesting birds, were once an important Indian food?
(Prunus)
Perhaps the most widely distributed tree on this continent, the chokecherry grows from the Arctic Circle to Mexico and from ocean to ocean. Despite their puckery quality, one handful of the small ripe berries seems to call for another when you’re hot and thirsty. The fruit, which is both red or black, also makes on enjoyable tart jelly.
Often merely a large shrub, the chokecherry also becomes a small tree up to twenty-five feet tall with a trunk about eight inches through. It is found in open woods, but is more often seen on streambanks, in thickets in the corners of fields, and along roadsides and fences. Although the wood is similar to that of the rum cherry, it has no commercial value because of its smallness.
Chokecherry leaves, from two to four inches long and about half as wide, are oval or inversely ovate, with abrupt points. They are thin and smooth, dull dark green above and paler below. The edges are finely indented with narrowly pointed teeth. The short stems, less than an inch in length, have a pair of glands at their tops. The long clusters of flowers blossom when the leaves are nearly grown. The red to black fruits, the size of peas, are frequently so abundant that the limbs bend under their weight.
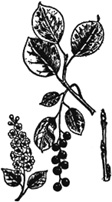
Chokecherry
Left: flowering branch. Center: branch with leaves and fruit.
Right: winter twig
An attractive and tasty jelly is made by adding 2 parts of cooked applejuice to 1 part of cooked chokecherry juice and proceeding as with rum cherry jelly. Too, a pure version can also be prepared with the help of commercial pectin.
Any of these tart wild cherry jellies can be used to flavor pies. Start by lightly beating 3 eggs. Mix 1 cup sugar, ¼ teaspoon salt, and ¼ teaspoon nutmeg, and add slowly to the eggs, continuing to beat. Melt ½ cup of butter or margarine and add that, too. Then thoroughly stir in 1 tablespoon of your jelly. Pour into an unbaked pie crust. Place in a preheated moderate oven for 10 minutes. Then reduce the heat to slow for 15 minutes, or until it firms.
(Cyperus)
Chufa was so valued as a nutriment during early centuries that as long as 4,000 years ago the Egyptians were including it among the choice foods placed in their tombs. Wildlife was enjoying it long before that. Both the edible tubers of this plant, also known as earth almond and as nut grass, and the seeds are sought by waterfowl, upland game birds, and other wildlife. Often abundant in mud flats that glisten with water in the late fall and early winter, the nutritious tubers are readily accessible to duck. Where chufa occurs as a robust weed in other places, especially in sandy soil and loam, upland game birds and rodents are seen vigorously digging for the tubers.
Abounding from Mexico to Alaska, and from one coast to the other, this edible sedge also grows in Europe, Asia, and Africa, being cultivated in some localities for its tubers. Sweet, nutty, and milky with juice, these are clustered about the base of the plant, particularly when it grows in sandy or loose soil where a few tugs will give a hungry man his dinner. In hard dirt, the nuts are widely scattered as well as being difficult to excavate. Except for several smaller leaves at the top of the stalk supporting the flower clusters, all the light green, grasslike leaves of the chufa grow from the roots. These latter are comprised of long runners, terminating in little nutlike tubers. The numerous flowers grow in little, flat, yellowish spikes.
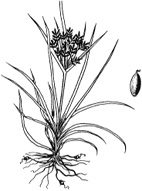
Chufa.
Chufa furnishes one of the wild coffees. Just separate the little tubers from their roots, wash them, and spread them out to dry. Then roast them in an oven with the door ajar until they are rich brown throughout, grind them as in the blender, and brew and serve like the store-bought beverage. So prepared, chufa tastes more like a cereal “coffee” than like the regular brew. But it is wholesome, pleasant, and it contains none of the sleep-retarding ingredients of the commercial grinds.
All you have to do is wash and eat chufas, but if you are going to have a wild-foods dinner for guests, why not go one step further and have some really different chips to serve with your dip during the cocktail hour? The chufas first have to be very well dried, as in a slow oven, then ground to powder as in the ubiquitous blender. This powder can be mixed with regular wheat flour for all sorts of appetizing vitamin-and-mineral-rich cakes, breads, and cookies.
For these chips, which resemble fat little pillows, sift together a cup of powdered chufa, a cup of all-purpose flour, 3 teaspoons baking powder, and a teaspoon of salt. Then cut in 2 tablespoons of shortening with a pastry blender or a pair of knives. Not wasting any time, work in ¾ cup of cold water bit by bit to make your dough. Roll this out as thinly as you can. Cut into 2-inch squares and fry these one by one in hot fat. They’ll puff as they bronze. If you’ll turn them, the other side will expand, too. Drain the some 30 resulting chips on paper toweling. They are particularly tasty, by the way, in an avocado and tomato dip touched up with grated wild onion.
The Spanish make a refreshing cold drink from the chufa, enjoyed both as is and as a base for stronger concoctions. A popular alcoholic drink is made by partially freezing this beverage in the refrigerator, then adding an equal volume of light rum to make a sort of wild frozen Daiquiri. The Spanish recipe calls for soaking ½ pound of the well-washed tubers for 2 days. Then drain them and either mash them or put them through the blender along with 4 cups of water and ⅓ cup sugar. Strain the white, milky results, and you’re in business.
Europeans in the Mediterranean area, northward as far as Great Britain, used to make a conserve of chufa that is still very much worth the trouble. Again, begin by soaking the scrubbed tubers for 2 days in cold water. You’ll need a quart of the drained vegetables for this recipe.
Make a syrup by boiling together a cup of sugar, a cup of corn syrup, and 1⅔ cups of water for 10 minutes. Add the drained chufas. Simmer, stirring occasionally, until the tubers are tender and the syrup thickened. Then take off the stove. Cover and let stand overnight. The next day, reheat to boiling. Pack the chufas in hot, sterile pint jars. Bring the liquid once more to a boil and pour it over the chufas, filling the jars to within ½ inch of their tops. Seal at once, cover if necessary to protect from drafts, allow to cool, label, and store.
(Trifolium)
Everyone who as a youngster has sucked honey from the tiny tubular florets of its white, yellow, and reddish blossoms, or who has searched among its green beds for the elusive four-leaf combinations, knows the clover. Some seventy-five species of clover grow in this country, about twenty of them thriving in the East.
Clovers, which are avidly pollinated by bees, grow from an inch or so to two feet high in the fields, pastures, meadows, open woods, and along roadsides of the continent. Incidentally, when introduced into Australia, it failed to reproduce itself until bumblebees were also imported.
The stemmed foliage is usually composed of three small leaflets with toothed edges, although some of the western species boast as many as six or seven leaflets. This sweet-scented member of the pea family provides esteemed livestock forage. Red clover is Vermont’s state flower. White clover is all the more familiar for being grown in lawns. Quail are among the birds eating the small, hard seeds, while deer, mountain sheep, antelope, rabbit, and other animals browse on the plants.
Bread made from the seeds and dried blossoms of clover has the reputation of being very wholesome and nutritious and of sometimes being a mainstay in times of famine. Being so widely known and plentiful, clover is certainly a potential survival food that can be invaluable in an emergency.
The young leaves and flowers are good raw. Some Indians, eating them in quantity, used to dip these first in salted water. The young leaves and blossoms can also be successfully boiled, and they can be steamed as the Indians used to do before drying them for winter use.
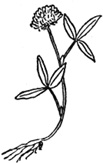
Clover
If you’re steaming greens for 2 couples, melt 4 tablespoons of butter or margarine in a large, heavy frypan over high heat. Stir in 6 loosely packed cups of greens and blossoms, along with 6 tablespoons of water. Cover, except when stirring periodically, and cook for several minutes until the clover is wilted. Salt, pepper, and eat.
The sweetish roots may also be appreciated on occasion, some people liking them best when they have been dipped in oil or in meat drippings.
Clover tea is something you may very well enjoy. Gather the fullgrown flowers at a time when they are dry. Then further dry them indoors at ordinary house temperatures, afterwards rubbing them into small particles and sealing them in bottles or jars to hold in the flavor. Use 1 teaspoon of these to each cup of boiling water, brewing either in a teapot or in individual cups, as you would oriental tea.
(Caltha)
The glossy yellow flowers of the cowslip, also known as marsh marigold and by over two dozen other common names, are among the first to gleam in the spring along stream banks and in marshy coolnesses from Alaska to Newfoundland and as far south as Tennessee and South Carolina. This wild edible is also eagerly awaited in Europe.
One reason this member of the crowfoot family gained its name of cowslip is that you often see it growing in wet barnyards and meadows and in the trampled soggy ground where cattle drink. Few wild blossoms are more familiar or beautiful, and New Englanders find few wild greens that boil us so delicately so soon after the long, white winters.
The bright golden blossoms, which grow up to an inch and a half broad and which somewhat resemble large buttercups, have from five to nine petal-like divisions which do not last long, falling off and being replaced by clusters of seed-crammed pods. These flowers grow, singly and in groups, on slippery stems that lift hollowly among the leaves.
Cowslips, growing up to one and two feet tall, have crisp, shiny, heart-shaped lower leaves, some three to seven inches broad. These grow on long, fleshy stems. On the other hand, the upper leaves appear almost directly from the smooth stalks themselves. The leaf edges, sometimes wavy, frequently are divided into rounded segments.
There are two things to watch out for if you are going to enjoy the succulent cowslip. First, this plant must be served as a potherb, as the raw leaves contain the poison helleborin, which is destroyed by cooking. It is, therefore, a good idea to gather cowslips by themselves to avoid the mistake of mixing them with salad greens. Secondly, ordinary care must be taken not to include any of the easily differentiated poisonous hellebore or water hemlocks that sometimes grow in the same places.
The two poisonous plants are entirely different in appearance from the distinctive cowslip. The water hemlock plant superficially resembles the domestic carrot plant but has coarser leaves and a taller, thicker stem. The white hellebore, which can be mistaken for a loose-leaved cabbage, is a leafy plant which somewhat resembles skunk cabbage, one reason why that not altogether agreeable edible has been omitted from these pages.
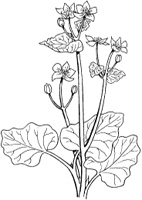
Cowslip
The dark green leaves and thick, fleshy stems of the cowslip are at their tastiest before the plant flowers. The way many know them best is boiled for an hour in 2 changes of salted water, then lifted out in liberal forkfuls and topped with quickly spreading pads of butter.
For a change, you can cream them, too. Tear the cowslips into small pieces and boil for an hour in 2 changes of salted water. Then drain. In the meantime, be melting 3 tablespoons of butter or margarine, either in a saucepan over low heat or in the top of a double boiler. Stir in 3 tablespoons of flour and cook a minute. Then gradually add ½ cup of cream. Salt and pepper to taste, and stir until thickened. Add the cooked greens, mix well, and serve.
Parmesan cheese also goes well with cowslips on occasion. Just use the above recipe, adding 3 tablespoons of grated cheese after the flour and other ingredients have started to thicken. Then stir until the Parmesan has melted and the sauce is creamy.
The leaves and stems aren’t the only deli-ciously edible portions of this bright little harbinger of spring. You can make pickles from the buds, soaking them first for several hours in salted water, draining, and then simmering them in spiced vinegar, whereupon they take on the flavor of capers.
(Taraxacum)
Gathering wild greens is a happy way to sharpen a satisfactory hunger, even if you go no farther than to collect a bagful of common dandelions. Actually, this familiar vegetable, all too well known because of the way it dots many a lawn, is among the best of the wild greens.
Dandelion
Left: Arctic and alpine dandelion.
Right: ordinary dandelion.
The well-known dandelion of flower beds, lawns, pastures, meadows, roadsides, and other moist, open places, boasts some three species in this country and about twenty-five in the civilized world, over which it is widespread. The green leaves are long and narrow, spreading in a rosette at the bottom. Their coarse edges, irregularly lobed and toothed, give this wild edible its name, which means “lion’s tooth.”
The flowers are yellow, maturing into full white ovals of plumetailed seeds that later scatter in the wind to make dandelions plentiful and persistent. The hollow and leafless flower stems discharge a bitterish milky juice when bruised or severed, as do the roots when the greens are cut free. These roots are generally thick and deep. Such wildlife as mule and white-tailed deer relish the green foliage, while grouse and pheasant find the seeds delectable.
The tender young leaves, available in the early spring, are among the first wild edibles I gather while bear hunting, trout fishing, or just plain hiking or horseback riding through the greening wilderness. At first they are excellent in salads. Later, when the plants begin blossoming, they develop a toughness and bitterness. Changing the first boiling water into which they are crammed will remove much of this bitter taste if you want, but we find it clean and zestful. Incidentally, when you can, include as many buds as possible, as they liven both the color and the flavor.
Young, tender dandelion greens can be used to add character and vitamins to scrambled eggs. Mix 4 eggs and 4 tablespoons cold water with salt and pepper to taste. Add a cup of shredded dandelions. Heat 2 tablespoons of butter, margarine, or bacon grease in a frypan just hot enough to sizzle a drop of water. Pour in the egg and dandelion mixture and reduce the heat. When the eggs have started to harden, begin stirring them constantly with a fork. Remove them while they’re still soft and creamy.
Although they contain a laxative, taraxacum, the roots, when young, are often peeled and sliced, like carrots or parsnips, for boiling as a vegetable. To remove the characteristic tinge of bitterness, you may choose to change the salted water once. Serve with melting butter or margarine. Being particularly nourishing, these roots are a famous emergency food, having saved people from starving during famines.
Although the woods afford a multitude of teas, they are short on coffees. The dandelion will provide one of the latter. Roast the roots slowly in an open oven all afternoon until, shriveling, they resemble miniature dragons and will snap crisply when broken, revealing insides as brown as coffee beans.
Grind these roots and keep tightly covered for use either as regular coffee or for mixing to extend your normal supplies. Dandelion roots may be used the year around for this purpose. Because I generally roast my grind shortly before freezeup in the fall when the roots are near their strongest, I find I only have to use a level tablespoon of this homemade mixture per cup, whereas I prefer a heaping tablespoon of store coffee.
Dandelion wine is famous. If you’d like to make your own, pick a gallon of the flowers early on a dry morning, making sure that no parts of the bitterish stems are included. Press these into a 2-gallon crock. Pour a gallon of boiling water over them and leave for 3 days. Then strain through a cloth, squeezing all the liquid from the blossoms.
Add the juice and the thinly sliced rind and pulp from 3 oranges and 3 lemons. Stir in 3 pounds sugar. Add 1 ounce yeast. Cover the crock with a cloth and let it stand, out of the way, for 3 weeks while the mixture ferments. Then strain, bottle, and cork or cap tightly.
(Nereocystis)
If you live or vacation where giant kelp grows, this abundant marine alga, which often thrives in beds acres wide, makes unusual and excellent pickles.
Giant kelp has round, hollow stalks up to about seventy-five feet long, gradually widening from less than one-half inch at the base to perhaps four inches at the top and ending in a floating round bulb which may be up to eight inches in diameter. Two rows of narrow, leathery, leaflike blades, ten to thirty feet long, stem from the bulbs. These blades float on the ocean surface, and on the Pacific Coast from Mexico to Alaska you can often watch sea lions, whales, and sometimes sea otters swimming among them.
The long, hollow stalks, used by the Indians of southeastern Alaska as fishing lines for deep-sea angling, may be collected during June, July, and August, when they are at their prime. Although it is preferable to use only the ones rooted to the bottom, fresh stalks are also common along the beaches, especially after storms.
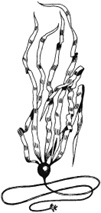
Giant kelp.
The kelp is washed, peeled, and used the same as green cucumbers or tomatoes for relish and pickles. It may also be used like watermelon rind for preserving.
For some memorable sweet sea pickles, you’ll need 4 pounds giant kelp, 3 ½ cups sugar, 2 cups white vinegar, 1 cup salt, ½ teaspoon alum, ½ teaspoon oil of cloves, ½ teaspoon oil of cinnamon, and water.
Cut the stalks into 12-inch lengths and split the bulbs. Using a vegetable parer, remove the dark surface layer and discard. Keep the pieces covered in a brine solution, 1 cup of salt to 2 gallons of water, for 2 hours. After the giant kelp is taken out of the brine, wash it thoroughly with cold water.
Then cut it into 1-inch cubes. Soak these in a solution of ½ teaspoon of alum to 2 quarts of cold water for 15 minutes. Drain, wash in cold water, and redrain. Drop the cubes into an enamel kettle and cover them with boiling water. Simmer only until a few test cubes can be easily pierced with a fork. Then drain again.
Combine the sugar, vinegar, and oils. Simmer this for 2 minutes and then pour over the cooked kelp. Let stand overnight in the enamel kettle or in a crock. In the morning, drain and save the syrup. Reheat the kelp to the boiling point with just enough water to prevent sticking, pour off the water, recover with the syrup, and allow to set another 24 hours. On the third morning, heat both kelp and syrup to the boiling point, and seal immediately in 3 hot, sterilized pint jars.
Whole spices, tied in small bags, may be used instead, but the cubes will not then remain so nearly transparently clear. A conservative amount of green food coloring may be put in to make the pickles brighter. If you don’t mind sacrificing a certain amount of crispness, omit the salt and alum solutions, merely soaking the kelp in cold water, rinsing, and then cooking until tender.
(Crataegus)
It is fortunate that it’s easy to distinguish the hawthorn from other shrubs and small trees. Even the professionals find it difficult to identify the separate species, the number of which in the United States is estimated to run all the way from about 100 to as high as 1,200. They grow from one coast to the other, making them valuable when survival is a problem. Taste varies considerably, and the only way to determine the edibility of hawthorn you’ve come across is by sampling. The better of them are delicious raw and when turned into jelly require very little sugar.
These cousins of the domestic apple are also known as thorn apples, thorn plums, thorns, mayhaws, red haws, scarlet haws, haws, cockspur thorn, etc. Wood ducks eat the fruit. Pheasants, grouse, pigeons, and turkeys relish both buds and fruit. Black bears, rabbits, beavers, raccoons, and squirrels include both fruit and bark in their diets. Deer browse on the foliage and the applelike pomes. In addition to all this, hawthorns provide almost impregnable nesting places.
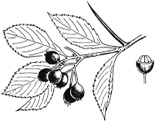
Hawthorn.
You can readily identify a hawthorn even in winter, particularly as the long, sharp, usually straight, occasionally slightly curved thorns, ranging in length up to about five inches, are not shared by any of our other native trees and shrubs.
Showy when blossoming in the spring and attractive when colorful with fruit, especially against the snow, hawthorns thrive in sunny locales in clearings, pastures, abandoned fields, and along roads and fences. The white and occasionally pinkish flowers, which have five petals, grow in terminal clusters. The fruit, which is usually red but sometimes greenish or yellowish, looks like tiny apples. Each contains one to five bony, one-seeded nutlets.
The part of the fruit that isn’t seed is somewhat dry, and you’ll need a lot of it, but the jelly made from hawthorns is golden and intriguing. Cover the berries with water and simmer them until they are soft, stirring them occasionally to prevent their sticking. Add more hot water if they start to run dry. Then put the results in a jelly bag, squeezing this to get out the last drop of juice. Depending on the particular fruit, it will take about 2 pounds of the berries to make the following recipe.
Stir a package of pectin into 4 cups of the juice. Continuing to stir, bring to a boil over high heat. Add 6 cups of sugar and stirring, bring to a full rolling boil for 2 minutes. Then remove from the heat, skim off the foam, and pour to within ¼ inch of the tops of hot, sterilized jelly glasses that are standing on a towel away from drafts. Seal with a thin layer of melted paraffin, carefully tilting each of the glasses so that this will adhere evenly to the sides. When it has cooled, add a second coating. Cool gradually, cover with regular caps or with aluminum foil, label, and store in a cool, dry place.
(Tsuga)
Hemlock tea is famous in northern New England and Canada. Drunk hot and black, its taste is reminiscent of the way a Christmas tree smells. More important for trappers, prospectors, and other outdoorsmen, this tea contains the vital Vitamin C.
Of the seven to nine species of hemlocks recognized in the world, four are native to North America. These tall, straight evergreens are typical of cool, damp slopes, ravines, and swamps, generally in northern regions and in the higher mountains. They also spring up after tree-cutting operations, their low dense foliage affording fine winter cover for grouse, turkey, deer, and other wildlife.
The needles grow in spirals, although they often seem to be attached in two ranks. The hanging cones have thin segments which hide a pair of tiny winged seeds that are important food for birds and red squirrels. Hemlocks in New England and the Maritimes are often killed by porcupines eating the bark.

Hemlock.
Incidentally, these conifers are no relation whatsoever to the poison hemlock from which Socrates and other ancients brewed their deadly draughts. Those entirely different plants are members of the parsley family.
It doesn’t really make too much difference if you mistake one of the other conifers for hemlock. All these members of the pine family provide aromatic and beneficial tea. The bright green young tips, when they appear in the springtime, are best. These are tender and starchy at this time and can also be enjoyed raw. Older green needles will do, too. I just put a handful in a receptacle, cover them with boiling water, and let them steep until the tea tastes strong enough. If you prefer this black as I do, there’s no need of any straining. Just narrow your lips on the rim and quaff it down.
The hemlocks and other members of the great pine family, which includes the numerous pines themselves, the spruces, firs, balsams, and all the others, have another feature which, if one is ever lost or stranded, can mean the difference between life and death. The inner bark can be cut off and eaten, either raw or boiled, to provide strength and nourishment.
(Carya)
Hickories are probably our most important native nuts. The Indians used them in great quantities for food, and the settlers soon followed suit, even tapping the sweet sap in the spring for syrup and sugar. Today the nuts are familiar in the stores of this country.
The shellbark hickory, also called the shag-bark, is the leader of the clan, although there are from twenty to twenty-two other species, depending upon the botanist. All are edible, although the taste of some is not appealing. There are the sweet hickories, including the above, in which the husk splits into 4 parts when the nuts are ripe. There are the pignuts, often bitter but sometimes delicious, in which the thin husk splits only above the middle, or, sometimes late in the season, all the way to the base. There are also the familiar pecans.
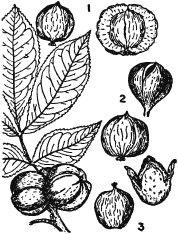
Hickory. 1 Shagbark. 2 Pignut. 3 Bitternut.
The stout twigs and the gray bark which loosens in shaggy narrow strips, attached at the middle, distinguishes the shellbark and the shag-bark, actually two different species, from all other trees. The leaves, from seven to fourteen inches long, are composed of usually five but sometimes seven leaflets. Dark yellowish green above, these are lighter and often downy beneath, with fine sharp teeth marking the edges.
Hickories grow slowly, and the shellbark does not produce nuts until about eighty years old. It becomes a large stately tree, reaching a height of up to 180 or more feet and a trunk diameter of one to three feet. Its wood is used for such things as bows, skiis, and ax handles, while hickory-smoked hams and bacon are famous. Wood duck, ring-necked pheasant, bobwhite, and wild turkey compete with man for the nuts. Black bear, raccoon, squirrel, and rabbit eat both nuts and bark, while the white-tailed deer relishes both these and the younger twigs.
The shellbark, which leafs out later than most other trees and sheds its bronze foliage earlier, ranges from Maine and Quebec west to the Great Lakes and Minnesota, and south to northern Florida and eastern Texas. The fruits, varying a great deal in size, are on the average from one to two inches in diameter, nearly round or somewhat oblong, and depressed at the top. The husks, which are about a quarter inch thick, split into four pieces at maturity. The familiar white or tawny nuts are a bit flattened with four ridges, an easily cracked thin shell, and large sweet kernels.
You can have an enjoyable time with just a heap of hickory nuts and a stone or hammer. But the pleasant, slightly aromatic meats also excel in the kitchen.
They can even be cooked with vegetables. Sometimes when you have gathered a bushel or so of nuts, probably from a noble tree in an open field or along the rim of a wood where its branches can stretch far into the sunlight, try cooking some with corn. Whip 2 eggs to a froth. Stir in a teaspoon salt, a tablespoon flour, and a cup of chopped hickory nuts. Add a cup of milk and 2 cups corn, fresh, canned, or frozen. Bake the mixture in a greased dish in a moderate oven until it is firm.
It is in the desserts, though, that the sweetmeat members of the clan are surpassingly good. For instance, it is difficult to outdo the following simple cookies. Just whip the whites of 2 eggs until they are stiff. Beat 2 cups of brown sugar into this. Then add 2 cups nuts that have been broken into small pieces. Drop from a teaspoon, about 1½ inches apart, onto a shallow greased pan or a greased baking sheet. Bake in a slow oven for 35 to 45 minutes or until light brown.
When we are in hickory country, nut balls have become traditional with us for the Christmas season, when neighbors are always dropping in to exchange cheer. You have to crush 2 cups of nuts for this by pounding, rolling, or, most easily, by running through a food grinder. Then blend a cup of butter or margarine with 4 tablespoons sugar and 3 teaspoons vanilla until creamy. Thoroughly mix the nuts with 2 cups sifted flour and stir into the preceding mixture. Shape the dough into little balls slightly larger than marbles. Place on a greased shallow pan or cookie sheet. Bake in a slow oven 45 minutes. Frost by rolling in confectioners’ sugar while hot and again when cool. Store those that aren’t snatched up immediately in a closed container.
The following pie is delectable with pecans but even better with shellbark hickories. Beat 3 eggs until light. Add 1 cup sugar, 1 cup white corn syrup, a melted ¼ pound stick of butter or margarine, 1½ teaspoons vanilla, and finally, I cup shopped nuts. Bake in an uncooked 9-inch pie shell in a moderate oven for about 40 minutes. We don’t know of a tastier way to usher in the nutting season.
(Arisaema)
Many Indians relied on the dried and powdered roots of the familiar jack-in-the-pulpit for flour. Today, however, this edible has its principal value as an emergency food, especially for people stranded in one place for a long time. Widely known and easily recognizable, it can then be a lifesaver.
Indian turnip, wake-robin, and dragonroot are among the local names for this North and South American member of the great Arum family, used for food by people the world over. Both the leaves and the bright red fruit are eaten by the ring-necked pheasant and the wild turkey.
In the moist, sequestered woodlands of April and May, the jack-in-the-pulpit preaches his silent sermon to a congregation of wild violets and other spring neighbors. Unmistakable, the brown, green, and purplish “pulpit” is a striped two- to four-inch spathe terminating with a hood over the top. The “preacher” is a clublike spadix, two or three inches long, with small greenish yellow flowers, occasionally varying greatly in hues and in brightness, near its base.
The plant, growing in rich woods from the Maritime Provinces to Florida, west to Minnesota and Louisiana, becomes from one to three feet high. The two leaves, growing on long stems, are each composed of three egg-shaped, sometimes lobed, pointed leaflets. Green clusters of berries become handsome scarlet masses that brighten the dark woods in late August.
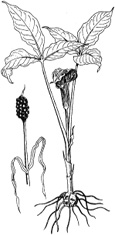
Jack-in-the-pulpit.
All parts of the plant, especially the round roots, will burn the mouth like liquid fire if eaten raw. Many youngsters used to have a standard ceremony for initiating newcomers to town, and perhaps still do. This consisted of offering the tenderfoot the tiniest morsel of what they claimed was the finest delicacy their woods had to offer. At first contact, this innocent-looking tidbit was palatable enough. But then the taste became as bitingly hot as a teaspoon of red pepper. This burning sensation, which was followed by inflammation and tenderness, seemed to permeate every part of tongue, mouth, and throat and to linger for hours, although cold milk did appear to allay it some.
The wonder is that aborigines the world over have learned to rid Arum roots of this corrosive acridness and thus capitalize upon their nutritious, delicate, white starchiness. Boiling won’t do it! Drying will. The fastest way to do this is by roasting. The simplest method is just to cut the fresh roots into very thin slices, then set these aside in a dry place for upwards of three months. They then provide pleasant snacks, either as is or with a potato chip dip. Or you can crumble the crisp slices into flour and use it in regular recipes, preferably half and half with wheat flour.
Jack-in-the-pulpits and hazelnuts, often growing in the same habitats, go together in the following cookies which always seem to call for seconds and thirds whenever guests get their first samples of them. Beat 2 egg yolks until thick. Add, bit by bit, a cup of brown sugar and beat that in well. Then mix in a cup of chopped hazelnuts and a scant ⅛ teaspoon salt.
Beat the 2 egg whites until they form peaks and fold them in. Sift together 3 tablespoons jack-in-the-pulpit flour and 3 tablespoons all-purpose flour. Stir that in. Distribute by the teaspoonful on cooky sheets or heavy foil, press gently flat with a spatula, transfer to a preheated 350-degree [F] oven, and bake about 7 minutes or until firm. After they have cooled, keep the 4 dozen or so cookies in a closed container for as long as they last, which isn’t likely to be long.
Once the fire had been taken out of them, jack-in-the-pulpit roots were also held to be medicinally valuable. One prescription for spasms of asthma consisted of a handful of the dried and chipped roots, aged for three days in a quart of whisky. Even then, the dosage was conservative. It was a single tablespoonful twice a day.
(Helianthus)
Jerusalem artichokes, distinctively flavored tubers of a native wild sunflower, were cultivated by Indians and much used by early settlers. Besides still growing wild, they are also raised for today’s markets, all of which indicates how well worth finding they are.
They have no connection with the Holy City. Soon introduced into Europe following Columbus’ voyages to the New World, they became popular along the Mediterranean and were called girasole in Italian and girasol in Spanish. These words, denoting sunflower, became corrupted in English to Jerusalem. The artichoke part of the name stems from the fact that even centuries ago the flower buds of some of the edible sunflowers were boiled and eaten with butter like that vegetable.
About ninety species of sunflowers occur in the world. Some two-thirds of these grow in the United States, among them these tall perennials whose roots are such a delicacy. You have to like them, of course. We’ve learned to prepare them so that we do.
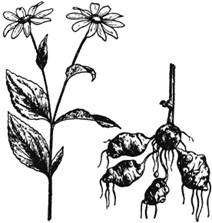
Jerusalem artichoke.
Left: stalk with leaves and flowers.
Right: tubers.
Wild Jerusalem artichokes, which should be harvested no sooner than fall, are native to the central parts of the United States and Canada. Their popularity among Indians and arriving Europeans, plus their cultivation in different parts of the country, helps explain why this native has long since escaped its original bounds and is now often found in abundance elsewhere—such as east of the Appalachians, where it has moved to usually moist soil along ditches, streams, roadways, fence rows, and in vacant fields and lots.
These perennial sunflowers grow with thin stalks commonly five to ten feet tall. The rough leaves, whose tops are hairy, develop sharp points from oblong or egg-shaped bodies that are broadest near their bases. The frequently numerous flowers are yellow. From two to three inches broad, and maturing on slender stems that rise from where the higher leaves meet the stalk, these blossoms lack the purplish and brownish centers of those sunflowers that yield edible, oil-rich seeds. But the tubers, which are attached to the thickly creeping roots, more than make up for this deficiency.
History is all in favor of these delicacies whose somewhat sweetish juiciness, however, may take a bit of getting accustomed to. On the other hand, Jerusalem artichokes are nutritious and easily digestible enough to be regarded as a favored food for invalids. Here are a couple of hints that may help along your enjoyment. Dig them late in the year, even in winter if the ground is not too frozen, previously noting their whereabouts when they are conspicuously in bloom. Secondly, take care that they are not cooked too long nor at too high temperatures, as both toughen them.
Your cooking efforts may be as simple or as elaborate as you want them to be. The long, somewhat flat tubers are good just scrubbed, simmered in their skins in enough water to cover until just tender, and then peeled and served like potatoes, either with salt and butter or margarine or with a cream sauce. They then afford a byproduct, too. When cold, the water in which they were boiled becomes jellylike, providing a flavorful and substantial foundation for soup.
Or, if you want everything all ready when mealtime arrives, wash and scrape the Jerusalem artichokes. As you finish with each one, drop it into acidulated water, made by stirring 1 teaspoon vinegar with a quart of cold water, to prevent it from darkening in the air. Slice or dice. Then cook, covered, in a small amount of boiling salted water 15 to 30 minutes, or until tender. Drain well. Serve with salt, pepper, and butter or margarine, or cream.
The non-starchy Jerusalem artichokes also make memorable salads. One way is to boil them first, then mix 4 cups with 1 finely diced small onion, 1 cup chopped celery, ½ teaspoon salt, a sliced cucumber, and a cup of mayonnaise. Stir together lightly, lifting from the outside in, season, and serve cold.
However, we usually prefer the crisp sweetness of the peeled tubers, which have somewhat the same texture as that of cabbage stalks, just sliced raw and added liberally to tossed salads.
Although not mealy like potatoes, Jerusalem artichokes can be substituted in many recipes for that common vegetable. For instance, fried slices of the wild edible have a flavor and consistency of their own. When in a hurry I’ve frequently cooked them in camp this way, sauteing them 8 to 10 minutes with bacon drippings in an already warm frypan and turning them several times during the process. When you have more leisure, they’re even better rubbed with oil and baked. Or just add them to a mulligan when it’s about half an hour from being done.
When someone in the household is a little under the weather, they may especially enjoy Jerusalem artichokes simmered in milk. Peel about a pound of these healthful tubers and dice them. Drop these small pieces into ¼ cup hot milk, stirring to moisten them well. Cover and cook just below the boiling point for 10 minutes. Then mix in 1 teaspoon salt and 2 tablespoons ground parsley. Sprinkle with paprika and serve while still steaming.
(Juniperus)
Black bear, quail, and band-tailed pigeon are among the game dining on the fruit of the juniper. These evergreen shrubs and shrubby trees with their compact branches, thin shreddy bark, and scalelike leaves pressed closely to the twigs grow from Alaska to Labrador, south as far as New Mexico and California. The usually sprawling evergreens prefer exposed dry slopes and rocky ridges, and many a hunter has lounged in them to glass the country or to watch a game trail. The not unpleasant sharpness of some of their short needles makes one feel warmer on a brisk day.
The fruit, whose flavor and aroma is familiar to anyone who has had contact with gin, is dark blue and has a bloom to it. Growing in large numbers on the shoots of the female shrubs, these berries are to be found the year around. They are the size of peas. The flesh surrounding the large seed is sweetish and resinously aromatic.

Juniper.
Indians used to dry and grind juniper berries and use them for cakes and for mush. The principal individual use today is as a nibble and as a woodsy seasoning. A few will take the edge off hunger. Too many, though, are irritating to the kidneys. In fact, a diuretic is made of the berries, a teaspoon of them to a cup of boiling water, drunk cold, a large mouthful at a time, one or two cups a day.
Juniper tea, quaffed in small amounts, is one of the decidedly pleasant evergreen beverages. Add about a dozen young berryless sprigs to a quart of cold water. Bring this to a boil, cover, reduce the heat, and allow to simmer for 10 minutes. Strain and serve like regular tea.
(Gymnocladus)
Roasted and ground, the seeds of the Kentucky coffee tree were used by early settlers in the New World as a substitute for coffee. Some of the Indians roasted them and ate them like nuts. The trees, often planted today for shade and for landscaping, range from New York to southern Minnesota, south to Tennessee and Oklahoma.
Usually a medium-sized tree, reaching a height of forty to ninety feet and a trunk diameter of from one to three feet, the Kentucky coffee tree ordinarily branches a few feet above the ground into three or four limbs which climb almost vertically to form a narrow crown.
The dark green leaves, which remain on for only about half of the year, are sometimes almost three feet long and two feet wide. They are composed of up to forty or more short-stemmed leaflets. Long clusters of greenish-white flowers appear in June. These develop into reddish-brown pods from four to ten inches long and from one to two inches wide. Each contains six to nine large, oval, flat, hard brownish seeds encased in a dark sweetish pulp.
You can roast these seeds slowly in the oven, grind them, and brew them like coffee. They have none of the caffeine of regular coffee, and the resulting beverage agrees with some people better.

Kentucky coffee tree.
(Chenopodium)
In a lot of homes the acknowledged pick of the edible greens is lamb’s quarter. The tender tops of this wild spinach, which has none of the strong taste of market varieties, are delicious from early spring to frost-withering fall.
The entire young plant is good from the ground up. Even from the older ones a quantity of tender leaves can usually be stripped. However, the pale green leaves with their mealy-appearing underneaths and the slim stalks are not the only taste-tempting components of this green, also widely known as pigweed and goosefoot.
Indians long used the ripe seeds, 75,000 of which have been counted on a single plant, for cereal and for grinding into meal. These tiny gleaming discs, which develop from elognated dense clusters of small green flowers, are also handy for giving a pumpernickel complexion to biscuits and breads.
Some twenty of the sixty or more species in this genus, which belongs to the same family as beets and spinach, grow in the United States, thriving in nearly every part of the country. Lamb’s quarter is a very common annual which grows from two to seven feet tall. By searching, you can usually find plenty of young plants up to about twelve inches high, and these are best for the table. These young plants have a mealy whiteness to them, but they do not require parboiling. Later, the tender tips alone are excellent. The alternate leaves, which are fleshy and tasty, have long stems and angular margins.

Lamb’s Quarter.
Along with other of the more tender leafy greens, lamb’s quarter can be given a bit more taste on occasion with the help of a vinegar sauce. Such a flavorful acid also tends to preserve the vitamins C and A in such vegetables. Alkalies, on the other hand, such as the commonly but inadvisedly used baking soda, destroy an unnecessary proportion of these food values.
For 4 cups of loosely packed greens, take 1 small onion, 4 slices bacon, ¼ cup vinegar, ¼ teaspoon salt, and pepper to taste. Shred the greens if they are large. Dice the onion. Mix. Then chop up the bacon and fry it until the bits become brown and brittle. Put in the vinegar, salt, and pepper and bring to a simmer.
You now have 2 choices. You may pour the sauce over the raw greens. Or you may add the greens to the sauce and cook over low heat until they are limp. In either case, serve immediately. And see what the family’s idea is for vegetables for the rest of the week.
(Podophyllum)
Springtimes these attractive plants poke up like miniature forests of little opening umbrellas. Preferring moist rich woods and banks, their creamy-white flowers are later familiar from southeastern Canada to Florida and west to Minnesota and Texas. These produce sweetly scented, lemon-yellow fruits which, when delectably ripe, are relished by many.
This native perennial, a member of the barberry family, is also known as mandrake, wild lemon, and raccoon berry. Only the fruit is edible. The root, which Indians collected soon after the fruit had ripened and used in small quantities as a cathartic, is poisonous. So are the leaves and stems.
Each spring the long horizontal roots, which stay alive year after year, shoot up single-stemmed plants twelve to eighteen inches high. These roots, incidentally, are dark brown, jointed, and very fibrous. Internally yellow, they are mostly about half the size of a finger.
The solitary stems bear either one or two large leaves which open like tiny parasols. It is the latter plants that produce the single flowers which nod on short stems that rise from the fork of the leaves. About two inches wide, these oddly scented blossoms have from six to nine waxy white petals and twice that number of golden stamens.
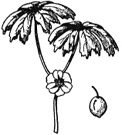
May apple.
Left: stem with flower and leaves. Right: fruit.
The sweet yellow fruit, the size and shape of small eggs, ripens from July to September, depending on the climate, generally when the dying plants have dropped to the ground. Despite numerous seeds and a tough skin, it is very enjoyable in moderation raw, although there are those who, as in the case of serviceberries, prefer the May apple cooked.
The raw juice, however, really touches up sweet lemonade and other fruit drinks, while in some parts of the country there are those who add it and sugar to wine.
You can make a luscious, thick, pulpy jam from May apples. Clean about 2 quarts of fully ripe fruit, being sure to remove all stems. Place a layer in the bottom of a kettle. Crush them with a potato masher, repeating this process until all the fruit has been mashed. Add ½ cup water and heat short of simmering for 20 minutes, stirring now and then. Then press the fruit through a colander. To 4 cups of the resulting juicy pulp, add a package of powdered pectin and a pinch of salt. Put back on the heat. When it starts to bubble, stir in 4 cups of sugar. Bring to a full boil, remove from the heat, skim, and seal in hot sterilized jars.
The heat does alter the delicate flavor of the fruit, although many think this is for the better, there are those who prefer the natural taste of May apples. For these, here is an uncooked jam that will keep for several months in the refrigerator. Clean and crush 2 quarts of ripe May apples as before, add ½ cup water, and heat to lukewarm only—100°F, on your thermometer. Press through a colander. Stir a package of powdered pectin into the still warm juice and pulp and let stand 20 minutes. Add 1 cup light corn syrup to prevent the sugar from crystalizing in the cold. Then thoroughly mix in 4 cups of sugar and a pinch of salt. Pour immediately into sterilized containers and store in the refrigerator.
(Asclepias)
Although milkweed grows from coast to coast and was long used by the Indians, it is the common milkweed, Asclepias syriaca, with which many are most familiar. This native perennial, thriving from the Maritimes to Saskatchewan and south to Kansas and the Carolinas, has stout stems reaching from two to five feet high.
This milkweed is abundant in meadows, old fields, marshes, and along roadsides, where in the fall its seeds with their familiar parachutes waft away by the thousands into the wind. These, plus a milky juice—latex, the subject of numerous experiments seeking a native rubber—are the plant’s two predominant characteristics. However, these edibles should never be identified by this milky sap alone.
The leaves of this branchless edible grow in opposite pairs. Their short stems, like the stalks, are stout and sturdy. From four to nine inches long, and about half as wide, these oblong to ovate leaves taper at both top and bottom. They have wide central ribs.
The clusters of numerous tiny flowers have a memorable fragrance. They vary in color from greenish lilac to almost white. Each of the components of the delicate blossoms, which are deadly traps to many of the insects that seek their nectar, is divided into five parts. They eventually produce large green pods, some three to five inches long. The warty coverings of these finally split, exposing silk-tufted seeds.
Young milkweed sprouts, when up to some eight inches tall, are excellent asparagus substitutes, especially when cooked with a small piece of salt pork—if “substitute” is the right word, their being so regally satisfying in their own right. Then the young leaves provide cooking greens. The flower buds are a delicacy. Running the sprouts a close second, and even surpassing them in some estimations, are the firm, young pods. If they are at all elastic in your fingers, however, the silken wings of the seeds have developed too far to make for good eating.
There is one thing to keep in mind, however. All parts of the plant are bitter with the pervasive latex. However, this is readily soluble in water. Put your milk-weed—whether sprouts, young leaves, flower buds, or seed-pods—all ready for cooking, in a saucepan. Cover it with boiling water, bring again to a boil over high heat, and pour off. Do this at least once again, maybe more times, depending on your palate. To some, a slight bitterish tinge is invigorating. In any event, finally recover with boiling water, add a bit of salt, and simmer until tender. This may require a bit longer than expected, as milkweed takes more cooking than most other greens. Serve with margarine or butter melting on top.
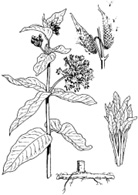
Milkweed.
I’ve also used the similar Asclepias speciosa with its purplish flowers on the western side of the continent, from British Columbia to California.
The tough fibers of the mature stalks of this milkweed were employed by the Indians for making string and rope and for coarse weaving. The milky juice was applied to warts and to ringworm infections, as well as to ordinary sores and cuts. The exquisitely packed ripe seeds were gathered just before soaring and skittering over the landscape, their hairy protuberances burned off, and the remainder ground into a salve for sores. These seeds were also boiled in a minimum of water and the concentrated liquid applied to draw the poison out of rattlesnake bites.
Besides serving as a cough medicine, a hot beverage made by steeping the roots was taken to bring out the rash in measles. Externally, it was supposed to help rheumatism. The root, mashed with water, was applied as a poultice to reduce swelling.
Once the shoots are more than eight inches tall and too old to eat, the bottom leaves can no longer be used but the young top leaves are still tender and tasty before the green flowers. These are fine mixed with young dandelion leaves, although they are good by themselves, too. Then there are the buds themselves, prepared and cooked the same way. Finally, the young pods are fine served on the side with roast or steak, or you may like what they can do for a stew.
Getting back to the blossoms, the Indians are supposed to have used them for sweetening on summer mornings, shaking the dew-laden nectar onto their foods before this dampness evaporated in the heat of the day. This has never worked for me, however, perhaps because I’ve become too lazy too soon.
(Oxyria)
Mountain sorrel is a green we’ve enjoyed in such diverse places as New Mexico, British Columbia, and the green-sloped White Mountains of New Hampshire. This member of the buckwheat family, which grows from Alaska and Greenland to Southern California, is also widely enjoyed in Europe and Asia. It is known in different parts of this country as sourgrass, scurvy grass, and Alpine sorrel.
The perennial mountain sorrel springs from a few inches to two feet high from a large, thick, deep, fleshy root. The small leaves, growing one or two on stems that for the most part rise directly from the root-stock, are smooth and either round or broadly kidney-shaped. Scarcely noticeable greenish or crimson flowers grow in rising clusters on long, full stems that extend above the mostly basal leaves. These blossoms turn into tiny reddish capsules.
The juicy leaves, which are at their best before the plant flowers, have a pleasantly acid taste which somewhat resembles that of rhubarb. In fact, mountain sorrel looks to some like miniature rhubarb, although it so happens that the leaves of domestic rhubarb, whether raw or cooked, are poisonous. Those of mountain sorrel, on the other hand, are delicious for salads, potherbs, and purees. Where this wild edible grows in the Arctic, Eskimos both in America and Asia ferment some of it as a sauerkraut. The tender young leaves will also give a zip to sandwiches.
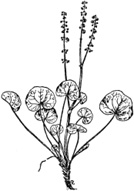
Mountain sorrel.
Mountain sorrel leaves can be turned into a puree by simmering them for 20 minutes, then pressing them through a colander or mashing them, and adding butter or margarine, salt, and pepper. You’ll save vitamins, flavor, and time, though, if you use a meat grinder or kitchen blender on these juicy greens, then quickly cook and add them to a piping hot base.
For a memorable cream soup, pour a quart of rich milk into a pan and set over low heat. When it starts to bubble, add 3 cups of mountain sorrel puree and salt and pepper to taste. Simmer for 5 minutes, stirring. Then gradually pour 3 beaten egg yolks into the mixture, stirring energetically until the color is even. Remove from the heat and, using a fork, blend in 4 tablespoons of butter or margarine. Serve immediately.
You can capitalize on the excellent way mountain sorrel combines with the delicate flavor of fish by making a thick fish stock, slowly bringing the heads, tails, bones, fins, and even the scales, if any, to a boil in cold water to cover, and simmering all afternoon along with a chopped onion and, if you want, a kernel of garlic. You’ll need about ⅓ pound of such remnants for each individual, so wait until the fishing has been good.
Just before you’re ready to sit down to the table, heat in proportional amounts for each diner 1 cup strained fish stock, ¼ teaspoon salt, and a sprinkling of black pepper. Stir in an equal amount of mountain sorrel puree, simmer for 5 minutes, and serve hot with a liberal pat of butter or margarine spreading atop.
Mountain sorrel adds a pungency to green salads, especially when about one-fourth as much watercress is added to contrast with its flavorsome sourness. We usually prefer a plain oil dressing, carefully touched up with a very little salt to taste. It’s doubtful if you’ll want any vinegar. Such salads go especially well with fish, crabs, and lobsters.
Boiled, mountain sorrel combines well with other greens, its acidity giving them added flavor. Because of this acidness, it is best to season gradually to taste and, in most cases, to omit the usual vinegar or lemon juice. A complement of hard-boiled eggs and crisp bacon, both thinly sliced, goes well with these greens.
Always welcome is this robust soup, individually seasoned. For 4 fishermen, the procedure is to start it by dicing about ½ pound bacon and, starting with a cold frypan, slowly bringing this to a sputter. Let the bits become crisp by tilting the pan so that the grease will run to one side. Then spoon them temporarily onto a plate.
Have 8 medium-sized potatoes, 2 onions, and 4 cups of mountain sorrel leaves chopped and mixed. Add these to the bacon fat and stir occasionally until the potatoes start to tan. Then return the bacon, flatten out everything in the pan, cover with water, stir, and simmer until a fork penetrates the potatoes easily. By this time none of us has ever been able to wait any longer.
(Brassica)
Mustard, which flourishes wild over most of the globe, is universally recognizable because of its brilliant yellow flowers that become almost solid gold across many a field and hillside. Five species are widely distributed over the United States. Most important of these is black mustard, an immigrant from Europe and Asia, which has become so much at home on this continent that it now grows over most of the United States and southern Canada.
This annual ordinarily grows from two to six feet tall, although in California I have seen it as tall as a telephone pole. A relative of cabbages, turnips, cauliflowers, radishes, brussel sprouts, and similar cultivated vegetables, black mustard grows erect with widely spreading branches. The leaves on the young plants, which are the ones to pick, are rather fuzzy and feel stiffly hairy. The finely toothed lower leaves are deeply indented at the bases of the stalks and less indented as they ascend. These lobes do not appear on the upper, small, extremely bitter leaves that grow, nearly stemless, from the flower stalks.
The sunny yellow flowers are small but numerous. Typically for mustard, each has four petals and six little upright stamens, four long and two shorter. The blossoms mature during the summer into small, short pods. These are filled with dark, minute, zestfully pungent seeds.
One way this pleasantly edible plant can really start the mouth tingling is in a cream of wild green soup—especially when you come in dehydrated from a day of fishing or spring bear hunting and get that first sniff of it, all steaming and savory. To go with 2 cups of chopped or scissored young mustard greens, start slowly heating a quart of milk, not allowing it to boil.
Meanwhile, melt 2 tablespoons of butter, margarine, bacon drippings, or any other edible fat in a saucepan over low heat. Gradually stir in 1 ½ teaspoons salt, ⅛ teaspoon pepper, and 2 tablespoons flour. Add a finely minced small onion. Then pour in the hot milk bit by bit. Cook gently for 5 minutes.
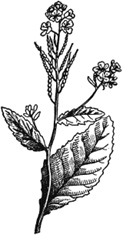
Mustard.
Drop in the greens and, stirring occasionally, continue to heat just below the boiling point until these are just tender. To be at its best, mustard requires more cooking than most greens, something like a half hour. You’ll need a lot, too, as it shrinks considerably. When the soup is ready, sprinkle with paprika. Serve at once.
Mustard, whether used in soup or elsewhere, is most agreeable when it first appears. The young stalks are not hard to identify, particularly as older mustard is often standing in the same patch. The slightly peppery young leaves are enjoyable raw. So are the young flowers with their then subtle pungency. The entire young plant goes well cooked with fish and meat.
Later on, the profusion of golden flowers can be capitalized upon to make a broccolilike dish. When you pick these over, it is best to eliminate any of the small upper leaves because of their bitterness. The blossoms boil up quickly in salted water. Bring them to a rapid boil, then let them stand away from the heat, tightly covered, for 5 minutes. Drain, spread with melting butter or margarine, and sprinkle with a little vinegar. Besides being colorful and delicious, this repast is full of vitamins and protein.
The easily gathered seeds of wild mustard, even after it has grown old and tough, are hard to equal for garnishing salads, adding to pickles and such for that extra seasoning, giving a final authority to barbecue sauces, and lending a wisp of zip and zest to stews. Mustard’s very name comes from its seeds, being a corruption of must seeds, which harks back to ancient Roman-occupied Britain, where these were processed by saturating them in a solution of grape juice, or must, as it was sometimes called.
Table mustard can be made by finely grinding wild mustard seeds, between two stones, if you’re in camp, or in the family food chopper, if you’re at home, and adding enough water or vinegar to make a paste. After that, it’s up to you. Commercially prepared condiments often contain such additional ingredients as flour, salt, turmeric, and other spices. If you choose to modify your raw mustard with up to an equal bulk of flour, brown this latter slowly and lightly in an oven first to take away the starchy taste. The vinegar may be diluted, depending on its strength, up to half and half with water. Occasionally, the blender likes the added flavor of horseradish. This white-flowered member of the mustard family, with the pungent white roots, likewise grows wild.
A lot of us remember, back when we were growing up, the application of mustard plasters to cold-congested chests and sore backs. These famous old remedies, still highly regarded in many households, can be easily homemade. Just mix ground mustard seeds with an equal bulk of ordinary flour, then stir in enough tepid water to make a paste. Sandwich this sparingly between two cloths and tape into position while still warmly wet. Leave some 20 minutes, or until the recipient, with skin that starts to redden in about 5 minutes, begins to complain too vociferously of the increasing warmth.
(Urtica)
Don’t overcook your wild vegetables. Even with such a formidable green as young nettles, which, like prickly pears, are best gathered with leather gloves and a knife, once the salted water has reached the boiling point and the dark green nettles have been dropped in, they’ll be tender almost immediately and ready for that crowning pat of butter or margarine as soon as they are cool enough to eat.
Nettles, which regrow in the same places year after year across Canada and the states, are for the most part erect, single-stemmed greens which sometimes grow up to seven feet tall. The opposite leaves are coarsely veined, egg-shaped to oblong, with heartlike bases, and roughly and sharply toothed. Both stem and leaf surfaces bristle with a fuzz of numerous, fine prickles containing irritating formic acid. Very small green flowers, which, like those of plantain, are easy to overlook, appear in multibranched clusters between leaves and stalk.
Nettle leaves may be gathered in the spring and early summer. These unlikely but delectable edibles are among the first wild vegetables available near our log cabin when greenery begins thrusting up like spring fire, but even so early in the season the presence of stinging bristles makes it necessary to wear gloves while harvesting them. If the skin should be irritated, maybe at the wrists, alcohol can be administered. The Indians of southeastern Alaska, several hundred miles west of our homesite, relieve the stinging by rubbing the irritated skin with the dryish, rusty, feltlike material that covers young ferns or fiddleheads.
When young, nettle leaves and the small entire plants quickly lose their stinging properties when boiled. They have such a delicate flavor that they are good by themselves. Topped with butter or margarine, they are far more subtly delicious than spinach and are excellent sources of vitamins A and C and some of the minerals.
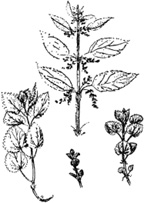
Nettle.
Because they are so easily and positively identified, nettles may be an important emergency food. Too, in a pinch, the stems of the older plants will yield a strong fiber, useful for fish lines.
(Asimina)
This fruit so relished by raccoons and possums, sometimes called “false banana” because of its appearance, is also widely known as “custard apple” in deference both to its deliciousness and its family. Like the highbush cranberry, papaws usually call for an acquired taste. But once you come to like their creamy sweetness, they can become one of your favorite fruits. They are sometimes found in city markets, but they are at their best harvested when ripe, which in the North may mean after the first frost.
This hardy cousin of similar tropical fruits is native from New York southward to Florida and west to Nebraska and Texas. Preferring ground that is moist and fertile, it is most often seen in stream valleys and on the lower adjoining hills. It grows, too, in small clearings and along shaded roadsides. Papaws planted during landscaping often turn out to be doubly valued for their decorativeness as well as for their fruit.
A big shrub or a small tree, the papaw occasionally grows some forty feet high in the South, with a trunk perhaps as much as a foot in diameter. Northward, however, even the taller trees are often fifteen to twenty feet high, with trunks only a few inches thick. The papaw’s large and often drooping leaves, which give it a tropical appearance, are from six to twelve inches long and, growing on short stems, are dark green above and paler beneath.
In early spring, just as these first leaves are starting to open, it blossoms with greenish flowers that later turn to a brownish or reddish purple. Growing from where the branches are met by the stems of the previous year’s leaves, these are unusual in that they have six petals in two sets of three. The inner trio bunch together in a little chalice around which the outer three are outstretched like a saucer. About one and one-half inches wide, these produce slender fruits that look like short bananas, from several to about five inches long, with smooth, greenish-yellow hides that become brown a day or two after the papaws are plucked.
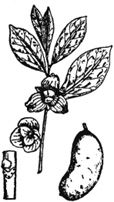
Papaw.
Left: bud and leaf scar. Center: branch with flowers and leaves.
Right: fruit.
Despite the nuisance of several large dark seeds, the papaw has a wealth of bright yellow pulp whose mellow sweetness makes it really something to feast on outdoors, as the hungry members of the Lewis and Clark expedition discovered on their homeward journey. They are quickly gathered, often from the ground. You can also pull them slightly green and put them out of the way in a dark and dry place to ripen.
The custardlike consistency of the ripe fruit, whose odor is also fragrant, blends well with a number of desserts. For 2 people, make a sauce by beating the yolks of 3 eggs briefly, then stirring in 2 cups of milk and ½ cup sugar. Cook in the top of a double boiler until it thickens slightly. Then mix with a cup of papaw pulp that has been strained through a colander. Allow to cool, and then put in the refrigerator. Serve chilled, snowily topped with the beaten whites of 3 eggs into which, after they have become stiff, 6 tablespoons of sugar have been whipped.
Frozen papaw will also make you hope that no unexpected company drops in at the last moment. It’s easy to make, although you have to go at it in stages, with everything at the same temperature to begin with. Start by separating 3 eggs. Beat the yolks until thick, add ½ cup sugar, and whip until creamy. Beat the whites until they form peaks, pour in ½ cup sugar, and continue beating until stiff. Then beat 1 cup of heavy cream until it, too, is stiff. Gently combine all these ingredients and fold in a cup of strained papaw pulp. Then just freeze.
(Pinus)
The soft little nuts from the pinecones of millions of low-spreading conifers in the western United States and Mexico are not only pleasantly sweet by themselves, but they also afford prime flavoring for salads of the edible greens often seen flourishing nearby.
Roast the piñons first, after shelling them with the help of pliers or hammer, by spreading them in a single layer in a pan and placing it for 5 minutes in a moderate 350-degree [F] oven. Shake the pan several times during the process.
Coarsely chop ½ cup of the toasted piñons. Mix these with ¼ teaspoon each of grated lemon peel, tarragon, and salt, and with ⅛ teaspoon cinnamon. Shake well with ½ cup salad oil and ¼ cup vinegar. This salad dressing can be stored, tightly covered, in the refrigerator. Use only about 1 ½ teaspoons for every cup of greens. As exciting as a honking wedge of geese undulating across the blue evening sky, it will make everything taste new.
Piñon pines have needlelike leaves in clusters of from two to five which persist for two, three, or more years. The flowers appear in the spring, producing an abundance of yellow, sulphurlike pollen which enlivens the wind. Once this fertilizes the pistillate flowers, which are scattered among the new shoots, there develop the familiar cones which take two and occasionally three years to reach maturity and disperse their winged seeds on the breezes. It is only on the innumerable small, low-growing pines in the vast drier mountainous regions of the West that these seeds become large enough to bother with. They are regularly available in stores.
However, if the cones’ seeds, no matter how greatly relished by squirrels, turn out to be small, at least there will be nothing unwholesome about them. Romanian cooks grind entire young pinecones and use them to flavor game sauces. Some Indians used to roast the soft centers of green cones by the fringes of their campfires and feast on the syrupy results.
The settlers early learned to gather the inner bark of the pines in the spring, dry it throughout the summer, and then grind it and mix it with regular flour. Next to devouring it raw, though, the easiest way to eat this sweet cambium is first to cut it into thin strips, then cook it like spaghetti. The bland flavor goes well with meat simmered at the same time.
Some of the tribes went to more elaborate preparations, even to making a sort of bread. The squaws mashed the cambium to a pulp in water, then molded this into big cakes. In the meantime, a rousing fire was kindled in a rock-lined hole. The coals were then removed, the cakes set in on green leaves, and the embers raked back over a thick layer of leaves on top. Damp moss covered everything, which was left to smolder for upwards of an hour. The cakes were then placed on pole frames and smoked for a week, after which they could be carried as trail rations. The results were so hard that before use the cake was customarily broken into bits and boiled until soft.
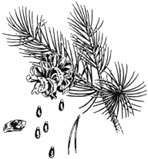
Piñon.
Even pine needles, when they are new and starchy, are pleasantly nutritious to chew on. Some Indians boiled the still firm, spikelike flower clusters, in which the petalless blossoms grow in circular rows on slender stalks, to flavor their meats.
The piñons have also long been important medicinally. Hot pine tea, made by steeping the needles or by boiling gum or pitch, was one of the earliest cold remedies. Chewing the gum was considered soothing to sore throats. Too, the resin was dried, powdered, and applied to sore throats by swabs.
The piñon resin was also used by various Indians, and later by white adventurers and settlers, as a cure for everything from rheumatism and flu to indigestion. Heated, it was applied as a poultice to draw out splinters and to bring boils to a head. This hot resin dressing was also smeared on cuts, burns, sores, abrasions, and insect bites. Applied liberally to a hot cloth, it was used like mustard plasters in treating pneumonia, neuralgia, and general muscular soreness and stiffness.
The pines as a whole hold a position near the peak in importance to wildlife, partly because many birds and mammals feast on the seeds and to some extent because of the year-around cover the trees afford game birds, fur bearers, and both large and small game animals. Grouse, pigeons, doves, quail, prairie chickens, and turkeys eat the needles as well as the seeds. Deer, elk, moose, and mountain sheep browse on the foliage.
If you’ve ever lived in New Mexico, you’ll remember the fragrance of burning piñon enlivening the air, as it has been doing in this country for centuries. The piñon and its cousins, such as the Parry pine and the Digger pine, have long been the most important trees to the Indians in the Southwest. The women still use the nuts in all kinds of cooking, from soups to salads, and a pocketful of their almost airy evergreen flavor goes well at any time.
Incidentally, when you’re foraging for piñons in high country, don’t overlook the ungainly nests of the pack rat. Indians customarily break each of these rough, large retreats apart, often finding as much as several pints of nuts stored for winter use.
These rich little nuts found in the hearts of pinecones add a subtle sweetness to the already piquant flavor of young dandelions. To go with enough of these greens to serve four, get 3 tablespoons of salad oil sizzling in a frypan. Then stir in ½ cup of piñons, ½ cup of diced black olives, ¼ cup seedless raisins, and a small mashed clove of garlic. After 3 minutes, put in the greens that have been torn to bite size, including a reasonable number of buds if possible. Reduce the heat, cover, and cook only until warm and tender. Season to taste with salt and, if you want, with a dusting of black pepper. Serve hot.
A delicious green sauce, flavorsome over steaming noodles or spaghetti, can be made with piñons and watercress. Start with ½ cup of chopped watercress, ¼ cup piñons, a large chopped garlic clove, and ⅛ teaspoon of salt in the blender. When this pureed, add ½ cup of freshly grated Parmesan cheese. Conclude by slowly blending in ¼ cup salad oil and ½ stick of butter or margarine. With fruit and perhaps a dry red wine, this makes a perfect meal.
When the Indians taught the early frontiersmen how to obtain nuts from the piñons and related low-spreading pines, they began an adventure in good eating that continues to this day. Piñon cakes are unique and delicious, both hot and cold. You can make them in camp, perhaps where you’re gathering the nuts, or at home. In either event, the shelled nuts first must be chopped or crushed, as with a rolling pin, to a coarse meal. The easiest way to go about this, of course, is in the home blender.
If you’re cooking over an open fire, just mix each cup of piñon meal with ¼ teaspoon of salt and about ⅓ cup of lukewarm water to make a stiff batter. Get a tablespoon of shortening warming in a large, preferably heavy frypan until it is just short of smoking. Drop the batter from a tablespoon, flattening it into cakes with a spatula. Reduce the heat and tan the cakes slowly on one side before turning them to brown the other.
If you are at home, you can make a little less primitive cake by stirring each cup of piñon meal, then ¼ cup of all-purpose flour, into a well-beaten egg. Drop on a greased baking tin with a teaspoon. Bake in a moderate 375-degree [F] oven about 10 minutes until lightly browned. The flavor of these is even more delicate.
For about three dozen piñon bread sticks of unusual crunchiness and distinctive flavor, stir a package of yeast into a cup of lukewarm water. Once it has dissolved, pour into a mixing bowl. Add ¼ cup olive oil, ¼ cup salad oil, a tablespoon sugar, 1½ teaspoons salt, a slightly beaten egg, and a cup of all-purpose flour. Beat until smooth.
Then add ¾ cup piñons and enough additional flour, about 2 ¼ cups, to make a stiff dough. Using a floured board or square of plastic, knead this about 5 minutes until it is smooth and elastic, adding flour if necessary. Cover with a damp cloth and place in the refrigerator overnight or, if you are in a hurry, for at least 2 hours. In any event, plan your cooking so that the dough can later rise for another 2 hours, starting this recipe early in the afternoon if you plan to serve the hot bread sticks for dinner.
Divide the chilled dough into 3 parts. Cut each portion into a dozen equal slices. Using your palms, roll each piece into an 8-inch crayon-like strip. Place about ½ inch apart on greased baking sheets, brush with melted butter or margarine, and let rise until about double size. Salt lightly. Bake in a preheated moderate 325-degree [F] oven for about a dozen minutes until crisp and barely golden. Either warm or cold, such crusty tidbits, their outdoorsy flavor becoming more evident with each bite, will really arouse the appetite.
Piñon crops vary in different years, but if you happen to run into a bountiful harvest, you may like to try some cookies. These are simply made in any desired quantity by mixing each cup of chopped piñons with a cup of brown sugar and the beaten white of an egg. Drop small blobs from a teaspoon onto a greased pan or cooky sheet. Bake in a slow 300-degree [F] oven until lightly browned.
Or you can bake more elaborate cookies. In any event, piñon cookies will fill the house with a tantalizing aroma. Start the preparations for these by finely grinding 2 cups of blanched almonds. Lightly beat 2 egg whites. Mix these thoroughly with the almonds and with a cup of sifted confectioners’ sugar. You may choose to omit this next step, but we now like to blend in 2 tablespoons of crème de cacao.
Shape the dough into cookies about 1½ inches in diameter. Place apart on a well-greased cooky sheet. Brush the top of each with lightly beaten egg white. Arrange a half-dozen or so toasted piñons atop each cooky. Leave at room temperature all afternoon. Just before dinner, heat your oven to a moderate 350 degrees [F] and cook the delicacies, which will number between 3 and 4 dozen, for about 10 minutes or until they are a light brown.
One of the most splendiferous edibles ever concocted by man in piñon torte. Beat ¼ cup of sugar and a stick of melted butter or margarine into 2 egg yolks. Add 2 tablespoons milk and ¾ cup toasted piñons. Mix together ½ cup all-purpose flour and ½ teaspoon salt, and fold that in. Whip 2 egg whites until they form short peaks. Gradually beat in ¼ cup of sugar and fold that, too, into the batter.
Bake in 2 deep, well-greased, 8-inch layer cake pans in a slow 300-degree [F] oven for 50 minutes. In the meantime whip a cup of heavy cream, sweetened to taste with sugar. Put the cooled layers together with half the whipped cream. Spoon the remaining whipped cream over the dome and garnish it with ¼ cup of the toasted nuts, perhaps arranged in a pine tree pattern.
The flavor of chilled piñons soup is so satisfyingly piquant that this luxury is particularly refreshing on a hot fall evening. The soup is also excellent while still steaming. Because it is better appreciated when served in small portions, the following recipe will make enough for four.
Bring 2 cups of milk, a cup of game bird or chicken stock, a cup of raw piñons, a small diced onion, ⅛ teaspoon dried mint, and ⅛ teaspoon of black pepper, preferably freshly ground, to a simmer. Stirring occasionally, cook for half an hour over heat so low that only an occasional bubble dances to the surface. Then process in the blender until smooth. Either reheat for immediate use or refrigerate for serving cold. A palmful of minced chives scattered on just before bringing to the table helps bring out the savor.
(Plantago)
Plantain is almost as good as lamb’s quarter. Furthermore, plantain is as well known to most of us as are the similarly prepared and eaten dandelions, although not usually by name.
It is the short, stemless potherb whose broadly elliptic green leaves rise directly from the root about a straight central spike. This singular spike blossoms, although possibly you’ve never noticed it, with minute greenish flowers that later turn into seeds. At any rate, plantain is found all over the world, even growing through sidewalks in New York, San Francisco, and Boston.
Some nineteen kinds of plantain thrive in the United States. One of the more widely distributed of these is the seaside plantain, also known as goosetongue, which grows along such widely separated coasts as those of Quebec, Nova Scotia, New England, Alaska, British Columbia, and California. The natives in Alaska boil this fresh both for eating on the spot and for canning for winter.
Plantain leaves make excellent greens. Fact is, the greener they are, the richer they are in vitamins A and C and in minerals. They are good boiled. What holds for plantain, when it comes to this common if often murderous method of cookery, goes for the other wild greens as well. Unless it means standing over a riled cook with a cleaver, try to see that all these are cooked only until just tender and still slightly crisp. This usually takes a surprisingly brief time.

Plantain.
The simple gimmick with these wild vegetables is to start them in a minimum amount of boiling water and to cook them, covered, as rapidly and briefly as possible. Young plantain and such can be lifted directly from the rinse to the saucepan and cooked without added water.
For two liberal servings of slightly older greens, ½ cup water and ½ teaspoon salt will do the job. When the greens become tougher, a full cup of water may be required. Any of the vitamin- and mineral-rich fluid remaining should be used, as in soups, gravies, sauces, and the like, unless there’s some reason against this such as unusual bitterness. Me, I drink it.
Plantain, also called ribwort and soldiers herb, is mildly astringent. During pioneer times, and even today in some backwoods localities, the fresh leaves are mashed and applied to cuts, scratches, and wounds. The leaves are also used for tea, ½ handful being dropped into a cup of boiling water and allowed to steep for ½ hour.
(Phytolacca)
The first wild greens of the spring in many a happy household, pokeweed flourishes in the eastern half of the country except along the Canadian border, west to Texas and south to the tropics. The Indians found it delicious, and some of the first European adventurers on these shores were in such agreement that they took the seeds back to France and southern Europe, where the vegetable became popular. Today pokeweed finds its way into many of our stores as a springtime delicacy. Some devotees like it so well that they even grow it in their cellars.
Also known as pokeberry, poke, scoke, pigeonberry, garget, coakum, and inkberry, this wild vegetable has a huge perennial root often as large as a man’s forearm. Fibrous and covered with a thin tannish bark, this can be easily broken to size and planted in garden soil in a deep, flat box. Best are the medium-size roots, some three or four inches in diameter, broken or cut into six-inch lengths, dug and replanted indoors after the first heavy freeze of fall. Kept in a dark, warm cellar and regularly watered, these will regularly send up shoots for months. For a family of three, you’ll want about a dozen such roots.
The fat young sprouts, especially when they are some six to eight inches high, are the only part of pokeweed that is good to eat. The bitter roots—cathartic, emetic, and somewhat narcotic—are poisonous. So are the mature stalks when they take on a purplish cast. You may have seen birds get tipsy on the berries.
You’ll want to be able to recognize the full-grown plants, however, as in the spring it is near their dried remains that the tender young shoots will arrow upward. These annuals grow into round stalks, about an inch in diameter, which reach and branch upwards from four to nine feet. The leaves, which are shaped like rounded lances, have stems on one end and points on the other. Scattered, smooth on both sides, and wavy-margined, they are up to about ten inches long.
Both flowers and fruit grow in long clusters on short stems. The numerous, small flowers are a greenish white. The round, ripe berries are a deep purple and are an important source of food for the mourning dove. Their reddish purple juice, as boys sometimes used to confirm in the fall when school classes were first resuming, will serve as an ink for steel pen points.
Gather your small, tender pokeweed shoots when they are no more than about eight inches tall. Remove skin and leaves, saving the latter for greens. Simmer the whole stems in a small amount of lightly salted water for 10 minutes or until tender. Serve on hot buttered toast, steaming with sauce.
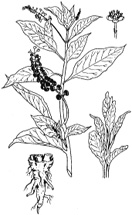
Pokeweed.
One sauce whose flavor really brings out the springlike deli-ciousness of young pokeweed is started by finely chopping 2 slices of a medium-size onion, then tanning the bits in 2 tablespoons of butter or margarine. Then blend in 3 tablespoons flour. Slowly add a cup of milk, stirring vigorously. Mix in a teaspoon of chopped watercress. Salt and pepper to taste, sprinkle with ⅛ teaspoon nutmeg, and simmer gently for 5 minutes, stirring occasionally. Add ¼ cup of heavy cream, bring again to a bubble, and serve.
A tantalizing cheese sauce to touch up the flavor of such pokeweed on toast can be made by slowly melting 2 tablespoons of butter or margarine in a saucepan over moderate heat, not allowing it to brown. Then smoothly stir in an equal volume of flour. Stirring vigorously, gradually add 1¼ cups of milk and bring to a bubble. Season with ¼ teaspoon salt and ⅛ teaspoon pepper. Still stirring, simmer for 5 minutes to take away the raw taste of the flour. Now remove from the heat for several minutes. Add a bit at a time, stirring energetically until each portion has melted before adding more, ¾ cup of good grated American cheese. Return to low heat but do not allow to boil. Spoon over each serving, dust with paprika and with parsley flakes, and see what everyone’s idea is for vegetables the next day.
Pokeweed is also good with eggs. For this dish, skin the shoots but leave on the little unfurled leaves at the top. Wash well. Then boil whole for 8 minutes in salted water until nearly tender. Drain, saving ¼ cup of the fluid. Mix this liquid with 3 beaten eggs, 3 tablespoons salad oil, a halved clove of garlic, and salt and pepper to taste. Add to the pokeweed and, stirring occasionally, cook about 2 minutes or until the latter is ready for the table. Remove the garlic and serve.
For a rich, aromatic soup, simmer 2 cups of pokeweed shoots until soft and then put either through a sieve or the blender. Bring 2 cups of milk to a bubble along with a halved clove of garlic. Then discard the garlic and add the pureed vegetable. Mix 3 tablespoons flour smoothly with a small amount of cold water. Stir that, along with 3 tablespoons of butter or margarine, into the soup. Season to taste with salt and pepper. Bring again to a bubble, add a tablespoon of chopped watercress and a cup of heavy cream, sprinkle with paprika, and serve steaming.
Those times when bachelors are doing the cooking they sometimes go in a lot for one-dish meals, and this wild vegetable is one of those lending itself well to such production. Simmer until tender in a minimum amount of salted water enough young pokeweed for four. In the meantime, be preparing a white sauce by melting ½ stick of butter or margarine in a saucepan, smoothly stirring in ¼ cup flour, and then, still stirring, slowly add 2 cups milk. Season to taste with salt and pepper. Stir in 2 tablespoons of finely diced green pepper. Bring to a simmer.
Also be simmering 4 eggs, completely covered with water, for 8 to 10 minutes depending on their size. Then remove them from the heat and plunge them into cold water. Crack the shells slightly before the eggs cool, so that peeling will be easier. Slice.
Spread a base of pokeweed over the bottom of a well-greased casserole. Cover with white sauce, then with sliced egg. Repeat until all the ingredients are used. Top with ½ cup of buttered white bread crumbs. Bake in a moderate 325-degree [F] oven for half an hour. Serve hot. Just a whiff of this will have your customers waiting eagerly.
(Populus)
The poplar’s sweetish, starchy sap layer is edible both raw and cooked. This lies between the wood of trunks, branches, and twigs and the outside bark, the latter being intensely bitter with salicin, which for some reason is relished by moose, beaver, and rabbit and is an ingredient in some tonics concocted for the benefit of mankind.
All three animals chaw poplar bark, and poplar trunks and branches are common in beaver dams and houses. Deer, elk, and mountain sheep browse on the twigs and foliage. Grouse, prairie chickens, and quail are among the game birds relying on buds, catkins, and seeds.
One of the most common trees on the continent, the life-giving poplar grows about as far north as any other on the great barrens of Canada. Cottonwoods as well as aspens are poplars. On the other hand, the so-called yellow poplar of the Southeast is not a polar at all. In numerous northern areas, poplars quickly spring up in burns and clearings.
The poplars, members of the great willow family which has saved more than one man from starving, have alternate leaves with toothed and sometimes lobed edges. The stems are long and slender, occasionally being definitely flattened. The branches are characteristically brittle and, breaking easily from trunks and big limbs, make excellent firewood for lone campfires, burning with a clean, medicinal odor.
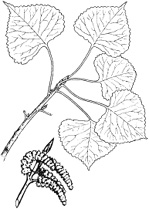
Poplar.
Pollen fills the wind when the flowers, growing in drooping spikelike clusters, appear in the first warm weather of spring before the light green leaves blaze forth, like pale green fire crowning the forest. The cottony aspect of the later splitting capsules of seeds, each with its long, fibrous hairs, has brought the name “cottonwood” to some species.
The soft formative tissue between wood and bark can be scraped off and eaten on the spot. One of the modern ways of obtaining such nourishment is in tea. It can also be cut into strips or chunks and cooked like noodles in soups and stews. Dried and powdered, it is a flour additive and substitute. No matter how it is eaten, however, it can by itself keep you going for weeks.
(Opuntia)
There is also the unlikely prickly pear—the little thorny knobs, ranging from the size of apricots to the size of large lemons, that bulge from the padlike joints of cactus. Actually, the spine-bristling skin of this fruit of the cactus is so unmistakable that any difficulties lie not in identifying but in picking. It’s best to go about this with leather gloves and a knife.
Depending on the kind of cactus, the ripened colors of prickly pears vary from tawny green and purplish black to the choicest of them all—the big red fruits of the large Opuntia megacantha of the continental Southwest. To eat any of these Indian figs, as they’re also known, slice off the ends, slit the hide lengthways, and scoop out the pulp.