Chapter 10. Working with Files and File Types
At the moment, the iOS app can work with the text content of note documents, but doesn’t really know anything about attachments that might have been added through the OS X app.
In this chapter, we’ll add support for working with attachments to the iOS app, as well as make its handling of note documents more robust. We’ll do this by adding—you guessed it—more user interface to:
-
display any attachments.
-
handle conflict resolution, for when a file is synced from multiple devices.
-
add Quick Look support, to display a thumbnail preview of attachments.
Setting Up the Interface for Attachments
First, we’ll update the interface for the document view controller to support showing the list of attachments. This will involve reworking everything, as well as some reasonably complex constraints, so it’s easier to start from scratch.
-
Open Main.storyboard.
-
Delete the text view from the document view controller’s interface. We’ll be reconstructing the interface, with room for the attachments to be displayed, so it’s easier to remove everything than it is to rearrange.
-
It’ll be easier to do this without the top bar in the way, so select the document view controller, and in the Simulated Metrics section of the Inspector, change Top Bar from Inferred to None (Figure 10-1).
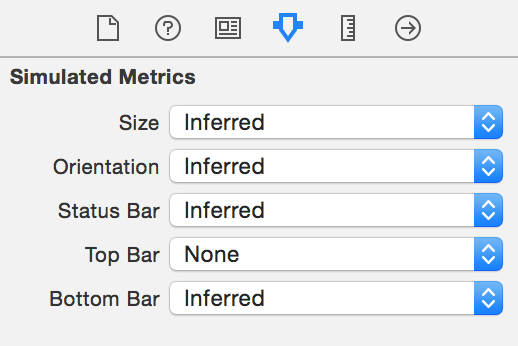
Figure 10-1. Setting the mode of the top bar
-
Drag a
UIScrollViewinto the interface; this will enable us to display content larger than the view it’s currently in (see Figure 10-2).We want the scroll view to fill the entire screen. By default, constraints are made relative to the margins, and to the layout guides at the top and the bottom. However, because the contents of the entire screen need to scroll, we want to take up all of the space. This means that we need to add constraints differently.
-
Add constraints to the scroll view by selecting the scroll view and clicking the Pin button at the bottom right of the window. Turn off “Constrain to margins” and set all four of the numbers that appear to 0. Change Update Frames to Items of New Constraints, and click Add 4 Constraints. The scroll view will now completely fill the screen.
We’ll now add controls inside it. In particular, we’ll be adding a stack view, which will contain the text editor and the collection view that will show the list of attachments. A stack view handles most of the work of laying out views in a horizontal or vertical stack. If all you care about is “these views should be next to each other,” and you don’t want to have to deal with more complex layouts, then stack views are exactly what you want.
Note
While
UIStackViewis a single class, it appears in the Object library twice: once for “vertical stack view,” and once for “horizontal stack view.”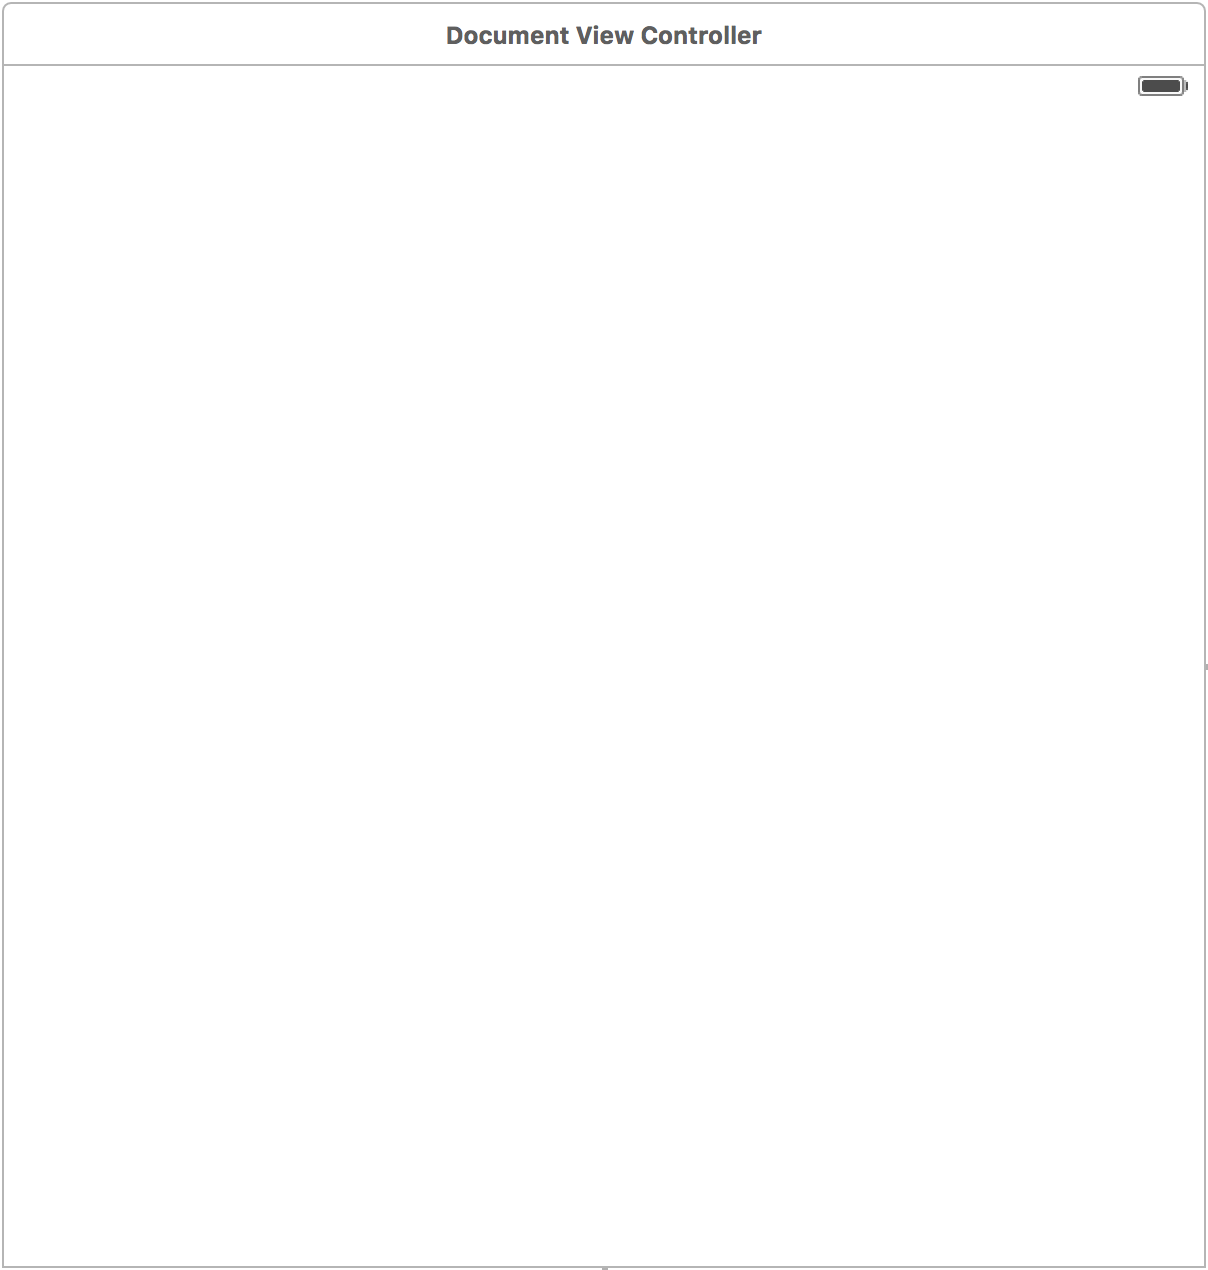
Figure 10-2. The empty document view controller interface
-
Drag a vertical
UIStackViewinto the scroll view. -
With the stack view selected, click the Pin button, and set the top, leading, trailing, and bottom space to 0.
-
Next, resize the stack view so that it’s the same width as the scroll view.
-
Hold down the Control key and drag from the stack view to the scroll view. A list of possible constraints will appear; choose Equal Widths.
Note
It’s important to make it the same width as the scroll view. This ensures that the scroll view doesn’t collapse it to 0.
-
Inside the Attribute Inspector, ensure that the stack view’s Alignment and Distribution are both set to Fill. This means that the stack view will make the size of its child views sufficient to fill up the stack view’s boundaries.
-
Hold down the Control key and drag from the collection view to the collection view itself. Choose Height from the menu that appears.
-
Select the collection view’s cell and resize the cell size to 88 by 88.
-
Set the collection view’s background color to 90% white (very slightly gray) in the Attributes Inspector.
Next, we’ll add (back) the text view, just like we did in the previous chapter.
-
Add a
UITextViewto the stack view.It needs no constraints, since the stack view will size and position it. Setting the height to 88 for the collection view, and adding no other constraints, will make the stack view do two things: position the collection view at the very top and make it fill the width of the screen, and make other views expand their height to fill the remaining space.
-
Connect the document view controller’s
textViewoutlet to this text view.Tip
The
textViewproperty has the typeUITextView, which means that the connection can only be made to a text view. The interface builder won’t let you connect to any other type of view. -
Make the text view use the document view controller as its delegate, by Control-dragging from the text view onto the document view controller in the outline.
-
Select the text view, and go to the Attributes Inspector. Set the text view to use attributed text and then turn Scrolling Enabled off—it’s not necessary, because it’s already contained inside a scroll view (see Figure 10-3).
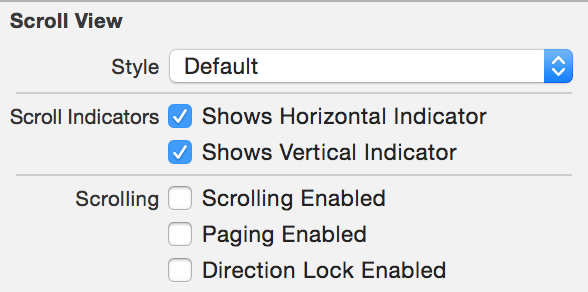
Figure 10-3. Disabling scrolling on the text view
-
Run the app; the text now appears underneath the collection view.
Listing Attachments
Now that the interface is set up, we’ll add support for storing attachments in the iOS Document class.
-
Open Document.swift.
-
Add the following code to add the
attachmentsDirectoryWrapperproperty, which returns theNSFileWrapperrepresenting the folder where attachments are stored. If it doesn’t exist, it creates it:privatevarattachmentsDirectoryWrapper:NSFileWrapper?{// Ensure that we can actually work with this documentguardletfileWrappers=self.documentFileWrapper.fileWrapperselse{NSLog("Attempting to access document's contents, but none found!")returnnil}// Try to get the attachments directoryvarattachmentsDirectoryWrapper=fileWrappers[NoteDocumentFileNames.AttachmentsDirectory.rawValue]// If it doesn't exist...ifattachmentsDirectoryWrapper==nil{// Create itattachmentsDirectoryWrapper=NSFileWrapper(directoryWithFileWrappers:[:])attachmentsDirectoryWrapper?.preferredFilename=NoteDocumentFileNames.AttachmentsDirectory.rawValue// And then add itself.documentFileWrapper.addFileWrapper(attachmentsDirectoryWrapper!)// We made a change to the file, so record thatself.updateChangeCount(UIDocumentChangeKind.Done)}// Either way, return itreturnattachmentsDirectoryWrapper}The
attachmentsDirectoryWrappercomputed property first checks to make sure theDocument’s file wrapper actually has a usable array of file wrappers to access. Generally, this is always true, but if it’s not, we can’t continue.Next, we attempt to get the file wrapper for the Attachments directory. If that doesn’t exist, then we first create it, and add it to the document’s file wrapper. Either way, by the end of the method, we’ve got an Attachments directory to use, which we then return.
-
Add the
attachedFilesproperty, which returns an array ofNSFileWrappers, each of which represents an attached file:dynamicvarattachedFiles:[NSFileWrapper]?{// Get the contents of the attachments directoryguardletattachmentsFileWrappers=attachmentsDirectoryWrapper?.fileWrapperselse{NSLog("Can't access the attachments directory!")returnnil}// attachmentsFileWrappers is a dictionary mapping filenames// to NSFileWrapper objects; we only care about the// NSFileWrappers, so return that as an arrayreturnArray(attachmentsFileWrappers.values)}To return the list of all attachments, we first ensure that we have an attachments directory to use. Next, we need to do a little bit of conversion. The
fileWrappersproperty onNSFileWrapperobjects returns a dictionary, in which strings are mapped to otherNSFileWrappers. If we don’t care about the filenames, and only care about the file wrappers, we need to ask the dictionary for itsvaluesvalue, and then ask Swift to convert it to anArray, which we then return. -
Add the
addAttachmentAtURLmethod, which adds an attachment to the document by copying it in:funcaddAttachmentAtURL(url:NSURL)throws->NSFileWrapper{// Ensure that we have a place to put attachmentsguardattachmentsDirectoryWrapper!=nilelse{throwerr(.CannotAccessAttachments)}// Create the new attachment with this file, or throw an errorletnewAttachment=tryNSFileWrapper(URL:url,options:NSFileWrapperReadingOptions.Immediate)// Add it to the Attachments directoryattachmentsDirectoryWrapper?.addFileWrapper(newAttachment)// Mark ourselves as needing to saveself.updateChangeCount(UIDocumentChangeKind.Done)returnnewAttachment}Adding an attachment to the
Documentclass works almost identically to the Mac version of the same method (seen in “Storing and Managing Attachments”). We first check to ensure that we have a file wrapper that we can place our attachments in, and then attempt to create a new file wrapper for the attachment. It’s then added to the Attachments directory, and we record the fact that the document changed.
Determining Types of Attachments
To show attachments in the list, we need a way to visually represent them. This means that we need to show some kind of thumbnail image. We’ll start by adding the default File image, which will be used as the fallback for when the app doesn’t have special support for a type of file.
-
Open the Assets.xcassets file.
-
Drag the File.pdf image from the resources we provided on our website into the list of images to add it to the collection.
Next, we’ll implement a way for the document to determine the type of the attachment, and a method to generate a thumbnail for the attachment. We’ll do this by adding methods to the
NSFileWrapperclass that allow it to determine its file type and to return aUIImagethat’s appropriate for the type. -
Open Document.swift.
-
Import the
MobileCoreServicesframework by adding this to the top of the file:importMobileCoreServices -
Add a new extension to
NSFileWrapperby adding the following code to Document.swift. We’ll be putting our extra methods forNSFileWrapperinto it:extensionNSFileWrapper{} -
Next, add the
fileExtensionproperty and theconformsToTypemethod to this extension, which determines the file type:varfileExtension:String?{returnself.preferredFilename?.componentsSeparatedByString(".").last}funcconformsToType(type:CFString)->Bool{// Get the extension of this fileguardletfileExtension=fileExtensionelse{// If we can't get a file extension, assume that// it doesn't conformreturnfalse}// Get the file type of the attachment based on its extension.guardletfileType=UTTypeCreatePreferredIdentifierForTag(kUTTagClassFilenameExtension,fileExtension,nil)?.takeRetainedValue()else{// If we can't figure out the file type from the extension,// it also doesn't conformreturnfalse}// Ask the system if this file type conforms to the provided typereturnUTTypeConformsTo(fileType,type)}The
fileExtensionproperty simply splits the file extension’spreferredFilenamewherever a . appears, and takes the last item from that array. This has the effect of getting the file extension.Note
The
Stringclass used to have apathExtensionproperty, but it was deprecated, likely due toNSURLobjects having the same method. However, since theNSFileExtensionclass doesn’t have any knowledge of its URL, we need to go based on the filename instead. As a result, we have to do it ourselves.The
conformsToTypemethod takes a UTI, stored in aCFString, and asks the type system to give us the UTI that applies to our file extension (using thefileExtensionproperty we just added). If that UTI conforms to the UTI that was passed in as a parameter, then we returntrue.
Note
The takeRetainedValue method is necessary because the UTType collection of methods is written in C and isn’t designed with Swift’s memory management system. The takeRetainedValue method signals to Swift that it’s responsible for disposing of the returned value from UTTypeCreatePreferredIdentifierForTag when it’s all done.
-
Finally, we’ll add the method
thumbnailImageto the extension, which uses the information fromconformsToTypeto figure out and return the image:functhumbnailImage()->UIImage?{ifself.conformsToType(kUTTypeImage){// If it's an image, return it as a UIImage// Ensure that we can get the contents of the fileguardletattachmentContent=self.regularFileContentselse{returnnil}// Attempt to convert the file's contents to textreturnUIImage(data:attachmentContent)}// We don't know what type it is, so return nilreturnnil}The
thumbnailImageproperty is one that we’ll be adding to over time, as we continue to add support for additional types of attachments. At the moment, it simply checks to see if the file wrapper is an image file; if it is, it returns aUIImagebased on the content of the file.
Tip
This is an early example of how UTIs can be powerful. To identify if the file wrapper is an image, we don’t need to manually check to see if the file extension is .png, .jpg, .jpeg, and so on. We can simply ask the system. In addition, if iOS adds support for some additional image format, our code will automatically handle it.
Displaying Attachment Cells
Now that attachments are capable of providing an image, we’ll make the attachments collection view show cells. We’ll show one cell for each attachment, plus an additional “add new attachment” cell, which will add a new attachment when tapped.
First, we’ll add the image for this “add attachment” cell, and then we’ll connect up the collection view to the document view controller.
-
Open the Assets.xcassets file.
-
Add the AddAttachment.pdf image to the list of images. Next, we’ll define the class that powers the collection view cells that represent each attachment.
-
In DocumentViewController.swift, add
AttachmentCell. It’s a subclass ofUICollectionViewCellthat has an outlet for an image view and for a label:classAttachmentCell:UICollectionViewCell{@IBOutletweakvarimageView:UIImageView?@IBOutletweakvarextensionLabel:UILabel?}
Next, let’s make the view controller use this new class to show the list of all attachments.
-
Open DocumentViewController.swift.
-
Add an outlet for a
UICollectionViewcalledattachmentsCollectionView:@IBOutletweakvarattachmentsCollectionView:UICollectionView! -
Create an extension on
DocumentViewControllerthat conforms toUICollectionViewDataSourceandUICollectionViewDelegate:extensionDocumentViewController:UICollectionViewDataSource,UICollectionViewDelegate{} -
Implement the
numberOfItemsInSectionmethod in this extension, which returns the number of attachments the document has, plus an additional cell (for the “add attachment” cell):funccollectionView(collectionView:UICollectionView,numberOfItemsInSectionsection:Int)->Int{// No cells if the document is closed or if it doesn't existifself.document!.documentState.contains(.Closed){return0}guardletattachments=self.document?.attachedFileselse{// No cells if we can't access the attached files listreturn0}// Return as many cells as we have, plus the add cellreturnattachments.count+1}To figure out how many items need to exist in the attachments list, we need to first check to see if the document is closed; if it is, then we can’t display any attachments, or the “add” cell. (This will be the case when the view controller has appeared on screen, but the document hasn’t finished opening yet.) We then ask for the document’s
attachedFilesarray and return its length, plus one. This additional cell will be the “add attachment” cell. -
Implement the
cellForItemAtIndexPathmethod:funccollectionView(collectionView:UICollectionView,cellForItemAtIndexPathindexPath:NSIndexPath)->UICollectionViewCell{// Work out how many cells we need to displaylettotalNumberOfCells=collectionView.numberOfItemsInSection(indexPath.section)// Figure out if we're being asked to configure the add cell,// or any other cell. If we're the last cell, it's the add cell.letisAddCell=(indexPath.row==(totalNumberOfCells-1))// The place to store the cell. By making it 'let', we're// ensuring that we never accidentally fail to give it a// value - the compiler will call us out.letcell:UICollectionViewCell// Create and return the 'add' cell if we need toifisAddCell{cell=collectionView.dequeueReusableCellWithReuseIdentifier("AddAttachmentCell",forIndexPath:indexPath)}else{// This is a regular attachment cell// Get the cellletattachmentCell=collectionView.dequeueReusableCellWithReuseIdentifier("AttachmentCell",forIndexPath:indexPath)as!AttachmentCell// Get a thumbnail image for the attachmentletattachment=self.document?.attachedFiles?[indexPath.row]varimage=attachment?.thumbnailImage()// Give it to the cellifimage==nil{// We don't know what it is, so use a generic imageimage=UIImage(named:"File")// Also set the labelattachmentCell.extensionLabel?.text=attachment?.fileExtension?.uppercaseString}else{// We know what it is, so ensure that the label is emptyattachmentCell.extensionLabel?.text=nil}attachmentCell.imageView?.image=image// Use this cellcell=attachmentCell}returncell}The
cellForItemAtIndexPathmethod is very similar to its counterpart in theDocumentListViewController: the collection view will provide an index path, and we use it to grab a thumbnail image for the attachment, which is displayed in the cell. The only significant twist in this method is that if the index path refers to the last item in the collection view, we don’t display an attachment but instead display theAddAttachmentCell.
We’ll now create the interface for the attachment cells.
-
Open Main.storyboard and select the collection view.
-
Go to the Attributes Inspector, change the number of Items from 1 to 2, and set the Scroll Direction to Horizontal (Figure 10-4).
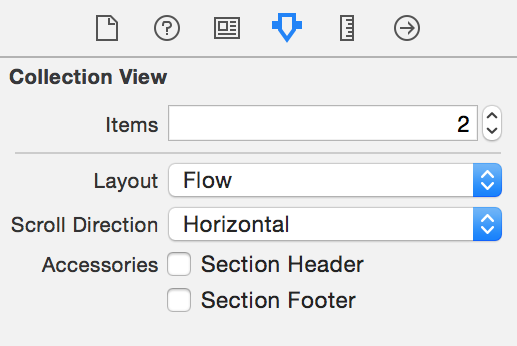
Figure 10-4. Updating the collection view’s settings
-
Select the first cell and set its Identifier to
AttachmentCell. -
Go to the Identity Inspector, and set the class of this cell to
AttachmentCell. -
Select the second cell and set its Identifier to
AddAttachmentCell. -
Make them both fill their cells—that is, resize them to fill the cell, and add constraints that pin the distances from all edges to 0.
-
Select the image view that you just added to the first cell—that is,
AttachmentCell, and go to the Attributes Inspector. Set its Mode to Aspect Fill. This will make the image fill all of the image view. -
Add a label to the first cell. Place it near the bottom of the cell, and resize it to fill the width.
-
Reduce the font size to 13.
-
Set its text alignment to Center.
-
Add constraints that pin the label to the bottom of the cell, and to the left and right edges.
-
-
Next, select the image view in the second cell (
AddAttachmentCell). Set its Mode to Center. This will center the image in the middle of the view, without scaling. -
Set the
AddAttachmentCell’s image view’s Image property toAddAttachment, as shown in Figure 10-5.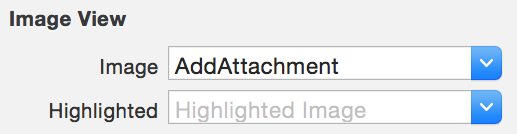
Figure 10-5. Setting the image view’s image
The collection view’s cells should now look like Figure 10-6.

Figure 10-6. The configured collection view
-
Open DocumentViewController.swift in the Assistant.
-
Connect the empty image view in
AttachmentCellto theimageViewoutlet ofAttachmentCell. -
Connect the label to the
extensionLabeloutlet. -
Connect the
attachmentsCollectionViewoutlet of theDocumentViewControllerclass to the collection view. -
Hold down the Control key and drag from the collection view to the view controller, and then choose “data source” from the menu that appears.
-
Repeat the process, this time choosing “delegate” from the menu.
-
Open DocumentViewController.swift, and add the following code to the code in
viewWillAppear:// If this document is not already open, open itifdocument.documentState.contains(UIDocumentState.Closed){document.openWithCompletionHandler{(success)->Voidinifsuccess==true{self.textView?.attributedText=document.text>self.attachmentsCollectionView?.reloadData()}This code makes the view controller reload the contents of the collection view once the document is opened. This ensures that the list of attachments actually contains content.
-
Finally, add the following code to the end of
viewWillAppearto make the attachments list refresh even if the document wasn’t just freshly opened:// And reload our list of attachments, in case it changed// while we were awayself.attachmentsCollectionView?.reloadData() -
Run the app. You’ll see the list of attachments, plus an add cell!
Dealing with Conflicts
This is now a good point to address conflict resolution in the files. When you’re making an application that uses iCloud—or, for that matter, any app that deals with files that can be opened by multiple entities at the same time—you need to handle situations in which a file is changed from two places at once.
Consider the following situation: you’re about to board your flight, and you’re editing a note. Your flight is called, so you hit Save and close your laptop. As a result, your file doesn’t get saved to iCloud yet. On board the flight, you pull out your phone, and open your document. You make some changes and put your phone away. You later get off the plane, and your phone syncs its changes to iCloud. You then get home and open up your laptop, which finally has a chance to send your changes to iCloud. Suddenly, there’s a problem: the file was changed from two places at once, which means that the file is in conflict. Which version of the file is correct? The file on your laptop, or the file on your phone? Or both?
It’s up to your app to decide what to do. There are three main methods for resolving a conflict:
-
Pick whichever file was most recently modified, and throw away all others. A variant of this technique is used by Dropbox.1
-
Look at the contents of both files, and attempt to automatically merge them. This technique is used by source code management systems like Git.
-
Present the user with the list of files that are in conflict, and ask him or her to choose the version to keep. This technique is used in Apple’s productivity applications, like Pages and Keynote.
Our app will pick the third option: if a document ends up in a conflicted state, then we’ll simply show the list of possible options to the user, and let him or her decide. The advantage to doing this is that it’s simple to think about, and generally what the user wants; the downside is that it will always involve discarding data.
-
Add the following property to the
DocumentViewControllerclass:varstateChangedObserver:AnyObject? -
Add the following code to
viewWillAppear:// If this document is not already open, open itifdocument.documentState.contains(UIDocumentState.Closed){document.openWithCompletionHandler{(success)->Voidinifsuccess==true{self.textView?.attributedText=document.text>// Register for state change notifications>self.stateChangedObserver=NSNotificationCenter>.defaultCenter().addObserverForName(>UIDocumentStateChangedNotification,>object:document,>queue:nil,>usingBlock:{(notification)->Voidin>self.documentStateChanged()>})>>self.documentStateChanged()}This code registers a closure with the system, which will be run every time iOS receives a notification that the document’s state has changed. In this case, all it will do is call the
documentStateChangedmethod, which will handle conflicts for us.Currently, the view controller will close the document when the view controller disappears. This can happen for a number of reasons, and we don’t want the document to be closed except when the user taps the back button to go back to the document list. We therefore need to add some code to support this.
-
Add the following property to
DocumentViewControllerto keep track of whether we should close the document whenviewWillDisappearis called:privatevarshouldCloseOnDisappear=trueWe’ll use a
UIAlertControllerto present the list of possible actions the user can take. We’ve usedUIAlertControllers before to present a message and possible actions for the user to take, but they’ve all been presented as dialog boxes—small windows that appear with buttons underneath. When you could have multiple options for the user to select from, or when the options might be quite wide, then an action sheet is better. Action sheets slide up from the bottom of the window and provide you room for multiple options. Functionally, there’s no difference; the only way they differ is in their presentation. -
Add the following method to
DocumentViewController:funcdocumentStateChanged(){ifletdocument=self.documentwheredocument.documentState.contains(UIDocumentState.InConflict){// Gather all conflicted versionsguardvarconflictedVersions=NSFileVersion.unresolvedConflictVersionsOfItemAtURL(document.fileURL)else{fatalError("The document is in conflict, but no "+"conflicting versions were found. This should not happen.")}letcurrentVersion=NSFileVersion.currentVersionOfItemAtURL(document.fileURL)!// And include our own local versionconflictedVersions+=[currentVersion]// Prepare a chooserlettitle="Resolve conflicts"letmessage="Choose a version of this document to keep."letpicker=UIAlertController(title:title,message:message,preferredStyle:UIAlertControllerStyle.ActionSheet)letdateFormatter=NSDateFormatter()dateFormatter.dateStyle=.ShortStyledateFormatter.timeStyle=.ShortStyle// We'll use this multiple times, so save it as a variableletcancelAndClose={(action:UIAlertAction)->Voidin// Give up and returnself.navigationController?.popViewControllerAnimated(true)}// For each version, offer it as an optionforversioninconflictedVersions{letdescription="Edited on "+"\(version.localizedNameOfSavingComputer!) at "+"\(dateFormatter.stringFromDate(version.modificationDate!))"letaction=UIAlertAction(title:description,style:UIAlertActionStyle.Default,handler:{(action)->Voidin// If it was selected, use this versiondo{ifversion!=currentVersion{tryversion.replaceItemAtURL(document.fileURL,options:NSFileVersionReplacingOptions.ByMoving)tryNSFileVersion.removeOtherVersionsOfItemAtURL(document.fileURL)}document.revertToContentsOfURL(document.fileURL,completionHandler:{(success)->Voidinself.textView.attributedText=document.textself.attachmentsCollectionView?.reloadData()})forversioninconflictedVersions{version.resolved=true}}catchleterrorasNSError{// If there was a problem, let the user know and// close the documentleterrorView=UIAlertController(title:"Error",message:error.localizedDescription,preferredStyle:UIAlertControllerStyle.Alert)errorView.addAction(UIAlertAction(title:"Done",style:UIAlertActionStyle.Cancel,handler:cancelAndClose))self.shouldCloseOnDisappear=falseself.presentViewController(errorView,animated:true,completion:nil)}})picker.addAction(action)}// Add a "choose later" optionpicker.addAction(UIAlertAction(title:"Choose Later",style:UIAlertActionStyle.Cancel,handler:cancelAndClose))self.shouldCloseOnDisappear=false// Finally, show the pickerself.presentViewController(picker,animated:true,completion:nil)}}First, this method asks if the document is in a conflicted state. If it is, we’ve got some problems to solve! We ask the system to provide us with a list of all of the possible versions of this file. We then add the local device’s current version of this file to the list.
We then create a closure, called
cancelAndClose, which bails on the whole operation and returns to the document list view controller. This is kept in a variable, because it’s used both for the Choose Later option (which we’ll add in a moment), as well as for when there’s a problem resolving the conflict.Once this is done, we create a
UIAlertAction, and, for each version of the file, we create a new action. This action displays the name of the computer that created the conflicting version, as well as the date and time that the version was created. When the action is selected, the app indicates to the system that we should use the action’s associated version of the file and discard every other version.If there’s a problem, we present a separate alert controller, indicating to the user that something’s gone wrong. This alert controller only has a single action, which, when tapped, runs the
cancelAndClosecode.Finally, we add a final option, labeled Choose Later, which simply runs the
cancelAndClosecode (see Figure 10-7). The action sheet is then presented, letting the user choose what to do.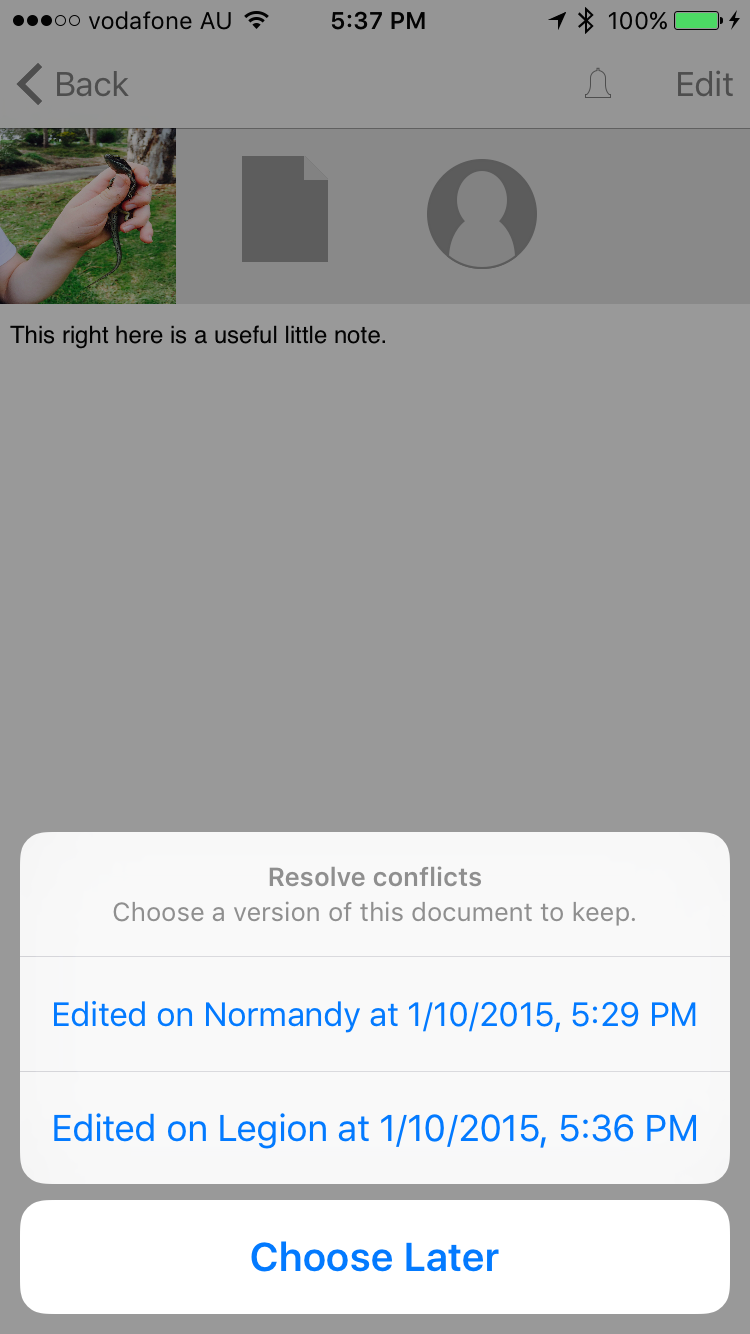
Figure 10-7. The interface that appears when resolving conflicts
-
Add the following code to
viewWillDisappearto use theshouldCloseOnDisappearproperty to determine whether the document should be closed or not. Additionally, we’ll clear the state changed observer:overridefuncviewWillDisappear(animated:Bool){>ifshouldCloseOnDisappear==false{>return>}>self.stateChangedObserver=nilself.document?.closeWithCompletionHandler(nil)} -
Add the following code to the very end of
viewWillAppearto reset the flag totruewhen the view controller reappears:// We may be reappearing after having presented an attachment,// which means that our "don't close on disappear" flag has been set.// Regardless, clear that flag.self.shouldCloseOnDisappear=true
You can now test to see if it worked:
-
Open a document in the Mac application and make some changes. Don’t save the changes yet.
-
Open the same document in the iOS application, ideally on a real device, and make some different changes to the ones you made on the Mac app.
-
Save and close the document in the Mac application, and then close the document in the iOS app. This will cause both of the apps to save their own versions, which will conflict with each other.
-
Wait a little bit of time—30 seconds or so—for both of the changes to be uploaded to iCloud and synchronized to the different apps.
-
Open the document one last time in the iOS app. Because it’s in conflict, you’ll see the UI that you just created!
Creating the Quick Look Thumbnail
Now that we can access the attachments, we’ll add support for Quick Look in the iOS app.
We’ll add a method to the Document class that generates an NSData containing a PNG-encoded image that can be used for the app. This will generate the same kind of image as used in the Mac app (which we added in “Adding QuickLook”); the difference being that we need to use the iOS methods for drawing.
-
Add the following method to the
Documentclass:funciconImageDataWithSize(size:CGSize)->NSData?{UIGraphicsBeginImageContext(size)defer{UIGraphicsEndImageContext()}letentireImageRect=CGRect(origin:CGPoint.zero,size:size)// Fill the background with whiteletbackgroundRect=UIBezierPath(rect:entireImageRect)UIColor.whiteColor().setFill()backgroundRect.fill()ifself.attachedFiles?.count>=1{// Render our text and the first attachmentletattachmentImage=self.attachedFiles?[0].thumbnailImage()varfirstHalf:CGRect=CGRectZerovarsecondHalf:CGRect=CGRectZeroCGRectDivide(entireImageRect,&firstHalf,&secondHalf,entireImageRect.size.height/2.0,CGRectEdge.MinYEdge)self.text.drawInRect(firstHalf)attachmentImage?.drawInRect(secondHalf)}else{// Just render our textself.text.drawInRect(entireImageRect)}letimage=UIGraphicsGetImageFromCurrentImageContext()returnUIImagePNGRepresentation(image)}To create the image in iOS, we first call
UIGraphicsBeginImageContextto indicate that we’d like to start drawing in a canvas with the specifiedsize. In addition, we need to be sure to tell iOS that we’re done with this drawing once we are finished; to ensure that we don’t forget, we’ll use thedeferkeyword.When you use
defer, any code that you put in its associated block of code will be run when you exit the current scope. In this case, it means that just before we return from this method, we’ll callUIGraphicsEndImageContext.deferis a great way to ensure that you clean up after yourself while keeping your clean-up code close to the code that actually creates the mess in the first place.When we’re drawing this icon, we use the
UIBezierPathandUIColorclasses to paint the entire canvas white. We then do the exact same thing as in the Mac version: if we have at least one attachment, we get its thumbnail image and draw it in the top half of the canvas while drawing the text in the lower half. If we don’t have any attachments, we just draw the text.Finally, we get the image from iOS by calling
UIGraphicsGetImageFromCurrentImageContext, and convert it to anNSDatacontaining the PNG-encoded image by callingUIImagePNGRepresentation. -
Add the following code to the
contentsForTypemethod to add the Quick Look files to the document package:overridefunccontentsForType(typeName:String)throws->AnyObject{lettextRTFData=tryself.text.dataFromRange(NSRange(0..<self.text.length),documentAttributes:[NSDocumentTypeDocumentAttribute:NSRTFTextDocumentType])ifletoldTextFileWrapper=self.documentFileWrapper.fileWrappers?[NoteDocumentFileNames.TextFile.rawValue]{self.documentFileWrapper.removeFileWrapper(oldTextFileWrapper)}>// Create the QuickLook folder>>letthumbnailImageData=>self.iconImageDataWithSize(CGSize(width:512,height:512))!>>letthumbnailWrapper=>NSFileWrapper(regularFileWithContents:thumbnailImageData)>>letquicklookPreview=>NSFileWrapper(regularFileWithContents:textRTFData)>>letquickLookFolderFileWrapper=>NSFileWrapper(directoryWithFileWrappers:[>NoteDocumentFileNames.QuickLookTextFile.rawValue:quicklookPreview,>NoteDocumentFileNames.QuickLookThumbnail.rawValue:thumbnailWrapper>])>quickLookFolderFileWrapper.preferredFilename=>NoteDocumentFileNames.QuickLookDirectory.rawValue>>// Remove the old QuickLook folder if it existed>ifletoldQuickLookFolder=self.documentFileWrapper>.fileWrappers?[NoteDocumentFileNames.QuickLookDirectory.rawValue]{>self.documentFileWrapper.removeFileWrapper(oldQuickLookFolder)>}>>// Add the new QuickLook folder>self.documentFileWrapper.addFileWrapper(quickLookFolderFileWrapper)self.documentFileWrapper.addRegularFileWithContents(textRTFData,preferredFilename:NoteDocumentFileNames.TextFile.rawValue)returnself.documentFileWrapper}Again, this is almost identical to the code seen in the Mac version: we create a file wrapper for the QuickLook folder, as well as file wrappers for both the thumbnail and preview file. We then remove the old QuickLook folder, if it exists, and add the new one to the document.
-
Run the app. When you close a document, it will update its Quick Look thumbnail.
1 Dropbox doesn’t throw away the other versions; instead, it sticks Jon’s conflicted copy to the end of them, so that you can later decide what you want to do.