You’ve never made herbal remedies before? Not to worry. The remedies recommended in this book are quite easy, and most are quite delicious. In fact, preparing herbal remedies is a lot like cooking, if not even easier. If the kitchen isn’t normally your domain, the most difficult task you might encounter is locating the “tools” you’ll need: measuring cups, mixing bowls, the right size cooking pot . . .
Though men often say they can’t cook, many end up being very adept in the kitchen. Some of the most famous chefs in the world are men, as are many of the best herbal medicine makers, like herbalists Ed Smith (Herb Pharm), David Winston (Herbalist & Alchemist), Matthias Reisen (Healing Spirits), and Guido Masé (Grian Herbs), all of whom have created not only excellent herbal products but also very successful herbal businesses. Give a few of the recipes in this book a try, and see if you don’t enjoy being an herbal medicine maker yourself.
The most common preparations of herbs for medicinal purposes are teas, tinctures, and capsules, and in this chapter we’ll talk about how to make these kinds of remedies. But don’t limit yourself. Herbs can be prepared and administered in many creative ways. Syrups and elixirs are a delicious and effective way to get down the medicinal properties of herbs. You can also add powdered herbs to food or mix the powders into a paste with honey and spices for a delicious daily tonic. Some herbs, such as hawthorn and elder, can be prepared as tasty jams and jellies — not a bad way to take medicine. And herbal oils, compresses, and poultices apply the healing power of herbs from the outside in and are wonderful remedies for cuts, scrapes, bruises, sore muscles, rashes, and other ailments.
If making herbal products is not your cup of tea, not to worry. You can find many excellent ready-made herbal formulas these days in health food stores and herb shops. Even supermarkets generally carry a selection of medicinal herbal teas. And there are countless online retailers ready to sell you a full selection of herbal products. (See Resources for some reliable, high-quality online sources.)
The single most important factor for making your own herbal remedies is obtaining the best-quality herbs available. Buy your herbs from reputable companies. Ask where their herbs come from. Are they organically grown? Are they wildcrafted? If they’re wildcrafted, are they harvested ethically, with respect for the environment? Buying high-quality herbs ensures not only that you’re getting quality herbal medicine but also that the wild herbs are being protected, that the soils are being restored, and that farmers are being treated fairly — all important factors in healing.
Whenever possible, use your herbs fresh. However, for a variety of reasons, it is not always feasible to get fresh herbs. Dried herbs, if harvested and dried properly, will generally retain all of their medicinal properties.
How do you tell if a dried herb is of good quality? Use your senses just like you would when shopping for fruits and vegetables in the market. If an herb looks, smells, and tastes almost exactly as it does when it’s fresh, it should be effective. Here’s what to look for.

The dried herb should retain almost the same color as it has when it is fresh. If you are buying green leaves, such as peppermint or spearmint, they should be vivid and bright. If you’re buying blossoms, they should be bright and colorful; dried calendula blossoms, for example, should be bright orange or yellow. Roots, though generally subtle shades to begin with, should remain true to their original color. Goldenseal should be a golden green, echinacea a silvery brown, yellow dock root a yellowish brown. If you’re just getting started with herbs, you may not always know what the correct color of a plant should be, but look for liveliness, vibrancy, and deep, strong colors. You will soon develop a knack for knowing.
Herbs have distinctive odors that serve as an effective means of determining quality. They should smell strongly, but they may not necessarily smell “good.” Herbs don’t always smell refreshing and aromatic. The scent of valerian, for instance, has been compared to that of dirty socks. Well-aged valerian smells like really ripe socks. Good-quality peppermint, on the other hand, is delightfully refreshing and will make your nose tingle and your eyes water. Some herbs, such as alfalfa, smell “green,” like freshly mown grass or newly cut hay. But in that green odor is a freshness and unmistakable vitality. Sweetly scented, refreshing, pungent, fragile, sometimes offensive — herbs have a variety of smells, but in general that scent is strong and distinctive.
Herbs also should have distinctive flavors. As with smell, their taste should be judged on potency, rather than whether the flavor is “good” or not. You will quickly learn that not all herbs taste good, by any stretch of the imagination! Do the herbs taste fresh? Strong? Vital? Or do they taste flat and flavorless? Good-quality dried herbs will arouse a distinctive response from your taste buds.
If you enjoy expanding your palate and repertoire in the kitchen, then you’ll enjoy this process. It’s not work; it’s fun. And if you’re doing this as part of a process of taking control of your own health, it’s very empowering as well.
Light, heat, air, moisture, and age are the major factors that destroy the essence of herbs. Insects also can be a problem. The ideal storage containers for dried herbs are glass jars with tight-fitting lids, though other airtight containers work well too. Store your dried herbs away from direct light and heat; a cool, dark kitchen closet or pantry is excellent. Dried herbs stored this way will last for several months or even years.

Even in conventional (allopathic) medicine, correct dosage is often less precise than we’re led to believe. With herbs, be aware that determining dosage involves some skill, a healthy touch of “inner knowledge,” observation, and a bit of guesswork. While strong, they tend not to be as concentrated or potent (or potentially harmful) as many pharmaceutical drugs. This doesn’t mean herbs aren’t as effective; it just means they are generally safer.
Dosages for herbal formulas are given throughout this book and on most commercial preparations that you might purchase. However, in determining the proper dosage of an herbal preparation, you should also consider your weight, height, size, overall constitution, and any food sensitivities or allergies that might make you react to herbs. The general rule is to start with a smaller dose and work up. However, if the dose is too small, you may not feel or see any effects. Ultimately, we must each learn to trust the wisdom of our own body and listen to what it is telling us. The following chart shows typical dosages for a variety of remedies. Remember that dosage may also vary based on the potency of the herb.
Dosage Chart |
||
|
Chronic problems are long-term imbalances such as hay fever, arthritis, and long-term bronchial problems. Chronic issues usually develop slowly over a period of weeks or months and generally require a long-term commitment to correct the imbalance. Chronic problems can flare up and manifest acute symptoms, but the underlying problem is long-standing. |
||
|
Acute problems come on suddenly, reach a crisis quickly, and need immediate response and attention. Examples of acute problems include toothaches, wounds, stomachache, and the sudden onset of cold or flu. Pain is often an acute symptom, though it can be caused by either an acute or chronic problem. |
||
|
Dosages will differ depending on whether you are experiencing a chronic or an acute problem. |
||
|
Remedy |
Chronic |
Acute |
|
Tea |
3–4 cups daily for several weeks |
1⁄4–1⁄2 cup throughout the day, up to 3–4 cups, until symptoms subside |
|
Extracts/tinctures |
1⁄2–1 teaspoon three or four times daily for several weeks or until the problem is corrected |
1⁄4–1⁄2 teaspoon every 30–60 minutes until symptoms subside |
|
Capsules/tablets |
2–3 capsules/tablets three times daily for several weeks |
1–2 capsules/tablets every hour until symptoms subside |
While many people are converting to the metric system, I’ve reverted to the simpler’s method of measuring. Many herbalists choose to use this system because it is extremely simple and versatile. Throughout this book you’ll see measurements referred to as “parts”: 3 parts sarsaparilla, 2 parts dandelion root, 1 part eleuthero. A “part” is any unit of measurement you want it to be: cups, ounces, pounds, tablespoons, teaspoons — as long as you use that unit consistently throughout the recipe. The formula is then a ratio of ingredients, and you can prepare it in the amount you need.
Sample Formula Blended in the Simpler’s Method |
||
|
Formula |
Parts as Tablespoons |
Parts as Ounces |
|
3 parts sarsaparilla |
3 tablespoons sarsaparilla |
3 ounces sarsaparilla |
|
2 parts dandelion root |
2 tablespoons dandelion root |
2 ounces dandelion root |
|
1 part eleuthero |
1 tablespoon eleuthero |
1 ounce eleuthero |
Herbs have a long history of safe use. While there are, of course, some herbs that are highly toxic and shouldn’t be used by novices, those herbs are generally illegal to sell or otherwise unavailable, or they are used only by the pharmaceutical industry, not by individuals. Most of the herbs mentioned in this book all have a long record of safety and can be used with confidence. Those few that should be used with caution or that may have side effects are clearly indicated. However, it’s always possible to have an idiosyncratic, or individual, reaction to an herb, just as you could to any particular food. If upon taking an herb you experience an allergic-like reaction — itchy skin, eyes, or throat, or an upset stomach — discontinue use of the herb immediately. Drinking several glasses of water and/or water with lemon in it may help, but if symptoms persist, consult with your health care professional.
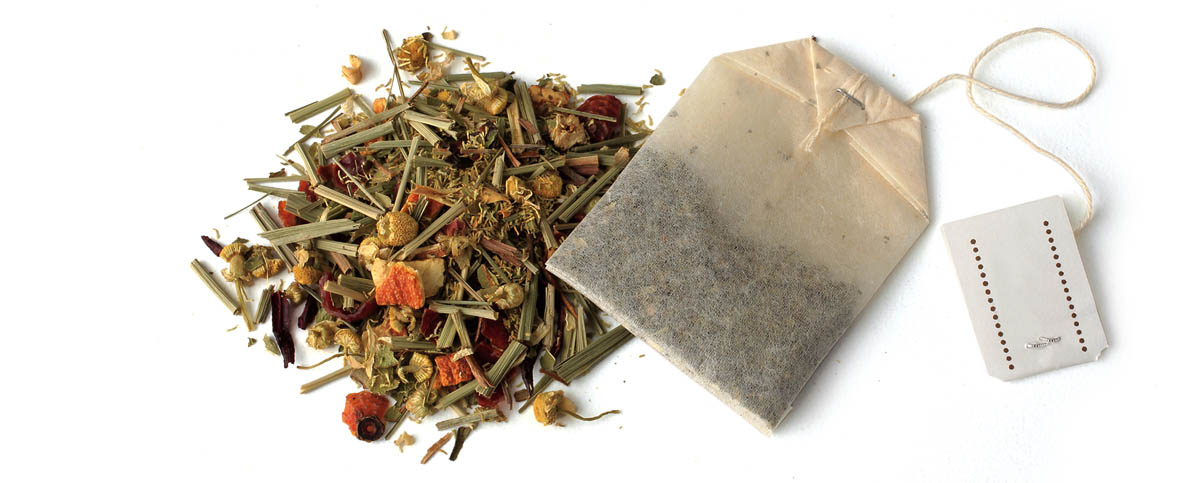
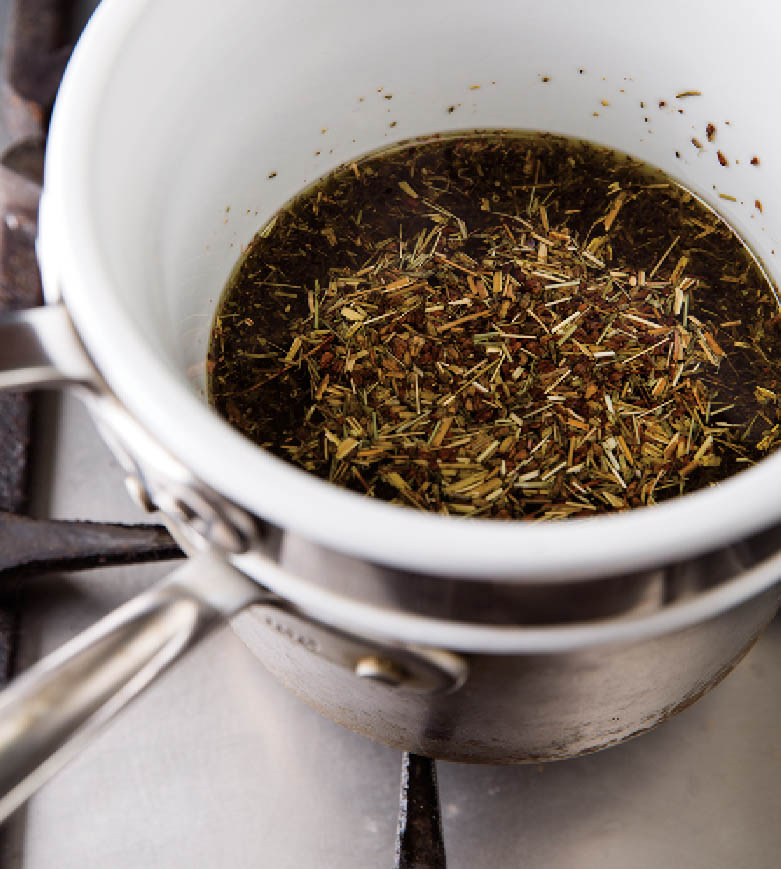
There are whole books devoted to the art of making tea. In fact, I’ve written many pages myself on this subject. But suffice it to say it’s probably the easiest preparation you can make in the kitchen. If you’ve never cooked a thing in your life, trust me, you can make a good cup of medicinal tea. There are two basic methods used for brewing herbs for medicinal purposes: infusions and decoctions.
Leaves, flowers, and other plant parts rich in aromatic oils and other heat-sensitive constituents require infusing or steeping, as opposed to simmering, because simmering them would cause rapid loss of those constituents. Simply boil 1 quart of water per 1 ounce of herb (or 1 cup of water per 1 tablespoon of herb), pour the hot water over the herb, cover, and let steep for 30 to 60 minutes.
That’s the general idea, but the exact proportion of water to herb and the required time to infuse varies greatly depending on the herb. Start out with the above proportions and then experiment. The more herb you use and the longer you let it steep, the stronger the brew. Let your taste buds and your senses guide you. And remember, for medicinal teas you want a stronger brew.
Decoctions are used to make tea from the more tenacious parts of the plant, such as roots, barks, and hard seeds or nuts. These plant materials require more direct heat and longer exposure to the heat to release their healing constituents. Using the same proportions as for infusions (1 quart of water per 1 ounce of herb, or 1 cup of water per 1 tablespoon of herb), place the herbs in a pot of cold water, cover tightly, bring to a low simmer, and let simmer for 30 to 45 minutes. For a stronger decoction, simmer the herbs for 30 to 45 minutes, then turn off the heat and let the herbs sit overnight in the water.
While every herb is different, here are a few tips for making the perfect infusion:

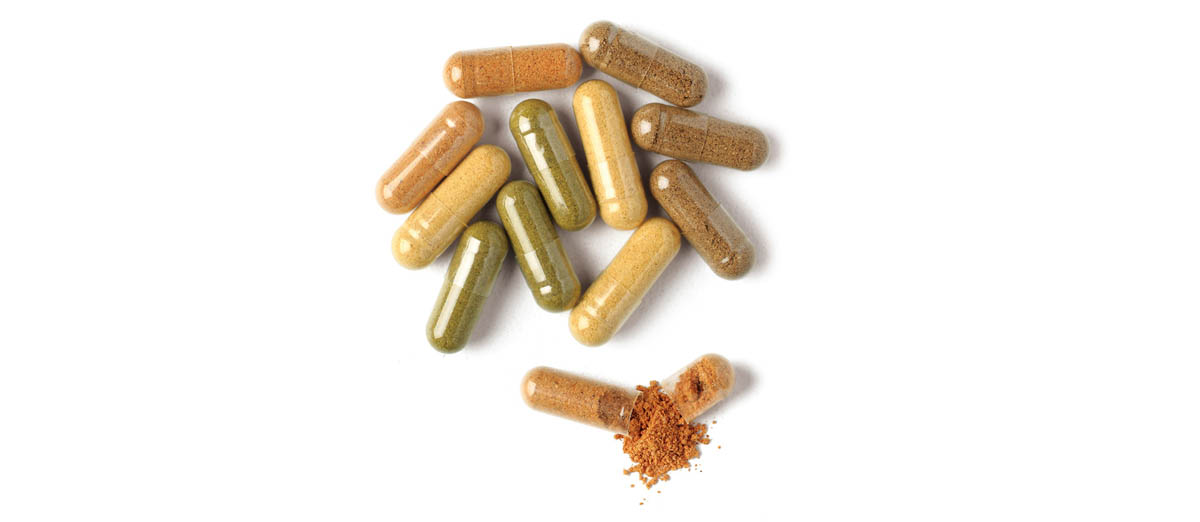
Herbal capsules are among the most popular ways to ingest herbs. They’re quick and easy to take, as well as being virtually tasteless.
The powdered herb in a capsule should be of high quality. Open a capsule to test for quality. Does the powdered herb taste and smell potent? Does it retain some of its color? If not, it may be past its prime and not effective. Be sure that the capsules you use are vegetable based; they generally are of much higher quality than gelatin capsules made from animal sources, and they also dissolve quickly and are easy to digest.
There are many excellent ready-made herbal capsules on the market, but it’s best to know your sources (see the resources at the end of this book for a list of reputable suppliers). You can also easily make your own capsules. It’s a bit time consuming, but it’s a nice meditative process. You open the empty capsules, pack powdered herbs in each half, and join the halves together. You can also find inexpensive encapsulating “machines” that quicken the task.
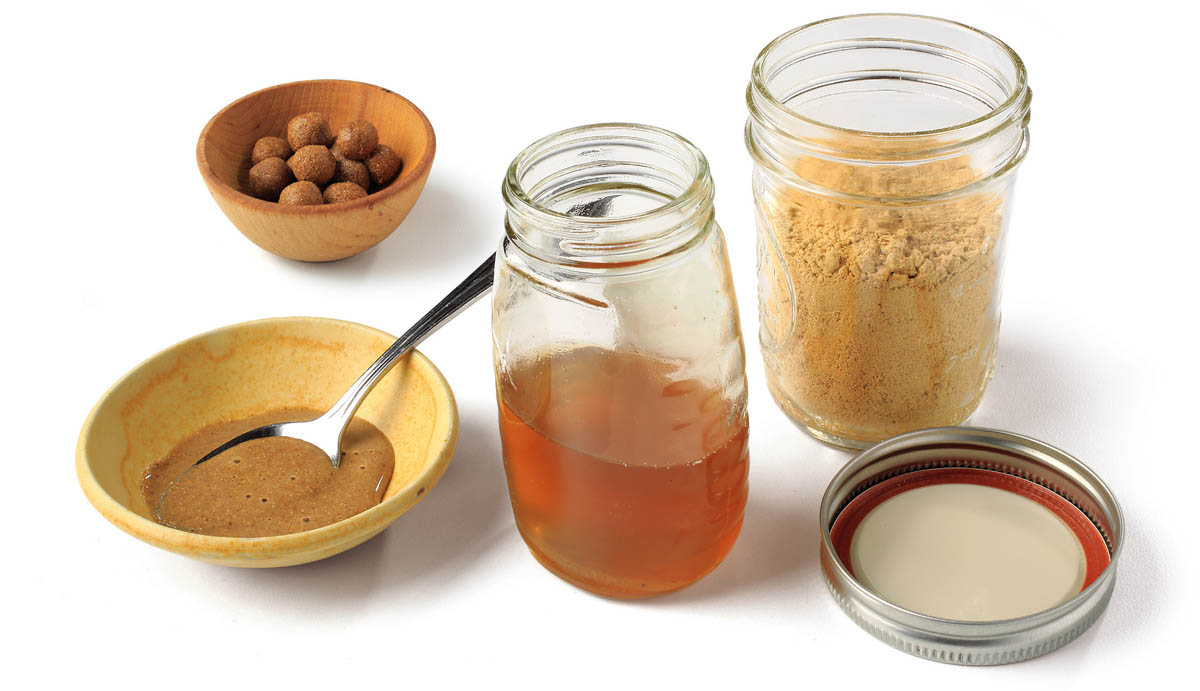
Though capsules are quick and easy, powdered herbs can be used in far more creative ways. A great way to take herbs — and a very simple method of preparation — is to mix powdered herbs with honey and/or maple syrup, forming a thick paste, known as an electuary. By mixing sweeter spices such as cinnamon, cardamom, and nutmeg with less tasty herbs, you can make these blends quite delicious.
Add a tablespoon of this electuary paste to hot water for an “instant tea,” spread it on crackers and toast, or eat it plain. Or you can roll the paste into small pea-size balls and swallow these “pills” straight, if you prefer. Because honey is a natural preservative, they last for weeks, even months, on the shelf.
An herb’s constituent profile can vary depending on where it was grown, when it was harvested, and growing conditions. An extract of eleuthero, for example, may contain more or less eleutheroside E, considered by many to be eleuthero’s principle active constituent, depending on the particular eleuthero root the extract was made from. Standardized extracts are extracts that contain a specified amount of certain constituents. A standardized eleuthero extract is generally 0.5 percent eleutheroside E.
Standardized herbal extracts are made through two basic methods. Whole-plant standardized extracts are made from the whole plant; they contain a broad range of the plant’s constituents, and they are modified as needed to guarantee that they contain a certain amount of the plant’s primary active constituent. The second method isolates and concentrates the single active component, giving you one constituent rather than the whole range of plant chemicals.
The problem lies in the fact that no one knows for sure which constituent is the primary active ingredient. In fact, a plant’s medicine may lie not in any single constituent but in the interactions among its many constituents. One particular chemical component may have a measurable physiological effect, but science has yet to discern how that action is guided and moderated by all the many other chemical components in a plant — and there are hundreds upon hundreds. Needless to say, if you’re using standardized extracts, I’m in favor of whole-plant standardization.
As we study herbs further, we are reminded that it’s the whole plant — the complexity of all the chemicals and the spirit of the plant — that makes a medicine active.
Tinctures are concentrated liquid extracts of herbs. Once prepared, they are taken simply by diluting the desired amount (usually a few drops) of the tincture in warm water, tea, or juice. Most tinctures are made with alcohol as the primary solvent or extractant. Though the amount of alcohol is very small, some people choose not to use alcohol-based tinctures for a variety of sound reasons. As an alternative, you can make effective tinctures using either vegetable glycerin or apple cider vinegar as the solvent, but they are not as strong as alcohol-based tinctures.
If they are stored in a cool, dark location, tinctures have a very long shelf life, lasting almost indefinitely. Because they are concentrated, follow the dosage chart carefully.
While there are several methods for making tinctures, the traditional or simpler’s method is the one I prefer, especially for beginners, since it is easy and reliable. All that is required is the herbs, the solvent, and a jar with a tight-fitting lid.
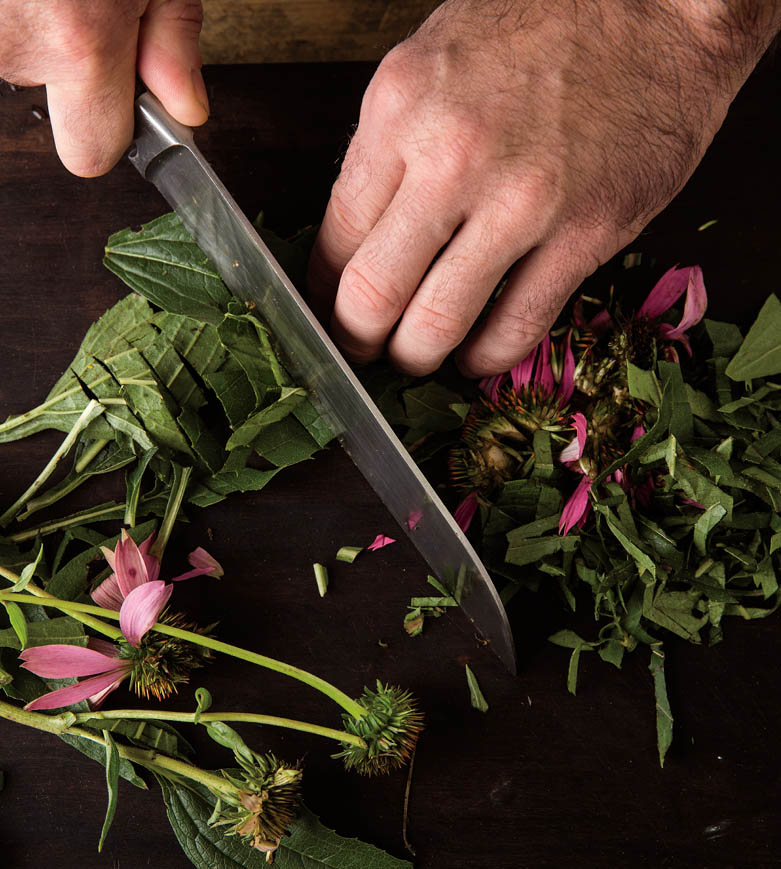
Step 1. Chop your herbs finely, or mix the herbs with some of your chosen solvent (see step 2) and blend in a blender. I recommend using fresh herbs whenever possible because one of the advantages of tincturing is the ability to preserve the fresh attributes of the plant. But either fresh or dried herbs will work, and you can even use both in a single tincture.
Step 2. Place the chopped herbs in a clean, dry jar. Pour enough solvent over the herbs to cover them by 2 to 3 inches. If you’re using alcohol as your solvent, select one that is 80- to 100-proof alcohol, such as vodka, gin, or brandy. If you’re using vegetable glycerin, dilute it first with an equal amount of water (1 part water to 1 part vegetable glycerin). If you’re using vinegar, warm it before pouring it over the herbs to help facilitate the release of the herbs’ constituents. Cover the jar with a tight-fitting lid.
Step 3. Place the jar in a warm place and let the herbs and solvent macerate (soak) for 4 to 6 weeks. The longer the maceration time, the better. Shake the jar occasionally during this period. Shaking keeps the herbs from packing down on the bottom of the jar. It is also an invitation for some of the old magic to come back into medicine making: while you shake the jar, empower your herbal remedies with prayer, song, or just a simple thought of gratitude.
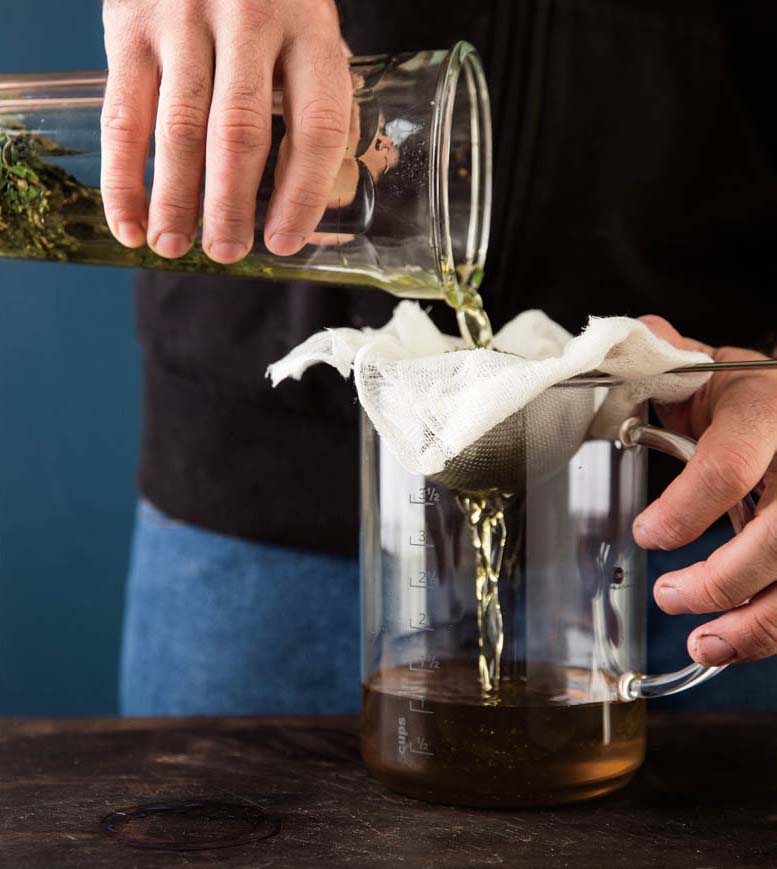
Step 4. At the end of the maceration period, strain the herbs from the solvent by pouring the mixture through a large stainless steel strainer lined with cheesecloth or muslin and placed over a large bowl or pitcher. Reserve the liquid, which is now a potent tincture, and compost the herbs.
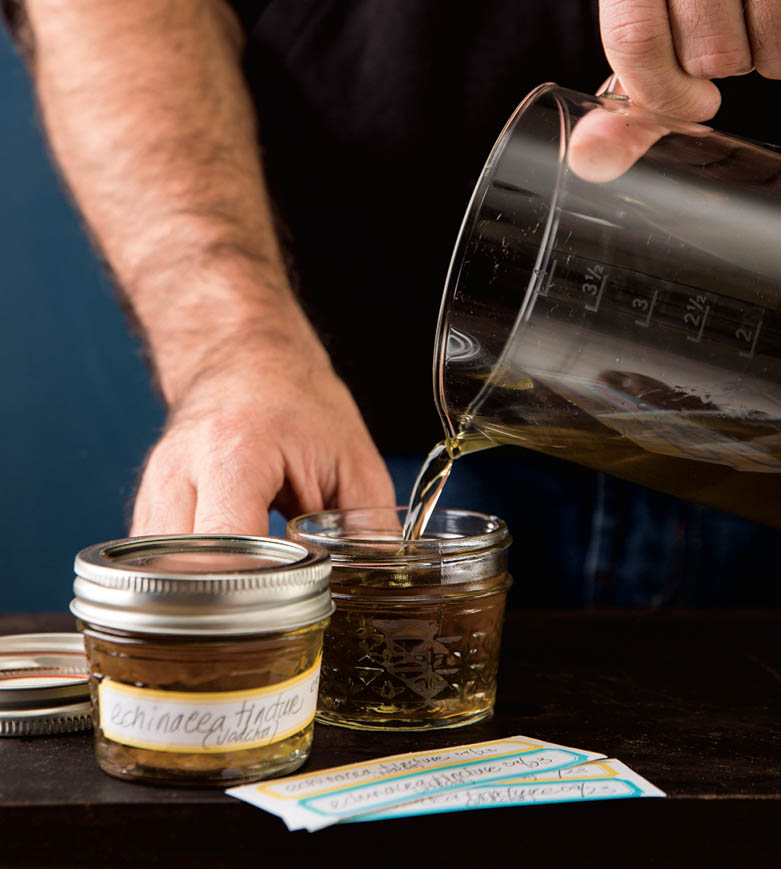
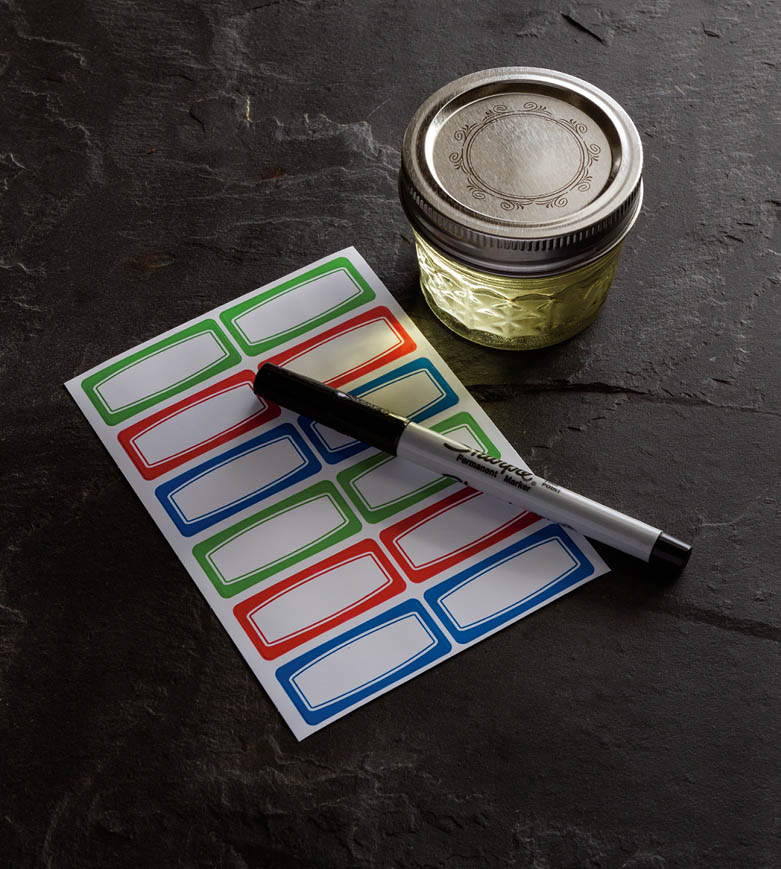
Step 5. Rebottle and label. Labeling is more important than it seems. If you don’t label your tinctures with the date, the herbs, and the type of alcohol, you will, if you’re like most people, soon forget what’s in your tincture jar. Especially if you have more than one jar of tincture! So label, label, label . . .

Steps 2–3: Add solvent and macerate.

Step 4: Strain.
Step 5: Bottle and label.
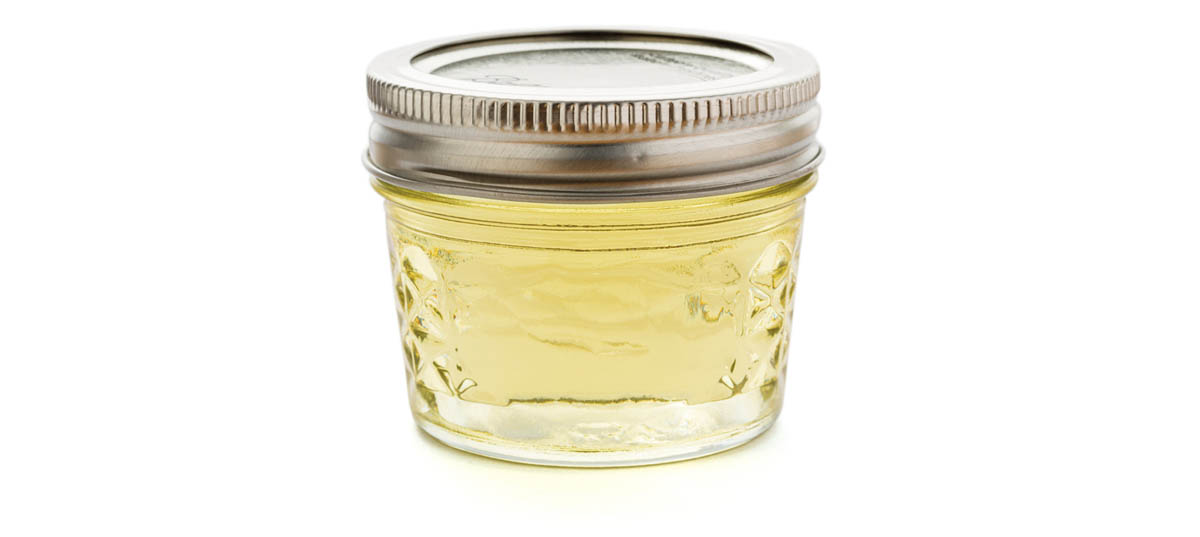
Herbal oils are made by infusing herbs in oil. It’s that simple. They can be used on their own or as a base for making salves. Though any high-quality vegetable oil will do, the oil of choice for medicine is olive oil; there is no finer oil for this purpose.
Many people prefer to make oils using fresh herbs, and you certainly can. But I find that in most cases high-quality dried herbs, which are more concentrated and don’t contain water that could spoil the oil, make better oils and salves. I do enjoy making herbal oils from fresh herbs, going outside and collecting fresh plantain, yarrow, comfrey, and chickweed, but I usually dry-wilt these herbs before adding them to the oil. Dry wilting — spreading out the herbs on a towel or rack and letting them sit at room temperature until they are fairly well wilted, which can take a few hours — allows some of the moisture to evaporate, so there’s less chance of spoilage due to the water content of fresh herbs.
This is the classic method of preparing an infused oil. It is quick and simple.
Step 1. Chop the herbs, if necessary, and put them in the top part of a double boiler. I strongly recommend a double boiler over a regular cooking pot because the oil can overheat quickly, destroying the herbs and oil. You don’t want deep-fried herbs or burned oil, and believe me, it happens very quickly unless you’re using a double boiler.
Step 2. Cover the herbs with an inch or two of olive oil.
Step 3. Fill the bottom part of the double boiler with a couple inches of water. Set the top part (with the oil and herbs) over the bottom part (with the water) and slowly heat until the oil reaches a very low simmer, with just a few bubbles. Keeping the heat low, gently simmer for 30 minutes to 1 hour, checking frequently to be sure the oil is not overheating. When the oil looks and smells “herby” — it will become deep green or golden and smell strongly of herbs — then you know the herbal properties have been transferred to the oil. The lower the heat and the longer the infusion, the better the oil.
Step 4. Remove the oil from the heat and let cool. Then strain the herbs from the oil, using a large stainless steel strainer lined with cheesecloth. Discard the spent herbs.
Step 5. Bottle and label your herbal oil. A quick hint: Don’t put the label on until after you have poured in the oil and cleaned the outside of the jar to avoid staining your labels.
Steps 1–2: Chop herbs and cover with oil.

Step 3: Fill double boiler and heat.
Step 4: Cool and strain.

Step 5: Bottle and label.
This, I must admit, is my favorite method for making herbal oils. I learned how to make oils this way from one of my earliest teachers, Juliette de Bairacli Levy. She would place her jars of infusing oils in sandboxes to concentrate the heat, a technique used in the Mediterranean. In this solar extraction method you use the great luminary energy of the sun to extract the herb’s properties into the oil. There must be something healing about that.
Step 1. Place the herbs in a widemouthed glass jar and add enough olive oil to cover the herbs by 1 to 2 inches. Cover tightly.
Step 2. Place the jar in a warm, sunny spot and let steep for 2 weeks. (For a super double-strength infusion, at the end of 2 weeks strain out the herbs, add a fresh batch of herbs, and infuse for 2 more weeks. This will give you very potent medicinal oil.)
Step 3. Strain the herbs from the oil, using a large stainless steel strainer lined with cheesecloth. Discard the spent herbs and bottle your herbal oil.
Because oils generally go rancid quite quickly when exposed to heat and light, you would expect these solar-infused oils to spoil within a couple of weeks. However, so long as the herb is infusing, the oils don’t go rancid. Once poured and strained, they are as susceptible to rancidity as any oil, but during the actual process of maceration they remain stable. I’ve never met anyone who can explain this phenomenon to me, so I have to assume it’s something to do with the antioxidant properties of the herbs? I just know that this is the way our ancestors did it, and it has worked wondrously for the centuries that herbalists have been making medicinal herbal oils.

Occasionally, in a moist climate like New England, where I live, condensation will gather on the inside top of the jar as the oil infuses in the sun. Since water can introduce bacteria to the oil, if you see this happen, open the jar and use a clean, dry cloth to wipe up any water. Alternatively, some people prefer to use thick layers of cheesecloth as the covering rather than a tight-fitting lid, so any condensation can evaporate. But this happens only occasionally, and only in a moist climate.
In general, oils tend to spoil quickly and don’t have a long shelf life (with the exception of olive and coconut, which are remarkably stable). Most oils, if exposed to heat and light, will begin to go rancid within a few weeks; unfortunately, many are already rancid when they’re purchased. Rancid oils are a major cause of free radical damage in the body and related health issues. All oils should be stored in a cool, dark place to prolong their shelf life. Refrigeration is best, but in most kitchens real estate in the “ice box” is in high demand. So find a place that’s cool and dark to store those precious oils. If stored properly in a cool, dark space, herbal oils will keep for several months.
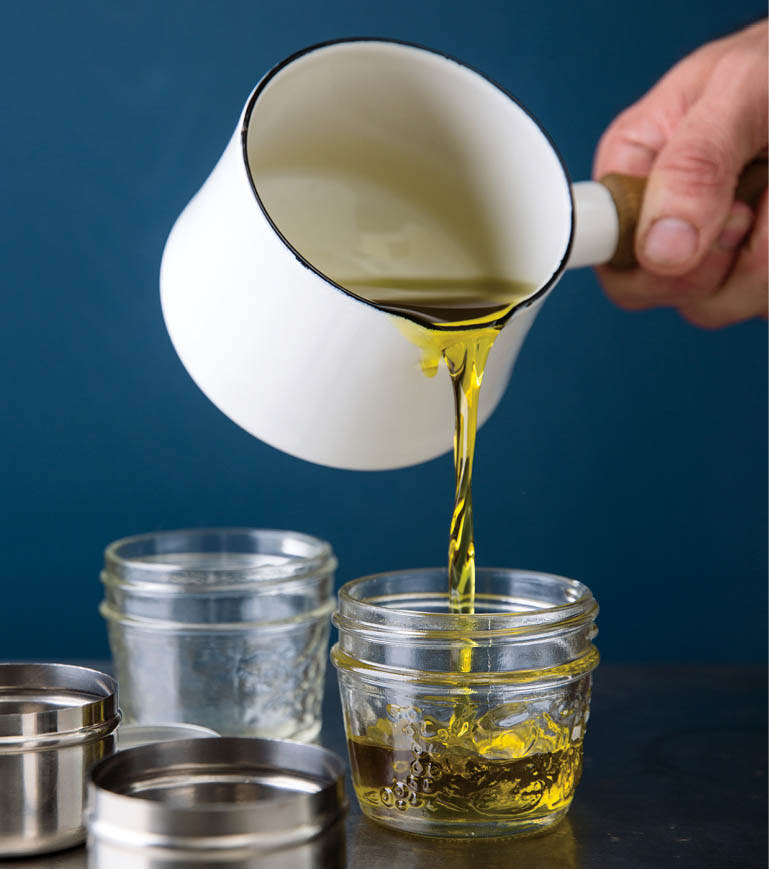
Once you’ve made herbal oil, you’re a step away from a salve. Salves, or ointments (two words for the same thing), are made of beeswax, herbs, and vegetable oil. The oil is used as the solvent, extracting the medicinal properties of the herbs, and also provides a healing, emollient base. The beeswax adds a soothing and protective quality and the firmness necessary to form the salve.
Step 1. Begin by making an infused herbal oil, following the instructions and being sure to strain it well.
Step 2. For each cup of herbal oil, use 1⁄4 cup of grated beeswax. Combine the oil and beeswax in a pot over very low heat and let warm, stirring, until the beeswax has melted. Stir together.
Step 3. Thanks to the beeswax, the mixture will thicken as it cools. To check that it’s going to have the right consistency, do a quick test: Place 1 tablespoon of the mixture in the freezer for just a minute or two. Then test it. If it seems too soft, add more beeswax, reheating as necessary until the beeswax melts. If it seems too hard, add more oil.
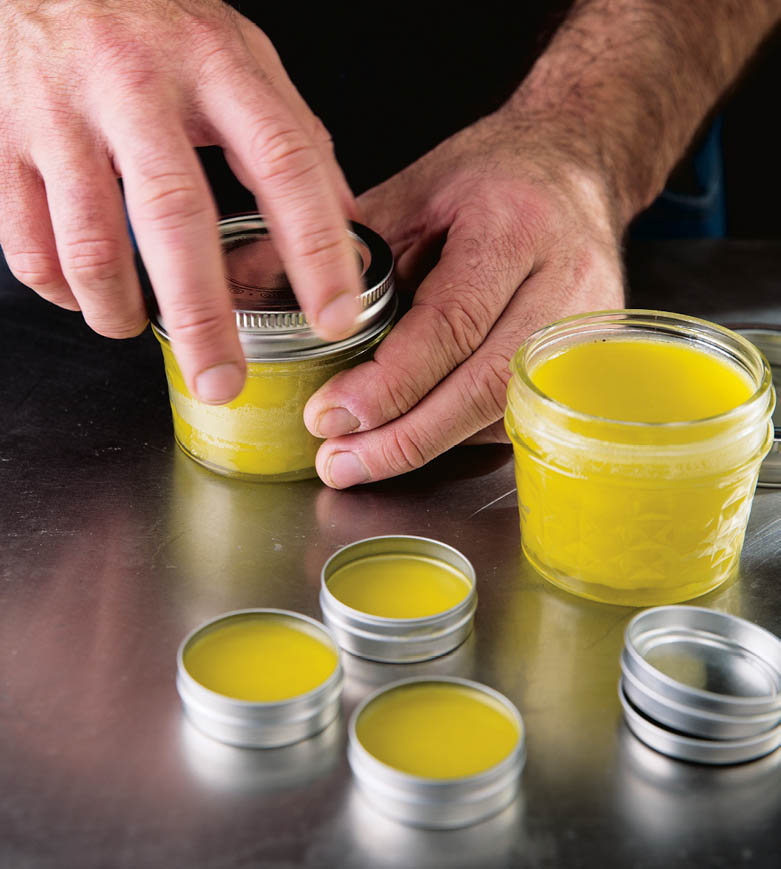
Step 4. Once you’re satisfied with the results of your consistency test, remove the mixture from the heat and pour into small glass jars or tins. Obviously, you’re working with very hot oil, so be careful.
Step 5. Let cool, then cover and store in a cool, dark place. Stored properly, salves will keep for several months. I’ve had some that lasted for years. If, however, salve is kept in sunlight or a warm area, it will deteriorate rapidly; the color fades and the salve begins to smell rancid. Oil and heat are not healthy partners.

Step 2: Melt beeswax in infused oil.

Step 3: Test the consistency.
Step 4: Pour into containers.
Step 5: Cool and then cover.
I don’t know many men who enjoy bathing. Most seem to prefer the quick “in and out” efficiency of the shower. Perhaps this is simply because the modern bathtub tends to be on the small side and doesn’t always accommodate the larger male body. It’s hard to enjoy the relaxing benefits of an herbal bath if half your body sits up out of the water and freezes! You might consider investing in an old-style clawfoot tub — it’s roomy, stylish, and well worth the hassle of finding and installing one. Even better, find a larger tub that fits both you and your sweetie!
Bathing is one of the most relaxing and enjoyable ways to use herbs. When soaking in a warm herbal bath, the pores of the skin, our largest organ of elimination and assimilation, are wide open and receptive. It’s like soaking in a giant cup of tea; your entire body reaps the benefits. If you come home from work stressed and tense, a 15-minute bath with calming herbs can work magic, soothing the senses and relaxing your entire being. You can bathe with a glass of wine or a bottle of cold beer in hand for even deeper relaxation. Just be sure not to fall asleep in the tub!
Herbal bathing is a superlative treatment for sore, tired muscles; the warm water relaxes your whole body, while herbs like chamomile and lavender soothe the nerves, and eucalyptus and peppermint ease tight muscles.
The temperature of the water will affect the healing quality of the bath. A warm bath is relaxing and soothing to the nervous system. Cool to tepid water is excellent when you’re trying to lower a fever or normalize and balance the system. Cold water is stimulating and contracting, and some believe it will firm and strengthen the entire nervous system if you’re brave enough to endure it.
Herbal baths are easy to prepare. Simply place a handful of herbs in a cotton bag or nylon stocking, and tie it onto the nozzle of the tub. Let the hot water run through it for a few minutes, then release the bag into the tub and adjust the temperature of the water to your liking.
There are also large tea strainers that hold a cup or more of herbs that are just perfect for making herbal baths. The strainer comes with a chain that can be fastened onto the nozzle of the tub so the hot water runs through it.
Alternatively, you can prepare a strong herbal tea and add it to the bathwater after filling your tub.

An herbal compress is an external application of either hot or cold, extra-strong herbal tea on the skin. A hot compress draws blood to the skin’s surface, thereby increasing circulation in that area. The heat also draws impurities to the surface and in some cases can relieve congestion. A cold compress reduces inflammation and swelling and soothes conditions of excess heat, such as sunburn, bruises, strains, sprains, and swollen glands.
Begin by brewing a strong herbal tea, using (usually) three times the amount of herb that you would if you were making it to drink. For a cold compress, cool the tea in the refrigerator. For a hot compress, heat the tea on the stovetop. When the tea is ready, dip a piece of soft cotton fabric in the tea and then place it directly on the affected area. Keep the compress on for at least 30 minutes, and up to 45 minutes, dipping the cloth back in the tea as needed to keep it cold or hot. (For a hot compress, you can maintain the heat by placing a hot water bottle or heating pad over the cloth.) Repeat several times a day for several days.
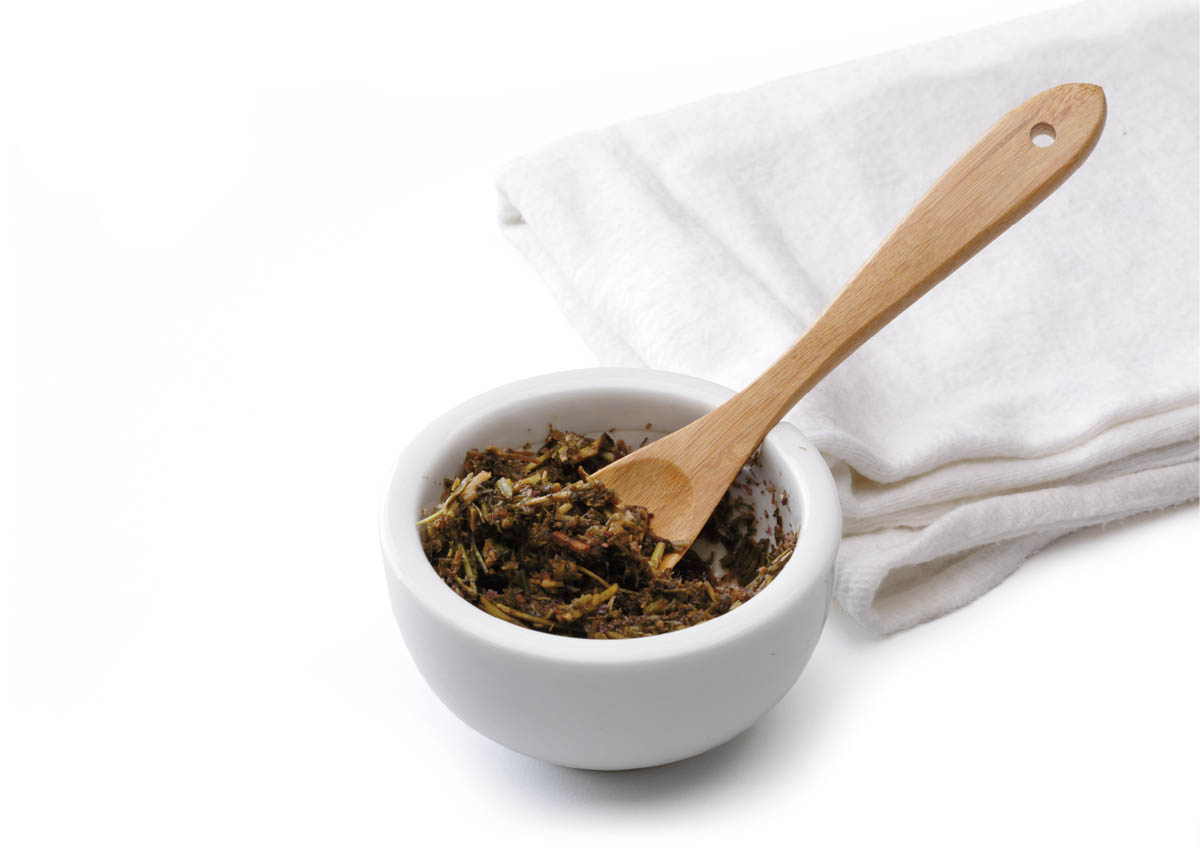
A poultice is an external application of fresh or dried herbs, clay, grated or mashed vegetables, or other absorbent material placed on the skin to draw out impurities, to soothe, or to increase circulation. Typically a poultice is used to treat insect bites, rashes, sore muscles, sprains, swollen glands, cysts, boils, pimples, internal injuries, and tumors.
If you’re using fresh herbs or vegetables, mash or grate them first. Mix the poultice ingredients with enough boiling water to form a paste or pulp. Then apply the paste to the skin, either directly or folded into a piece of cotton fabric (flannel is my favorite). Cover with a towel.
Replace the poultice as it cools down. Repeat as needed, for up to an hour at a time. You can maintain the heat by placing a hot water bottle or heating pad over the poultice.