DOORS AND WINDOWS
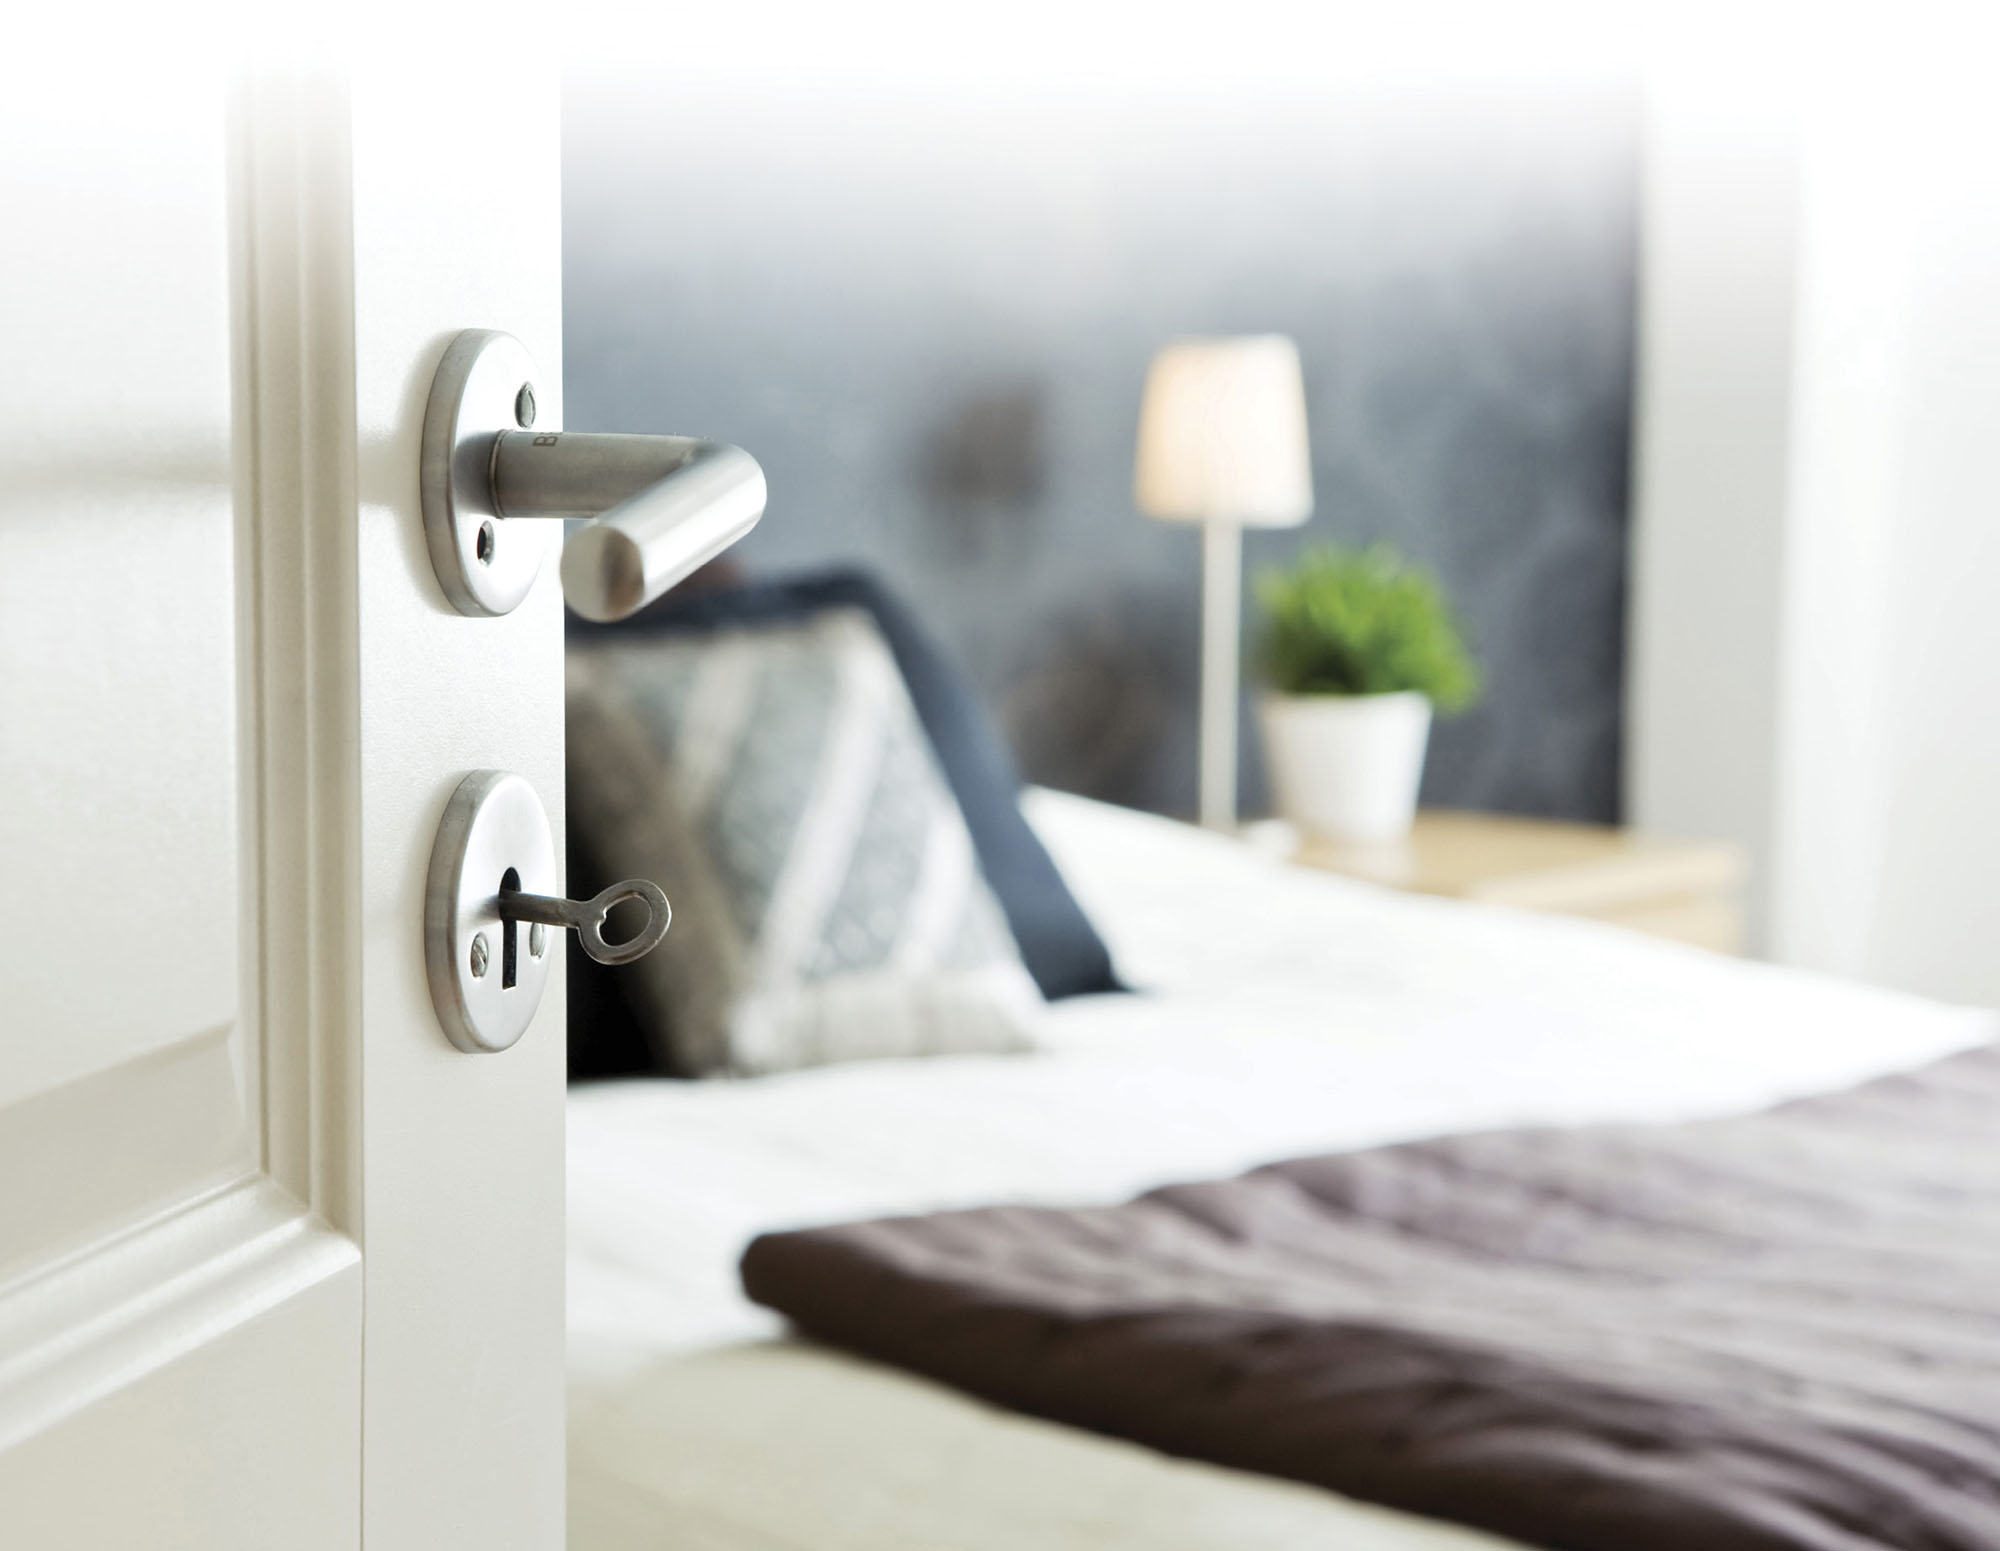
Doors and windows have a tough job keeping your home warm, dry, and secure through the seasonal extremes of temperature and moisture. Wear and tear, the elements, and slight movement in the walls of your house conspire to put windows and frames out of alignment, making them stiff to open and close, and opening up drafty gaps.
DOORS
Problems with doors often develop gradually as hinges age, paint finishes break down, and houses settle. A wooden door that rubs on the frame one day may soon stick shut as moisture in the air causes the wood to swell. Old hinges will wear and cause the door to sag or drop, while badly installed hinges might make the door hard to close.
The door sticks
Whack the frame to get some clearance
First, check if the door is warped (see box, below) and ensure that the hinges have been correctly installed (see here). If the door is straight and hung correctly, you’ll need to find the high spot where the door catches the frame.
- • Rub a stick of colored chalk on the edges of the door, then repeatedly open and close the door. Chalk marks on the frame will indicate the high spot.
- • Find a piece of scrap wood and a hammer. Place the wood against the frame at the point where the door is sticking and give it a couple of sharp whacks with the hammer—this may be enough to shift the frame back sufficiently to accommodate the door.

CHUCK IT?
A warped door is likely to stick. There’s little you can do to straighten it, so you’ll need to consider a replacement. Warping may be obvious from looking at the door sideways, but if in doubt, open the door and hang a plumb line from the top of the open edge. If the edge of the door deviates from the line further down, the door is probably warped.
Sand down the high spots
- • If the door still sticks, you’ll need to sand down the high point on the edge of the door. Keep the door still as you work by pushing two wooden wedges under the bottom edge, one facing in each direction. Use a power sander, or sandpaper wrapped around a wooden block, to make sure that you keep the surface flat. Sand a little deeper than is necessary to free the door to allow for a layer of paint. If you need to remove more than 1/4 inch of wood, use a plane to level out the high point.
- • Paint the bare wood exposed by sanding—it’ll help prevent moisture getting in and causing the wood to swell.
- • If the door is sticking on the floor—for example, if you’ve recently laid a new, thicker carpet—you’ll need to take it off its hinges to reach the bottom edge. Recruit a helper to support the weight of the door while you tap out the pins from all the hinges (see here). Take care to control the door’s movement as you work. With the hinges removed, lift the door away, sand and paint the bottom edge as described above, then rehang the door.
- • For a quick fix, try rubbing a bar of soap along the top and side edges of the door—it may help to fix sticking.
The door slams loudly
Make a cushion with a blob of silicone sealant
A door that always slams shut is simple to silence. Apply a few blobs of clear silicone sealant onto the edge of the door stop—four evenly spaced dabs will do. Allow the sealant to dry thoroughly before closing the door. The sealant remains springy after it has set, providing a cushion for the slamming door.
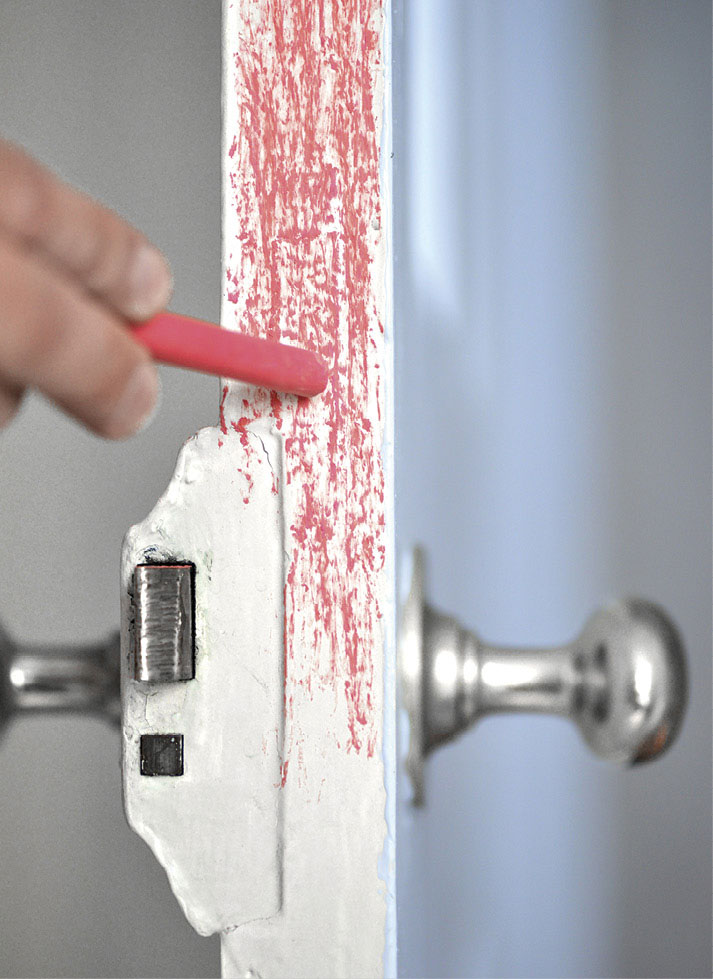
Colored chalk rubbed on the edges of the door will quickly show the point at which the door is sticking.
The door’s hinges are stiff
Apply some lubricant
Hinges—especially those on external doors—may rust or corrode over time.
- • First, try applying some WD-40 or penetrating oil to the hinge pin—squirt it onto the top of the pin so that it runs down the shaft.
- • Some hinges have removable pins. You can drive them out by aligning a nail with the bottom of the pin, then tapping gently upward with a hammer. Take the pin out of one hinge: rub it with steel wool to remove any corrosion, coat it with some light machine oil, then replace it. Now remove the next pin and repeat. Don’t remove all the pins at once unless you want to take the door off.

TOOLS OF THE TRADE
Carpet brush
Maintain the paint finish on the edges of a door to prevent moisture swelling the wood. This is easy on the sides of the door, but access to the underside is restricted unless you remove the door. To get around this problem, apply the paint to the pile of an old piece of carpet, slide it beneath the door, and pull the door to and fro.
There’s a draft from my door
Stop the winter chills
It’s easy to banish drafts around the sides and top of a door with some inexpensive DIY products. Rubber, foam, and plastic strips are quick to fit on doors and windows (see here).
- • A draft from the bottom of a door requires a different approach. If the floor is even and covered with smooth vinyl or laminate, screw a flexible plastic or rubber strip to the front face of the door. This forms a seal between the door and floor. On an uneven or carpeted floor, fit a brush strip instead—it’s made up of lots of nylon bristles that can pass over lumps and bumps more easily.
- • Don’t forget to fit a mailbox flap and a cover plate over any keyholes that run through the door.
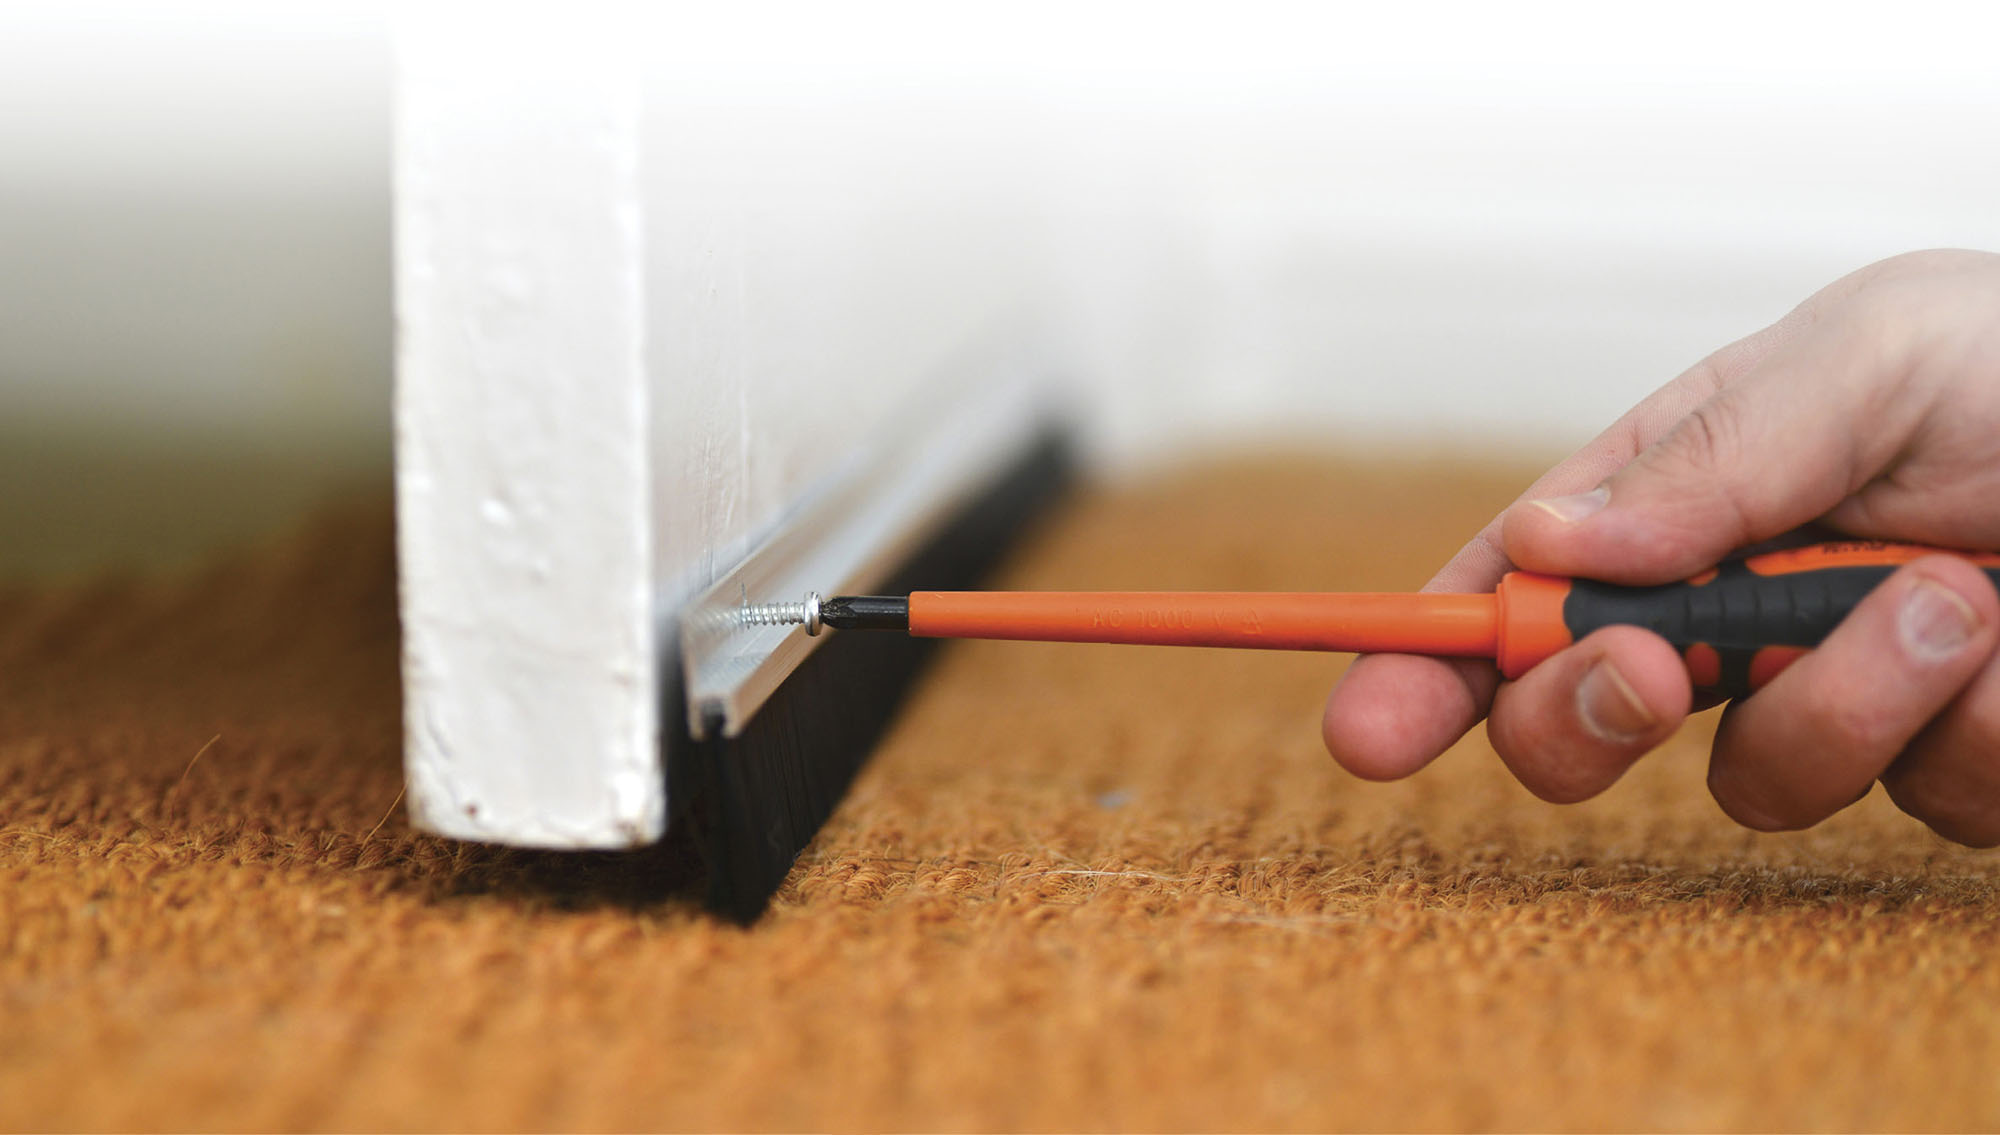
Draft-proof a door over a carpeted or tiled floor by screwing on a length of brush strip.
The door won’t close
Make it fit by adjusting the hinges
Badly fitted hinges are a common cause of door problems. A door that springs open and is hard to close is termed “hinge-bound.” Its hinges are recessed too deeply into the door or frame; the door and frame make contact before the door is fully closed so the two parts of the hinge can’t come together properly. This puts strain on the hinge and can loosen the fixing screws.
- • To remedy this problem, remove the hinge screws from the top hinge, then insert one or more layers of cardboard (cut to the same size as the hinge plate) into the recess cut for the hinge plate. After you have packed out the space, screw the hinge back on; you may need to use a slightly longer screw to bite into the wood. Do this for each hinge in turn to fix the door’s action. You should not need to completely remove the door.
- • If the top corner of the door farthest from the hinges rubs on top of the frame as it closes, try packing out the top hinge only—this will lower the corner.
- • Check that the screws used to secure the hinges sit flush with the surface of the hinge plates—if screws with too large heads have been used, the hinge won’t be able to close fully.
The door sags
Tighten up the hinges
Loose hinges may make a door rub on the floor. Check to see if the screws securing the hinges are loose.
- • If the screws have lost their grip on the wood, first remove them. Push one or two matchsticks, dipped in PVA glue (white school glue), into the screw holes and trim the matchsticks flush to the wood with a craft knife. Allow the glue to set before driving the screws back in—they’ll now have some fresh wood to secure their grip.
- • You can use the same technique to pack out screw holes on loose door handles too (see below).
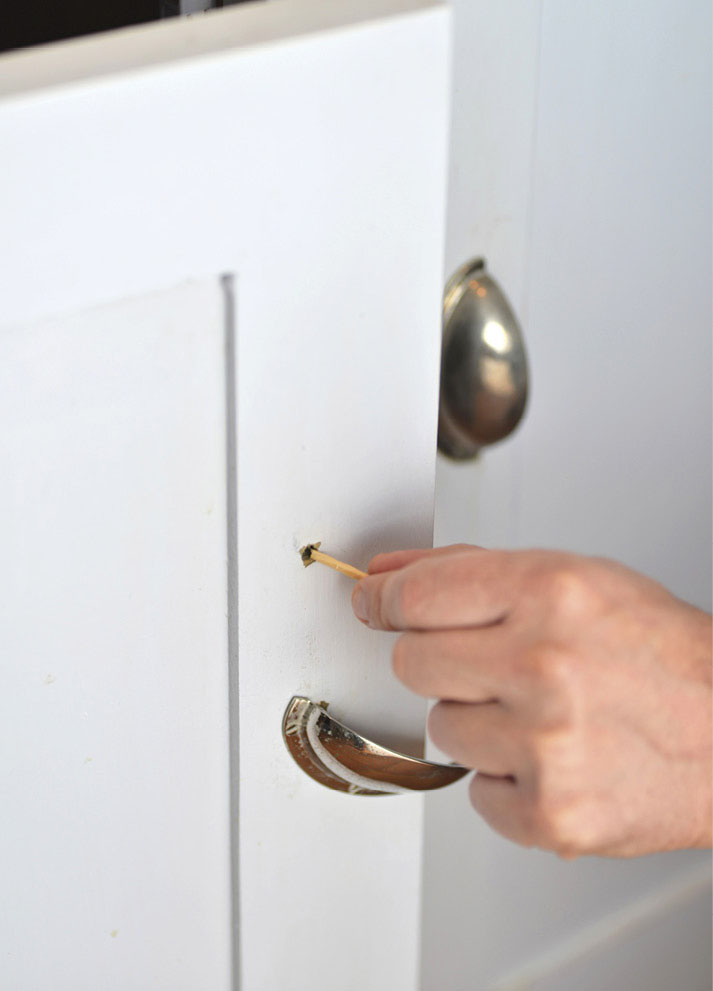
Packing out an old screw hole with matchsticks dipped in PVA glue will give a new screw more purchase.
The door keeps swinging open
Bend the hinge pin to keep it in place
If your door won’t stay shut, but mysteriously swings open, simply remove one of the hinge pins (see above), lay it across a nail or screw, and tap the pin with a hammer to give it a tiny kink. Reinsert the pin, and the extra friction should prevent the door from opening.
The sliding door sticks
Clear the tracks and adjust the rollers
Sliding doors move on rollers that run within tracks. Heavier patio doors tend to have their rollers and track beneath the door, while lightweight internal doors or room dividers may hang from the ceiling. Try these troubleshooting tips if your doors get stuck.
- • Pebbles, coins and children’s toys can get wedged in the track, so first make sure it is clear.
- • Look along the metal track to check if it is bent. Localized bends can be reshaped with a pair of pliers, but a larger kink in the track needs a different treatment. Find or buy a piece of wood, about 1 foot long, that just fits inside the track. Run this to and fro along the inside of the track to force the gap open just enough to let the door slide without hindrance.
- • Check that the door hasn’t jumped off the track. With the help of a friend, lift the door up and lower it gently back onto the track. Take care—the door may be heavier than it looks.
- • Is the door scraping on the track? If so, try raising it up on its rollers. Many patio doors have adjustment screws along the edge of the door’s bottom rail, sometimes hidden behind button-sized covers. Remove the covers and turn the adjustment screws beneath—usually clockwise—to raise the door.
- • Clean the track with a cloth dipped in denatured alcohol. Over time it can get dirty, which will cause the rollers to slide, rather than roll, along the track. Don’t lubricate the track—this can make matters worse.
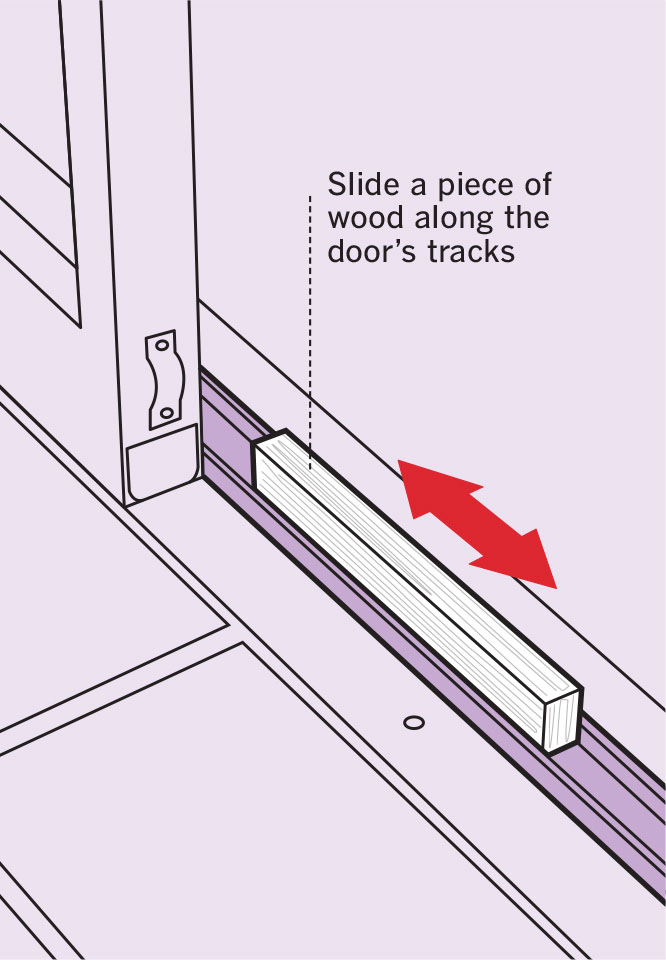
To make a door run smoothly in its tracks, use a length of wood just wide enough to slot into the track. Slide it forcefully down the track to even out its metal sides.
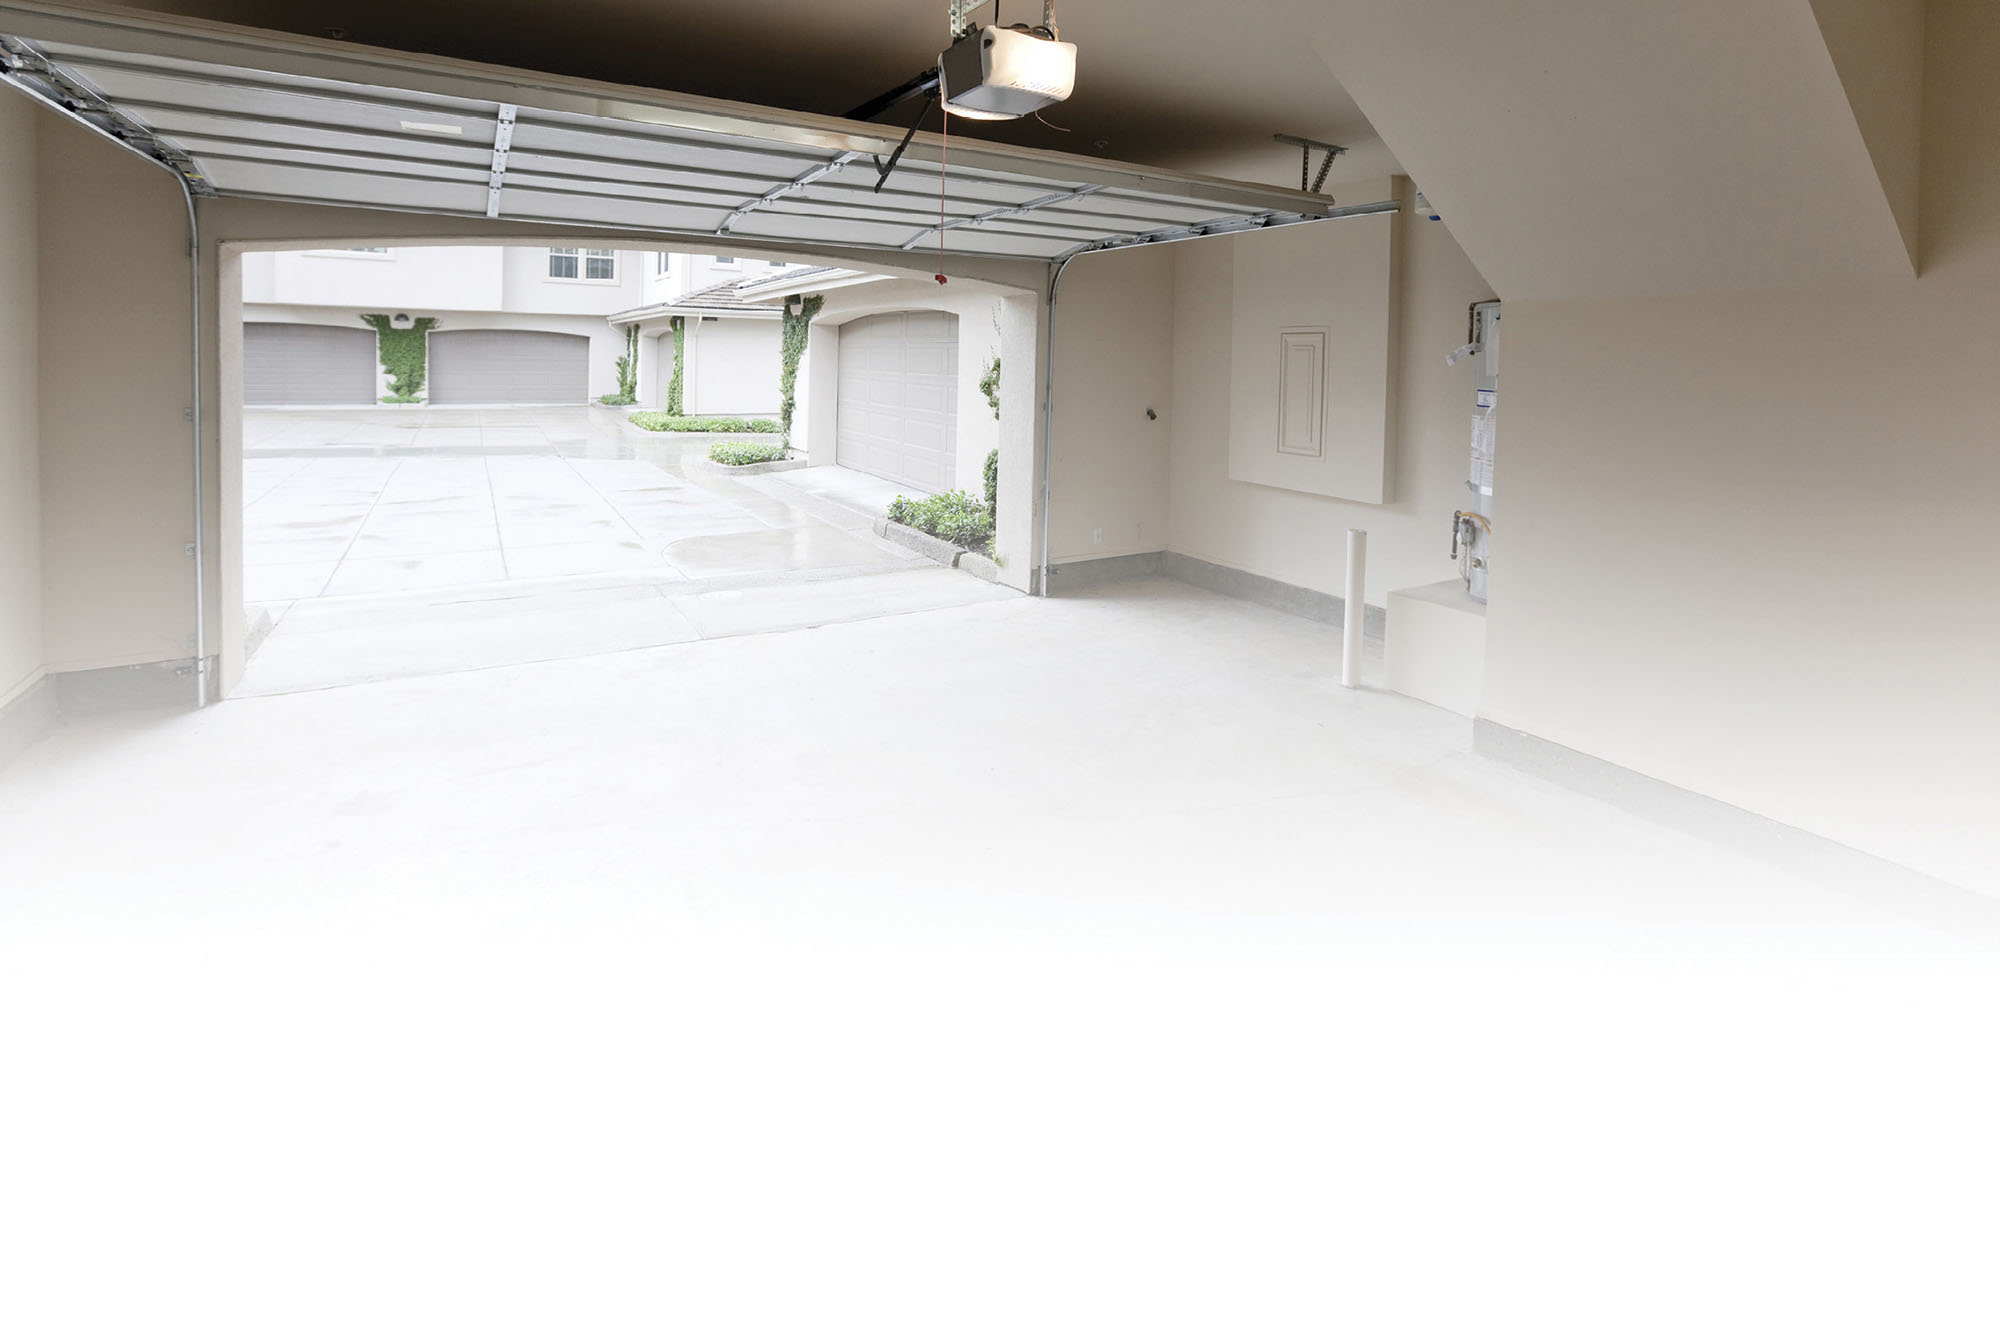
The garage door is jammed
Cure a stuck up-and-over door
When an up-and-over, or canopy, garage door doesn’t open, it may have dropped out of its vertical guide track. This can happen when you open or close the door from one side, rather than in the middle, or try to open or close it too quickly.
- • To put it back, lift the side that’s in the track as high as possible while keeping the loose side low. With a bit of pushing, you should be able to pop the loose roller back into the track.
- • Check that the rollers aren’t worn or missing. Replacements are available from garage door specialists.
- • Dirty tracks may cause the door to stick and make you pull it unevenly. Clean out the tracks with a rag soaked in denatured alcohol—take care as the metal edges can be sharp.

WARNING
Many canopy, or up-and-over, garage doors have a large spring to provide the lifting power. The spring stores a huge amount of energy and can cause serious injury if released or removed incorrectly. Don’t attempt a garage-door repair unless you know exactly what you are doing. If in any doubt, call in a professional.
The garage doors drag
My side-hinged garage doors drag on the ground
Hinged garage doors are heavy and can sag over time. If the lower edge of the door drags on the ground, it will sustain damage and make a grating noise whenever it is opened and closed.
- • Open the door, and push a wooden wedge beneath the edge farthest from the hinge so that the door is level. Loosen—don’t remove—the screws or bolts holding the hinges to the frame and door. Tighten the screws holding the hinges in place. If the screws are loose, replace them with longer screws with the same head size, or pack out the screw holes with matchsticks (see here).
- • For a long-term solution, buy and fit a caster to each door. These large wheels, available from DIY stores, fix to the bottom of the door and support it against the ground. Installing the casters will involve taking the doors off. Casters are usually spring-loaded to cope with uneven surfaces.
WINDOWS
Modern sealed-unit vinyl windows require little maintenance, and if they crack, break, or fall out of their tracks, you’ll need to call a specialist. Wooden windows, however, can be repaired and maintained with ease—you can sort out everyday problems such as cracks, poor insulation, and sticking and sagging frames to help keep your home secure, dry, and warm.
The window is stuck shut
Get it open without cracking the glass
Windows get stuck for a variety of reasons—condensation can swell the wooden elements, building settlement can skew the frame, and a rushed paint job can effectively glue the window shut. To free a stuck window, work slowly, without applying excessive force.
- • For a wooden casement or sash window, run a kitchen spatula or putty knife all the way around the gap between the window and the frame. Tap the spatula or knife gently with a hammer to push it into the gap. If possible, go round the window in this way from the inside and also from the outside.
- • For a casement window, wrap a cloth around a block of wood; place the block along the “opening” side of the wooden inner-frame and tap it gently with a hammer. For a sash window, insert a broad chisel beneath the window from the outside and lever gently upward.
- • Don’t attempt these solutions if you have a stuck vinyl window as it is likely that the locking pins have jammed; call a specialist.
CHUCK IT?
If rot has eaten through joints in a window frame, repair is rarely worthwhile, although it may be viable for expensive, period sash windows. Old single-glazed steel windows rust and are very poor insulators—replace them if possible.
I can open the window, but it’s very stiff
Get it open without cracking the glass
A drop of 3-in-One oil will get window hinges moving and glazed panels sliding easily in their metal tracks. If your windows have plastic tracks, try some talcum power or a little soap instead of oil. For wooden windows, rub a candle on moving surfaces for quick lubrication. Clean out the window tracks with an old toothbrush and wipe the edges of the window to remove any old cobwebs and other debris that may interfere with the window’s movement.
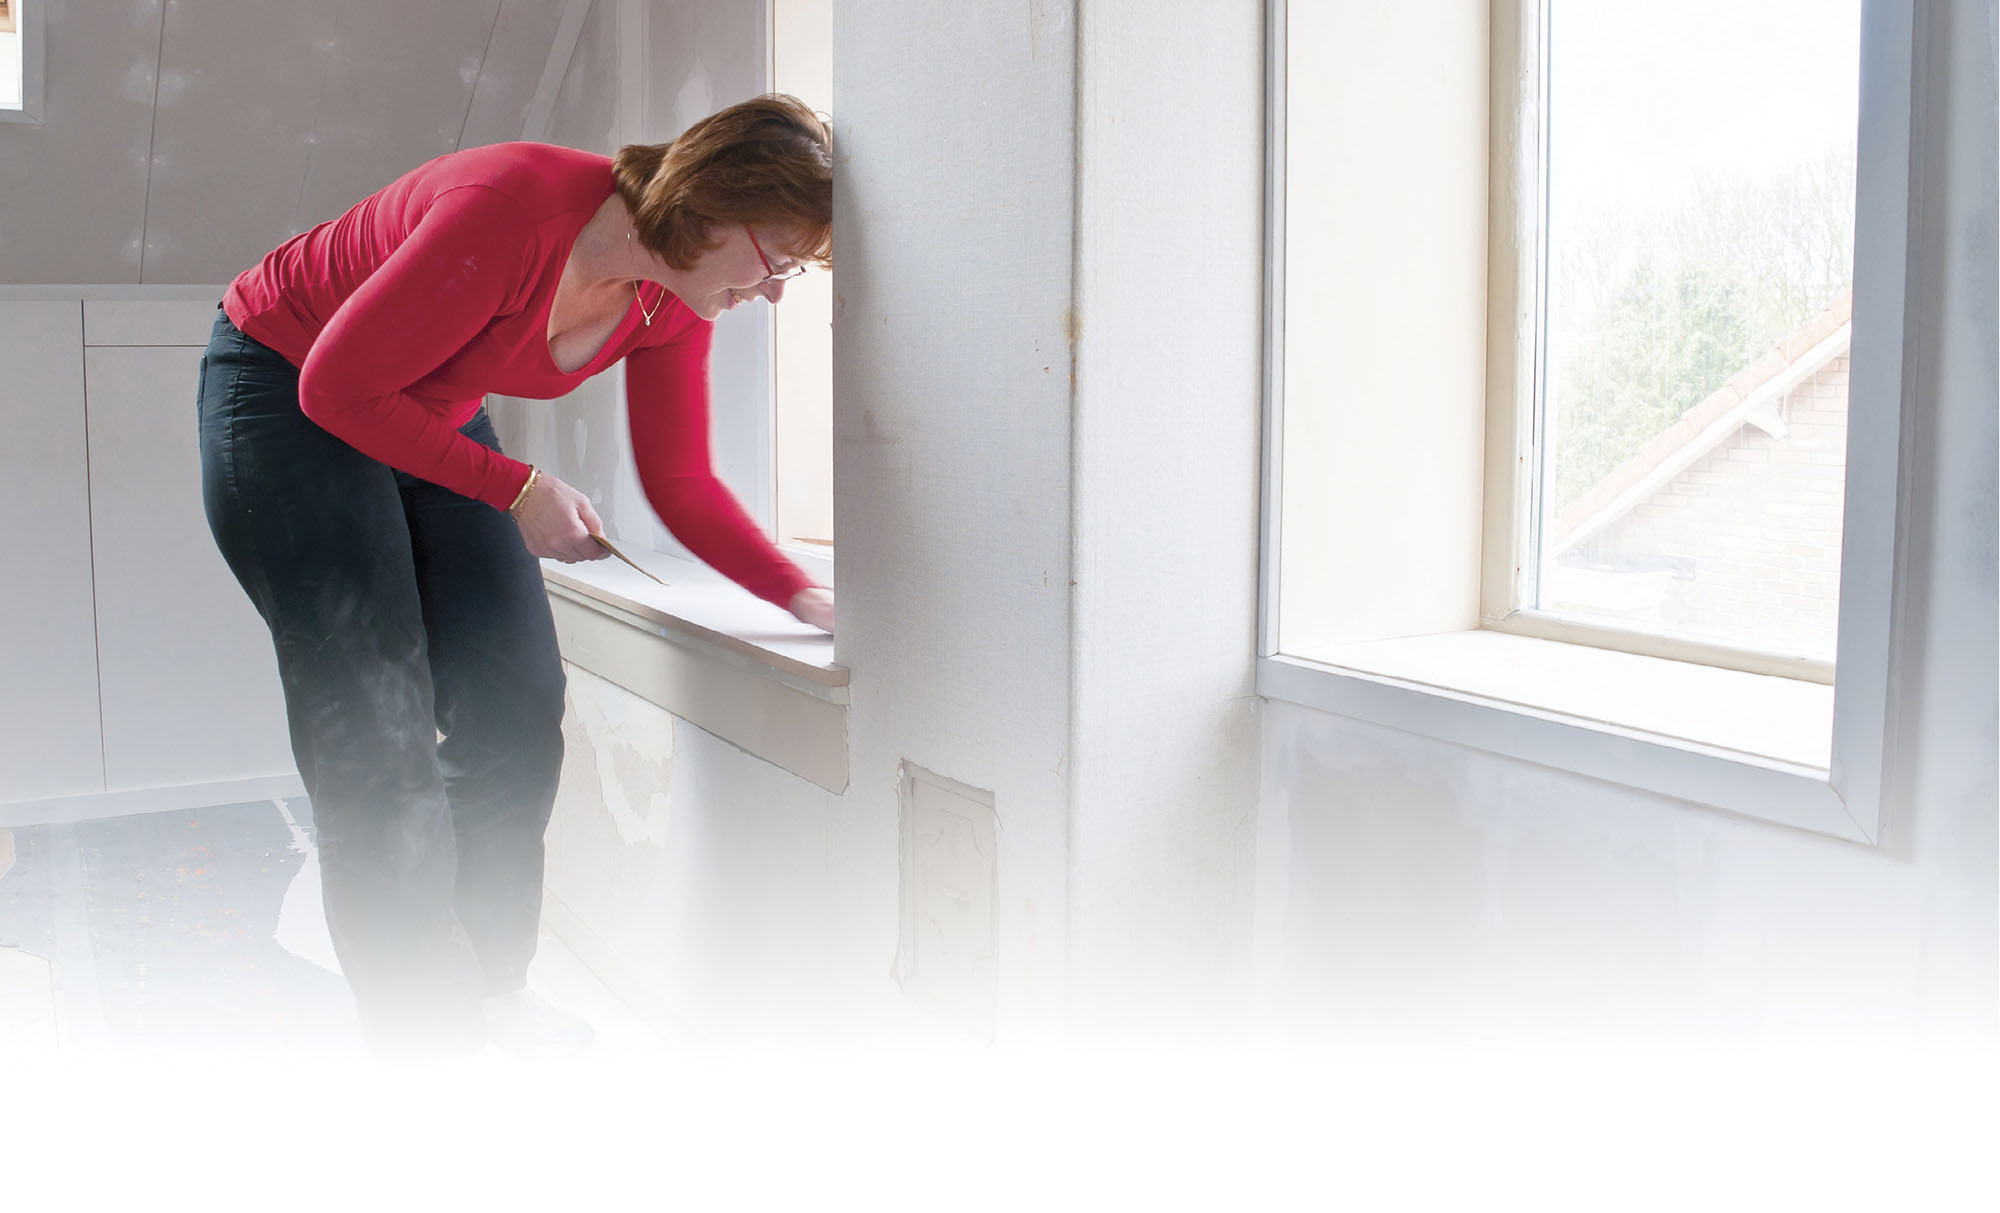
My window is cracked
Deal with minor damage and scratches without replacing the pane
Temporarily seal the crack and prevent it from spreading further with a strip of waterproof tape on the outside of the window.
- • For a more durable and almost invisible repair, brush a thin layer of clear nail polish onto the crack; allow it to dry and repeat the process until the polish is level with the window glass.
- • Surface scratches in a window can be buffed away using a bit of non-gel toothpaste, a lint-free cloth, and a little elbow grease. “Whitening” toothpastes that include baking soda in their formula are the most effective.
The window is broken
Make a temporary fix
If any glass is missing, remove the whole pane to make it safe.
- • Lay newspaper on the ground on both sides of the window to catch the pieces of old glass. Put on gloves and safety glasses, and wear thick shoes to protect your feet.
- • Pull out any loose pieces of glass by hand. For glass that can’t be easily removed, cover the edge with a sheet of newspaper and then gently but firmly grab the fragment with a pair of pliers, wiggling the glass back and forth until it comes away from the frame.
- • Remove the putty and any small pieces of glass around the inside of the frame with a hammer and an old chisel. Use long-nose pliers to pull out any holding pins or spring clips.
- • Dispose of the large glass pieces carefully, then vacuum the inside of the frame and the floor to pick up any stray fragments.
- • When the frame is clean, measure the space and cut a piece of plywood to size. Insert the plywood in the hole and tape it in place with weatherproof tape all the way round the inner frame.
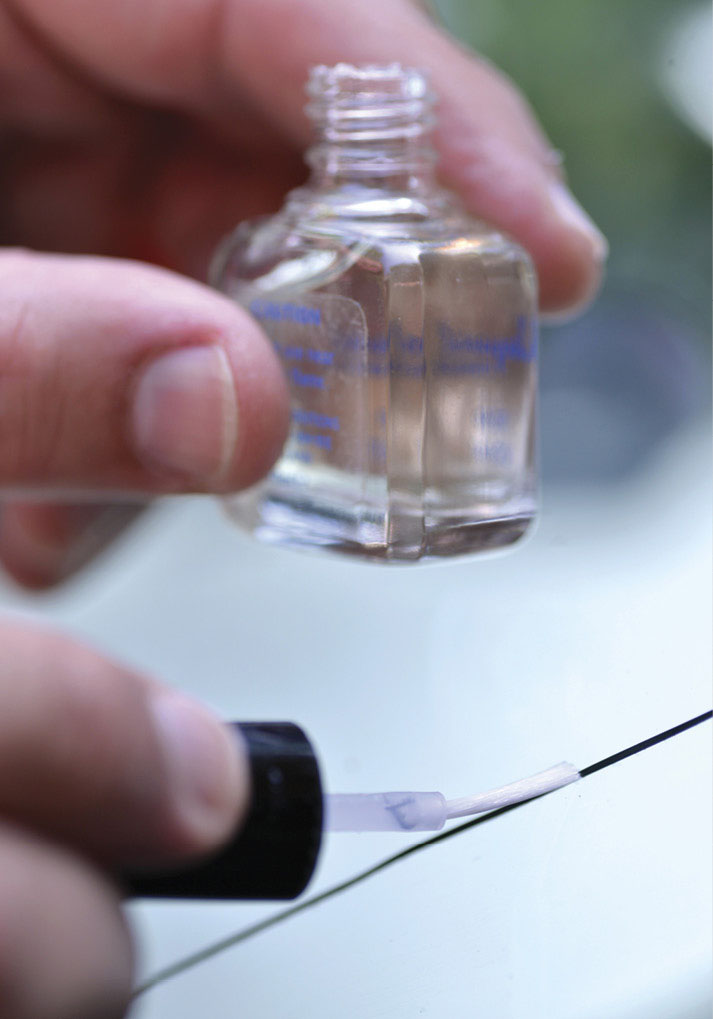
Fill a small hole or crack in a window with clear nail polish; clean the window first with a damp paper towel.
The glass needs to be replaced
Do a professional job of installing a new pane
You don’t need a glazier to replace a pane of glass; save yourself the service fee by taking on the job yourself. First, you’ll need to remove the old glass, putty, and pins (see here). Make a cardboard template that fits snugly into the inner frame and take it to a glass supplier. Tell them the location of the window so they can provide the correct weight of glass.
Time needed 1 hour
You will need old chisel, paintbrush, tape measure, glazing push points, putty, putty knife
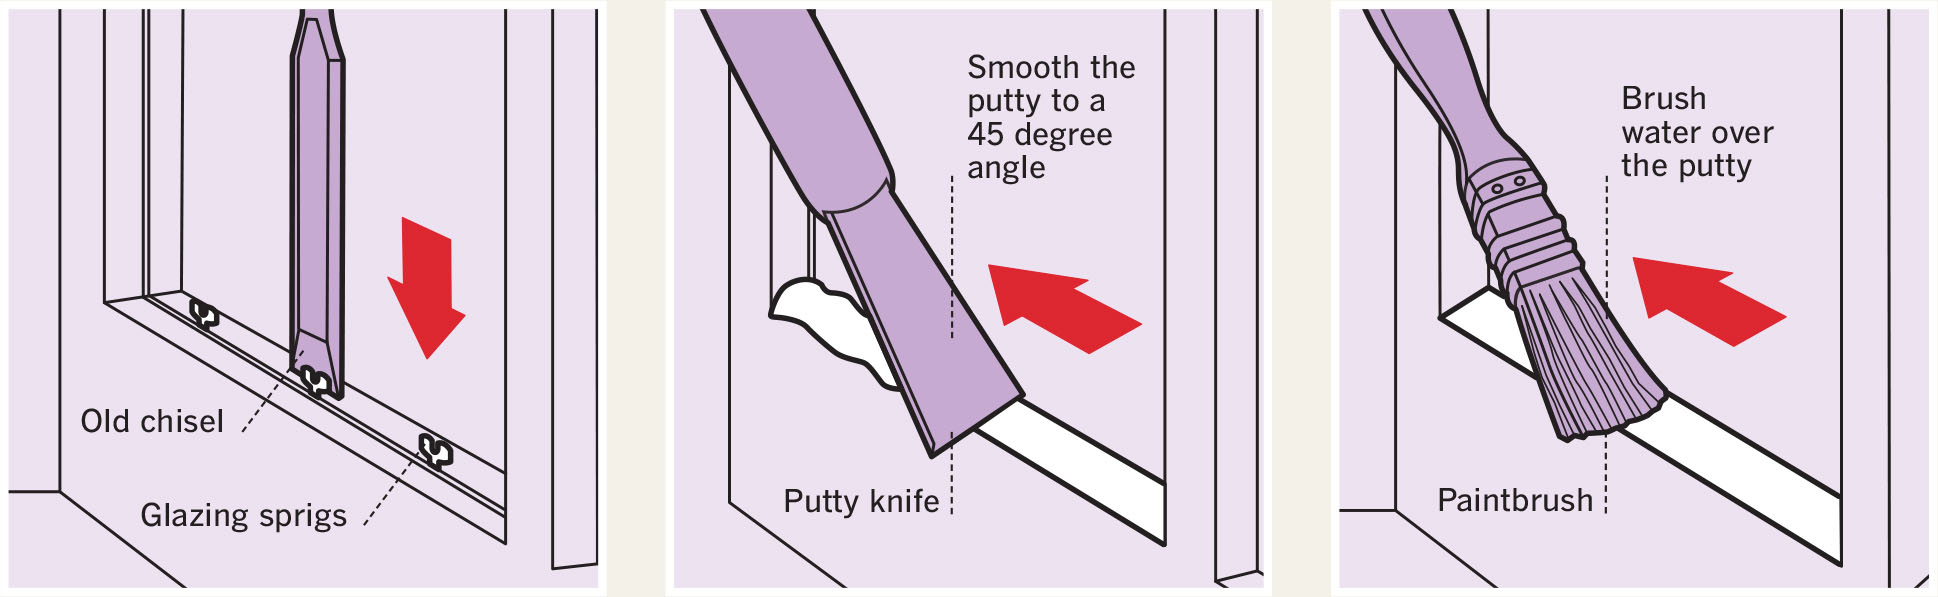
- 1 Work a lump of putty in your hands until it’s pliable. Lay it about 3 mm thick around the inner frame to form a bed. Press the new glass gently onto it, working from the edges, not the middle, to avoid cracking.
- 2 Measure regular intervals around the glass, and use the back of an old chisel to tap in glazing push points, with their heads just projecting enough to hold the glass firmly (see above, left). Resecure any spring clips on metal windows.
- 3 Press more putty around the front of the glass, then use the flat edge of a putty knife to form a neat bevel. Smooth the putty to a 45 degree angle and remove surplus putty from both sides of the window (see above, center). Dab a paintbrush in water and brush over the putty to get rid of any irregularities (see above, right) and ensure that the putty is in close contact with both glass and frame.
- 4 Don’t paint the putty for at least two weeks to allow it to harden. When painting, overlap the glass by 1–2 mm—this will help prevent water from penetrating behind the putty and into the wooden frame.
A chunk of putty has fallen off
Replace the putty without cracking the glass
Linseed oil–based putty will harden and crack and eventually fall out. Act fast to renew it or the wooden frame will soon begin to rot. Wear gloves and eye protection when you are removing the old putty.
- • Remove loose putty with a screwdriver or paint scraper; lever the sections out against the wood of the frame, not against the glass.
- • Use a heat gun on a low setting to help soften stubborn putty, but be careful not to heat the glass too much.
- • Press the new putty into place following steps 3 and 4 above.
There’s condensation on my windows
Warm up and dry out
Condensation running down your windows is not only unsightly, but will stain curtains and carpets, cause wooden window frames to rot and encourage the growth of mildew. Unfortunately, there’s no simple way to eliminate condensation, but you can make a difference by following two main strategies—reducing the amount of water vapor in the air of your house and raising the temperature of the inner surfaces of the windows.

Avoid drying clothes on radiators in a room that is prone to condensation; keep a window very slightly open to allow moist air to balance with that outdoors.
- • If you have exhaust fans in your kitchen and bathroom, use them. Running ceiling fans will also help by mixing moist and dry air.
- • Open windows very slightly to balance the amount of water vapor inside with that outside; don’t open the windows fully if it is cool outside. Don’t keep house plants or stacks of firewood in rooms that are prone to condensation.
- • Try rearranging the furniture. An armchair in front of the window may be stopping heat from reaching the glass and so encouraging condensation on its surface.
- • If possible, run a dehumidifier in the affected room(s) to extract moisture from the air, or buy a window-film kit from a DIY store to add temporary “double glazing” through the cold winter months.
WARNING
If you have installed window locks, make sure there is a key close to every window in case of fire. Keep it out of sight of burglars—a small hook next to the window does the job perfectly.
My windows are cold and rattly
Buy inexpensive draft-proofing strips to suit your window
Installing inexpensive draft excluders will save you an average of 15 percent on heating bills as well as silencing any annoying window rattles. Self-adhesive draft excluders are made from a variety of materials and are available in different depths and colors:
- • Squashy adhesive rubber strips, available in “P” or “E” profiles, compress so that the rubber forms a tight seal.
- • “V” profile weatherstrip, made of polypropylene, has a fold down its length; it is ideal for filling thinner gaps between the frame and the window.
- • Strips of siliconized nylon brushes make a seal between the bristles and the window edge.
- • Strips of foam about 1/3 inch wide make a seal when compressed.
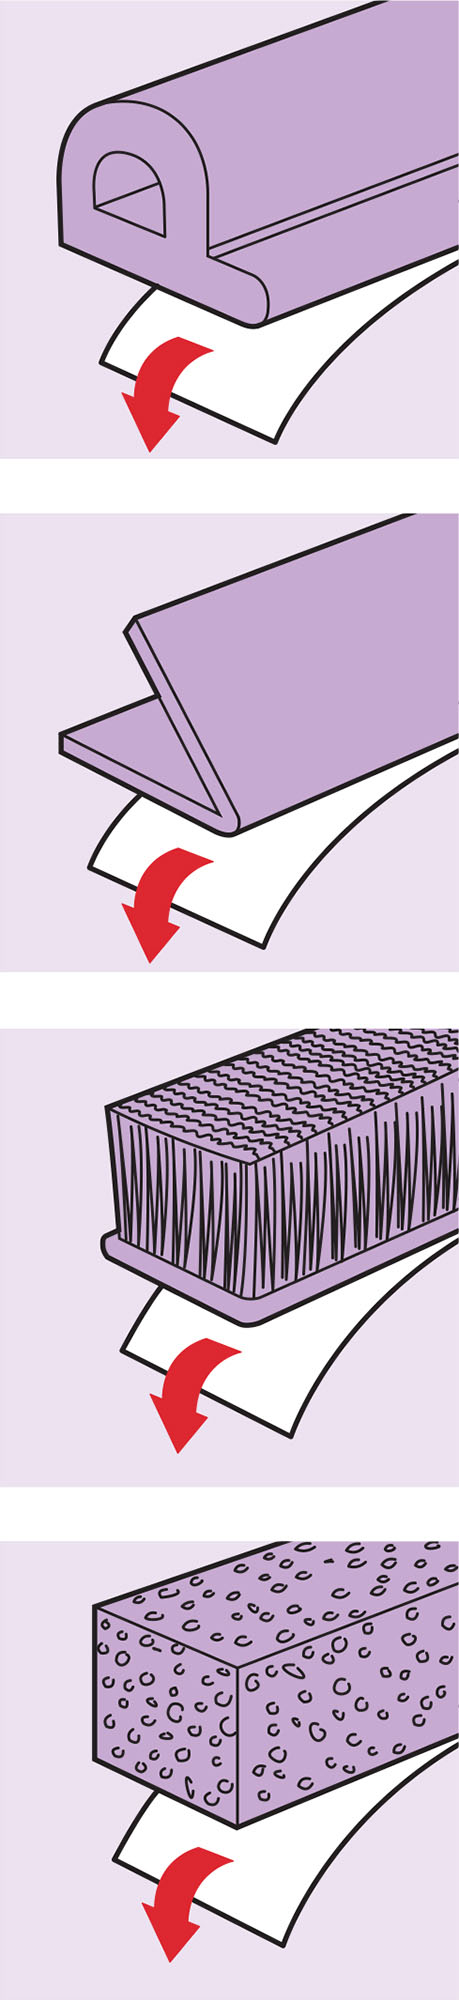
Draft-proofing products include (from top): “P” profile rubber strips, polypropylene V-strips, silicone brush strips and strips of foam.
Install the strips
- • Clean the surfaces where you intend to stick the strips with a damp rag; allow them to dry fully. Stick the draft-proofing strip to the inside of the window frame, as near as possible to the inside of the house.
- • Stick on a short test strip, then close the window. Insert a credit card between the strip and window; if it is loose and falls out, you’ll need a deeper strip to block the drafts effectively.
- • Sash windows are notoriously drafty. Fit brush strip onto the inside of the bottom sash and the outside of the top one and stick a compressible foam strip onto the top and bottom edges of the sashes.
- • Seal casement windows with self-adhesive foam or rubber strip around the inner edge so it compresses when the window is shut. If there’s not enough of a gap to fit foam or rubber, fit V-strip instead.
My windows leak heat
Install some temporary double glazing
Single-glazed windows are very poor insulators, but a temporary fix will help you keep warmer in the winter months.
- • Clean the inside of your window frames thoroughly with a cloth and mild detergent; allow to dry.
- • Stick double-sided tape along the window frames.
- • Stretch plastic wrap tightly across the window frame and secure it to the tape. It should not touch the glass, but form a second layer, about 1/2 inch from the pane.
- • More robust secondary glazing kits, using tougher glazing film, are available from home improvement stores.